
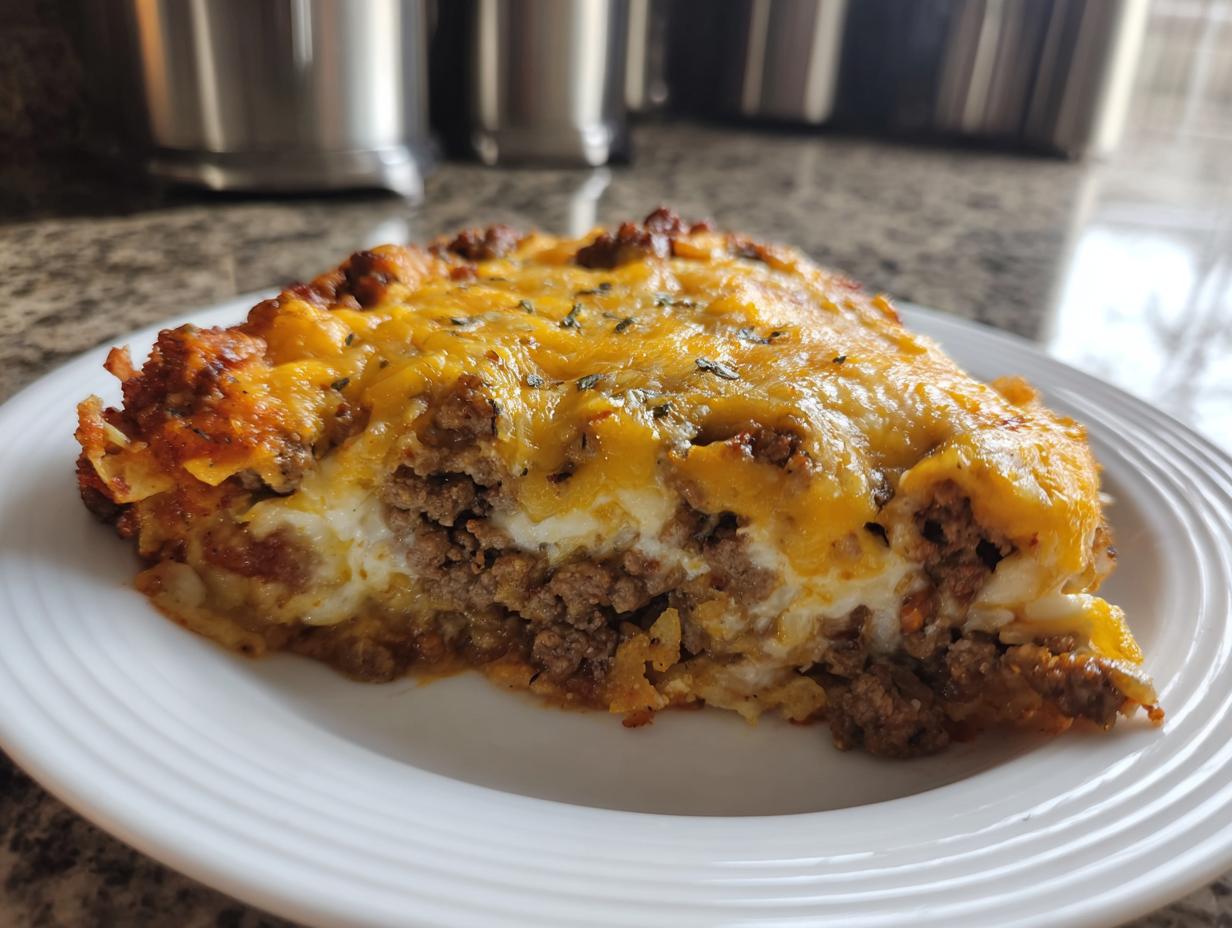
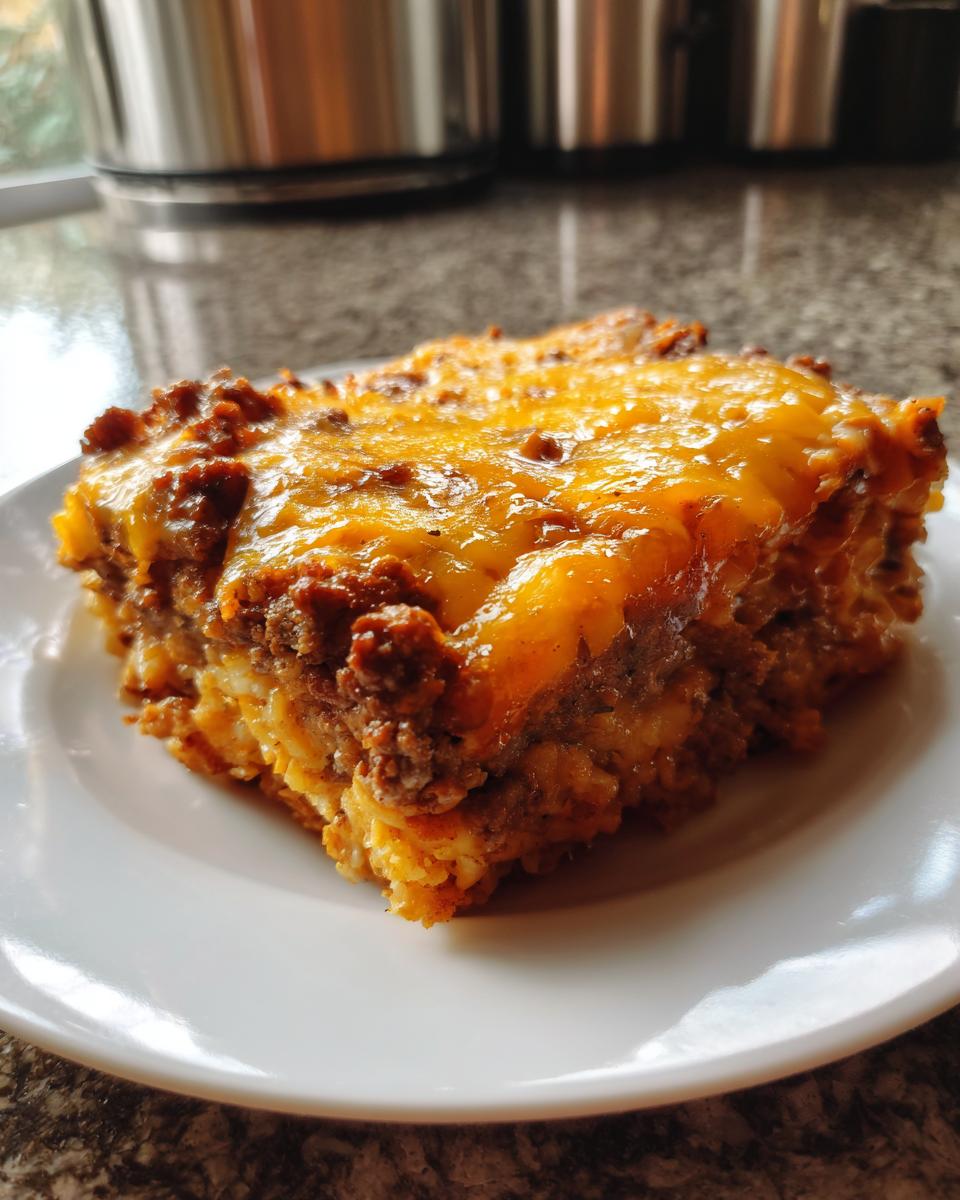
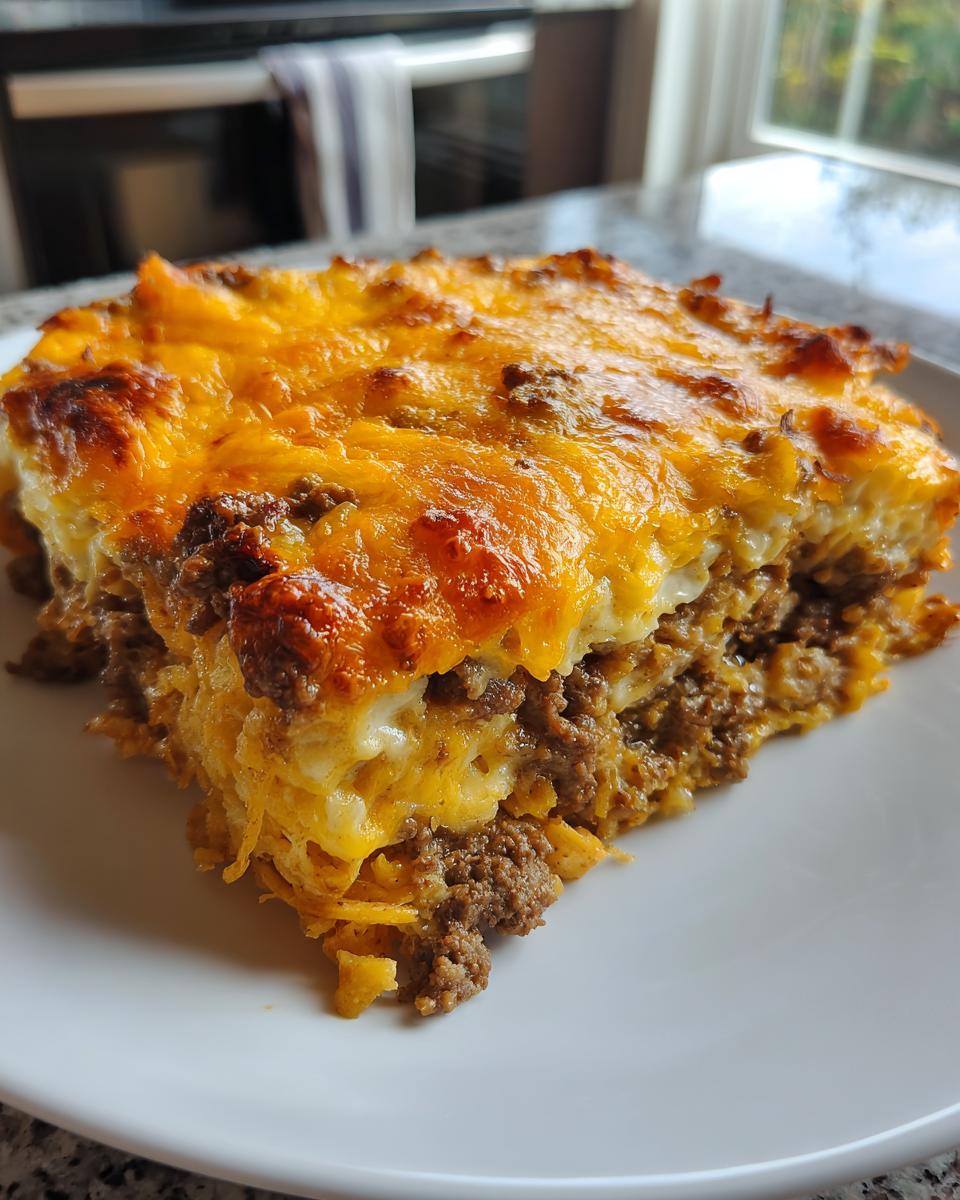
When the game is on, or when you just can’t face chopping vegetables after a long day, nothing solves the craving for comfort food like a mountain of melted cheddar. Trust me, this is the easiest, crunchiest Dorito Casserole you will ever make. It’s my go-to for unbelievably fast weeknights or when the gang gathers for a watch party. I learned firsthand while exploring the vibrant Southwest that true flavor doesn’t need hours; it just needs the right approach. My time learning the soul of those Tex-Mex tables really paid off in creating this simple, perfect cheesy Dorito casserole. If you want to know more about the journey that brought these flavors to my digital kitchen, check out our story here.
- Why This Dorito Casserole Recipe is Your New Weeknight Hero
- Essential Ingredients for the Perfect Cheesy Dorito Casserole
- Step-by-Step Instructions for Making This Ground Beef Dorito Bake
- Make-Ahead and Freezing Instructions for Dorito Casserole
- Serving Suggestions for Your Tex Mex Chip Casserole
- Storing and Reheating Leftover Cheesy Dorito Casserole
- Frequently Asked Questions About This Doritos Chicken Casserole
- Estimated Nutritional Data for This Dorito Casserole Recipe
- Share Your Experience Making the Dorito Casserole
Why This Dorito Casserole Recipe is Your New Weeknight Hero
Look, I get it. Weeknights are chaotic. You need food on the table five minutes ago, and you absolutely need it to taste like you spent way more time on it than you actually did. That’s why this dorito casserole recipe is always front-of-mind for me.
This bake is seriously magic because it checks all the boxes busy families look for. You can have this whole thing assembled in about ten minutes flat, which is less time than it takes to decide what streaming show to watch!
- It relies almost entirely on things you already have tucked away in your pantry—hello, quick dinners!
- It’s a total crowd-pleaser; expect zero complaints when this Tex-Mex chip casserole hits the table.
- The best part? It’s super flexible. Don’t have ground beef? Swap it out for shredded chicken! It handles substitutions beautifully.
When you need that cheesy, spicy comfort without the fuss, this is absolutely the way you go. It’s reliable, fast, and always a huge hit.
Essential Ingredients for the Perfect Cheesy Dorito Casserole
With this rotel dorito casserole, having the right building blocks makes all the difference. Because we’re keeping the prep time so short, we really need to rely on high-impact flavors right out of the can or bag. Don’t worry, I’ve got the cheat sheet ready so you can grab exactly what you need and be mixing in minutes. It’s all about layering that creamy sauce with the seasoned meat and, crucially, those crunchy chips!
Here’s what you absolutely must have on hand for this ground beef dorito bake:
- We are using 1 pound of ground beef or, if you prefer, shredded chicken.
- You’ll need one medium onion, just chopped up.
- One can of cream of chicken soup and one can of cream of mushroom soup—don’t skip one!
- Exactly 1 cup of sour cream to get that rich texture we are aiming for.
- One can of those fantastic Rotel diced tomatoes and green chilies, and here’s the key: leave them undrained!
- One full packet of taco seasoning mix—use your favorite brand!
- About 2 cups of shredded cheddar cheese total, divided for layering.
- The star: One full bag (9.25 ounces) of Nacho Cheese Flavored Tortilla Chips, okay? These are non-negotiable for the classic flavor.
- And 1/2 cup of milk to thin the sauce just slightly.
Ingredient Notes and Substitutions for Your Dorito Casserole Recipe
This is where you can tweak things without ruining the texture. If you go the ground beef route, I really recommend using 80/20 beef. The little bit of extra fat renders out in the oven and keeps the interior moist, which is essential for a good easy weeknight casserole.
Now, about that sour cream—it creates our cheesy backbone. If you are counting calories or just prefer a little tang, you can absolutely substitute the sour cream with plain Greek yogurt. It gives the casserole the exact same creamy body, just with a slightly sharper bite. It works seamlessly, so don’t let dairy choices stop you!
If you are making a doritos chicken casserole instead, just make sure your chicken is already pulled or cut into chunks before you mix it into the sauce later. Keep it simple, keep it tasty!
Step-by-Step Instructions for Making This Ground Beef Dorito Bake
Okay, let’s get baking! This is the fun part where everything comes together so fast. First things first, get that oven heating up to 375 degrees Fahrenheit. You want it hot and ready to go when your cheesy dorito casserole is mixed. Grab yourself a standard 9×13 inch baking dish and just give it a quick, light greasing so we don’t have sticking drama later.
Next up is the meat. Get your ground beef—or chicken, if you went that way—cooking over medium heat in a big skillet. Once it’s all browned up, which happens quickly, tilt that pan and drain off every last drop of fat. We don’t need that slowing down our bake! Toss in your chopped onion and let it soften up until it’s looking translucent; that usually takes about 5 minutes across the heat.
Time for seasoning! Stir in that whole packet of taco seasoning right into the skillet, cooking it just as the packet tells you to—maybe add a splash of water if the directions call for it. While that’s mingling, hustle over to a large bowl and whisk together the cream of chicken, cream of mushroom, sour cream, your undrained can of Rotel tomatoes, and that milk until it’s smooth. Wow, that smells like dinner already!
Gently fold the cooked meat mixture right into that creamy pool. Now, here’s an important moment: crush about half of your bag of Doritos right into the mixture. Crush them coarsely, you want texture! Fold those chips in. Spread half of that gooey mixture into your prepared dish and sprinkle 1 cup of that cheddar cheese over the layer. Top it with the rest of the meat mixture, and shower the top with the final cup of cheese. Pop it in the oven for 20 minutes until it’s bubbly—check out this step-by-step guide if you need more detailed guidance.
When it comes out, crush the *remaining* Doritos and throw those on top immediately. Back into the oven for just five more minutes to heat those top chips through. Let it rest for five minutes before you serve this glorious pile of comfort. It’s worth the wait!
Tips for Success When Assembling Your Rotel Dorito Casserole
To guarantee this tex mex chip casserole turns out perfectly every time, I have a couple of non-negotiables. First, when you drain the beef, really drain it well. Soggy bottom casseroles are a tragedy, and excess grease is the enemy of a great crunch!
Second, when you get to folding in those chips, be gentle! You want big, crunchy chunks left over for the topping, so don’t just beat them into dust when mixing them into the sauce. Coarsely crushed is absolutely the move here.
Third, don’t skip the two-stage baking. Baking the first layer with cheese melts everything together beautifully. But putting the final layer of chips on *only* for the last five minutes—that keeps them crispy instead of turning them into mushy sadness under all that cheese and sauce!
Make-Ahead and Freezing Instructions for Dorito Casserole
I know the appeal of this ground beef dorito bake is how fast it comes together raw, but sometimes you need dinner done before lunchtime, right? That’s where future-you comes in to save the day! This casserole freezes like an absolute dream, making it perfect stock for those super crazy nights when you just can’t even look at a skillet.
The secret to freezing this easy weeknight casserole—and keeping the final texture amazing—is delaying the Doritos. Seriously, don’t add them yet! Assemble the entire thing—the seasoned meat, the creamy Rotel mixture, the cheese layers—just like we rehearsed above. Put it all into your greased 9×13 dish.
Wrap that thing up tight. I mean, use a layer of plastic wrap, then a layer of heavy-duty aluminum foil. You want it sealed up like a treasure chest so it doesn’t absorb any weird freezer smells. It will keep happily in your freezer for up to three months. If you’re worried about forgetting what’s inside, just slap a little piece of tape on it saying “Cheesy Chip Bake – No Chips Yet!”
When you’re ready to eat it, the thawing process is slow and steady. Pull the foil-wrapped dish out of the freezer and let it thaw overnight in the refrigerator. Seriously, no cheating by leaving it on the counter! Once it’s thawed overnight, you can bake it exactly as the recipe states, but one crucial step comes last: only after it’s bubbly and hot from the oven do you crush those remaining Doritos and sprinkle them on top for those last glorious five minutes.
This preparation method is the only way to ensure your final dorito casserole recipe comes out bubbly hot and perfectly crunchy right when you want it!
Serving Suggestions for Your Tex Mex Chip Casserole
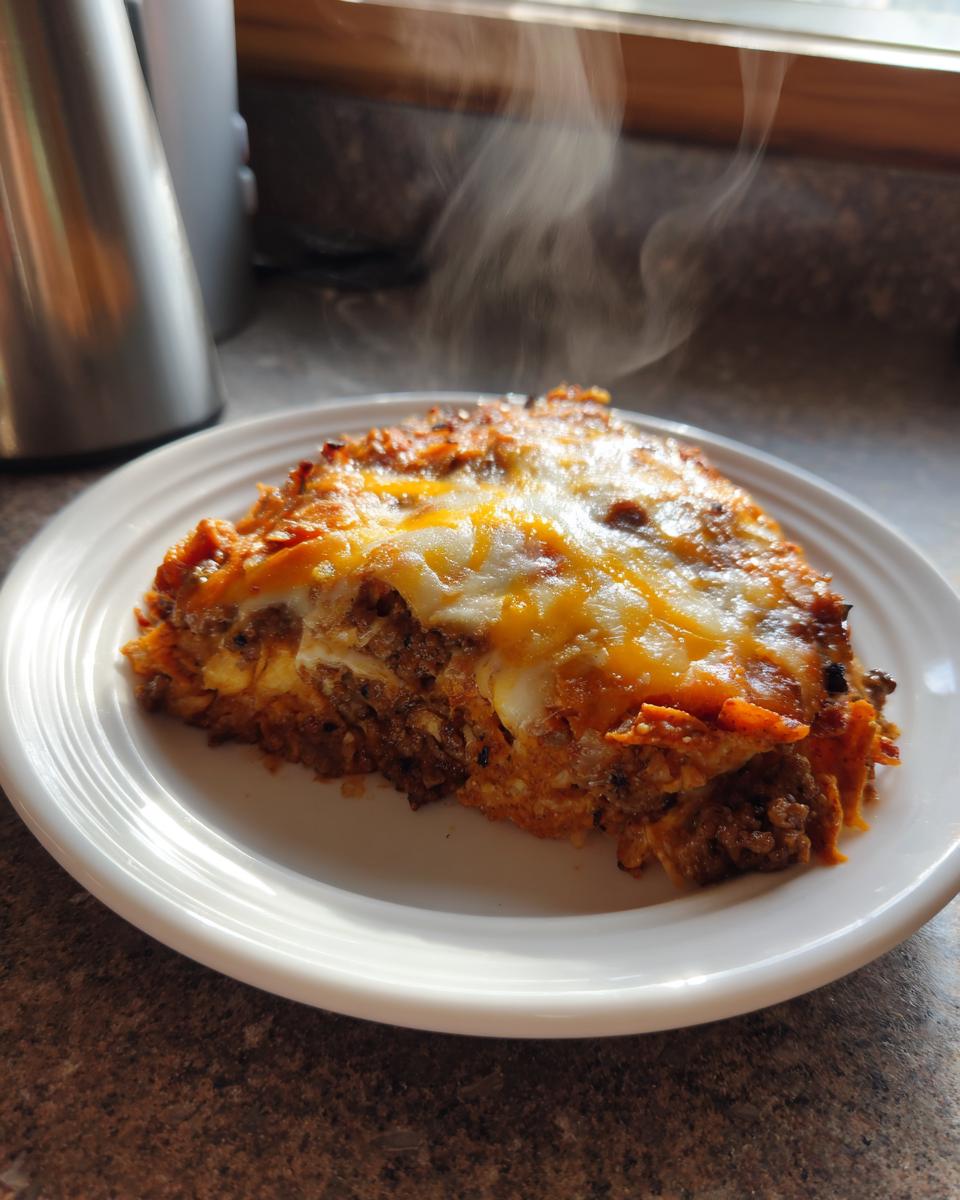
Now that you’ve managed the miracle of assembling and baking this glorious Tex Mex chip casserole in under 35 minutes, we need to talk about how to serve it up right! This dish is so rich and savory on its own, thanks to all that melted cheddar and taco seasoning, that it loves a little brightness on the side to cut through the richness.
I always think about texture and temperature when deciding on toppings. Since this casserole is served steaming hot, I love adding something cool and fresh right on top for that perfect contrast. You absolutely must have some fresh cilantro—just a quick, rough chop over the top makes this look professional and adds a burst of freshness that really wakes up the corn chip flavor.
For my family, a dollop of salsa is mandatory! You can use your favorite jarred salsa, or if you’re feeling ambitious, whip up a super quick, vibrant pico de gallo. It adds a nice acidity that balances everything out.
If you have picky eaters, or if you’re trying to stretch this thing even further, serve it up next to a simple, crisp side salad. A bit of shredded lettuce dressed lightly with lime juice and salt is perfect downtime from all that cheese. It makes the whole plate feel a little more complete without adding any extra fuss to your cooking time, which, let’s face it, is the whole point of this cheesy dorito casserole!
Storing and Reheating Leftover Cheesy Dorito Casserole
The best part about making a massive casserole like this simple cheesy dorito casserole? The leftovers are usually just as good the next day. However, we face the eternal enemy of any crunchy-topped dish: sogginess! We can absolutely beat the sogginess factor if we handle the leftovers smartly. You want to keep that savory beef or chicken mixture moist, but you need to protect that beautiful Dorito crust, right?
For storage, keep things simple. Once the casserole has cooled down to room temperature—and this is important, don’t put hot food straight into the fridge—cover the whole dish tightly. I usually use plastic wrap first, then foil over the top of that, or just use an airtight container if I’ve transferred some to smaller bowls. Keep it in the refrigerator for up to three or four days. It holds up surprisingly well!
The Best Way to Reheat Leftover Ground Beef Dorito Bake
Listen, you have two options here: the quick and easy way, or the crunchy quality way. If you are starving and need a bowl fast, the microwave works, but I won’t lie—the chips on top will have totally softened during storage. You’ll end up with a creamy, taco-flavored mixture that’s still delicious, but lacking that fresh-baked texture.
But if you invested ten minutes assembling this ground beef dorito bake the first time, you should invest a little more to bring back the crunch! Preheat your oven—go back to 375 degrees Fahrenheit, or maybe even 350 if you’re doing a giant slab. Place your leftover portion in an oven-safe dish. If the chips underneath are looking a little sad, you can sprinkle a tiny layer of fresh, raw Doritos over the top!
Bake it uncovered—no need to cover it this time—until it’s heated all the way through and bubbling again, which usually takes about 15 to 20 minutes depending on how thick your slice is. That little bit of dry heat will magically crisp up the top layer of chips again. That’s the goal for enjoying those leftovers!
Frequently Asked Questions About This Doritos Chicken Casserole
I know when I search for a recipe, I always read the FAQ section first. It’s where the real secrets live! Julian has definitely field-tested this dorito casserole recipe a million ways, so here are the common hurdles folks run into when making this easy weeknight meal.
Can I use a different type of chip besides Nacho Cheese Doritos?
Oh, you totally can experiment here, but I have to be honest: the signature flavor comes from that specific nacho cheese dusting. If you swap them out, it stops being the classic cheesy dorito casserole and becomes a slightly different tex mex chip casserole. If you want to try something else, Cool Ranch Doritos work surprisingly well, or you could use plain tortilla chips but maybe add an extra teaspoon of taco seasoning to the sauce to boost the flavor.
Is there a way to make this a vegetarian Dorito Casserole?
That’s a great question! Handling the meat substitute is easy. You can absolutely create a vegetarian version. Instead of the ground beef or chicken, sauté 1 pound of mushrooms with the onion until they release all their liquid and brown up nicely. Make sure your package of taco seasoning is vegetarian-friendly, and just be aware that you might need a little extra cheese or maybe a can of drained black beans stirred into the sauce to replace the heft the meat usually provides. It makes for a fantastic meatless Monday meal!
My biggest concern is soggy chips—how do I keep the topping crunchy?
This is the million-dollar question for any baked chip dish! We talked about this in the tips, but it’s worth repeating because it’s so crucial to enjoy this rotel dorito casserole as intended. You MUST reserve about half the chips to sprinkle on *right before the very end*. Bake the main casserole for 20 minutes, then add the final layer of chips and bake for only 5 more minutes. That quick blast of heat warms them up without letting them soak up all the moisture from the creamy filling below. You can even check out our general baking tips page if you want to dive deeper into managing moisture in casseroles.
If I use chicken, should I use ground chicken or shredded chicken breasts for this Doritos Chicken Casserole?
I really, really prefer shredded chicken for the doritos chicken casserole option. Ground chicken can sometimes dry out unless you are super watchful. When you shred pre-cooked chicken (rotisserie chicken is your secret weapon here!), it mixes into that creamy soup base so much better. It leaves pockets of tender chicken throughout the sauce, which is exactly what you want. Just make sure your shredded chicken is relatively dry before mixing it into the sauce.
Estimated Nutritional Data for This Dorito Casserole Recipe
Now, let’s talk numbers, though you know I always say that the sheer happiness this dorito casserole recipe brings your family is the most important caloric intake!
Because we are building this dish mostly from pantry staples like cream soups, cheese, and chips, the numbers are going to reflect that satisfying, comforting profile. Based on the standard recipe using ground beef, here are the averages you can expect per generous serving.
Remember, I always stress that these are just good guides. If you use leaner meat or swap out the sour cream for Greek yogurt, or if you use low-fat cheddar, these numbers will shift up or down! Always take them with a grain of salt because the brands you choose make a huge difference in the fat and sodium counts.
- Calories land right around 550 per slice.
- Fat content is usually about 32 grams, which includes 14 grams of that saturated fat we try to keep an eye on.
- Protein is fantastic—you’re getting about 28 grams per serving because of all that dairy and meat!
- Carbohydrates come in around 40 grams.
The sodium, as you might expect from taco seasoning and canned goods, is a bit high at around 950mg. If sodium is a big concern for your family, you can really cut that down by using low-sodium taco seasoning packets and rinsing your Rotel tomatoes before adding them in. Every little bit helps when you’re making an easy weeknight casserole like this one!
Share Your Experience Making the Dorito Casserole
Alright, my friends, that’s the end of the line for this seriously satisfying recipe! Now that you know all the secrets to making the crispiest, cheesiest dorito casserole recipe possible, I truly want to know what you think. Getting this dish right is just as much about the connection it creates at your table as it is about the flavor!
Did you follow the two-stage baking method perfectly, or did you sneak the chips on early? I hope you found making this easy, whether you chose ground beef or went for the doritos chicken casserole swap. Seriously, let me know!
Jump down into the comments below and tell me two things. First, what rating would you give this cheesy dorito casserole out of five stars? And second, I’m dying to hear: what was the occasion when you served this amazing ground beef dorito bake? Was it a nail-biting game day or just a Tuesday night that desperately needed some comfort?
We love connecting with you and hearing how these recipes work in your real kitchens. If you need to reach out with a question or want to share a photo, you can always find us over at the contact page. Happy baking, and I hope you’re already planning your next cheesy feast!
PrintEasy Cheesy Dorito Casserole

A simple, satisfying Tex-Mex casserole layered with seasoned ground beef or chicken, creamy sauce, Rotel tomatoes, and topped with crunchy Doritos.
- Prep Time: 10 min
- Cook Time: 25 min
- Total Time: 35 min
- Yield: 6 servings 1x
- Category: Dinner
- Method: Baking
- Cuisine: Tex-Mex
- Diet: Vegetarian
Ingredients
- 1 pound ground beef or shredded chicken
- 1 medium onion, chopped
- 1 (10.5 ounce) can cream of chicken soup
- 1 (10.5 ounce) can cream of mushroom soup
- 1 cup sour cream
- 1 (10 ounce) can Rotel diced tomatoes and green chilies, undrained
- 1 packet (1 ounce) taco seasoning mix
- 2 cups shredded cheddar cheese, divided
- 1 bag (9.25 ounces) Nacho Cheese Flavored Tortilla Chips (Doritos)
- 1/2 cup milk
Instructions
- Preheat your oven to 375 degrees Fahrenheit. Lightly grease a 9×13 inch baking dish.
- Cook the ground beef or chicken in a large skillet over medium heat until browned. Drain off any excess fat.
- Add the chopped onion to the skillet and cook until soft, about 5 minutes.
- Stir in the taco seasoning mix according to the packet directions, usually with a little water.
- In a large bowl, combine the cream of chicken soup, cream of mushroom soup, sour cream, Rotel tomatoes (undrained), and milk. Mix well.
- Fold the cooked meat mixture into the soup mixture.
- Crush about half of the Doritos into coarse pieces. Stir the crushed chips into the meat and sauce mixture.
- Spread half of the mixture into the prepared baking dish. Sprinkle with 1 cup of the shredded cheese.
- Top with the remaining meat mixture. Sprinkle the remaining 1 cup of cheese over the top layer.
- Bake for 20 minutes, or until the casserole is bubbly and the cheese is melted.
- Crush the remaining Doritos and sprinkle them over the top of the hot casserole. Return to the oven for 5 more minutes to heat the chips through.
- Let the casserole rest for 5 minutes before serving.
Notes
- For a ground beef dorito bake, use 80/20 ground beef for better flavor.
- You can substitute sour cream with plain Greek yogurt for a slightly tangier, lower-fat option.
- To freeze this casserole, assemble everything except the final layer of crushed chips. Cover tightly and freeze for up to 3 months. Thaw overnight in the refrigerator before baking, then add the final chip topping before baking as directed.
Nutrition
- Serving Size: 1 serving
- Calories: 550
- Sugar: 6
- Sodium: 950
- Fat: 32
- Saturated Fat: 14
- Unsaturated Fat: 18
- Trans Fat: 0.5
- Carbohydrates: 40
- Fiber: 3
- Protein: 28
- Cholesterol: 75