
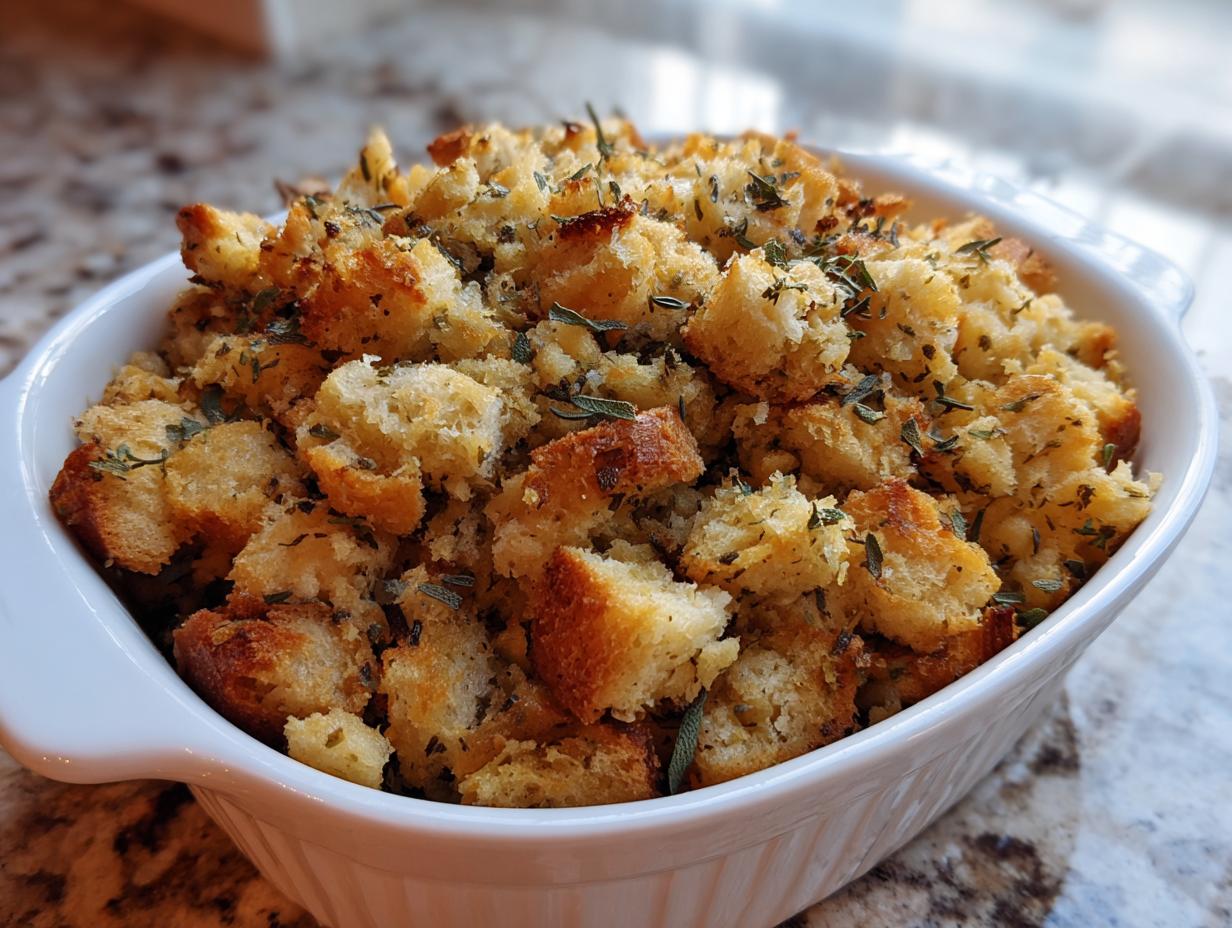
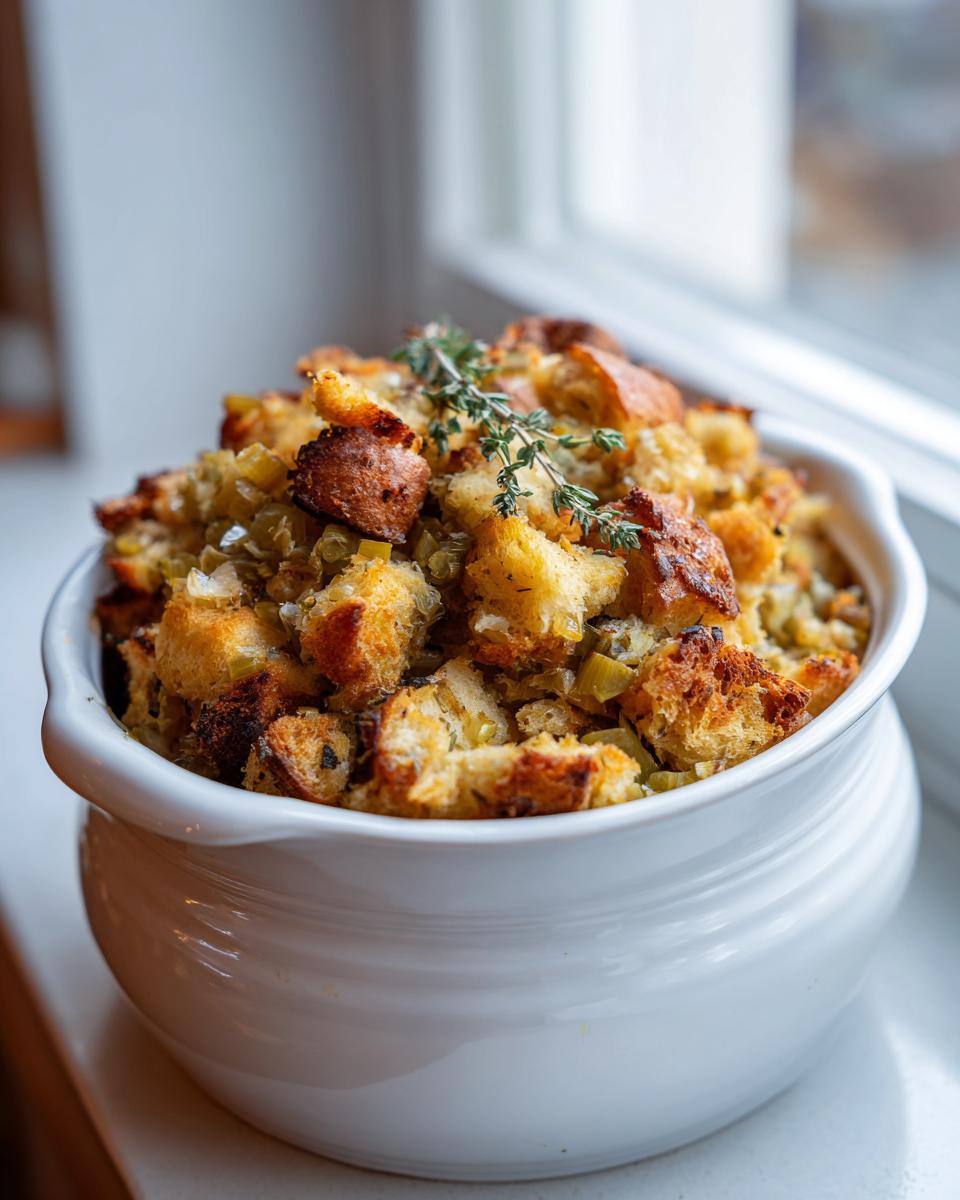
The oven clock is always the biggest source of stress on Thanksgiving, right? It feels like that massive turkey hogs every single available inch of heat. I remember Julian talking about that tight squeeze in his grandmother’s Ohio kitchen years ago! That’s why I’m obsessed with moving a classic, savory side dish over to the counter. Trust me on this: using your slow cooker for this rich, buttery herb stuffing is a complete game-changer. It’s my favorite way to handle the main event because as soon as you get this crock pot stuffing going, you gain back prime real estate. Plus, it just tastes absolutely delicious and comforting. This commitment to making holiday cooking accessible and joyful is what we built Julia Meal on!
- Why This Crock Pot Stuffing Saves Your Holiday Menu Planning
- Ingredients for Your Slow Cooker Stuffing
- Step-by-Step Instructions for Perfect Crock Pot Stuffing
- Achieving Crispy Edges Stuffing Texture
- Tips for Make Ahead Stuffing Success
- Crowd Feeding Tips and Adjusting This Thanksgiving Side Dish
- Ingredient Notes and Substitutions for Buttery Herb Stuffing
- Storing and Reheating Your Leftover Crock Pot Stuffing
- Frequently Asked Questions About Slow Cooker Stuffing
- Estimated Nutritional Data for This Thanksgiving Side Dish
- Share Your Crock Pot Stuffing Experience
Why This Crock Pot Stuffing Saves Your Holiday Menu Planning
When you’re trying to get three different casseroles and a roasted ham cooked simultaneously, the oven gets completely overwhelmed. That’s why I insist people think about set and forget sides when tackling serious holiday menu planning. Moving the stuffing to the slow cooker is brilliant! It cooks low and slow, giving you perfectly moist results without fighting the turkey for temperature control. You plug it in, set the timer, and forget about it until it’s time to eat. It’s pure genius for maximizing your day.
The Secret to Perfect Buttery Herb Stuffing Flavor
What separates this from watery stuff cooked in a slow cooker? It’s all in the seasoning mix! We load this up with real, earthy flavor using plenty of sage and thyme. When you cook that chopped onion and celery in that big stick of melted butter *before* adding it to the bread, you’re blooming those herbs. That step releases so much richness you can taste it on the steam rising off the cooker—it makes for the best buttery herb stuffing you’ve ever had.
Ingredients for Your Slow Cooker Stuffing
Okay, now for the easy part! You don’t need a massive shopping list here, just make sure those bread cubes are good quality—stale cubes work great, but don’t use anything flavored or sweet. We need that blank canvas for our butter and herbs to shine. Remember, precision matters in baking, even for something as comforting as slow cooker stuffing, so measure out that butter carefully!
- 10 cups dry bread cubes (about 1 standard loaf)
- 1 cup (2 sticks) unsalted butter, melted
- 1 large yellow onion, finely chopped
- 2 celery stalks, finely chopped
- 1 tablespoon dried sage
- 1 teaspoon dried thyme
- 1 teaspoon salt
- 1/2 teaspoon black pepper
- 2 large eggs, lightly beaten
- 1 1/2 cups chicken or vegetable broth
- 1/4 cup fresh parsley, chopped (optional)
Step-by-Step Instructions for Perfect Crock Pot Stuffing
Now that everything is measured out, let’s get this show on the road! The beauty of this crock pot stuffing is that you do almost all the work before you even turn the machine on. It’s about layering flavors gently so that when it cooks, it just melds together into something spectacular. Just follow my lead here, and you’ll have the best side dish ready to go without sacrificing oven time.
Preparing the Aromatics and Bread Base
First things first, melt that butter down gently in a little saucepan until it’s nice and liquid. Toss in your onion and celery and sweat those veggies down until they look soft—we want flavor, not crunch! Stir in those dried sage and thyme herbs right at the end so they get fragrant for just a moment. Pour that whole beautiful, buttery herb mixture over your ten cups of dry bread cubes. Mix it around until every piece is coated, but stop before you mix in the wet stuff! We are treating the bread gently here.
Cooking Times for Ideal Slow Cooker Stuffing
Get your slow cooker liner nice and slicked with grease, then gently place the stuffing inside. Don’t press it down, seriously, keep it loose! This is where the magic of set and forget sides really kicks in. For the LOW setting, you’re looking at about 3 1/2 to 4 hours, depending on your machine. If you’re really pressed for time, HIGH works in about 1 1/2 to 2 hours. Either way, you cook it until it’s piping hot all the way through. Easy peasy!
Achieving Crispy Edges Stuffing Texture
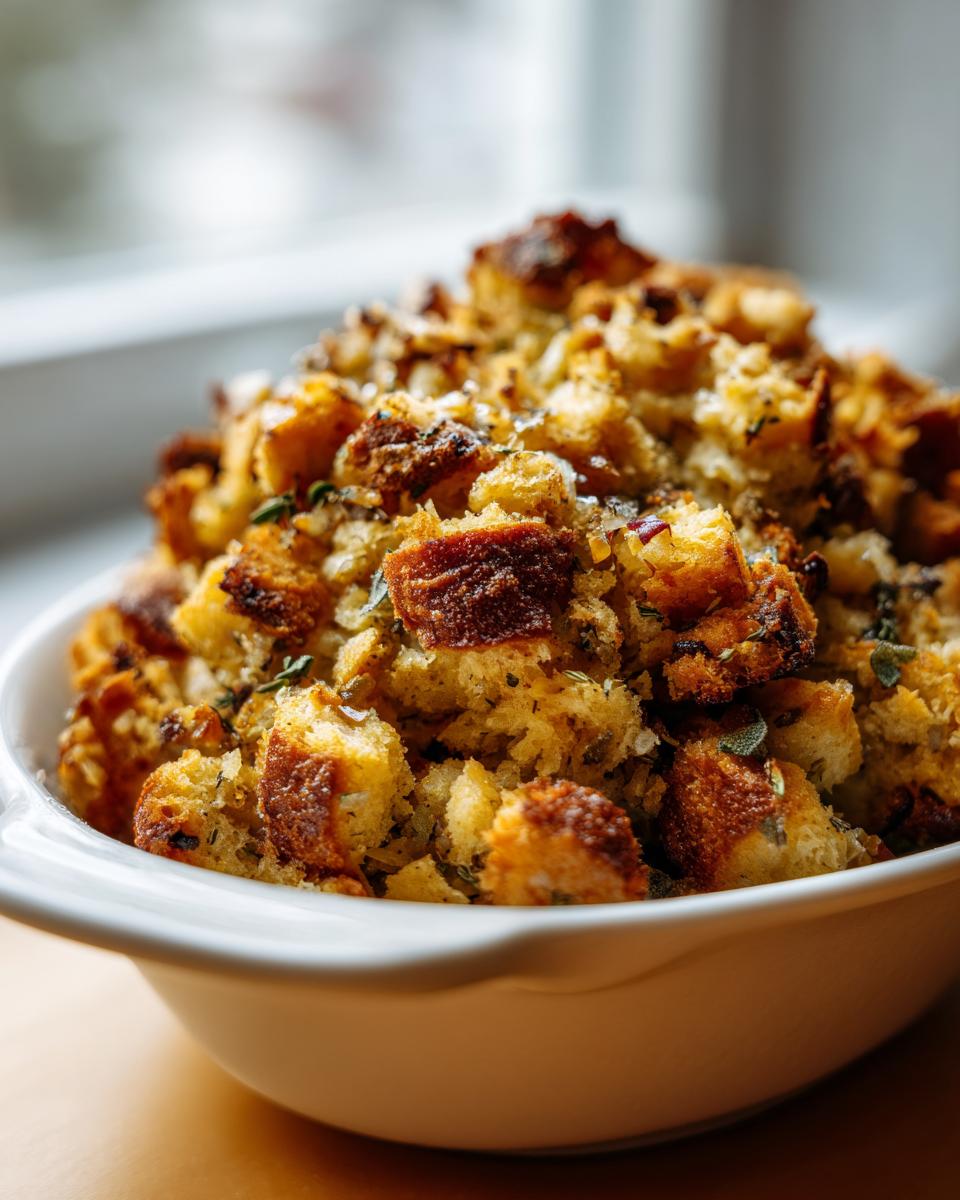
Look, nobody wants stuffing that tastes like savory porridge, right? We want that beautiful contrast! We are making crock pot stuffing, which naturally steams things moist, so we have to be a little sneaky to get those amazing textures. The key to getting those wonderful, slightly browned, crispy edges stuffing spots is all about airflow right at the end of the cooking time.
When you have about 30 minutes left on your timer—whether you’re cooking low or high—pop that lid right off! Letting the steam escape lets the top layer start drying out and browning slightly. That’s Method One, and it works perfectly well for a nice rustic, slightly crusty top layer.
But if you *really* want that restaurant-quality crunch, you have to bring out the broiler for the final few minutes. This is my trick for making sure the top layer looks amazing for serving. Once the stuffing is heated through, carefully scoop just that top layer—maybe an inch deep—onto a baking sheet. Slide that under a hot broiler for maybe two or three minutes. Watch it like a hawk! It goes from perfect to charcoal in the blink of an eye, so stay right there!
Here is an extra little tip Julian taught me: right before you take the lid off for those last 30 minutes, I sometimes take a small pat of butter—maybe a teaspoon—and dot it right across the top surface of the stuffing. When that lid comes off, the butter melts a little and helps accelerate that desirable browning. That little bit of fat helps bring out the best flavor on those crunchy spots!
Tips for Make Ahead Stuffing Success
Isn’t it wonderful when you can actually get ahead of the game during the holidays? I love being able to prep components early—it keeps the actual cooking day way calmer. This recipe is perfect for that because it works beautifully as a make ahead stuffing!
You can totally mix everything together—the bread, the sauteed veggies, the broth, the eggs—up to 24 hours before you plan to serve it. Just mix it all up exactly as instructed, put it in the greased slow cooker insert, cover it tightly with plastic wrap, and stick the whole thing in the fridge.
When it comes time to cook your crock pot stuffing the next day, you just have to remember one thing: it’s starting off cold, not room temperature. That means you need to give it an extra 30 minutes on your LOW setting to heat all the way through properly. That little bit of planning makes the whole morning so much smoother!
Crowd Feeding Tips and Adjusting This Thanksgiving Side Dish
When you realize you invited everyone you’ve ever met for dinner—which happens to me every year, oops!—you need real crowd feeding tips. Thankfully, this crock pot stuffing recipe is incredibly easy to scale up because it cooks totally independently of the rest of the meal. If you need more than ten servings, don’t panic about overcrowding your 6-quart cooker.
For doubling the recipe, I strongly suggest using two separate slow cookers if you have them. Trying to cram too much into one pot makes the heat distribution terrible, and you’ll end up with wet stuffing on the bottom and dry stuffing on top, which defeats the whole purpose! Two separate cookers mean two perfectly cooked batches.
If you only have one massive 8-quart slow cooker, you can manage it, but you’ll need to lean heavily on the LOW setting and increase the cooking time significantly—probably closer to 5 or 6 hours. Remember the goal: heat thoroughly and let the steam escape at the end for those crispy bits! It’s such peace of mind to have this major thanksgiving side dish handled outside the oven.
Ingredient Notes and Substitutions for Buttery Herb Stuffing
I get asked all the time what happens if you run out of one specific ingredient for our buttery herb stuffing. Since we are focused on home cooking and letting people use what they have, substitutions are totally fine, but you need to be smart about them!
For the liquid, chicken broth gives you that classic savory depth, but seriously, vegetable broth works wonderfully if you are serving vegetarians or just don’t have the poultry kind on hand. The flavors of the sage and thyme are strong enough they carry the dish beautifully either way.
Now, the bread is another story. If your bread cubes are super fresh and soft—like that soft white sandwich bread—please don’t just throw them in! They will turn to complete mush. My little helper trick is to spread those fresh cubes out on a sheet pan and toast them in a 300°F oven for about 15 minutes until they feel dry to the touch. This mimics the staling process and gives your slow cooker stuffing the structure it needs, guaranteeing you don’t end up with a dense brick at the bottom of the insert!
Storing and Reheating Your Leftover Crock Pot Stuffing
I always make way too much every year, but honestly, leftover stuffing is the best part of the next day! Storing your crock pot stuffing is super easy. If you’re keeping it for just a few days, just pack the leftovers into an airtight container and pop it in the fridge. It should be great for about four days.
If you want to freeze it—which is great for storing up to a month—make sure it’s completely cooled down first. Freeze it flat in a freezer bag so it doesn’t take up much room in your freezer.
When you reheat it, don’t just dump it in the microwave dry! That’s how you get sad, soggy results. Instead, place the desired portion in a covered casserole dish with a tablespoon or two of extra broth or even just water sprinkled over the top. Cover it tightly with foil and heat it at 350°F until it’s steaming all the way through. The moisture you added prevents that dry-out!
Frequently Asked Questions About Slow Cooker Stuffing
Oh, I know you might have a few questions when you move a classic recipe like this into a new appliance! It’s totally normal. Honestly, the more questions you ask now, the smoother your big thanksgiving side dish day will be. Here are the most common things people ask me about making perfect crock pot stuffing when they try it for the first time.
Can I use fresh herbs instead of dried sage and thyme?
You absolutely can! Fresh is always wonderful if you have it. The general rule of thumb when you swap dried spices for fresh ones is that you need about triple the amount because the fresh herbs have more water content. So, instead of 1 tablespoon of dried sage, you’d use about 3 tablespoons of finely chopped fresh sage. I love using fresh sage and thyme if I have time to tear the leaves off the stem!
What is the best broth to use for this recipe?
For the richest, most traditional flavor, nothing beats a good quality chicken broth. But if you are sticking to a vegetarian meal or just prefer it, vegetable broth works perfectly fine! The flavor profile of the buttery herb stuffing, thanks to all that butter and those aromatics, is so strong that you won’t miss the chicken flavor much at all. Just make sure whatever you use, it’s low sodium so you can control the saltiness!
How do I prevent the bottom layer from getting too mushy?
This is the number one troubleshooting concern for slow cooker stuffing! The bottom layer tends to sit right on the heated surface, absorbing all the moisture. To combat this, when you grease your slow cooker, use a little extra butter or spray on the bottom. Then, spread your stuffing mixture in loosely, really avoiding packing it down. If you suspect your cooker runs super hot, try placing a double layer of foil underneath the stuffing mass when you put it in, almost like a little sling, to slightly elevate it from the direct heat base.
Estimated Nutritional Data for This Thanksgiving Side Dish
Now, let’s talk fuel for the big day! Since this is a rich, satisfying thanksgiving side dish loaded with butter and bread, it does serve up some hearty numbers, but you need that energy for hosting!
- Serving Size: 1 cup
- Calories: 280
- Fat: 16g (with 9g saturated)
- Carbohydrates: 30g
- Protein: 6g
Just a quick heads-up: since we are making this crock pot stuffing from scratch using homemade measurements, these figures are just great estimates based on the main ingredients listed. Your exact numbers might shift slightly depending on your brand of bread or broth!
Share Your Crock Pot Stuffing Experience
I truly hope this recipe makes your crock pot stuffing dreams come true and frees up some much-needed oven space for you this year! If you loved how easy this was, please come back and leave a rating so others know this slow cooker stuffing works like a charm.
I want to hear all about your holiday menu successes! Did you pair this buttery herb stuffing with something amazing? If you have any extra little tricks when using your slow cooker for crowd feeding tips, drop them below—I’m always learning! Feel free to send any remaining questions through our contact page, too!
PrintCrock Pot Buttery Herb Stuffing
Make classic, flavorful stuffing in your slow cooker to save oven space during holiday cooking. This recipe features sage and thyme for a rich taste.
- Prep Time: 20 min
- Cook Time: 4 hr
- Total Time: 4 hr 20 min
- Yield: 10 servings 1x
- Category: Side Dish
- Method: Slow Cooking
- Cuisine: American
- Diet: Vegetarian
Ingredients
- 10 cups dry bread cubes (about 1 standard loaf)
- 1 cup (2 sticks) unsalted butter, melted
- 1 large yellow onion, finely chopped
- 2 celery stalks, finely chopped
- 1 tablespoon dried sage
- 1 teaspoon dried thyme
- 1 teaspoon salt
- 1/2 teaspoon black pepper
- 2 large eggs, lightly beaten
- 1 1/2 cups chicken or vegetable broth
- 1/4 cup fresh parsley, chopped (optional)
Instructions
- Place the bread cubes in a very large bowl.
- Melt the butter in a small saucepan over medium heat. Add the chopped onion and celery to the melted butter and cook until softened, about 5 to 7 minutes.
- Stir the sage, thyme, salt, and pepper into the onion and celery mixture. Cook for 1 minute until fragrant.
- Pour the butter mixture over the bread cubes and toss gently to coat evenly.
- In a separate small bowl, whisk together the beaten eggs and the broth. Pour this liquid mixture over the bread mixture and toss again until everything is just moistened. Do not overmix.
- Stir in the fresh parsley, if using.
- Lightly grease the inside of your slow cooker insert. Transfer the stuffing mixture to the slow cooker. Do not pack it down; keep it loose.
- Cover the slow cooker and cook on LOW for 3 to 4 hours, or on HIGH for 1 1/2 to 2 hours. The stuffing is done when it is heated through.
- For crispy edges, remove the lid for the last 30 minutes of cooking time. If you want a crispier top, carefully transfer the top layer of stuffing to a baking sheet and place it under a preheated broiler for 2 to 3 minutes, watching closely to prevent burning.
- Serve directly from the slow cooker.
Notes
- You can assemble this make ahead stuffing mixture up to 24 hours in advance. Store it, covered, in the refrigerator. Add 30 minutes to the cooking time if cooking directly from cold.
- This recipe is excellent for crowd feeding tips as it frees up your oven.
- If you prefer a moister stuffing, add up to 1/4 cup more broth during mixing.
Nutrition
- Serving Size: 1 cup
- Calories: 280
- Sugar: 2
- Sodium: 350
- Fat: 16
- Saturated Fat: 9
- Unsaturated Fat: 7
- Trans Fat: 0.5
- Carbohydrates: 30
- Fiber: 2
- Protein: 6
- Cholesterol: 75