
When the first chill hits the air, my mind immediately jumps to holiday baking. There’s something so comforting about creating treats that smell like pure celebration, and if you ask me, nothing signals Christmas quite like that cool, crisp pairing of dark chocolate and peppermint. Forget those dry, crumbly versions you sometimes see; we aren’t making a cake here! We’re making the ultimate showstopper: incredibly rich, intensely fudgy peppermint brownies. Honestly, I used to think these decadent squares demanded hours in the kitchen, but those days are over. My goal was to strip the process down without losing one ounce of flavor. That’s why I landed on this truly amazing, almost foolproof, one-bowl method. Trust me, you’re about to bake the best fudgy peppermint brownies of your life, and cleanup is minimal! If you love simple bakes, this recipe joins our collection of simple, delicious desserts that deliver huge flavor.
- Why These Are the Best Peppermint Brownies You Will Bake This Season
- Gathering Ingredients for Your Peppermint Brownies
- How to Prepare Fudgy Peppermint Brownies Step-by-Step
- Crafting the Creamy Peppermint Frosting for Your Peppermint Brownies
- Finishing Touches: The Crushed Candy Cane Topping
- Tips for Making Homemade Peppermint Treats That Impress
- Storage and Reheating Instructions for Your Decadent Brownie Recipes
- Frequently Asked Questions About Peppermint Brownies
- Sharing Your **Best Winter Desserts**
Why These Are the Best Peppermint Brownies You Will Bake This Season
Look, I’ve tested about nineteen different brownie recipes in the pursuit of perfection, especially for the holidays. What sets these fudgy peppermint brownies apart isn’t just the minty frosting; it’s the foundation. Most recipes online either result in a cakey mess or a sticky puddle. Mine? They hit that sweet spot every single time, making them my favorite choice for brownie cookies that rival these easy Christmas baking ideas.
People rave about these because they deliver on the promise of luxury without requiring a ton of fuss. They’re rich, they’re dense, and they taste exactly like the incredible mint chocolate dessert you remember from childhood, only better.
Achieving the Ultimate Fudgy Texture in Your Peppermint Brownies
The secret to truly decadent brownie recipes isn’t just the chocolate—it’s how you treat the sugar and butter. We use melted butter whisked aggressively with the sugar first. This initial step starts dissolving the sugar just enough to create that coveted shiny, crinkly top that professional bakers strive for. Crucially, you must stop baking the *second* a toothpick comes out with moist crumbs clinging to it. Bake five minutes too long, and poof! You’ve got a cake. We want fudgy layers here, so trust the visual cue over the timer.
The Appeal of an Easy Peppermint Brownies Recipe
I know your holiday schedule is packed, which is why these are designed to be truly simple. These are my go-to one bowl mint brownies because everything goes into one mixing bowl! We combine the dry ingredients right on top of the wet ones and mix minimally. This keeps the gluten development low, meaning a softer, chewier, and definitely fudgier result. It radically simplifies the whole process of chocolate peppermint baking, letting you focus less on dishes and more on enjoying the process.
Gathering Ingredients for Your Peppermint Brownies
Okay, time for the fun part: ingredients! Even though this is an easy peppermint brownies recipe, we still need the right building blocks to ensure we get those incredibly rich chocolate mint squares we talked about. Since this recipe is so straightforward—basically just mixing things in a bowl—the quality of what you put in really shines through. You’ll need the essentials like melted butter, sugar, eggs, flour, cocoa powder, and those crucial chocolate chips. I’ve detailed everything you need in the recipe card below, but let’s talk about the stars of the show: the mint elements.
We are aiming for those spectacular candy cane brownies, and using high-quality peppermint is non-negotiable if you want that true, cooling mint flavor that dances with the dark chocolate. This is where so many home recipes fall flat, so pay attention to these few notes!
Ingredient Notes and Substitutions for **Candy Cane Brownies**
First up, the extract. You absolutely must use pure peppermint extract here, not artificial mint flavoring. Artificial stuff tastes strangely synthetic, and it won’t deliver that wonderful, clean flavor we want in these homemade peppermint treats. You’ll notice I put a teaspoon in the batter and another half-teaspoon in the frosting—this double-hit ensures the mint flavor carries through the richness of the chocolate.
Next, the topping! You have two fantastic choices, and both lead to incredible results. You can use plain crushed candy canes, which give you that sharp, bright crunch. Or, if you want to lean into the chocolate even more—and trust me, you might—swap those out for crushed pieces of peppermint bark. If you use bark, you get extra crisp flakes of chocolate mixed in with the mint, which elevates these into true peppermint bark brownies territory. Both work beautifully as our final layer of crunch before slicing into these holiday brownies.
How to Prepare Fudgy Peppermint Brownies Step-by-Step
Alright, let’s get these decadent beauties into the oven! Even though you’re tackling this in one bowl, following the order I lay out here is what moves you from making a standard chocolate square to achieving the ultimate fudgy peppermint brownies. When I started out, I rushed Step 1, and my brownies turned out puffy and dry. Lesson learned the hard way!
First things first: get your oven preheated to 350°F (175°C). This is crucial for even baking. Then, grab that 9×13 inch pan and give it a good line of parchment paper—leave some overhang on the sides. That overhang is your non-stick insurance policy; nobody wants to wrestle hot brownies out of a pan!
Mixing the **One Bowl Mint Brownies** Batter
Here’s where we build that fudgy texture. Start by whisking the melted butter and sugar until they look pale and smooth. Then, add your eggs one by one, followed by the vanilla and that teaspoon of peppermint extract. The batter will look glossy—that’s good! Now, gently sift your cocoa, flour, salt, and baking powder right on top of that wet mixture. This is the most important moment: mix with a spatula just until you see no more white streaks of flour. Stop! Seriously, stop mixing right then. Overmixing develops gluten, and gluten equals cakey brownies. We want chewy, dense rich chocolate mint squares, not mini cakes! If you want to see how I apply this technique to other fun bakes, check out my approach for chocolate chip cheesecake cookies.
Baking and Cooling for Perfect **Rich Chocolate Mint Squares**
Fold in those chocolate chips gently, spread the batter evenly, and bake for about 25 to 30 minutes. Remember what I said about fudgy? When you test it, that toothpick needs to come out with moist crumbs—not wet goo, but definitely not dry and clean. That slightly under-baked center sets up perfectly as it cools. Once they are out, you have to let these amazing peppermint brownies cool completely. I mean it! If you try to frost them warm, the creamy topping melts into a disappointing puddle. Patience is your final secret ingredient here!
Crafting the Creamy Peppermint Frosting for Your Peppermint Brownies
Once those fudgy bases are safely cooling—and trust me, resisting the urge to cut into them is the hardest part—it’s time to make the frosting. This isn’t some greasy, overly sweet canned stuff, either. This frosting is rich, buttery, and perfectly balanced with that cool mint flavor. It’s the perfect contrast to the deep, dark chocolate underneath, creating a truly complete dessert experience.
You only need a few simple things for this topping: powdered sugar, a bit of milk or heavy cream, and the remaining half teaspoon of peppermint extract. If you struggle with buttercream occasionally, don’t worry; I’ll show you exactly how to hit that perfect consistency that lets you spread it easily but still holds its shape.
In a medium bowl, whisk your powdered sugar until it’s clump-free—this is an essential step for smooth frosting. Then, start adding your liquid slowly. I always start with just two tablespoons of milk or cream. Whisk it until it’s incorporated, and then add that final touch of peppermint extract. You are looking for a texture that’s thick enough that it doesn’t run off the side of the spoon immediately, but still easily spreadable with an offset spatula. If you’re having trouble getting it smooth, run it through a quick pass with an electric hand mixer—it helps incorporate air, just like preparing a great vanilla buttercream frosting recipe. If it ends up too thick for spreading, add milk just one teaspoon at a time until you get that perfect, creamy finish. This glaze is what really pushes these over the top into amazing **holiday brownies** territory!
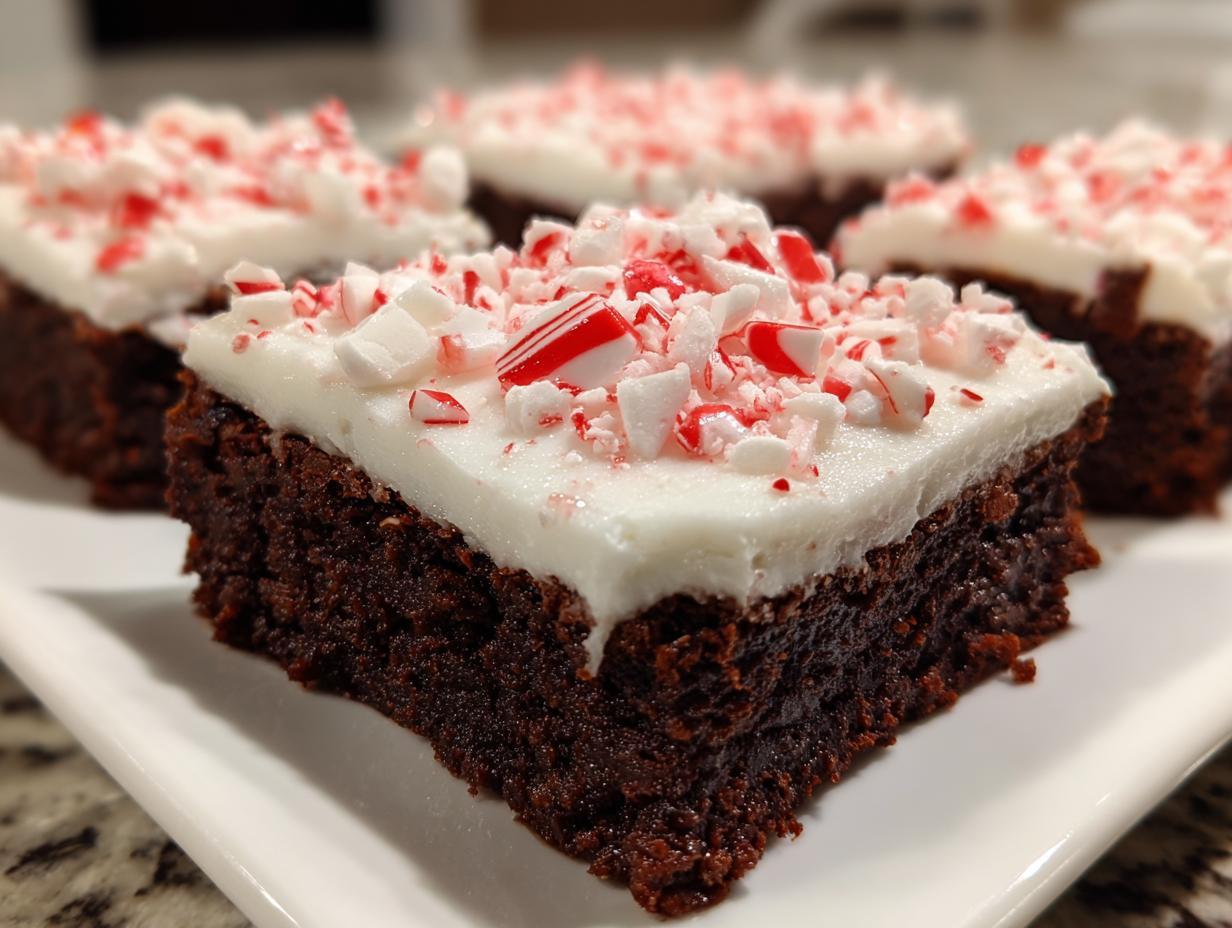
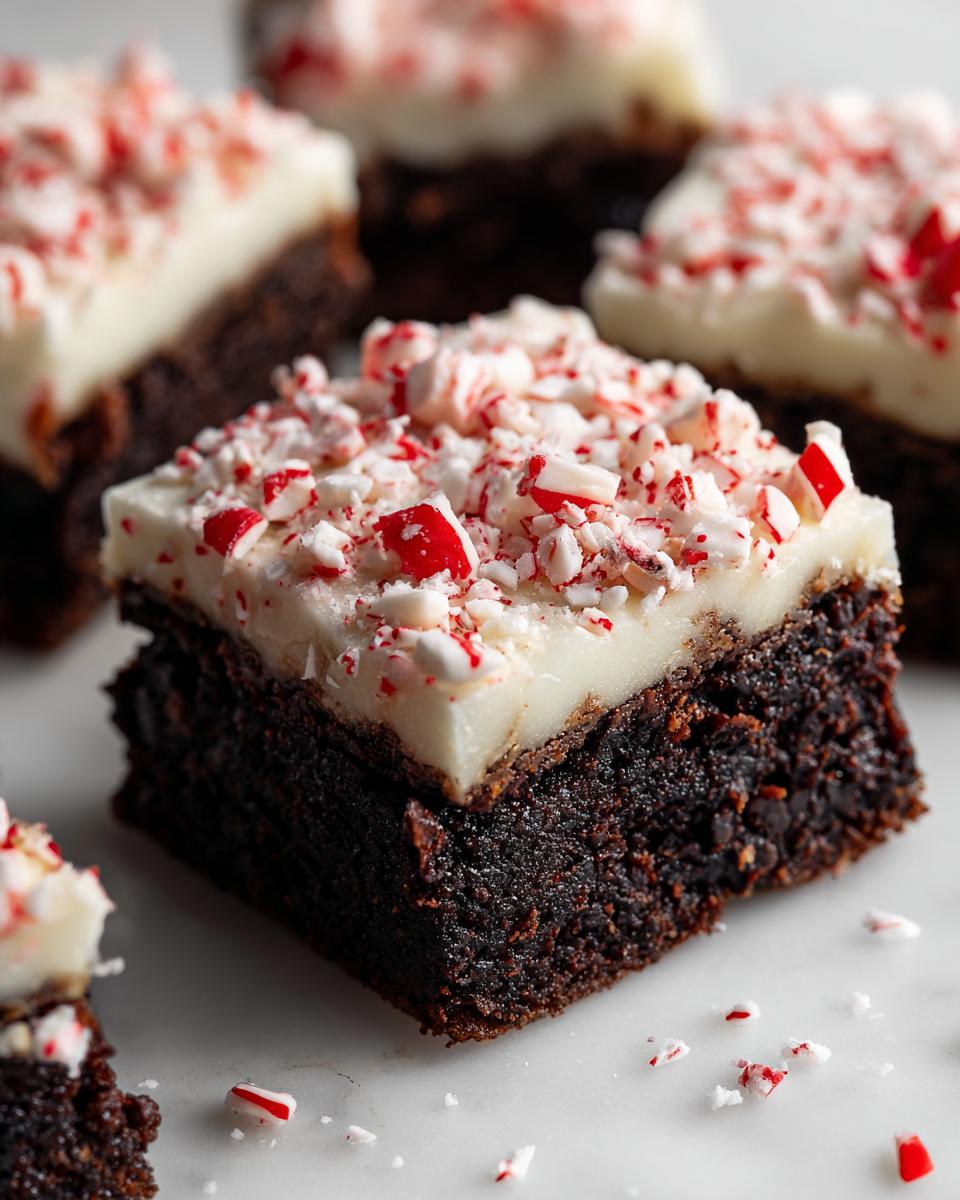
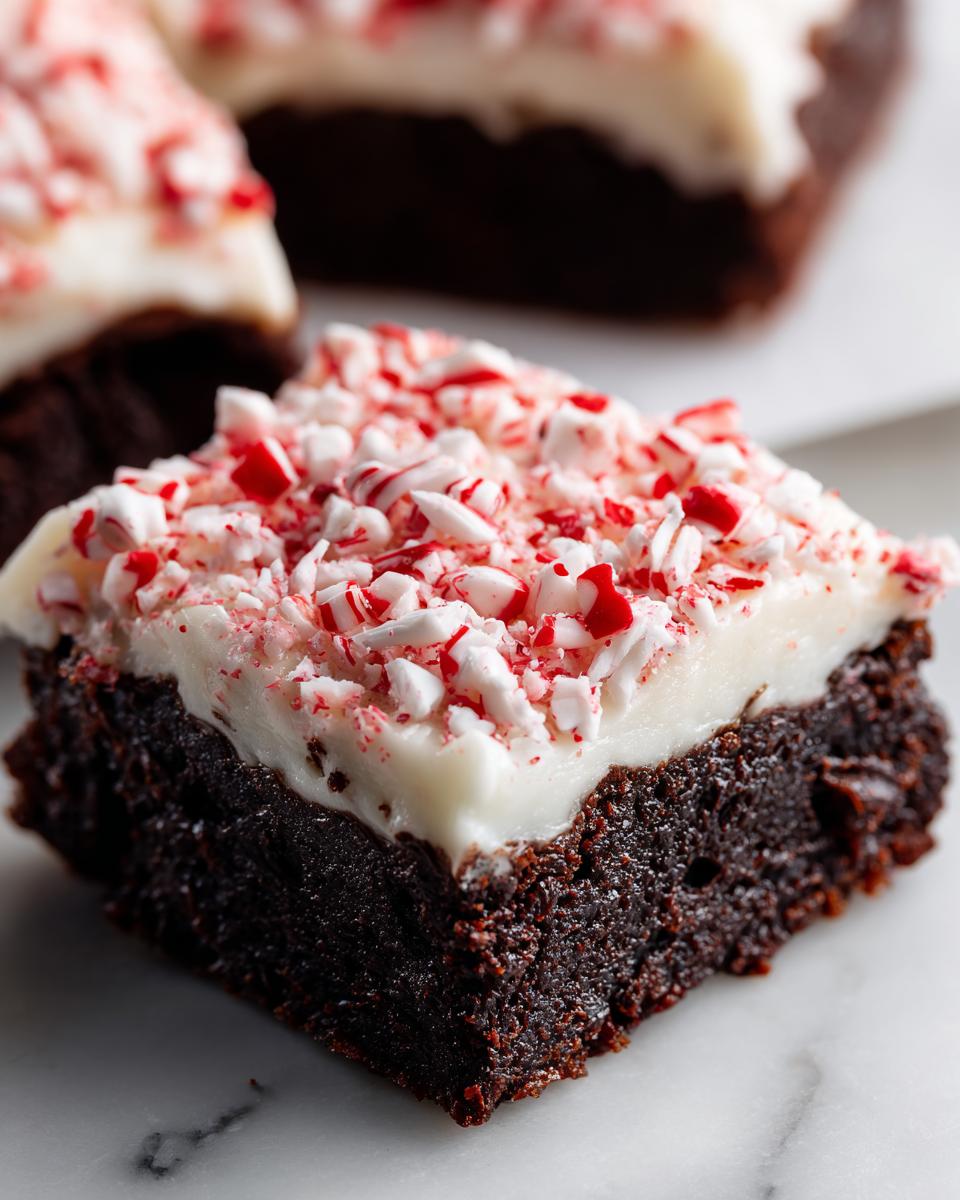
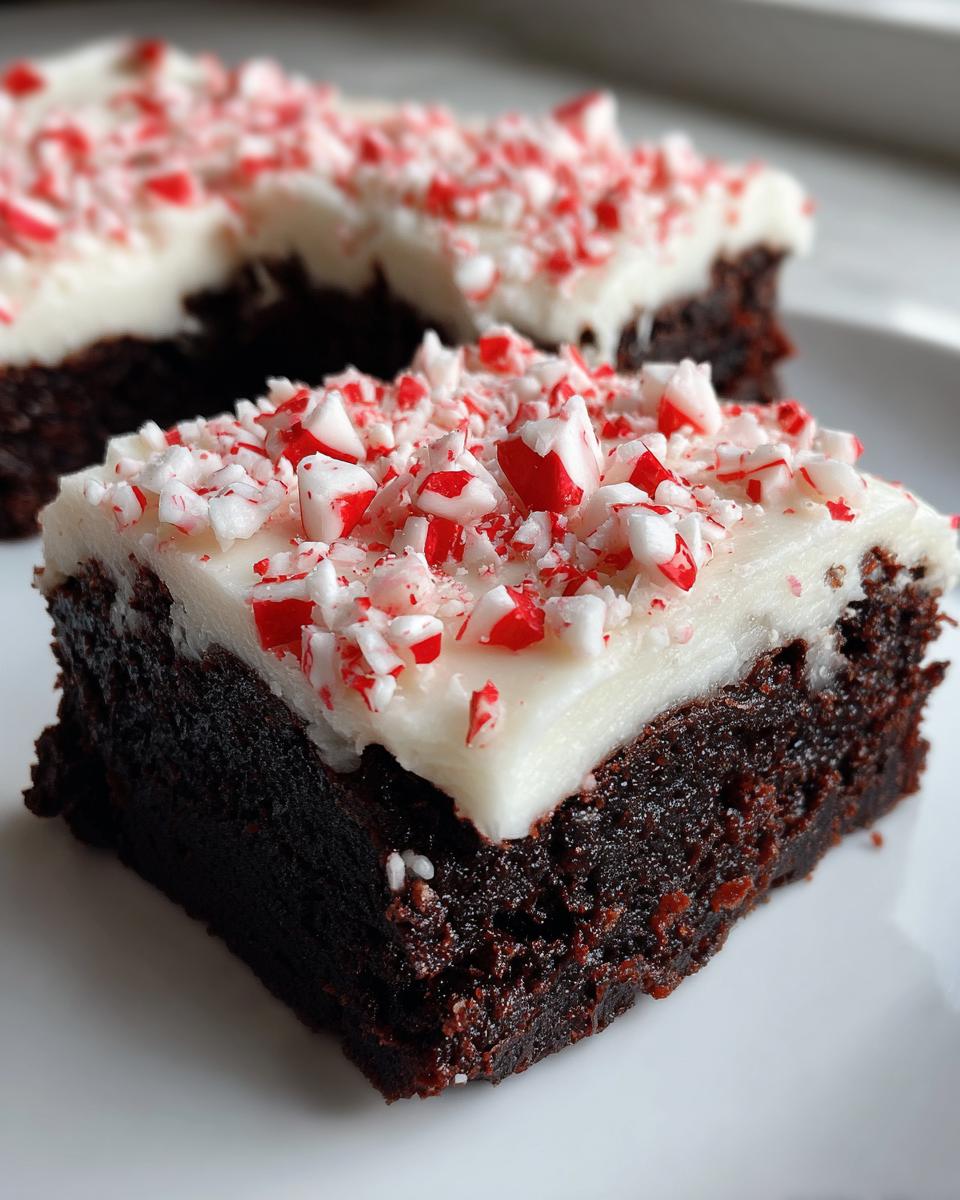
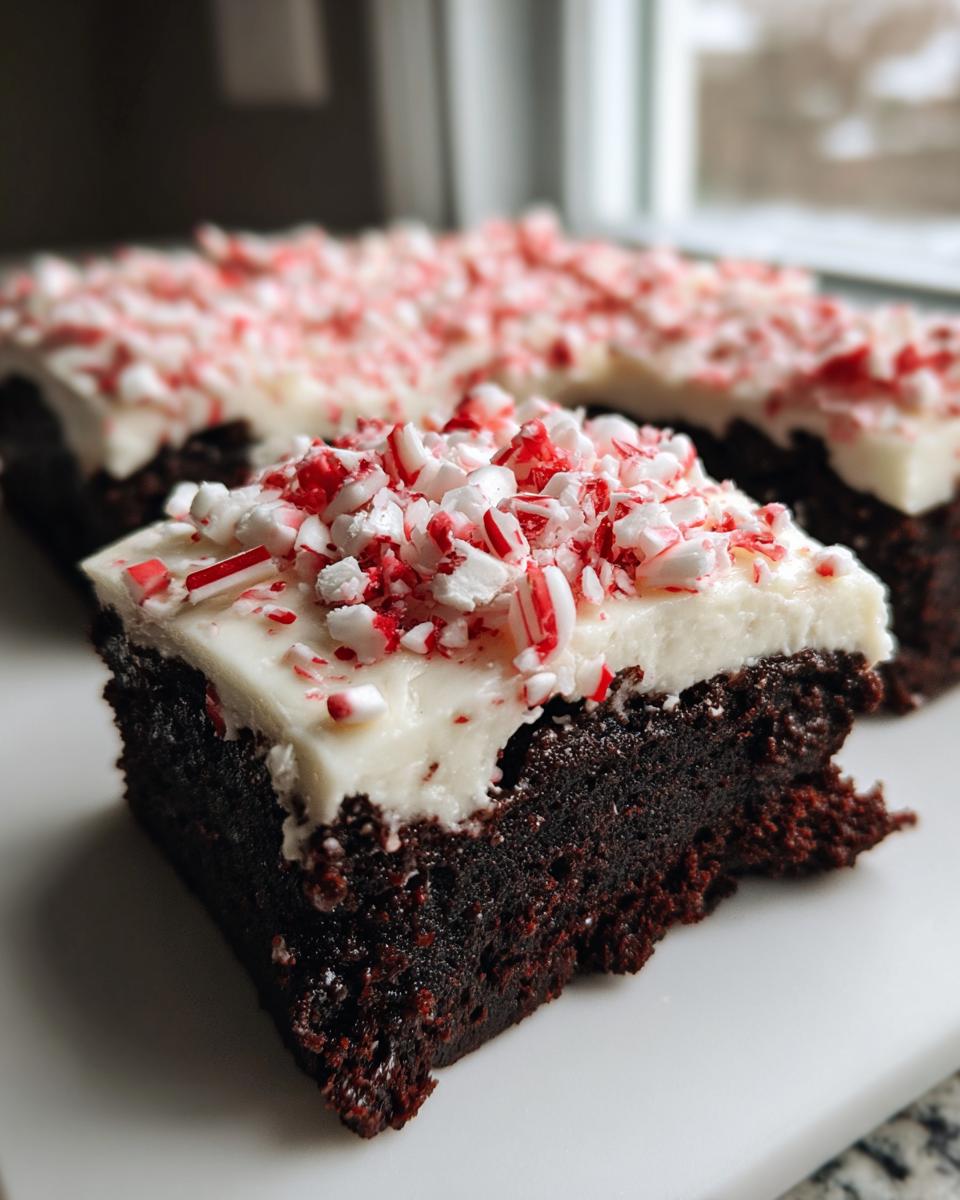
Finishing Touches: The Crushed Candy Cane Topping
This is the moment where our rich, fudgy squares transform from a simple, incredible brownie into a full-blown, festive showstopper. Once that beautiful peppermint frosting is spread evenly over the completely cooled brownies, you have to work fast! The frosting starts setting up pretty quickly, especially if your kitchen isn’t too warm, and we want those crushed candy canes or peppermint bark pieces to stick right where we put them.
Take your pre-crushed peppermint—whether you went with classic candy canes or rich peppermint bark pieces—and sprinkle generously right over the top of that creamy white layer. Don’t be shy! You want plenty of those bright red and white flecks scattered everywhere. This topping is what makes them instantly recognizable as holiday brownies and adds that fantastic textural pop that contrasts so nicely with the soft frosting and dense base.
I learned a trick from some professional bakers back in the day about presentation: if you’re making these for a party and want super clean slices, let them chill out in the refrigerator for about 30 minutes after you’ve put the topping on. This firms up the frosting and helps the candy pieces adhere firmly. When you finally slice them, your knife goes through cleanly, and the layers stay distinct. It’s a tiny step, but it makes all the difference when you’re presenting these gorgeous homemade peppermint treats. If you enjoy adding crunchy things to your bakes, you might also want to check out my recipe for candied pecans—it uses a similar immediate-adherence technique!
Tips for Making Homemade Peppermint Treats That Impress
Now that you’ve mastered the mixing and the frosting, let me give you a few pointers I picked up back when I was working in professional kitchens. These aren’t on the recipe card, but they are the techniques that elevate something good into something truly memorable. When you’re making something as festive as these peppermint brownies, presentation really matters, especially if you’re bringing them to a cookie swap or gifting them.
The first thing I always emphasize is temperature control, especially when working with butter and eggs. Even though this is an easy recipe, using ingredients that are slightly too warm or too cold can mess with the emulsification when you mix the butter and sugar. Keep your eggs near room temperature if you can. It helps them incorporate more smoothly into the melted butter base, leading to a better final structure, even in these already dense decadent brownie recipes.
Another thing people often overlook is the pan itself. We use a 9×13, which is great for crowds and yields those perfect rich chocolate mint squares. But if you decide to split this batter into smaller, deeper pans—say, two 8×8 squares—you must adjust your baking time. Because the heat has to travel further into the center of a deeper pan, you might need an extra 5 to 10 minutes of bake time. Always keep testing with that toothpick!
Finally, let’s talk about cutting. If you want those beautifully clean edges that look like they came from a bakery case—the kind that show off that gorgeous peppermint frosting layer—you need a good, sharp knife, and it has to be clean between cuts. After you spread the topping and let it set, wipe your knife clean with a warm, damp paper towel for every single slice. It sounds fussy, but using a cold or sticky knife smears the frosting and ruins the visual appeal of your gorgeous candy cane brownies! If you love cutting clean squares, you’ll want to check out my guide on making perfectly structured fudgy chewy brownie cookies, too, because the same rule applies there.
Storage and Reheating Instructions for Your Decadent Brownie Recipes
These decadent brownie recipes are so good, you might actually have leftovers—and that’s a good problem to have! The great thing about fudgy brownies, especially when they have that layer of soft peppermint frosting, is they actually keep really well, which is wonderful news for your easy Christmas baking ideas prep schedule.
When it comes to keeping them fresh, you have a couple of options depending on how long you need to store them. Remember, these contain a dairy-based frosting, so we need to be mindful of counter versus fridge time.
For short-term storage—say, if you plan on eating them within two or three days—room temperature is perfect. Keep the remaining rich chocolate mint squares in an airtight container. You don’t want them exposed to the air because that’s what pulls moisture out! If you have an overly warm kitchen, storing them tightly covered on the counter is still usually fine for a couple of days. The high sugar content in the frosting helps keep things stable.
If you need them to last longer, or if your kitchen is just too warm, pop them into the refrigerator. Covered tightly, they’ll last easily a whole week. Now, here’s the catch: cold ruins fudge! When you pull them straight from the fridge, the brownie base will be dense—almost hard—and the frosting stiff. That’s why reheating advice is critical.
To bring back that perfect, melt-in-your-mouth fudgy texture, you need to let them sit out on the counter for about 30 to 45 minutes before you plan to serve them. If you’re desperate, you can microwave a single square for just 5 to 10 seconds. This gently softens the chocolate chips again and loosens up the structure. If you’re freezing them for later—which you absolutely can do—wrap individual squares tightly in plastic wrap first, then place them in a freezer-safe bag. You can freeze them like this for up to two months! When you’re ready to eat, transfer them straight from the freezer to the counter to thaw slowly. Don’t rush them straight into the microwave from frozen, or the texture will get weird. If you’re interested in freezing other treats, I have some great advice for getting the best results with easy freezer jam, too, so you know how to handle temperature changes!
Frequently Asked Questions About Peppermint Brownies
Baking during the holidays always brings up a few common questions, especially when we are dealing with layered, frosted treats like these peppermint brownies. I’ve gathered the ones I hear most often from folks trying to nail that perfect fudgy texture and festive look. Getting these little details right is what separates a good brownie from the truly memorable best winter desserts! If you are looking for other simple recipes to round out your holiday menu, check out my guide to quick, easy weeknight dinners for inspiration.
Can I make these **easy Christmas baking ideas** ahead of time?
Yes, absolutely! That’s one reason I love including these in my **easy Christmas baking ideas**. The brownie base itself holds up brilliantly. You can bake the brownies, let them cool completely, and store them tightly covered at room temperature for up to two days, or wrapped well in the fridge for four days. However, if you’re making them ahead, here’s my crucial advice: wait to frost them! Frosting always tastes best when it’s fresh, and the crushed candy canes can start to melt or weep slightly if they sit on the counter for too long, especially if the environment is humid. I recommend baking the base early in the week, and then making the frosting and topping them the night before you plan to serve them. This ensures that beautiful, sharp peppermint flavor and the crisp topping stay perfect.
What is the best way to crush candy canes for the topping?
Oh, this is a great question because if you crush them too finely, you just end up with dusty red sugar. We want texture! For the very best crushed candy cane topping, where you still get those satisfying little bites of mint, ditch the food processor for the final step. If you put them in the processor, they turn into powder almost instantly. Instead, take your candy canes (or peppermint bark pieces) and put them inside a heavy-duty zip-top bag. You want a strong bag because peppermint can be sharp! Then, use the bottom of a heavy saucepan or a rolling pin and give them a few good, firm taps. Work around the bag until you’ve broken them into varied sizes—some coarse chunks, some fine pieces. If you want an alternative crunch that lasts longer, think about using candied pecans instead; you can find my recipe for those over at candied pecans, which uses a similar technique.
If you have any other burning questions about making these stellar chocolate peppermint baking favorites, drop them in the comments below! I love helping fellow home cooks master these spectacular brownie recipes for holidays.
Sharing Your **Best Winter Desserts**
Well, that’s it, my friends! We’ve gone from melted butter to crunchy peppermint topping, and you now have my absolute secret weapon for the holidays: the Ultimate Fudgy Peppermint Brownies. Honestly, crafting these rich chocolate mint squares is one of my favorite parts of the entire year. The smell when that peppermint frosting goes on? Unbeatable!
Now that these peppermint brownies are cooling and setting, the final memory-making step is sharing them! Food tastes ten times better when you know someone else enjoyed it too. I would absolutely love to hear how they turned out for you. Did you stick strictly to the candy canes, or did you sneak in some of that peppermint bark?
Please, if you bake these best winter desserts, take a picture and tag me! Showing off your incredible holiday baking is the biggest compliment you can give me. And if you ran into a snag, or if you made an amazing tweak of your own—maybe you added espresso powder to deepen the chocolate—let me know in the comments below. Hearing about your successes, big or small, is what helps keep the spirit of Julia Meal alive in my kitchen and yours. Happy baking, and thank you for letting this recipe be a part of your celebration this year. For more inspiration or just to learn more about the journey behind these recipes, feel free to check out my About page!
PrintUltimate Fudgy Peppermint Brownies with Creamy Frosting

Make rich, fudgy peppermint brownies using a simple one-bowl method. Top them with creamy peppermint frosting and crushed candy canes for a decadent holiday dessert.
- Prep Time: 15 min
- Cook Time: 30 min
- Total Time: 45 min
- Yield: 16 servings 1x
- Category: Dessert
- Method: Baking
- Cuisine: American
- Diet: Vegetarian
Ingredients
- 1 cup (2 sticks) unsalted butter, melted
- 2 cups granulated sugar
- 4 large eggs
- 1 teaspoon vanilla extract
- 1/2 cup unsweetened cocoa powder
- 1 cup all-purpose flour
- 1/2 teaspoon salt
- 1/2 teaspoon baking powder
- 1/4 cup semi-sweet chocolate chips
- 1 teaspoon peppermint extract (for batter)
- 1 cup crushed candy canes or peppermint bark (for topping)
- 1 cup powdered sugar (for frosting)
- 2 tablespoons milk or heavy cream (for frosting)
- 1/2 teaspoon peppermint extract (for frosting)
Instructions
- Preheat your oven to 350°F (175°C). Line a 9×13 inch baking pan with parchment paper, leaving an overhang for easy removal.
- In a large bowl, whisk the melted butter and granulated sugar together until well combined.
- Whisk in the eggs one at a time until fully incorporated. Stir in the vanilla extract and 1 teaspoon of peppermint extract.
- Sift the cocoa powder, flour, salt, and baking powder directly into the wet ingredients. Mix gently with a spatula until just combined; do not overmix.
- Fold in the chocolate chips. Spread the batter evenly into the prepared baking pan.
- Bake for 25 to 30 minutes. A toothpick inserted near the center should come out with moist crumbs attached, not wet batter, for a fudgy texture.
- While the brownies cool completely, prepare the frosting. In a medium bowl, whisk together the powdered sugar, milk, and 1/2 teaspoon of peppermint extract until smooth and creamy. Add more milk, one teaspoon at a time, if the frosting is too thick.
- Once the brownies are cool, spread the peppermint frosting evenly over the top.
- Immediately sprinkle the crushed candy canes or peppermint bark over the frosting.
- Let the frosting set for about 30 minutes before cutting into rich chocolate mint squares.
Notes
- For the fudgiest texture, do not overbake the brownies. Check them early.
- You can substitute peppermint bark pieces for candy canes in the topping for extra chocolate flavor.
- Chill the brownies for 30 minutes after frosting to help the topping adhere before slicing.
Nutrition
- Serving Size: 1 square
- Calories: 310
- Sugar: 35g
- Sodium: 120mg
- Fat: 17g
- Saturated Fat: 10g
- Unsaturated Fat: 7g
- Trans Fat: 0g
- Carbohydrates: 38g
- Fiber: 1g
- Protein: 3g
- Cholesterol: 55mg