
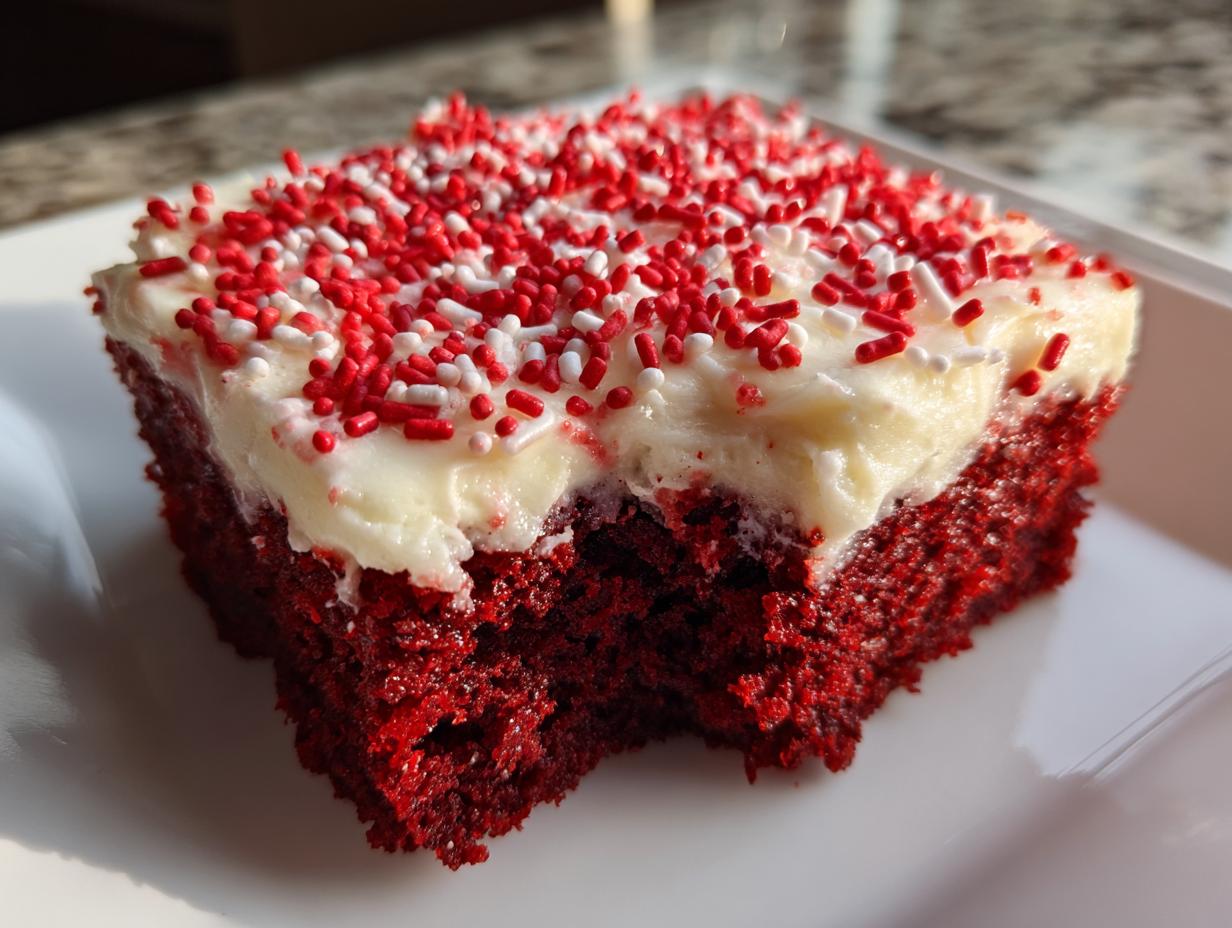
If you’re like me, you chase that perfect, almost sinful level of moistness in every dessert you bake. It’s the difference between a good cake and one everyone begs you for at parties. Well, stop looking! This red velvet poke cake is the real deal—it’s ridiculously easy, incredibly festive, and I promise you, it practically soaks itself into pure, velvety heaven. When I’m developing recipes here at Julia Meal, my goal, learned from years in professional kitchens yet rooted in home tradition, is reliability. This recipe uses a brilliant cake mix hack to deliver that deep red color and rich flavor you crave, guaranteeing moisture so deep it melts in your mouth. For more classic, reliable baking, you can check out my main guide on making a perfect moist and easy Red Velvet Cake. Trust me, this is the one you need for your next celebration.
- Why This Red Velvet Poke Cake is Your New Favorite Easy Dessert
- Gather Ingredients for Your Red Velvet Poke Cake Recipe
- Step-by-Step Instructions for the Red Velvet Poke Cake
- Tips for the Perfect Moist Cake Every Time
- Making Your Red Velvet Poke Cake Ahead of Time
- Serving Suggestions for This Velvet Dessert
- Storing Your Leftover Red Velvet Poke Cake
- Frequently Asked Questions About This Poke Cake Recipe
- Nutritional Estimates for This Rich Dessert Recipe
- Share Your Red Velvet Poke Cake Creations
Why This Red Velvet Poke Cake is Your New Favorite Easy Dessert
I know what you’re thinking: another dessert? But this red velvet poke cake is different, I swear! It hits that sweet spot where minimal effort meets maximum flavor payoff. It’s truly one of my go-to recipes when I need something impressive but don’t have all day. If you are looking for more straightforward, joyful baking projects, take a look at all my options for simple delicious desserts.
Guaranteed Ultra-Moist Texture
The reason this cake is never dry is the magic happening *after* it comes out of the oven. We poke deep holes, and then we flood them with our secret soak. That’s the hallmark of a fantastic Poke Cake Recipe—the cake drinks up all that creamy goodness until it’s unbelievably tender. You just can’t cheat that level of moisture!

Simple Cake Mix Hack for Speed
We’re using a box mix here, friends! And I’m not judging. We are busy people, and sometimes you need that rich red velvet base ready to go in twenty minutes flat. This hack keeps the prep time down so you can focus on getting that gorgeous cream cheese frosting layer perfect.
Festive Look for Any Party Cake
Honestly, the color alone makes this cake a winner. It screams celebration! Whether it’s Christmas, Valentine’s Day, or just Tuesday, the deep red color topped with white frosting looks instantly fancy. It’s the perfect party cake centerpiece.
Gather Ingredients for Your Red Velvet Poke Cake Recipe
Okay, gathering the supplies is the next big step. Now, remember, even though we’re using a box mix for the base, the flavor boost we get from the soak and the fantastic topping requires pretty precise stuff. Lay everything out before you start mixing so you aren’t scrambling later. Precision in the mixing bowls is what separates a good dessert from a phenomenal one.
For the frosting, I absolutely insist you follow this small tip, which comes straight from my years of learning how cakes should behave: make sure your cream cheese and your butter are softened! We aren’t melting them; we want them just soft enough to combine smoothly without lumps. This is crucial for getting that perfect finish, which you can read more about in my guide for easy cream cheese frosting recipe for cakes.
For the Moist Cake Base
This is our starting canvas, so we keep it simple. We are relying on the box mix to do most of the heavy lifting on color and structure!
- 1 box red velvet cake mix (plus all ingredients it calls for on the box—usually eggs, oil, and water).
The Sweetened Condensed Milk Soaked Cake Filling
This mixture sinks deep into the crumb, making this the ultimate red velvet poke cake. This is where the moisture truly comes from, so don’t skimp!
- 1 (14 ounce) can sweetened condensed milk
- 1 package (3.4 oz) instant vanilla pudding mix
- 2 cups cold milk
For the Cream Cheese Frosting Cake Topping
This rich, tangy layer balances the sweetness of the soak perfectly. Remember what I said before—softened butter and cream cheese are non-negotiable here for a beautiful, lump-free Cream Cheese Frosting Cake!
- 8 ounces cream cheese, softened
- 1/2 cup unsalted butter, softened
- 3 cups powdered sugar
- 1 teaspoon vanilla extract
- Red sprinkles for topping
- 1 tub (8 oz) frozen whipped topping, thawed (This goes on *after* the cream cheese layer!)
Step-by-Step Instructions for the Red Velvet Poke Cake
Alright, deep breath! This is the fun part, but you need to work quickly while the cake is still warm so that wonderful soak gets pulled deep into the crumb. Remember, precision under pressure is our friend here. If you want to see how I whip up a quick frosting for other projects while this cools—though ours uses cream cheese—you can check out my quick creamy chocolate frosting guide for technique inspiration.
Baking and Poking the Warm Cake
First things first, get that oven hot and bake your cake batter according to the box instructions in your 9×13 inch pan. Once the timer goes off, resist the urge to run it straight out of the oven! Let it cool there on the counter for a solid 10 minutes. This slightly cooled stage is vital. We need it warm enough to accept the filling but not so hot that the filling melts right through the base.
Now, grab the handle of a sturdy wooden spoon—that’s my favorite tool for this—or even a thick, clean straw, and start poking! Poke holes evenly all over the surface. Make them deep, almost reaching the bottom of the pan, but don’t punch through it and create a puddle on the bottom. You want deep little wells for that filling to dive into.
Creating the Sweetened Condensed Milk Soaked Cake Layer
While you are poking away, get your soak mixture ready. In a separate bowl, you just need to whisk together that sweetened condensed milk, the instant vanilla pudding mix, and the cold milk. Whisk it until it looks smooth and everything is combined. It won’t be thick yet, and that’s perfect.
This next step is super important for turning this into the ultimate Sweetened Condensed Milk Soaked Cake. Pour that liquid mixture slowly and evenly over the entire top surface of the warm, poked cake. Watch it disappear! Use a spatula if you need to gently guide some liquid into any missed spots. After that, cover the pan gently and pop it into the fridge for just about 30 minutes. This lets that initial liquid absorb a bit before we put the heavy frosting on.
Assembling the Cream Cheese Frosting Cake
Time for the best part of any red velvet poke cake—the topping! First, make your cream cheese layer. Beat that softened cream cheese and butter together until they are super light and fluffy—no lumps allowed! Slowly beat in your powdered sugar and vanilla extract until you have a smooth, gorgeous frosting consistency. Spread this evenly right over the chilled, soaked cake layer.
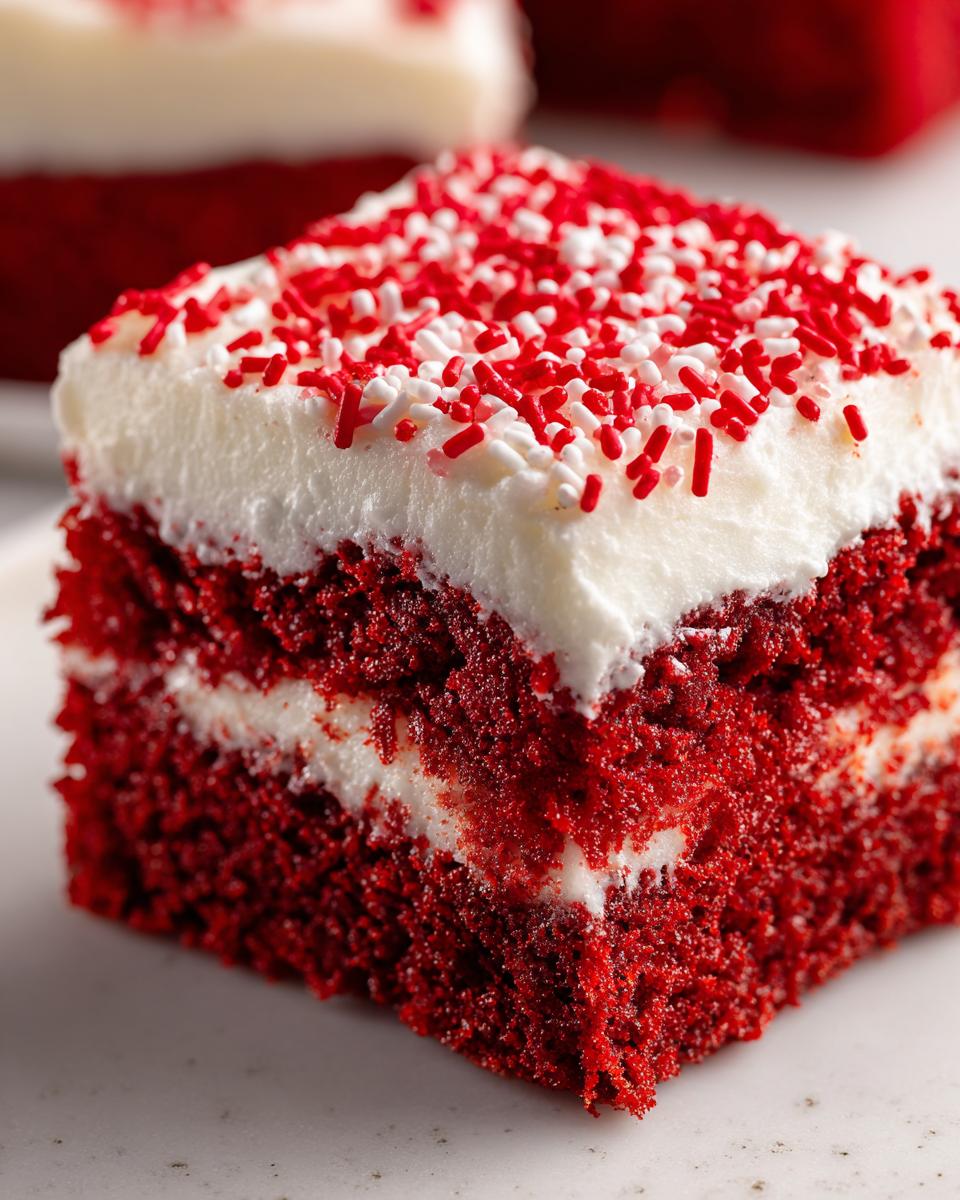
Next, take that thawed whipped topping and spread it gently over the cream cheese layer. You want a fluffy, even cloud top. Finish it off with a generous shower of red sprinkles! Then, this is the final test of patience: everything needs to chill together for at least one hour. This locks everything in place and maximizes the creamy texture throughout the whole red velvet poke cake.
Tips for the Perfect Moist Cake Every Time
Look, I’ve made this spectacularly rich dessert probably thirty times now, and I’ve learned a few things along the way that will save you heartache! Even though the recipe is solid, the little execution details make all the difference between a good cake and a show-stopper. Getting this moist cake right is all about timing and touch. For more secrets on reliably moist baking, check out my guide on the best moist lemon loaf recipe with glaze.
Poking Technique for Maximum Soak
When you go in with that spoon handle, you really want to commit! You need to poke those holes close together, maybe an inch apart at most, making sure you’re getting down deep. But here’s the thing my kitchen mentors taught me: don’t jam it so hard you tear the bottom of the pan open. We want holes, not canyons that leak filling onto your counter. Also, remember that sweetness rule: the cake needs to be warm, but not piping hot, when that liquid goes on. Piping hot liquid will just evaporate before it can seep in properly.
Frosting Consistency Check
The cream cheese frosting should be lovely and spreadable, like thick peanut butter, once you beat the sugar in. But sometimes, depending on the humidity or if your butter was just a touch too soft, it can seize up and feel stiff. If that happens, don’t panic! Just grab the milk from the soak bowl and mix in a single teaspoon at a time until it smooths out. It should still hold soft peaks.
The other thing people often mess up is the final Cool Whip layer. If your cake isn’t fully chilled when you try to spread that topping, the whipped topping gets runny so fast! You need that deeply chilled, soaked cake base acting like a solid foundation before you layer on the fluff. A chilled base keeps the whole thing looking picture-perfect, even hours after you put it in the fridge.
Making Your Red Velvet Poke Cake Ahead of Time
One of the things I love most about this dessert—and why it is consistently my secret weapon for big holiday gatherings—is that you absolutely *can* make it ahead. In fact, I think it tastes even better the next day! Planning for big meals, especially for major Holiday Desserts like Christmas, means you want things ready to go. This cake is perfect for that, but you have to stage the steps correctly so you don’t end up with a soggy mess.
If you’re planning your holiday schedule and need the full rundown on prepping dishes in advance, I’ve put together a whole guide on make ahead dessert strategy over on the site. But for this specific red velvet poke cake, here is how I manage the timeline.
The crucial stage for making this ahead is right after the soak! After you pour that sweet milk and pudding mixture over the warm cake, chill it for that initial 30 minutes, and then let it sit covered in the fridge overnight. Yes, overnight is ideal! This gives the cake ample time—like 8 to 12 hours—to completely absorb all that delicious moisture without the texture breaking down.
Now, here’s the crucial part about timing the topping: Do NOT put the cream cheese frosting and whipped topping on the cake until the day you plan to serve it. If you frost it the night before, the moisture from the soak can sometimes cause the whipped topping to weep or the cream cheese layer to get too soft and sink into the holes. Frost it the morning of your party, or even just two hours before serving, let it chill for that final hour to set up nicely, and it will be absolutely spectacular!
Serving Suggestions for This Velvet Dessert
Once this spectacular cake is chilled and set, it’s practically demanding to be served! Because this velvet dessert is so rich—combining that dense red cake, the creamy soak, and the thick cream cheese frosting—you need refreshments that either cut through that richness or complement the deep cocoa notes. It needs the right partner on the plate to make the whole experience perfect.
If you are planning a full gathering around this cake, make sure you balance the richness with something bright! For some non-alcoholic inspiration that cleanses the palate beautifully, I always turn to bright, tangy flavors. Try serving it alongside my recipe for a wonderful apple cider Moscow mule if you want a fantastic seasonal drink idea.
Pairing Beverages
A heavy dessert like this begs for something that cuts the fat and sugar just a little bit. Skip the heavy sodas!
- A steaming cup of strong, black coffee is my absolute favorite—the bitterness plays so nicely against the tangy cream cheese.
- If you’re serving it during the day, a simple fruit-based drink works wonders. Think sparkling white grape juice or a tart cranberry spritzer. It just refreshes your mouth between bites of that rich red velvet.
Garnish Variations
While I use those classic red sprinkles because they look so perfectly festive, especially around the holidays, you deserve to customize this for your crowd. Sometimes a little texture contrast is exactly what a smooth poke cake needs!
- For an elegant look, try using a vegetable peeler to create thin chocolate shavings right over the top of the whipped cream layer. The slight bitterness of dark chocolate is heavenly here.
- If you want a little crunch but still want to keep it relatively simple, toast some pecans very lightly in a dry pan until they smell nutty, let them cool completely, and chop them roughly before sprinkling them over the top. This adds a fantastic textural element to chew through the creaminess.
Storing Your Leftover Red Velvet Poke Cake
Now, the ultimate test of true deliciousness: surviving the next day! Because this red velvet poke cake is loaded with liquids, frostings, and dairy, you cannot just leave it on the counter hoping for the best. We treat this like the special, chilled dessert it is. We want to make sure that creamy soak we created stays cold and fresh!
If, by some miracle, you have leftovers—and honestly, you probably won’t, because this is just too good—storage is simple, provided you keep it cold. This cake is amazing made ahead, but it needs to stay refrigerated after it’s fully assembled.
Refrigeration is Non-Negotiable
Once you’ve applied that cream cheese frosting and the whipped topping, this cake must live in the fridge until you are ready to serve it again. Cover the 9×13 pan tightly with plastic wrap or use a tight-fitting lid if you have one. This stops the cake from absorbing any weird smells from the fridge, and it keeps the whipped topping looking fresh.
It lasts wonderfully for about three to four days when stored properly in the refrigerator. Trust me, I’ve had to test this theory many times. Remember how I said it tastes better the next day? Well, days two and three are still fantastic because that soak continues to meld with the cake!
Bringing It Back to Serving Temperature
This is a chilled dessert, but you want to take the hard chill off before you eat it again. Eating it straight from the deepest corner of the fridge can make the cream cheese frosting feel a little too hard and chewy. About 15 to 20 minutes on the counter before you slice it up again is perfect. This allows the texture to soften up just enough for that lovely, creamy melt in your mouth experience.
You should never try to microwave this cake, even for a second! Microwaving the whipped topping or the sweetened condensed milk soak will completely ruin the texture, turning the top layer soupy and weirdly hot. Stick to counter time for softening; it keeps the structural integrity of our beautiful red velvet poke cake intact!
Frequently Asked Questions About This Poke Cake Recipe
When you are making a classic dessert like this, sometimes you end up with little questions popping up while you’re rolling through the steps! That’s totally natural. I’ve answered a few of the things I always hear people ask when they try to make their first truly spectacular poke cake recipe. If you need more general kitchen advice, I’ve got tons of tips on everything from dips to dinners over at my guide for an easy cowboy caviar recipe (no cook dip), but these are specific to getting our red velvet just right!
Can I skip the pudding mix in the soak?
You could technically skip it, but I really, really wouldn’t advise it! Think of the instant pudding mix as the glue that holds the moisture in place. If you just pour straight sweetened condensed milk over the cake, some of it will soak in, sure, but a lot of it will just run off the sides or pool too heavily at the bottom. The pudding mix helps that liquid thicken up just enough as it chills so it clings to the cake crumb. It’s what helps us achieve that lovely, integrated texture when we call this a pudding filled cake.
What if I want a different topping than cream cheese frosting?
That’s a great way to customize it! If you love the tang of cream cheese but perhaps want something lighter for a summer event, you can follow the note in the recipe and skip the cream cheese layer altogether. Just use the vanilla pudding and milk soak, let it chill, and then top it only with that large tub of Cool Whip. It will be lighter and airier—still delicious!
On the flip side, if you want to go richer for a winter gathering, forget the Cool Whip! After the cream cheese layer is spread, you could drizzle a simple homemade chocolate ganache over the top instead. You just need heavy cream and good quality chocolate chips melted together until smooth. That combination of red velvet, cream cheese, and dark chocolate is honestly sinful.
Can I bake this Red Velvet Cake in a Bundt pan?
Oh, that shiny Bundt pan sounds tempting, but for a red velvet poke cake, I strongly suggest you stick to the 9×13 sheet pan. Poke cakes rely on that large, flat surface area for two main reasons: even liquid distribution and even topping application. If you pour the soak into a Bundt mold, the liquid will just pool weirdly in the center tube, and you won’t get that glorious, evenly saturated crumb.
Plus, getting the layers of frosting and whipped topping spread evenly over that domed surface can just turn into a mess! If you are absolutely dead-set on baking that red velvet cake mix shape, I recommend you bake it in a standard 10-inch tube pan or two 9-inch rounds, which are easier to frost, but if you want the soak to work its magic, the sheet pan is your only way. For great Bundt recipes, you should definitely check out my guide on making a classic moist and easy Red Velvet Cake which works perfectly in those pans!
Nutritional Estimates for This Rich Dessert Recipe
Now, I always say that when you’re eating something this decadent, you probably aren’t counting every tiny calorie, right? But because we focus on reliability here at Julia Meal, I have to give you a rough idea of what’s in a slice of this amazing cake. Please keep in mind these numbers are just estimates based on the ingredients we listed, especially relying on standard box mix yields.
| Serving Size | 1 slice |
| Calories | 410 |
| Sugar | 45g |
| Fat | 19g |
| Protein | 4g |
It’s definitely a rich dessert, folks, but every single one of those calories is worth the creamy, velvety magic. Enjoy!
Share Your Red Velvet Poke Cake Creations
Creating meals and baking beautiful desserts is all about connection for me, Julian Maxwell. Food tells a story, and I genuinely want to hear how this red velvet poke cake fits into yours! I put my heart into making sure these recipes work flawlessly in your kitchen, and nothing makes me happier than seeing the results when you try them out.
When you make this spectacular, ultra-moist cake—whether you served it for Christmas or just because it was a Tuesday—please let me know how it went! Did you find the vanilla pudding soak worked perfectly? Did everyone rave about the cream cheese frosting?
If you baked up a slice of this festive dish, please head over and leave a rating right on the recipe page—five stars lets me know I nailed this one for you! And if you took a picture—and I sincerely hope you did, because that red and white contrast is stunning—tag me on social media! Seeing your beautiful bakes reminds me why I love sharing these timeless American recipes with you all. For more of my story and philosophy on cooking, you can always learn more about what drives us over at my About Page.
PrintUltra-Moist Red Velvet Poke Cake with Cream Cheese Frosting

Make this ultra-moist Red Velvet Poke Cake using a simple cake mix hack. Poking holes allows a sweet filling to soak in, guaranteeing a rich, creamy dessert perfect for any celebration or holiday gathering.
- Prep Time: 15 min
- Cook Time: 30 min
- Total Time: 1 hour 55 min
- Yield: 12 servings 1x
- Category: Dessert
- Method: Baking and Chilling
- Cuisine: American
- Diet: Vegetarian
Ingredients
- 1 box red velvet cake mix (plus ingredients listed on the box)
- 1 (14 ounce) can sweetened condensed milk
- 1 package (3.4 oz) instant vanilla pudding mix
- 2 cups cold milk
- 1 tub (8 oz) frozen whipped topping, thawed
- 8 ounces cream cheese, softened
- 1/2 cup unsalted butter, softened
- 3 cups powdered sugar
- 1 teaspoon vanilla extract
- Red sprinkles for topping
Instructions
- Prepare and bake the red velvet cake mix according to package directions in a 9×13 inch baking pan.
- Remove the cake from the oven and let it cool for 10 minutes.
- Use the handle of a wooden spoon or a thick straw to poke holes evenly across the entire surface of the warm cake. Make the holes deep but do not poke through the bottom.
- In a bowl, whisk together the sweetened condensed milk and the instant vanilla pudding mix until smooth.
- Slowly pour this milk and pudding mixture over the cake, ensuring the liquid seeps into all the poked holes.
- Refrigerate the cake for at least 30 minutes to allow the filling to set slightly within the cake structure.
- Prepare the cream cheese frosting: Beat the softened cream cheese and butter together until smooth. Gradually add the powdered sugar and vanilla extract, beating until the frosting is light and fluffy.
- Spread the cream cheese frosting evenly over the chilled, soaked cake.
- Spread the thawed whipped topping over the cream cheese frosting layer.
- Sprinkle the top generously with red sprinkles.
- Chill the finished Red Velvet Poke Cake for at least 1 hour before slicing and serving.
Notes
- For an extra rich flavor, substitute the vanilla pudding and milk with a can of chilled, ready-to-use cream cheese frosting poured over the holes instead of the pudding mixture.
- This cake is excellent made ahead of time; chill it for up to 24 hours for maximum moisture absorption.
- If you prefer a lighter topping, use only the Cool Whip layer instead of the cream cheese frosting.
Nutrition
- Serving Size: 1 slice
- Calories: 410
- Sugar: 45g
- Sodium: 350mg
- Fat: 19g
- Saturated Fat: 10g
- Unsaturated Fat: 9g
- Trans Fat: 0.5g
- Carbohydrates: 58g
- Fiber: 1g
- Protein: 4g
- Cholesterol: 45mg