
There’s nothing quite like seeing a tray full of vibrant, bite-sized sweets, and when that color is that unmistakable deep red, you know you’ve hit the jackpot. I want to share my tried-and-true recipe for the Ultimate Moist red velvet cake pops with Flawless White Chocolate Dip. Seriously, these are the kind of treats that disappear first at any gathering, and they feel so special while being surprisingly simple to assemble. Making these shareable sweets never fails to bring a smile to my face, and they bring that iconic red velvet flavor right into the palm of your hand! If you love simple, delicious desserts, you’ll want to bookmark this one.
We’re ditching the dry, crumbly versions you might have tried before. My method focuses heavily on keeping that cake interior unbelievably moist, thanks to one crucial ingredient we always have on hand. You’re going to love how easy it is to look like a professional baker!
- Why You Will Make These red velvet cake pops Again and Again
- Essential Ingredients for Perfect red velvet cake pops
- Step-by-Step Guide to Making Moist red velvet cake pops
- Pro Tips for Flawless White Chocolate Coating on red velvet cake pops
- Making red velvet cake pops for Party Dessert Ideas
- Storage and Make-Ahead Tips for Your red velvet cake pops
- Ingredient Substitutions and Red Velvet Flavor Variations
- Frequently Asked Questions About Homemade Cake Pops
- Sharing Your red velvet cake pops Creations
Why You Will Make These red velvet cake pops Again and Again
I promise, once you try these, they’ll become your go-to for any celebration. They truly nail that perfect texture we all want in a red velvet baking project.
- Seriously Moist Interior: The cream cheese frosting does double duty as the binder and the moisture insurance policy—no dry crumbs here!
- Effortless Start: Grabbing a box mix means you skip the fussy cake bake time, making these truly approachable for any skill level.
- That Professional Finish: Follow my dipping secrets, and you’ll get that smooth, bakery-style shell every single time.
Essential Ingredients for Perfect red velvet cake pops
When making great cream cheese frosting recipes into something fantastic like this, you can’t really skimp or substitute the heavy hitters. Luckily, this recipe keeps the ingredient list really tight, focusing on quality where it counts. Remember, the cream cheese frosting isn’t just for flavor here; it’s the glue that keeps everything together and ensures these are some of the moistest truffles you’ll ever eat!
Here’s what you need to grab before you dive into making your amazing batch of red velvet cake pops:
- One whole box of red velvet cake mix (plus whatever the box says you need to bake it—usually eggs, oil, and water).
- A full cup of cream cheese frosting. Yes, one whole cup! This is key.
- Around 12 ounces of white candy coating or the wafers that melt smoothly.
- A tiny splash of coconut oil or shortening if your coating is fighting you—it helps thin it out nicely.
- And, of course, your cake pop sticks and any fun red or pink sprinkles you want to use!
Step-by-Step Guide to Making Moist red velvet cake pops
Okay, buckle up! This is where the magic happens, turning baked cake into those adorable, handheld bites everyone loves. The process is straightforward, but you can’t rush the chill time—if you try, your beautiful little orbs will turn into sad, broken messes when you dip them. Trust me, I’ve learned this the hard way! We’re taking this simple box mix and turning it into something truly special, inspired by my explorations into the best red velvet cake out there.
First things first: bake that cake according to the box directions, and you absolutely have to let it cool completely. I mean stone cold! Once it’s cool, crumble it up fine in a big bowl—get rid of any overly dark, crunchy edges you might find.
Mixing the Cake Dough: Achieving the Right Consistency
Now, dump in that full cup of cream cheese frosting! Squish it all together with your hands—that’s the best tool for the job. You’re looking for a texture that feels like playdough. If you squeeze a piece between your fingers, it should hold its shape perfectly. If it seems too dry and crumbly, add maybe another spoonful of frosting. If it feels way too sticky and greasy, crumble in a spoonful of plain leftover cake crumbs. We want density!
Crucial Chilling Time for Bakery Style red velvet cake pops
Once you have your dough, roll those beauties into uniform balls, about an inch or a little bigger. Then, they must go onto parchment paper and into the fridge. This is non-negotiable for great red velvet cake pops. You need them completely firm, which means at least two hours in the refrigerator. If they are even slightly soft, the warm chocolate will make them squish when you dip, and you’ll end up with cracked shells later. Patience pays off here, my friend!
Once they are chilled and hard, carefully push the cake pop sticks about halfway into the center of each solid ball. Now they are ready for their shiny makeover!
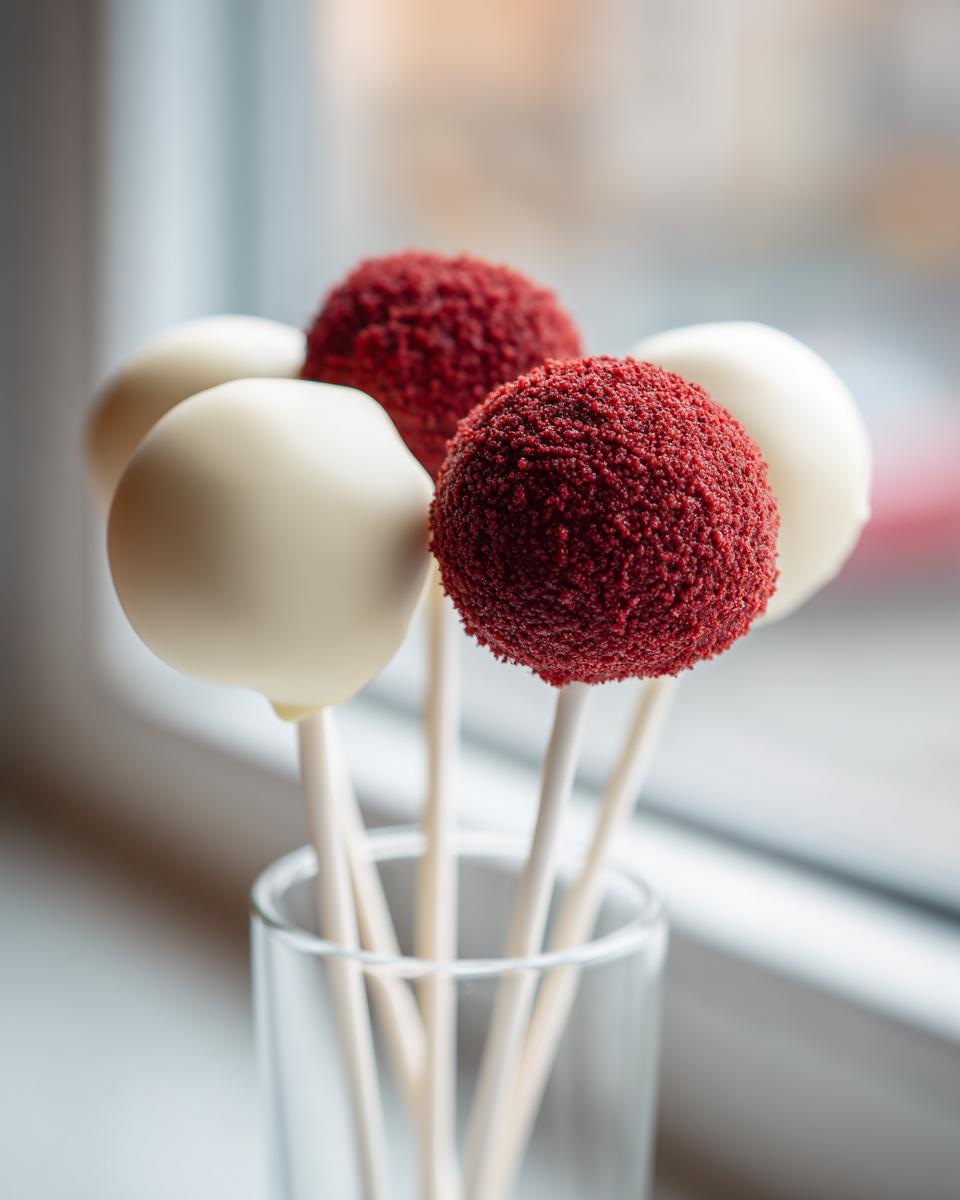
Pro Tips for Flawless White Chocolate Coating on red velvet cake pops
Alright, we’ve locked in the moist center, but now we face the final boss: the coating. I cannot tell you how many times I’ve seen perfectly rolled cake balls turn into cracked, messy disasters because the coating wasn’t cooperating. It’s frustrating, but I figured out the secret sauce, and it all comes down to what you melt!
First, stop right there if you were thinking about grabbing standard chocolate chips. Those chips have stabilizers so they hold their shape in a cookie, which means they seize up terribly when you try to dip. You absolutely need candy coating wafers—the good quality ones melt beautifully and stay glossy. If you want a super smooth application, especially for these rich creamy chocolate frosting treats, stir in about half a teaspoon of coconut oil or shortening into your melted wafers. You just need a hint of fat to thin it down so it flows beautifully.
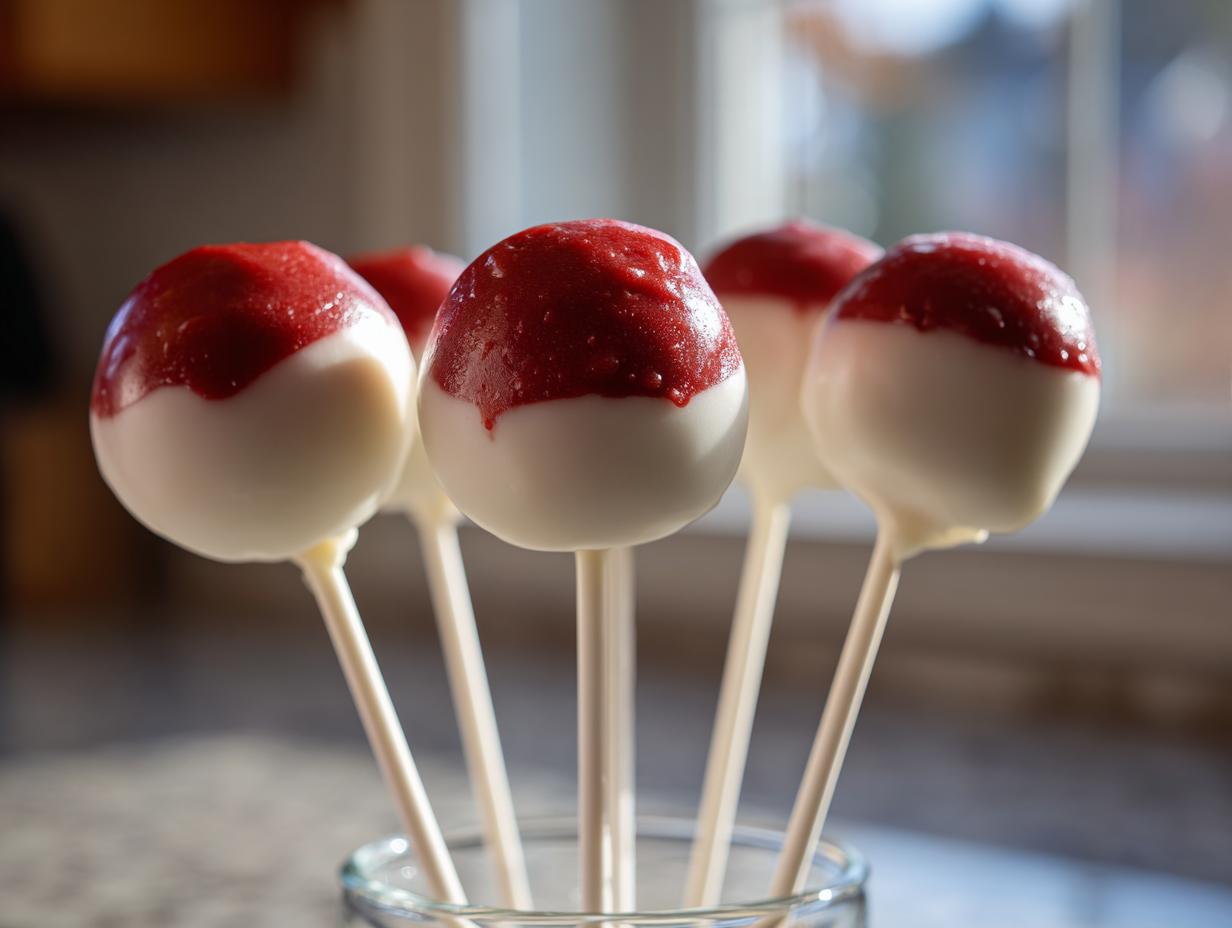
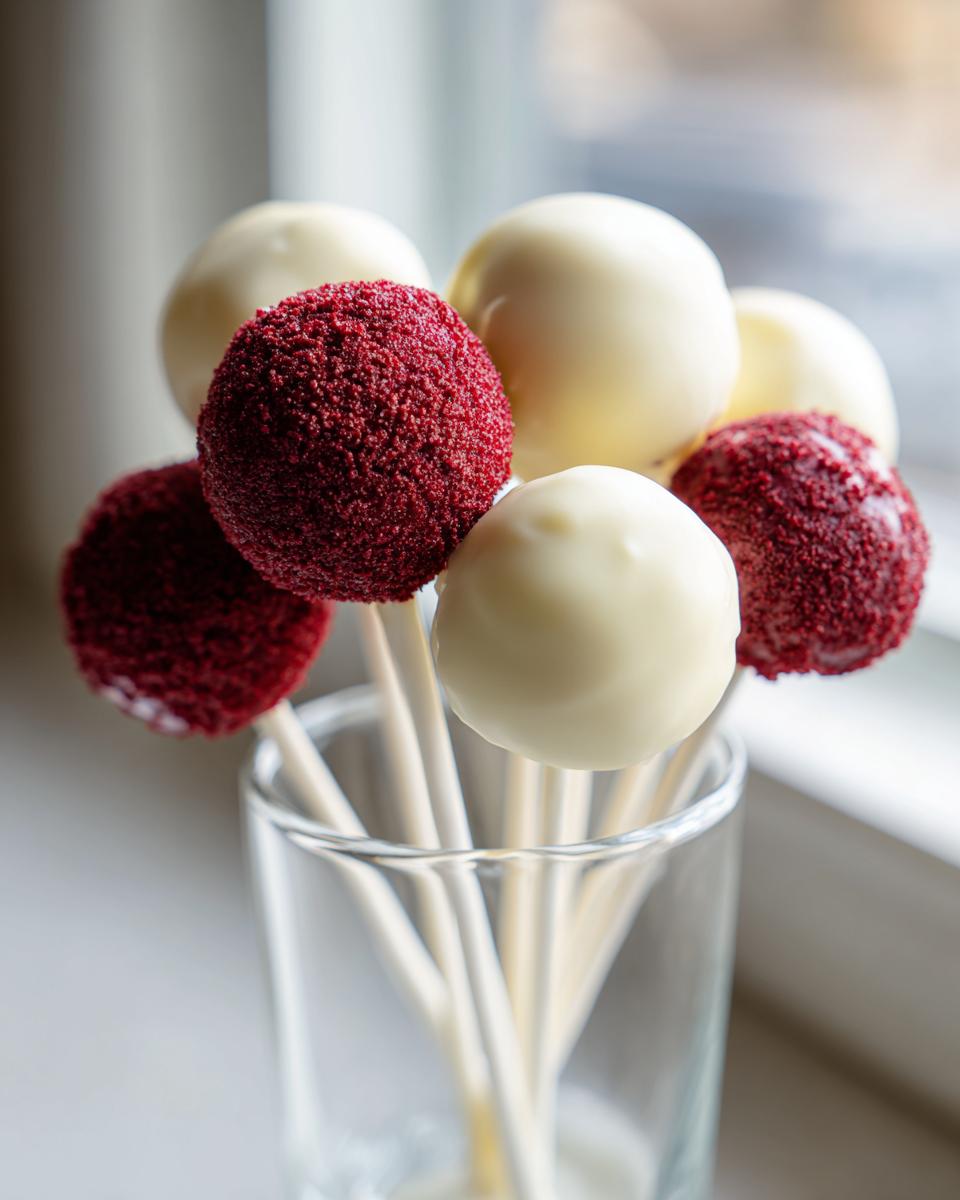
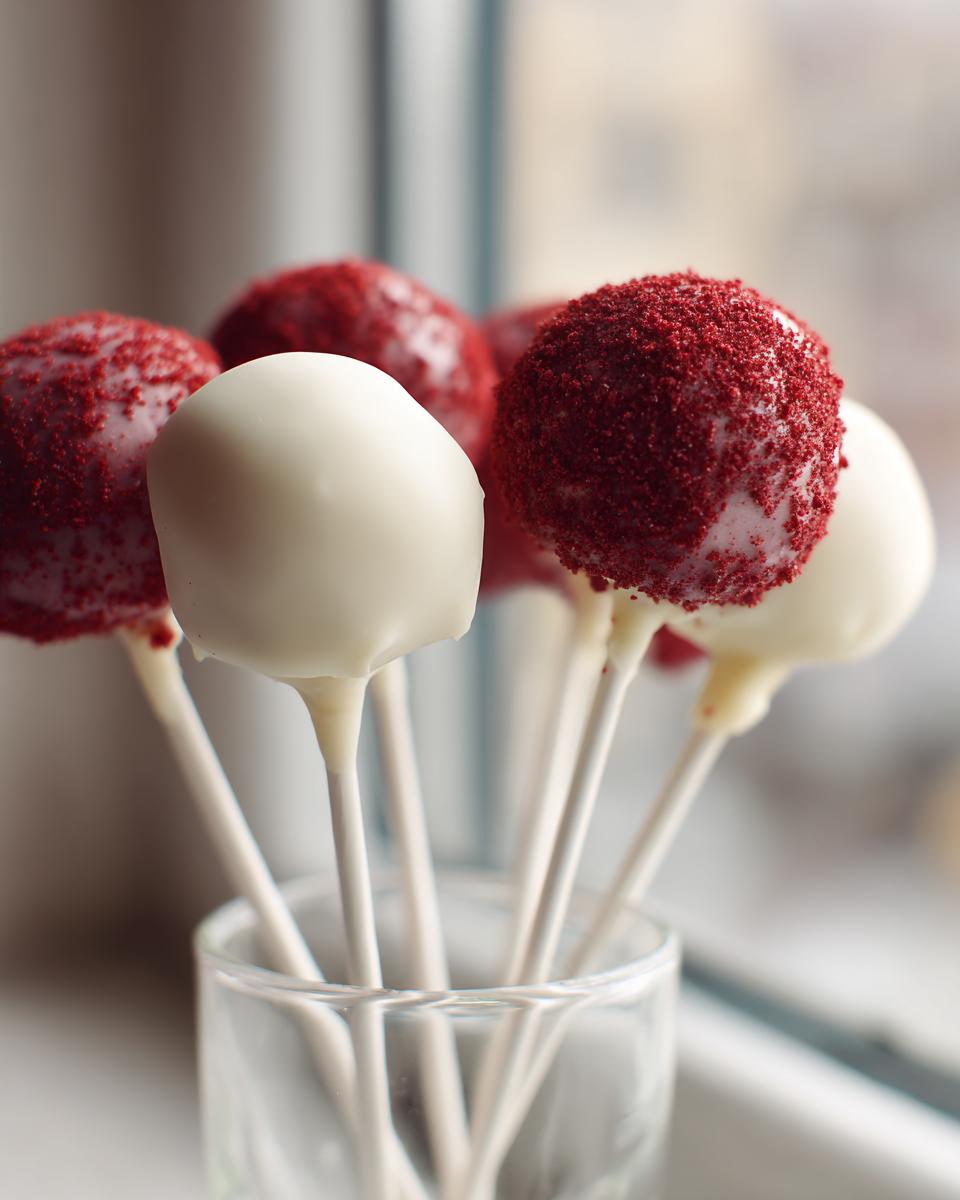
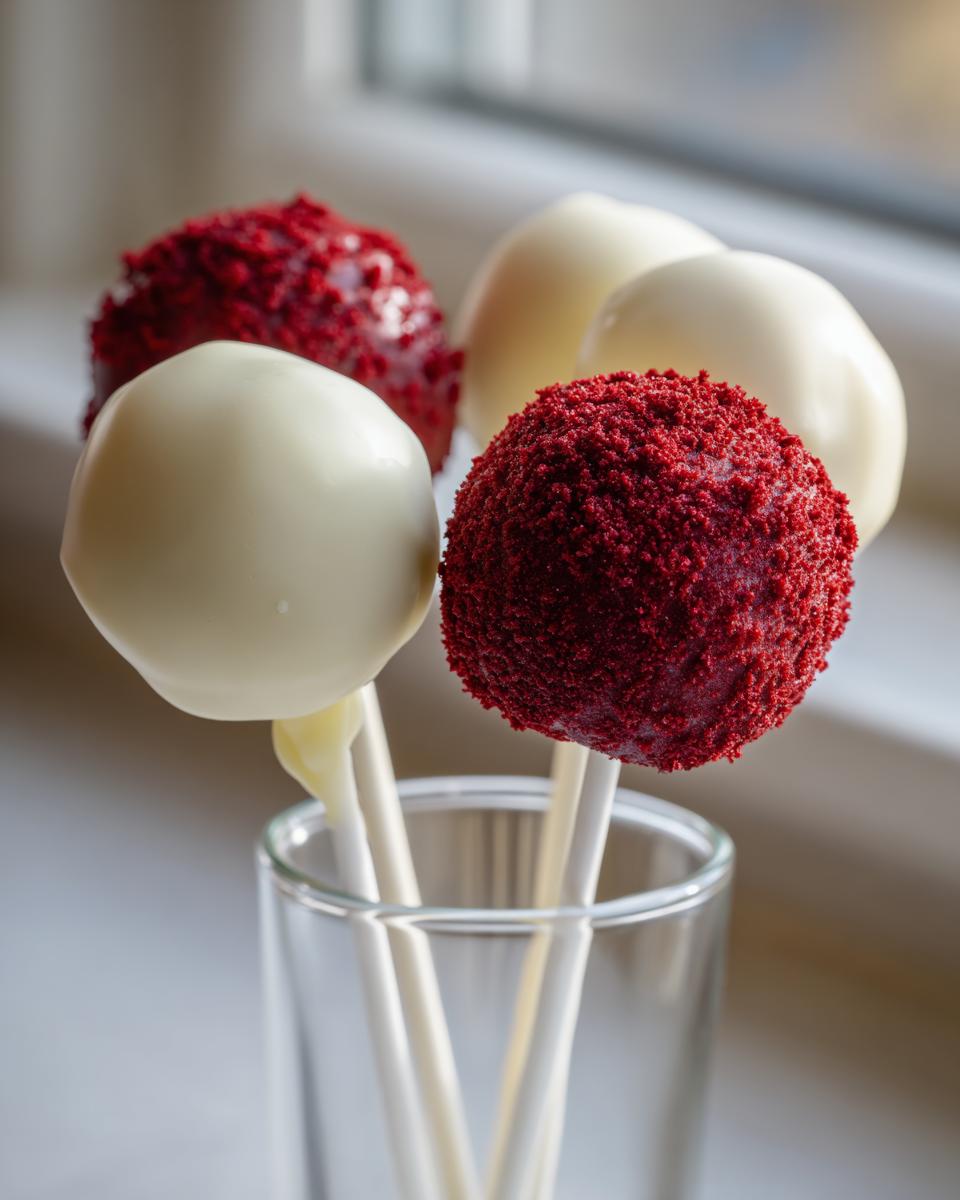
The instant you pull those super-cold cake pops out of the fridge, dip them quickly, swirling them gently. Tap off the excess coating right over the bowl, and then let them stand up in Styrofoam to dry. If your coating is thin enough and your cake pop is cold enough, you won’t see a single crack!
Making red velvet cake pops for Party Dessert Ideas
These aren’t just treats, they are miniature masterpieces, which makes them the absolute best party dessert ideas! Since we’re already making a big batch of these red velvet cake pops, you might as well go all out on the presentation, right? These are the perfect shareable sweets because they look so intentional and elegant, but they are gone in two bites!
If you’re doing a big spread for Valentine’s Day, stick to pink and red sprinkles, just like the recipe suggests. But for a shower or a birthday, try mixing it up! I love doing a simple white chocolate dip, letting it set for just five minutes, and then using a contrasting candy melt (maybe a thin drizzle of dark chocolate or even deep pink) to create stripes across the pops. It looks so professional, yet it’s just something you do with a fork while the base layer is still slightly tacky. They are always the first things guests carry away!
Storage and Make-Ahead Tips for Your red velvet cake pops
One of the best things about making red velvet cake pops is that you can absolutely make them ahead of time! If you’re planning for a big party, this is a lifesaver. Once the chocolate coating is totally hard, these little bundles of joy store beautifully. You’ll want to keep them in an airtight container, but honestly, they do best in the refrigerator. The cream cheese inside loves the cool temp!
You can honestly make these up to three or four days in advance! If you need even more lead time, freezing them works like a charm too. Once they are fully coated and set, place them in a freezer-safe container, making sure they aren’t squished together (maybe put parchment between layers). They last great in the freezer for a month or so. Just let them thaw slowly in the fridge before you plan to serve them. You can find some more great tips on meal prep organization that actually applies perfectly to baking prep, too!
Ingredient Substitutions and Red Velvet Flavor Variations
I get asked all the time if you *have* to use the box mix, and look, I love shortcuts, but sometimes you want that deep, from-scratch flavor! If you prefer to skip the mix, you can totally use your favorite tried-and-true scratch red velvet cake recipe. Just bake it, cool it, and treat the resulting cake exactly like the crumbled box mix in the recipe—it all works the same way.
Now, let’s talk coatings. If you aren’t a huge fan of the classic brilliant white coating on your red velvet cake pops, don’t stress! Candy melts come in every color under the sun. You can go dark chocolate for a richer look, or grab some bright pink or even light purple melts for a fun contrast. I’ve even done a thin layer of white chocolate, let it set, and then drizzled dark chocolate over the top for a marbled look—it’s so fancy!
Also, just a note on the frosting binder: if you absolutely cannot use cream cheese frosting, try a very thick, stiff buttercream made with butter and powdered sugar, but you might need a tiny bit less of it since buttercream doesn’t have that signature tanginess.
Frequently Asked Questions About Homemade Cake Pops
I always get questions after I make these incredible, rich treats! It makes sense—baking anything on a stick seems simple until you actually try it. Here are a few things people always ask me about getting these moist cake truffles perfect.
Can I make red velvet cake pops without baking a cake first?
Oh, absolutely! That’s the beauty of the cake ball concept, which is really just a cousin to the cake pop. If you are aiming for true no bake cake balls, you can definitely skip baking your own base. You can buy pre-made cake, or if you want a totally different flavor profile, people often use crushed Oreos or even fudgy brownie scraps mixed with the frosting. Just remember that using a different baked good might change the texture slightly from what you get with this specific cake recipe.
Why are my cake pops cracking after dipping?
This is the most common meltdown moment, but it’s almost always fixable! Nine times out of ten, the cracking happens because of temperature shock. If your cake balls are room temperature or even slightly cool, when they hit that hot melted white chocolate coating, the cake expands *through* the drying shell, causing fissures. You need those balls rock solid—I mean fridge-cold! Also, make sure you added that tiny bit of coconut oil or shortening to your melted coating so it stays fluid and flexible as it sets.
Sharing Your red velvet cake pops Creations
I really hope you loved making these as much as I love sharing them with you! When you finish up that last perfect coat on all your red velvet cake pops, I’d be thrilled if you came back here and left a star rating. It helps me know what’s working for you all. And please, sneak a photo and share it with me! We’re all one big cooking family here at Julia Meal, and I can’t wait to see your beautiful, bright red creations. Don’t hesitate to reach out if you have questions via my contact page!
PrintUltimate Moist Red Velvet Cake Pops with Flawless White Chocolate Dip

Make bakery-style red velvet cake pops at home. This recipe uses cream cheese frosting to ensure a moist texture, and includes tips for achieving a smooth, crack-free white chocolate coating. These bite-sized treats are perfect for parties and gifting.
- Prep Time: 30 min
- Cook Time: 30 min
- Total Time: 4 hours
- Yield: 24 cake pops 1x
- Category: Dessert
- Method: No Bake (after initial cake baking)
- Cuisine: American
- Diet: Vegetarian
Ingredients
- 1 box red velvet cake mix (plus ingredients listed on box for cake)
- 1 cup cream cheese frosting (store-bought or homemade)
- 12 ounces white candy coating or white chocolate melting wafers
- 1 teaspoon coconut oil or vegetable shortening (optional, for thinning coating)
- Red or pink sprinkles (optional, for decoration)
- Cake pop sticks
Instructions
- Bake the red velvet cake according to the package directions. Let the cake cool completely.
- Crumble the cooled cake into fine crumbs in a large bowl. Discard any overly browned edges.
- Add the cream cheese frosting to the cake crumbs. Mix thoroughly with your hands or a sturdy spoon until a dough forms that holds its shape when squeezed.
- Roll the mixture into uniform balls, about 1 to 1.5 inches in diameter. Place the rolled balls on a parchment-lined baking sheet.
- Insert the cake pop sticks about halfway into the center of each ball.
- Chill the cake pops in the refrigerator for at least 2 hours, or until firm. This step is crucial for preventing cracking during dipping.
- Melt the white candy coating according to package directions. If the coating is too thick, stir in the coconut oil or shortening for a smoother consistency.
- Dip each chilled cake pop into the melted coating, ensuring it is fully submerged. Gently tap the stick against the side of the bowl to allow excess coating to drip off.
- Immediately decorate with sprinkles, if using, before the coating sets.
- Place the dipped cake pops upright in a styrofoam block or a tall glass to set completely.
- Allow the coating to harden fully before serving or storing.
Notes
- For the smoothest white chocolate coating, use high-quality melting wafers. Avoid using standard chocolate chips, as they contain stabilizers that make them difficult to melt smoothly.
- Ensure the cake balls are very cold before dipping. If they are not cold enough, the temperature difference will cause the coating to crack as it cools.
- If you are making these for Valentine’s Day desserts, consider shaping some of the balls into hearts before chilling.
Nutrition
- Serving Size: 1 cake pop
- Calories: 220
- Sugar: 20g
- Sodium: 150mg
- Fat: 12g
- Saturated Fat: 7g
- Unsaturated Fat: 5g
- Trans Fat: 0.5g
- Carbohydrates: 28g
- Fiber: 0.5g
- Protein: 2g
- Cholesterol: 15mg