
When we talk about celebration cakes—the kind that anchors a birthday table or shines at an anniversary gathering—we aren’t just talking about sugar, right? We’re talking about memory-making. I’ve spent years learning techniques, but the dishes that truly matter are the ones that feel like a warm hug from home. That’s exactly what this homemade layer cake recipe is designed to be.
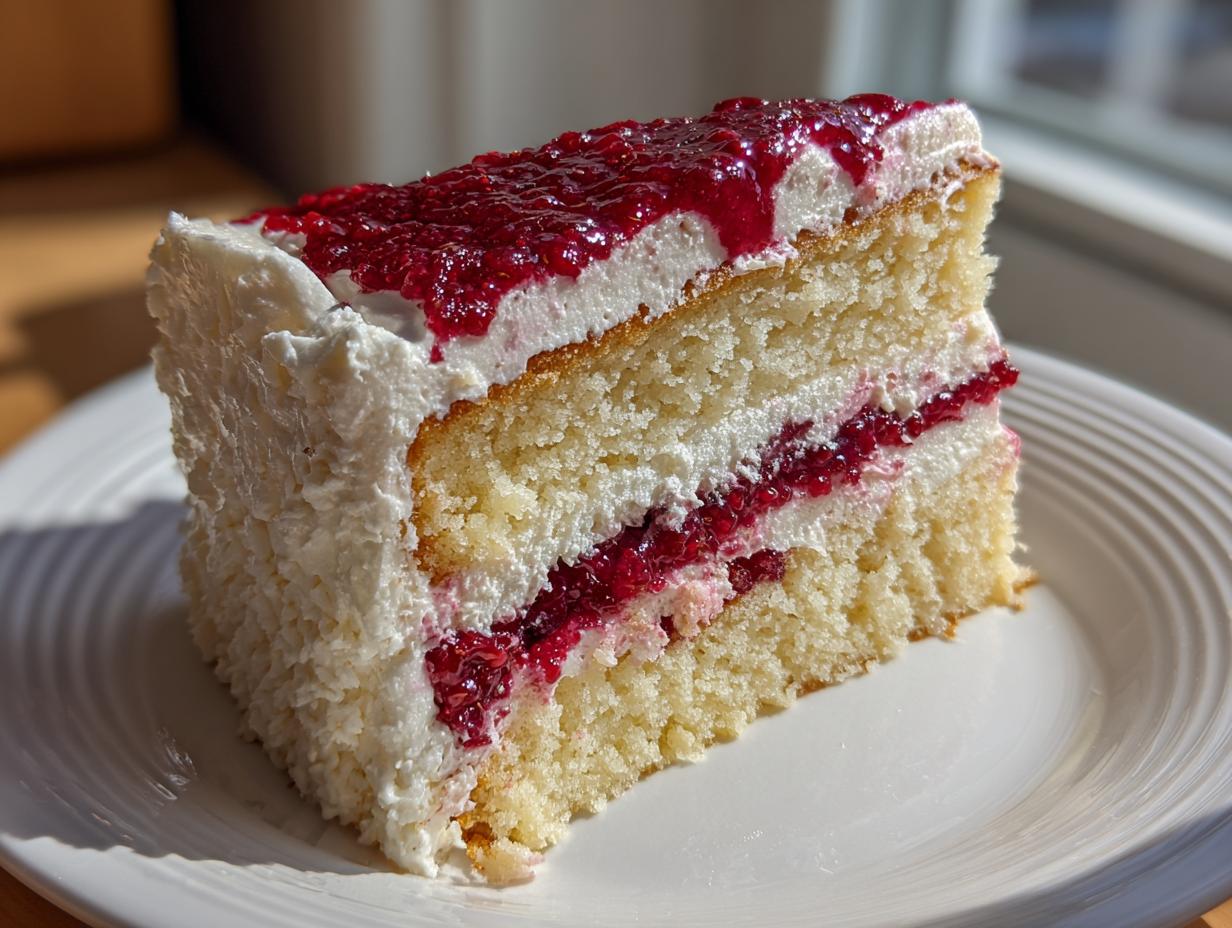
Forget those dry, crumbly layer cakes you’ve fought with before. This Ultimate Vanilla Raspberry Layer Cake is the one you’ve been searching for—it’s unbelievably moist, bursting with that pure vanilla flavor we all crave, and paired with the brightest real raspberry filling you can imagine. Trust me, following these steps, just like I learned in my grandmother’s kitchen, will give you a cake that looks like it came from a professional bakery, but was made with pure heart right where you are.
- Why This Vanilla Raspberry Layer Cake Stands Above Others
- Ingredients for Your Vanilla Raspberry Layer Cake
- Baking the Perfect Moist Vanilla Sponge Layers
- Making the Intense Fresh Raspberry Filling Tutorial
- Preparing the Swiss Meringue Buttercream Recipe
- How to Assemble a Layer Cake for Impressive Celebration Cakes
- Tips for an Elegant Birthday Cake Presentation
- Storage and Reheating Instructions for Your Vanilla Raspberry Layer Cake
- Frequently Asked Questions About This Fruit Filled Layer Cake
Why This Vanilla Raspberry Layer Cake Stands Above Others
I’ve tried a million vanilla cakes in my journey to bring you the best recipes, and this one truly wins when stacked against the competition. It’s not just about flavor; it’s about structure and reliability. This cake holds up beautifully, making it the perfect platform for that rich fruit filling and cloud-like frosting. When you’re putting in the effort to bake from scratch, you deserve results that wow!
- It uses techniques that guarantee a tender crumb without ever being fragile.
- The flavor profile is classic, elevated by real vanilla bean—no artificial shortcuts here!
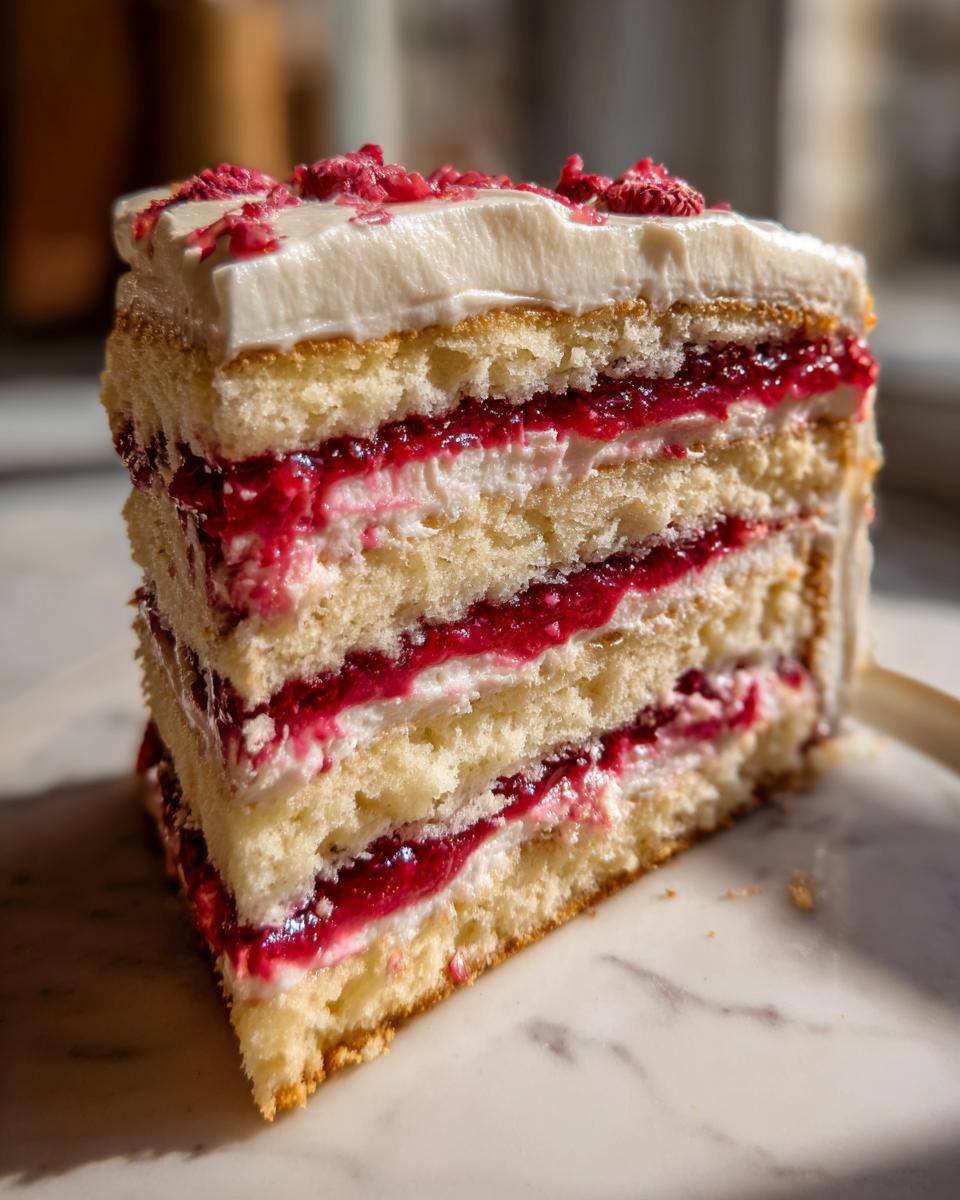
- The entire structure is sound, perfect for stacking high for that amazing ‘wow’ factor at any party.
Achieving Moist Vanilla Sponge Layers
The secret to those moist vanilla sponge layers comes down to temperature, seriously. We treat our butter and eggs right by making sure they are perfectly room temperature before they ever meet the mixer. Then, we use that slow creaming method, which basically whips tiny air pockets into the batter structure before we even add the wet stuff. That’s the foundation of a soft cake!
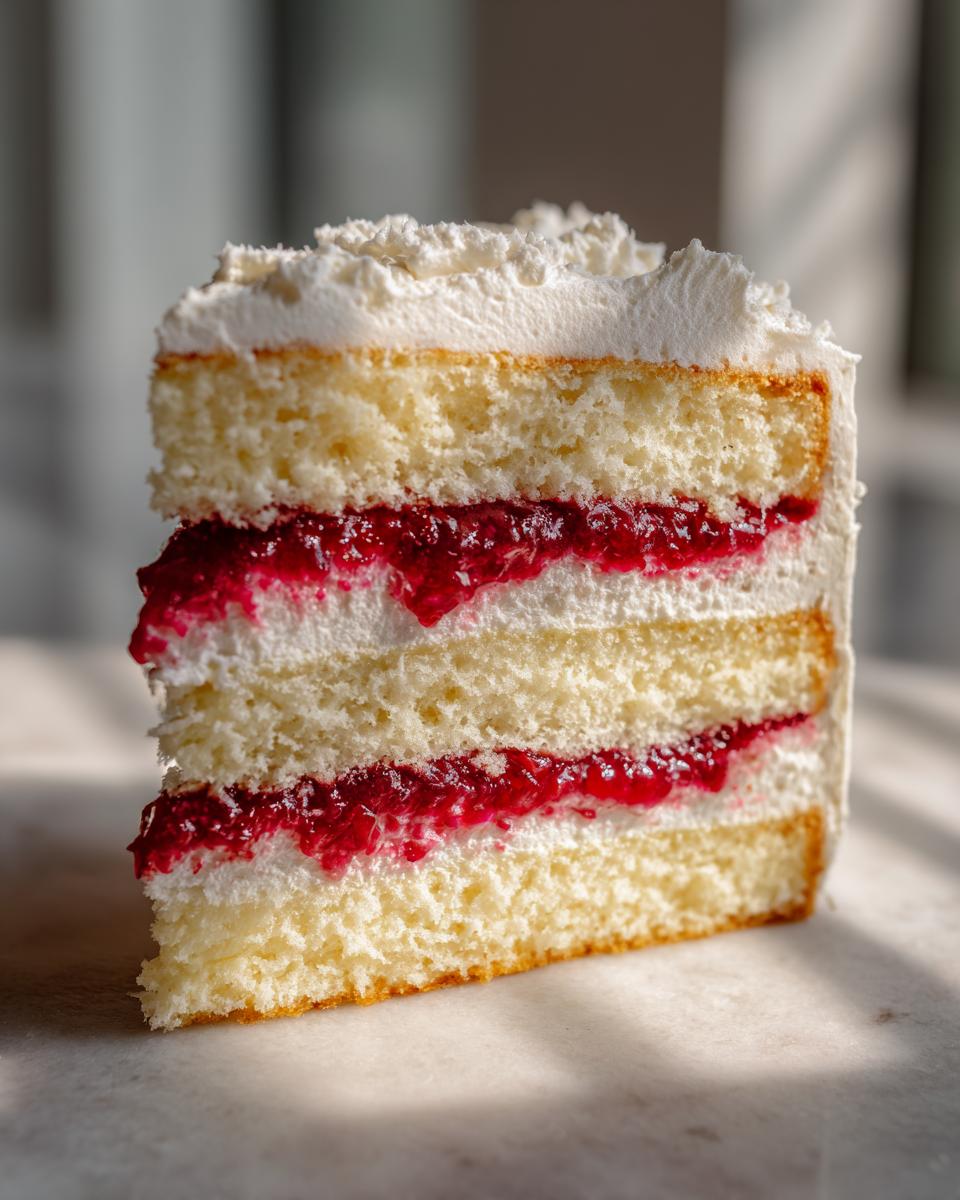
Intense Flavor from the Fresh Raspberry Filling Tutorial
You know how sometimes the filling leaks out when you cut into a layer cake? Not here! During the fresh raspberry filling tutorial, we cook the berries down until they’re jammy, and then we incorporate a cornstarch slurry right near the end. This is non-negotiable; it thickens everything into a beautiful, stable layer. It makes the raspberry flavor pop without turning your beautiful cake into a soupy mess. If you want a great frosting to go with this masterpiece, check out my guide on the ultimate vanilla buttercream!

Ingredients for Your Vanilla Raspberry Layer Cake
Okay, friends, getting this right starts right here with the supplies. I’ve divided everything up so you can shop and prep without getting overwhelmed. Remember what I always say? The better the ingredients, the better the stories we tell around the table. For this incredible dessert, we need three distinct groups of things. If you’re looking for my go-to smooth frosting recipe, check out this one for easy vanilla buttercream—but for this project, we are tackling the Swiss Meringue!
For the Moist Vanilla Sponge Layers
For the actual cakes, we need precision to get that structure perfect. Make sure your butter, eggs, and milk have been sitting out for a little while; room temperature is key, seriously! You need:
- 2 1/2 cups all-purpose flour
- 1 1/2 cups granulated sugar
- 1 tablespoon baking powder
- 1/2 teaspoon salt
- 1 cup unsalted butter, softened
- 4 large eggs, room temperature
- 1 cup whole milk, room temperature
- 1 tablespoon pure vanilla extract
- 1 teaspoon vanilla bean paste (This is where the real flavor is!)
For the Fresh Raspberry Filling Tutorial
This part is simple, but it needs to cook down just right so it sets up perfectly between those soft layers. Whether you use fresh berries or frozen, the result is pure heaven. Don’t skip the lemon juice—it brightens everything up!
- 3 cups fresh or frozen raspberries
- 1/2 cup granulated sugar
- 2 tablespoons lemon juice
- 2 tablespoons cornstarch
For the Swiss Meringue Buttercream Recipe
This frosting takes a little more effort, but I promise, once you try Swiss Meringue, you’ll never go back! It’s like silk. You need your butter cubed up and ready to go, and it must be softened, meaning it yields just slightly to pressure, but isn’t melty.
- 5 large egg whites
- 1 1/2 cups granulated sugar
- 1 1/2 cups unsalted butter, cubed and softened
- 1 teaspoon vanilla extract
- 1/4 teaspoon salt
Baking the Perfect Moist Vanilla Sponge Layers
Alright, let’s get those amazing cake bases done! First things first: fire up that oven to 350°F (175°C). Don’t forget to grease and flour your three 8-inch round pans, and I always cut parchment circles to fit the bottom—that’s my insurance policy against sticking, which is just smart baking, in my book.
In your big bowl, whisk the flour, sugar, baking powder, and salt. Now, here’s where the structure starts: add that softened butter and beat it on low speed until it looks like coarse, damp sand. It sounds odd, but this technique coats the flour proteins gently, which is one of the first secrets to really soft baking techniques for soft cake layers.
In another bowl, just gently whisk your room-temperature ingredients together—the eggs, milk, vanilla extract, and that glorious vanilla bean paste. Then, add those wet ingredients to the sandy butter mixture slowly, just a bit at a time, mixing until it’s finally combined. Stop mixing the second you don’t see streaks of flour anymore. Seriously, overmixing is the enemy of moisture here! Divide that beautiful batter evenly, and they bake for about 28 to 32 minutes. They should come out with a toothpick test showing just a few moist crumbs attached. Let them rest for 10 minutes before turning them out to cool completely. Patience is magic!
Making the Intense Fresh Raspberry Filling Tutorial
Okay, now that our cake layers are getting comfy while they cool, let’s make the filling, because this is where we get that incredible burst of fresh flavor for our raspberry dessert inspiration.
Grab a saucepan and toss in those three cups of raspberries—fresh or frozen works, no stress either way—along with the sugar and that bit of lemon juice. Get it over medium heat and let it bubble away until the berries really start to break down, which takes about five minutes. You want them soft and juicy!
Here’s the critical step for stability: mix up your cornstarch with just two tablespoons of cold water until it’s smooth—that’s a slurry. Pour that right into the simmering fruit mixture while you stir constantly. Keep stirring! It thickens up fast, almost like magic, until it coats the back of a spoon like a real glaze. Pull it off the heat right then. It has to cool down completely before we use it—like totally cold—so don’t try to sneak it into the cake while it’s warm!
Preparing the Swiss Meringue Buttercream Recipe
Okay, now we tackle the frosting. I know Swiss Meringue Buttercream sounds fancy and maybe a little intimidating, but I promise, if you follow this process exactly, you will end up with the smoothest, glossiest frosting you’ve ever seen. It’s worth every minute!
First, we need to dissolve that sugar perfectly. Put your egg whites and granulated sugar into a heatproof bowl—I usually use a metal bowl—and set that bowl right over a saucepan of simmering water, making sure the water never actually touches the bottom of your bowl. That steam is your gentle heat source! Whisk this constantly by hand until you feel zero graininess when you rub a little mixture between your fingers, or until that candy thermometer hits 160°F (71°C). This heat pasteurizes the egg whites too, which is always a bonus.
Immediately transfer that warm mixture to your stand mixer fitted with the whisk attachment. Beat it on high speed. You’re looking for stiff, glossy peaks, and you want the outside of the bowl to be totally cool to the touch—this can take ten minutes or more. Once it’s cool, switch to the paddle attachment. Now, add that softened, cubed butter slowly, just one cube at a time. Yes, it might look soupy or curdled for a minute—that’s normal! Keep mixing! It always comes together into that beautiful, pipeable finish. Add your vanilla and salt last. If you want an alternative frosting for another time, check out my easy cream cheese frosting recipe!
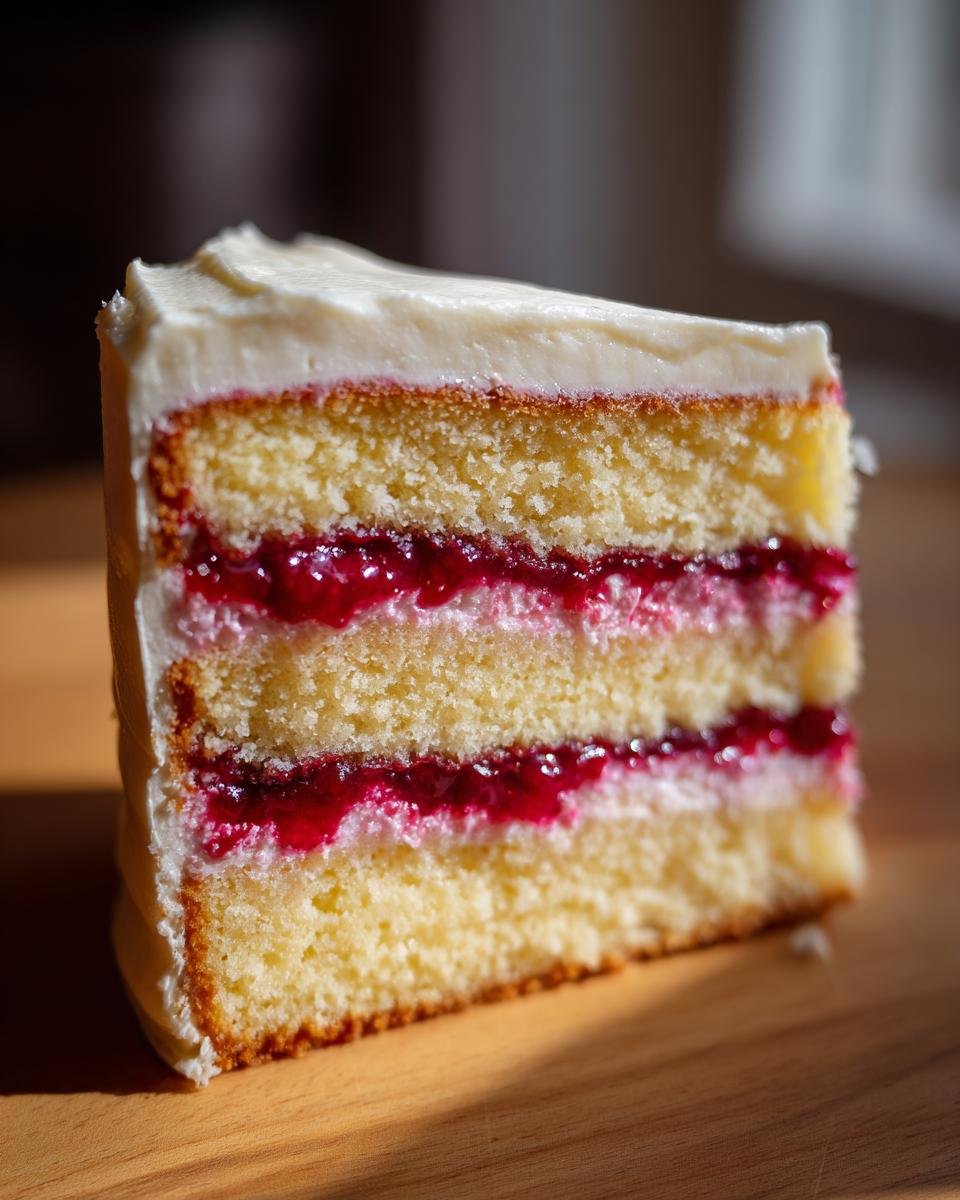
How to Assemble a Layer Cake for Impressive Celebration Cakes
This is the moment we pull everything together, and honestly, this is where the structure matters most for a perfect high layer cake assembly guide outcome. We want those layers sitting perfectly flat and that raspberry filling staying exactly where we put it!
Start with your first, perfectly cooled cake layer sitting on your serving plate or turntable. Now, trust me on this next step: use a piping bag fitted with a round tip to pipe a sturdy ring of your Swiss Meringue Buttercream all the way around the outside edge of that first layer. This is your ‘dam’—it’s what keeps the jammy filling from squishing out when we add the weight of the other layers.
Once the dam is secure, gently spoon half of your completely cooled raspberry filling right into the center and spread it carefully inside that wall. Top it with the second cake layer, and repeat the dam and filling process. Then, place that final layer on top. Now we seal it all in!
Mastering the Easy Crumb Coat Technique
Before we get to the final, beautiful layer of frosting, we have to crumb coat. The purpose of this thin first layer is simple: it traps any loose crumbs so your final coat stays totally clean and professional. Just take a small amount of that buttercream and spread a very thin layer all over the sides and top of the stacked cake. Don’t worry about making it look pretty; just cover it!
Once that thin coating is on, the cake needs a little nap. Place it in the refrigerator for about 20 minutes until that crumb coat is firm to the touch. Then, you score that perfect final layer of smooth frosting on top! You’re basically done building the structure of your incredible vanilla raspberry layer cake!
Tips for an Elegant Birthday Cake Presentation
We’ve baked the moist layers, we’ve made that stabilizing filling, and the Swiss Meringue Buttercream is perfectly smooth—now we make it beautiful! I feel like baking is only half the fun; the presentation is where we get to show off a little bit of our heart to everyone coming over. We want this to look like one of those truly impressive celebration cakes, right?
Getting those sides perfectly smooth takes practice, but here’s my favorite trick: after the crumb coat is chilled, apply your final, generous layer of buttercream. Then, take an offset spatula or a bench scraper, hold it steady against the side of the cake, and slowly spin your turntable. Don’t rush the spin! It smooths everything out like magic. I often go around twice, adding a little pressure the second time.
For decoration, since we have that gorgeous, bright raspberry flavor inside, I love letting the fruit be the star on top. Don’t just dump them on! Wipe any extra moisture off your fresh raspberries. You can arrange them in a pretty mound right in the center, or carefully place them sitting right on top of the buttercream dam you created on the very top layer. If you want a more classic look, use a star piping tip to make simple, uniform rosettes around the top edge. Either way, the contrast between the stark white, silky frosting and that deep red fruit just screams delicious sophistication!
Storage and Reheating Instructions for Your Vanilla Raspberry Layer Cake
Now that you’ve made this spectacular vanilla raspberry layer cake, we have to keep it perfect! Honestly, this cake is best eaten the day it’s made, but it travels okay. If you have leftovers, the Swiss Meringue Buttercream does best at cool room temperature, about 68°F, covered loosely.
If you absolutely must refrigerate it—especially if the kitchen is really warm—wrap the cake tightly in plastic wrap and chill it for up to three days. The trick is bringing it back to temperature! Take it out of the fridge at least two hours before serving so the buttercream softens up and the cake layers themselves can gently warm through again. Trust me, cold cake is just sad cake!
Frequently Asked Questions About This Fruit Filled Layer Cake
I get so many messages asking about variations on this showstopper! Honestly, I love hearing about the creative ways you all adapt recipes, but for this specific vanilla raspberry layer cake, there are a few things I strongly recommend sticking to for the very best results. Here are some of the things I hear most often when folks are thinking about their baking from scratch layered cakes journey.
Can I use store-bought raspberry jam instead of making the fresh filling?
Can I use store-bought raspberry jam instead of making the fresh filling?
You certainly *could*, but you’ll lose that intense, bright flavor that makes this cake special. Jam is often much sweeter and lacks the fresh tartness. If you must substitute, I suggest thinning the jam slightly with a teaspoon of lemon juice so it’s closer to a soft compote consistency before you use it inside that buttercream dam.
Do I really have to use Swiss Meringue Buttercream? Can I use a simpler frosting?
Do I really have to use Swiss Meringue Buttercream? Can I use a simpler frosting?
The Swiss Meringue is key because it’s incredibly stable and less sweet than American buttercream, which allows the vanilla flavor and the raspberry filling to shine through without being overpowered. If you need a simpler option, try a classic Seven-Minute Frosting, but be warned: it won’t have the same structure for stacking high layers quite as reliably.
How far ahead can I bake the cake layers?
How far ahead can I bake the cake layers?
This is the best part of a **classic layer cake baking** project! You can bake those moist layers up to two days ahead of time. Once totally cool, wrap each layer tightly in two layers of plastic wrap while they are still slightly warm, then let them cool completely on the counter before wrapping and storing at cool room temperature. They freeze beautifully too, up to a month!
PrintUltimate Vanilla Raspberry Layer Cake with Swiss Meringue Buttercream
A detailed recipe for a moist, flavorful vanilla bean cake layered with intense fresh raspberry filling and frosted with smooth Swiss meringue buttercream. This guide covers baking, filling preparation, and professional assembly for an impressive celebration cake.
- Prep Time: 45 min
- Cook Time: 35 min
- Total Time: 1 hour 55 min
- Yield: 12 servings 1x
- Category: Dessert
- Method: Baking and Mixing
- Cuisine: American
- Diet: Vegetarian
Ingredients
- For the Vanilla Cake Layers: 2 1/2 cups all-purpose flour
- 1 1/2 cups granulated sugar
- 1 tablespoon baking powder
- 1/2 teaspoon salt
- 1 cup unsalted butter, softened
- 4 large eggs, room temperature
- 1 cup whole milk, room temperature
- 1 tablespoon pure vanilla extract
- 1 teaspoon vanilla bean paste
- For the Fresh Raspberry Filling: 3 cups fresh or frozen raspberries
- 1/2 cup granulated sugar
- 2 tablespoons lemon juice
- 2 tablespoons cornstarch
- For the Swiss Meringue Buttercream: 5 large egg whites
- 1 1/2 cups granulated sugar
- 1 1/2 cups unsalted butter, cubed and softened
- 1 teaspoon vanilla extract
- 1/4 teaspoon salt
Instructions
- Preheat your oven to 350°F (175°C). Grease and flour three 8-inch round cake pans. Line the bottoms with parchment paper.
- Make the Cake Layers: In a large bowl, whisk together the flour, sugar, baking powder, and salt.
- Add the softened butter to the dry ingredients. Beat with an electric mixer on low speed until the mixture resembles coarse sand.
- In a separate bowl, whisk together the eggs, milk, vanilla extract, and vanilla bean paste.
- Gradually add the wet ingredients to the dry ingredients in three additions, mixing well after each addition until just combined. Do not overmix.
- Divide the batter evenly among the prepared pans. Bake for 28 to 32 minutes, or until a toothpick inserted into the center comes out clean. Let the cakes cool in the pans for 10 minutes before inverting them onto a wire rack to cool completely.
- Make the Raspberry Filling: Combine raspberries, sugar, and lemon juice in a saucepan over medium heat. Cook until the berries break down, about 5 minutes.
- In a small bowl, whisk the cornstarch with 2 tablespoons of cold water to create a slurry. Pour the slurry into the simmering raspberries, stirring constantly until the mixture thickens significantly. Remove from heat and let it cool completely.
- Make the Swiss Meringue Buttercream: Combine egg whites and sugar in a heatproof bowl set over a saucepan of simmering water (a double boiler). Whisk constantly until the sugar is completely dissolved and the mixture reaches 160°F (71°C).
- Transfer the mixture to a stand mixer fitted with the whisk attachment. Beat on high speed until stiff, glossy peaks form and the meringue is cool to the touch, about 10 to 15 minutes.
- Switch to the paddle attachment. Add the softened butter, one cube at a time, mixing well after each addition. If the frosting looks curdled, continue mixing; it will come together into a smooth buttercream. Beat in the vanilla and salt.
- Assemble the Cake: Place the first cake layer on your serving plate or cake stand.
- Pipe a dam of buttercream around the outer edge of the layer to contain the filling. Spread half of the cooled raspberry filling inside the dam.
- Top with the second cake layer, repeat the buttercream dam and filling process. Place the final layer on top.
- Apply a thin layer of buttercream over the entire cake to create a crumb coat. Chill the cake for 20 minutes until the coat is firm.
- Apply the final layer of buttercream smoothly around the sides and top of the cake. Decorate as desired.
Notes
- For the most moist vanilla sponge layers, ensure your butter, eggs, and milk are at true room temperature before mixing.
- To achieve an intense raspberry flavor, use high-quality vanilla bean paste in the cake batter.
- When assembling, use a turntable and an offset spatula for the easiest application of the final coat of frosting.
- If your Swiss Meringue Buttercream becomes too soft, chill the bowl for 10 minutes and then re-whip.
Nutrition
- Serving Size: 1 slice
- Calories: 580
- Sugar: 65
- Sodium: 250
- Fat: 35
- Saturated Fat: 20
- Unsaturated Fat: 15
- Trans Fat: 0.5
- Carbohydrates: 62
- Fiber: 2
- Protein: 7
- Cholesterol: 140