
When I think about the heart of home cooking, I see beans. They might seem simple, but when you treat them right—especially dried pinto beans—they become these unbelievably creamy powerhouses. My grandfather, Julian, always said the best food is the food that fuels you without bogging you down. That’s exactly what this recipe is for. We’re ditching the can and making truly healthy pinto beans from scratch on the stovetop, focusing on fresh herbs and letting the beans’ natural texture shine. Trust me, once you try simple stovetop pinto beans this way, loaded with flavor but kept completely low in sodium, you’ll never go back. These are the foundations of good, honest meals.
- Why These Are the Best Healthy Pinto Beans You Will Make
- Ingredients for Simple Stovetop Healthy Pinto Beans
- Making Dried Pinto Beans from Scratch: Step-by-Step Instructions
- Flavor Boost: Finishing Your Light and Flavorful Bean Recipes
- Tips for Perfect Heart Healthy Pinto Bean Cooking
- Serving Suggestions for Your Nutritious Pinto Bean Recipes
- Storage and Reheating Instructions for Leftover Healthy Pinto Beans
- Frequently Asked Questions About Healthy Pinto Beans
- Nutritional Estimates for This Recipe
Why These Are the Best Healthy Pinto Beans You Will Make
I’ve learned that beating the flavor out of whole foods with salt and processed fats just isn’t worth it. These **healthy pinto beans** prove that you don’t need much fuss to make something incredible.
- They are naturally low in fat and cholesterol-free—just pure, clean energy.
- We pack in unbelievable amounts of fiber, making them fantastic for feeling full and supporting your heart.
- Because we skip the huge hits of sodium often found in canned versions, we rely on cumin and fresh herbs for a bright, satisfying taste.
- You get incredible results using fresh ingredients, transforming a basic side into a star player in your dinner rotation.
Ingredients for Simple Stovetop Healthy Pinto Beans
When you’re aiming for true **low sodium pinto beans**, the quality and freshness of what you *do* add really matters. Since we aren’t relying on salt, we are going heavy on aromatics and bright finishers. I want you to gather everything before you even turn on the stove; it makes the whole process feel smoother, just like my old mentor taught me in the restaurant.
Here’s the lineup for this batch of beautiful, **nutritious pinto bean recipes**:
- 1 pound dried pinto beans: Make sure you rinse these well before the soak!
- 6 cups water (for soaking): This is just for covering them overnight or for a long soak.
- 6 cups fresh water (for cooking): This is the liquid that turns them creamy!
- 1 medium yellow onion, quartered: Don’t chop it fine; we pull these big pieces out later.
- 3 cloves garlic, smashed: Smash them with the flat of your knife—this releases the oils beautifully!
- 1 bay leaf: Don’t skip this; it adds background depth you can’t place but can’t live without.
- 1 teaspoon dried oregano
- 1/2 teaspoon ground cumin
- 1/4 cup fresh cilantro, chopped: This goes in at the end for that necessary cilantro brightness.
- 2 tablespoons fresh parsley, chopped: More fresh green flavor!
- 1 tablespoon apple cider vinegar: This is our little secret to making the beans taste lively and balanced without needing much salt. Think of it like a squeeze of lemon on a rich dish, similar to how I boost my lemon vinaigrette!
- Salt substitute or small pinch of salt (optional): If you must use salt, use the absolute smallest amount, or skip it entirely and rely on the vinegar.
We are building flavor here, piece by piece, so that when we get to the end, we have **easy whole food pinto beans** that taste like they simmered all day long.
Making Dried Pinto Beans from Scratch: Step-by-Step Instructions
This entire process hinges on patience, which is sometimes the hardest ingredient to measure! Getting the prep right for your **healthy pinto beans** ensures a perfect, creamy texture later. We’re focusing on **making dried pinto beans from scratch** because it gives us total control over sodium and flavor—it’s key for **heart healthy pinto bean cooking**. If you want to see how these can transform into main meals, check out my guide on easy whole food pinto beans!
If your beans are older, they might take closer to two and a half hours to get tender. If you’re at a high altitude, you’ll definitely need to add extra time! Simmering gently is always better than boiling hard; we want slow tenderness, not splitting skins.
Soaking and Initial Prep for Healthy Pinto Beans
First things first: don’t rush the soak! You need to give those dried beans a good, long drink so they cook evenly and become truly edible. Take your pound of dried beans and rinse them under cold water until the water runs clear. Then, put them in a big bowl and cover them with about 6 cups of water. They need at least 4 hours, but honestly, leaving them overnight is my favorite method. When you wake up—or when it’s time to cook—just drain off that soaking water and rinse the beans again before they hit the cooking pot.
Simmering Time for Tender, Healthy Pinto Beans
Now we build the base flavor for these fantastic **easy whole food pinto beans**! After rinsing them one last time, toss the beans into your Dutch oven. Add the 6 cups of fresh cooking water, the quartered onion, smashed garlic, bay leaf, oregano, and cumin. Bring the whole noisy mess up to a rolling boil over high heat. Once you see those big bubbles, immediately knock the heat down to low—just enough heat to maintain a gentle, lazy simmer where only a few bubbles break the surface every few seconds. This simmer process usually takes 1.5 to 2.5 hours. You have to check on them every 30 minutes or so, and if the liquid level drops too much, top it off with a bit of fresh *hot* water. We want them submerged!
Flavor Boost: Finishing Your Light and Flavorful Bean Recipes
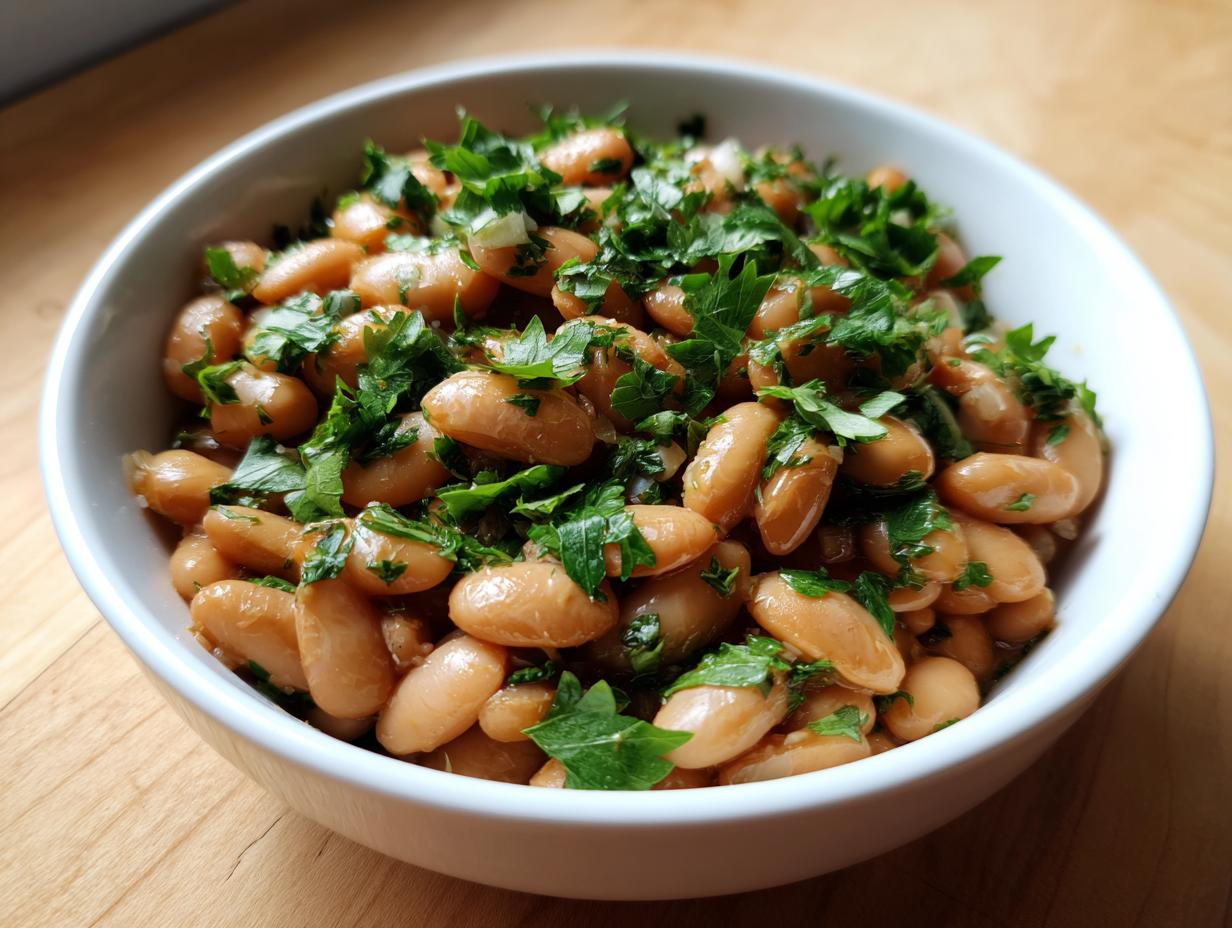
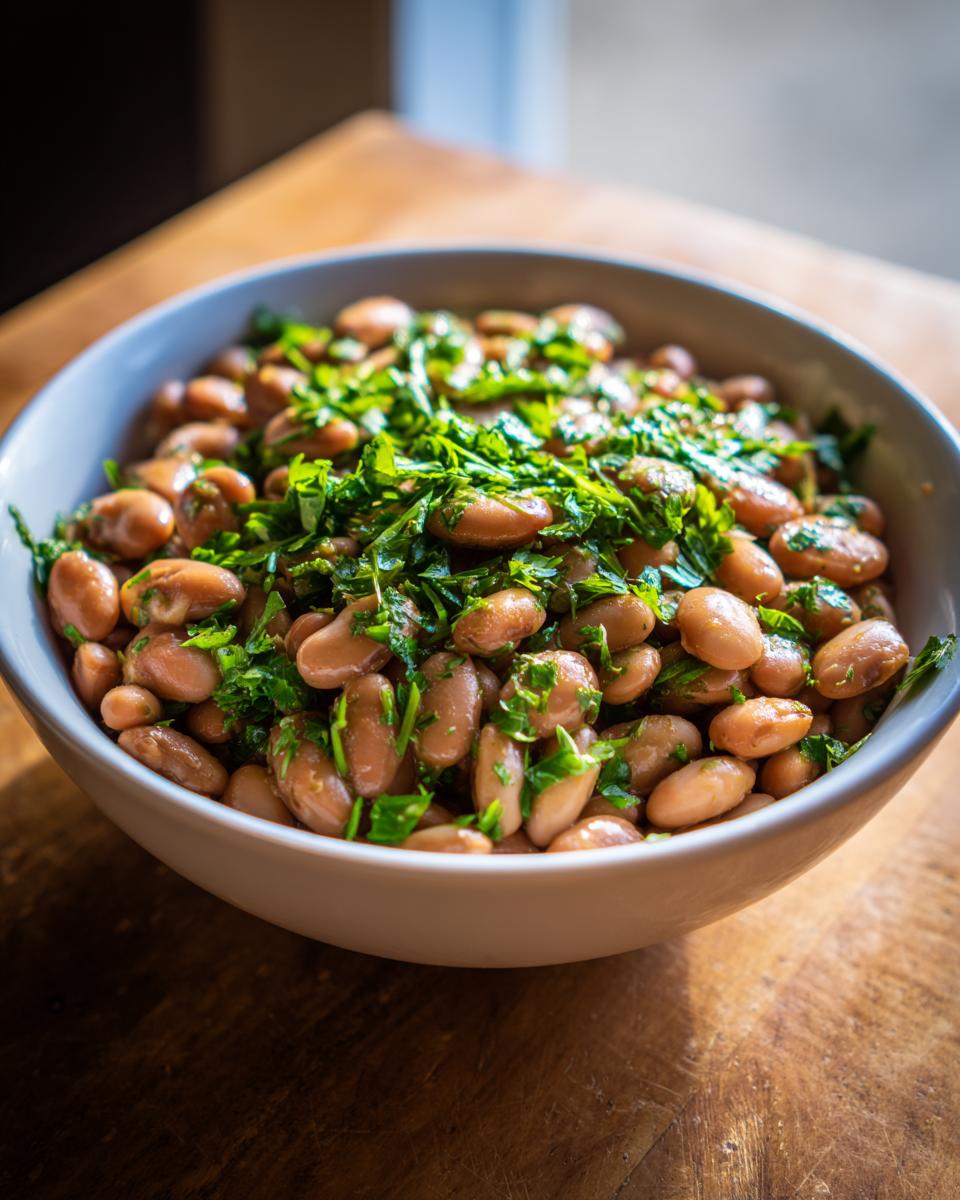
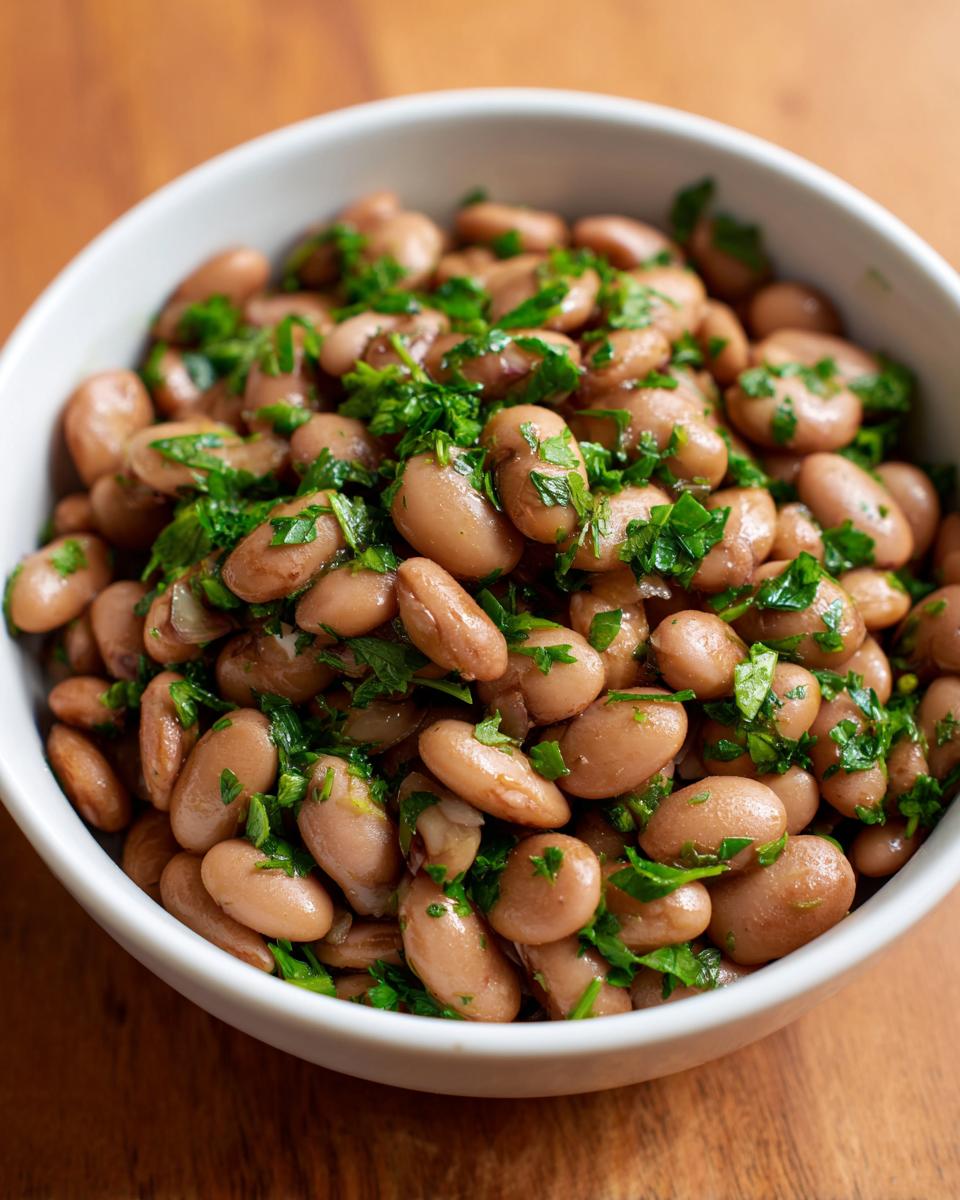
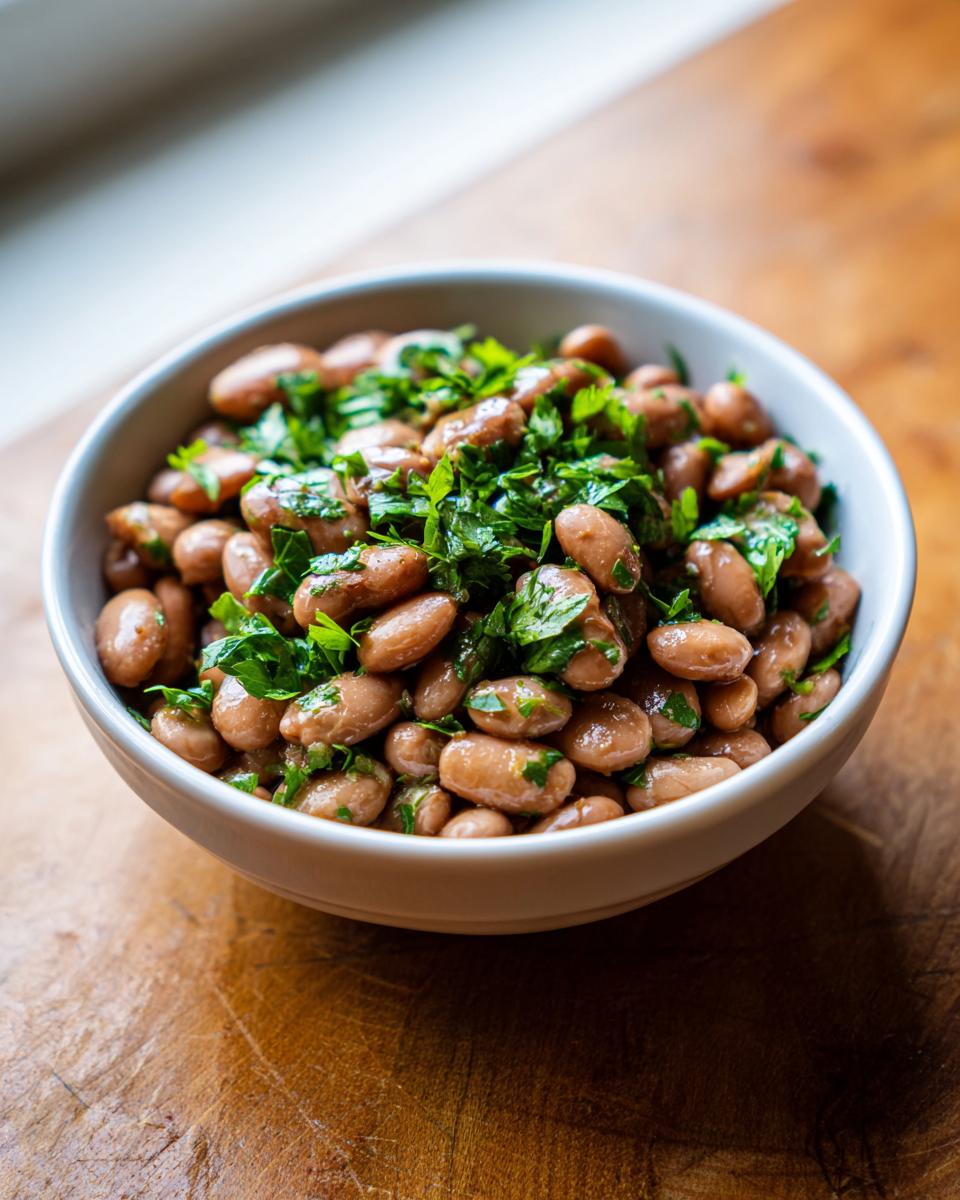
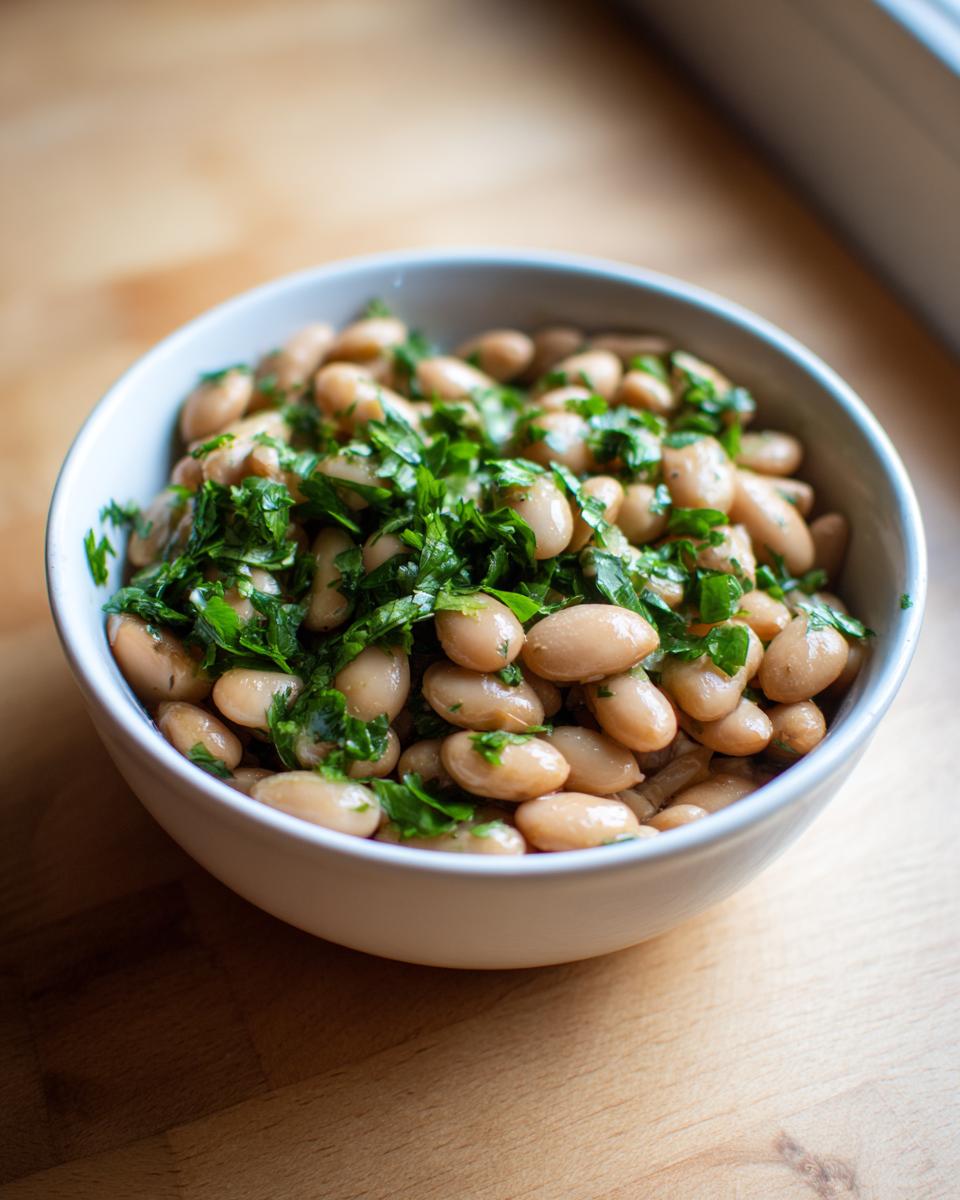
Okay, friend, the beans are tender, and now this is where the *magic* happens—the flavor infusion! This final step is what separates bland beans from truly **light and flavorful bean recipes**. Once you remove the onion, garlic, and that necessary bay leaf, it’s time for brightness. I always wait until the very end to stir in the fresh cilantro, fresh parsley, and especially that apple cider vinegar. Why wait? Because heat kills the vibrant, sharp flavor of fresh herbs and can dull the tang of the vinegar.
Stir those gorgeous green flecks right in, let it simmer uncovered for just 10 more minutes so the flavors marry, and taste before adding any salt substitute. This small final addition of acid keeps the entire dish tasting alive and balanced. If you’re thinking about turning these into one of those **healthy bean dips and spreads**, this is your spot to adjust texture! Take about half of the beans out right now, mash them with a potato masher—don’t you dare use a blender unless you want soup—and stir that thick mash back with the remaining whole beans. It gives you the perfect thick base for dipping or spreading, similar to how I start my creamy sauces!
Tips for Perfect Heart Healthy Pinto Bean Cooking
Now that you’ve mastered the stovetop simmer for your **heart healthy pinto bean cooking**, let’s talk about those little tricks that save time or keep the sodium count rock bottom. I know life gets busy, and sometimes you just can’t dedicate three hours to beans. That’s okay! We adapt, but we don’t compromise on the nutrition or the flavor profile we built with those fresh herbs earlier.
For those super busy evenings, the pressure cooker is your best friend when making **low sodium pinto beans**. If you skip the overnight soak, you can still get tender results pretty quickly. After rinsing your beans, pop them straight into the pressure cooker with your aromatics (onion, garlic, spices) and the cooking water. Bring it up to full pressure and let it run for about 25 minutes. Then, I highly recommend letting the pressure release naturally for at least 10 minutes; this gentle release keeps the skins intact, which is key for retaining that amazing fiber content!
When it comes to salt, remember that these beans are already super flavorful thanks to the oregano, cumin, and vinegar. If you are strictly monitoring your sodium intake, lean heavily on salt substitutes or things like a tiny dash of smoked paprika instead. If you do need salt, wait until they are fully cooked before adding just a pinch. Otherwise, you might find you don’t need any at all! These simple adjustments are what make these **quick healthy bean lunch ideas** so satisfying.
And one final thought, especially if you’re making a big batch for your meal prep this week for future delicious vegetarian pinto beans: always store them submerged in some of their cooking liquid. That liquid is pure essence—it keeps them moist and flavorful right up until you reheat them!
Serving Suggestions for Your Nutritious Pinto Bean Recipes
Honestly, these **nutritious pinto bean recipes** are so versatile that keeping them around means you’ve got half a meal planned already! Since we focused so heavily on flavor profiles that avoid heavy fats or salt, they pair beautifully with almost anything you want to throw at them. Don’t just settle for them sitting quietly next to a piece of chicken; these beans deserve to be the star sometimes.
For a complete, powerhouse meal that really leans into the **high fiber bean dishes** concept, you absolutely need to serve them over a bed of whole grains. I love whipping up a big batch of plain brown rice or even farro, and then topping that with a generous scoop of these seasoned beans. Since these are such fantastic **protein packed vegan bean meals**, pairing them with a grain that has a few amino acids they might be missing rounds everything out perfectly. Check out my guide on whole grain recipes with beans for more inspiration!
But let’s talk main course ideas, because that’s where they really shine:
- Bean & Veggie Skillet: Sauté some bell peppers, zucchini, and mushrooms until they start to caramelize. Stir in a few cups of your finished beans right at the end, maybe add a spoonful of salsa, and serve it warm. It’s a fantastic, **quick healthy bean lunch idea** if you have leftovers!
- The Ultimate Healthy Taco Filling: If you didn’t smash them up for a dip earlier, you can still use these whole beans as a filling. Warm them up, add a squeeze of lime, and layer them into whole grain tortillas with shredded cabbage and a dollop of Greek yogurt (if you aren’t strictly vegan) or avocado crema.
- Hearty Soup Booster: If you have leftover liquid, save it! Thin out a portion of the beans with that flavorful broth, add some chopped carrots or kale, and you instantly have a rustic, **delicious vegetarian pinto beans** soup that only needed 10 minutes of extra simmering time.
Remember how I talked about mashing some for a spread? That works great for quick snacks too. Spread them thickly onto toasted whole-grain bread instead of using cream cheese—a quick, flavorful breakfast or snack! They stay so wonderfully creamy, they behave just like refried beans but without any unhealthy additions.
Storage and Reheating Instructions for Leftover Healthy Pinto Beans
One of the best things about making **healthy pinto beans** from scratch is how amazing they are for meal prepping leftovers! Seriously, they often taste even better the next day once all those fresh herbs and the apple cider vinegar have had time to truly settle into the beans. But you have to store them correctly, or you’ll end up with a dry, sad clump by Wednesday.
For safe storage, you want them cooled down relatively fast. Transfer any leftovers into an airtight container. You can keep these beauties in the refrigerator for up to 4 or 5 days. If you made a massive pot, freezing is an option too! Store them (with a little of their cooking liquid!) in freezer-safe bags or containers for up to three months. Just remember to leave a little headspace in the container if you use liquid, because water expands when it freezes, and we don’t want cracked containers!
Now, reheating—this is crucial for keeping the texture right. If you use the microwave, don’t just blast them on high heat. That’s a fast track to tough beans. Instead, heat them in short 45-second bursts, stirring well between each blast. The key to keeping your **low sodium pinto beans** creamy is moisture retention.
If you’re reheating a larger batch on the stovetop (which I prefer), put them in a pot over medium-low heat. Before you even turn the burner on, stir in a splash—maybe a quarter cup—of fresh water or low-sodium vegetable broth. This added liquid will steam gently as the beans warm up, rehydrating the surface and keeping that creamy interior intact. You want them warmed through slowly until they are just sizzling hot. It’s that easy to keep your **protein packed vegan bean meals** tasting fresh all week!
Frequently Asked Questions About Healthy Pinto Beans
It’s natural to have questions when you’re moving from cans to cooking dried beans, especially when you’re focused on making them count as **healthy pinto beans** in your diet! I tried to answer the absolute most common things folks ask me about timing, substitutions, and hitting those nutritional macros. Getting this right means you have amazing easy lunch meal prep options ready to go!
Can I use canned beans instead of dried beans for this healthy pinto beans recipe?
You absolutely can, and sometimes you just need that speed—I get it! But you have to understand the trade-off. When you use canned beans, you are usually getting a huge shot of sodium, even if you rinse them well. If you use canned beans, drain and rinse them thoroughly first. Since you skipped the long soak and simmer, you’ll skip the onion, garlic, and bay leaf too. Just add those fresh cilantro and parsley at the end, plus the vinegar, and heat them gently. But honestly, for the best **low sodium pinto beans**, making them from scratch like we did here is the way to guarantee quality!
How do I make this a protein packed vegan bean meal?
Look at the bright side—this recipe is already totally plant-based! It’s naturally vegan, and loaded with fiber and protein just as it is. If you want to amp up the protein even further to make it a truly massive **protein packed vegan bean meal**, you have a couple of great options. My favorite technique is serving a big portion of these beans right over a base of cooked quinoa. Quinoa is a complete protein, so the pairing is incredible. You could also stir a few tablespoons of nutritional yeast right into the pot when you add the finishing herbs. It gives a slight cheese flavor and adds a few extra grams of protein per serving without changing the texture a bit!
Do you need to cook beans for hours if you want **high fiber bean dishes**? Nope! If you use the pressure cooker method I mentioned in the tips section, you can get perfectly cooked, high-fiber beans ready in under an hour total effort!
Nutritional Estimates for This Recipe
Now, I always say that if you focus on cooking with whole, fresh ingredients—like tossing in all that fresh cilantro and skipping the salt shaker—the nutrition takes care of itself! But I know some of you are tracking macros, especially when building out those **protein packed vegan bean meals**. So here are the numbers based on the recipe details provided.
Keep in mind that these are just ballpark figures! Since we’re **making dried pinto beans from scratch** and using a salt substitute or very little salt, the sodium count is wonderfully low, but your exact measurement of cumin or the brand of bean you buy can shift things slightly. This is just a guide to show you how fantastic these **heart healthy pinto bean cooking** results are!
- Serving Size: 1 cup cooked
- Calories: Around 230
- Fiber: An amazing 15 grams! That’s why these are such fantastic **high fiber bean dishes**!
- Protein: Packed with about 15 grams per serving.
- Fat: Super low, just 1 gram total. Zero saturated or trans fats!
- Sodium: Very low, right around 35 mg (since we controlled the salt heavily).
- Sugar: Just 1 gram naturally occurring.
- Cholesterol: 0 mg, as expected for plant-based food.
See? This is what I mean when I talk about clean eating that tastes amazing. These numbers show exactly why these **easy whole food pinto beans** are perfect for building **quick healthy bean lunch ideas** right into your weekly routine.
PrintSimple Stovetop Healthy Pinto Beans with Fresh Herbs
Prepare nutritious pinto bean dishes from scratch using a simple stovetop method, focusing on low sodium and high fiber content for heart healthy pinto bean cooking.
- Prep Time: 15 min
- Cook Time: 150 min
- Total Time: 165 min
- Yield: 6 servings 1x
- Category: Side Dish
- Method: Stovetop Simmering
- Cuisine: American
- Diet: Vegan
Ingredients
- 1 pound dried pinto beans
- 6 cups water (for soaking)
- 6 cups fresh water (for cooking)
- 1 medium yellow onion, quartered
- 3 cloves garlic, smashed
- 1 bay leaf
- 1 teaspoon dried oregano
- 1/2 teaspoon ground cumin
- 1/4 cup fresh cilantro, chopped
- 2 tablespoons fresh parsley, chopped
- 1 tablespoon apple cider vinegar
- Salt substitute or small pinch of salt (optional)
Instructions
- Rinse the dried pinto beans thoroughly. Place them in a large bowl and cover with 6 cups of water. Let the beans soak for at least 4 hours or overnight.
- Drain and rinse the soaked beans. Place the beans in a large pot or Dutch oven.
- Add 6 cups of fresh water, the quartered onion, smashed garlic, bay leaf, oregano, and cumin to the pot.
- Bring the mixture to a boil over high heat. Once boiling, reduce the heat to low, cover the pot partially, and simmer.
- Cook for 1.5 to 2.5 hours, or until the beans are tender. Check occasionally and add more hot water if the liquid level drops too low.
- Remove and discard the onion, garlic, and bay leaf once the beans are cooked.
- Stir in the fresh cilantro, parsley, and apple cider vinegar. Add a small pinch of salt substitute or salt, if desired.
- Simmer uncovered for 10 more minutes to allow the flavors to meld. Serve these easy whole food pinto beans as a side dish or main course.
Notes
- For quicker cooking, you can pressure cook the beans for 25 minutes after bringing them to pressure, followed by a natural release.
- To make a healthy bean dip or spread, mash about half of the cooked beans with a potato masher and mix them back into the pot.
- This recipe yields protein packed vegan bean meals suitable for lunch or dinner.
Nutrition
- Serving Size: 1 cup cooked
- Calories: 230
- Sugar: 1
- Sodium: 35
- Fat: 1
- Saturated Fat: 0
- Unsaturated Fat: 1
- Trans Fat: 0
- Carbohydrates: 42
- Fiber: 15
- Protein: 15
- Cholesterol: 0