
There is just something magical about homemade candy, isn’t there? That warm, sweet scent fills the whole house, and you instantly feel like you’re bringing a little bit of holiday spirit, even in July. I remember spending hours watching chefs try to get that perfect melt-in-your-mouth consistency. That’s why my goal with these caramels was uncompromising: they had to be impossibly soft, perfectly chewy, and deeply buttery. If you’re looking for simple, delicious desserts that truly impress, start right here. I wanted a recipe that honors the kind of dedicated, honest baking I learned growing up, ensuring these taste authentic. Trust me, once you try these from-scratch treats, you won’t go back to the packaged stuff. I’m Julian Maxwell, and I’m dedicated to bringing you that home-kitchen authenticity in every bite.
- Why These Homemade Caramels Are Your New Go-To Recipe
- Gathering Ingredients for Soft Chewy Caramels
- Step-by-Step Instructions for Stovetop Caramels
- Tips for Success with Easy Caramel Candy Making
- Variations on Classic Caramels
- Storage and Keeping Your Homemade Caramels Fresh
- Frequently Asked Questions About Making Caramels
- Nutritional Estimates for These Buttery Homemade Candy Squares
- Share Your Homemade Caramels Experience
Why These Homemade Caramels Are Your New Go-To Recipe
I know you’ve tried to make candy before, and maybe you ended up with something hard as a rock or melted into a sticky puddle. Not here! My goal was to create the absolute soft chewy caramel recipe that everyone dreams about. These are the real deal—rich, buttery homemade candy that feels gourmet but is shockingly simple.
- They are supremely soft and actually chewy, not brittle.
- The buttery flavor is intense, shining through in every single bite.
- I’ve tested the timing so that even beginners can get near-perfect results every time.
Achieving the Perfect Soft and Chewy Texture in Your Caramels
It all comes down to timing and the boil. We are pulling these off the heat right at 245 degrees Fahrenheit. That’s the sweet spot—the soft-ball stage. If you go too far, you’re heading into hard-taffy territory. We rely on the heavy cream and the corn syrup ratio to make sure that even once set, they stay pliable and wonderfully yielding when you bite in. That careful temperature control is our secret weapon for texture.

Making the Best Caramel Candy Recipe for Holiday Caramel Gifts
If you are looking for the best caramel candy recipe for your edible gift basket this year, stop searching. These homemade caramels are fantastic for wrapping up individually. The sea salt topping really elevates them, making them look like something you bought from a fancy gourmet shop. They are always the first thing to disappear from my holiday platter, I promise!
Gathering Ingredients for Soft Chewy Caramels
Alright, let’s look at what we need to make these incredible treats. Making homemade caramels is surprisingly straightforward because we are relying on pantry staples. Don’t be intimidated by the list; everything has a job to do! For the absolute best texture—that soft, buttery bite—we need specific amounts of the sugars and fats. We are aiming for about 64 perfect squares, so make sure your pan is ready to go!
Ingredient Notes and Substitutions for Perfect Caramels
Every single ingredient plays a role in achieving that melt-in-your-mouth result. You absolutely need that light corn syrup, for instance. It’s crucial because it stops the granulated sugar from crystallizing, which is what makes candy grainy instead of smooth. Please don’t skip it!
Also, measure that heavy cream precisely. It provides the richness and controls how quickly the temperature climbs. And listen, when it comes to salt, there are two spots for it:
- We use regular salt mixed *into* the bubbling sugar mixture for flavor deep inside the candy.
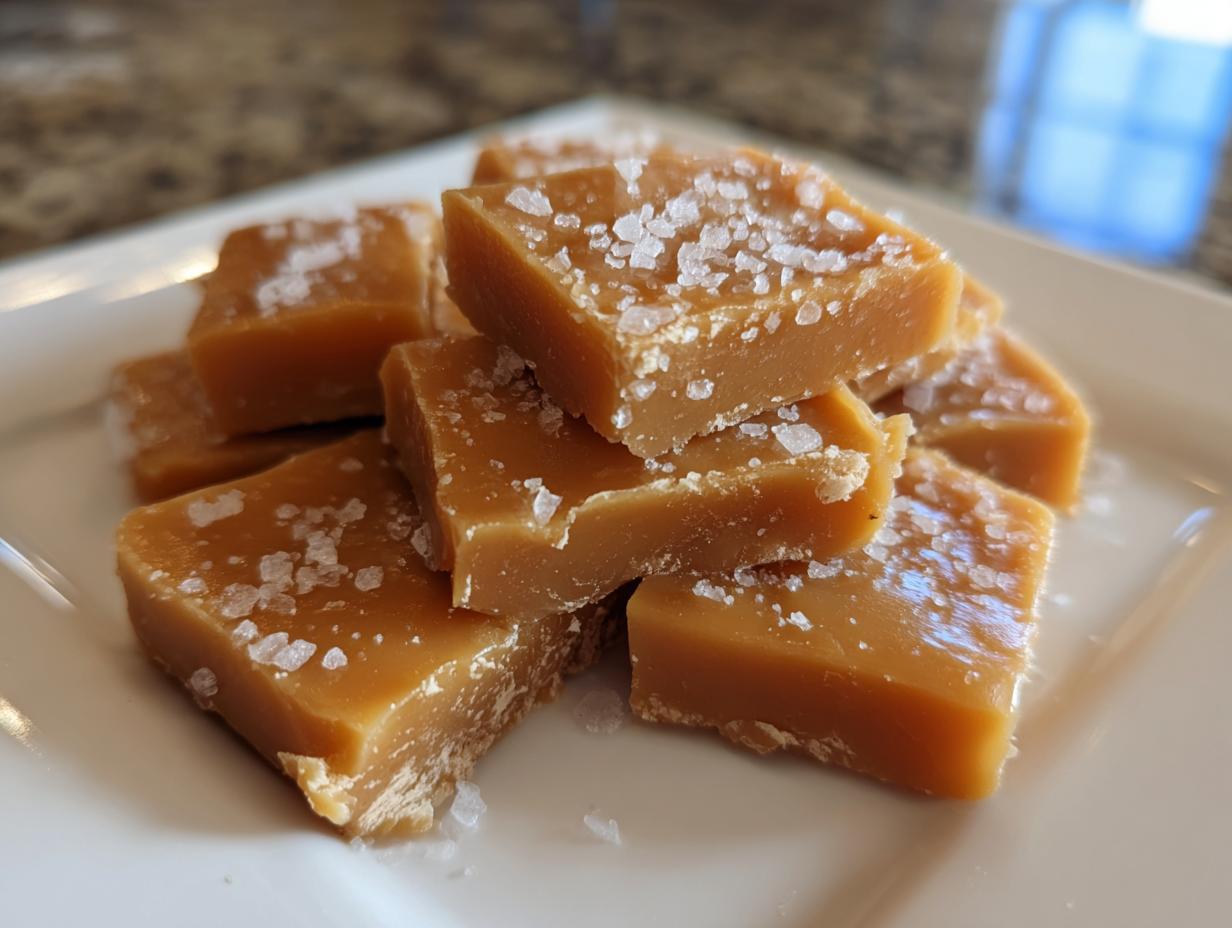
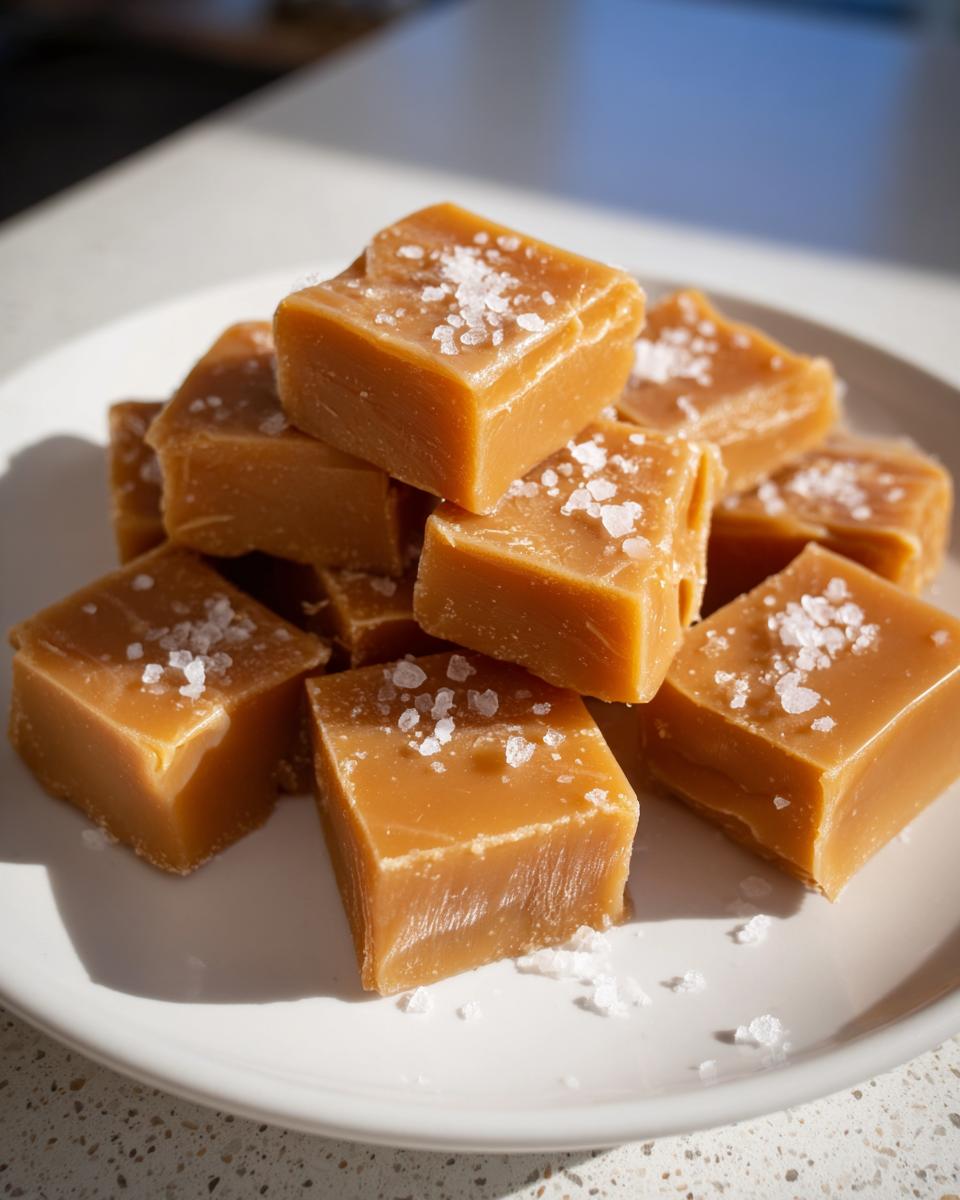
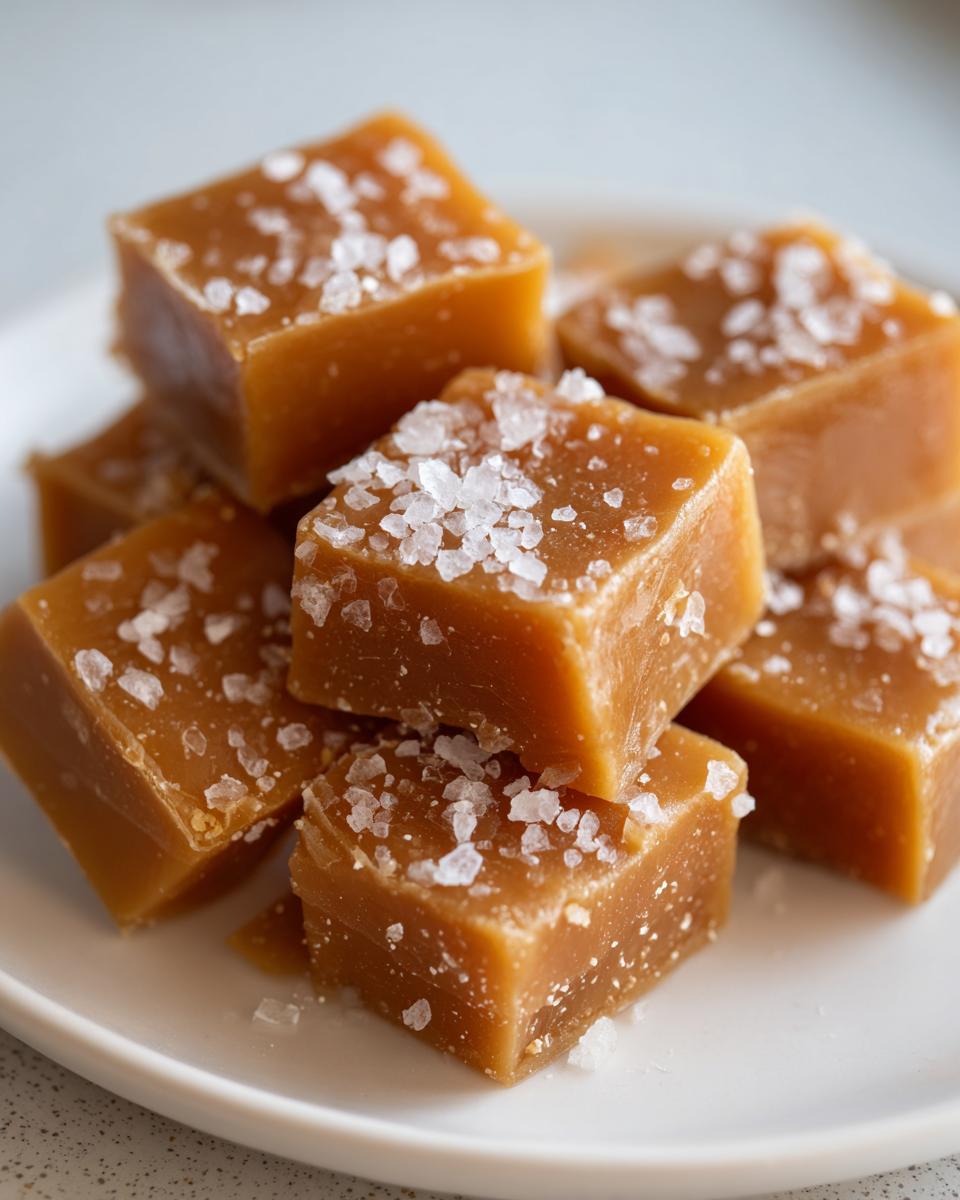
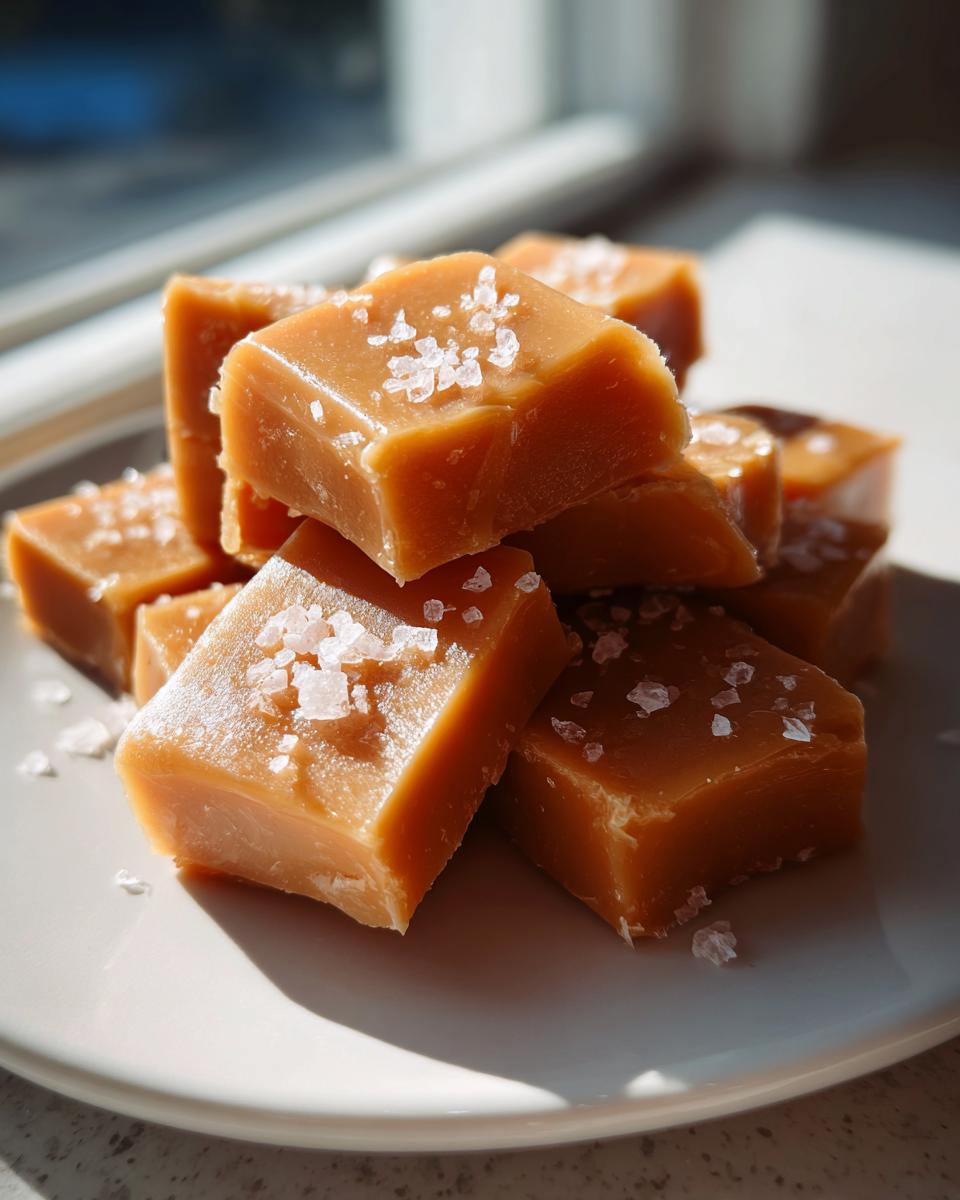
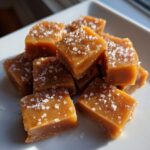
- Then—and this is key for gourmet flavor—we top them immediately with flaky sea salt. That pop of salty crunch on top of the sweet, soft caramel is what makes people ask for the recipe immediately. That’s non-negotiable for Sea Salt caramels!
Step-by-Step Instructions for Stovetop Caramels
Here we go—the fun part! Making these stovetop caramels requires focus because sugar gets incredibly hot. First things first, get your 8×8 pan ready. Lightly grease it and line it with parchment, making sure you leave those two overhangs. This little parchment sling is your best friend later when lifting the slab out. Seriously, don’t skip the sling!
In a heavy pot—I stress heavy, or it scorches—combine everything but the vanilla and the topping salt. We’re talking granulated sugar, brown sugar, butter, syrup, and cream stirred together until the butter melts and the sugars dissolve. Once it bubbles nicely, you insert that candy thermometer. Now, step back and resist the urge to stir! We want that beautiful boil to happen undisturbed. If you’re looking for inspiration on other quick and easy holiday treats, keep my blog bookmarked!
Crucial Temperature Checks When Making Homemade Caramels
The thermometer is your best friend here. We are pulling this entire glorious mixture right off the heat the second it hits 245 degrees Fahrenheit. That’s the soft-ball stage. If you stop cooking early—say, at 240—you will end up with a wonderful, soft sauce, great for drizzling, but it will stay too sticky to cut into neat squares. If you push past 250, you’re making hard candy, and all that lovely chewiness disappears. Watch it like a hawk after 12 minutes on the boil!
Cooling and Cutting Your Soft Chewy Caramel Recipe
Once that temperature hits its mark, yank it off the stove and stir in the vanilla and the internal salt quickly. Pour it into your prepared pan; remember, don’t scrape the heavy bits stuck near the top of the pot! Now, you wait. Seriously, let those amazing caramels cool undisturbed for at least two hours, or until they feel really firm when you press them. Once solid, use your parchment sling to lift them out. I like to use a sharp knife lightly oiled with vegetable oil to slice them into squares. As soon as they are cut, sprinkle the top of your soft chewy caramels with that flaky sea salt. Wrap them immediately to keep them fresh!
Tips for Success with Easy Caramel Candy Making
Making caramels from scratch shouldn’t feel like a high-stakes chemistry exam! I’ve spent time testing every variable so you don’t have to stress over the thermometer. I want this to be your go-to recipe, whether you’re whipping these up for an impromptu treat or planning ahead as part of your holiday candy bake. If you need something equally comforting but less involved with sugar work, check out my guide to easy banana cream pie.
First, a quick note on texture: If you taste-test one immediately after cutting and it’s just a touch too firm for your liking, don’t panic! That’s usually because the cooking temperature climbed just a hair too high. For a guaranteed softer, melt-in-your-mouth experience, pull the mixture off the heat when the thermometer reads 240 degrees Fahrenheit instead of 245. It will pour slightly thinner, but the final chew will be heavenly.
Now, for those days when you need treats *fast*—I totally get it. We have an excellent microwave variation for those moments. It’s definitely quicker since you bypass the stovetop heating time. You combine the sugars, butter, and corn syrup in a big microwave-safe bowl and heat it in short bursts. The trick is that you *still* need to reach that 245°F mark, so keep that thermometer handy even if you ditch the stove. Whisk in the cream carefully during those later bursts. It really is a fantastic, easy caramel candy hack when time is super tight.
Finally, if you plan on dipping these later—maybe for chocolate-covered delights—don’t forget my tip from the instructions: let them set completely firm first. Trying to dip warm or even slightly soft squares just ends up making a huge, sticky mess. Once they’re fully cooled, they hold up perfectly to any extra coating. You’ll find this whole process is much easier than you might think, and the flavor of real, buttery homemade candy is worth every minute!
Variations on Classic Caramels
Once you master the base recipe for these beautiful soft and chewy caramels, you start thinking about how to dress them up! Honestly, I think candy making is meant to be fun and personalized. While the pure sea salt topping is my absolute favorite way to enjoy these buttery homemade sweets, there are so many easy ways to turn them into gourmet homemade candy worthy of any fancy platter.
My first recommendation, especially if you’re looking to impress people at a party or just want a richer treat, is chocolate dipping. Once your caramels are fully cooled, cut, and salted, they are the perfect sturdy base for a chocolate coating. Melt down some good quality dark, milk, or white chocolate—whatever makes your heart sing. I love using dark chocolate because it cuts through the sweetness of the caramel just perfectly.
Here are a few flavor twists you can mix right into the caramel base—remember to do this right after you pull the mixture off the heat, just before adding the vanilla:
- Coffee Kick: Dissolve one teaspoon of instant espresso powder into the heavy cream before you start heating everything up. It gives such a subtle, sophisticated depth to the sugar notes.
- Spice It Up: A tiny pinch of cayenne pepper added with the vanilla gives a surprising warmth in the finish. It’s not spicy hot, just warming!
- Nutty Crunch: If you have time, stir in about half a cup of finely chopped toasted pecans or walnuts right before pouring the mixture into the pan. It adds a great secondary texture to the soft filling.
Remember, packaging them nicely makes all the difference if these wonderful homemade caramels are heading out as gifts. A little square of nice wax paper tied with kitchen twine elevates everything. Happy experimenting!
Storage and Keeping Your Homemade Caramels Fresh
Now that you’ve made the most perfect, buttery, soft candy—you want to make sure they last, right? Believe me, these homemade dinner rolls-soft treats don’t last long in my house, but if you manage to save some, storage is key to keeping that signature chewiness.
The biggest enemy of a soft caramel is air exposure, which dries out the sugars; the second enemy is heat, which makes them melt into a single sticky block! I’ve found that wrapping them immediately after they are cut is the best defense. You need wax paper—it’s cheap, effective, and it won’t stick to the candy like plastic cling wrap sometimes does.
Wrap each square individually. It takes a minute, but this step ensures that the flaky salt stays put and that the candy doesn’t fuse to its neighbor. Think of it like tucking each little treat into its own cozy bed!
Once wrapped, where should they live? For stability, especially if your house is warm, the refrigerator is fine. Storing them cold keeps them quite firm, which is nice if you plan to dip them in chocolate later, as I mentioned before. However, if you want that ultimate melt-in-your-mouth experience right out of the wrapper, I suggest just keeping them in an airtight container at a cool room temperature. A pantry or cellar works great.
If you do store them in the fridge, just remember to pull them out about 20 minutes before you plan to eat them. Letting them warm up just slightly lets the butter and cream soften back up, giving you that intended, wonderfully soft texture that makes this recipe so special. If stored properly, these candies will hold up beautifully for at least two weeks!
Frequently Asked Questions About Making Caramels
I completely understand that cooking candy can bring up a lot of questions, especially around timing and texture. We want these to be perfect, buttery, soft caramels every single time, right? Here are the things I’m asked most often when people try this recipe for the first time.
Can I make these without a candy thermometer for easy caramel candy?
Yes, you absolutely can get away without a thermometer if you have to, which makes this an incredibly easy caramel candy to whip up in a pinch! If you are using the stovetop method, you can test it using the tried-and-true cold water test. Just before the estimated time is up, drop about half a teaspoon of the hot syrup into a mug of very cold water. If it forms a soft, pliable ball that you can easily squish in your fingers, you’re done! If it dissolves right away, it needs more time. If it’s instantly hard, you’ve gone a bit too far.
If you use the microwave method I listed in the notes, you are still aiming for that 240°F to 245°F range, so you’ll definitely want that thermometer handy for accuracy. But for pure simplicity, the cold water test works if you’re patient!
Why are my caramels too hard or too soft?
This is totally dependent on one crucial factor: the final temperature. If your caramels turn out too hard—almost brittle—it means you cooked the sugar past the soft-ball stage, usually over 250 degrees Fahrenheit. The excess water boiled off, making the sugar structure too tight. They’ll still taste great, but they won’t have that satisfying chew.
On the flip side, if your candies are too soft and they just spread out into a gooey puddle after cutting, you undercooked them! If the thermometer didn’t quite hit 245°F, the moisture content is too high, and they won’t set up properly. Remember, if you want them slightly softer than the recipe calls for, aim for 240°F. Aiming for that perfect middle ground is what separates good caramels from the best ones!
Nutritional Estimates for These Buttery Homemade Candy Squares
I always feel a little bit guilty when I talk about candy, but hey, we deserve a treat sometimes, especially when they are this delicious! These soft and chewy caramels are loaded with real butter and sugar, so we know they aren’t exactly diet food—but they freeze up memories, and that’s worth more than a few calories, in my opinion!
I’ve put together these estimates, but I always tell people to take these numbers with a grain of salt—or in our case, a sprinkle of flaky sea salt! These figures are calculated based on my standard pantry brands and assume you cut the batch into exactly 64 uniform pieces. If you cut them larger, obviously the calories go up, but trust me, you won’t want to eat less than one of these perfect little squares!
Here is the breakdown per piece of buttery homemade candy:
- Serving Size: 1 piece
- Calories: 95
- Fat: 3.5g (with 2.2g saturated fat)
- Carbohydrates: 16g
- Sugar: 15g
- Sodium: 35mg
- Protein: 0.5g
See? Not too bad for something this decadent! The sodium number is low because we are using a tiny bit of salt in the mix and then topping it with flaky salt separately, which accounts for most of the flavor punch. Enjoy every single one of these magnificent homemade caramels!
Share Your Homemade Caramels Experience
Now that you have a pan full of what I truly believe are the best soft, chewy treats you’ll ever make in your own kitchen, I really want to hear about it! Cooking is an act of generosity, and sharing what you create is how we build this wonderful community here at Julia Meal.
Did these turn out exactly as you hoped? I put so much work into perfecting that 245°F temperature goal so you would end up with that melt-in-your-mouth result. Please drop a comment down below and let me know how your texture turned out. Were they wonderfully soft? Were they perfectly chewy? Or did someone sneak into the kitchen and eat them all before you could wrap them?
If you’re feeling brave and you’ve taken a beautiful picture of your freshly cut and salted squares—maybe wrapped up nicely for a holiday gift basket—I would absolutely love to see them! Don’t be shy about sharing your successes. You can tag me on social media or send a message through my contact page. Seeing your results is genuinely my favorite part of sharing these authentic recipes.
If you’ve already made your batch, go ahead and give the recipe a rating! Seeing how others enjoyed this buttery homemade candy helps new cooks feel confident trying it out next time. Happy baking, and thank you for letting my family’s traditions find a place in your home!
PrintEasy Soft and Chewy Sea Salt Caramels
Make buttery, soft, and chewy homemade caramels that melt in your mouth. This recipe is simple and perfect for holiday gifts or a sweet treat.
- Prep Time: 15 min
- Cook Time: 20 min
- Total Time: 35 min
- Yield: About 64 pieces 1x
- Category: Candy
- Method: Stovetop Cooking
- Cuisine: American
- Diet: Vegetarian
Ingredients
- 1 cup granulated sugar
- 1 cup light corn syrup
- 1 cup heavy cream
- 1 cup packed light brown sugar
- 1/2 cup unsalted butter
- 1 teaspoon vanilla extract
- 1/2 teaspoon salt (for the caramel)
- Flaky sea salt (for topping)
Instructions
- Lightly grease an 8×8 inch baking pan and line it with parchment paper, leaving an overhang on two sides for easy removal.
- In a medium, heavy-bottomed saucepan, combine the granulated sugar, corn syrup, heavy cream, brown sugar, and butter.
- Place the saucepan over medium heat. Stir the mixture constantly until the butter melts and the sugars dissolve. Do not let it boil yet.
- Once the mixture reaches a boil, stop stirring. Insert a candy thermometer.
- Continue to cook, without stirring, until the mixture reaches 245 degrees Fahrenheit (soft-ball stage). This usually takes about 15 to 20 minutes. Watch the heat carefully to prevent scorching.
- Remove the saucepan from the heat immediately once 245 degrees is reached. Stir in the vanilla extract and 1/2 teaspoon of salt.
- Carefully pour the hot caramel mixture into the prepared baking pan. Do not scrape the sides of the pan.
- Let the caramel cool completely at room temperature for at least 2 hours, or until firm.
- Once firm, use the parchment overhang to lift the caramel slab out of the pan.
- Peel off the parchment paper and place the slab on a cutting board. Use a sharp, oiled knife to cut the caramel into 1-inch squares.
- Immediately sprinkle the tops of the cut caramels with flaky sea salt.
- Wrap each individual caramel in wax paper or cellophane for storage or gifting.
Notes
- For a microwave version, combine the sugar, corn syrup, brown sugar, and butter in a large microwave-safe bowl. Microwave on high for 4 minutes, stir, then microwave in 1-minute intervals, stirring well after each, until the mixture reaches 240 degrees Fahrenheit. Whisk in the cream and continue microwaving in 30-second bursts until 245 degrees Fahrenheit is reached, then stir in vanilla and salt.
- If you prefer a softer caramel, cook the mixture to 240 degrees Fahrenheit instead of 245 degrees Fahrenheit.
- If you plan to dip these in chocolate, allow the caramels to cool and set completely before dipping.
Nutrition
- Serving Size: 1 piece
- Calories: 95
- Sugar: 15
- Sodium: 35
- Fat: 3.5
- Saturated Fat: 2.2
- Unsaturated Fat: 1.3
- Trans Fat: 0.1
- Carbohydrates: 16
- Fiber: 0
- Protein: 0.5
- Cholesterol: 10