
Isn’t it amazing how the simplest things in the kitchen often turn out to be the most satisfying? For me, nothing beats the feeling of pulling a fresh, warm loaf from the oven—especially when there was absolutely no messy yeast involved! When I think about core, reliable baking, I immediately think of true, honest food, and that’s where this Traditional Irish soda bread comes in. This is the ultimate no yeast bread solution, forged from heritage and the need for quick, delicious comfort. Trust me, this is a sturdy, reliable recipe in my kitchen, just like the ones my grandmother taught me existed for every important family moment. You just can’t beat a classic, honest soda bread.
My journey in food, which took me from professional kitchens back to the home bench like the one I talk about in my About page, taught me that reliability outweighs complexity every time. This recipe proves that you don’t need a complicated schedule or expensive ingredients to achieve that wonderful, rustic crumb we all crave on a cold evening.
- Why This Traditional Irish Soda Bread Recipe Works So Well
- Gathering Ingredients for Your Easy Homemade Bread
- How to Make Soda Bread: Simple Baking Methods
- Tips for Success with Your Soda Bread
- Serving Suggestions for Your Warm Loaf Recipes
- Storage & Reheating Instructions for Leftover Soda Bread
- Frequently Asked Questions About Soda Bread
- Nutritional Estimates for Traditional Soda Bread
- Share Your Irish Soda Bread Experience
Why This Traditional Irish Soda Bread Recipe Works So Well
When I first started experimenting with no yeast bread, I needed something fast that wouldn’t end up tasting like a brick. This traditional recipe is my go-to for reliable results. It’s incredibly satisfying to see a loaf come out golden brown when you put in maybe ten minutes of work. It truly stands out in the world of Quick Bread Recipes because of its texture.
- It’s the ultimate in Baking Without Kneading. Seriously, you just mix and shape.
- The speed means you can have a fresh, warm loaf on the table faster than you can order takeout.
- It delivers that beautiful, slightly dense but still unbelievably tender texture every time.
The Magic of Buttermilk Bread: Tender Crumb Guaranteed
The secret sauce here, besides the baking soda, is the buttermilk. When the acid in the buttermilk hits that baking soda, you get an immediate chemical reaction—that’s your lift! It’s instant magic. This process creates tiny pockets of air without having to knead or wait hours for yeast to develop. It’s essential for getting that soft, buttery crumb that makes any soda bread so addictive.
Achieving the Best Soda Bread Recipe in Under an Hour
If you’re looking for the absolute Best Soda Bread Recipe that fits into a busy schedule, this one is it. From the moment you grab your bowl to the minute it comes out golden, we’re talking less than forty-five minutes total. No proofing, no checking the temperature of the room—just mix, shape, score, and bake. That’s why this Irish staple has remained popular for generations!
Gathering Ingredients for Your Easy Homemade Bread
Honestly, seeing the ingredient list for this fantastic soda bread always makes me smile. This is how baking should be! You don’t need to run out to the specialty store for arcane flours or dried herbs you’ll use once a year. We are sticking to the essentials here. This keeps things easy and cost-effective, which is part of why it’s such a wonderful recipe for beginners learning Easy Homemade Bread.
Since you’re using chemical leaveners instead of yeast, everything needs to be measured correctly upfront. Unlike some of my more complex recipes where you can fudge an ingredient ratio slightly, here, precision matters because we are not kneading out the mistakes!
Here is exactly what you need on your counter before you start mixing:
- 4 cups all-purpose flour
- 1 teaspoon baking soda (make sure it’s fresh!)
- 1 teaspoon salt
- 1 3/4 cups buttermilk
Maybe you saw some chatter online about a 4 Ingredient Bread recipe; well, this is it! If you wanted to try my French Toast again next, you’d need eggs, but for this loaf, we keep it tight and right.
Ingredient Notes and Substitutions for Perfect Soda Bread
I know the buttermilk is the ingredient that throws people off sometimes, especially if they don’t keep huge tubs of it in the fridge. Don’t panic! If you are out, you can make your own quick substitute easily. Just measure out your 1 3/4 cups of whole milk—yes, whole milk works best for the fat content—and stir in one tablespoon of white vinegar or fresh lemon juice. Let that sit on the counter for about five minutes until it looks slightly curdled. That’s your homemade buttermilk, ready to react with the baking soda!
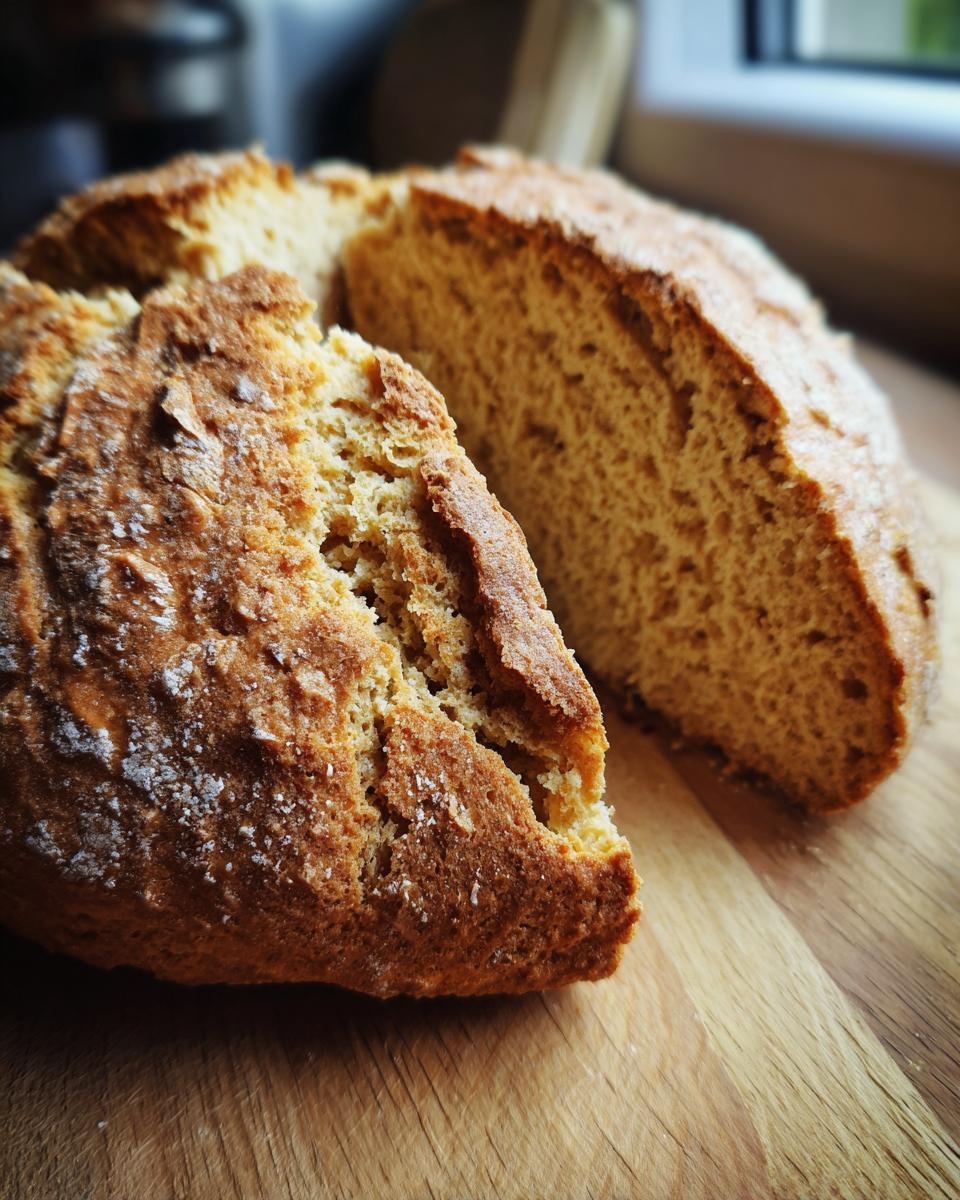
Also, if you have brown sugar in the pantry, you can swap out about half of the all-purpose flour for whole wheat flour. A little whole wheat flour bumps this right into the territory of a lovely, rustic Brown Soda Bread. It gives it a nuttier flavor, but keep the salt ratio the same, okay? You want that flavor to pop!
How to Make Soda Bread: Simple Baking Methods
Okay, the moment of truth! This is where we bring those lovely dry ingredients and the creamy buttermilk together. Remember, this entire process is about speed. Since we rely on the baking soda for our lift, we don’t want anything to spoil that reaction before it hits the heat. We only need about 4 cups of flour, 1 teaspoon of salt, and that baking soda mixed well in a big bowl for this perfect soda bread.
When you add that 1 3/4 cups of buttermilk, hold back. Mix everything quickly—and I mean *quickly*—with a wooden spoon or, if you feel the need for connection, just use your hands. We are aiming for a soft, shaggy dough. If you mix this for too long, you’re developing gluten, and that gluten is the enemy of tenderness here. We want rustic, not rubbery, right?
Once it’s just combined, tip that dough right out onto a lightly floured surface. You only need to gently knead it—and I mean *gently*—maybe four or five times to bring it into a nice round ball. Think of it as persuading the dough, not wrestling it!
Mixing the Dough: The Key to a Light Soda Bread
This is what separates the sublime from the sinking loaf. When that buttermilk goes in, stir just until you don’t see any dry streaks of flour left. Seriously, stop mixing when it looks slightly messy and clumpy. That’s your ‘shaggy’ texture. If you’ve mixed it until it’s perfectly smooth like a regular yeast dough, you’ve gone too far, and your loaf will be tough. I’ve seen it happen; we just don’t let it happen here! Keep it messy for a light texture.
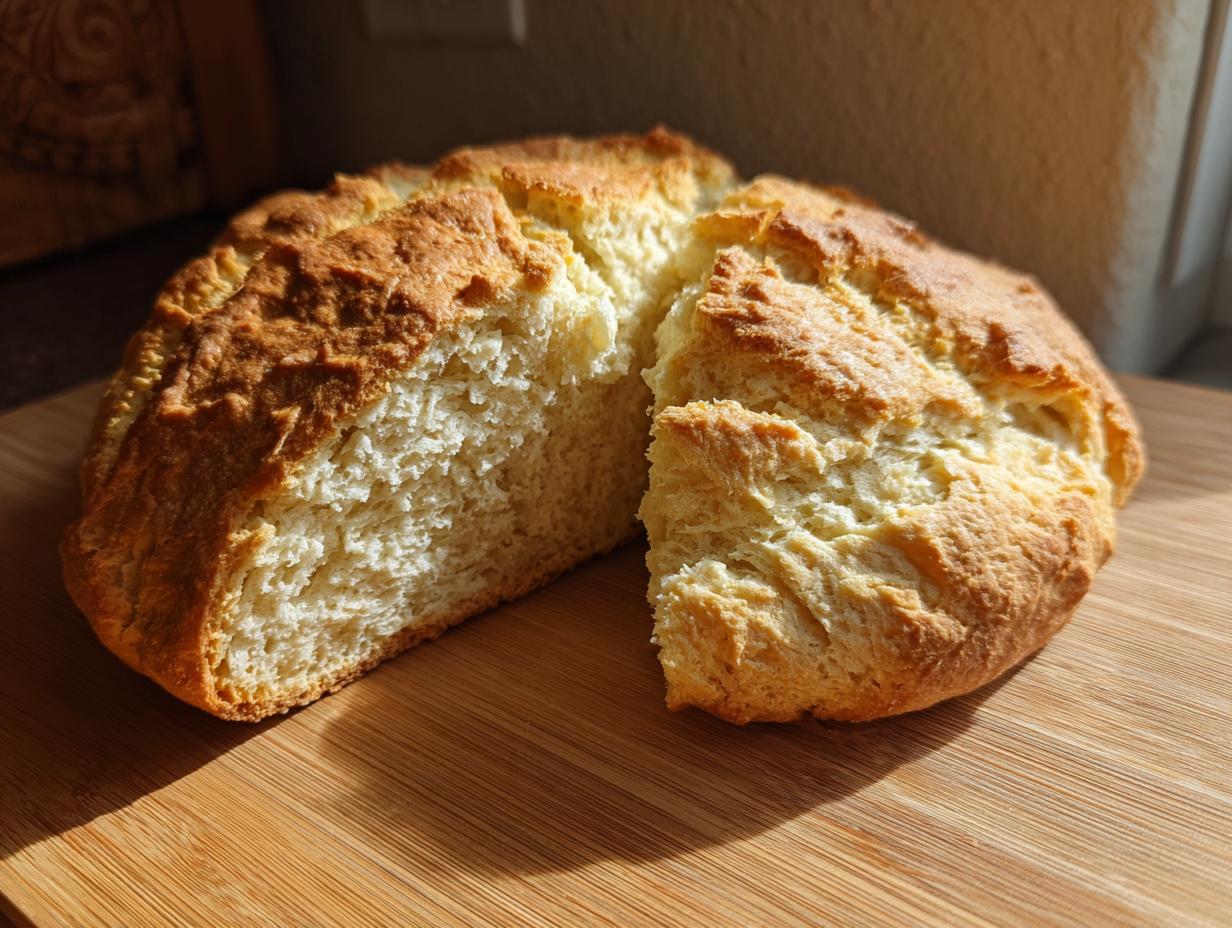
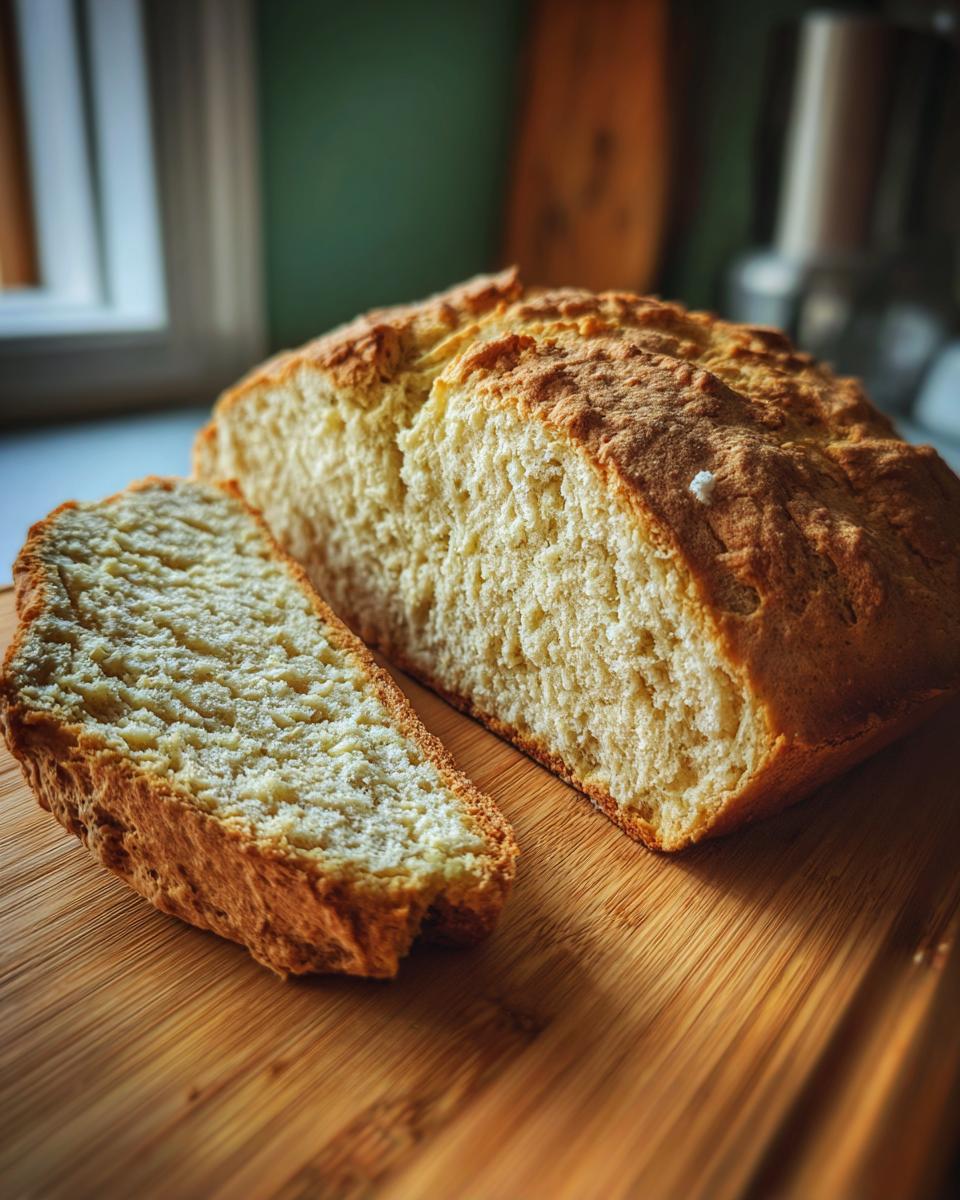
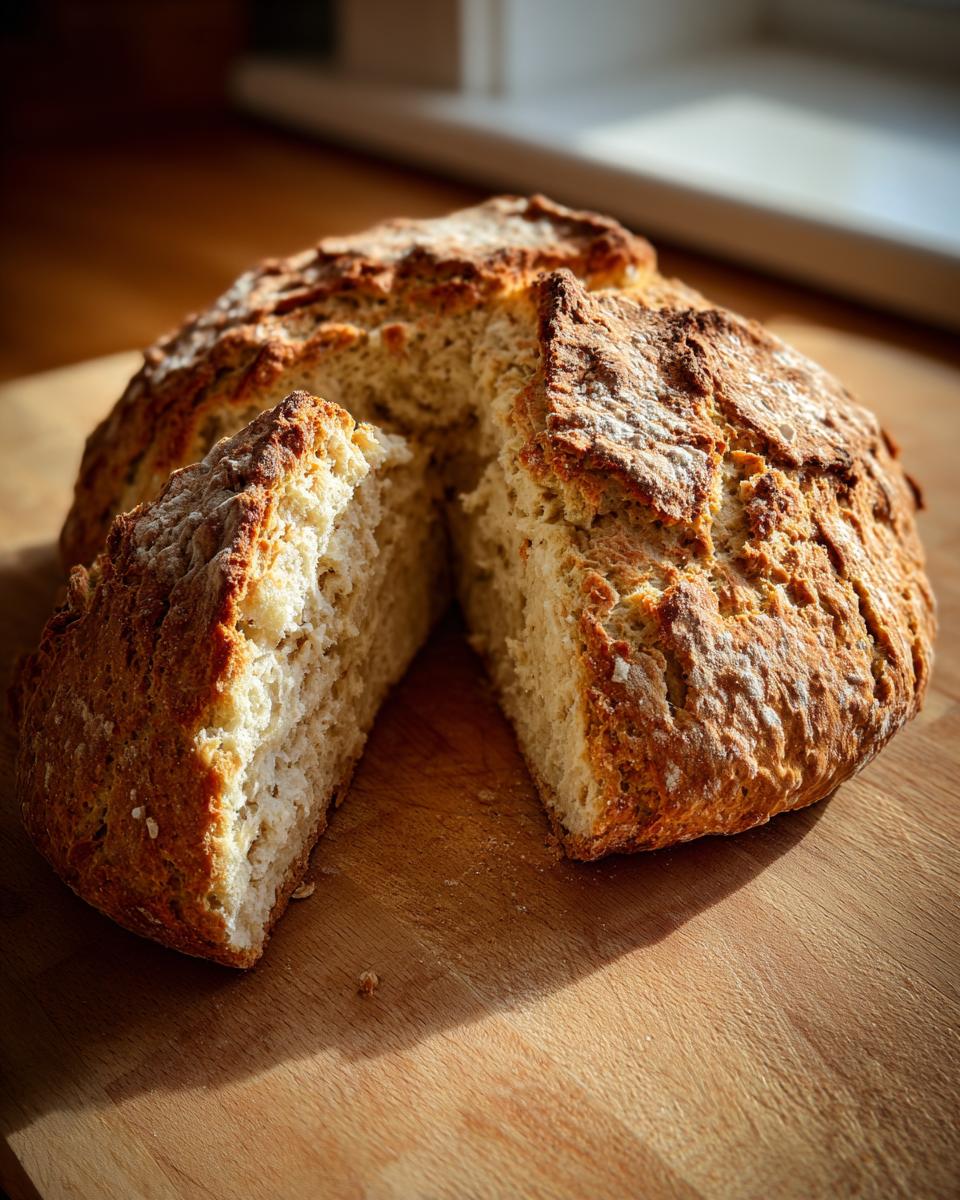
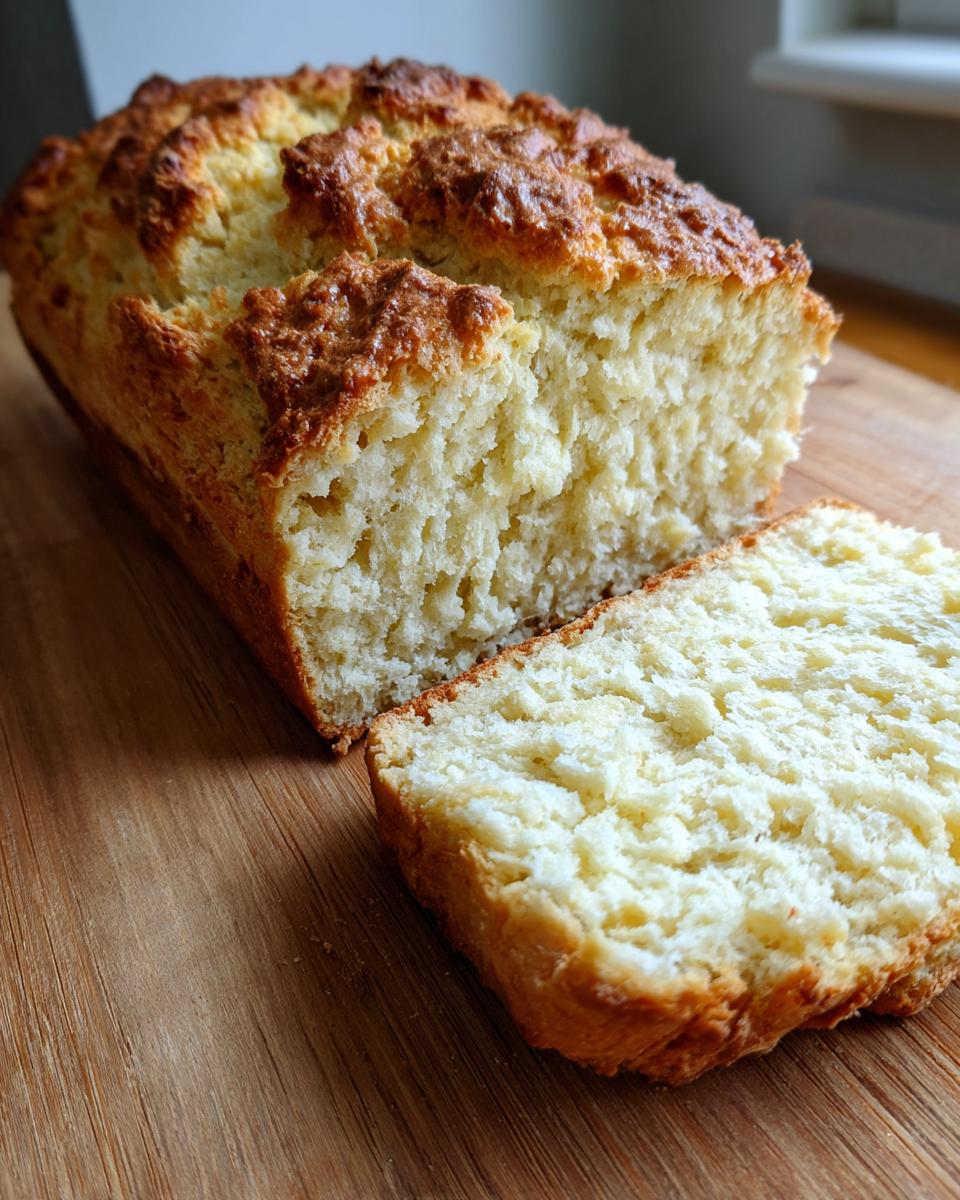
Scoring and Baking Your Rustic Loaf Recipe
Once you shape your dough into that beautiful round and place it on your baking sheet, grab a sharp knife. We have to score the top—cut a deep cross right into the middle, cutting about halfway through the dough. This isn’t just for looks, folks! That cross is essential because even though it’s a quick bread, the center needs a clear path for that oven heat to penetrate fully. Preheat that oven to 400°F (200°C) because this Rustic Loaf Recipe bakes up fast, usually needing only 30 to 40 minutes until it’s golden brown and sounds hollow when you tap the bottom. If you cooked this alongside my chicken and dumplings, you’re set for a feast!
Tips for Success with Your Soda Bread
We’ve covered the ‘how,’ but let’s talk about avoiding the pitfalls so you nail this every single time. Making great soda bread isn’t about following the steps perfectly; it’s about understanding *why* those steps matter. If your loaf comes out dense when you expected light and tender, I’m betting one of three things happened when you made it.
First, I want to stress the freshness of your baking soda. Since this is the only leavening agent we use, if that canister has been sitting in your cupboard since 2019, you might get a flat result. Test it first! Drop a little bit into a splash of hot water—if it fizzes immediately and vigorously, you’re good to go. If it just kinda sits there sadly, toss it and grab a new box. That fizz is the whole engine of this recipe, remember?
Second, we talked about overmixing, but honestly, it bears repeating. Mix until the flour *just* disappears. That shaggy look is your friend. Don’t feel guilty about leaving it a little messy; the less you handle it, the lighter your final bread will be. It’s baking without the hard work of kneading, so embrace the shortcut!
Finally, for that absolute, crackly, perfect crust that tastes like it came straight from a stone hearth in Ireland, try baking it in a cast iron skillet. Yes, use one of those heavy pans! If you don’t have one, just place a pizza stone or a heavy baking sheet in the oven while it preheats to 400°F. Placing the dough onto that screaming-hot surface gives the bottom a massive blast of initial heat, leading to a crisp crust and helping that rustic look along. It’s a small change that makes a huge difference in the final texture of your homemade soda bread.
Serving Suggestions for Your Warm Loaf Recipes
So, you’ve pulled the perfect, golden, rustic loaf out of the oven, and the kitchen smells incredible. Now what? You absolutely cannot let this beautiful loaf sit around waiting for dinner to be ready. This soda bread is best enjoyed when it’s still warm, almost steaming!
The most traditional and, frankly, most glorious way to eat it is sliced thick and slathered with good, quality butter that melts right into those little nooks and crannies. I’m talking about real Irish butter if you can find it—that bright yellow stuff is just different! A little sprinkle of flaky sea salt on top of the melting butter? Perfection. This is the simplest pleasure in Comfort Food Baking.
But let’s talk about making this the centerpiece of a great meal. This isn’t just a breakfast item; this is serious Dinner Side Bread material. Because the flavor profile is slightly tangy from the buttermilk and generally neutral (unless you added those herbs!), it pairs beautifully with deeply savory, slow-cooked meals.
If you’ve made a big pot of stew, a hearty soup, or even a chili—this is what you need for dipping. It soaks up broth like nothing else. For example, I often make this bread when I’m serving my vegetable beef soup. Scooping up that last bit of broth with a chunk of warm soda bread is just unbeatable. If you’re leaning into side dishes for a bigger meal, this loaf is incredible mopped clean alongside creamy sides. Get yourself a batch of my garlic mashed potatoes, and you’ve got a feast that feels ancient and new all at once. Go on, cut a slice while it’s still hot!
Storage & Reheating Instructions for Leftover Soda Bread
Now, let’s be real. If you follow the recipe above and make a fantastic, warm loaf, there might not actually be any leftovers! But if you’re baking for more than just yourself, or if you’re hoping to save some for a breakfast treat the next morning, you need to know how to keep this soda bread tasting its best. Quick breads, because they rely on a specific moisture balance, can sometimes lose their freshness faster than a yeasted loaf.
The best way to store it is to let it cool completely first—I mean completely—on a wire rack. If you wrap it up while it’s still warm, you’re basically steaming the beautiful crust we worked hard to create, and you’ll end up with a soggier texture. Once it’s totally cool, wrap it tightly. I like to use plastic wrap first, and then pop that whole package into a large zip-top bag. This traps all the moisture in without letting the outside go stale.
This traditional loaf should last about three days sitting on your counter tightly wrapped. I wouldn’t trust it much past that—it’s meant to be eaten fresh, after all!
If you end up with bread that’s firmed up a bit on day four or five, don’t reach for the garbage can! We can fix it right up. The best reheat method tricks the bread into thinking it just came out of the oven. Slice what you need—don’t reheat the whole thing—and either pop those slices directly onto a baking sheet in a 350°F oven for about five to seven minutes, or pop them under the broiler for just a minute until they smell fragrant again. If you used a cast iron skillet before, reheating a slice in that hot skillet works wonders too, bringing back that amazing crust we talked about earlier. A little heat brings all the tenderness right back to your yeast free bread.
Frequently Asked Questions About Soda Bread
Look, I get it. Even with the clearest instructions, sometimes you just have a quick question pop up right when you’re about to mix the dough. That’s totally normal when you’re trying out a new cornerstone recipe like this soda bread. I’ve gathered the questions I hear most often from folks trying their hand at this traditional baking staple.
Can I use regular milk instead of buttermilk in this soda bread?
Yes, absolutely! This is one of the great tricks of Yeast Free Bread baking. If you look at the recipe, we need the acidity from the buttermilk to react with the baking soda to make the loaf rise. If you only have regular milk—whole milk is best here—just whip up your own quick substitute! For the amount listed in the recipe, take 1 3/4 cups of whole milk and stir in exactly one tablespoon of white vinegar or lemon juice. Let it sit on your counter for about five minutes. You’ll notice it looks a little curdled; that’s exactly what you need! It’s now acidic enough to do the job perfectly.
How do I adapt this recipe to make Cheddar Herb Bread?
This takes our fantastic base recipe and moves it right into Savory Quick Bread territory! You want to make a delicious Cheddar Herb Bread? Easy. Instead of just mixing the flour, salt, and soda together, you’ll fold in your additions once the dry ingredients are whisked. For a standard loaf, I suggest using a sharp, good-quality cheddar—don’t skimp here!—about 1 to 1 1/2 cups, grated. I usually go half cheddar and half chives or thyme. Gently fold those into the flour mixture *before* you add the buttermilk. We handle the dough so lightly that the cheese stays mostly intact but distributes well. This makes it an amazing Dinner Side Bread!
What is the best way to store this traditional baking item?
Since this soda bread is meant to be eaten fresh, storage is all about trapping moisture without creating steam. Once the loaf is completely cool—and I mean *cool*—wrap it tightly in plastic wrap, and then you can put that wrapped loaf inside a large zip-top bag. Keep it on the counter at room temperature for up to three days. If you plan on keeping it longer, slicing it first and freezing the slices is your best bet. Just reheat them briefly in the oven when you want that fresh-baked flavor again. If you have extra questions about your loaf, feel free to reach out via my contact page!
Nutritional Estimates for Traditional Soda Bread
Okay, let’s talk numbers for a second. I know some of you are tracking macros or just curious about what’s in this glorious loaf. Since this soda bread is so darn simple, the nutrition is pretty straightforward, focusing mainly on carbs from the flour and a bit of richness from the buttermilk. I want you to remember that this is just an estimate based on the four core ingredients we used—flour, baking soda, salt, and buttermilk—divided into 8 servings. This doesn’t account for the extra sprinkle of sugar some of you might add, or if you go heavy on the butter when serving!
When I look at this data, I see a genuinely satisfying slice of easy homemade bread. It’s filling, comforting, and doesn’t carry a lot of unnecessary fat or sugar, which is why it’s such a popular dinner side bread, not a dessert.
Here’s a quick snapshot of what you can expect per slice:
- Serving Size: 1 slice
- Calories: 240
- Fat: 2g
- Carbohydrates: 50g
- Protein: 7g
- Sugar: 1g
See? Very low in sugar, which is why this traditional baking recipe remains a staple and not a special occasion treat. It’s real food that feeds you well. If you’re focusing on reducing sodium, you have control here—just use a low-sodium salt or slightly reduce the amount of salt specified in the recipe. Happy baking!
Share Your Irish Soda Bread Experience
Now that you’ve got the knowledge and the recipe right here, all that’s left is for you to get your hands dusted with a little flour! I truly believe that the best recipes are the ones that get used and loved, and this soda bread is meant to be shared.
If you followed along and baked up this wonderfully fast, no yeast bread for your family dinner or perhaps you tried it out for your big St Patricks Day Baking celebration, I desperately want to hear about it! Did you stick to the simple, traditional flavor, or did you sneak in a little spice? Maybe you baked it in a cast iron skillet like I suggested? Tell me everything!
Leave a comment below! Seriously. Drop a quick rating—was it a five-star success? Tell me what you served it with. Did it pair perfectly with your stew, or did you treat yourself to a huge slab of Irish butter? Seeing your loaf photos and reading your feedback honestly makes my day. It helps me know I’m giving you the most reliable, time-tested recipes possible, just like the ones I learned from my own family members.
If you loved how easy this was, maybe you’ll want to check out my Privacy Policy page sometime, just to see how we protect all the wonderful stories shared here. And if you’re looking for another great loaf variation to try next, check out what others are doing with theirs, like this amazing recipe resource over at The World’s Best Irish Soda Bread. Happy baking, friends. I look forward to hearing all about your rustic loaves!
PrintTraditional Irish Soda Bread: Easy No Yeast Recipe
Make authentic Traditional Irish Soda Bread with this simple, no-yeast recipe. This quick bread yields a moist, tender crumb perfect for serving warm with butter alongside any meal.
- Prep Time: 10 min
- Cook Time: 35 min
- Total Time: 45 min
- Yield: 1 loaf (8 servings) 1x
- Category: Bread
- Method: Baking
- Cuisine: Irish
- Diet: Vegetarian
Ingredients
- 4 cups all-purpose flour
- 1 teaspoon baking soda
- 1 teaspoon salt
- 1 3/4 cups buttermilk
Instructions
- Preheat your oven to 400°F (200°C). Lightly flour a baking sheet or line it with parchment paper.
- In a large bowl, whisk together the flour, baking soda, and salt.
- Make a well in the center of the dry ingredients and pour in the buttermilk.
- Mix the ingredients quickly with a wooden spoon or your hands until just combined into a soft, shaggy dough. Do not overmix; overmixing develops gluten and results in a tough loaf.
- Turn the dough out onto a lightly floured surface. Gently knead it 3 or 4 times to bring it together into a round shape.
- Place the dough round onto your prepared baking sheet.
- Use a sharp knife to cut a deep cross into the top of the loaf, cutting about halfway through the dough. This helps the heat penetrate the center.
- Bake for 30 to 40 minutes, or until the crust is golden brown and the loaf sounds hollow when tapped on the bottom.
- Transfer the soda bread to a wire rack to cool slightly before slicing and serving warm.
Notes
- For a slightly sweeter loaf, you can add 1 tablespoon of sugar to the dry ingredients.
- If you do not have buttermilk, mix 1 3/4 cups of whole milk with 1 tablespoon of white vinegar or lemon juice and let it sit for 5 minutes before using.
- Bake this rustic loaf recipe in a cast iron skillet for an extra crisp crust.
Nutrition
- Serving Size: 1 slice
- Calories: 240
- Sugar: 1
- Sodium: 350
- Fat: 2
- Saturated Fat: 1
- Unsaturated Fat: 1
- Trans Fat: 0
- Carbohydrates: 50
- Fiber: 2
- Protein: 7
- Cholesterol: 5