
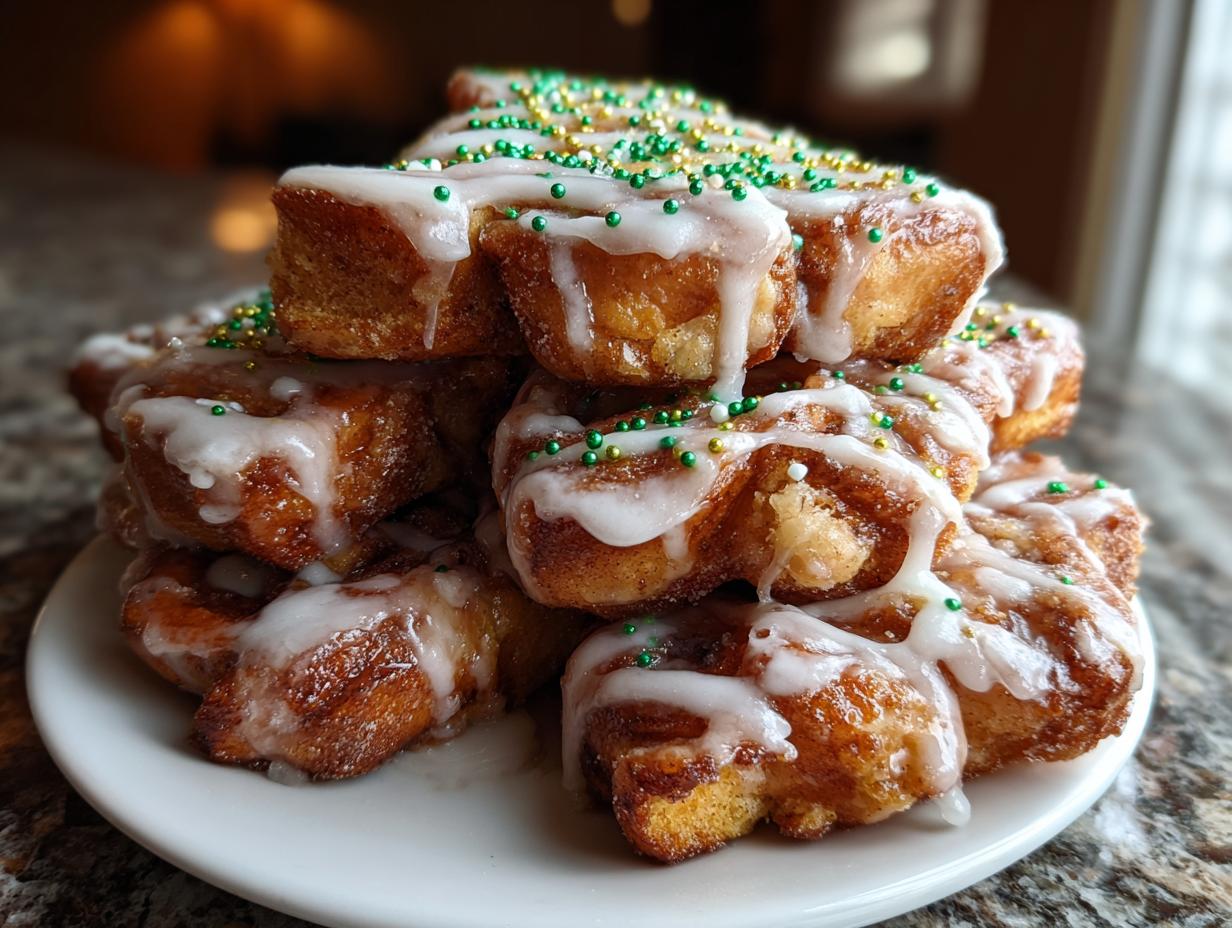
Is there anything that screams “Christmas morning” louder than the smell of warm cinnamon and sweet yeast drifting from the oven? I’m Julian, and for me, the holidays are defined by those moments—the quiet excitement before the chaos begins, a table waiting to be filled with warmth and indulgence. That’s why I developed this recipe: the Ultimate Pull-Apart Christmas Tree Cinnamon Rolls. Forget fussy layering or complicated dough work; this idea takes something familiar and transforms it into the most stunning centerpiece you could ask for. Trust me, when you pull back that first gooey roll beneath the canopy of green sprinkles, you’ll know you’ve created a culinary memory. These christmas tree cinnamon rolls are designed to be the absolute star of your Christmas breakfast ideas, whether you’re feeding a crowd or just making Christmas breakfast special for the immediate family.
- Why You Will Make These christmas tree cinnamon rolls Every Year
- Gathering Ingredients for Your christmas tree cinnamon rolls
- Step-by-Step Guide to Shaping your christmas tree cinnamon rolls
- Finishing Touches: Icing and Decorating Your Festive Pastry Treats
- Tips for Success with Shaped cinnamon rolls
- Make Ahead & Storage for Your christmas tree cinnamon rolls
- Variations on the christmas tree cinnamon rolls Centerpiece
- Frequently Asked Questions About christmas tree cinnamon rolls
- Estimated Nutritional Data for Glazed Holiday Breakfast
- Estimated Nutritional Data for Glazed Holiday Breakfast
Why You Will Make These christmas tree cinnamon rolls Every Year
Listen, holidays are busy, right? We want stunning results without spending all Christmas Eve wrestling with yeast. That’s the genius here! These christmas tree cinnamon rolls deliver that show-stopping visual punch with shockingly little effort. They are truly the definition of festive pastry treats that get the job done.
Here’s why this will be your new go-to for fun family Christmas morning food:
- It’s a Visual Wow: Seriously, it looks like you spent hours arranging and decorating, but you didn’t! It’s instantly recognizable and perfect for photos.
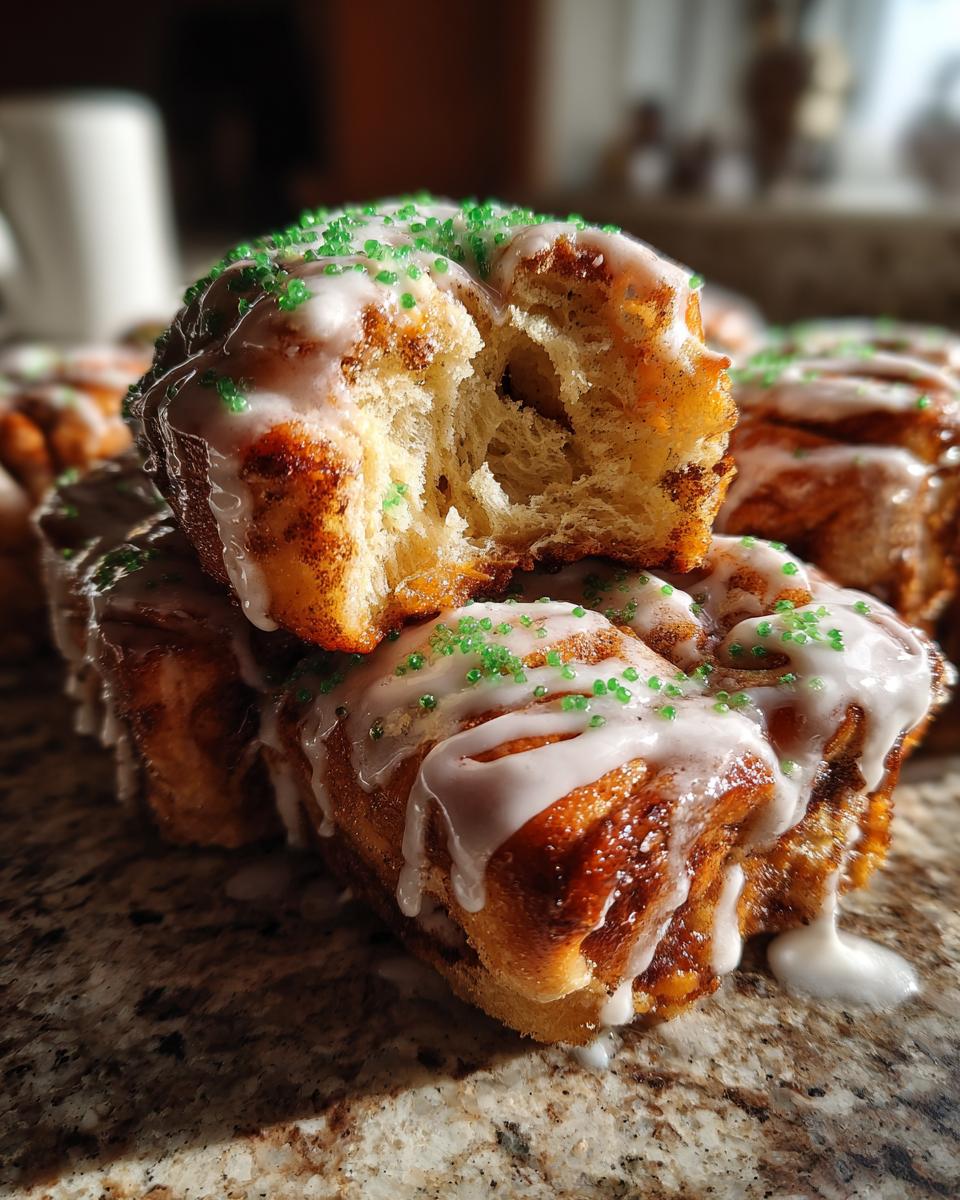
- The Pull-Apart Factor: Who doesn’t love peeling off a warm, gooey roll straight from the center? It feels communal and comforting.
- Speedy Assembly: Even if you opt for your favorite homemade cinnamon rolls dough, the shaping takes mere minutes. If you go with store-bought, you’re done prepping before your coffee even finishes brewing!
- Incredible Aroma: That burst of cinnamon when it comes out of the oven? That’s the smell of Christmas morning settling in nicely.
I promise you, once you’ve seen the smiles this centerpiece generates, you’ll be itching to whip up another batch next year. And hey, if you want something else easy and festive to serve alongside it, check out my recipe for easy homemade eggnog recipe!
Gathering Ingredients for Your christmas tree cinnamon rolls
Okay, this is where the magic starts, and honestly, this recipe is kind to everyone! Whether you’re a dedicated scratch baker or just looking for a fantastic short-cut for a holiday brunch recipe, this blueprint works. My philosophy about food is always about accessibility, so we respect both options here. The key is having everything measured out before you start arranging—it keeps the butter from getting too warm.
When I first made these, I used the store-bought tubes because I was running on fumes, and they were perfect! If you’re feeling ambitious and want to use your own dough, perhaps a recipe like my soft homemade cinnamon raisin bread recipe as a base, that’s amazing too! Just make sure you have enough dough rolled and ready to go.
For the Cinnamon Roll Base
This is the foundation of your entire tree. If you’re using store-bought tubs, you’re looking for that standard 12.4 ounce package, which usually yields about 8 decent-sized rolls, but for a nice full tree shape, I always grab a little extra dough.
- 1 can (12.4 oz) refrigerated cinnamon roll dough (This is our base shortcut!)
For the Brown Sugar Cinnamon Brush
This is what separates a good, gooey cinnamon roll from a GREAT one. We’re not just relying on the filling inside the tube; we’re bathing the outside in extra warmth. This layer caramelizes beautifully against the baking sheet.
- 1/4 cup unsalted butter, melted—make sure it’s truly melted, not just soft
- 1/4 cup packed light brown sugar—packed tight, that molasses richness is vital
- 1 tablespoon ground cinnamon
- 1/4 cup chopped pecans or walnuts (optional)—I love the crunch, but skip these if you have nut allergies!
For the Simple Vanilla Glaze and Decoration
We keep the icing super straightforward so nothing competes with that glorious cinnamon flavor. The decorating part is where the kids always jump in—it’s the best part of baking with kids Christmas morning!
- 1/2 cup powdered sugar (I sift mine, trust me, it keeps it smooth)
- 1 tablespoon milk or cream (start with less, you can always add more!)
- 1/4 teaspoon vanilla extract
- Green sprinkles or colored sugar (for decoration—these are our little edible ornaments!)
Step-by-Step Guide to Shaping your christmas tree cinnamon rolls
This is where the fun really kicks off, and honestly, it’s so straightforward that you won’t even need the kitchen timer running non-stop. We want that beautiful, interconnected look—that’s why we focus on arrangement rather than fussing over making the dough from scratch. Remember, a great presentation makes any holiday brunch recipe feel special!
Preparing the Dough and Oven
First things first: grab a large baking sheet. I mean large! If you stack these too tightly on a small pan, they’ll merge into one big cinnamon blob instead of looking like handsome little trees. Give that sheet a good grease—I’m a big fan of using a little non-stick cooking spray here. Preheat your oven exactly how your dough package tells you, usually right around 375°F (190°C).
Next, open up your dough. Carefully unroll the whole sheet of dough. Now, here’s the cutting part: Slice the dough into individual rolls. We usually aim for about 12 to 15 rolls total, depending on how big you want this showstopper to be. Separate them completely—we need that space so they can expand and touch neatly while baking.
Arranging the christmas tree cinnamon rolls Shape
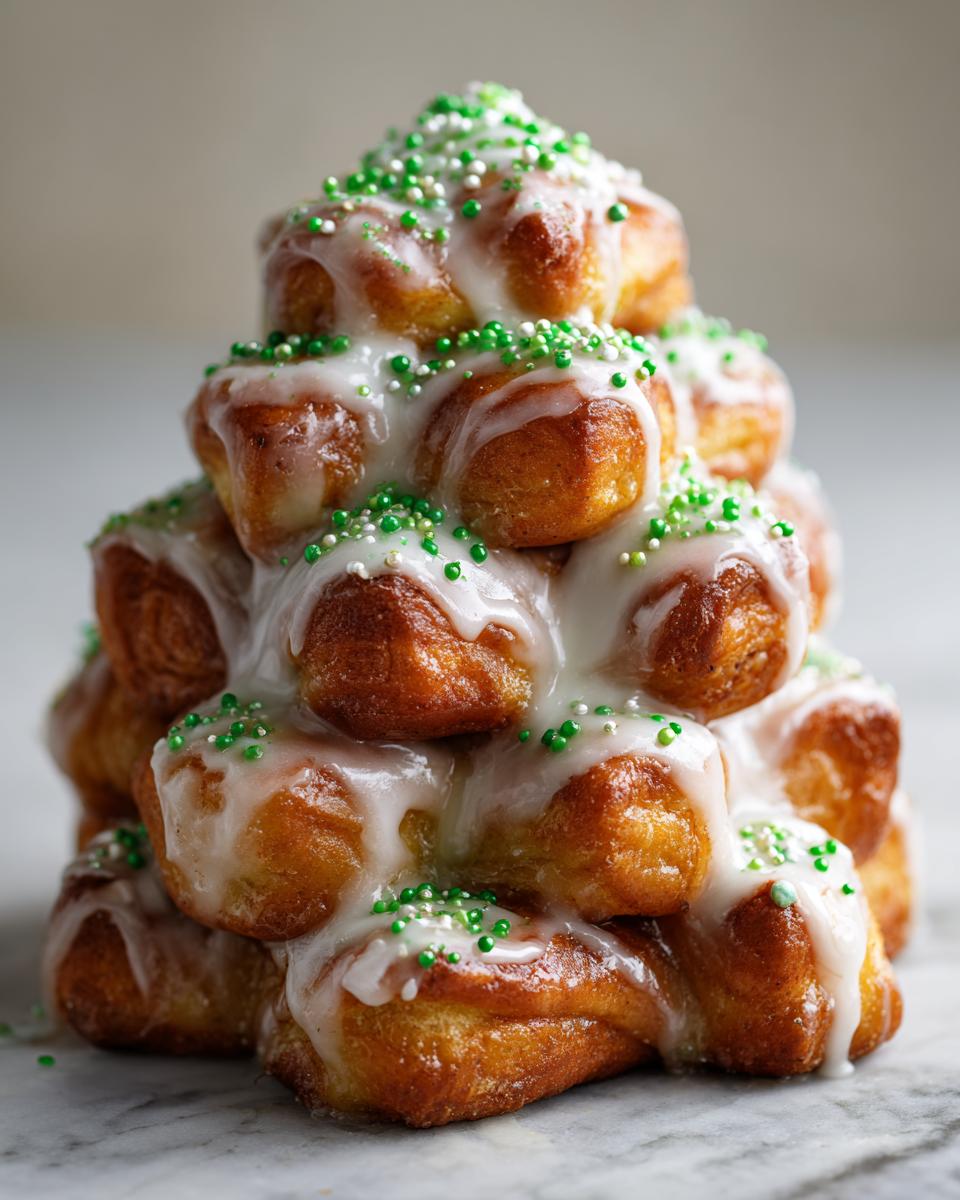
This is the most important step for that perfect centerpiece look! We are building a triangle, folks. Start at the very top point of where your tree will sit on the baking sheet. Place just **one single roll** right there—that’s the treetop ornament!
Below that first roll, lay down a row of two rolls, making sure they are touching side-by-side. Then, a row of three rolls underneath that. Keep adding wider rows (four, then five, perhaps even six depending on your pan size) until you have a clear, sturdy triangle shape spanning most of your baking sheet. This careful festive dough arrangement ensures you pull apart a beautiful tree when it’s done.
Applying the Butter Mixture and Baking
Now for that flavor bomb! Take your melted butter, brown sugar, and cinnamon mixture—the one we mixed earlier—and gently brush it evenly over the top and exposed sides of every single roll in your little arrangement. If you’re adding pecans, scatter them right over this sugary coating now. They’ll toast up nicely!
Slide that sheet into your preheated oven. Bake time is usually 15 to 20 minutes. You’re looking for them to be nicely puffed up and golden brown on top. If you see the edges start to look dark quicker than the center, give that sheet a quick half-turn halfway through. Speaking of easy baking, if you want something smaller later, check out how I make cinnamon roll bites recipe quick easy!
Pro Tip: If you want to see how others construct this, the recipe I often reference for this quick method is available over at Rumbly Tumbly, which is a great starting point right here.
Finishing Touches: Icing and Decorating Your Festive Pastry Treats
The oven timer goes off, and that incredible aroma of baked dough and caramelized sugar hits you—that’s the signal! Before you dive in, though, we need that sweet, shiny topping to seal the deal. This is where our decorated holiday pastries truly shine!
First things first: Patience, my friend. You have to let the tree cool for just a minute or two right on that baking sheet. If you try to move it immediately, especially if you squeezed the rolls together really tightly, you risk tearing the delicate links between them. Five to ten minutes is perfect. They should be warm, but firm enough to hold their shape when you slide a spatula underneath.
While that’s happening, let’s whip up that simple glaze. Remember the ingredients? We’re just marrying powdered sugar, a splash of milk or cream, and vanilla. I like to do this in a little mug. Start with just a teaspoon of liquid and whisk like crazy. You want it thick enough that it doesn’t immediately run off the entire tree, but fluid enough that it drips down the sides between the rolls. If it seems too thick? Add milk drop by drop. If it’s too thin, add a tiny bit more powdered sugar. If you want a variation on vanilla, my full vanilla buttercream frosting recipe easy is wonderful here, but for speed, the simple drizzle wins!
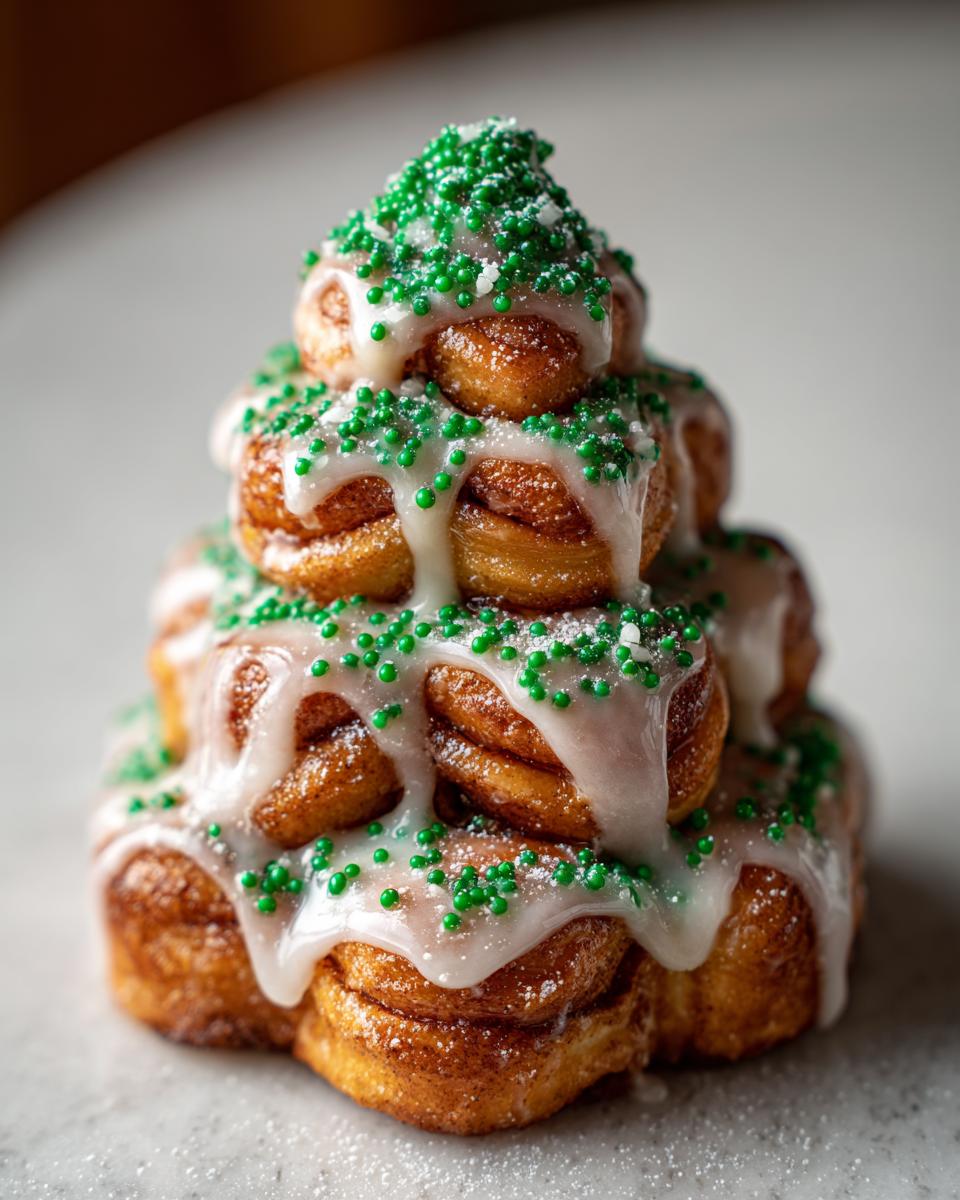
Once you’re happy with the consistency, take your icing and drizzle it generously back and forth across the top of the warm tree. Don’t be shy! A little bit will melt right in, making those fissures between the rolls gooey and amazing. Hit it immediately with your green sprinkles or colored sugar while the glaze is still wet. Think of those sprinkles as your tiny, bright Christmas lights and ornaments! That final pop of color truly makes this centerpiece unforgettable. Then, grab a fork and tear off that top section—the star of the tree—because no one can resist the first piece!
Tips for Success with Shaped cinnamon rolls
When you’re dealing with something this visual, you want it to look exactly how you planned! Since we are making a “pull-apart” centerpiece, we have to manage how much those glorious, gooey things spread during baking. I learned a few tricks over the years that save this recipe from looking like a melted blob by the time it hits the table. These little nuggets of truth come straight from keeping my recipes reliable for your kitchen!
Here are the things I absolutely insist you pay attention to:
- Don’t Fear the Dough Hug: This is crucial for the pull-apart effect. When you arrange your individual rolls into the triangle shape, they need to be touching. If you leave large gaps, they bake into individual buns instead of one cohesive tree. When you brush on that butter and sugar mix, it acts like glue, encouraging them to bond beautifully. They should just barely kiss each other when you place them on the pan.
- The Parchment Paper Lifesaver: Even though we are baking cinnamon rolls, which are usually fatty, sometimes the sugary bottom can still stick stubbornly, especially if you used a homemade butter mixture. I learned early on that for any bread or roll that needs to be presented whole, parchment paper is your best friend during the transfer. You can gently lift the entire tree onto a beautiful serving platter after only about five minutes of cooling, minimizing the risk of the bottom layer sticking and breaking your lovely shape.
- Glaze Consistency Check: If you want that beautiful drizzle look—where the icing runs down but still has opaque definition—you need to mix your glaze properly. If you add too much milk, it vanishes into the warm rolls, and you just get a sticky surface instead of a pretty topping. Use way less liquid than you think you need initially, and then slowly add more until the mixing spoon leaves a distinct trail through the topping. Too thin, and you might want to whisk in an extra tablespoon of powdered sugar. Save those thinner drizzles for when you’re making something like easy creamy one-pot pesto pasta, not for this sweet centerpiece!
- For a Fuller Tree: If your rolls (especially those store-bought ones) tend to spread out horizontally instead of rising up, you can combat that by chilling the arranged rolls in the fridge for 15 minutes *before* brushing them with the butter mix and baking. A slight chill helps them hold their shape just a little longer in that initial blast of oven heat. For more inspiration on fun Christmas food shapes, check out what my friends over at Recipes by Aileen are doing over here!
Make Ahead & Storage for Your christmas tree cinnamon rolls
One of the biggest secrets to a peaceful Christmas morning, or any big holiday brunch, is getting things done the night before. I totally get it; you don’t want to be wrestling with sticky dough when everyone else is opening presents! The good news is that these christmas tree cinnamon rolls are fantastic candidates for a make ahead Christmas breakfast plan.
This is a game-changer, especially if you’re using refrigerated dough because it means you just assemble, cover, and chill. You can enjoy your morning coffee while your stunning centerpiece is doing all the hard work in the oven! For more tried-and-true morning prep, you should definitely look at my recipe for overnight oats easy make ahead breakfast for lighter options.
Assembling the Tree the Night Before
Go through Step 1 and Step 2 exactly as written: Preheat the oven (though you won’t use it yet!), grease your baking sheet, cut the rolls apart, and arrange them into that perfect tree shape. Make sure they are kissing closely so they bond well!
Now, here is where we pause the process. Instead of brushing them with the butter mixture, leave them completely bare. Cover the entire baking sheet tightly—I mean *tightly*—with plastic wrap. You can even wrap it twice just to be safe from any fridge smells. Pop this entire setup into the refrigerator. They can chill like this for up to 18 hours. They might look a little sad and deflated when you first pull them out, but don’t worry!
Crucially, before you do anything else when you wake up on Christmas morning, pull that sheet out of the fridge and let it sit on the counter while the oven fully preheats to 375°F (190°C). This 30-minute warm-up time is essential so the dough relaxes a bit before the heat hits it. Once they look slightly puffy again, proceed directly to brushing them with the brown sugar butter mixture and baking as directed. Do NOT add the glaze until they are totally baked!
Storing Leftover Cinnamon Roll Trees
Okay, maybe you made yours too big, or maybe the family just couldn’t finish the whole glorious tree. That happens! Luckily, these hold up well.
Once the tree is completely cooled (and *after* you’ve drizzled on the glaze—the glaze helps seal in moisture), you need an airtight container. Wrap any leftovers tightly in plastic wrap first, then tuck them into an airtight food container. They stay wonderfully soft at room temperature for about two days. If you need to keep them longer, the fridge is the place to go for up to five days.
Reheating for Maximum Gooeyness
Who wants a cold cinnamon roll? Not me! To bring that fresh-baked warmth back, I always recommend the microwave for speed, especially if you’re just reheating a single roll. Place a slice on a microwave-safe plate and heat it for about 15 to 20 seconds until it’s steaming gently.
If you want to reheat a larger section or the whole cooled tree, the oven is better for texture. Wrap the remaining tree loosely in foil—this keeps the icing from burning or getting too crunchy—and place it in a 300°F (150°C) oven for about 10 to 15 minutes until heated through. That warmth will bring back all that wonderful gooeyness!
Variations on the christmas tree cinnamon rolls Centerpiece
Now that you’ve mastered the classic look—the warm cinnamon base topped with that bright green sprinkle garland—it’s time to have some fun! This recipe is so sturdy and simple, it begs for personalization. It easily adapts for different flavor profiles, making it adaptable for any spread, whether you’re looking for something to complement a savory breakfast or just want to switch things up from the usual. It’s perfect when thinking about easy, customizable holiday brunch recipes.
Here are a couple of ways I like to jazz up my tree depending on the mood:
Citrus Zest Brightens the Glaze
Cinnamon and orange are such heavenly partners, especially during winter. If you happen to have a fresh orange handy, use it! Before you mix your simple vanilla glaze, use a microplane zester to grate about a teaspoon of zest right into your powdered sugar. Then, instead of using plain milk, substitute fresh orange juice for half of the required liquid.
This adds a beautiful, bright lift that cuts through the butter and sugar wonderfully. If you love that bright, fruity spice combination, you might also want to try out my recipe for cranberry orange cake recipe moist zesty later in the season! It uses a similar balancing act between rich flavor and tart brightness.
Swap the Nuts and Add Toffee
We talked about using pecans or walnuts in the butter brush layer, but you can easily switch those out. For a sweeter, chewier bite, skip the nuts entirely and instead, sprinkle a layer of crushed toffee bits (like Heath bars) over the butter mixture before baking. When those bake, they melt slightly and create little pockets of crunchy, buttery caramel throughout the rolls. It’s dangerously good!
Alternatively, if you want something a bit more decadent, melt a few butterscotch chips along with the butter for the brush layer. It really enhances the gooey factor—and trust me, there’s never too much gooeyness on Christmas morning!
The Sprinkles Make the Tree
The green sprinkles are iconic, but don’t feel locked into them. If you’re serving this to adults who appreciate a little elegance, try using simple sanding sugar in metallic colors—gold and silver—instead of the bright green. It gives the tree a sophisticated, frosted look while still signaling that it’s a special occasion pastry.
If you have kids eagerly awaiting the decorating phase, have them make a “candy garland.” Use tiny, round, silver dragees or small red M&Ms (or any small, round candy) and place them strategically along the gaps between the un-iced rolls before the glaze goes on. It looks exactly like shimmering garland draped over the tree! Chloe at Cooking by Chloe has some gorgeous examples of unique decorating styles if you need visual inspiration for your centerpiece over here.
Frequently Asked Questions About christmas tree cinnamon rolls
I know baking for the holidays can bring up a million little questions, especially when you’re trying a new visual recipe like this centerpiece. I’ve baked this batch more times than I can count, whether I was rushing for a busy morning or teaching a niece how to cook, so let me save you some guesswork. These tips should make your easy Christmas baking project totally stress-free!
Can I use homemade dough instead of the store-bought tubes?
Absolutely, you can! If you have a favorite recipe for homemade dough—maybe one with extra butter or whole wheat flour—go for it. The only real difference is the quantity you need. Since the store-bought version is usually pre-cut into uniform rolls, you’ll need to roll out your homemade dough into a thick sheet (maybe about 1/2 inch thick) and then cut those shapes yourself. Aim for roughly 12 to 15 uniform circles of dough, making sure they are all roughly the same size so they bake evenly into that tree shape. Just give your homemade dough a little extra time to proof before you head into the shaping step!
What if my cinnamon rolls spread out too much and look like one big lump?
Oh, I hate when that happens! It usually means one of two things: either the rolls weren’t spaced closely enough together initially, or your dough was already too warm when it went into the oven. To fix this next time, make sure you leave just a tiny bit of space (like a pinky-finger width) between each roll when you arrange them on the pan—they need to touch but not be squished. And if you suspect your kitchen is warm or you’re making this ahead, chill the arranged tray in the fridge for 15 minutes before baking. That cool dough body holds shape better when it hits those hot oven walls!
How do I make the tree look fuller and taller, not flat?
This is all about the base layer and the topper, just like decorating a real tree! You want to arrange the rolls snugly (as we discussed in the tips section) so they push up against each other, forcing them to rise vertically rather than spreading horizontally. The secret weapon for a fuller look is often using an extra roll or two. If you think you have enough for your triangle, add one more row at the bottom, and definitely make sure your treetop piece is sitting up tall. For a really dramatic look, some people even stack two smaller rolls right on top of each other for the very peak!
Can I make this a savory breakfast treat instead of sweet?
That is a fun question! While the recipe is designed around that creamy cinnamon filling, you could certainly turn this into a savory pull-apart bread, though it wouldn’t be a *cinnamon* roll anymore. You’d skip the sweet dough and use a standard refrigerated biscuit dough instead. Then, instead of the brown sugar brush, you’d brush it with melted butter mixed with garlic powder, dried herbs like thyme and rosemary, and maybe top it with shredded Gruyère cheese before baking. It would make a fantastic centerpiece for a holiday brunch, just skip the vanilla glaze entirely! If you are looking for savory, quick appetizers, you might want to check out my recipe for easy pizza bites recipe quick homemade bombs.
Estimated Nutritional Data for Glazed Holiday Breakfast
I always like to give you a ballpark idea of what you’re eating when you dive into one of these magnificent holiday treats. Remember, these glazed holiday breakfast figures are just estimates. If you use homemade dough made with whole wheat flour or skip the icing entirely, your numbers will change! These figures are based on a standard portion size—which, let’s be honest, is probably going to be way bigger than one slice when everyone dives in!
Here is what you can generally expect from one generous serving of these christmas tree cinnamon rolls:
- Serving Size: 1 slice (about 1/8th of the tree)
- Calories: 380
- Sugar: 28g (That’s the fun part!)
- Fat: 18g
- Carbohydrates: 50g
- Protein: 5g
Please know that this data assumes you are using the standard refrigerated dough and the full glaze as listed in the recipe. If you’re trying to balance out your holiday feasting, look up some lighter fare like my ideas for healthy breakfast ideas, but on Christmas morning? Go ahead and enjoy that beautiful, warm slice of tree!
PrintUltimate Pull-Apart Christmas Tree Cinnamon Rolls: Easy Holiday Centerpiece

Create a stunning, festive centerpiece for your Christmas morning with these pull-apart cinnamon rolls shaped like a Christmas tree. This recipe works well with store-bought dough for quick assembly or homemade dough for a richer flavor.
- Prep Time: 15 min
- Cook Time: 20 min
- Total Time: 35 min
- Yield: 8 servings 1x
- Category: Breakfast
- Method: Baking
- Cuisine: American
- Diet: Vegetarian
Ingredients
- 1 can (12.4 oz) refrigerated cinnamon roll dough (or equivalent homemade dough)
- 1/4 cup unsalted butter, melted
- 1/4 cup packed light brown sugar
- 1 tablespoon ground cinnamon
- 1/4 cup chopped pecans or walnuts (optional)
- 1/2 cup powdered sugar (for icing)
- 1 tablespoon milk or cream (for icing)
- 1/4 teaspoon vanilla extract (for icing)
- Green sprinkles or colored sugar (for decoration)
Instructions
- Preheat your oven to the temperature specified on your cinnamon roll dough packaging, usually around 375°F (190°C). Lightly grease a large baking sheet.
- Unroll the cinnamon roll dough. Cut the rolls into individual pieces. You will need about 12 to 15 rolls depending on the size of your tree.
- Arrange the rolls on the prepared baking sheet in the shape of a large triangle or Christmas tree. Place one roll at the top for the tree topper. Arrange the remaining rolls below it in progressively wider rows, leaving small gaps between them so they can expand and touch while baking.
- In a small bowl, mix the melted butter, brown sugar, and cinnamon. Brush this mixture evenly over the tops and sides of the arranged cinnamon rolls. Sprinkle chopped nuts over the top if you are using them.
- Bake according to the package directions, usually 15 to 20 minutes, or until the rolls are golden brown and cooked through.
- While the rolls bake, prepare the glaze. Whisk together the powdered sugar, milk, and vanilla extract until smooth. Add more milk if you prefer a thinner glaze.
- Remove the baked tree from the oven and let it cool on the baking sheet for 5 to 10 minutes.
- Drizzle the prepared icing generously over the warm cinnamon roll tree.
- Immediately decorate with green sprinkles or colored sugar to resemble ornaments and garland.
- Serve warm as a fun family Christmas morning food centerpiece.
Notes
- For a make-ahead Christmas breakfast, assemble the rolls in the tree shape on the baking sheet, cover tightly with plastic wrap, and refrigerate overnight. Add the icing after baking.
- If using store-bought dough, this is a great recipe for baking with kids as the shaping and decorating are simple.
- To make the tree look fuller, you can use two cans of dough and arrange them tightly together.
Nutrition
- Serving Size: 1 slice
- Calories: 380
- Sugar: 28g
- Sodium: 450mg
- Fat: 18g
- Saturated Fat: 7g
- Unsaturated Fat: 11g
- Trans Fat: 0g
- Carbohydrates: 50g
- Fiber: 1g
- Protein: 5g
- Cholesterol: 20mg