
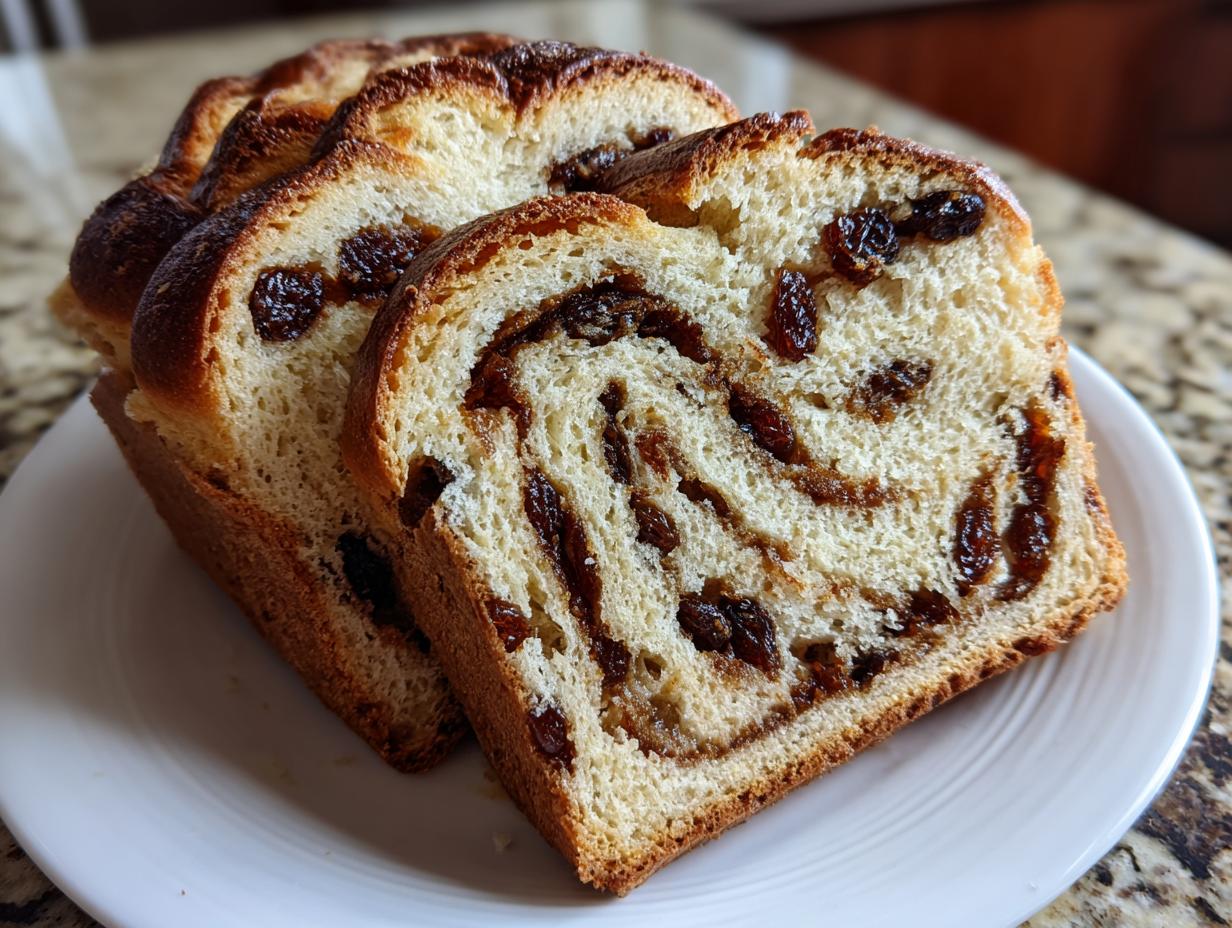
Oh, there is absolutely nothing that beats that welcoming, warm scent that fills the entire house when cinnamon raisin bread is baking. Seriously, that aroma is the definition of comfort for me, and it takes me right back to the simple, joyful meals my grandmother taught me to create. We aren’t messing around with dry, crumbly store-bought stuff here. My whole goal with this Homemade Raisin Bread Recipe is pure fluffiness—a soft texture that practically melts, coupled with those perfect, visible swirls of cinnamon sugar that don’t ooze out halfway through the bake.
If you’re looking for that truly cozy weekend baking project, this is it. Trust me, achieving that beautiful cinnamon swirl and incredible softness is easier than you think, even if you’re new to baking bread from scratch. Let’s get this sweet loaf started!
- Why This Homemade Raisin Bread Recipe Delivers Comfort
- Gathering Ingredients for Your Raisin Bread Loaf
- Step-by-Step Instructions for Soft Raisin Bread
- Tips for Success When Baking Bread From Scratch
- Storage and Reheating Instructions for Your Loaf
- Variations on the Classic Raisin Bread
- Frequently Asked Questions About Making Raisin Bread
- Serving Suggestions for Warm Homemade Bread Aroma
- Estimated Nutritional Data for This Sweet Loaf Recipes
- Share Your Raisin Bread Baking Experience
- Share Your Raisin Bread Baking Experience
Why This Homemade Raisin Bread Recipe Delivers Comfort
I know you’re looking for that perfect sliceable loaf, and I promise this raisin bread delivers exactly that: comfort baked right in. We focus on two main things here that take this recipe above the rest, ensuring you get that bakery quality without twenty trips to the mixing bowl. If you loved how soft those best soft, buttery dinner rolls turned out, you’ll adore this texture!
- It’s the ideal weekend baking project that fills your kitchen with the most incredible smells.
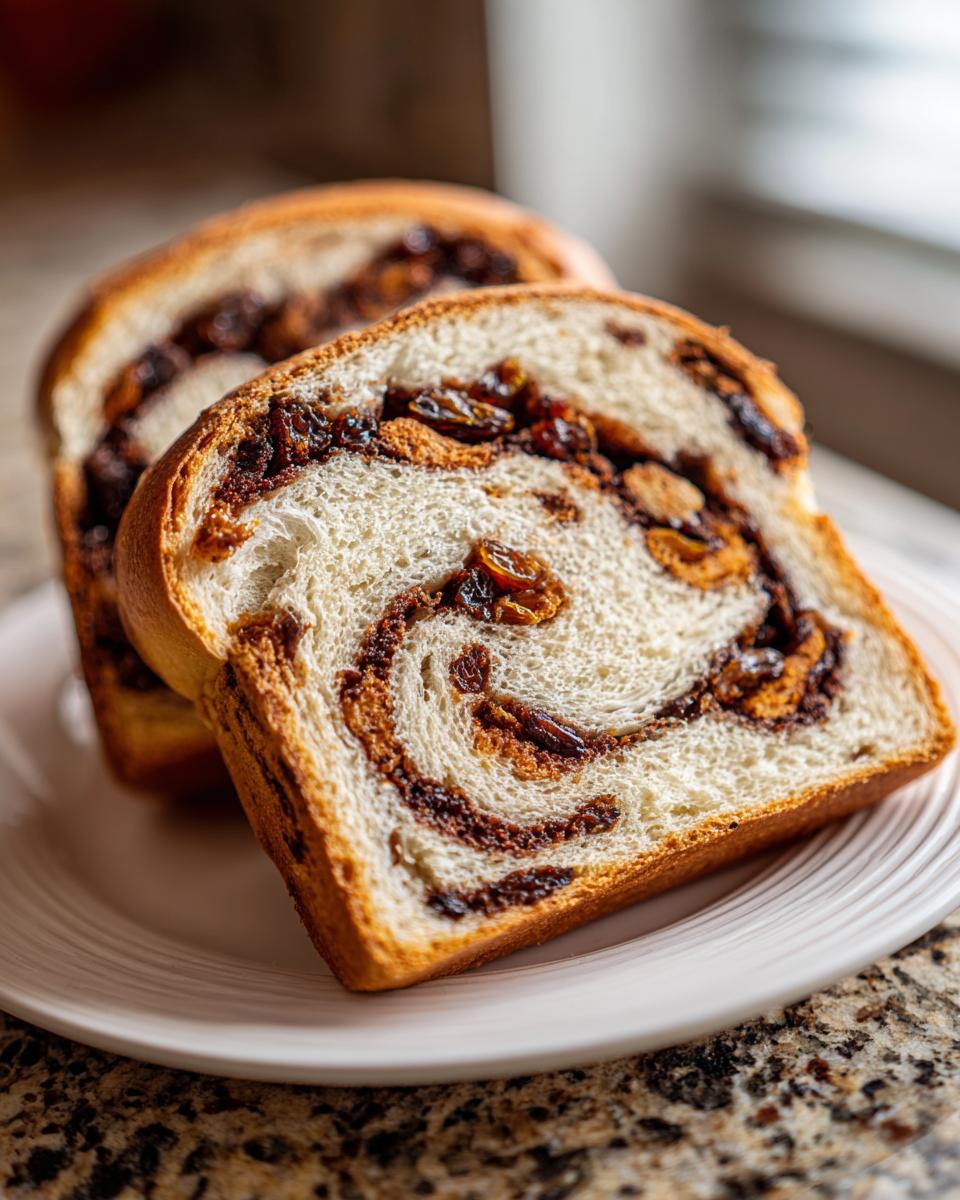
- The resulting loaf is tender, rich, and perfect for toasting.
Achieving the Soft Breakfast Bread Texture
The softness comes from using milk instead of just water, which adds a little fat and richness, making it a true soft breakfast bread. Plus, we give that dough a good 10 minutes of kneading. That work develops the gluten just right, giving it structure so it can rise high but stay unbelievably springy inside. Don’t skimp on the butter, either!
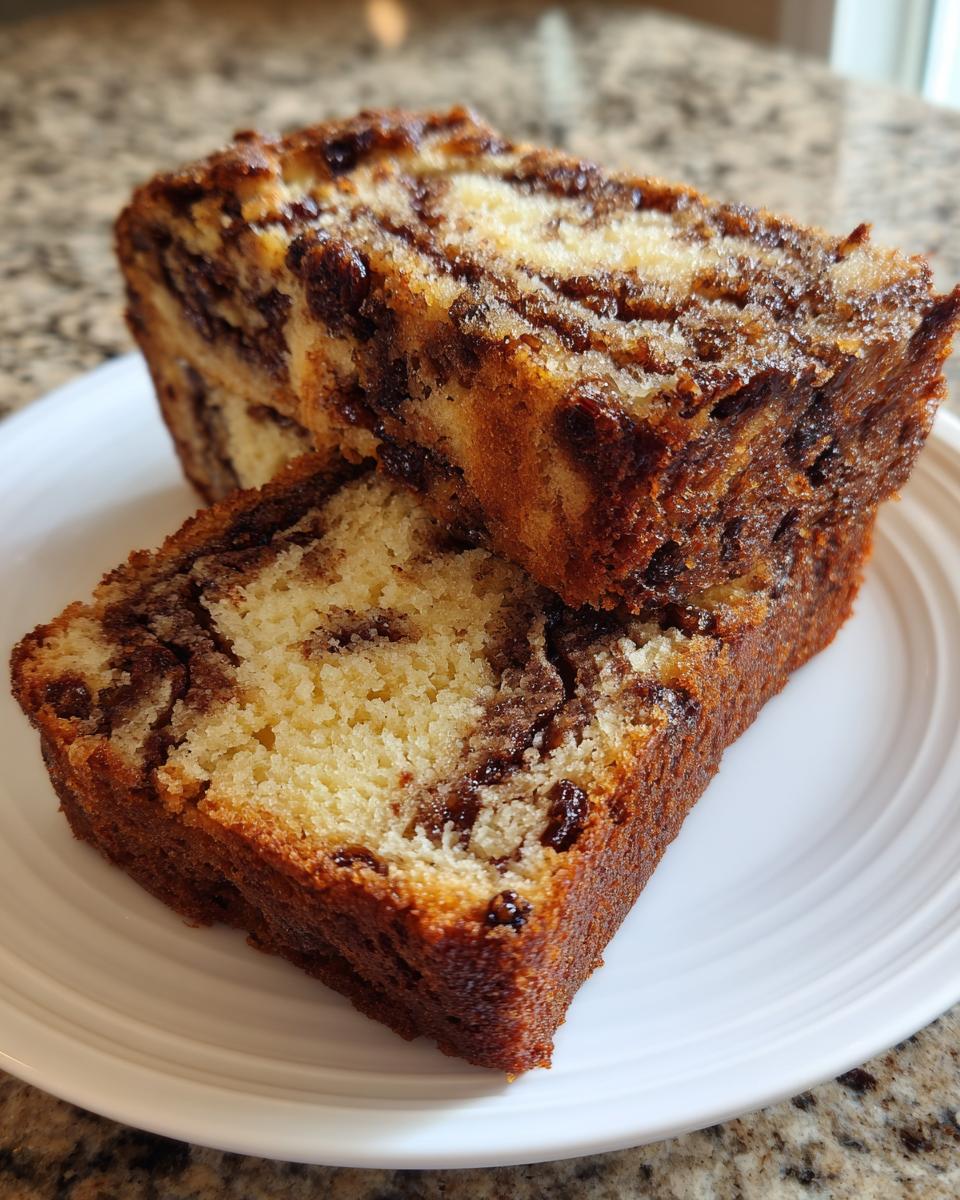
The Secret to the Best Cinnamon Swirl Bread
Everyone wants that giant, beautiful swirl, right? The trick is in the layering. We use softened butter—not melted—to “glue” the cinnamon sugar mixture down onto the rolled-out dough. This prevents the sugar from just sinking right through the bottom layer when you roll it up. This technique ensures you get the best cinnamon swirl bread look with fewer gaps and zero messy leaks onto your loaf pan.
Gathering Ingredients for Your Raisin Bread Loaf
Okay, before we get into the actual magic—the mixing and shaping—we need to get our troops ready! I always lay out every single item on the counter first. It just makes the whole process smoother, trust me. And remember my biggest tip for baking bread from scratch: make sure that egg and milk are at true room temperature; it makes a huge difference in how the yeast wakes up.
Here is exactly what you’ll need for one glorious loaf. Pay close attention to those raisins; we have a quick step to plump them up before they go into the mixing bowl.
- 1 cup warm milk (aiming for 105-115°F—too hot and you kill the yeast!)
- 2 1/4 teaspoons active dry yeast
- 1/4 cup granulated sugar, plus 1 teaspoon reserved for the yeast
- 1 large egg, room temperature
- 1/4 cup unsalted butter, melted
- 1 teaspoon salt
- 3 1/2 cups all-purpose flour, plus whatever you need for dusting
- 1 cup raisins, plumped first!
For the Swirl:
- 1/2 cup packed light brown sugar for swirl
- 2 tablespoons ground cinnamon for swirl
- 2 tablespoons unsalted butter, softened for swirl (this consistency is key!)
- 1 tablespoon milk for brushing the top
Step-by-Step Instructions for Soft Raisin Bread
Now we get to the really satisfying part of making raisin bread from scratch! Remember, yeast is fussy, so we treat it gently at the start. This recipe requires a little patience during the rising phases, but every minute waiting is worth it for that ultimate fluffy loaf. I always tell people, the dough will tell you when it’s ready if you just listen to it!
Activating Yeast and Mixing the Dough for Homemade Raisin Bread Recipe
Step one is all about the yeast baptism. Get that milk warm—and I mean *warm*, not hot. Think bathwater temperature, somewhere between 105°F and 115°F. Sprinkle that teaspoon of sugar and the yeast right on top. If it gets foamy and bubbly after about five or ten minutes? Success! That means your yeast is alive and ready to feast.
Next, mix in the rest of your sugar, the melted butter, and that room-temperature egg to the yeast mixture. Then, start adding the flour and salt gradually. You want to mix it until it just comes together into what looks like a shaggy mess. Don’t panic; that’s exactly where we want it before we move to the counter.
Kneading and First Rise for Fluffy Loaf Recipe
Turn that messy dough heap out onto a lightly floured board. Now, we knead! You need to work this for a good 8 to 10 minutes. You’re looking for it to feel smooth and elastic—when you poke it, it should slowly spring back. Once it looks good, fold in your plumped raisins gently, just enough until they are tucked in everywhere. You don’t want to overwork it once the fruit is in there!
Transfer the dough to an oiled bowl, twirling it around so it gets a nice little coating of fat. Cover it up—plastic wrap works great—and let it hang out in a warm spot for about an hour to an hour and a half, or until it’s doubled in size. That first rise builds all the beautiful structure that makes this a fluffy loaf recipe.
Creating the Cinnamon Sugar Swirl and Shaping the Raisin Bread
While that dough is relaxing, mix your brown sugar and cinnamon for the swirl in one bowl, and make sure your remaining two tablespoons of butter are nice and soft—Spreadable, but not greasy! Once the dough has doubled, gently punch it down—it’s so satisfying! Roll it out into a big rectangle, about 12 by 18 inches. This shape is crucial for a tight swirl.
Spread that softened butter all over the surface, edge to edge. Then, sprinkle that cinnamon-sugar mix evenly over the butter. This butter acts like super glue! Start rolling super tightly from the long side, like you’re rolling up a sleeping bag. Pinch that seam closed securely! I always tuck the ends under too for a perfect log shape before plopping it into your greased 9×5 pan, seam-side down.
Final Proof and Baking the Sweet Loaf Recipes
Cover that pan loosely again and let it have its second rise. This usually takes 30 to 45 minutes. You know it’s ready for the oven when the dough has crowned about an inch above the pan rim. Preheat your oven to 375°F while it finishes rising!
Right before it goes in, brush the top quickly with that last tablespoon of milk for color. Bake for 30 to 35 minutes. Here’s my master tip, something I learned grinding through long hours mastering Japanese Milk Bread recipes: don’t just rely on the toothpick test! If the internal temperature hits 200°F, you are golden. Pull it out, turn it onto a rack immediately, and let it cool completely before you dare try to slice into this beautiful sweet loaf.
Tips for Success When Baking Bread From Scratch
Baking any yeast bread, especially a sweet loaf like this one, sometimes feels like guesswork, but it really isn’t! These few pointers, based on what I learned from all my scribbled-down notes, will help you avoid common traps and get that perfect light texture every time you tackle this raisin bread. Don’t sweat it if your first rise isn’t exactly 90 minutes; environment plays a huge role! For instance, if you’re baking on a cool day, you might want to check out my tips for making easy homemade creamy eggnog recipe—the warmth of the spices is right up this alley!
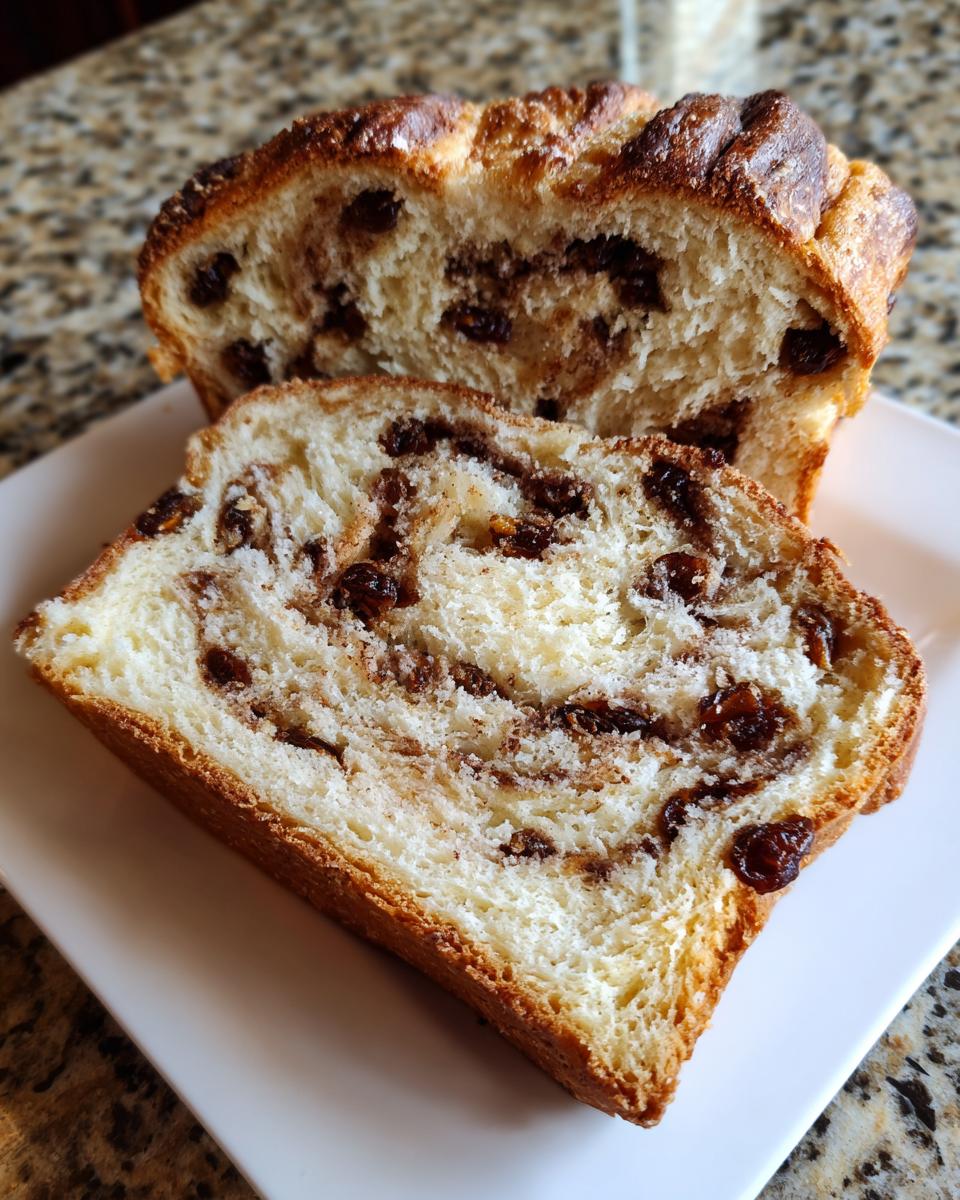
Handling Raisins and Dough Texture
You absolutely have to plump those raisins first! I’ve seen people skip this step, and honestly, it ruins the dough structure. Dry raisins act like tiny thirsty sponges inside your beautiful soft dough, sucking moisture away from the surrounding bread structure as it bakes. Soak them in hot water for ten minutes, drain them thoroughly, and pat them dry before you mix them in. This tiny extra step keeps your crumb hydrated and those raisins juicy!
Achieving a Golden Crust on Your Raisin Bread
The initial top brush with milk helps set that gorgeous color during the first half of the bake. But for that extra shine and incredible flavor, you want to try my little trick from the notes: as soon as that loaf is done and you pull it onto the wire rack, brush the top really generously with melted butter. It melts right into the hot crust, locks in softness, and gives you that beautiful, richer exterior that store-bought loaves just can’t match. It’s a small thing, but oh boy, does it make a difference!
Storage and Reheating Instructions for Your Loaf
This bread is best enjoyed the day it comes out of the oven, let’s be honest! But if you do manage to have leftovers—which takes some serious willpower—keeping it fresh is easy. Once the loaf is completely cool (and this is important; if you wrap it warm, it steams and gets gummy), wrap it tightly in plastic wrap, and then maybe throw that in some foil for good measure. This keeps that soft texture we worked so hard for!
If you just need a few days, it’ll last fine on the counter, but for longer? Pop it in the freezer. Wrap it up tight! It freezes beautifully, and when you’re ready for a slice, just pop that frozen piece right in the toaster. It thaws perfectly while it toasts up.
Variations on the Classic Raisin Bread
While this classic Cinnamon Raisin Bread is amazing—seriously heavenly—I always love encouraging people to treat their recipes as a starting point. Baking is flexible, right? You can easily turn this into a more artisan raisin bread feel with just a few simple additions. You don’t need a whole new recipe, just a little creativity!
My favorite little switch-up is adding toasted walnuts or pecans. Just chop about a cup of them and mix them in alongside the raisins when you are distributing the fruit in step 6. They add the best little crunch that breaks up the soft texture beautifully. For a different flavor profile, ditch the cinnamon swirl entirely and try swapping the raisins for dried cranberries and adding a tablespoon of orange zest to the main dough. That recipe is closer to my zesty cranberry orange bread, but it uses this wonderful, soft raisin bread base wonderfully! Sometimes I even just use a tiny splash of almond extract in the dough instead of vanilla for a richer, chewier result.
Frequently Asked Questions About Making Raisin Bread
Baking can sometimes bring up a lot of little questions once you get past the main steps, especially when you’re trying a new yeast recipe for the first time. I’ve gathered up some of the most common things people ask me about this loaf. Don’t forget to check out my tips on timing if that’s your main road bump! If you’re looking for quick meals later, that easy Crockpot Thai Coconut Soup is a life-saver!
Can I use the no knead raisin bread method for this recipe?
Oh, absolutely! That’s one of the great things about this dough structure. If you’re tired after a long day, you can definitely adapt this to a no knead raisin bread. Instead of kneading vigorously for 10 minutes, just mix it with a wooden spoon until it’s fully combined after you add the flour. Then, you just need a much longer first rise—think 3 to 4 hours, or even overnight slow-proofed in the fridge. You’ll want to mix the raisins in gently right before you shape it, but otherwise, the structure holds up amazingly well.
What is the best way to incorporate raisins evenly into the dough?
This is crucial for making sure you don’t end up with one giant clump of raisins in the middle of the loaf! You should always wait until the dough is fully kneaded and smooth—when it passes the elasticity test—before adding the fruit. Gently toss the plumped, dried raisins on top of the dough, and then knead them in for only about 30 seconds to a minute. Just work them in until you can’t see loose raisins anymore, and then stop immediately. Overworking the dough once the raisins are in definitely deflates the air bubbles we worked so hard to build!
Can I bake this raisin bread in a bread machine?
Yes, you can! If you own a bread machine, it saves you the mixing and kneading time, which is great for faster mornings. You can add all your wet ingredients, yeast, flour, and salt right into the pan according to your machine’s manual. The raisins and the swirl ingredients (the butter, cinnamon, and sugar) are the tricky part. Most machines have an add-in dispenser for fruit, which will drop them in near the end of the kneading cycle. You’ll skip the rolling and shaping steps completely, of course, but you’ll still get those delicious flavors baked right in. It’s perfect for true beginner bread baking!
Serving Suggestions for Warm Homemade Bread Aroma
If you manage to wait until this loaf is completely cool—good job!—here are my favorite ways to truly savor that incredible warm homemade bread aroma. I always have something simple ready to spread on it, ready to go!
- A thick smear of salted, real butter when it’s just slightly warm (not hot!) is heaven, letting the butter melt right into the swirl.
- Cream cheese, slightly softened, offers a lovely, tangy contrast to the sweetness.
- Try a dollop of high-quality apricot jam; the fruit brightens up the spices perfectly.
- If you’re making extra, slice it thin and use it for French toast! Check out my recipe for French Toast Muffins if you love that flavor profile!
Estimated Nutritional Data for This Sweet Loaf Recipes
Since we are making this totally from scratch, remember that these numbers are just my best guess based on the standard ingredients we used. The exact figures can shift depending on your exact brand of flour or how much butter you use on your slices!
This data is based on a serving size of one slice:
- Calories: Approximately 210
- Fat: About 4g
- Carbohydrates: Around 40g
- Protein: Roughly 5g
- Sugar: We’re looking at about 12g in this rich, sweet loaf.
Share Your Raisin Bread Baking Experience
I absolutely love seeing how your loaves turn out! Seriously, snapping a picture of that first beautiful slice of raisin bread makes my day. Please leave your rating and any notes you have for future bakers down in the comments below. Did you add walnuts? Did you sneak a slice while it was still warm? Don’t be shy!
If you’re trying to connect with us directly or need a quick kitchen tip, feel free to send a note through the contact page. Happy baking, friends!
PrintSoft Homemade Cinnamon Raisin Bread with a Perfect Swirl

Bake a soft, sliceable homemade cinnamon raisin bread with a clean cinnamon-sugar swirl. This recipe delivers a fluffy loaf perfect for breakfast or toasting.
- Prep Time: 30 min
- Cook Time: 35 min
- Total Time: 2 hr 40 min
- Yield: 1 loaf (12 slices) 1x
- Category: Breakfast
- Method: Baking
- Cuisine: American
- Diet: Vegetarian
Ingredients
- 1 cup warm milk (105-115°F)
- 2 1/4 teaspoons active dry yeast
- 1/4 cup granulated sugar, plus 1 teaspoon for yeast
- 1 large egg, room temperature
- 1/4 cup unsalted butter, melted
- 1 teaspoon salt
- 3 1/2 cups all-purpose flour, plus more for dusting
- 1 cup raisins, plumped
- 1/2 cup packed light brown sugar for swirl
- 2 tablespoons ground cinnamon for swirl
- 2 tablespoons unsalted butter, softened, for swirl
- 1 tablespoon milk for brushing
Instructions
- In a large bowl, combine the warm milk and 1 teaspoon of sugar. Sprinkle the yeast over the top and let it sit for 5 to 10 minutes until foamy.
- Add the remaining 1/4 cup sugar, melted butter, and egg to the yeast mixture. Stir to combine.
- Gradually add the flour and salt to the wet ingredients. Mix until a shaggy dough forms.
- Turn the dough out onto a lightly floured surface. Knead for 8 to 10 minutes until the dough is smooth and elastic.
- Place the plumped raisins into the dough and knead briefly until they are evenly distributed.
- Place the dough in a lightly oiled bowl, turning once to coat. Cover the bowl with plastic wrap and let it rise in a warm place for 1 to 1.5 hours, or until doubled in size.
- While the dough rises, prepare the cinnamon swirl: In a small bowl, mix the brown sugar and ground cinnamon thoroughly.
- Gently punch down the risen dough. Turn it out onto a lightly floured surface. Roll the dough into a large rectangle, about 12 by 18 inches.
- Spread the 2 tablespoons of softened butter evenly over the surface of the dough. Sprinkle the cinnamon-sugar mixture over the butter layer.
- Starting from the long edge, tightly roll the dough into a log. Pinch the seam closed.
- Carefully place the log, seam-side down, into a greased 9×5 inch loaf pan.
- Cover the pan loosely and let the dough rise again for 30 to 45 minutes, or until it has crowned about 1 inch over the rim of the pan.
- Preheat your oven to 375°F (190°C) during the last 15 minutes of the second rise. Brush the top of the loaf lightly with 1 tablespoon of milk.
- Bake for 30 to 35 minutes, or until the top is golden brown and the internal temperature reaches 200°F (93°C).
- Remove the bread from the pan immediately after baking and let it cool completely on a wire rack before slicing.
Notes
- To plump the raisins quickly, soak them in hot water for 10 minutes, then drain and pat them dry before adding them to the dough.
- For a richer crust, brush the top of the loaf with melted butter immediately after it comes out of the oven.
- This bread freezes well once completely cooled. Wrap tightly in plastic wrap and then foil.
Nutrition
- Serving Size: 1 slice
- Calories: 210
- Sugar: 12g
- Sodium: 250mg
- Fat: 4g
- Saturated Fat: 2g
- Unsaturated Fat: 2g
- Trans Fat: 0g
- Carbohydrates: 40g
- Fiber: 2g
- Protein: 5g
- Cholesterol: 25mg