

There is simply nothing that warms a home quite like the smell of fresh bread baking. I truly believe that the ultimate comfort food isn’t a heavy main course, but rather a basket filled with warm, fluffy bread sitting right in the middle of the table. When people ask me what the most important recipe in American home cooking is, I don’t hesitate: it’s the perfect dinner roll. These aren’t complicated little knots that require hours of attention; these are, hands down, the best soft, buttery dinner rolls you will ever make, and they are surprisingly easy to manage. After spending years in professional kitchens and then traveling across the country researching classic comfort dishes, perfecting these simple rolls became crucial to what we do here at Julia Meal. You can read more about that journey on the About Us page. They are the foundation of any great family meal or holiday gathering.
- Why These Are the Best Soft Dinner Rolls You Will Ever Make
- Gathering Ingredients for Your Buttery Yeast Rolls
- Step-by-Step Instructions for Easy Dinner Rolls Recipe
- Expert Tips for Copycat Restaurant Rolls Texture
- Variations: From Parker House Rolls to Garlic Butter Rolls
- Serving Suggestions for Your Homemade Bread Rolls
- Storage and Reheating Instructions for Leftover Rolls
- Frequently Asked Questions About Making Soft Rolls
- Understanding the Nutrition in Your Buttery Rolls
- Share Your Experience Baking These Rolls
Why These Are the Best Soft Dinner Rolls You Will Ever Make
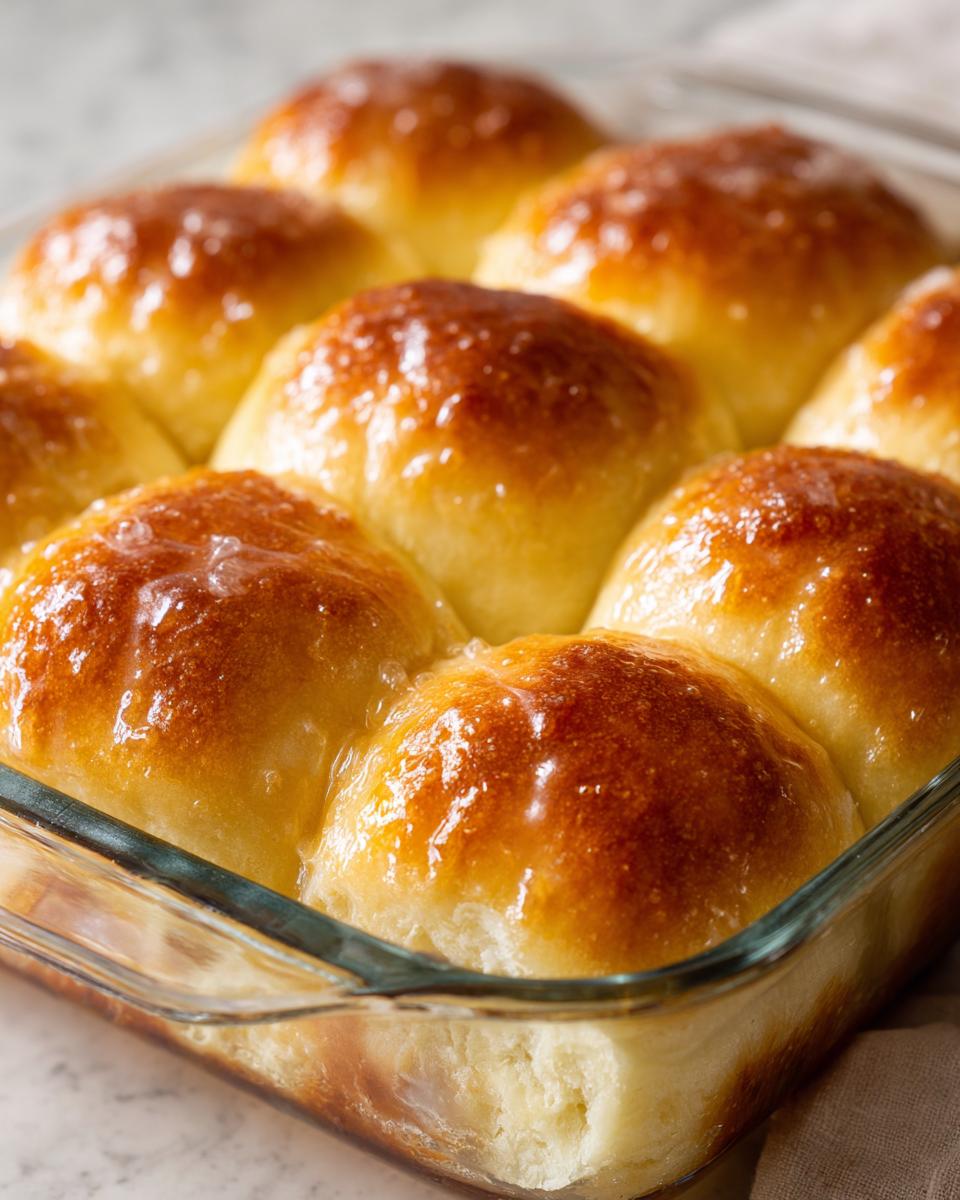
I spent a lot of time perfecting yeast recipes because bland, dry bread just doesn’t cut it at my table, especially not when you’re serving up something special. These soft dinner rolls are the closest I’ve come to bottling pure, buttery joy. They are everything you want in a side dish roll: pillowy, tender, and they seriously melt right in your mouth.
When I look at my classic recipes, these rise to the top every time, which is why I know they are excellent to keep on hand for big events—trust me, these are fantastic rolls for Thanksgiving or any time you need that unmistakable comfort.
Key Attributes of Our Fluffy Homemade Rolls
- They spoil you with unparalleled softness. If you’ve been settling for stiff, store-bought bakery items, prepare for a shock!
- The flavor is intensely buttery, which gets even better when we brush on that optional garlic topping later on.
- They manage to be incredibly fluffy without requiring hours of fussy handling. They are genuinely an easy dinner rolls recipe.
It’s the combination of the right yeast activation and the perfect amount of fat that locks in that incredible texture for days. I know you will love this recipe as much as my family does.
Gathering Ingredients for Your Buttery Yeast Rolls
Getting ready to bake is half the battle, right? With these ingredients laid out, you’re already setting yourself up for success. Don’t try to sneak in any substitutes here; for the best buttery yeast rolls, you need quality components. We are making yeast rolls from scratch, so take a minute to check your pantry!
First up, we need the yeast to wake up. Grab 1 cup of warm water—and this is important—it absolutely must be between 105°F and 115°F. Too cold, and the yeast just sleeps; too hot, and you zap it! Also, about 1 teaspoon of sugar goes in with the yeast to get it nice and foamy. For the dough itself, you’ll need 1/4 cup of granulated sugar, half a cup of unsalted butter that’s been melted, one large egg beaten lightly, and just a teaspoon of salt.
For the flour, we’re going with 3 1/2 to 4 cups of all-purpose flour. You might not use all of it, but have it ready! If you want that incredible garlic topping, mix 4 tablespoons of melted butter with about half a teaspoon of garlic powder. It’s optional, but honestly, why would you skip that?
Ingredient Notes and Substitutions for Perfect Rolls
I want every batch of these rolls to be perfect when you pull them from the oven. The type of flour really matters here. I call for all-purpose because I want that soft, pillowy interior that screams comfort food. If you swap it out for bread flour, you’ll absolutely get a great loaf, but they will be slightly chewier. That’s fine if that’s what you love, but it won’t give you that classic soft dinner roll structure.
Also, check your yeast! If it’s been in the cabinet since the Stone Age, it might not work, and then your dough won’t rise, ruining the entire batch of fluffy homemade rolls. You need active, lively dry yeast for this magic to happen. Fresh yeast is the key to making beautiful homemade bread rolls!
Step-by-Step Instructions for Easy Dinner Rolls Recipe
Alright, let’s get our hands a little messy! This is where the magic happens, and honestly, seeing this dough transform is what makes baking these easy homemade bread rolls so satisfying. We’re moving from simple ingredients to the fluffiest dinner rolls you can imagine. Don’t rush the rises, okay? That’s the secret to getting that beautiful, soft texture.
Activating Yeast and Mixing the Dough for Fluffy Rolls
First, remember that warm water temperature we talked about? Get that yeast, a tiny spoonful of sugar, and the water together in your big bowl. Watch it for about five to ten minutes until it looks foamy, like a little bubbly head on your beer. That means your yeast is awake and ready to party! Once it’s foamy, go ahead and dump in the rest of the sugar, that melted butter, the egg, and the salt. Stir that up. Now, start adding your flour, cup by cup. It’s going to look shaggy and rough at first, but then you turn it out onto your counter.
Kneading might feel like elbow grease, but it’s non-negotiable for great rolls. Work that dough for about six to eight minutes until it feels smooth and elastic under your hands. If it’s sticking too much to your floured surface, add just a little more flour until it stops clinging to your fingers.
The Rising Process for Maximum Texture in Your Rolls
Once you have that beautiful ball of dough, oil your bowl lightly and nestle the dough in there, turning it once to coat. Cover it up tight. This first rise is where the heavy lifting happens for texture. You need to let it sit in a warm spot for a good 60 to 90 minutes, or until it doubles in size. Seriously, don’t cheat this time!
If your kitchen is chilly, I sometimes turn my oven off after warming it for just two minutes, let it cool for a sec, and then place the covered bowl inside. It creates the perfect little sauna for your quick bread rolls to puff up fast, which is great when you need rolls on a shorter timeline. After it doubles, gently punch it down to release the air.
Shaping and Baking These Warm Buttery Bread Rolls
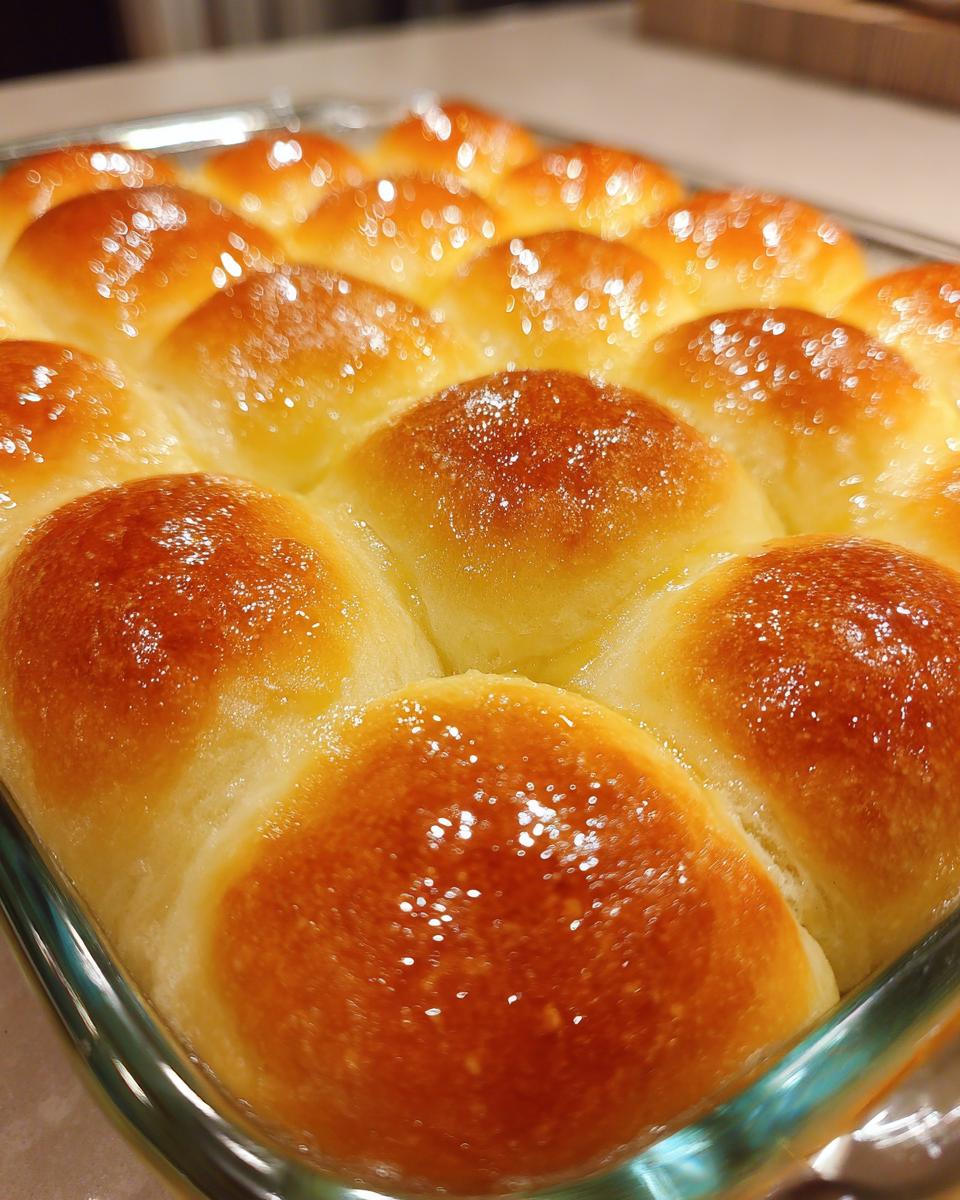
Now comes the fun part: dividing the dough. I usually get 12 to 16 pieces, depending on how big I want these warm buttery bread beauties to be. Roll each piece into a smooth, tight ball—this keeps them round and neat. Place them close together in your greased 9×13 pan. They need one more nap—about 30 to 45 minutes—until they look puffy again, touching slightly.

Preheat your oven to 375°F (190°C). They bake fast, usually 15 to 20 minutes until that golden color is perfect. Pull them out, and right away, brush them generously with that melted butter—plain or garlicky! That immediate coating is what traps the steam and keeps them impossibly soft. You can find some great tips on other bread techniques on the site, but this method is key for these specific rolls.
Expert Tips for Copycat Restaurant Rolls Texture
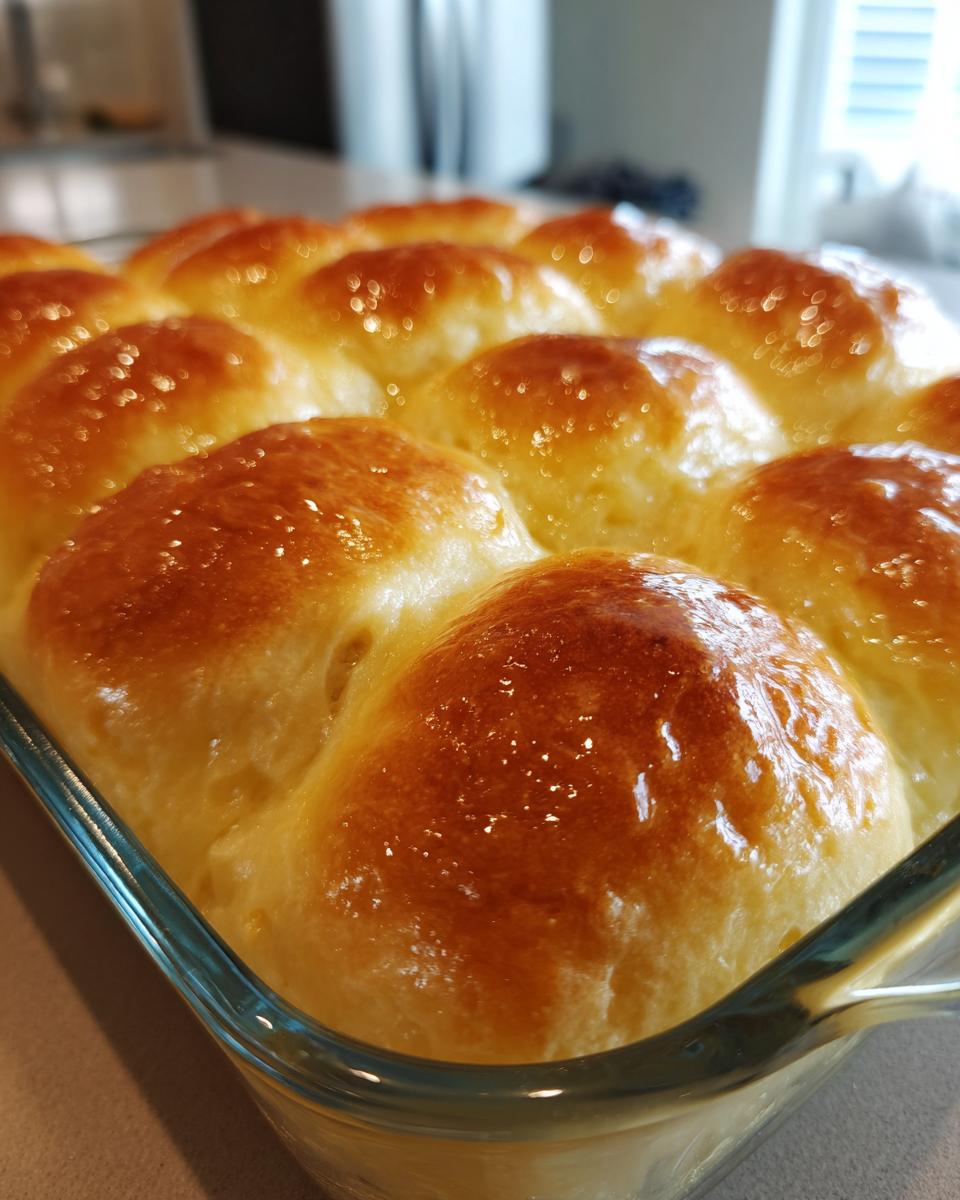
When everyone asks for that famous, melt-in-your-mouth texture, they are usually chasing that specific Texas Roadhouse rolls copycat feeling. It’s not just the dough; it’s what you do right when they come out of the heat. The secret weapon isn’t hidden in the mixing bowl—it’s the glorious, heavy layer of melted butter you brush on the second they land on the cooling rack.
I remember baking these for a big family reunion after testing recipes inspired by my Southwest travels. The difference between a good roll and a “famous” roll was that quick, hot butter bath. That butter soaks deep into the top crust, keeping the outside tender while locking in all that internal fluffiness. It’s the difference between dry bread and the ultimate warm buttery bread experience. For a recipe that shows you exactly how they achieve that famous texture, check out this guide here. Pair these buttery rolls next time you make my Garlic Parmesan Bake for a perfect pairing!
Variations: From Parker House Rolls to Garlic Butter Rolls
While I absolutely adore the simple, perfect round shape of these rolls, one thing I learned during my culinary travels is that every great base recipe should invite experimentation. These buttery yeast rolls are sturdy enough that you can adapt them easily without worrying about ruining the structure.
If you’re feeling fancy or maybe need something a bit more traditional for your spread of rolls for thanksgiving, try bending them into the classic Parker House Rolls. It’s easy! After you divide and roll your dough into balls, don’t just place them in the pan. Gently flatten each ball slightly with your hand, brush the top surface generously with melted butter, and then fold it over onto itself before pinching the edges shut. This folding technique creates those signature layers and that buttery pocket inside.
Now, let’s talk flavor boosters. Everybody loves the idea of garlic butter rolls, right? If you’re using the optional topping, ditch the powder! Trust me on this one. Mince about three cloves of fresh garlic—really fine—and let it simmer gently in your 4 tablespoons of melted butter for just five minutes before you take it off the heat. Let it cool slightly before brushing it over the hot rolls. The fresh garlic offers such a deeper, warmer aroma than the powdered stuff. It transforms these simple side dish rolls into something that tastes like it came straight from a fancy bakery.
These little tweaks keep baking fun and let you customize for any meal. If you want to see how I adapt flavor profiles in side dishes like rice, check out my recipe for easy fluffy one pot rice pilaf!
Serving Suggestions for Your Homemade Bread Rolls
Honestly, these side dish rolls are too good to save just for holidays, but they certainly steal the show at a big spread! If you are making a major feast, you absolutely need something soft and warm to sop up gravy or sauces. They pair divinely with a hearty main course, like my recipe for Creamy Smothered Chicken and Rice.
And listen, is there anything better than using the last bit of butter from these fluffy homemade rolls to scoop up a bite of cheesy goodness? Never skip the butter brush! For that perfect holiday tableau, serve these alongside creamy Garlic Mashed Potatoes. They’re the ultimate comfort pairing for whatever you’re serving.
Storage and Reheating Instructions for Leftover Rolls
Now, I know these rolls are meant to disappear immediately, but if—and I mean if—you manage to have any leftovers, you need to treat them right. We worked too hard to get that pillowy texture to let them dry out overnight!
First things first: cooling. You must let them cool completely on a wire rack before you even think about storing them. Trapping the heat in a closed container is a guaranteed way to make the bottoms soggy, and nobody wants a soggy bottom on their perfectly baked goods.
Keeping Rolls Fresh at Room Temperature
For the best quality over a day or two, store your leftover soft dinner rolls in an airtight container or a sturdy zip-top bag. Pop a paper towel in with them; it helps absorb any condensation that might try to sneak in and ruin the crust. They should stay wonderfully soft this way, especially with all that buttery goodness sealing in the moisture.
The Best Way to Freeze Homemade Rolls
If you made a huge batch for the holidays, freezing is your friend. You have to cool them completely first. Then, wrap the cooled rolls tightly in plastic wrap—go around them twice so they’re sealed tight against freezer burn. Pop that wrapped package into a heavy-duty freezer bag. They keep beautifully for about three months this way. Honestly, you can hardly tell the difference when you warm them back up!
Reviving Your Rolls to Warm Buttery Bread Status
Reheating is where you bring these back to life! If they’re just slightly stale from sitting out overnight, wrap the amount you want to eat in a piece of damp (not soaking wet!) paper towel and microwave them for about 10 to 15 seconds. That burst of steam works wonders for restoring that initial softness.
If you’re reheating frozen ones, don’t use the microwave unless you’re in a massive hurry. For the best result that returns them to that fresh-out-of-the-oven state—that perfect warm buttery bread experience—preheat your oven to a low 300°F. Toss the frozen rolls (still in their foil or a baking dish) onto a sheet pan. Bake them for about 10 to 15 minutes until they are heated all the way through. If you want that extra buttery kick, brush them with a little extra melted butter right before they finish!
Frequently Asked Questions About Making Soft Rolls
I get so many questions floating around about these rolls! Honestly, that’s wonderful because it means people are trying to bake them, and that’s what cooking is all about—experimenting and learning. Here are the top things folks ask me about getting these soft dinner rolls right on the first try. If you still have questions after this, feel free to reach out via the contact page!
Can I make these 30 Minute Rolls work faster?
I know, I know, you want that warm buttery bread right now! While this recipe is certainly faster than something like a brioche or a slow-fermented sourdough, you can’t really rush the yeast’s work, and that’s what makes them soft. If you try to cut the rising times drastically, you end up with dense, heavy little hockey pucks instead of fluffy homemade rolls. The 60 to 90-minute first rise is necessary for the yeast to develop those lovely gases that make the dough airy. My one tip for speeding it up slightly is the warm oven trick I mentioned—that warm, draft-free environment encourages faster rising without compromising the structure too much.
What is the secret to truly fluffy homemade rolls?
The secret lies in two main stages: kneading and rising. For the kneading, you have to develop that gluten network. That’s what gives the dough strength and allows it to hold the gas bubbles generated by the yeast. You need to knead until it’s smooth and passes the windowpane test loosely. But more important than that is letting it rise long enough—both times! The second rise, when the shaped rolls are puffy in the pan, is what guarantees that soft, pillowy texture you see in pictures. Don’t under-proof them!
Can I use instant yeast instead of active dry yeast in these rolls?
Yes, you absolutely can! Instant yeast is a little more forgiving since it doesn’t need to be “proofed” in the warm water first. If you want to switch to instant yeast—sometimes called rapid-rise yeast—you can skip Step 1 entirely. Just combine the instant yeast directly with your dry ingredients (flour, salt, and the rest of the sugar) and then add the warm water, melted butter, and egg mixture into that dry blend. You can usually cut the rising times down by about a third, too, making these even closer to those mythical 30 minute rolls people look for.
Understanding the Nutrition in Your Buttery Rolls
When we bake something this decadent, I know a lot of you are curious about what you’re eating, even if these buttery yeast rolls are mostly for enjoyment during holiday baking or big family meals. I always track the nutrition information for our recipes because I want you to feel good about what you’re serving. Remember, these aren’t diet food—they are celebration food!
The values below are estimated for one single roll, based on the recipe yielding 12 to 16 rolls. Please keep in mind that the exact brand of flour or the amount of butter you brush on top can change these statistics slightly. This information gives you a great baseline for knowing exactly what’s in these delicious homemade bread rolls.
- Serving Size: 1 roll
- Calories: 180
- Fat: 6g
- Saturated Fat: 3.5g
- Trans Fat: 0g
- Carbohydrates: 29g
- Fiber: 1g
- Sugar: 4g
- Protein: 4g
- Cholesterol: 25mg
- Sodium: 250mg
See? Not bad at all for something this wonderfully buttery! If you’re trying to cut back on fat while still getting that incredible texture, you can slightly reduce the amount of butter you use for brushing the tops, but I do that at my own risk because it compromises that shiny, soft finish readers love so much in these rolls!
Share Your Experience Baking These Rolls
Now that you have achieved perfection—and I mean truly perfect, unbelievably soft rolls—it’s time to share the love! Baking is such a communal act, even when we’re working solo in our kitchens. I put my heart and soul into testing every step of this recipe to make sure you get the best ever rolls recipe, but the best feedback comes directly from your table.
Did they stack up high? Did your family ask for seconds right away? Did you manage to keep any leftovers overnight? I truly want to hear about your success stories with these buttery yeast rolls.
Please take a moment to leave a rating and a comment below. Your insights help me continue refining these recipes and ensure that Julia Meal remains a trusted source for classic, heartfelt American cooking. Knowing how you adapted them—maybe you went full-on with the optional garlic butter, or maybe you stuck with the simple salted butter—helps me tailor future posts. We stand by our commitment to quality baking, and that includes transparency. You can review our general guidelines on interaction right here on our Terms of Use page.
Don’t forget to snap a picture of those gorgeous, golden homemade bread rolls and tag us on social media! Let’s celebrate this simple, beautiful act of baking comfort food together.
PrintThe Best Soft, Buttery Dinner Rolls (Easy Recipe)
Make unbelievably soft, fluffy homemade dinner rolls that taste better than store-bought. This easy yeast rolls recipe is perfect for family meals or holidays like Thanksgiving.
- Prep Time: 20 min
- Cook Time: 20 min
- Total Time: 1 hour 50 min
- Yield: 12 to 16 rolls 1x
- Category: Side Dish
- Method: Baking
- Cuisine: American
- Diet: Vegetarian
Ingredients
- 1 cup warm water (105°F to 115°F)
- 2 1/4 teaspoons active dry yeast
- 1/4 cup granulated sugar, plus 1 teaspoon for yeast
- 1/2 cup unsalted butter, melted, plus extra for brushing
- 1 large egg, lightly beaten
- 1 teaspoon salt
- 3 1/2 to 4 cups all-purpose flour
- For topping: 4 tablespoons melted butter mixed with 1/2 teaspoon garlic powder (optional)
Instructions
- Activate the yeast: In a large bowl, combine the warm water, 1 teaspoon of sugar, and the yeast. Let stand for 5 to 10 minutes until foamy.
- Mix wet ingredients: Add the remaining 1/4 cup sugar, 1/2 cup melted butter, egg, and salt to the yeast mixture. Stir to combine.
- Add flour: Gradually add the flour, one cup at a time, mixing until a shaggy dough forms.
- Knead the dough: Turn the dough out onto a lightly floured surface. Knead for 6 to 8 minutes until the dough is smooth and elastic. Add small amounts of flour if the dough is too sticky.
- First rise: Place the dough in a lightly oiled bowl, turning to coat. Cover the bowl with plastic wrap or a clean towel. Let the dough rise in a warm place for 60 to 90 minutes, or until doubled in size.
- Shape the rolls: Gently punch down the dough. Divide the dough into 12 or 16 equal pieces. Roll each piece into a smooth ball.
- Second rise: Arrange the dough balls in a greased 9×13 inch baking pan, leaving a small space between them. Cover and let rise again in a warm place for 30 to 45 minutes, or until puffy.
- Bake: Preheat your oven to 375°F (190°C). Bake for 15 to 20 minutes, or until the tops are golden brown.
- Brush with butter: Immediately after removing the rolls from the oven, brush the tops generously with the reserved melted butter mixture (plain or garlic butter).
- Serve warm: Let the rolls cool slightly before serving warm as a side dish.
Notes
- For a quick rise, place the covered dough in an oven that has been turned off but still retains residual warmth.
- If you want Texas Roadhouse Rolls copycat texture, brush the tops with melted butter immediately after baking.
- These rolls freeze well after baking; cool completely, place in a freezer bag, and reheat in the oven when ready to serve.
Nutrition
- Serving Size: 1 roll
- Calories: 180
- Sugar: 4g
- Sodium: 250mg
- Fat: 6g
- Saturated Fat: 3.5g
- Unsaturated Fat: 2.5g
- Trans Fat: 0g
- Carbohydrates: 29g
- Fiber: 1g
- Protein: 4g
- Cholesterol: 25mg