
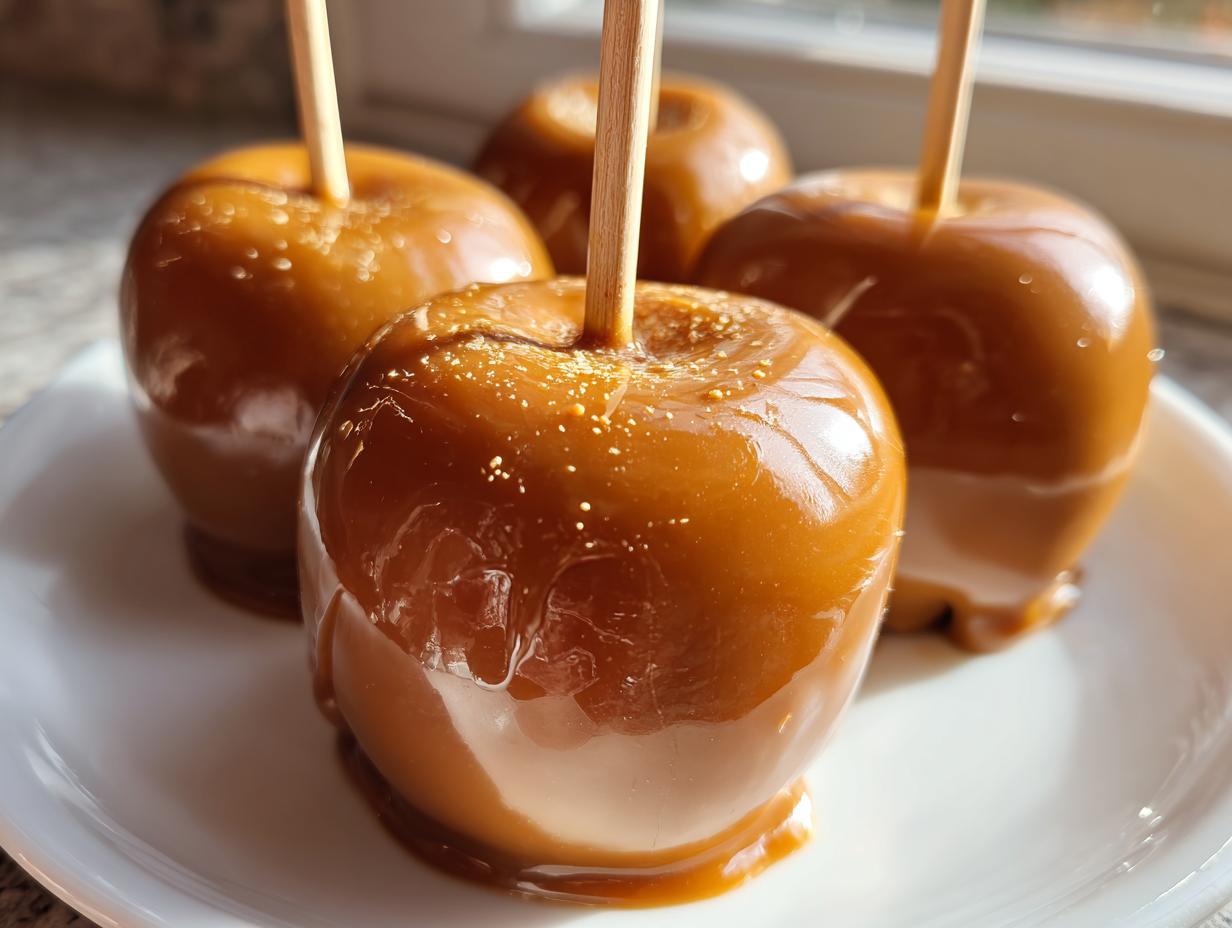
There’s just something about that crisp snap of an autumn apple, followed by that impossibly rich, buttery sweetness, that takes me right back to my grandfather’s kitchen in Ohio. We’d wait all year for the season when we could make proper caramel apples. But let’s be honest—most attempts end in disaster: runny caramel sliding right off, or worse, a rock-hard candy shell.
I spent years in professional kitchens learning precision, and I brought that precision home to solve this classic problem. Forget those frustrating batches! I promise you, what I have right here is the foolproof recipe for perfect homemade caramel apples that actually stick, every single time. It’s all about mastering a few simple techniques, and I’m going to walk you through every single step so you can create that gooey, sweet sticky goodness without fail.
- Why This is The BEST Foolproof Homemade Caramel Apples Recipe
- Essential Ingredients for Classic Caramel Apples
- Step-by-Step Instructions for Dipped Apples
- Tips and Tricks for Perfect Caramel Apples Every Time
- Fun Variations for Gourmet Caramel Apples
- Serving Suggestions and Autumn Dessert Inspiration
- Storage and Shelf Life for Homemade Caramel Apples
- Frequently Asked Questions About Caramel Apples
- Share Your Autumn Dessert Inspiration
Why This is The BEST Foolproof Homemade Caramel Apples Recipe
I won’t waste your time with recipes that lead to heartbreak, trust me. My goal here is to give you the ultimate no fail caramel recipe so your autumn baking is a success. We conquer the two biggest enemies of the caramel apple: weeping apples and caramel that won’t stay put.
- You get that rich, buttery flavor that store-bought versions just can’t touch.
- Because we manage the temperature right, you are guaranteed a layer of gooey caramel apples that stays soft!
- The preparation method ensures the coating adheres beautifully, so those beautiful toppings you choose actually stay on!
This method is rooted in the disciplined approach I learned early on, which is why it works every time we make it. You can check out some other wonderful dessert ideas we have over here: simple delicious desserts.
Achieving That Perfect Gooey Caramel Topping Technique
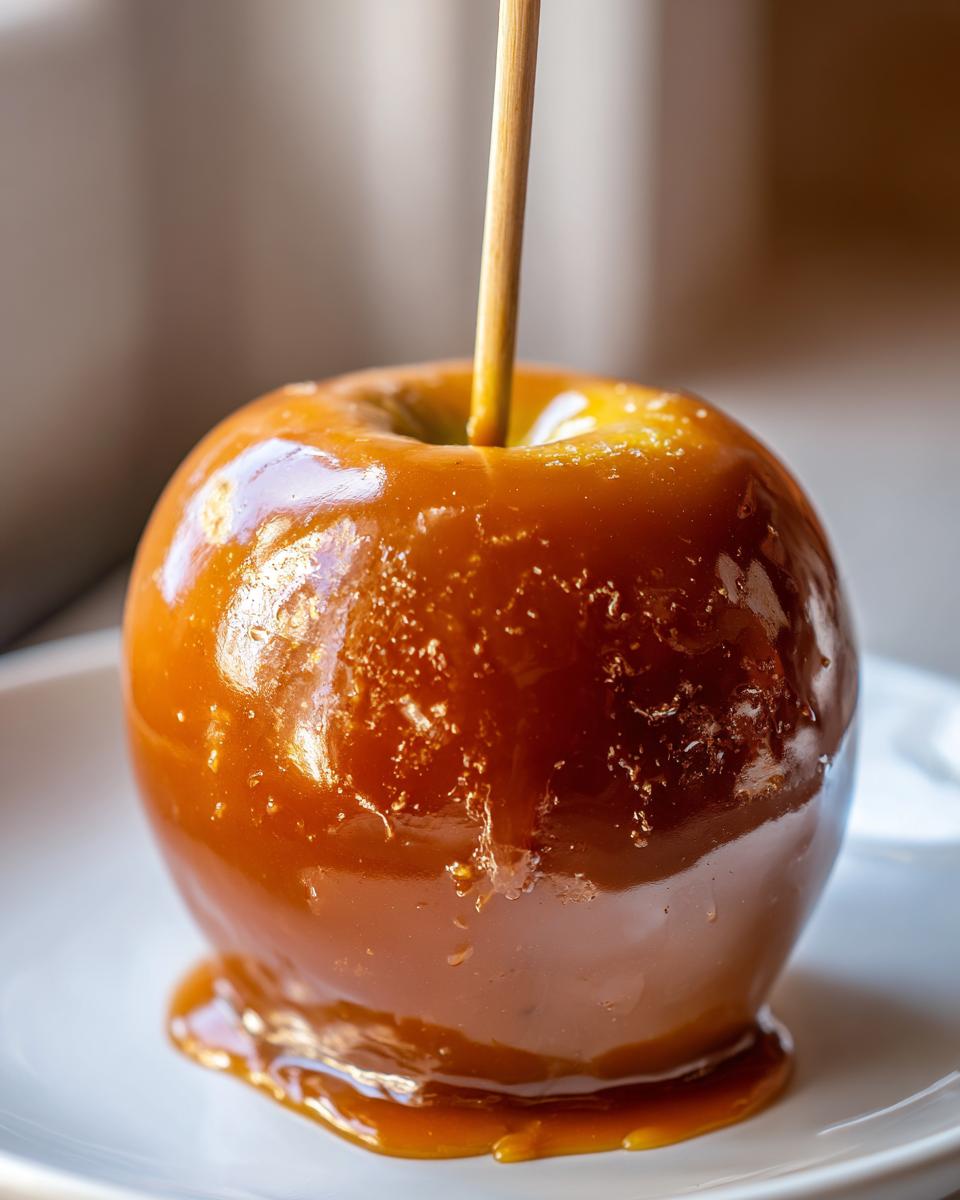
The absolute secret sauce—literally—is hitting that crucial temperature: 245 degrees Fahrenheit. That’s what candy makers call the firm-ball stage. If you cook it too low, your caramel will be a delicious puddle on the parchment paper. If you go too high, you get that sharp, brittle coating that cracks when you bite it.
But hitting 245°F gives you that magical sweet spot; it’s solidified enough to coat but soft enough to give way to that wonderful tart apple underneath. I always trust my digital thermometer here, but you can find some more tried-and-true methods on keeping things stable by looking at historical tips, like those shared by Adventures of a DIY Mom.
Essential Ingredients for Classic Caramel Apples
When we’re aiming for that truly classic, perfect bite, we can’t cut corners on the ingredients. The quality you put in directly dictates the gooey texture you get out. We need structure from the apples and richness from the fats. Don’t just grab anything; these items are the bedrock of our success.
- 12 medium crisp apples (Granny Smith are highly recommended here—they’re tart enough to cut the intense sweetness!)
- 10 sticks (that’s a full pound!) of good quality, unsalted butter.
- 2 pounds of light brown sugar, and make sure it’s packed firmly into your measuring cup.
- 2 cups of light corn syrup—this is crucial for that smooth, non-crystallizing coating.
- 1 (14 ounce) can of sweetened condensed milk.
- 1 teaspoon of pure vanilla extract and just a half teaspoon of salt to balance everything out.
- Sticks (12 of them), either sturdy wooden ones or parchment-covered for easy handling.
And of course, have your toppings ready! Chopped nuts, pretzels, or even some mini chocolate chips are perfect for rolling them in right after dipping.
Ingredient Notes and Substitutions for Homemade Caramel Apples
Let’s talk specifics because these choices matter immensely for our homemade caramel apples. Granny Smith apples are the champions for a reason; their firm structure holds up to the thick caramel, and their tartness is the necessary counterpoint to all that sugar. If you use something too soft, you’ll end up fighting mushy apples.
Now, about that corn syrup—please don’t skip it! It’s what professional candymakers use to stabilize the sugar structure and keep the caramel from breaking or becoming grainy. You can use maple syrup in a pinch for a different flavor profile, but the texture won’t be quite as reliable. We are going for that classic, dependable, sweet sticky apple texture, and light corn syrup guarantees it.
Step-by-Step Instructions for Dipped Apples
Alright, let’s get cooking! This part is where the magic happens, but we need a little discipline while we’re on the stove. Grab your biggest, heaviest saucepan—we’re using 10 sticks of butter here, so we need space for everything to bubble happily. Combine the butter, that packed brown sugar, the corn syrup, and the condensed milk.
Get that heating over medium heat, stirring until everything is melted together smoothly. Once it starts boiling, you have to stop stirring! Let it rage away until your candy thermometer screams 245°F. Listen closely: if sugar crystals cling to the side of the pot, take a wet pastry brush and just gently kiss those walls clean. Don’t let those crystals get into the main batch, or you’ll regret it! You can find great guidance on keeping things stable by looking at historical tips, like those shared by The Cook’s Treat.
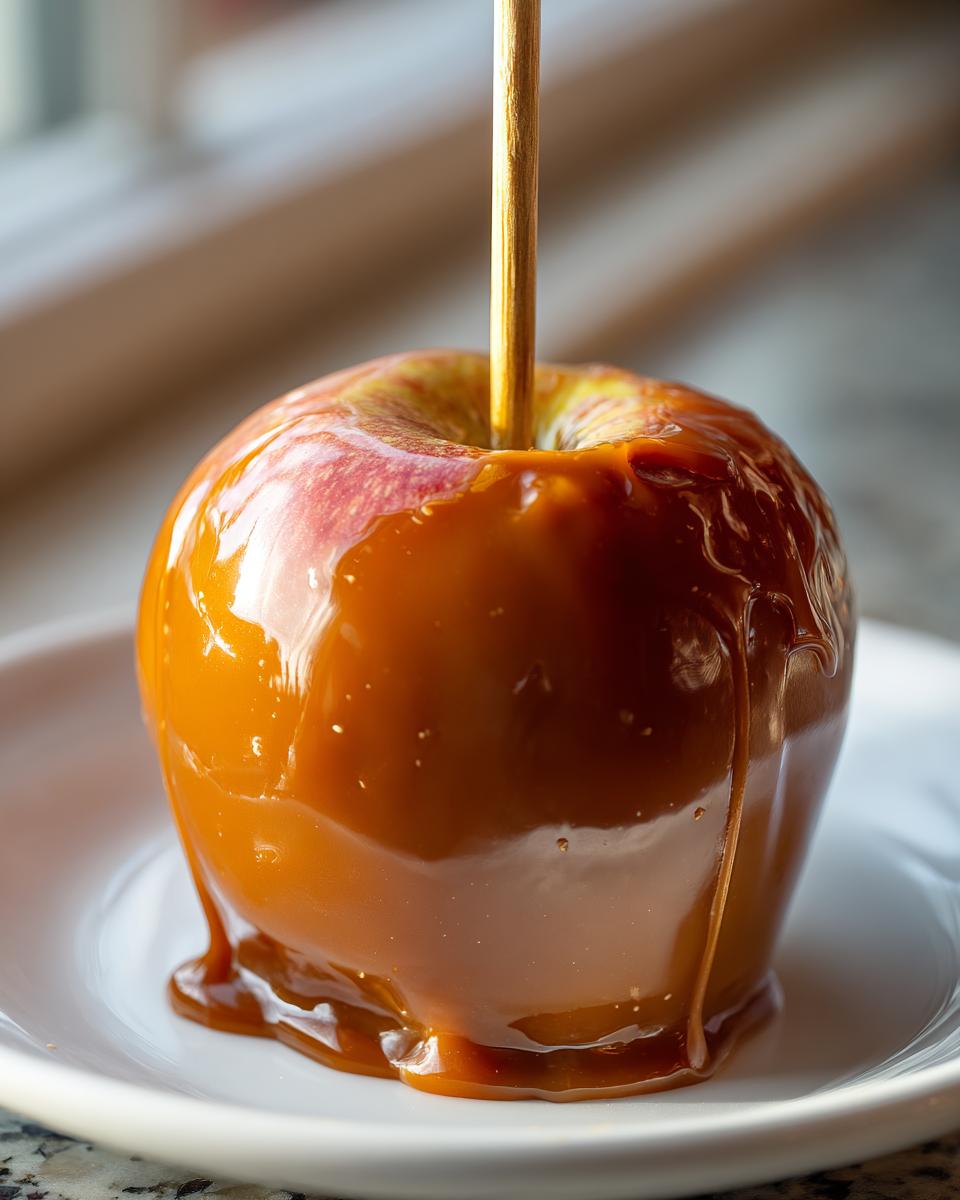
When it hits 245°F, pull it immediately off the heat. Stir in the vanilla and salt. Now, this is key for that perfect coating we talked about—you must let the caramel sit and cool slightly for about 5 to 10 minutes. It needs to get thick, but still totally dippable. Once it’s cooled just enough, tilt that pan and start dipping quickly!
The Crucial Apple Preparation for Perfect Caramel Apples
If your caramel won’t stick, I guarantee the issue is here! You have to remove every bit of wax and moisture from the apple surface. Wash them like you mean it. Truly, wipe them down with a little white vinegar and then pat them bone dry with paper towels. Insert your stick firmly, and make absolutely sure they are dry before they ever see caramel. This step is non-negotiable for great caramel apples.
Mastering the Caramel Apple Toppings
The second that apple comes out of the pot, it needs to hit its topping partner immediately before the caramel sets up too much! Have your toppings ready in shallow bowls right next to your stovetop. If you are going for those gourmet caramel apples, after the nuts, try rolling the tacky caramel in flaky sea salt, or maybe a drizzle of dark chocolate right before it sets up fully. It gives such a lovely contrast! For more ideas on delicious desserts you can serve alongside these, check out simple delicious desserts.
Tips and Tricks for Perfect Caramel Apples Every Time
Even when you follow the steps perfectly, sometimes the process throws you a curveball. That’s when you need my little library of insider tricks for handling your wonderful, bubbly caramel. Remember, working with sugar candy requires you to be calm and decisive—don’t rush the cooling, and don’t panic if things seem stiff!
If your caramel gets too thick before you finish dipping all twelve apples, don’t just throw it out or add water! That will ruin the whole batch. Just place the saucepan back on very low heat for just a minute or two, stirring gently until it loosens up enough to pour and coat nicely again. Then, pull it right back off the heat before dipping the next apple. It’s all about managing that temperature!
And please, please use that candy thermometer! Eyeballing 245°F is a recipe only grandmothers who’ve made candy for 60 years can pull off. For the rest of us, a digital thermometer is your very best friend for achieving that ideal texture. Once you nail that temperature, you’ll have the best homemade caramel apples around. If you’re looking for more inspiration on what to pair these treats with, check out some of my other favorites here: simple delicious desserts, or look at topping ideas from experts like Savory Experiments.
Fun Variations for Gourmet Caramel Apples
Once you have the basic technique down for your sweet sticky apples, you realize the opportunities are endless! Making gourmet caramel apples at home is honestly half the fun. We already mentioned salt and nuts, which are classics for a reason, but don’t stop there. Think about flavor contrast. A light sprinkle of smoked paprika right before the toppings go on gives the caramel an incredible, unexpected warmth.
Or, after the caramel has set for about 30 minutes, try drizzling high-quality dark chocolate over the top in thin zig-zags. That sweet, salty, tart, and rich combination is just heavenly. This is where you can really make things your own and impress everyone at your fall gathering. If you want to dive deeper into making these look truly professional, check out some inspiration from Glorious Treats.
Quick Alternatives: Easy Caramel Apple Slices
Look, I love a dramatic presentation, but sometimes you just need a snack, right? If you’re making dessert for a crowd and don’t want to deal with sticks and dripping, or maybe you need easy caramel apple slices for little hands—don’t sweat it. You use this exact same caramel! Just slice your apples into thick wedges, melt the caramel slightly more than you would for dipping (we want it a bit runnier here), and drizzle it artfully over the slices. Then toss those babies in toppings right away! It’s much faster, and they are gone in minutes. Good for quick snacks or you can find more ideas for great desserts like these when you look over our simple delicious desserts link.
Serving Suggestions and Autumn Dessert Inspiration
When you finally have these beautiful, perfect caramel apples staring back at you, you need the right stage for them! Honestly, serving them just sitting on a platter feels like a waste. I love setting them up on a rustic wooden board nestled among some crisp fall leaves for photographs, obviously. They look gorgeous next to little ramekins of flaky sea salt or mini caramel apple slices for variety.
These are the ultimate centerpiece for any gathering, whether it’s a spooky Halloween party or just a cozy Sunday afternoon when the leaves are turning. If you need a warm contrast to the cold caramel, try serving them alongside a piece of my easy cinnamon apple cobbler with biscuit topping—it’s sheer heaven. Nothing beats the flavor of true autumn treats!
Storage and Shelf Life for Homemade Caramel Apples
The bad news is that these sweet sticky apples are so good, they probably won’t last long! But if you do manage to have leftovers, storage is simple. We want to keep that caramel soft and not sticky against the plastic wrap.
Finished caramel apples are best kept at a cool room temperature, ideally between 60 and 70 degrees, for up to two days. If your house is warm or you’re worried about humidity, definitely put them in the refrigerator, wrapped individually in plastic wrap or parchment paper. Just let them sit out for about 30 minutes before serving so that caramel softens up again—they are supposed to be gooey, remember?
Frequently Asked Questions About Caramel Apples
I always get the same questions once people start tackling their own batch of these fall classics. It’s totally normal to have a few hurdles when candy making, so let’s just clear those right up so you can focus on the fun part—the toppings!
Why is my caramel runny and won’t stick to the apples?
Oh, that’s frustrating! Nine times out of ten, the caramel simply didn’t cook long enough. My recipe demands you hit 245°F for that firm-ball stage. If you don’t reach that temp, the sugar structure is too weak, and it just won’t adhere properly. Also, double-check that you wiped down those apples thoroughly; any wax or water is the enemy of a perfect coating!
What are the very best apples to use for homemade caramel apples?
Hands down, you need firm, tart apples. Granny Smith is my number one recommendation. They have that perfect snap, and their tartness is the ideal balance against the overwhelming sweetness of the caramel topping. Fuji or Honeycrisp work too, but Granny Smith is the gold standard for the best contrast in our classic caramel apples.
Can I make these ahead of time, or should I make them the day I need them?
You absolutely can make these ahead! They are one of the best make-ahead fall dessert recipes. They keep wonderfully for about a week if stored correctly in the fridge (wrapped well). Just let them sit out on the counter for about 30 minutes before your party so that caramel loosens up from its chilled state back into that perfect gooey texture we worked so hard for.
Is there an easier way to enjoy this without a big sticky mess?
If you want the flavor without the commitment of dipping a whole fruit, you should definitely try making easy caramel apple slices! Just core and slice your apples, melt the caramel slightly more, and drizzle. It’s such a fast, fun way to get that flavor profile. For more ways to enjoy great sweets, take a look at what we have grouped under simple delicious desserts.
Share Your Autumn Dessert Inspiration
Now that you have the ultimate guide to the best caramel apples—the ones that stick beautifully and stay gooey—it’s your turn to get messy! Seriously, I want to see what you create. Did you go classic? Did you try a crazy gourmet topping combination? Don’t be shy!
Go ahead and try this recipe out for your next gathering. When you do, come back here, leave a star rating so others know these tips work, and drop a comment below telling me how it went. If you have any lingering questions about the process, just ask! I’m happy to help you troubleshoot further at my contact page. Happy dipping, and enjoy every bit of that wonderful autumn inspiration!
PrintThe BEST Foolproof Homemade Caramel Apples (Gooey & Sticking Guarantee!)
Learn the secrets to making classic caramel apples where the caramel actually sticks. This recipe delivers unbelievably gooey caramel coating crisp apples, perfect for fall desserts and Halloween treats.
- Prep Time: 20 min
- Cook Time: 25 min
- Total Time: 45 min
- Yield: 12 servings 1x
- Category: Dessert
- Method: Stovetop Cooking
- Cuisine: American
- Diet: Vegetarian
Ingredients
- 12 medium crisp apples (Granny Smith recommended)
- 10 sticks (1 pound) unsalted butter
- 2 pounds light brown sugar, packed
- 2 cups light corn syrup
- 1 (14 ounce) can sweetened condensed milk
- 1 teaspoon pure vanilla extract
- 1/2 teaspoon salt
- 12 wooden or parchment-covered sticks
- Optional Toppings: Chopped nuts, mini chocolate chips, crushed pretzels, sprinkles
Instructions
- Prepare the apples: Wash the apples thoroughly to remove any wax coating. Dry them completely. Insert a wooden stick firmly into the core of each apple.
- Prepare the dipping station: Line baking sheets with parchment paper or silicone mats. Set out your chosen toppings in shallow bowls nearby.
- Make the caramel: In a large, heavy-bottomed saucepan, combine the butter, brown sugar, corn syrup, and sweetened condensed milk.
- Cook the caramel: Heat the mixture over medium heat, stirring constantly until the butter melts and the sugar dissolves.
- Bring the mixture to a boil without stirring. Use a pastry brush dipped in hot water to wash down any sugar crystals that form on the sides of the pan.
- Continue to boil until the caramel reaches 245 degrees Fahrenheit on a candy thermometer (firm-ball stage). This usually takes about 15 to 20 minutes after boiling begins. Do not overcook or the caramel will be too hard.
- Remove the pan from the heat. Carefully stir in the vanilla extract and salt. Let the caramel cool for 5 to 10 minutes until it thickens slightly but is still pourable. This cooling step is key for the caramel to stick.
- Dip the apples: Tilt the saucepan slightly. Dip one apple into the caramel, turning to coat completely. Lift the apple out, allowing excess caramel to drip back into the pan. Work quickly.
- Immediately roll the coated apple in your desired toppings, if using.
- Place the dipped apples on the prepared baking sheets to cool and set completely, about 1 hour.
Notes
- For the caramel to stick, the apples must be completely free of wax and moisture. Wipe them down with a little white vinegar before drying them if necessary.
- If the caramel becomes too stiff while dipping, return the pan to low heat briefly to loosen it, then remove it from the heat again before dipping the next apple.
- Store finished caramel apples at cool room temperature or in the refrigerator for up to one week.
Nutrition
- Serving Size: 1 apple
- Calories: 550
- Sugar: 95g
- Sodium: 150mg
- Fat: 18g
- Saturated Fat: 11g
- Unsaturated Fat: 7g
- Trans Fat: 0g
- Carbohydrates: 100g
- Fiber: 2g
- Protein: 3g
- Cholesterol: 55mg