

If you think you know soft bread, I want you to forget everything. Seriously! I’m here to tell you about achieving that almost mythical, melt-in-your-mouth tenderness that you just can’t find anywhere else. We are diving headfirst into the world of japanese milk bread, also known as Shokupan, and I promise you this is the best homemade bread you will ever bake. It takes a little extra effort, I won’t lie—mastering the technique requires dedication—but the payoff is a texture so cloud-like and pillowy, it’s unbelievable. The secret weapon we use is the Tangzhong method, and once you see how it works, you’ll never go back to plain bread again!
This recipe is the result of my own obsession to bake that perfect loaf, and trust me, when you pull that tall, golden block from your oven, you’ll understand why home bakers go crazy for it. We’re going to walk through every step together, and I can’t wait for you to see how easy it is once you have the technique down. If you love our recipe for those super fluffy homemade dinner rolls, you are absolutely going to fall in love with this loaf.
- Why This Japanese Milk Bread Recipe Delivers Cloud-Like Texture
- Gathering Ingredients for Authentic Japanese Milk Bread
- Step-by-Step Instructions for Homemade Tangzhong Bread
- Baking Your Japanese Bakery Style Bread
- Tips for Foolproof Japanese Milk Bread Results
- Serving Suggestions for Your Pillowy Sandwich Loaf
- Frequently Asked Questions About Hokkaido Milk Bread
- Estimated Nutritional Data for Japanese Milk Bread
- Share Your Softest Fluffy Bread Creations
Why This Japanese Milk Bread Recipe Delivers Cloud-Like Texture
So, what makes this loaf different from a regular white bread? The difference is night and day, folks. This isn’t just soft; this is softest fluffy bread territory! We’re aiming for that famous cloud bread texture that Japanese bakeries charge a fortune for. It all comes down to a couple of clever steps that trap moisture inside the dough, ensuring it stays tender for days.
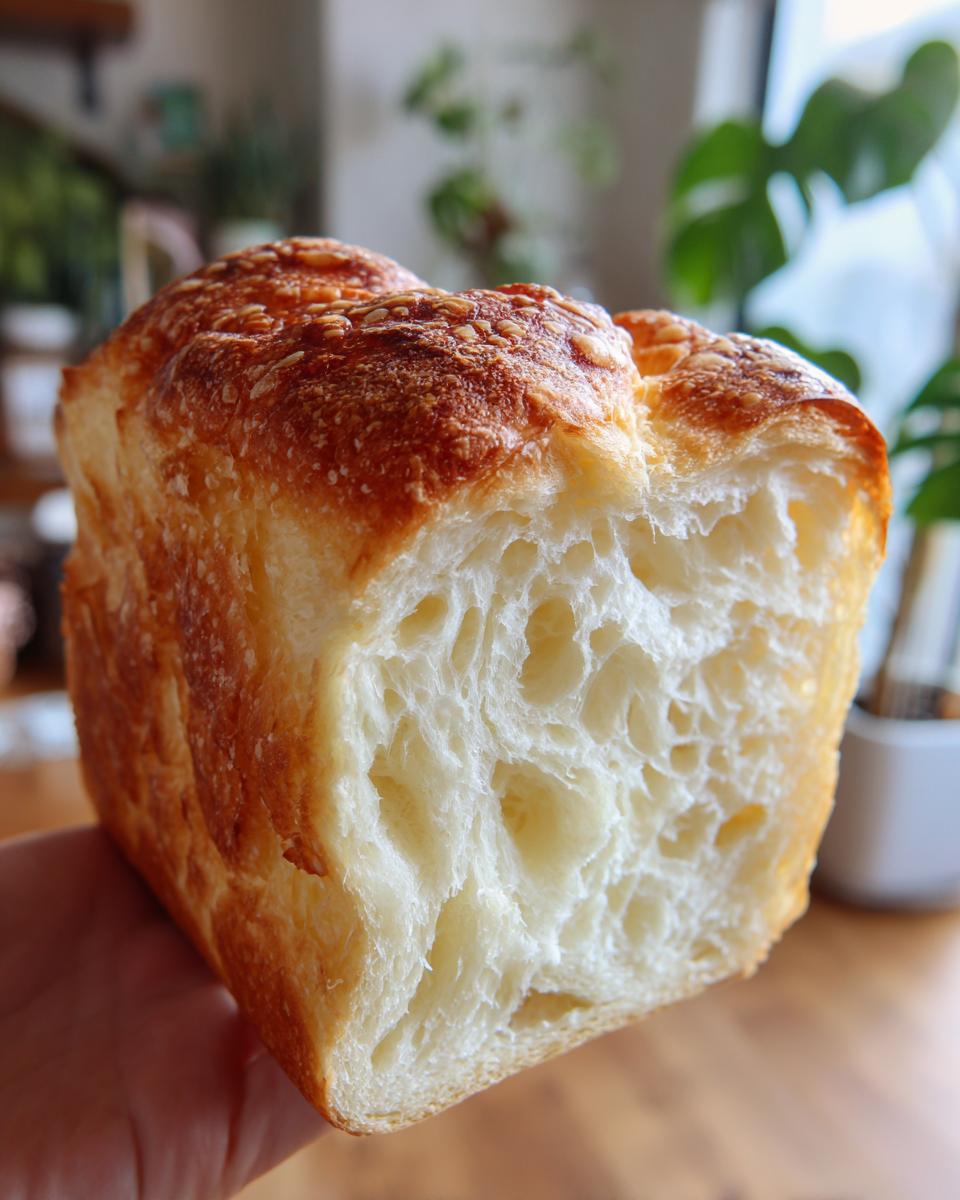
- It stays remarkably moist, even three days later—perfect for future sandwiches!
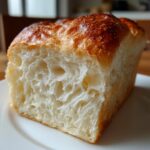
- The crumb achieves an airy, feathery quality that you just can’t fake with standard ingredients.
- It has a beautiful, tall rise because the gluten structure is so perfectly developed.
Mastering the Tangzhong Method for Japanese Milk Bread
The Tangzhong is non-negotiable if you want the real deal. It sounds fancy, but it’s truly simple! We take a small amount of the flour and milk from the recipe and physically cook it on the stovetop until it turns into this thick, gelatinous paste. Think of it like thickening a sauce, but for bread!
When we add this paste—which acts like a moisture sponge—to the main dough, it absorbs tons of water that would normally evaporate during baking. That trapped moisture is exactly what keeps your japanese milk bread feeling like literal clouds. It’s the science that makes the magic happen, I promise you!
The Importance of Extended Kneading for Fluffy Bread
Once we introduce that heavy Tangzhong paste, the dough needs some serious convincing to come together. This is where you need patience, but don’t rush it! We need to develop the gluten really well so the dough can hold all that moisture we just locked in.
You need to knead this dough for a good long while—way longer than you probably think! Keep going with that dough hook until it passes the windowpane test. You should be able to stretch a small piece thin enough to see light through it without it tearing. If you can do that, your structure is solid, and you’re going to get that amazing, light crumb you are craving!
Gathering Ingredients for Authentic Japanese Milk Bread
Okay, now we get to the fun (and slightly strict) part: the ingredients. For this japanese milk bread, you can’t just eyeball things. Because the Tangzhong changes the hydration drastically, every measurement needs to be pretty spot on. I’ve listed exactly what you need below, but the biggest secret here isn’t in the quantity; it’s in the quality—especially that flour!
You’ll notice we have two separate entries for flour and milk. That’s because we separate what goes into that spectacular Tangzhong from what goes into the main dough. It looks like a lot of components, but put them all together, and you get this absolutely divine pillowy sandwich loaf.
- 60g Bread Flour (for Tangzhong)
- 240ml Whole Milk (for Tangzhong)
- 350g Bread Flour (for Dough)
- 50g Granulated Sugar
- 1 teaspoon Instant Dry Yeast
- 1 teaspoon Salt
- 40g Unsalted Butter, softened
- 1 large Egg
- 60ml Whole Milk (for Dough)
Ingredient Notes and Substitutions for Your Milk Loaf
Listen up, this is where we earn our keep as expert home bakers! You absolutely must use Bread Flour for both parts! All-Purpose just doesn’t have the high protein content needed to develop the strong gluten network required to hold all the moisture from the Tangzhong. If you use AP flour, you’ll end up with a dense brick, not a cloud!
When it comes to the liquid, the whole milk is important for richness, but if you are desperate, using half-and-half mixed with water (to hit the 240ml mark for the Tangzhong) is fine. But please, don’t try substituting the milk in the Tangzhong ratio you see listed—that ratio is locked in for that perfectly thick consistency!
Don’t skimp on the butter either. This recipe creates such a versatile milk loaf, which is why it’s perfect for everything, but that richness really comes from good quality butter. It’s worth it!
Step-by-Step Instructions for Homemade Tangzhong Bread
Alright, let’s get baking! This is the main event. Making homemade Tangzhong bread isn’t tricky, but it does require you to pay attention during the first major step. You have to respect the process that leads to that incredible fluffiness. If you’ve followed tutorials for a Yudane bread tutorial before, this paste stage is going to look very familiar. We need to build the layers correctly, so follow along closely!
Creating the Tangzhong Starter
First things first: we make the paste. Whisk that tiny bit of flour and milk together in a small saucepan until it’s totally smooth—no lumps allowed! Now, turn the heat on medium-low and just stir constantly. This is where you watch carefully. You’re not making gravy; you are trying to hit that point where the mixture gets noticeably thick, like pudding. It should hit about 160°F if you’re using a thermometer, but visually, you’ll see the whisk leave clear tracks in the mixture. Stop immediately!
The most important thing? Cool it down before you do anything else. Cover the surface directly with plastic wrap so a skin doesn’t form, and let it chill completely. If you add hot goo to your yeast, you’re in trouble, trust me!
Mixing and Kneading the Japanese Milk Bread Dough
Time to get the stand mixer out! Start by mixing the dry stuff—the main flour, sugar, yeast, and salt—just to combine them before we add the sticky bits. Next, dump in that cooled Tangzhong paste, the remaining milk, and the egg. Mix that on low until it actually looks like a messy blob of dough. Then comes the butter, softened!
Now, we knead. I mean *knead*. This dough needs a serious workout to get that incredible structure for your japanese milk bread. Keep that mixer running medium-low for a full 15 minutes after the butter is incorporated. You are aiming for that perfect windowpane, so keep going until it stretches thin and translucent. Patience here pays off huge later!
Shaping and Proofing for the Perfect Rise
Once the dough has doubled the first time, it’s ready to be shaped for the pan. Gently deflate it and divide it into three equal pieces. Roll each piece into a tight little ball, cover them up, and let them rest for about fifteen minutes—this relaxes the gluten so you can handle them.
Take those rested balls, roll each one out into an oval shape, and place them seam-side down right next to each other in your greased loaf pan. This three-ball technique is what supports the structure of your japanese milk bread loaf. Cover it loosely and let it rise again until it’s nearly doubled AND it crests about an inch over the top of the pan rim. That’s your signal: the oven is preheating next!
If you want a fantastic guide on mixing up some simple, fluffy spreads to go with your bread, check out my one-pot rice pilaf recipe, which uses similar techniques to achieve fluffy lightness!
Baking Your Japanese Bakery Style Bread
This is the moment of truth after all that careful kneading and patient proofing! We’re treating this gorgeous dough carefully now. Preheat your oven to 350°F (175°C) while your loaf is finishing its second rise—you don’t want to shock the batter with sudden heat.
When the loaf looks beautifully puffy and just cresting over the top edge of the pan, give it a quick, gentle wash of milk over the top. This is what gives you that signature golden sheen reminiscent of a real Japanese bakery style bread. Pop it into the preheated oven for about 30 to 35 minutes.
Now, here’s a pro tip that shows you’re paying attention: keep an eye on that beautiful top. Because we have so much sugar in this dough, it can brown much faster than a standard loaf. If you see it getting deeply golden brown around the 20-minute mark, just take a piece of aluminum foil—loosely tent it over the top. Don’t press it down, or you’ll deflate your work!
You aren’t done just because the timer goes off, though. We are aiming for two things to tell us it’s done: the outside should look gorgeous, and the internal temperature, measured right in the center, absolutely needs to hit 200°F (93°C). Anything less, and you risk a gummy center when you cut into it. Trust me on the temperature check!
As soon as it hits that temperature, get it out! It needs to cool quickly to stop the carryover cooking. Immediately flip it out onto a wire rack. If you leave it sitting in that hot metal pan, the bottom will steam itself into sogginess, and we worked way too hard for soggy bottoms!
Tips for Foolproof Japanese Milk Bread Results
Whew! You pulled off the bake. Now we need to make sure that beautiful loaf stays soft for days. It’s easy to mess up the cooling or storage, and suddenly that amazing cloud bread texture is gone. I’ve learned a few hard ways over the years where I messed up my own bread, so here are my absolute best tips to keep that fluff factor locked in.
First, I can’t stress this enough: cool it immediately on a wire rack! If you let it sit even five minutes in that warm pan after it comes out of the oven, the residual heat steams the bottom. We worked too hard for a soggy bottom slice, right?
Once it is completely cool—and I mean totally cool to the touch—then we wrap it up. Wrapping it tightly is key for maintaining that moisture we worked so hard to capture with the Tangzhong. If you want to use some of your leftover slices for fun baking projects, like making little vanilla cupcakes, make sure those slices are sealed tight!
Storage and Keeping Your Japanese Milk Bread Soft
This bread lasts way longer than regular bread if you store it right. The moment it’s completely cool? Wrap that loaf up super tight in plastic wrap. I usually do a double layer just to be safe. This keeps the moisture locked inside so it never dries out.
Keep it right on the counter at room temperature. Don’t put it in the fridge! Refrigeration makes almost any bread taste stale way faster, and we want that pillowy bread flavor to last. Seriously, if you wrap it well, it’ll still feel nearly fresh off the cooling rack three or four days later. If you want it extra soft for toast, you can microwave a slice for about 10 seconds, and watch it transform back—it’s like magic!
Serving Suggestions for Your Pillowy Sandwich Loaf
Now that you have this incredibly soft, shokupan-inspired loaf cooling on the rack, what do you do with it? Honestly, you can just slice it thick and eat it plain, but I love finding ways to show off that gorgeous, airy crumb!
The absolute classic first use has to be toast. Because this bread has natural sweetness and a higher fat content from the milk, when you toast it, the edges get this lovely golden crunch while the inside stays just slightly soft. It’s the perfect canvas for cream cheese, jam, or just a massive slab of melting butter. It makes breakfast feel like a celebration!
But let’s talk about sandwiches. This is where this loaf really shines as the ultimate bread for sandwiches. Think about it: delicate egg salad, creamy turkey, or homemade PB&J—the bread is so soft it never fights with the filling. It just cradles it perfectly. You should absolutely try making your favorite classics with this loaf; I promise you won’t go back to store-bought sandwich bread!
If you’re looking for a companion recipe for those incredible sandwiches, check out how I make a creamy chicken salad filling; it’s perfect for testing out the bread!
When you get down to the last heel of the loaf (which seems to take forever because this bread stays fresh!), don’t throw it out! It makes the most amazing French toast or bread pudding. Since the slices are quite sturdy from the extended kneading, they soak up the custard beautifully without turning to mush. See? Versatility is key!
Frequently Asked Questions About Hokkaido Milk Bread
I know you’re probably over here staring at your sticky dough wondering if you did something wrong, or maybe you’re just wondering if you can skip a component. Don’t worry! It’s totally normal when you start tackling something as specific as Hokkaido Milk Bread. I’ve gathered the questions I get asked the most about making this loaf the first time. Let’s clear those up so you can get that perfect loaf!
Can I make Japanese Milk Bread without a stand mixer?
Yes, you absolutely can! But, I’m going to give it to you straight: it’s a whole workout. Remember how I stressed that long kneading time for that super strong gluten structure? If you’re doing it by hand, you need to dedicate a solid 20 to 25 minutes of vigorous, continuous kneading after the butter goes in. If you’re up for the arm workout, you’ll get the texture, but you have to be persistent until that dough passes the windowpane test. Skip kneading, and you skip the true Fluffy Asian Bread experience!
How do I know if my dough is proofed enough?
This is key for a tall loaf! You don’t want to underproof it, or it won’t rise nicely in the oven. You want the dough to have almost doubled in size in the pan, and the very top surface should be cresting up about an inch above the rim of your loaf pan. Poke it very gently with a floured finger. If the indentation springs back slowly and only partially fills in, you’re good to go for the oven. If the indent springs back instantly, give it ten more minutes. If it collapses, oops—you’ve gone too far!
What is the difference between Shokupan and standard milk bread?
This is a great question! Standard milk bread uses milk or milk powder in the main dough for softness, which is nice. But Shokupan—your true japanese milk bread—requires the Tangzhong or Yudane method. That little cooked flour paste traps massive amounts of moisture, making the final bread significantly softer, fluffier, and helps it stay fresh for days longer than basic milk bread. It’s that crucial paste that elevates it to bakery status.
If you’re looking for some lovely baked goods to try out after you master this loaf, my recipe for bakery-style pistachio muffins is always a winner!
Estimated Nutritional Data for Japanese Milk Bread
I’m often asked about the nutrition since this bread is so rich and tender, but remember, baking is an art, not a science lab! The numbers below are just estimates based on the proportions in the recipe provided.
Don’t get too hung up on tweaking these numbers, because the joy of this loaf is in the texture and homemade taste!
- Serving Size: 1 slice
- Calories: 180
- Sugar: 7g
- Sodium: 150mg
- Fat: 5g
- Saturated Fat: 3g
- Carbohydrates: 28g
- Protein: 6g
These values are calculated based on the standard recipe, which yeilds about 12 slices from the full loaf. If you slice yours thinner or thicker, these numbers will naturally shift. Focus on how good this bread tastes when you slice it warm!
Share Your Softest Fluffy Bread Creations
Phew! We made it to the end, and I truly hope you are looking at a beautiful, tall, golden loaf of japanese milk bread cooling on your counter right now! That soft, pillowy crumb is waiting!
Now comes my favorite part—hearing from you! If this was your first time tackling the Tangzhong method, I want to know everything! Did you pass the windowpane test? Was your dough sticky, or did you manage that perfect smooth kneading?
Please, please leave a star rating for the recipe right below this section. It helps other bakers know they can tackle this too! If you took photos of your amazing, fluffy creation, I would absolutely love to see them—tag me or drop a link in the comments. It’s so rewarding to see my family’s favorite loaf showing up in your kitchens.
If you’re already planning what to serve with your incredible bread, you should check out my recipe for quick and creamy dill dip. It’s fantastic for tearing off warm pieces of milk bread!
When you’re ready to see more inspiring loaves, check out how others are doing on Pinterest—it’s inspiring! Happy baking, friends, and let me know how your journey to the softest bread on earth went!
PrintThe Definitive Ultra-Fluffy Japanese Milk Bread (Shokupan) Featuring the Tangzhong Method
Make unbelievably soft, cloud-like Japanese Milk Bread (Shokupan) at home using the Tangzhong method. This recipe delivers a pillowy crumb that stays moist longer, perfect for sandwiches or toast.
- Prep Time: 45 min
- Cook Time: 35 min
- Total Time: 3 hours 0 minutes
- Yield: 1 loaf (about 12 slices) 1x
- Category: Baking
- Method: Baking
- Cuisine: Japanese
- Diet: Vegetarian
Ingredients
- 60g Bread Flour (for Tangzhong)
- 240ml Whole Milk (for Tangzhong)
- 350g Bread Flour (for Dough)
- 50g Granulated Sugar
- 1 teaspoon Instant Dry Yeast
- 1 teaspoon Salt
- 40g Unsalted Butter, softened
- 1 large Egg
- 60ml Whole Milk (for Dough)
Instructions
- Prepare the Tangzhong: Whisk the 60g bread flour and 240ml milk in a small saucepan until smooth. Heat over medium-low heat, stirring constantly, until the mixture thickens significantly, reaching about 160°F (71°C). It should resemble a thick paste. Remove from heat, cover the surface directly with plastic wrap, and let it cool completely.
- Mix Dry Ingredients: In the bowl of a stand mixer fitted with the dough hook, combine the 350g bread flour, sugar, yeast, and salt. Mix briefly on low speed.
- Combine Wet Ingredients: Add the cooled Tangzhong, the 60ml milk, and the egg to the dry ingredients. Mix on low speed until a shaggy dough forms.
- Knead: Increase the speed to medium-low and knead for 5 minutes. Add the softened butter. Continue kneading for another 10 to 15 minutes until the dough is very smooth, elastic, and passes the windowpane test. This extended kneading is necessary for the soft texture.
- First Rise (Bulk Fermentation): Place the dough in a lightly oiled bowl, cover, and let it rise in a warm place until doubled in size, about 1 to 1.5 hours.
- Shape the Loaf: Gently deflate the dough. Divide it into three equal pieces. Shape each piece into a tight ball. Let the balls rest for 15 minutes, covered.
- Final Shaping: Roll each rested ball into a smooth oval. Place the three ovals side-by-side in a greased 9×5 inch loaf pan, ensuring the seam side is down.
- Second Rise (Proofing): Cover the pan loosely and let the dough proof in a warm spot until it has nearly doubled and crests about 1 inch over the top of the pan, about 45 to 60 minutes. Preheat your oven to 350°F (175°C) during the last 15 minutes of proofing.
- Bake: Brush the top of the dough lightly with milk. Bake for 30 to 35 minutes, or until the top is golden brown and the internal temperature reaches 200°F (93°C). If the top browns too quickly, loosely tent it with foil.
- Cool: Immediately remove the loaf from the pan and cool completely on a wire rack before slicing to preserve the texture.
Notes
- For an extra glossy crust, brush the top of the baked loaf with melted butter immediately after removing it from the oven.
- This bread stays moist for several days when stored tightly wrapped at room temperature.
- If you do not have a stand mixer, you can knead this dough by hand, but expect the process to take 20 to 25 minutes of continuous work.
Nutrition
- Serving Size: 1 slice
- Calories: 180
- Sugar: 7
- Sodium: 150
- Fat: 5
- Saturated Fat: 3
- Unsaturated Fat: 2
- Trans Fat: 0
- Carbohydrates: 28
- Fiber: 1
- Protein: 6
- Cholesterol: 25