
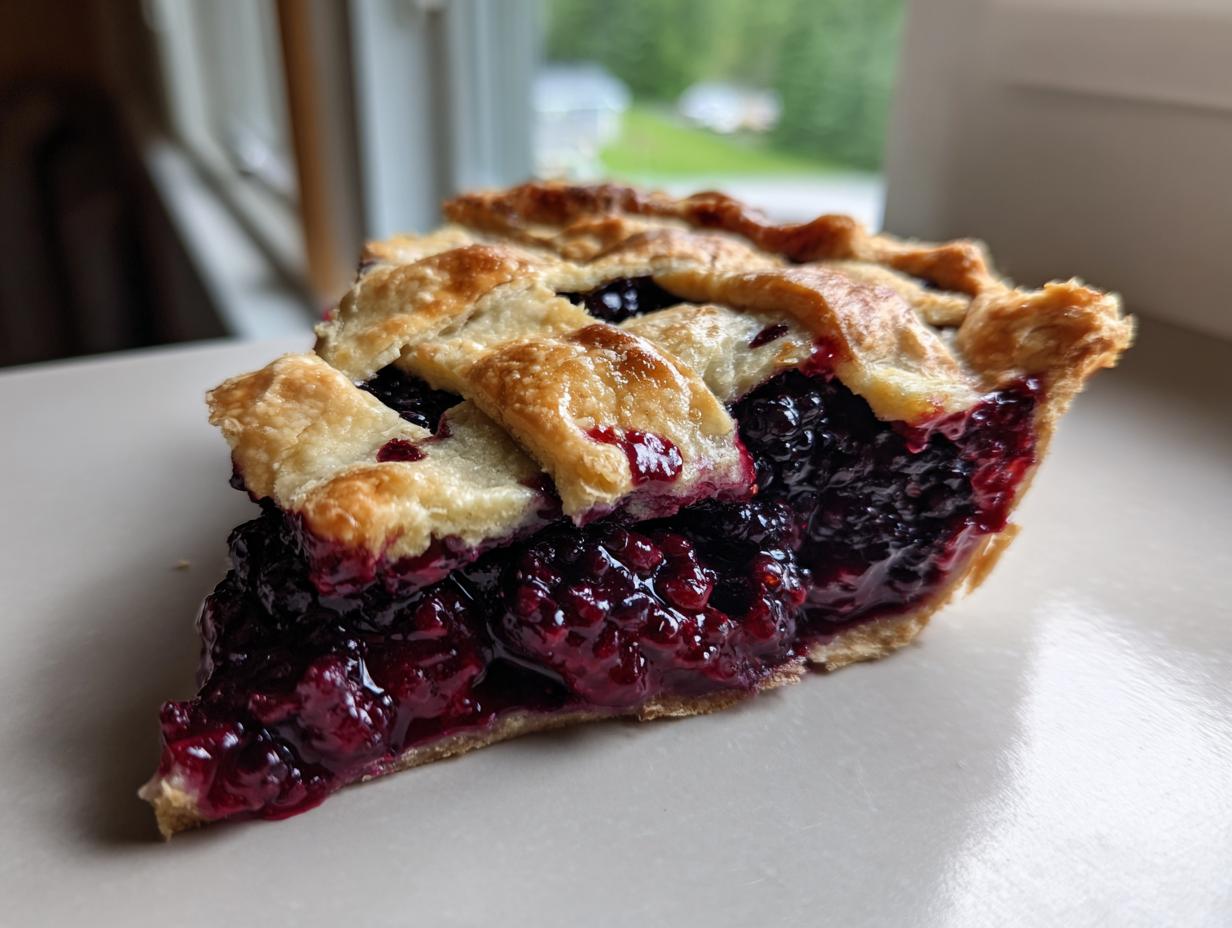
There’s just something about a perfect slice of pie that takes me right back to the foundations of American cooking. As I explored kitchens across the country, I always searched for the recipes that felt like coming home, and this classic homemade blackberry pie is certainly one of them. Forget those overly sweet, runny versions you sometimes see! My goal here is absolute perfection: an all-butter, flaky crust that shatters just right around a sweet-tart filling that actually sets up beautifully. This tried-and-true method ensures you get that amazing texture every single time you bake.
Making an incredible dessert for the family shouldn’t require a culinary degree, which is why I’ve refined this recipe to work flawlessly in your home. After all, the best stories—and the best flavors—are built layer by delicious layer, just like this pie. If you’d like to explore another Southern masterpiece while you’re here, check out my classic buttermilk pie recipe.
- Why This Classic Blackberry Pie Recipe Works Every Time
- Ingredients for Your Homemade Blackberry Pie
- Step-by-Step Instructions for Classic Blackberry Pie
- Baking the Perfect Blackberry Pie
- Cooling and Serving Your Old Fashioned Blackberry Pie
- Tips for Baking with Fresh Blackberries
- Variations on the Blackberry Pie Theme
- Storage and Reheating Instructions for Blackberry Pie
- Frequently Asked Questions About Blackberry Pie
- Share Your Perfect Blackberry Pie Creation
Why This Classic Blackberry Pie Recipe Works Every Time
I want you to feel confident every time you commit to baking a fruit pie. This recipe isn’t just another dessert; it’s one of those true comfort food dessert ideas that delivers on its promise. It’s built around two absolute must-haves for a perfect result.
- We nail the texture: My method ensures you get that crisp, buttery flakiness without any fuss.
- We set the filling: Say goodbye to that soupy mess! Your slices will hold their beautiful shape.
If you’ve ever admired a beautiful slice of fruit pie, you can make this one. For another summery delight, you should really look at my Southern Peach Cobbler recipe too.
Achieving the Best Flaky Pie Crust
The secret to the best flaky pie crust is simple: cold, cold, cold! We are using 100% unsalted butter here, and you need to keep it absolutely fridge-hard until the very last second. Those little frozen pockets of butter steam up in the oven, creating those beautiful, separated layers, which is the heart of all great buttery pie crust secrets. My personal rule? Work fast. If my hands start warming the dough too much, I stop, put the whole bowl in the freezer for five minutes, and then keep going. No lingering allowed!
The Secret to a Perfectly Set Blackberry Pie Filling
This is where most homemade berry pies go wrong! The key here is the cornstarch—it’s much more stable than relying just on flour. We need that thick, jammy consistency when it cools down. Plus, we cheat the system with a quick blind bake. That little bit of pre-baking sets the bottom crust structure, which is the fail-safe no soggy bottom pie technique. It works whether you’re using gorgeous summer berries or pulling them straight from the freezer bag.
Ingredients for Your Homemade Blackberry Pie
Okay, now that we’ve talked about *why* this pie is the best, let’s get down to what you actually need to pull this off. Remember, quality matters here, especially with that butter. I’ve separated everything so you can shop or gather your supplies easily. Don’t worry about the chilling time just yet; we cover the timeline in the instructions later.
For the Flaky Double Crust
This is the foundation, so don’t skimp! You need flour, salt, plenty of ice water, and the magic ingredient: butter. Seriously, your butter must be very cold and cubed—I mean, you should almost use tongs to handle it. We only use enough water to bring the dough together, just barely. Any more, and you’re heading straight for biscuits, not beautiful pie dough.
- 2 1/2 cups all-purpose flour
- 1 teaspoon salt
- 1 cup (2 sticks) unsalted butter, very cold and cubed
- 1/2 cup ice water, plus more if needed
For the Juicy Blackberry Pie Filling
This filling comes together in about five minutes, but the combination is what sings. We rely on cornstarch here; it’s the necessary stabilizer that ensures your filling is thick and gorgeous, not watery. The lemon juice just wakes up the sweetness of those blackberries. You can use fresh ones if they look amazing at the market, or frozen if you need to bake this out of season.
- 6 cups fresh or frozen blackberries
- 1 1/2 cups granulated sugar
- 1/2 cup cornstarch (this is the key!)
- 1 tablespoon lemon juice
- 1/4 teaspoon ground cinnamon
- 1 large egg, beaten with 1 teaspoon water (for egg wash)
- 1 tablespoon coarse sugar (for sprinkling)
Step-by-Step Instructions for Classic Blackberry Pie
Alright, let’s get our hands moving! Baking this classic blackberry pie recipe is a multi-stage affair, but if you follow these steps—especially keeping it cold—you’re golden. We need to tackle the crust first because it needs quality chilling time before we can even think about loading up the berries.
Making the Buttery Pie Crust Dough
First things first: whisk your flour and salt together. Now for the butter. You want to use a pastry blender, or honestly, just your fingers if you’re quick! You are looking for a texture that resembles coarse crumbs, but you absolutely need those chunks of butter—think small peas—still visible. If they melt, the flakiness is gone! Slowly drizzle in that ice water, just mixing until the dough *barely* holds together. Split it into two disks, wrap them up tight, and put them in the fridge for at least two hours. Patience there pays off big time!
Assembling the Blackberry Pie Filling
While that dough chills, mix the filling. Get your berries in a bowl and gently toss them with the sugar, cornstarch, cinnamon, and lemon juice. I mean gentle—we want whole berries, not purple mush right now! The lemon is just a little secret to make sure that deep blackberry flavor really pops against the sweet crust.
The No Soggy Bottom Technique: Blind Baking
This is non-negotiable for a perfect fruit pie! Preheat your oven to 400°F. Roll out one disk and slip it into your 9-inch plate. Now, line that shell with parchment paper and fill it right up with pie weights or dried kidney beans. Bake it for 15 minutes, then carefully pull out the paper and weights. This initial bake is the core of the no soggy bottom pie technique, ensuring your base is cooked through before the juicy filling ever touches it.
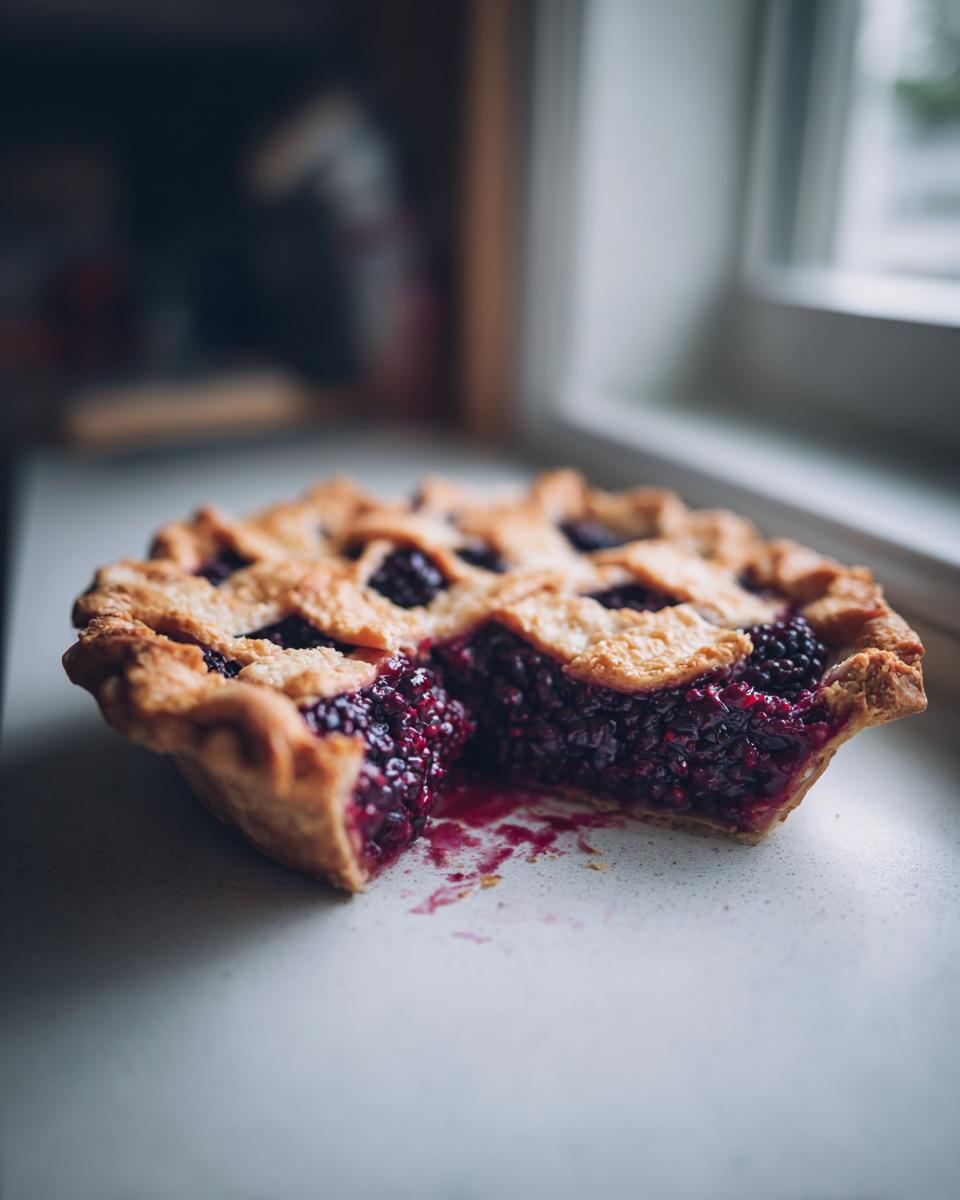
Creating the Lattice Top Pie Tutorial
Take your second dough disk and roll it out. You can cut even strips for a gorgeous lattice top pie tutorial look, or just lay the whole sheet on top! Whatever you choose, lay it over the chilled, pre-baked bottom crust filled with berries. Trim the edges so you have about an inch overhang, and then pinch the top and bottom crusts together firmly, crimping them however you like best. This traps all those wonderful berry vapors inside while baking!
Baking the Perfect Blackberry Pie
Now that we have assembled this beautiful creation, we need to treat it right in the heat! Getting the temperature right is what guarantees that golden crust and that thick, bubbling filling in your blackberry pie. We are doing a two-stage bake here, which is super important for fully cooking the bottom crust without burning the top too soon.
Get your oven up to 400°F (200°C). Place the prepared pie onto a baking sheet—trust me, you want that sheet there to catch any slow drips! Bake it hard for the first 20 minutes. That initial blast of high heat helps the butter in the crust puff up fast and sets the structure.
After 20 minutes, you need to drop the heat down to 375°F (190°C). Continue baking for another 35 to 45 minutes. You are looking for two things: the crust needs to be deep golden brown, and you must see the filling bubbling thick and slow in the vents—like lava, not water! If you notice those gorgeous edges (especially the crimping) getting dark too soon, don’t panic! Just tear off a few small strips of aluminum foil and drape them over the edges. This protects them while the center finishes cooking through. It’s simple temperature control, and it makes all the difference!
If you’re getting interested in using those higher oven temperatures for searing, you might want to check out how I handle high-heat cooking with my easy honey harissa chicken bowls.
Cooling and Serving Your Old Fashioned Blackberry Pie
Okay, you’ve pulled this gorgeous beauty out of the oven. Congratulations! But now comes the hardest part of the entire process: walking away. Seriously, do not touch it for hours. I can’t stress this enough—it feels wrong when you’ve just made such an amazing old fashioned blackberry pie, but you must resist cutting into it.
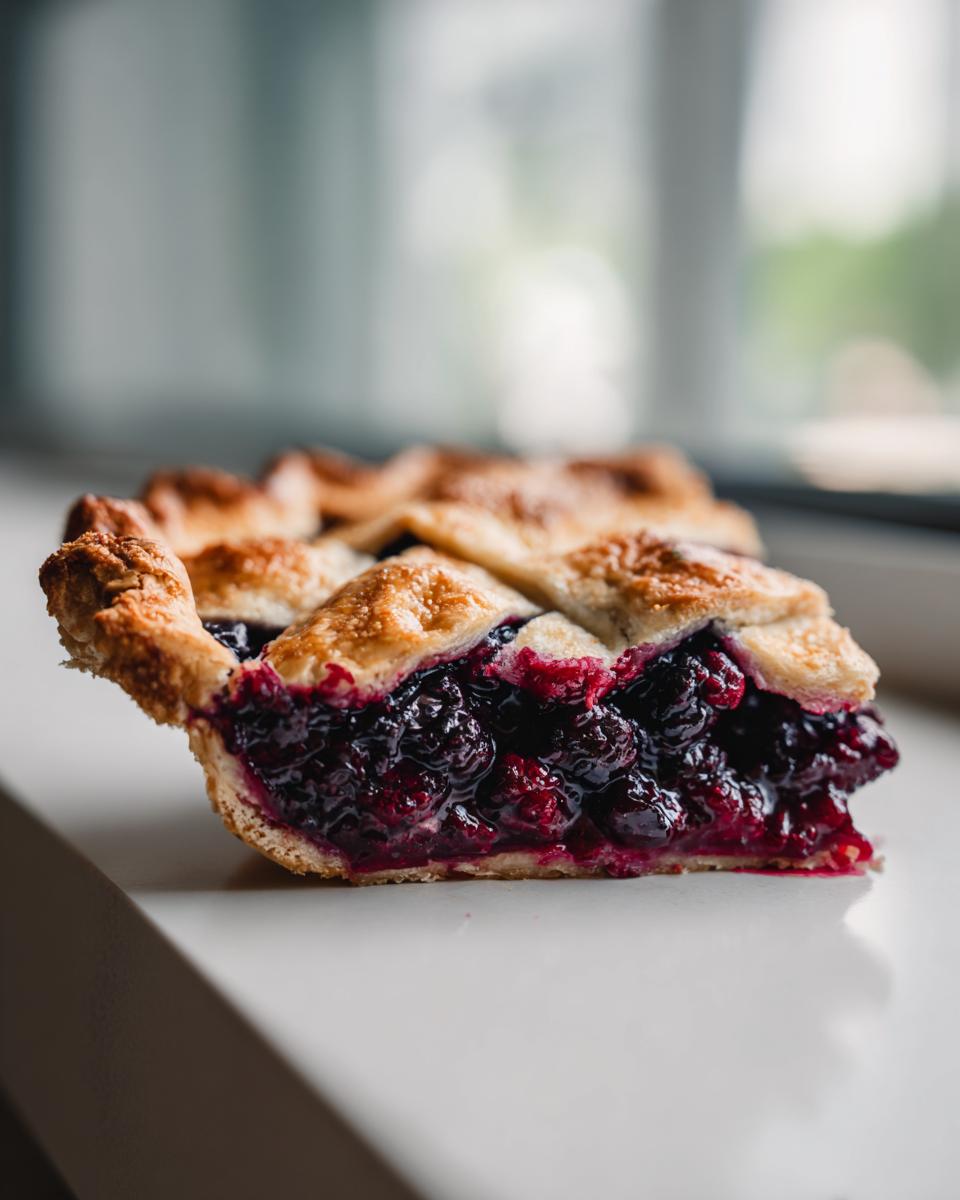
The filling, even when it looks perfectly bubbly hot, is still thin. That cornstarch needs time to cool down and actually thicken up properly. If you cut into this pie after only an hour, you’re going to get that runny, disappointing mess you worked so hard to avoid. I wait a minimum of four full hours, sometimes longer if the kitchen is really warm. It transforms from ‘hot fruit soup’ to a sliceable, hold-your-shape masterpiece.

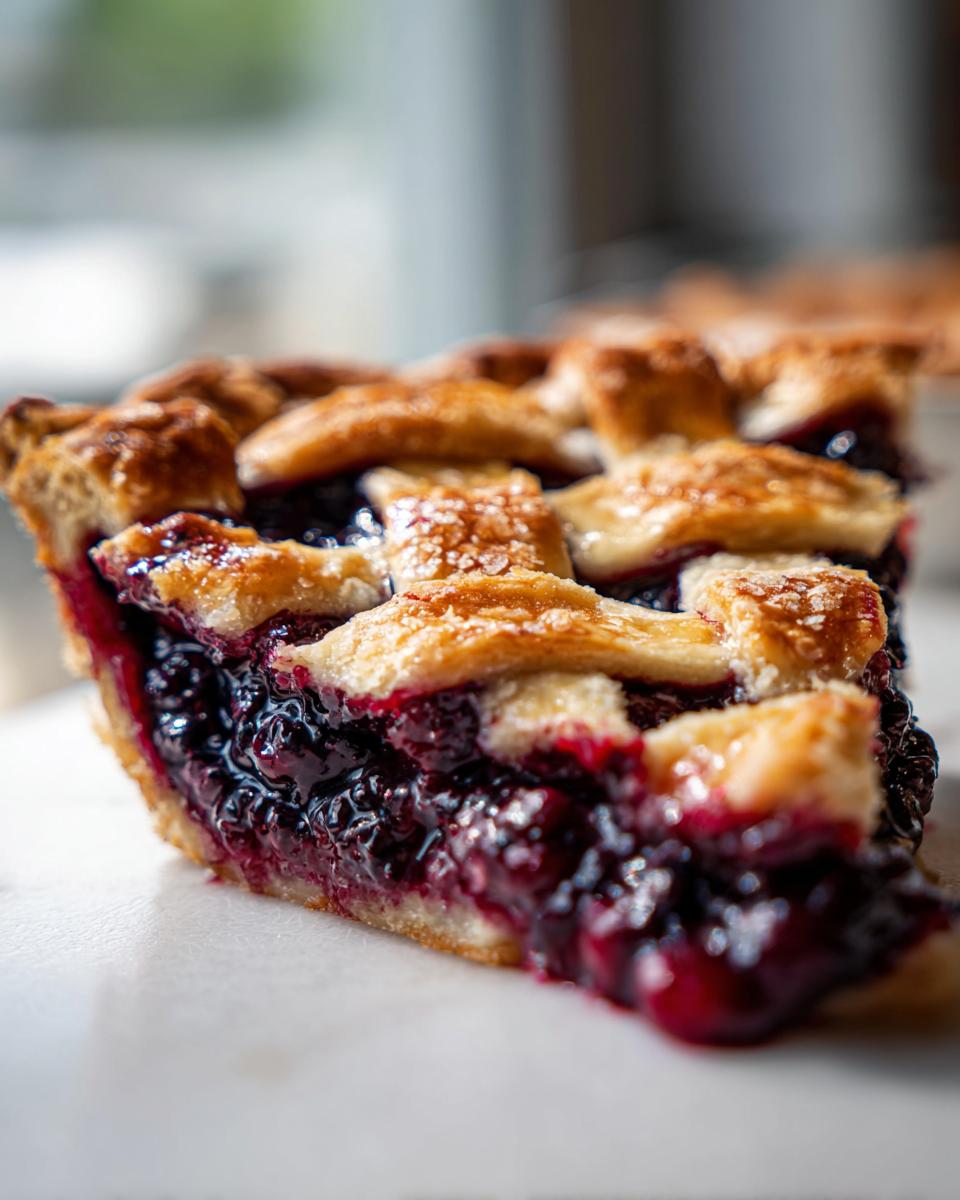
When it is finally, finally cool enough, slicing the pie is almost ceremonial. Every bite should give you that glorious contrast: the crisp, delicate layers of the all-butter crust against that jammy, intensely flavored blackberry center. This is exactly how my grandmother served it—no fuss, no fancy sauces, just pure, honest flavor.
For the ultimate experience, grab a scoop of high-quality vanilla bean ice cream. The cold creaminess melting over that tart, warm-or-room-temperature pie? Pure comfort. If you are looking for another recipe that perfectly captures that home-cooked feeling, you have to try my recipe for the best mashed potatoes; they are the perfect savory side for any meal!
Tips for Baking with Fresh Blackberries
When berries are in season, there’s no substitute for finding the best ones you can. Dealing with fresh fruit, especially something as delicate as wild blackberries, requires a little extra care compared to using frozen. This direct attention to the ingredient is what separates a good homemade berry pie from a truly spectacular one.
First off, where are you getting them? If you happen upon wild blackberries—maybe you know a secret patch or hit a local farm stand—those little guys are usually tart and intensely flavored. They are amazing, but they can be fragile. If you’re picking them yourself, take a shallow container. Deep bowls mean that the berries on the bottom get crushed by the weight of the ones above them before you even get them home!
When you bring them home, don’t wash them until just before you plan to mix them into your sugar and cornstarch blend. Excess moisture is the enemy when baking with fresh blackberries; it makes them turn mushy faster and can throw off the water balance in your filling mixture. Just a quick rinse under cool water and drain them gently on paper towels.
If you happen to be dealing with cultivated berries that look a bit softer than you’d like, don’t worry! They’ll still taste fantastic once they bake down. Just be extra gentle when mixing them with the sugar and cornstarch. You want to carefully fold the dry ingredients in rather than stirring vigorously. A light toss is all it takes to coat them beautifully without bruising them.
Variations on the Blackberry Pie Theme
I believe firmly that once you master the core technique—that flaky crust and set filling—you can play around with the presentation! Not every gathering calls for a full, two-crust pie, and sometimes you just want something you can eat standing up. If you’re looking to shake things up but keep that wonderful blackberry flavor going strong, I have a couple of quick ideas.
First, let’s talk about skipping the top crust entirely. If you love that crisp, crumbly texture more than a woven lattice, you can completely shift the character of the pie with a simple topping. You can easily turn this into a blackberry crumble topping recipe by skipping the second pie disk entirely. Just mix 1 cup of flour, 3/4 cup of brown sugar, 1/2 cup of old-fashioned oats, and 1/2 cup of cold, cubed butter until you have large, irregular clumps. Sprinkle that generously over your filled bottom crust before baking. It bakes up golden and crunchy—it’s just phenomenal!
Alternatively, if you want something portion-controlled and perfect for packing up for a picnic, try turning this into bars. This is one of my favorite easy blackberry pie bars shortcuts. Instead of lining a pie plate, press about two-thirds of your chilled, prepared pastry into the bottom of a greased 9×13 inch pan. Pour that beautiful filling right over the top. Then, crumble the remaining dough over the top like you would for a crisp. Bake it at the same temperature as the pie (maybe shave about 10 minutes off the time) until set. They cut beautifully once cooled, and they’re perfect for sharing!
For a completely different spin on a handheld treat, you could always use this berry mixture to fill small turnovers or homemade pizza bites (just kidding on the pizza part, but you get the idea!). You can find some great inspiration for adapting recipes like this over at Cook with Ayla.
Storage and Reheating Instructions for Blackberry Pie
So, you actually managed to have leftovers? That’s a feat in itself because this blackberry pie disappears fast! Handling the leftovers correctly is almost as important as the baking process itself, especially if you want that crust to remain flaky when you reheat it later. I’ve learned a thing or two over the years about keeping a slice tasting like it just came out of the oven.
First, you absolutely must store this pie at room temperature (on the counter) if you plan on eating it within the first 12 hours after it has finished cooling. Why? Because refrigeration is the enemy of a flaky crust! When you put that beautiful butter structure into the fridge, the fat hardens up, and you end up with a dense, almost cookie-like crust instead of a shatteringly crisp one.
If you need to keep it longer than a day, then the fridge is necessary for food safety, especially with all that fruit juice. Cover the plate loosely with plastic wrap or foil—don’t wrap it tightly, or you’ll trap moisture and steam the crust soft! When you pull it out of the fridge, let it sit on the counter for at least an hour before you even think about serving it. This allows some of that butter texture to soften back up.
Now, for the real kicker: reheating a slice. Everyone wants that slightly warm, gooey center effect, right? The microwave is a fast path to a soggy bottom, so I always skip it for reheating pie slices. Instead, I use a small toaster oven or a conventional oven set very low, around 275°F (135°C).
Place the slice directly on the rack (maybe on a small piece of foil just in case). Heat it for about 8 to 10 minutes. This gentle warmth thaws the chilling butter just enough to make the crust crisp up again and warms that gorgeous, thickened blackberry filling without cooking it further. It’s the best way to bring this incredible comfort food dessert back to life, just like you intended!
Frequently Asked Questions About Blackberry Pie
I know baking results in questions! When you’re dealing with delicate fruit and temperamental pastry, it’s natural to double-check things. I’ve gathered the most common things folks ask me about bringing this perfect homemade berry pie to life. These tips should help you troubleshoot any last-minute worries before you pull that showstopper out of the oven.
Can I use frozen blackberries in this blackberry pie recipe?
Yes, 100%! I’ve tested this recipe with frozen berries dozens of times, especially when the craving hits me in the middle of winter, and they are fantastic. The key, and I mean the *absolute* key, is this: Do not thaw them first! Toss the frozen berries right into your sugar and cornstarch mixture. Thawing them releases too much liquid prematurely, and that’s when you risk messes.
Because the berries start colder, they just take a little longer to heat up enough for the cornstarch to do its job. You might need to add an extra minute or two onto the final baking time. Keep an eye on the filling bubbling thickly, and you’ll be golden. This makes it a great option for summer fruit dessert recipes even when summer is long past!
What is the best way to serve this dessert for gatherings?
This is actually one of my favorite parts of this whole experience! Because we relied on that 4-hour cooling time, the pie is meant to be served either completely at room temperature or just slightly warm. If you cut it straight from the oven, it’s a beautiful, juicy disaster, remember? For a gathering, I usually let it cool completely (it tastes better anyway!).
If you absolutely must serve it warmer, you can reheat the *entire* pie very briefly, or reheat individual slices using the low oven convection method I shared earlier. My preferred presentation for an easy dessert for gatherings is to serve slices with a very small dollop of freshly whipped cream—just a quarter cup of heavy cream whipped with a teaspoon of sugar and a dash of vanilla. It’s lighter than ice cream but adds that luscious finish. If you want to see how another fantastic berry recipe holds up, check out this recipe for fresh blackberry pie.
I hope those little tips help you serve up something truly special! If baking doesn’t go perfectly the first time, don’t sweat it. That’s why we keep practicing!
Share Your Perfect Blackberry Pie Creation
You’ve done the work! You kept the butter cold, you blind-baked that bottom crust, and you waited what felt like an eternity for it to cool. Now, you get to enjoy the fruits (literally!) of your labor. In my journey from professional kitchens back to the home setting, the best part of sharing a recipe like this classic blackberry pie is hearing from you folks who bring it to life in your own kitchens.
I genuinely want to know how it went! Did the lattice hold up? Was your filling perfectly set? Leave a star rating right down below so others know what a winner this recipe is. And if you snapped a picture of that gorgeous, golden creation, feel free to share it! Tagging me is always appreciated, and seeing your family gather around that pie is the whole reason I keep writing these recipes down.
Remember, cooking is about generosity, and sharing your successful bakes is part of that spirit. I put my heart into making sure this recipe honors the tradition of American baking, and your success is the best compliment I could ever receive. If you need a wonderful savory pairing for that slice, try out my recipe for easy creamy garlic sauce—it’s surprisingly good with a slice of warm pie, don’t knock it ’til you try it!
PrintClassic Homemade Blackberry Pie with Flaky Lattice Crust

You will master the art of the perfect pie with this recipe. It features an all-butter, flaky double crust and a perfectly balanced sweet-tart blackberry filling. This Old Fashioned Pie guarantees a showstopper dessert with no soggy bottom.
- Prep Time: 45 min
- Cook Time: 60 min
- Total Time: 105 min
- Yield: 8 servings 1x
- Category: Dessert
- Method: Baking
- Cuisine: American
- Diet: Vegetarian
Ingredients
- 2 1/2 cups all-purpose flour
- 1 teaspoon salt
- 1 cup (2 sticks) unsalted butter, very cold and cubed
- 1/2 cup ice water, plus more if needed
- 6 cups fresh or frozen blackberries
- 1 1/2 cups granulated sugar
- 1/2 cup cornstarch
- 1 tablespoon lemon juice
- 1/4 teaspoon ground cinnamon
- 1 large egg, beaten with 1 teaspoon water (for egg wash)
- 1 tablespoon coarse sugar (for sprinkling)
Instructions
- Prepare the Pie Crust: In a large bowl, whisk together the flour and salt. Cut in the cold butter using a pastry blender or your fingers until the mixture resembles coarse crumbs with some pea-sized pieces of butter remaining. Gradually add the ice water, one tablespoon at a time, mixing until the dough just comes together. Do not overmix. Divide the dough in half, flatten each half into a disk, wrap in plastic, and chill for at least 2 hours.
- Prepare the Filling: In a separate bowl, gently combine the blackberries, granulated sugar, cornstarch, lemon juice, and cinnamon. Toss lightly until the berries are evenly coated. Set aside while you roll out the bottom crust.
- Assemble the Bottom Crust: On a lightly floured surface, roll out one disk of dough into a 12-inch circle. Carefully transfer the dough to a 9-inch pie plate. Trim the edges, leaving a 1-inch overhang, and chill the pie shell.
- Prevent a Soggy Bottom: Preheat your oven to 400°F (200°C). Line the chilled bottom crust with parchment paper and fill with pie weights or dried beans. Bake for 15 minutes. Remove the weights and parchment paper. This step helps set the bottom crust.
- Fill and Top the Pie: Pour the blackberry filling into the partially baked crust. Roll out the second disk of dough. Cut strips to create a lattice top, or place the whole top crust over the filling, cutting vents for steam release. Crimp the edges to seal the top and bottom crusts together.
- Egg Wash and Bake: Brush the top crust or lattice with the egg wash and sprinkle generously with coarse sugar. Place the pie on a baking sheet to catch any drips.
- Bake: Bake at 400°F (200°C) for 20 minutes. Reduce the oven temperature to 375°F (190°C) and continue baking for another 35 to 45 minutes, or until the crust is golden brown and the filling is bubbling thickly. If the edges brown too quickly, cover them with foil strips.
- Cool: Cool the blackberry pie completely on a wire rack for at least 4 hours before slicing. This allows the cornstarch to fully set the juicy filling.
Notes
- For the flakiest crust, keep all ingredients very cold. Work quickly when handling the dough.
- If you use frozen berries, do not thaw them first; add them directly to the sugar mixture.
- Serve this classic American dessert warm with vanilla ice cream for the ultimate comfort food experience.
Nutrition
- Serving Size: 1 slice
- Calories: 450
- Sugar: 35g
- Sodium: 250mg
- Fat: 25g
- Saturated Fat: 15g
- Unsaturated Fat: 10g
- Trans Fat: 0g
- Carbohydrates: 58g
- Fiber: 4g
- Protein: 5g
- Cholesterol: 60mg