

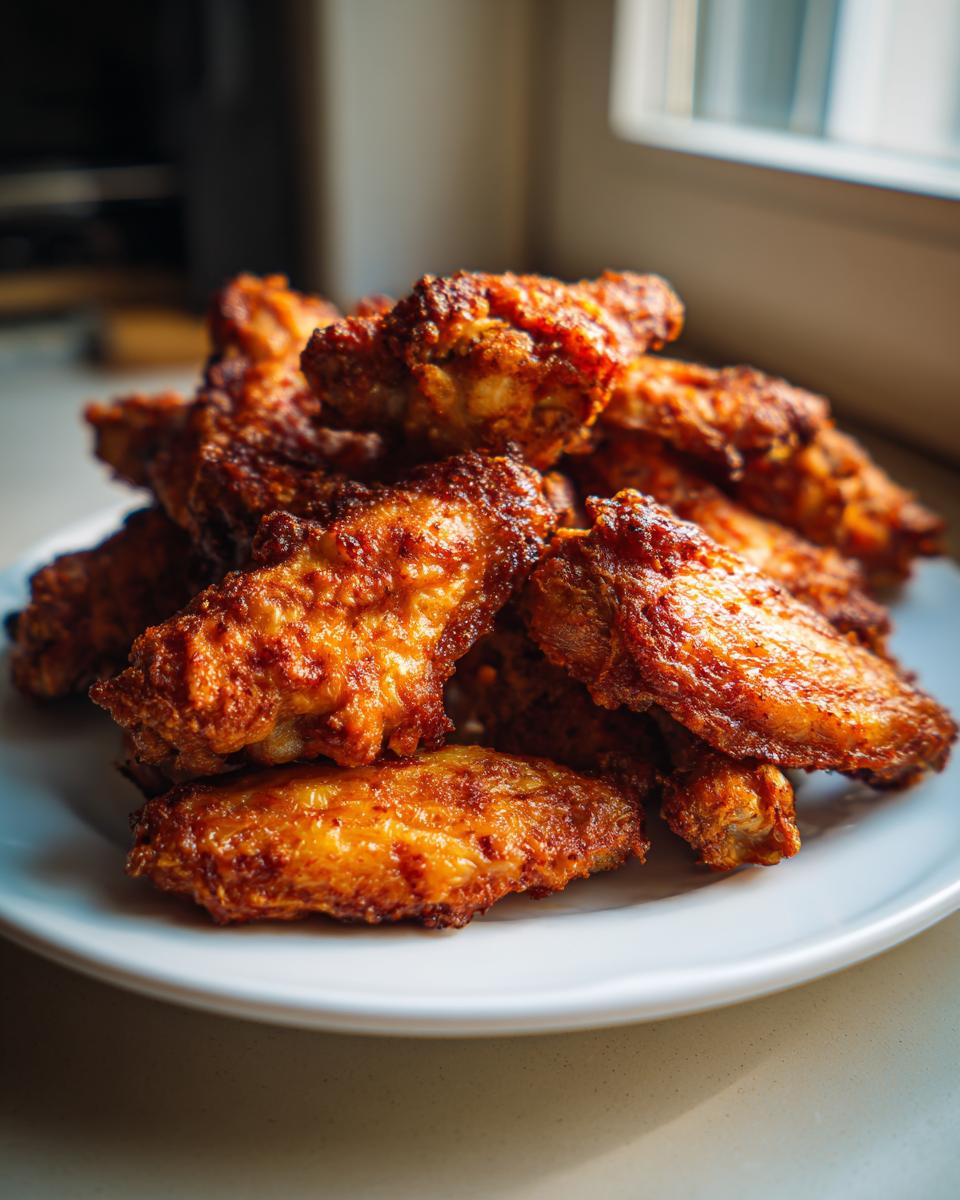
Oh, the tragedy of a soggy chicken wing! Doesn’t it just break your heart? You look forward to that ultimate, crackling crunch, and what do you get? Something rubbery that tastes like it took a quick swim in its own juices. That’s unacceptable, especially for game day chicken wings.
For years, I wrestled with this—balancing the need for juicy meat against achieving that gorgeous, bronzed skin you usually only get from a deep fryer. When I was working professionally, the fryer was always blazing hot, but at home, I wanted something simpler, cleaner, and honestly, something I could actually feel good about serving my family. So, I dedicated months to testing every trick out there to deliver the absolute best chicken wing recipe that works right in your standard oven.
I’m so happy to tell you, we cracked the code. This baked chicken wings recipe uses a simple, almost magical principle involving baking powder. It sounds strange, I know, but trust me, this technique transforms the skin, delivering incredibly crispy baked chicken wings that are shockingly juicy inside. Forget the grease; this is my foolproof method for no fry chicken wings, born right out of my own quest for home kitchen perfection.
- Why This Baked Chicken Wings Recipe Delivers Ultimate Crispiness
- Ingredients for Perfect Crispy Chicken Wings
- How to Make Crispy Chicken Wings in the Oven
- Tips for Success with Baked Chicken Wings
- Serving Suggestions for Your Game Day Chicken Wings
- Storage and Reheating Instructions for Leftover Chicken Wings
- Frequently Asked Questions About Crispy Chicken Wings
- Nutritional Estimates for Baked Chicken Wings
- Share Your Favorite Chicken Wings Creations
Why This Baked Chicken Wings Recipe Delivers Ultimate Crispiness
Look, I tried everything before settling on this method for my no fry chicken wings. I did the cornstarch dust, I did the weird parchment paper lining, I even tried air frying everything until it tasted like shoe leather. Nothing quite got that beautiful, crackling exterior on the crispy chicken wings oven without totally drying out the inside until I realized the power of a simple raising agent.
The key is baking powder—specifically, aluminum-free aluminum-free baking powder. It chemically changes the pH level of the skin just enough to help it brown deeper and dry out faster in the high heat. It’s pure science winning over brute force, my friends! I spent three separate weekends testing wing batches until I found the exact ratio that gave me that restaurant-quality, savory crunch. This is exactly how we achieve those famously juicy chicken wings without ever hitting oil.
If you love that crispy texture, you might also want to check out my recipe for oven-baked garlic parmesan bites later on, because texture is everything!
The Secret to Juicy Chicken Wings Tutorial: Preparation Matters
Before any baking powder touches that skin, we have to do the groundwork. First, make sure you separate your flats from your drumettes—it helps them cook evenly. But honestly, nothing matters more than drying them out. Grab paper towels, and I mean *really* grab them. You must pat those pieces until you think they can’t possibly get any drier. Moisture is the enemy of crispiness, so don’t skip this vital step!
Ingredients for Perfect Crispy Chicken Wings
Okay, now that you know *why* this works, let’s talk about what you need in your bowl. The ingredient list for these chicken wings is gloriously short. Seriously, this recipe proves that the best flavors come from a perfect technique applied to simple tools, not some exotic grocery haul. I’ve learned over the years that the quality of the baking powder actually matters here since it’s doing heavy lifting for us!
Don’t forget to check out my guide on making no-bake Oreo dirt cake if you need a dessert for your next party—because you should always have a snack *and* a showstopper ready.
Here’s what you need sitting on your counter:
- 3 lbs chicken wings (and please separate those flats and drumettes—it makes a difference!)
- 1 tablespoon aluminum-free baking powder (This is the game-changer, folks!)
- 1 teaspoon kosher salt
- 1/2 teaspoon black pepper
- 1/2 teaspoon garlic powder
- 1/4 teaspoon cayenne pepper (If you like a tiny bit of warmth, otherwise leave it out!)
That’s it! We’re not masking flavor; we’re perfecting texture. These measurements are balanced perfectly to coat three pounds of wings without drowning them in unnecessary powder.
How to Make Crispy Chicken Wings in the Oven
Alright, here’s where the real magic happens. Getting these chicken wings out of the oven looking golden and tasting like they spent all day by a deep fryer is all about control. We’re looking for a roaring hot oven—preheat that thing to 425 degrees Fahrenheit before you even start tossing. And listen up: you need a wire rack set over a foil-lined baking sheet. That rack is critical because it lets the air move all the way around the wing. We want 360 degrees of crisp, not soggy bottoms!
Once they’re totally dry and the oven is hot, we move to building that crunch. If you’re looking for something truly satisfying to serve alongside these, my baked chicken parmesan recipe is a family favorite!
Coating Your Chicken Wings for Maximum Crunch
Take all your dry ingredients—that baking powder blend, salt, pepper, and spices—and whisk them together really well in a big bowl. You need that seasoning totally uniform! Now, toss your super-dry wings into that bowl. I use my hands for this part, making sure every single flat and drumette gets a light, even blanket of the powder mixture. Don’t try to pour it on or you’ll get clumps that burn. We want barely-there coverage that adheres perfectly. Once coated, lay them out on that waiting wire rack, making sure they aren’t touching. Space is your friend here!
Baking Times and Flipping for Evenly Cooked Chicken Wings
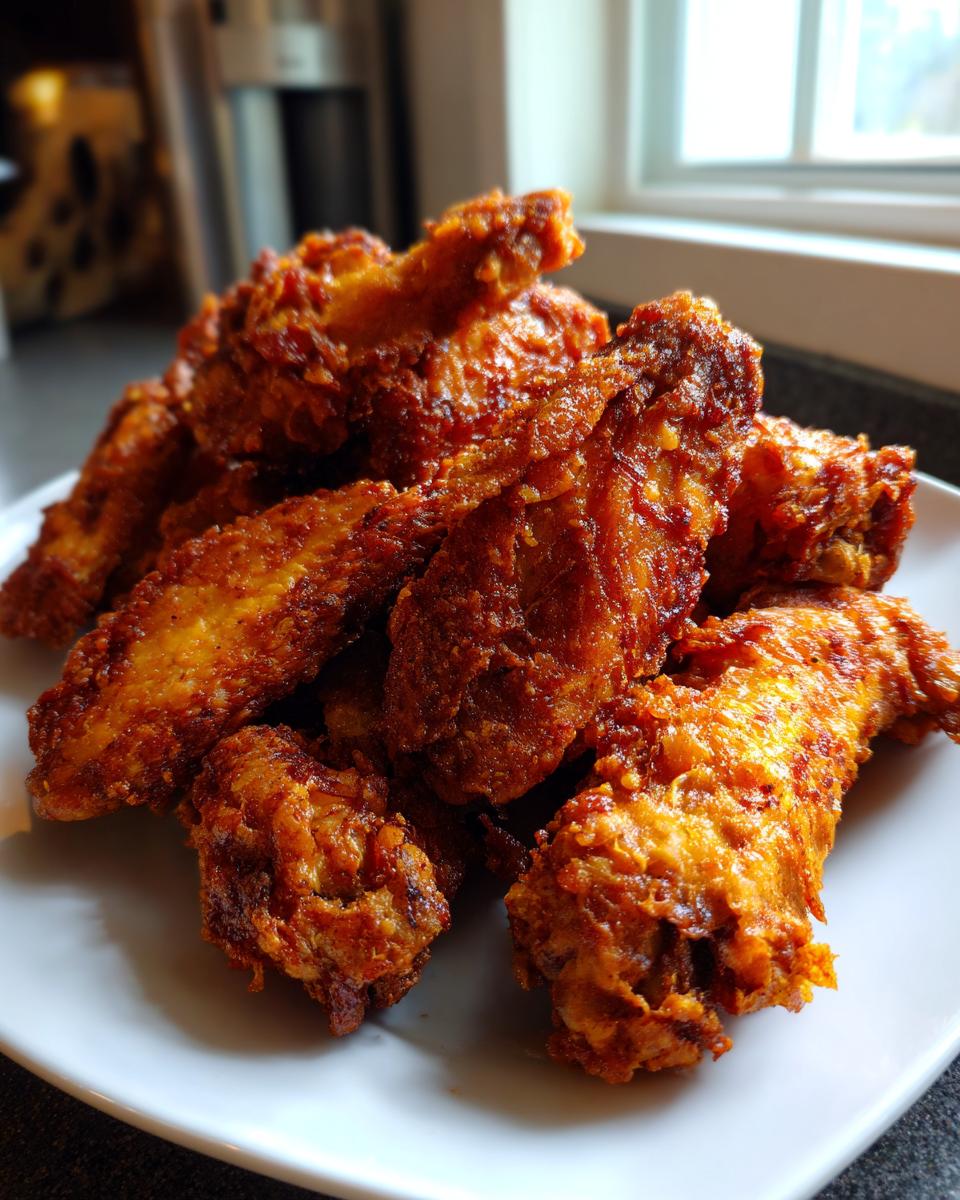
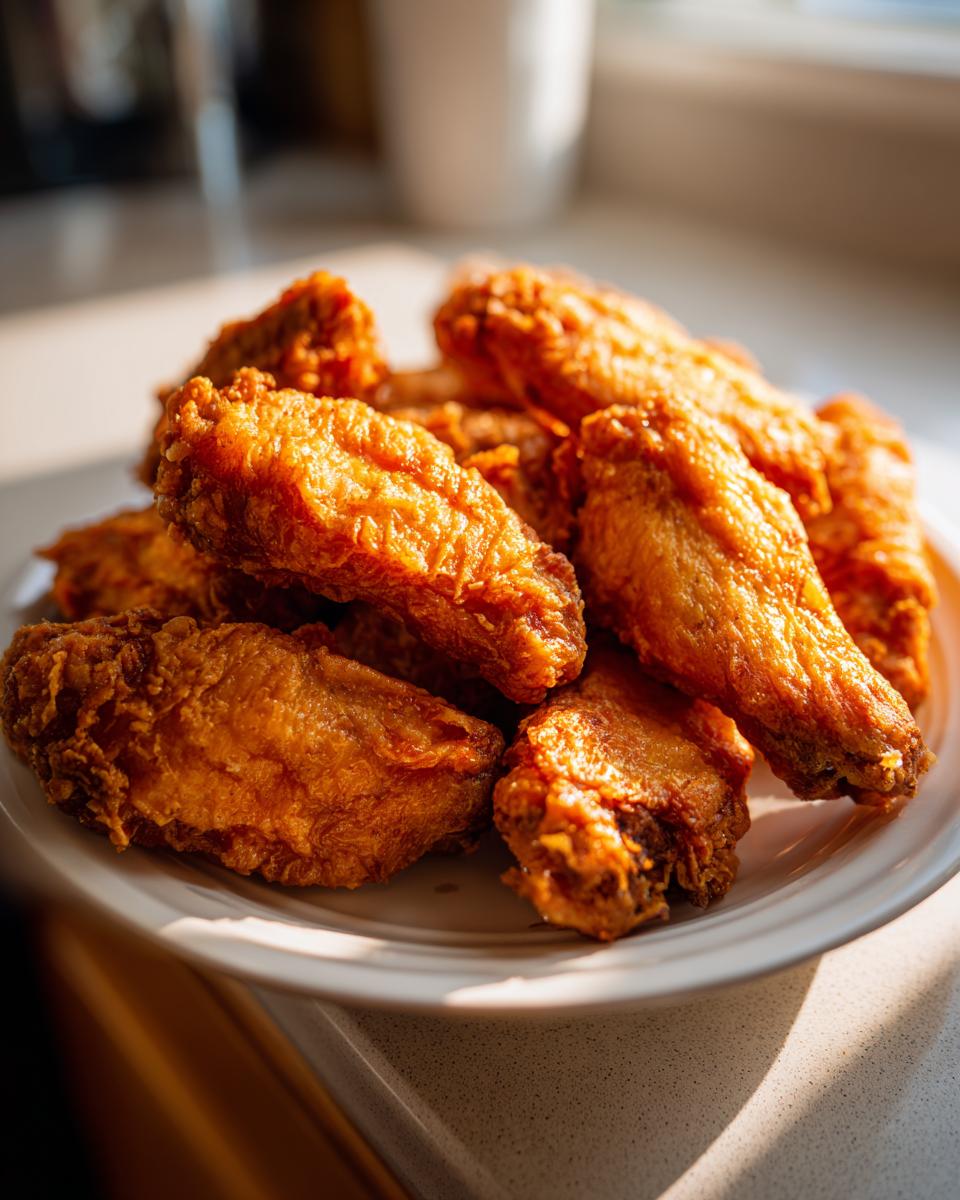
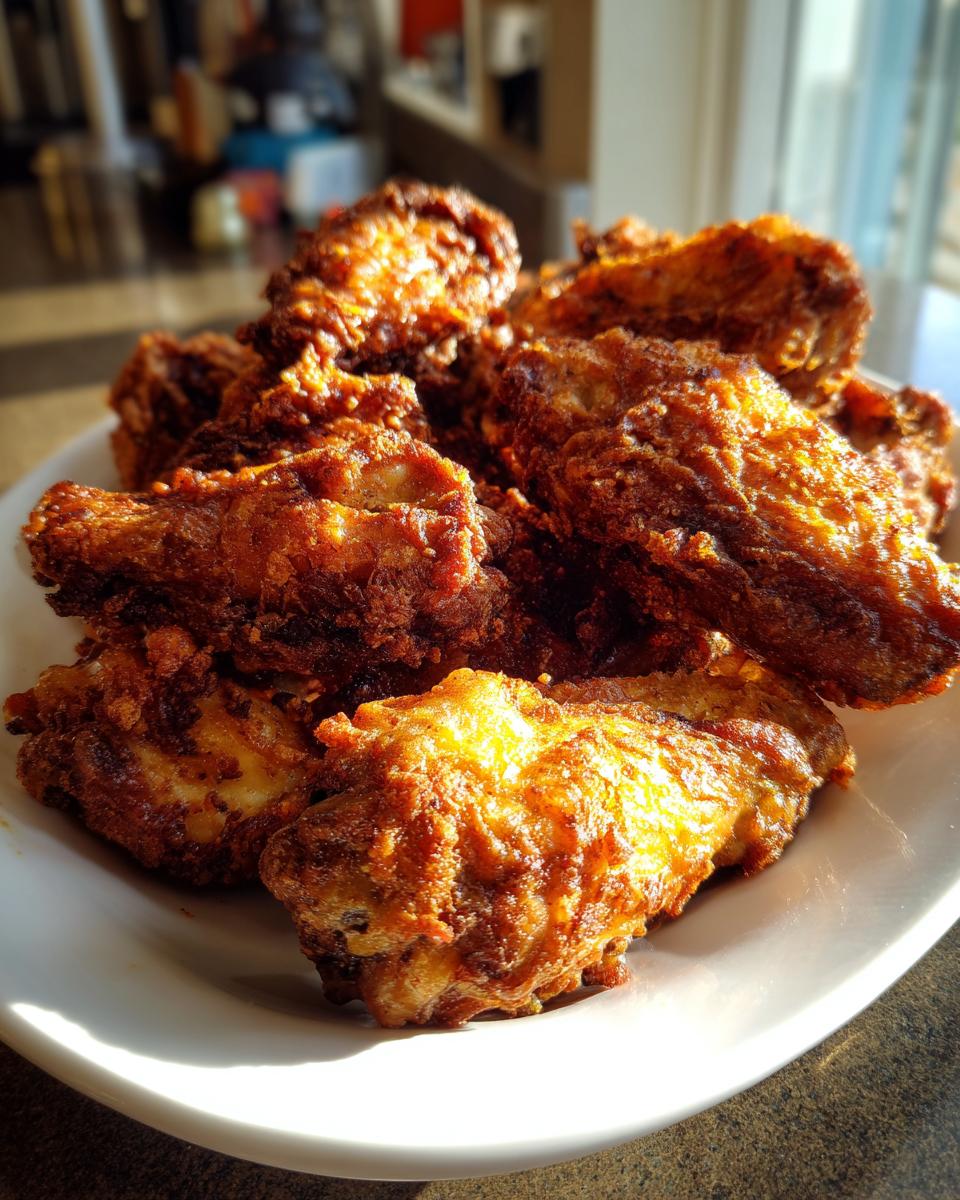
The cooking process is a two-act play. First, we blast them for 25 minutes at 425°F. This sets the skin. When those 25 minutes are up—careful opening the oven, it’s hot—you flip every single wing over. Then, they go back in for the second act: another 20 to 25 minutes. You’re looking for that deep, deeply golden brown color. They should look totally rendered and unbelievably crisp to the touch. That’s how you know you’ve nailed the best chicken wing seasoning application and technique!
Tips for Success with Baked Chicken Wings
Look, I already told you these are the best chicken wing recipe base you can find, but success sometimes comes down to those little extra touches. These kitchen lessons I picked up trying to master chicken wing preparation tips go beyond just the baking powder. If you follow the basic steps, you’ll get great wings, but if you pay attention to these finishing moves, you’ll get legendary wings.
If you’re looking for a way to guarantee juiciness for future meals, check out how I build flavor with my ultimate all-purpose juicy chicken marinade! It’s great for grilling, too.
The biggest thing folks ask me is: How do I get sauces to stick without making the skin instantly soggy? It’s all about timing. You just pulled those gorgeous, crisp wings out of the oven, right? That’s the moment to act.
Customizing Your Baked Chicken Wings Recipe
If you’re aiming for classic Buffalo chicken wings recipe style or a sticky Honey BBQ wings baked version, you must sauce them right out of the oven. The residual heat and the slightly dry skin are perfect for grabbing onto sauce. Get your sauce warm—maybe heat it gently on the stovetop—and toss the wings *immediately* while they are blistering hot from the baking sheet. Toss them quickly until they are evenly coated, but don’t let them sit soaking in the bowl.
For the ultimate set, if you’re going for a sticky glaze texture, transfer those sauced wings back onto that wire rack and pop them under the broiler for just 2 to 3 minutes. Watch them like a hawk! You want the sauce to bubble and set slightly, not burn off completely. That final, quick blast of heat locks in the moisture and gives you that glossy, slightly sticky finish that everyone wants from great party chicken wings ideas.
Oh, and remember that air fryer tip I promised? If you’re ditching the oven this time around, these same coating principles apply! Cook them in the air fryer at 380 degrees Fahrenheit for about 20 minutes, giving the basket a good shake halfway through. Either way, dry skin leads to crispy results!
Serving Suggestions for Your Game Day Chicken Wings
You’ve nailed the crunch! Now, what are you putting next to those perfect chicken wings? This is where you turn a great snack into an epic spread. Since these wings are so savory and crisp, you want sides that are either cooling or have a bright, fresh contrast. Forget heavy sides; this is the time for dipping and grazing!
For me, the essential pairing has to be a great dip. Since we’re likely dealing with Buffalo or savory dry rubs, you absolutely need that cooling element. I always have a fresh batch of my quick creamy blue cheese dip ready to go. If blue cheese isn’t your thing, a simple ranch dip works just as well.
When it comes to bigger party chicken wings ideas, you don’t want anything that requires utensils. Think portable! A big bowl of my easy no-cook Cowboy Caviar is fantastic because the beans and veggies offer a completely different texture profile than the wings. Serve both, throw on a playlist, and enjoy the applause!
Storage and Reheating Instructions for Leftover Chicken Wings
Listen, I know these chicken wings are going to disappear fast, but let’s be real—sometimes you have leftovers, maybe even better the next day! The challenge with any crispy baked good is keeping that crunch alive. If you just toss sauced wings into a sealed Tupperware container, you are setting yourself up for disappointment. The steam gets trapped, and you’re back to square one with damp skin.
For any wings you plan to save—either dry rub or sauced—you need them cooled down first. Don’t put hot wings directly into a sealed container, or they’ll steam themselves into mush. Let them sit on the counter until they reach room temperature. Then, here’s the trick for storage: use an airtight container, but line the bottom with a paper towel. This absorbs any residual moisture trying to escape overnight. They should be good in the fridge for three, maybe four days tops.
Now, for the reheating—this determines if you get that glorious crunch back. Please, for the love of good cooking, banish the microwave from this equation! Microwaving turns crispy things soft immediately. We want to reverse the cooking process gently.
The Best Way to Revive Crispy Baked Chicken Wings
The oven or the air fryer are your only friends here. For the oven, spread those leftovers out on that same trusty wire rack over a baking sheet. This mimics the original cooking setup and lets the heat circulate again. Set your oven to about 375 degrees Fahrenheit. Pop them in for about 8 to 10 minutes. You’ll notice the skin tightening up and getting that lovely, crackly texture back. It’s truly amazing how well they revive!
If you’re in a hurry, the air fryer is faster, but you need lower heat. Set your air fryer to about 350 degrees Fahrenheit and cook them for only 4 to 6 minutes. Shake the basket once halfway through. If you had sauced wings, they might need an extra minute, or you can even flash them under the broiler for 60 seconds at the very end—just watch them closely so the sauce doesn’t burn! Following these chicken wing preparation tips means your leftovers taste almost as good as fresh.
Frequently Asked Questions About Crispy Chicken Wings
I always get questions when I share this recipe because everyone wants to know the fine print on getting crispy chicken wings oven perfection at home. Don’t worry if you need to tweak things; that’s what cooking is all about! Here are some of the most common things folks ask me about achieving the best chicken wing recipe results in their own kitchens.
If you’re looking for more ideas for when you need something fast, take a peek at my guide on quick, easy weeknight dinners!
Can I use baking soda instead of baking powder for my chicken wings?
This is a popular question, and honestly, I highly recommend sticking to the baking powder—especially the aluminum-free kind, just like I noted earlier. Baking powder is designed to lift and dry the skin surface during baking for that perfect crisp. Baking soda is much more alkaline—it can sometimes react too strongly, potentially giving the skin a slightly metallic or soapy flavor if not perfectly rinsed off, which we definitely don’t want on our easy baked wings!
How long can I bake chicken wings using this method?
For the standard 425°F method I use, the total time is usually between 45 and 50 minutes, split into two halves with a flip. If you find your wings seem too pale after the full cook time, just leave them in for another 5 minutes. The real test isn’t the clock, though; it’s the color! You’re looking for deeply golden brown. If you use frozen wings, plan on adding at least 15 to 20 extra minutes to your total cook time to allow them to thaw and dry adequately first.
Can I use frozen chicken wings without thawing them first?
Technically, you *can* put frozen wings in the oven, but I wouldn’t recommend it if you want crispy chicken wings oven results. If you bake them from frozen, they steam themselves first while they thaw, and that steam ruins any chance of achieving that desirable crunch. For the best flavor and that beautiful golden exterior on your healthy chicken wings recipe attempt, always thaw them completely in the fridge overnight. Then, make absolutely sure you pat them bone-dry before applying the seasoning mixture!
What’s the difference between using a baking sheet and a wire rack?
This is crucial for no fry chicken wings success. If you place the wings directly on a foil-covered baking sheet, the bottom of the wing sits in its own rendered fat and moisture, guaranteeing you a soggy bottom. The wire rack elevates the chicken wings so that the hot air can circulate completely underneath them. Air circulation means crisp all the way around—it’s the secret to evenly cooked, juicy chicken wings every single time.
Nutritional Estimates for Baked Chicken Wings
Now, I know what some of you are thinking: Julian, these look incredible, but are they secretly loaded with hidden grease? Nope! Because we ditched the fryer and used high heat to render the fat instead of bathing the chicken wings in it, these are genuinely a fantastic option for a healthier snack. Remember, these figures are based on using the dry rub seasoning only, without added sauces like Honey BBQ, which will definitely swing the sugar and carb counts up!
These numbers are estimates, of course, since every wing is a little different and the way the fat renders always varies. But as a baseline for these incredibly crispy chicken wings oven cooked wings, here’s what you’re looking at per serving (which is about 4 wings, according to my testing):
- Calories: 280
- Fat: 18g (Remember, a lot of this renders out during baking!)
- Saturated Fat: 5g
- Protein: 27g
- Carbohydrates: 1g
- Sugar: 0.5g
See that high protein and low carb count? That’s exactly why I love these baked chicken wings recipe wings for game day snacking or a satisfying, guilt-free appetizer. They fill you up without weighing you down!
Share Your Favorite Chicken Wings Creations
Honestly, seeing what you all do with these recipes is my favorite part of running Julia Meal. I spent so long chasing the perfect chicken wings texture here in my own kitchen, and now that I’ve laid out the blueprint for you, I want to see them on your tables! Whether you followed the dry rub exactly or you immediately tossed them in a killer sauce, I want to hear about it.
Did you stick with a classic Buffalo coating? Or maybe you followed my hint and tried out a homemade Garlic Parmesan coating? Let me know in the comments below which sauce you picked for your game day chicken wings! Your sauce pairing ideas often inspire my next batch, so don’t be shy about sharing your brilliant combinations.
If you took a picture of those beautifully bronzed, crispy bites—and I hope you did, because they deserve it—tag me on social media! Sharing your successes is what keeps this whole culinary journey worthwhile. It’s about building memories around great food, right? And when you get a chance, please leave a rating on the recipe. Those little stars help other home cooks find the absolute best chicken wing recipe when they’re searching for their own perfect flavor adventure.
If you’re curious about who I am and why I obsess over these classic techniques, you can always swing by my About Page and say hello! Happy cooking, everyone!
PrintExtra Crispy Baked Chicken Wings (No Frying Required)

Learn the simple technique to make incredibly crispy baked chicken wings in your oven that rival fried versions. These wings are juicy inside with perfectly golden, crackling skin, making them ideal for game day or parties.
- Prep Time: 15 min
- Cook Time: 45 min
- Total Time: 60 min
- Yield: 4 servings 1x
- Category: Appetizer
- Method: Baking
- Cuisine: American
- Diet: Low Fat
Ingredients
- 3 lbs chicken wings (flats and drumettes separated)
- 1 tablespoon baking powder (aluminum-free preferred)
- 1 teaspoon kosher salt
- 1/2 teaspoon black pepper
- 1/2 teaspoon garlic powder
- 1/4 teaspoon cayenne pepper (optional)
Instructions
- Preheat your oven to 425 degrees Fahrenheit. Line a large, rimmed baking sheet with aluminum foil for easy cleanup. Place a wire cooling rack on top of the baking sheet.
- Pat the chicken wings completely dry using paper towels. This step is crucial for achieving crispiness.
- In a large bowl, combine the baking powder, kosher salt, black pepper, garlic powder, and cayenne pepper. This is your dry rub.
- Add the dried chicken wings to the bowl. Toss thoroughly until every piece is lightly and evenly coated with the baking powder mixture.
- Arrange the coated wings in a single layer on the wire rack, ensuring there is space between each wing for air circulation. Do not overcrowd the rack.
- Bake for 25 minutes.
- Flip each wing over. Return the pan to the oven and bake for another 20 to 25 minutes, or until the skin is deeply golden brown and very crispy.
- Remove the wings from the oven. If you plan to toss them in sauce (like Buffalo or Honey BBQ), do so immediately while hot. Serve right away for the best texture.
Notes
- For the crispiest results, use aluminum-free baking powder; it helps raise the skin’s pH level, promoting browning and crisping.
- If you prefer sauced wings, toss them in your favorite sauce immediately after they come out of the oven, then return them to the oven under the broiler for 2-3 minutes to set the sauce.
- If you are using an air fryer, cook at 380 degrees Fahrenheit for 20 minutes, shaking the basket halfway through.
Nutrition
- Serving Size: 4 wings
- Calories: 280
- Sugar: 0.5
- Sodium: 350
- Fat: 18
- Saturated Fat: 5
- Unsaturated Fat: 13
- Trans Fat: 0
- Carbohydrates: 1
- Fiber: 0
- Protein: 27
- Cholesterol: 95