

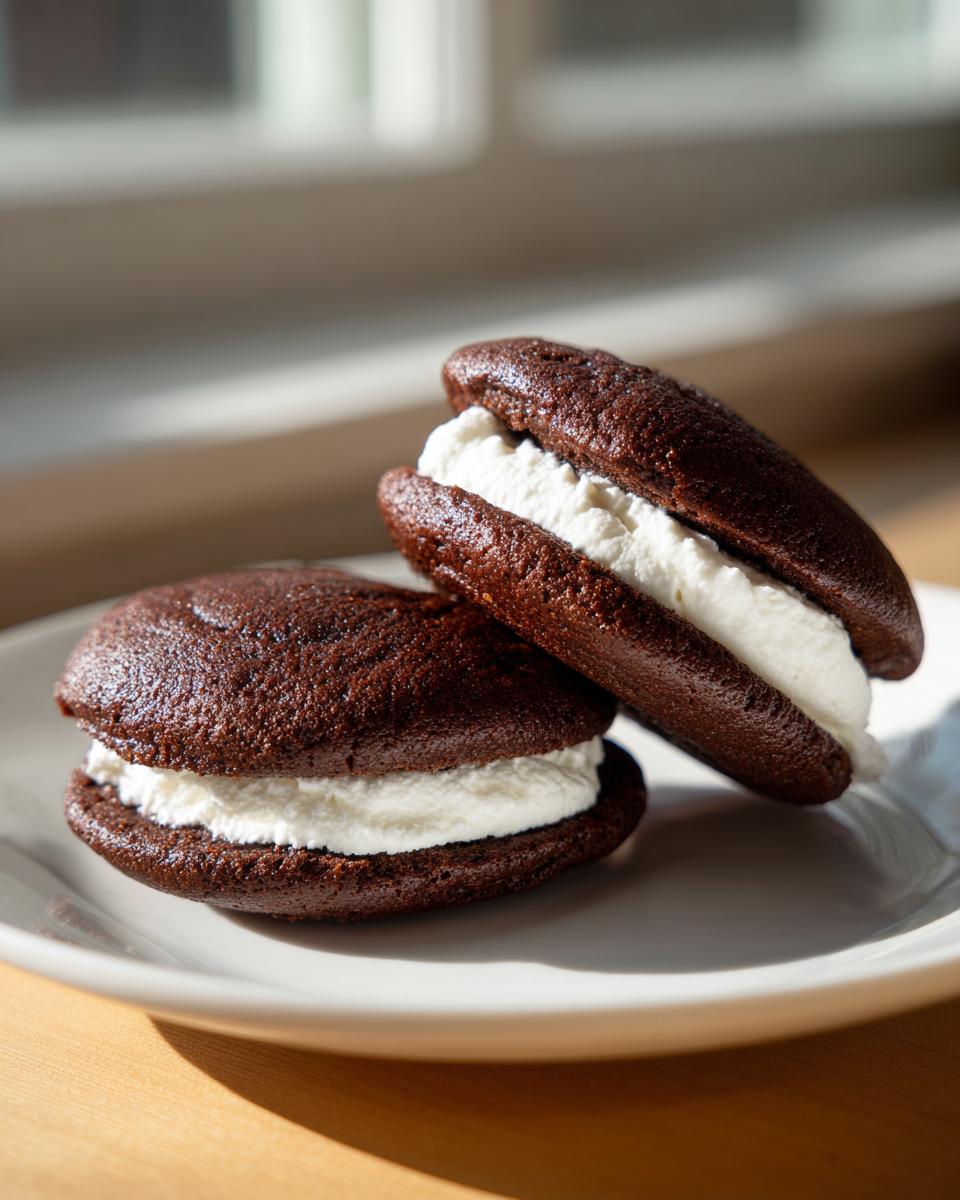
When I think about the absolute best of American baking, my mind jumps straight to those nostalgic, creamy sandwich cookies that always disappear first at any gathering—yes, I’m talking about whoopie pies! Forget those dry, store-bought versions you might remember. We are going all in on the real deal: the Classic Chocolate Whoopie Pies with Fluffy Marshmallow Filling. Trust me when I say mastering these from scratch changes everything. The key is achieving that perfect, incredibly soft, cake-like texture in the chocolate rounds. It takes a little patience, but when they come out tender and pillowy, you’ll realize you’ve found the best homemade whoopie pies recipe around. You need to try these!
If you’re looking for more incredible sweets to round out your dessert spread, check out my guide to simple delicious desserts; sometimes you just need something quick and wonderful!
- Why This Classic Chocolate Whoopie Pies Recipe Works (E-E-A-T)
- Ingredients for Homemade Whoopie Pies From Scratch
- How to Prepare Classic Whoopie Pies
- Expert Tips for Perfect Whoopie Pies Every Time
- Variations on Classic Whoopie Pies
- Storage and Make-Ahead Tips for Whoopie Pies
- Frequently Asked Questions About Whoopie Pies
- Nutritional Estimates for Classic Whoopie Pies
- Share Your Homemade Whoopie Pies Creations
Why This Classic Chocolate Whoopie Pies Recipe Works (E-E-A-T)
Okay, I know there are a million ways to approach these, but if you want the real deal—the ones that taste like childhood—you have to respect the classics. What sets these chocolate whoopie pies apart is the partnership between buttermilk and baking soda; that reaction gives us the lift we need without making the cake tough. Also, I always prefer this straightforward marshmallow cream filling. While cream cheese frosting is amazing, the pure, light sweetness of the marshmallow filling is what truly honors the tradition of authentic New England whoopie pies.
It’s about respecting the process. If you want true bakery-quality results, don’t skip the buttermilk; you can learn about why I swear by it in my biscuit recipe here: buttermilk biscuits fluffy southern recipe. For reference on how seriously the greats take these treats, check out Martha Stewart’s version too! Martha Stewart Whoopie Pies Recipe is another great baseline.
Achieving Soft Cake Like Cookies Texture
The secret weapon for getting that perfect soft cake like cookies texture is all about the mixing. You need to handle that batter gently once the flour goes in. Think of it like folding a cloud; you don’t want to deflate it! The moment you mix in the buttermilk, the baking soda starts working—that fizz is what keeps the rounds tender. Stop mixing as soon as you don’t see dry streaks of flour anymore. Overmixing develops gluten, and suddenly, your soft cake turns into a chewy hockey puck, and nobody wants that!
Ingredients for Homemade Whoopie Pies From Scratch
When it comes to making truly excellent chocolate whoopie pies, you just can’t skimp on quality ingredients. I’ve listed everything below, split into the cake rounds and that beautiful, fluffy filling. Remember, precision matters here; we are aiming for light, tender cakes, not dense ones!
You want soft, perfect results, so make sure your butter is softened right—not melted! If you need a great vanilla element in other recipes someday, I have a super fast recipe for vanilla buttercream you might want to save: vanilla buttercream ultimate 10-minute recipe.
Here’s what you need for about 12 amazing sandwich cookies:
For the Chocolate Cake Rounds:
- 2 cups all-purpose flour
- 1 teaspoon baking soda
- 1/2 teaspoon salt
- 1/2 cup unsalted butter, softened
- 1 cup granulated sugar
- 2 large eggs
- 1 teaspoon vanilla extract
- 1/2 cup unsweetened cocoa powder
- 1 cup buttermilk
For the Fluffy Whoopie Pie Filling:
- 1/2 cup marshmallow fluff (Don’t skimp on this!)
- 1/2 cup unsalted butter, softened
- 3 cups powdered sugar
- 1 teaspoon vanilla extract
How to Prepare Classic Whoopie Pies
Alright, let’s get these beauties baked! Making incredible whoopie pies is really just a sequence of simple, intentional steps. First things first: get that oven hot—350°F (175°C) is what we’re aiming for. Line those baking sheets with parchment paper; trust me, it saves your clean-up time, which is precious!
Next, we prep our dry bits and our wet bits separately. Remember that buttermilk we talked about being so important? Now it’s time to introduce the cocoa powder to it—whisk those together until they look like rich, dark chocolate milk. The dry ingredients (flour, baking soda, salt) get a quick whisk in their own bowl. Then we move on to creaming the butter and sugar until it’s pale. It should look light and fluffy, like whipped honey, before adding the eggs one at a time.
Now for the crucial combination part that keeps these soft rather than tough. We alternate adding the dry mixture and the buttermilk, always finishing with the dry stuff. Drop rounded tablespoons of batter onto your sheets, spacing them about 2 inches apart—you should get about 24 rounds total. Bake them for just 10 to 12 minutes, or until a toothpick comes out clean. No longer! Let them settle for five minutes on the tray before transferring them to cool completely. That cooling time is essential before we get to the fun part: the filling!
If you ever want to pipe some rich chocolate drizzle on top of these instead of just sandwiching them, my recipe for easy homemade chocolate syrup recipe is perfect for that touch! Also, for a deep dive into the best baking practices for these sandwich cookies, checking out the guidance at Handle the Heat is a great idea.
Mixing the Chocolate Cake Rounds
The cake rounds depend entirely on creaming that butter and sugar until they are genuinely light and airy. When the sugar crystals cut into that soft butter, they create microscopic air pockets. That’s your lift! Once the eggs are incorporated, you add the dry mixture and the buttermilk mix in turns. Keep mixing only until it just comes together. If you see a few streaks of flour lingering, that’s okay! Stop there. We are building a cake-like base, not a tough bread.
Creating the Fluffy Whoopie Pie Filling
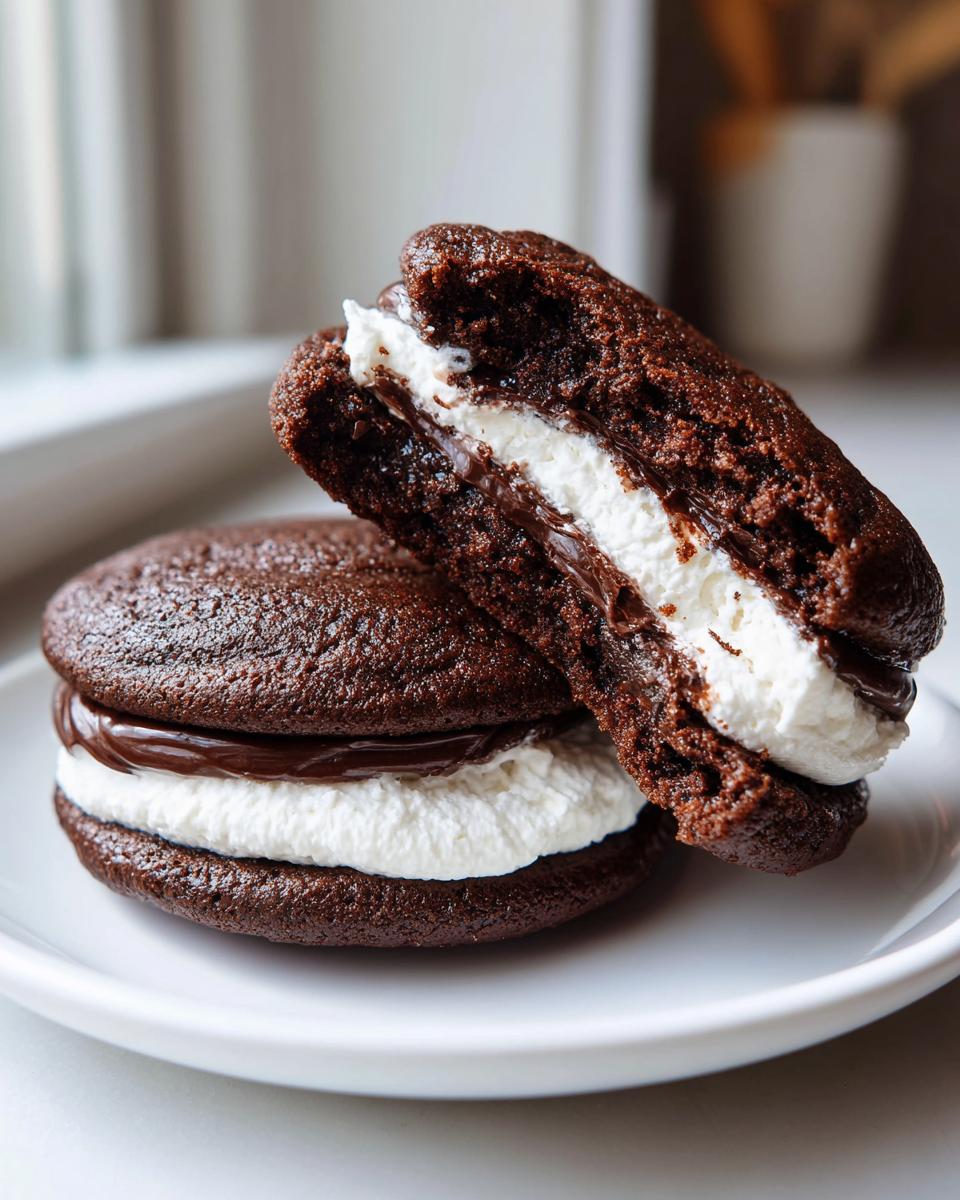
This filling is what makes these whoopie pies legendary. Start by beating that second half-cup of soft butter until it’s beautifully smooth—no lumps allowed! Then you add the powdered sugar slowly, beating well after each addition. This forces air into the mixture, which keeps it fluffy. The real star is the marshmallow fluff; beat that in right before you add your vanilla. You want this filling to be cloud-like so it squishes perfectly out the sides when you sandwich the chocolate cakes together!
Expert Tips for Perfect Whoopie Pies Every Time
Making whoopie pies is fun, but sometimes they don’t turn out exactly how we picture them! The biggest rookie mistake I see people make (and I’ve done it too, trust me!) is tapping the baking sheet after dropping the batter. You’ll notice in the instructions I said *not* to do that. Tapping the pan forces the air out, and that’s how you end up with flat, dense chocolate rounds instead of those beautiful, domed, cake-like cookies we want.
Also, for the filling—if you’re finding it grainy, it means your powdered sugar wasn’t fully incorporated before you added the fluff. Beat the butter until it’s super light first! If you’re looking for ideas on making soft cookies that hold up well, my gingerbread recipe is full of tips on managing texture: best soft chewy gingerbread cookies.
Ingredient Substitutions for Whoopie Pies
Don’t panic if the store was out of buttermilk! You can totally fake it right here at home. Just take one cup of regular whole milk and whisk in one tablespoon of white vinegar or lemon juice. Let it sit for about five minutes until it curdles slightly—that acidity is what you need for successful cakes.
If you’re craving something a little tangier than that fluffy marshmallow center, you can definitely swap it out for a cream cheese frosting, which pairs wonderfully with chocolate. Honestly, any creamy frosting typically works if you want to get creative with your whoopie pies.
Variations on Classic Whoopie Pies
The wonderful thing about mastering the basic chocolate whoopie pies recipe is that you unlock a whole world of sandwich cookie possibilities! Once you nail the technique for those soft, cakey rounds, you can pivot into so many fun flavors. People absolutely love making red velvet whoopie pies, usually swapped out with cream cheese frosting instead of marshmallow cream—it just tastes better with that slight tang, you know?
Then there are the seasonal treats, like pumpkin whoopie pies come October, which swap cocoa powder for pumpkin puree and spices. We also have amazing options like carrot cake or even vanilla! If you’re exploring cream cheese frosting ideas or need a recipe for carrot cake, I have you covered over here: moist carrot cake with cream cheese frosting. And for another celebration favorite, check out my take on red velvet: red velvet poke cake recipe. You can find even more fun ideas for flavor twists from other bakers too, like these amazing Creative Whoopie Pie Recipes!
Storage and Make-Ahead Tips for Whoopie Pies
These nostalgic sandwich cookies are best when they are fresh, but sometimes we just can’t eat a dozen in one sitting! If you assemble your chocolate whoopie pies right away, they are great at room temperature for about two days, but honestly, they start to get a little soft around the edges.
My favorite strategy is to bake the cake rounds and let them cool completely—like, totally cold—and store them in an airtight container on the counter for up to three days. Then, I only fill them right before I plan to serve them. That keeps the cake part perfectly soft!
If you need to keep leftovers or want to prep ahead for a party, these whoopie pies freeze beautifully. Store the assembled pies in a single layer inside a good airtight container. If you need to stack them, just put parchment paper between the layers. They keep well in the freezer for about a month. You can even make a quick freezer jam sometime using my recipe here: easy freezer jam no canning recipe, though I’d serve that jam on toast, not in these beauties!
Frequently Asked Questions About Whoopie Pies
Can I use cake mix to make whoopie pies faster?
You absolutely can grab a box for a shortcut! The search results show that ‘cake mix whoopie pies’ are super popular for a reason—they’re fast. But if you want that melt-in-your-mouth, soft cake like cookies texture that rivals any bakery style whoopie pies, I really encourage you to stick with scratch. The difference in tenderness is worth the extra ten minutes, I promise!
What is the difference between whoopie pies and whoopie pie cookies?
That’s a great question, and it really depends on who you ask! Sometimes people call them ‘whoopie pie cookies,’ but generally, the term ‘whoopie pie’ refers to this specific sandwich dessert that has a cake-like texture rather than a crisp cookie texture. If you’re looking for that authentic New England feel, think soft cake, not a crisp cookie ring.
How do I prevent my chocolate cakes from cracking?
Cracking usually happens for two reasons: you either overbake them slightly, or you try to spread the batter instead of just dropping it. Make sure you are dropping rounded tablespoons of batter and leaving them alone! Do not squish them flat. A few tiny cracks can happen, especially if your oven gets hot spots, but major splitting means they baked too long or the oven temperature was too high.
If you’re doing some batch cooking or meal prepping later, remember that even these sweet treats follow structure! You can see how I organize my week in my guide to easy lunch meal prep.
Nutritional Estimates for Classic Whoopie Pies
Because these are serious, from-scratch treats, they certainly aren’t on the lighter side, but wow, are they worth it! It’s important to remember these estimates can shift a tiny bit depending on how generously you fill them. This information is based on one assembled pie using the marshmallow fluff filling recipe provided above. Think rich dessert!
Here is a quick look at what you’re looking at:
- Calories: Roughly 350 per serving
- Total Fat: About 18g
- Sugar: We are looking at 40g of sugar, which is where all that deliciousness comes from!
Enjoy one with a glass of cold milk, and don’t worry about the rest of the day. We earned these!
Share Your Homemade Whoopie Pies Creations
Now that you’ve got the recipe for the best whoopie pies right here in your hands, the next step is the best part: the tasting! I really, truly want to hear how these turned out for you. Did your marshmallow filling get extra fluffy? Did you manage to get those perfectly round, cake-like tops?
Please leave a comment below and let me know your score out of ten! Knowing that these nostalgic sandwich cookies are making it out of my kitchen and into yours is honestly why I write these recipes down in the first place. If you had any hiccups along the way, or maybe a genius idea for a filling variation, share it! We all learn so much from each other’s kitchen adventures.
If you have photos of your stunning chocolate whoopie pies, tag me on social media! I love seeing your successes and cheering you on. If you ever need to reach out directly about an ingredient question or technique, the contact page is always open for kitchen correspondence: Contact Us. Happy baking, friends!
PrintClassic Chocolate Whoopie Pies with Fluffy Marshmallow Filling
Make soft, cake-like chocolate whoopie pies from scratch with a light, fluffy marshmallow cream filling. This recipe delivers nostalgic New England Whoopie Pies that are easy to bake.
- Prep Time: 20 min
- Cook Time: 12 min
- Total Time: 32 min
- Yield: 12 servings 1x
- Category: Dessert
- Method: Baking
- Cuisine: American
- Diet: Vegetarian
Ingredients
- 2 cups all-purpose flour
- 1 teaspoon baking soda
- 1/2 teaspoon salt
- 1/2 cup unsalted butter, softened
- 1 cup granulated sugar
- 2 large eggs
- 1 teaspoon vanilla extract
- 1/2 cup unsweetened cocoa powder
- 1 cup buttermilk
- 1/2 cup marshmallow fluff (for filling)
- 1/2 cup unsalted butter, softened (for filling)
- 3 cups powdered sugar (for filling)
- 1 teaspoon vanilla extract (for filling)
Instructions
- Preheat your oven to 350°F (175°C). Line baking sheets with parchment paper.
- In a medium bowl, whisk together the flour, baking soda, and salt. Set aside.
- In a large bowl, cream together the softened butter and granulated sugar until light and fluffy. Beat in the eggs one at a time, then stir in the vanilla extract.
- In a separate bowl, whisk the cocoa powder into the buttermilk until smooth.
- Gradually add the dry ingredients to the wet ingredients, alternating with the buttermilk mixture, beginning and ending with the dry ingredients. Mix until just combined; do not overmix.
- Drop rounded tablespoons of batter onto the prepared baking sheets, spacing them about 2 inches apart. You should get about 24 rounds.
- Bake for 10 to 12 minutes, or until a toothpick inserted into the center comes out clean. Let the cakes cool on the baking sheet for 5 minutes before transferring them to a wire rack to cool completely.
- Prepare the filling: Beat the 1/2 cup softened butter until creamy. Gradually add the powdered sugar, beating until smooth. Beat in the marshmallow fluff and vanilla extract until the filling is light and fluffy.
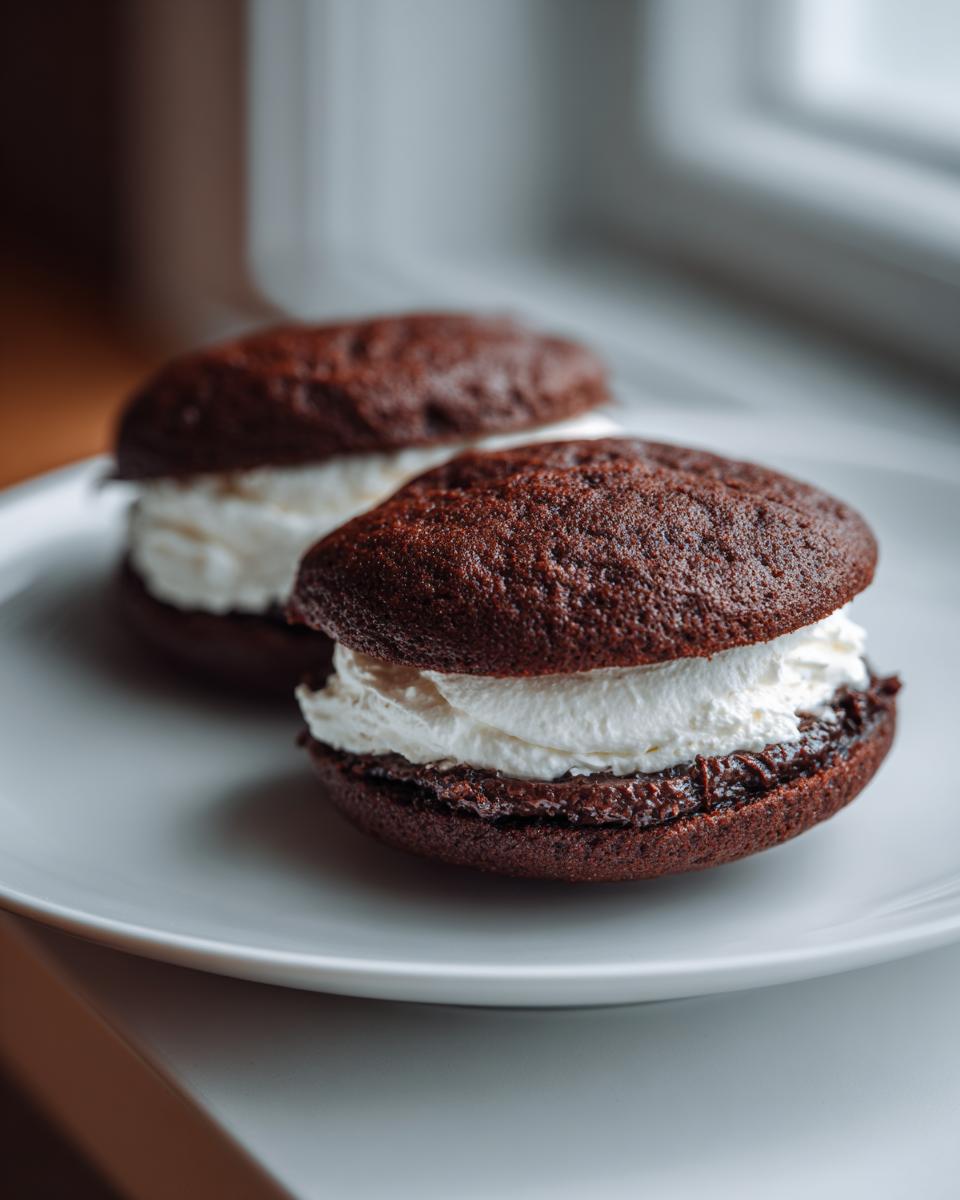
- To assemble, match two cooled chocolate cakes of similar size. Spread a generous amount of filling on the flat side of one cake and top with the flat side of the second cake to create a sandwich cookie.
- Repeat with the remaining cakes and filling.
Notes
- For the softest cake-like cookies, do not tap the baking sheets on the counter after dropping the batter.
- If you prefer a more stable filling, substitute the marshmallow fluff with a traditional American buttercream recipe using shortening instead of some of the butter.
- These homemade whoopie pies freeze well; store assembled pies in an airtight container for up to one month.
Nutrition
- Serving Size: 1 whoopie pie
- Calories: 350
- Sugar: 40g
- Sodium: 250mg
- Fat: 18g
- Saturated Fat: 10g
- Unsaturated Fat: 8g
- Trans Fat: 0g
- Carbohydrates: 48g
- Fiber: 1g
- Protein: 3g
- Cholesterol: 60mg