

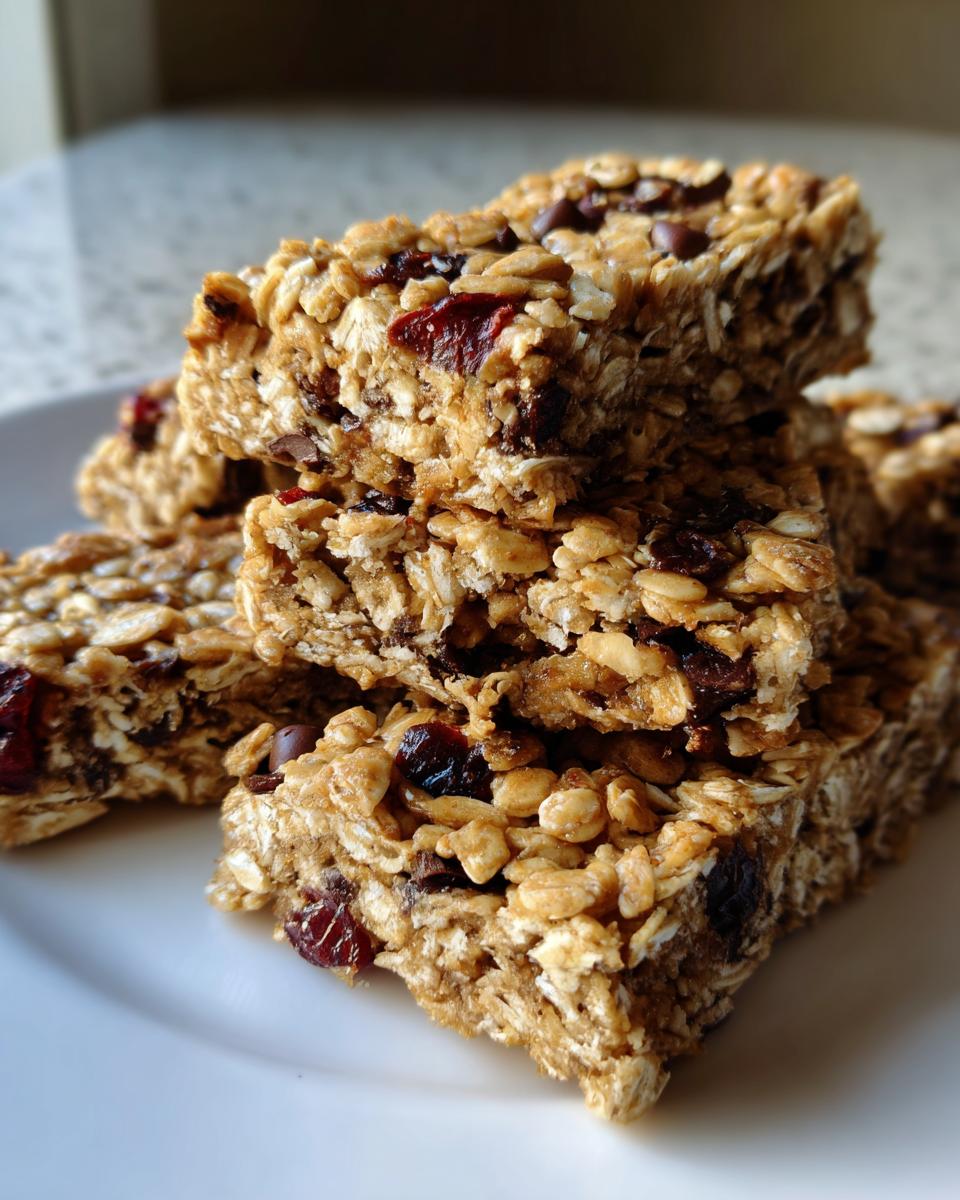
Oh, I know that feeling. It’s 90 degrees out, and the last thing I want is to fire up the oven just to make a snack. Trust me, those days led me straight to perfecting this recipe. We needed something that tasted amazing, held together in a lunchbox, and didn’t require babysitting the heat. So, I finally cracked the code on the ultimate chewy, non-crumbling no bake granola bars. Seriously, you’ll have these prepped in under 15 minutes, and you’ll never look back. These are my go-to right now for keeping snacks stocked for busy afternoons. If you need more ideas for quick food prep beyond these bars, you should check out some of my favorite tips for easy lunch meal prep!
- Why These Are the Ultimate Chewy No Bake Granola Bars
- Gathering Ingredients for Your No Bake Granola Bars
- Step-by-Step Instructions for Perfect No Bake Granola Bars
- Tips for Success Making Your Chewy Granola Bars Recipe
- Storage and Making Ahead with Freezer Friendly Snacks
- Variations for Customizable Energy Bars
- Serving Suggestions for Quick Grab and Go Treats
- Frequently Asked Questions About No Bake Granola Bars
- Nutrition Snapshot for Naturally Sweetened Bars
Why These Are the Ultimate Chewy No Bake Granola Bars
When you’re skipping the oven, you can end up with a tray of crumbs instead of actual bars. Not with this recipe! We engineered these to be the most reliable, satisfying no bake granola bars you’ll ever press into a pan. Everything we do here is about maximizing flavor and minimizing fuss. If you’re looking for other quick, wholesome fuel, my guide to healthy breakfast ideas might inspire you!
- They deliver that satisfying, dense chewiness every time.
- They are genuinely freezer friendly—perfect for future grabbing!
- Zero baking means less cleanup and less heat in the kitchen.
Achieving Perfect Texture in No Bake Granola Bars
The secret sauce, literally, is the binder ratio. We use just the right amount of creamy peanut butter and honey, warmed until they marry perfectly. This creates a slightly sticky, yet robust glue for the oats. Don’t skip the step where you press down on the mixture in the pan—I mean really press hard! That compaction is what stops them from crumbling when you slice them later. It’s essential for that classic, chewy texture.
Quick Grab and Go Treats: 15 Minute Prep Time
Honestly, if you can stir, you can make these bars. Most of the time is just measuring out the dry stuff. From start to finish, you are actively working for maybe 15 minutes. Then, they just need some chill time. That speed makes them incredible Homemade Snack Bars when you realize at 6 AM you forgot to pack lunches!
Gathering Ingredients for Your No Bake Granola Bars
Okay, step number two in making this magic happen is getting your ingredients ready. Since we aren’t using that oven heat to temper or bake anything, the quality of what you put in here really shines through. These ingredients are simple—stuff you probably already have—but they work together perfectly to build that wholesome backbone that makes these Homemade Snack Bars feel like you actually worked hard on them. I’m all about transparency here; you need the right ratios for these binders to work their non-bake wonders. If you want to see what else I use for quick snacks, check out my thoughts on homemade granola bars in general!
Binder and Base for Chewy Granola Bars Recipe
This is the heavy-hitting stuff that holds everything together. You absolutely need two full cups of old-fashioned rolled oats—don’t go using the instant stuff, or your texture will be off! For the sticky goodness, make sure you have three-quarters of a cup of creamy peanut butter. I’m using standard creamy, but feel free to swap if you need an allergy-friendly bar, just make sure it pours nicely. We mix that with half a cup of honey—this is key for that natural sweetness—and just one tablespoon of packed light brown sugar for a little depth. And don’t forget the supporting cast: half a teaspoon of kosher salt to cut the sweetness, and one teaspoon of pure vanilla extract to round out that flavor profile. These elements build the core of your Chewy Granola Bars Recipe.
Customizable Mix-Ins for No Bake Granola Bars
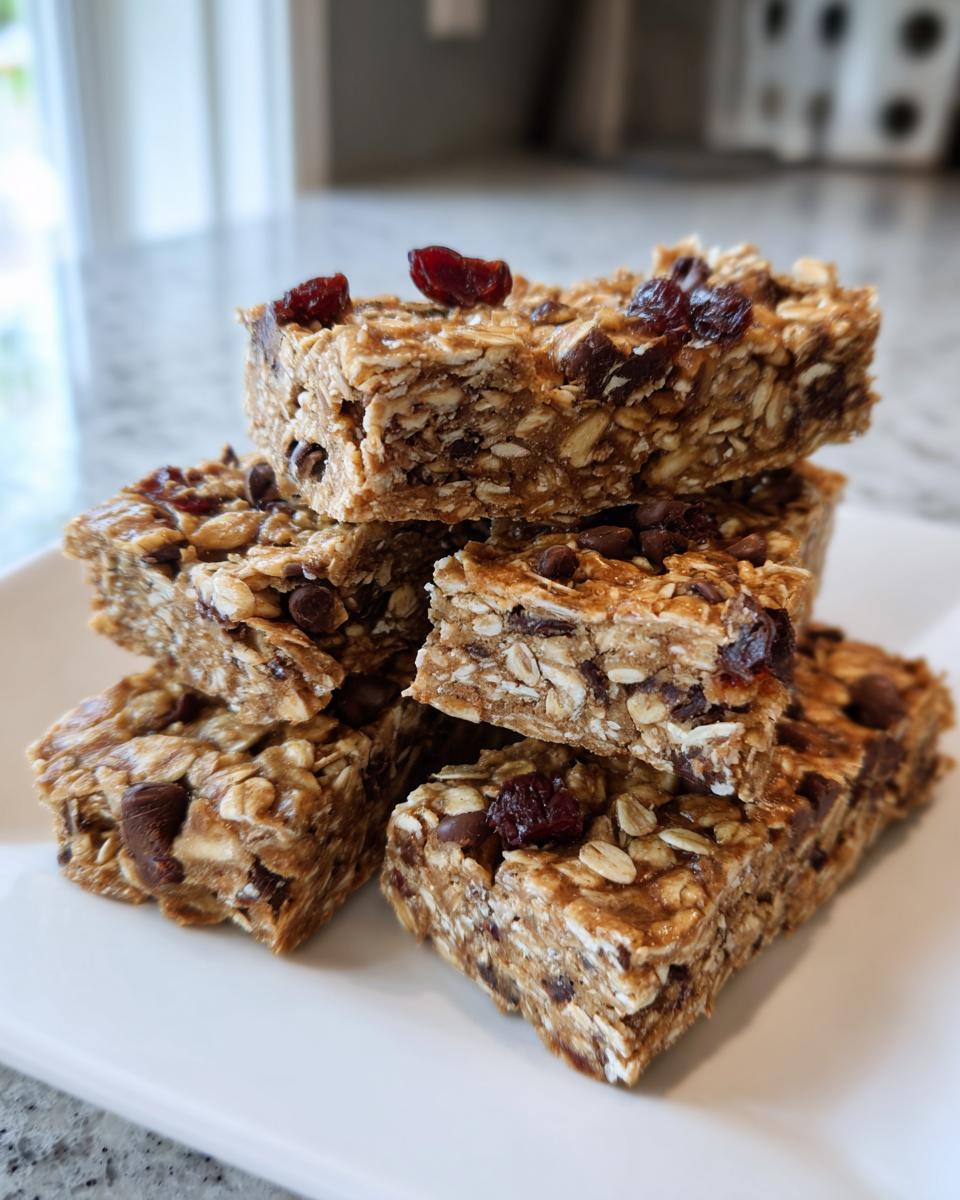
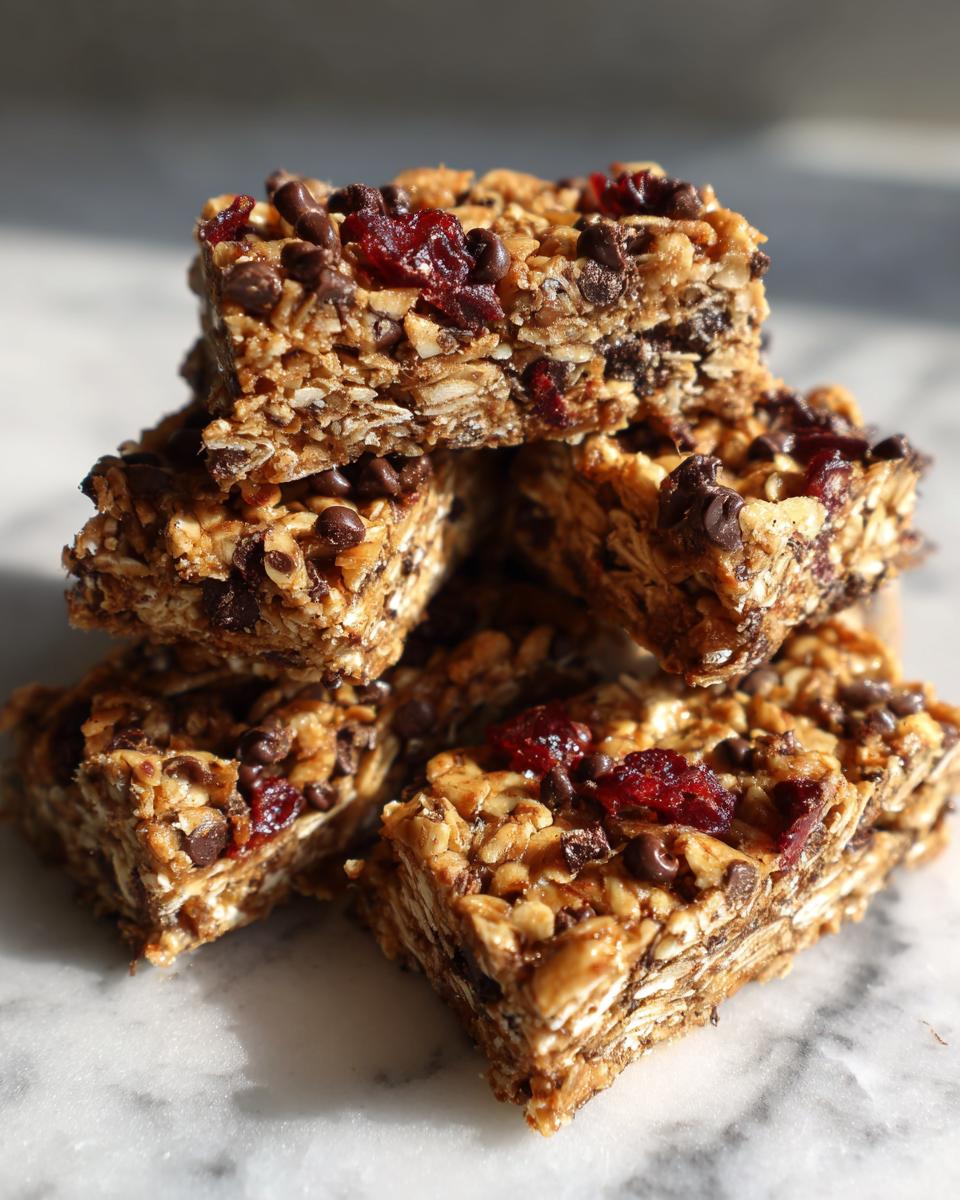
This is where you get to be totally selfish, which I love! The recipe calls for one full cup of whatever makes your heart sing. I often throw in some mini chocolate chips and maybe some dried cranberries or chopped apricots for a little chew. But I always have to throw in one cup of puffed rice cereal—it adds a lightness to the dense oat base which I think is crucial for the final texture. Think about what you want in your Customizable Energy Bars. Maybe you want walnuts, maybe slivered almonds, maybe even some shredded coconut? The sky is really the limit here, just measure out one cup total of your chosen treats!
Step-by-Step Instructions for Perfect No Bake Granola Bars
Alright, time to put it all together! Since we aren’t using any oven guesswork, the only tricky part here is technique—and trust me, it’s easy! We need to make sure everything gets coated evenly and then has a good, solid press so these turn out as proper, Chewy Granola Bars Recipe squares and not just a pile of granola. If you’re looking for more speedy kitchen wins after this, perhaps check out my guide to quick easy weeknight dinners!
Preparing the Pan and Dry Mix for No Bake Granola Bars
First thing, get your 8×8 inch pan ready. You absolutely need to line it with parchment paper and leave an overhang on the sides. This overhang is your handle when it’s time to get them out later—don’t skip it! Now, dump your oats and all those goodies (your chosen mix-ins!) into a big bowl. If you saved back a tiny handful of chocolate chips or nuts for the top, toss those in a little dish on the counter so you remember them later.
Creating the Warm Binder for Your No Bake Granola Bars
Time to make the glue! In a small saucepan, on medium-low heat, combine your peanut butter, honey, and brown sugar. You need to stir this constantly. Seriously, don’t walk away! We want it smooth and just starting to bubble at the edges—that’s the signal. The absolute most crucial thing here: do not let it boil. Once it hits that tiny bubble, yank it right off the heat immediately. Then, stir in your vanilla extract and salt. That little bit of heat wakes up the flavor, but boiling it ruins the texture!
Mixing, Pressing, and Chilling Your Homemade Snack Bars
Pour that warm sticky stuff right over your bowl of oats. Stir it until everything is totally coated; it’s going to look messy for a second. Now, scrape that whole mixture into your prepared pan. Here is the moment of truth for those non-crumbling bars: use the back of a spatula or another piece of parchment paper and press down with *all* your might. Pack it in there! Sprinkle those reserved toppings on top and press them in lightly.
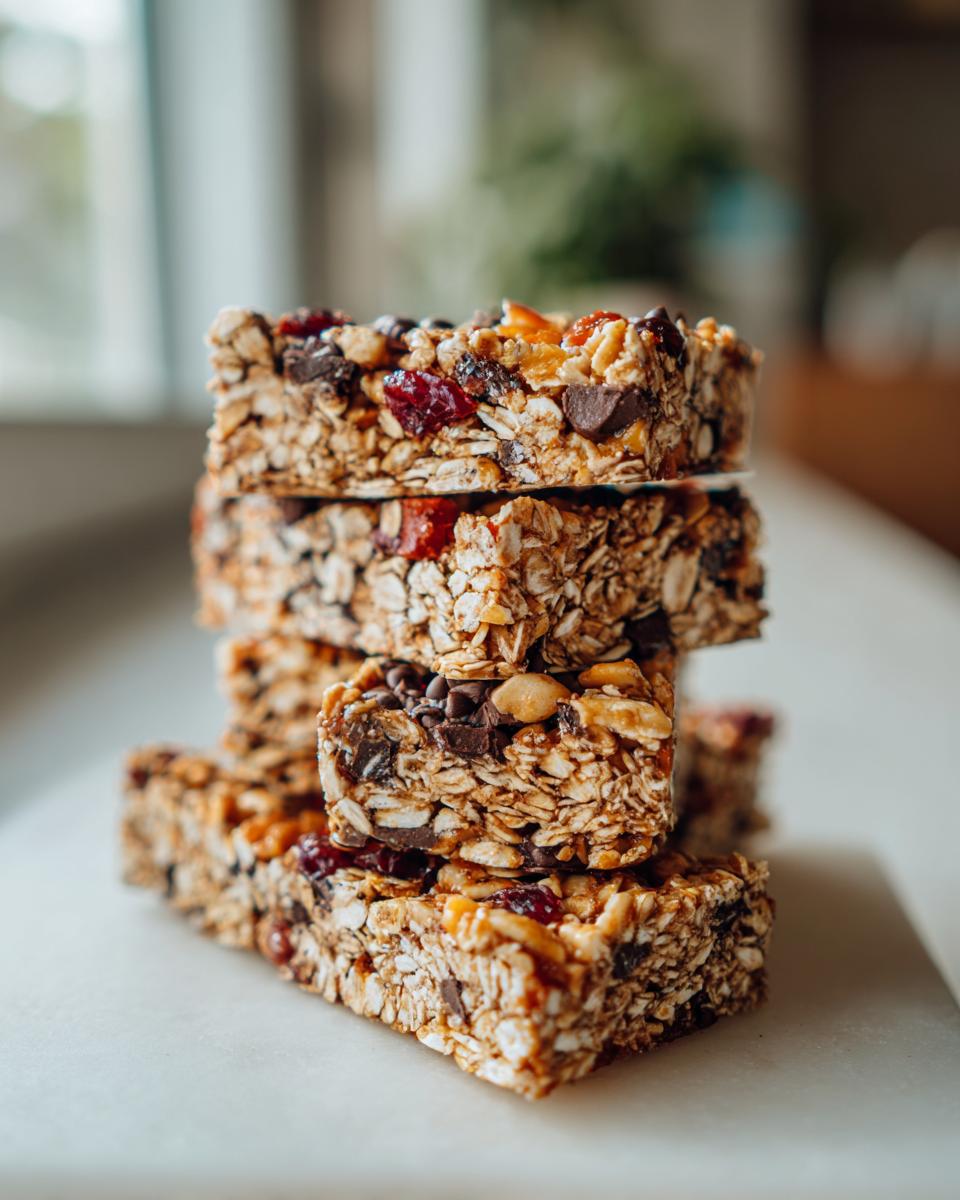
This is the hardest part: patience! They need to chill in the fridge for a solid two hours before you try to cut them. If you cut them early, they’ll fall apart. Once they are rock hard, lift them out using the paper overhang, slice into 12 or 16 squares, and you’re done with your Homemade Snack Bars!
Tips for Success Making Your Chewy Granola Bars Recipe
I’ve certainly made my share of sticky messes and crumbly disasters trying to get these no bake granola bars just right over the years. But that’s how you learn, right? We want these beautiful Wholesome Homemade Snacks to last all week and stay perfectly intact in the kids’ lunch boxes. If you’re looking for other recipes that require that same level of dependable technique, you might love my guide to making the best classic chicken salad recipe!
Ingredient Notes and Peanut Butter Granola Bar Alternative Swaps
Let’s talk swaps, because I know not everyone loves peanut butter, or maybe you have an allergy to worry about. If you need a nut-free version, sunflower seed butter—sunbutter—is my trusted Peanut Butter Granola Bar Alternative. It works just as beautifully in the binder because it has the right amount of oil and thickness.
Also, if you’re using certified gluten-free oats, that’s fantastic! Just make sure they are the old-fashioned rolled kind, not the quick oats. If you get into the mixing stage and everything seems a little too dry—like the oats aren’t fully coated—don’t panic! Just stir in one or two extra teaspoons of honey or that nut butter you’re using. A little extra binder goes a long way in making sure everything sticks.
Achieving Non-Crumbling No Bake Granola Bars
Seriously, I cannot emphasize this enough: you have to press hard when you put the mixture into the pan. I mean, use your weight! Don’t just gently spread it around; you need to compact those oats together. Think of it like packing perfect snow for a snowball—you need density for it to hold its shape when you slice it.
Another thing that affects the final texture? The temperature of your ingredients going in. If your peanut butter is rock hard straight from the fridge, it won’t mix as smoothly with the warm honey, leading to pockets that don’t adhere well when chilling. Make sure your peanut butter is on the softer side of room temperature before you ever start heating that saucepan. This little step ensures you get those completely uniform, non-crumbling no bake granola bars.
Storage and Making Ahead with Freezer Friendly Snacks
One of the biggest reasons I love these bars is how perfectly they fit into my simple meal prep snacks routine. You make one big batch, and suddenly, you have delicious treats ready for the entire week, maybe even longer. Because these are no bake granola bars, they rely on refrigeration to stay firm, so storing them correctly is super important.
For general storage, keep them in an airtight container in the refrigerator. They hold up beautifully for about a week that way. They stay nice and chewy, just how we like them!
But if you really want to stock up for busy mornings or sudden cravings, these are definitely freezer friendly snacks. If you’re planning to freeze them, here is the trick I learned the hard way: wrap each bar individually! Use a little square of plastic wrap or parchment paper around each one once they are completely set and cut.
This way, when you need a snack, you can just pull one out of the freezer, and because it’s wrapped solo, it thaws quickly and isn’t stuck to its neighbors. It’s such a time saver! You can store them wrapped like this in a big freezer bag for up to three months. They come out tasting almost exactly like they were fresh out of the fridge. It’s the easiest way to ensure you always have something wholesome ready to grab when you’re running out the door. You can find more of my make-ahead ideas in my guide to the best simple meal prep snacks!
Variations for Customizable Energy Bars
The beauty of this recipe is honestly how adaptable it is. Once you nail the binder ratio, you can tweak it endlessly to fit whatever you have lying around or whatever you’re craving that week. Remember, these are supposed to be your perfect customizable energy bars, not something stiff and uniform from a plastic wrapper! If I’m craving something different, I usually look to my fruit basket or my spice rack first. For ideas on other ways to customize simple baked goods, you might enjoy my recipe for Greek yogurt banana bread—it follows a similar spirit of using what you have!
Since we established that the binder is the key structure, changing the nut butter base is usually safe, but you just have to watch the consistency. If you switch from peanut butter to something like almond butter, it might be slightly thinner, so you might need to add just a tiny extra spoonful of oats to keep things firm, but usually, it works out fine!
Boosting the Protein Content
If you need these bars to power you through a huge workout or keep the kids full until dinner, adding a little protein powder is a great move. If you want to add protein powder—say, about a quarter cup—you must increase your binder slightly. I usually add one extra tablespoon of honey or nut butter to compensate because the protein powder sucks up moisture like crazy.
If you are skeptical, just mix the protein powder into the warm binder for a minute before pouring it over the dry ingredients. It dissolves better that way! This turns your simple snack into a genuine high-protein option.
Fruity and Bright Add-Ins
The standard is chocolate chips, but dried fruit plays so nicely with the honey and salt! Instead of just raisins, try chopping up some dried apricots or using dried cranberries for a little tartness. They plump up just enough during the chilling process to give you a pleasant, chewy surprise.
If you want something really bright, use finely diced crystallized ginger mixed with maybe half a cup of unsweetened coconut flakes. It gives the bars a slightly tropical kick that feels amazing in the summer months. Don’t be afraid to mix it up—even swapping out the vanilla for almond extract can change the entire flavor profile!
Serving Suggestions for Quick Grab and Go Treats
Now that you have these perfect, stable no bake granola bars, the next fun part is figuring out how to eat them! They are so much better than the store-bought stuff, and honestly, they turn a sad desk lunch into something you actually look forward to. Because they are packed with those substantial oat based snacks elements, they offer real energy that lasts.
I think of these bars as the foundation of quick eating. They aren’t meant to be a huge meal on their own, but they fill in those gaps beautifully. For the kids’ lunchboxes, I almost always pair one bar with a small container of plain Greek yogurt and maybe some sliced apples or orange segments. That combination of the healthy fats/protein from the bar combined with fresh fruit makes it a really balanced offering.
Pairing with Breakfast Beverages
If you’re grabbing one on the way out the door in the morning, you need a good companion drink! I usually grab one of my famous coffee smoothies—you can check out the recipe for my coffee smoothie if you need a boost. That rich, cool coffee flavor alongside the sweet, chewy oat bar is just heaven. It’s a surprisingly great combination that keeps me going until lunch without feeling heavy.
Another great pairing, especially if you made a batch heavy on the chocolate chips, is a tall glass of cold milk. It just brings out that dessert quality, even though these are genuinely good for you!
Making Them a More Substantial Snack
When I need a bar to feel like a slightly more substantial snack—maybe after an afternoon activity or yard work—I tend to stack it up a little bit. Try eating half a bar alongside a hard-boiled egg or a cheese stick. You get that hit of natural sweetness and carbohydrates from the bar, balanced perfectly by quick protein and fat from the side item.
It’s all about balance, right? We keep the snacks wholesome but satisfying. These little powerhouses are so versatile; you can eat them straight from the fridge, or let them sit out for fifteen minutes and they soften just slightly for an even chewier experience.
Frequently Asked Questions About No Bake Granola Bars
I always get so many questions once I post these to my stories! It makes total sense, because even though this recipe is simple, people want to make sure they get that perfect, non-crumbling texture. I’ve pulled the most common ones here just to put your mind at ease when you are making these quick grab and go treats. If you’re looking for other simple kitchen solutions, you can always check out my guide to my easy one-pot sausage and rice skillet!
Can I make these Easy No Bake Recipes vegan?
You absolutely can pivot these into wonderful vegan snacks! Since honey is an animal product, we swap that out directly for maple syrup. Honey and maple syrup bind in a very similar fashion here, so you don’t have to change your ratios at all. The other thing you must check are your mix-ins. If you love chocolate chips like I do, just make sure you grab a bag of good quality dairy-free or vegan chips. That’s it! They turn into fantastic easy no bake recipes perfect for everyone.
How long do these Kid Friendly No Bake Treats last?
Because these rely on the coolness of the fridge to stay firm, they really are best eaten straight out of the refrigerator. If you keep them in an airtight container, they are fantastic for about one full week. Seriously, they hold up really well! I find that after about 8 days, they start to get a little bit softer than I prefer, but they definitely taste fine.
Now, if you’re using them for those freezer friendly snacks I mentioned, you can store them wrapped individually for up to three months. Pull one out the night before, or let it defrost on the counter for about 30 minutes, and it’s perfect. They are definitely best eaten fresh, but their freezer life is super convenient for quick planning.
What is the best way to cut the No Bake Granola Bars cleanly?
Cutting is the most frustrating part if you rush it! The number one rule is: they MUST be completely firm. Don’t even think about cutting them until they have chilled for a minimum of two hours, maybe even longer if your kitchen is warm. Once they are rock hard, grab a very sharp knife.
Here’s my little trick for the cleanest slices on these no bake granola bars: dip the tip of your sharp knife into a tall glass of hot water right before you make your cut. Then, wipe the blade totally dry with a paper towel before piercing the bar. You can repeat this process between every slice. The heat prevents the sticky binder from catching on the blade, giving you those beautiful, professional-looking squares!
Nutrition Snapshot for Naturally Sweetened Bars
When we’re talking about these delicious no bake granola bars, one thing people always ask me is, “Are they actually good for me?” Since we are using honey or maple syrup instead of processed white sugar, they certainly fall into the naturally sweetened category, which is a huge win for a snack bar! But remember, since we are using peanut butter, oats, and whatever fun mix-ins you threw in, these numbers are my best estimate based on the standard recipe I shared.
If you’re using almond butter instead of peanut butter or adding a boatload of dark chocolate chips, those statistics will shift, so take this as a wonderful guideline for your simple meal prep snacks!
For one bar (cut into 12 total), here is what you can generally expect to see:
- Serving Size: 1 bar
- Calories: Around 220! Pretty good for a satisfying treat.
- Sugar: About 12g (but remember, this is mostly natural sugars from honey/fruit).
- Fat: About 10g. Most of this is the healthy fat from the peanut butter!
- Protein: A solid 6g to keep you full.
- Fiber: 3g, courtesy of those healthy oats.
I always say that knowing what goes into your food is half the battle, and these homemade bars let you control everything! If you want more ideas for making treats deliciously wholesome, I hope you check out my guide on simple delicious desserts where we keep things light and tasty!
PrintUltimate Chewy No-Bake Granola Bars for Quick Meal Prep
Make these chewy, homemade no-bake granola bars in under 15 minutes of prep time. This recipe creates satisfying, portable energy bars that do not crumble, perfect for healthy lunchbox fillers or quick grab and go treats.
- Prep Time: 15 min
- Cook Time: 0 min
- Total Time: 2 hours 15 min
- Yield: 12 servings 1x
- Category: Snack
- Method: No Bake
- Cuisine: American
- Diet: Vegetarian
Ingredients
- 2 cups old-fashioned rolled oats
- 1 cup mix-ins (like chocolate chips, dried fruit, or nuts)
- 3/4 cup creamy peanut butter (or alternative nut/seed butter)
- 1/2 cup honey or maple syrup
- 1 tablespoon packed light brown sugar
- 1/2 teaspoon kosher salt
- 1 teaspoon pure vanilla extract
- 1 cup puffed rice cereal (optional, for texture)
Instructions
- Line an 8×8 inch baking pan with parchment paper, leaving an overhang on the sides for easy removal.
- In a large bowl, combine the rolled oats and your chosen mix-ins, including the puffed rice cereal if you are using it. Set aside a small amount of mix-ins for the top if desired.
- In a small saucepan over medium-low heat, combine the peanut butter, honey, and brown sugar. Stir constantly until the mixture is smooth and just beginning to bubble slightly around the edges. Do not let it boil.
- Remove the saucepan from the heat. Stir in the vanilla extract and salt.
- Pour the warm binder mixture over the oat and mix-in combination in the large bowl. Stir well until everything is evenly coated.
- Transfer the mixture to the prepared 8×8 pan.
- Press the mixture firmly and evenly into the pan using the back of a spatula or another piece of parchment paper. Pressing firmly is key to bars that do not fall apart.
- Sprinkle any reserved mix-ins over the top and press them in lightly.
- Refrigerate the pan for at least 2 hours, or until the bars are completely firm.
- Use the parchment overhang to lift the block out of the pan. Cut into 12 or 16 bars.
- Store the bars in an airtight container in the refrigerator for up to one week, or freeze for longer storage.
Notes
- For a nut-free option, substitute sunflower seed butter for peanut butter.
- To make these gluten free, use certified gluten-free rolled oats.
- If the mixture seems too dry, add 1-2 teaspoons more honey or nut butter until it holds together when pressed.
- These bars are excellent for freezer friendly snacks; wrap individually before freezing.
Nutrition
- Serving Size: 1 bar
- Calories: 220
- Sugar: 12g
- Sodium: 110mg
- Fat: 10g
- Saturated Fat: 2g
- Unsaturated Fat: 8g
- Trans Fat: 0g
- Carbohydrates: 32g
- Fiber: 3g
- Protein: 6g
- Cholesterol: 0mg