
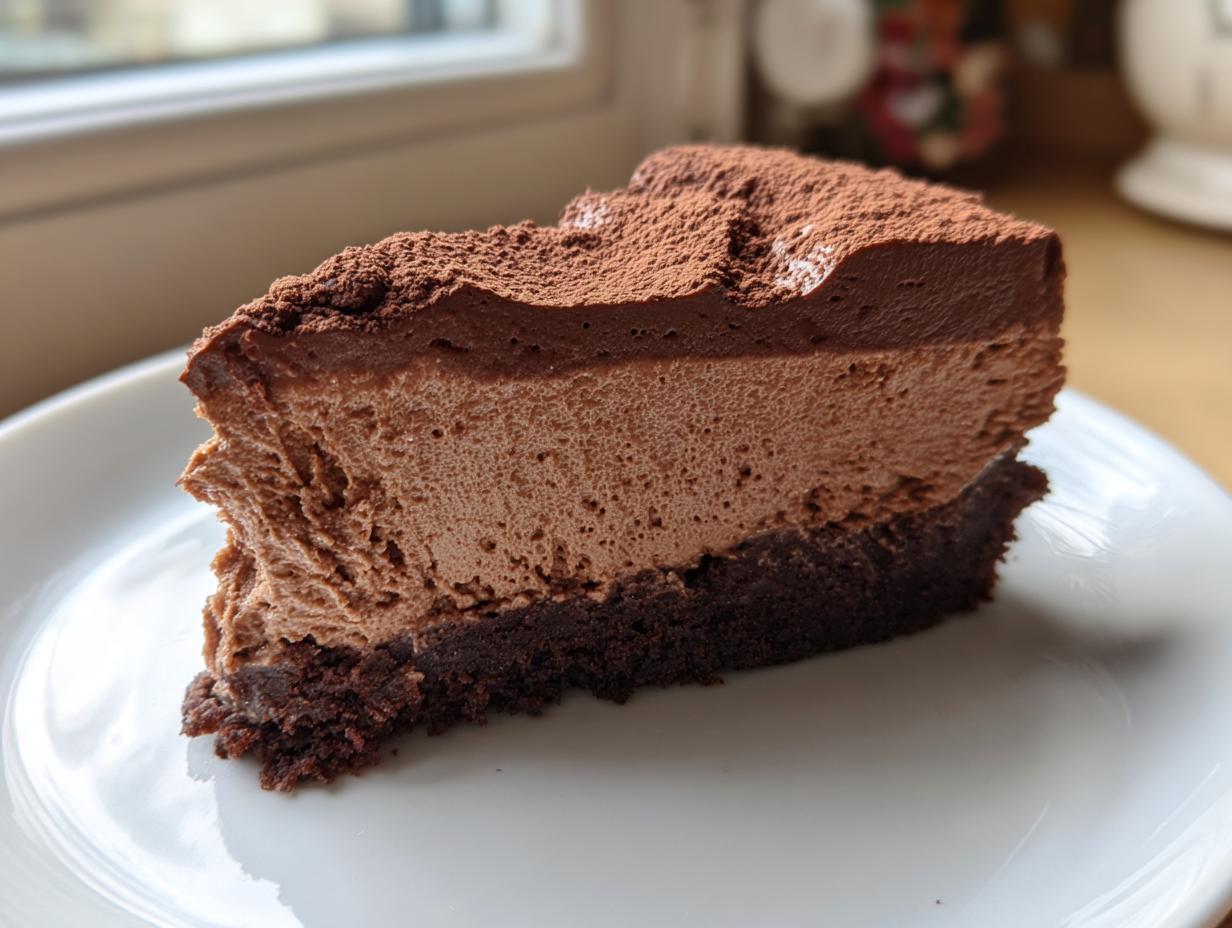
I’ve spent years searching through restaurants and testing old family notebooks to find that one dessert that feels completely luxurious but doesn’t require a culinary degree to pull off. And folks, I found it. This chocolate mousse cake is the absolute pinnacle of decadent home baking. We’re talking about a deep, fudgy, flourless base topped with an ethereal, yet incredibly stable, dark chocolate mousse layer. Trust me when I say that achieving that perfect, melt-in-your-mouth texture—one that says ‘I spent all day on this’ but only took a little patience in the kitchen—is entirely doable. Forget those overly complicated French instructions; we’re keeping this straightforward and soulful.
- Why This Flourless Chocolate Mousse Cake is Your New Favorite Rich Chocolate Dessert
- Gathering Ingredients for Your Decadent Chocolate Mousse Cake
- Step-by-Step Instructions for the Chocolate Mousse Cake Base
- Creating the Creamy Mousse Topping for Your Chocolate Mousse Cake
- Assembling and Chilling the Layered Chocolate Mousse Dessert
- Tips for Success When Making a Chocolate Mousse Cake
- Variations on the Classic Chocolate Mousse Cake
- Storage and Serving Suggestions for Your Chocolate Mousse Cake
- Frequently Asked Questions About This Chocolate Mousse Cake
Why This Flourless Chocolate Mousse Cake is Your New Favorite Rich Chocolate Dessert
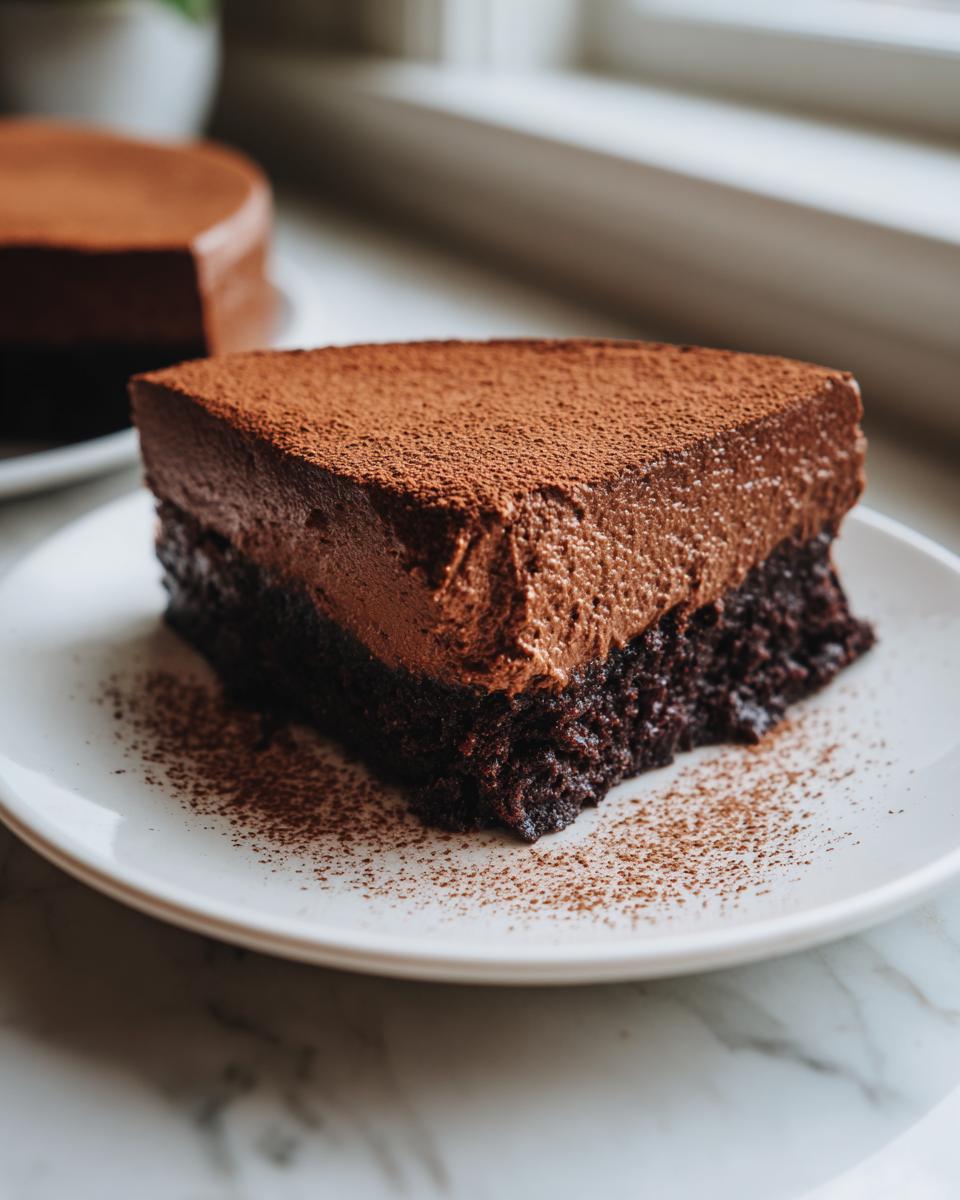
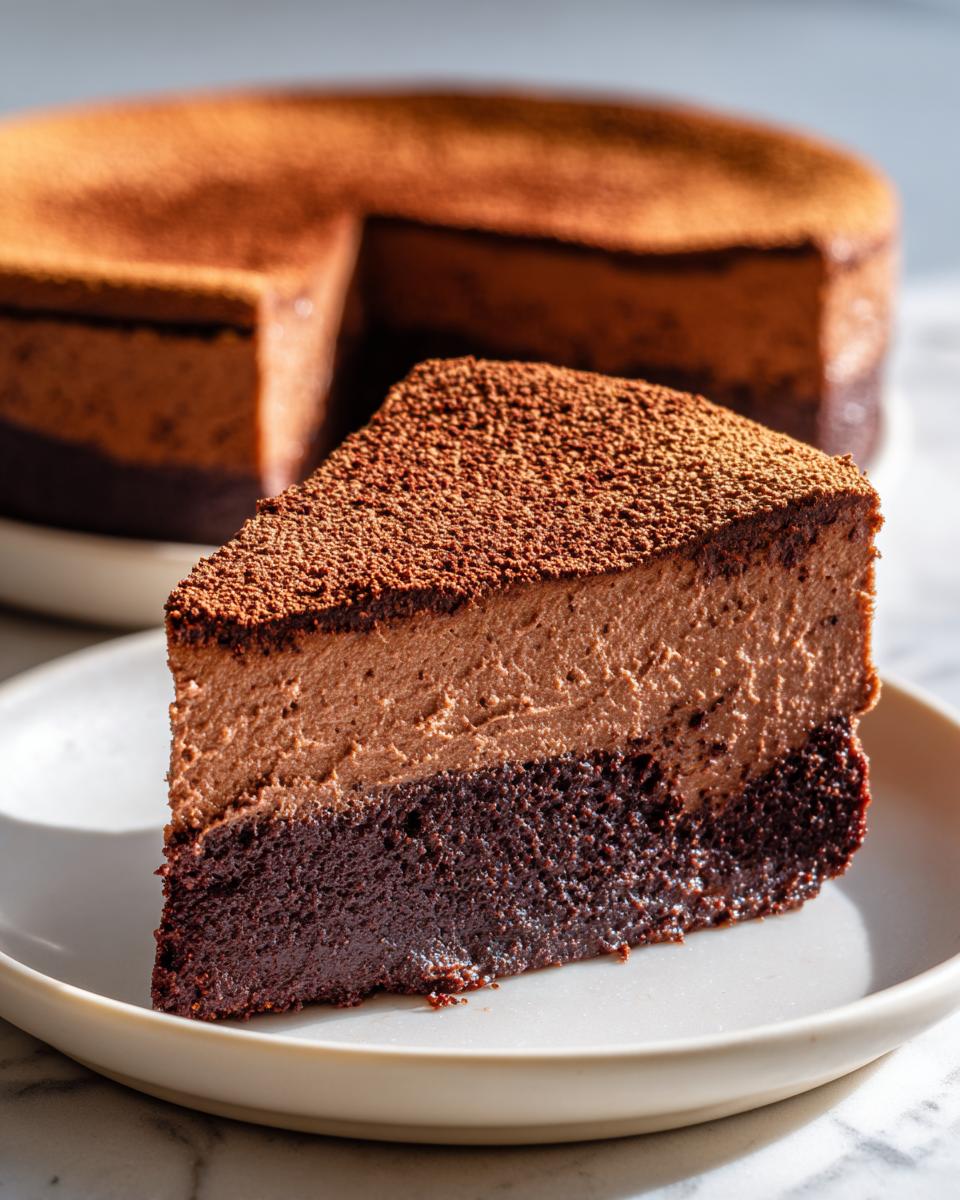
There’s just something undeniably special about plating up a showstopper dessert, right? This layered masterpiece truly delivers on that wow factor. It easily takes the title for the most satisfying rich chocolate dessert I’ve ever made at home. It’s perfect for birthdays or when you simply need a moment of pure chocolate indulgence.
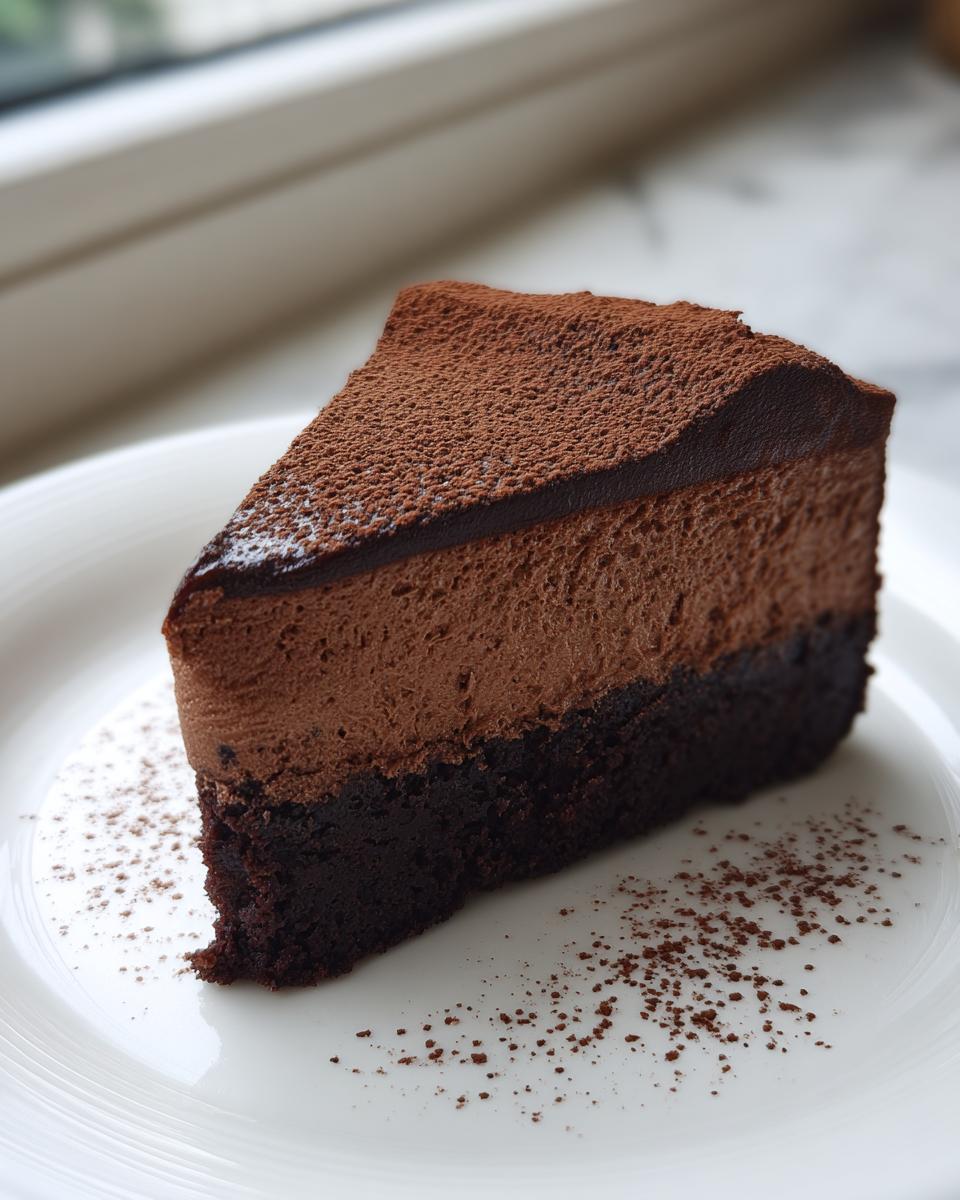
- It achieves that perfect textural contrast: a dense, moist base beneath a cloud-like mousse.
- Because it chills overnight, it feels like a truly luxurious, special-occasion bake.
- These are hands-down some of the most impressive chocolate centerpiece desserts you can create without special pastry tools.
Gathering Ingredients for Your Decadent Chocolate Mousse Cake
For a cake this rich, the quality of your staples really shines through, so don’t skimp here! We need two main groups: the fudgy foundation and the airy topping. Getting your bits and pieces ready beforehand—what the pros call *mise en place*—makes assembly so much calmer.
For the Flourless Base:
- 8 ounces bittersweet chocolate (aim for 70% cacao, this is key!)
- 1/2 cup (1 stick) unsalted butter
- 3 large eggs, separated
- 1/4 cup granulated sugar
- 1 teaspoon vanilla extract
- Pinch of salt
For the Dark Chocolate Mousse:
- 10 ounces dark chocolate (60-70% cacao)
- 1 1/2 cups heavy cream, divided
- 2 large egg yolks
- 2 tablespoons granulated sugar
- 1 teaspoon vanilla extract
- 1 1/2 teaspoons unflavored gelatin powder
- 3 tablespoons cold water
For Garnish:
- Cocoa powder or chocolate shavings
Ingredient Notes and Substitution Guidance
Listen, when you’re making something this intensely chocolatey, the flavor comes straight from the source. Use the best dark chocolate you can find for both layers; it makes a huge difference in the final taste of your chocolate mousse cake.
That gelatin we are using is our real secret weapon for how to make stable chocolate mousse that holds its shape beautifully in the fridge. Don’t skip it!
If you wanted to skip baking the base entirely and go straight for an easy no bake mousse cake, you could swap the flourless base ingredients for one thin, pre-baked, or store-bought chocolate sponge layer. Just make sure it’s perfectly level!
Step-by-Step Instructions for the Chocolate Mousse Cake Base
Okay, let’s get this flourless base baked up first, because this needs time to cool properly before we even think about our creamy topping. Preheat your oven to 350°F (175°C). I always take an extra minute to properly grease and line the bottom of my 8-inch springform pan with parchment paper—this ensures zero sticking later on. Nobody wants a beautiful base stuck to a springform rim!
In a heatproof bowl set over simmering water—that gentle double-boiler method is perfect—melt your bittersweet chocolate and butter together. Stir it just until it goes completely smooth, like dark velvet. Take it off the heat and let it sit for a minute so it cools down just a tiny bit. You don’t want scrambled eggs!
Next, whisk the egg yolks and that quarter cup of sugar until they get pale and thick. Then, you gently stir in your slightly cooled chocolate mixture and the vanilla. Now for the magic: in a separate, totally clean bowl, whip those egg whites with that little pinch of salt until they form stiff peaks. That means when you lift the beater, the peaks stand straight up and look brave.
Don’t dump it all in at once! Take about a third of those glorious whites and fold them into the chocolate mixture to lighten it up. Then, slowly, gently—treat it like it’s made of spun sugar—fold in the rest of the whites. Keep folding just until you don’t see any white streaks left around. Seriously, stop mixing when it looks *almost* combined. Pour that batter into your prepared pan and pop it in the oven for about 20 to 25 minutes. Here’s my pro tip for this chocolate mousse cake base: you want the edges set, but if the very center still has a slight, tiny wobble, that’s perfection. It’ll set fully as it cools on the rack.
Creating the Creamy Mousse Topping for Your Chocolate Mousse Cake
This is where we transform simple dark chocolate into that dreamy, airy texture everyone swoons over in a proper chocolate mousse cake. The key to avoiding a dense, pudding-like layer is temperature control and stability. We are using a little gelatin here—it’s our insurance policy—so let’s get that blooming first. Sprinkle your gelatin powder right over the cold water in a small bowl and just let it sit there for about five minutes until it looks thick and spongy.
While that rests, let’s make our chocolate base. Chop that 10 ounces of dark chocolate super fine—the smaller the pieces, the quicker they melt! Heat up just half a cup of your heavy cream until it’s simmering, then dump it right over that chopped chocolate. Let it sit untouched for two minutes, no peeking! Then whisk it gently until you have a gorgeous, glossy pool of chocolate ganache.
Now, whisk in your bloomed gelatin once it’s liquid again—just warm it slightly on the stove, never let it boil! Then, stir in your egg yolks, the remaining sugar, and vanilla. This mixture needs to come down in temperature before we layer it up. Why? Because if it’s too warm when you add the whipped cream, you’ll melt all the air right out! So, let this chocolate base cool down completely to room temperature while you whip up the rest of your cream.
Take that remaining cup of heavy cream and beat it until you hit medium peaks. They should hold their shape but still have a little softness at the very tip. This step is crucial for how to make stable chocolate mousse; you want that body!
Finally, fold the whipped cream into the cooled chocolate mixture. Do this gradually, using a wide spatula and cutting down the middle, scraping around the sides. Do three additions, stopping as soon as everything looks unified and creamy. That’s it! You’ve made a stunning, stable mousse ready to top that flourless base.
Assembling and Chilling the Layered Chocolate Mousse Dessert
Now for the satisfying moment when the two parts finally become one incredible dessert! Make sure your flourless base is completely and totally cool—I mean room temperature, not even a hint of warmth lingering. Gently spread that airy, creamy dark chocolate mousse evenly over the top of the base right there in the springform pan. Don’t press hard; you want to keep all that air you just whipped in!
This next part is the hardest because it requires patience, but it’s non-negotiable for a solid layered chocolate mousse dessert. Cover the whole thing and move it into the fridge. You absolutely must let it chill for a minimum of six hours, but honestly, overnight is when it truly firms up into that perfect sliceable state.
When you’re ready to serve, carefully unlock and remove the ring of the springform pan. I use a thin offset spatula around the edge just to be safe. Finish it with a generous dusting of cocoa powder or some pretty chocolate shavings scraped off a good quality bar. That’s how you finish a jaw-dropping chocolate mousse cake!
Tips for Success When Making a Chocolate Mousse Cake
Making an absolutely stunning chocolate mousse cake comes down to a few nerdy details that I picked up over years of kitchen failures and triumphs. Honestly, once you nail these small things, you’ll feel like you can conquer any luxury chocolate baking recipe out there.
Remember what I said about the mousse mixture cooling down? That’s the number one rule for a stable topping. If that melted chocolate base is warm when you fold in the whipped cream, you’re basically making chocolate soup, not mousse! Let it get to room temperature—touch it; if it feels anywhere near warm, wait a bit longer.
Also, use high-quality chocolate, please! Since this recipe relies purely on chocolate fats and air for structure, cheaper stuff with vegetable oils just won’t melt the way we need it to, and your mousse won’t set up right. Invest in the good stuff for both the base and the topping; your taste buds will thank you.
Here’s one more thing I learned the hard way: slicing this magnificent creation! Because the base is flourless and fudgy, and the top is such a delicate mousse, trying to cut it warm or immediately out of the fridge results in a sloppy mess. You need a perfect balance.
- Use a long, thin knife dipped in very hot water, then wipe it completely dry between every single slice. This heats the blade just enough to pass cleanly through the mousse and the dense base without dragging the layers.
- Always cut before you serve. If you let this gorgeous cake sit out for too long waiting for people, the mousse will start to soften, and slicing becomes a nightmare!
Follow those temperature rules, use great chocolate, and you’ll have zero issues achieving that ultimate decadent slice every single time.
Variations on the Classic Chocolate Mousse Cake
The beauty of a great recipe is that it gives you a solid foundation to build on, and this glorious cake is no exception! While I absolutely stand by this specific flourless base recipe, I totally understand that sometimes life calls for shortcuts or flavor twists.
If you’re having a super busy week or maybe your oven is occupied, we can absolutely pivot this into an easy no bake mousse cake. The simplest way to do this is to ditch the first baking step and use a very thin, stable store-bought sponge cake layer—or even a thin, sturdy shortbread crust—as your base. Just make sure that base is chilled solid before you start pouring on that lovely mousse you just made!
Flavor-wise, it’s all in the chocolate percentage. If you want something slightly sweeter and maybe friendlier for kids, try using 60% cacao for the mousse layer instead of 70%. On the flip side, if you live for that deep, bitter intensity, switch everything over to 75% or even 80% cacao for a truly intense dark chocolate dessert recipes experience.
Another easy trick I love involves the cream. For the mousse, you can infuse that heavy cream first. Gently warm half a cup of the cream with a strip of orange zest or a couple of crushed espresso beans for about ten minutes before you use it to melt your chocolate. Strain the cream out, and boom—you’ve got built-in flavor that complements the dark chocolate so nicely. It adds that little extra something without needing a whole new step!
Storage and Serving Suggestions for Your Chocolate Mousse Cake
Alright, we’ve poured our heart into this spectacular creation, so next up is making sure we keep it beautiful until it hits the table. Since this is such a delicate, layered dessert, storage is just as important as the baking part itself!
The absolute best environment for this chocolate mousse cake is, without a doubt, the refrigerator. Keep it chilled the entire time, covered loosely with plastic wrap or in an airtight container if you can manage it without squishing the top. The cold temperature is what keeps that mousse layer perfectly firm and sliceable. If you’ve baked the flourless base properly, it stays wonderfully moist even after a few days in the cold.
I really don’t recommend trying to freeze this. That high-fat, airy mousse structure doesn’t handle the thawing process well; it tends to separate and weep, which is just heartbreaking after all that folding we did. For the best results, this cake truly hits its peak flavor and texture on day two, after it’s had a full 24 hours to settle in the cold. So, if you’re planning for a big event, make this cake the day before!
When it’s time to serve this stunning piece of luxury chocolate baking, skip the fuss—it needs almost nothing extra! The rich flavor stands up beautifully all on its own. However, if you feel like adding a little something vibrant to cut through that deep dark chocolate, fresh raspberries or strawberries are incredible alongside it. The slight acidity and freshness are the perfect counterpoint.
If you’re serving it with a hot drink, you need something that can stand up to the richness. A simple, strong cup of black coffee or an espresso always works wonders. If you’re feeling ambitious and want a drink pairing, a nice, chilled Port wine really sings with the dark chocolate notes. Seriously, just slice it cold, watch it glisten, and enjoy the silence when everyone takes their first bite!
Frequently Asked Questions About This Chocolate Mousse Cake
Can I make this chocolate mousse cake ahead of time?
Oh, yes, and I actually encourage it! This is one of those **luxury chocolate baking** recipes that gets better with rest. Because the layers need time to firm up and the flavors need to marry, making it the day before serving is my personal preference. Keep it well-covered in the fridge, and it’s perfect the next day. Since it’s such a rich chocolate dessert, it holds up beautifully.
What is the best chocolate to use for the mousse layer?
For the most stable and flavorful topping, you really need to stick to dark chocolate between the 60% and 70% cacao range. If you use chocolate chips, they sometimes contain stabilizers meant to help them hold their shape when baking cookies, which can mess up how they melt smoothly into our chocolate-gelatin mixture. I always recommend using good quality bars and chopping them finely yourself. That high-quality cocoa really defines the success of your layered chocolate mousse dessert.
Can this be a no-bake chocolate mousse cake?
Absolutely! If you’re in a pinch or just don’t want to turn the oven on, you can definitely create an **easy no bake mousse cake**. Instead of making the flourless base, just use a pre-made, thin, and sturdy chocolate cookie or cake crumb crust—think Oreo crumbs mixed with melted butter. Make sure that crust base is completely chilled and firm before you ladle that creamy mousse topping over it. It will still be decadent!
My mousse deflated! Why won’t my chocolate mousse stabilize?
This is usually one of two things! The most common mistake when learning how to make stable chocolate mousse is folding the whipped cream in while the chocolate layer is still too warm. If the chocolate mixture is warm, it melts the air right out of the cream, and you lose all that height. Wait until that chocolate base is completely room temperature, almost cool to the touch, before gently folding in the whipped cream. Give it time!
How do I get that beautiful, clean slice on this decadent chocolate cake recipe?
This takes a little practice, since the base is so fudgy! You need a very sharp, thin-bladed knife, like a chef’s knife. The trick is to dip the knife into a tall glass of steaming hot water, wipe it bone dry completely—moisture doesn’t mix well with chocolate—and then slice straight down quickly. Rinse, wipe dry, and repeat for every single slice. It keeps the cut incredibly clean and pretty!
PrintDecadent Flourless Chocolate Mousse Cake
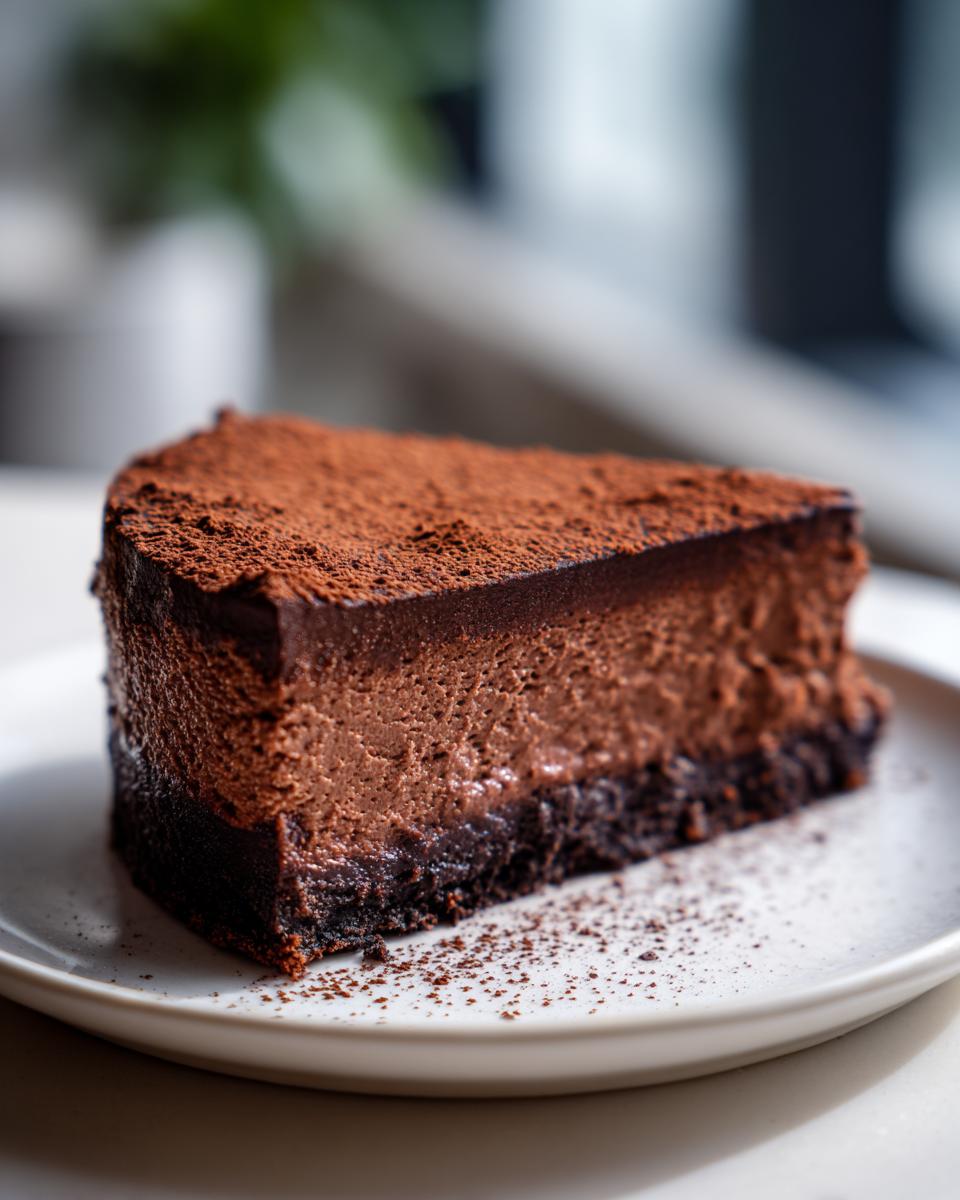
This recipe creates a rich, layered chocolate mousse cake featuring a moist, flourless base and a light, stable dark chocolate mousse topping. It is an impressive centerpiece dessert.
- Prep Time: 45 min
- Cook Time: 25 min
- Total Time: 7 hours 10 min
- Yield: 10 servings 1x
- Category: Dessert
- Method: Baking and Chilling
- Cuisine: American
- Diet: Vegetarian
Ingredients
- For the Flourless Base: 8 ounces bittersweet chocolate (70% cacao), chopped
- 1/2 cup (1 stick) unsalted butter
- 3 large eggs, separated
- 1/4 cup granulated sugar
- 1 teaspoon vanilla extract
- Pinch of salt
- For the Dark Chocolate Mousse: 10 ounces dark chocolate (60-70% cacao), finely chopped
- 1 1/2 cups heavy cream, divided
- 2 large egg yolks
- 2 tablespoons granulated sugar
- 1 teaspoon vanilla extract
- 1 1/2 teaspoons unflavored gelatin powder
- 3 tablespoons cold water
- For Garnish: Cocoa powder or chocolate shavings
Instructions
- Prepare the Base: Preheat your oven to 350°F (175°C). Grease and line the bottom of an 8-inch springform pan with parchment paper.
- Melt the chocolate and butter together in a heatproof bowl set over simmering water, stirring until smooth. Remove from heat and let cool slightly.
- In a separate bowl, whisk the egg yolks and 1/4 cup sugar until pale. Stir the melted chocolate mixture and vanilla into the yolks.
- In a clean bowl, beat the egg whites with a pinch of salt until stiff peaks form. Gently fold one-third of the egg whites into the chocolate mixture to lighten it, then fold in the remaining egg whites until just combined. Do not overmix.
- Pour the batter into the prepared pan. Bake for 20 to 25 minutes, or until the edges are set but the center still has a slight wobble. Cool completely on a wire rack.
- Prepare the Mousse: Sprinkle the gelatin powder over the cold water in a small bowl and let it bloom for 5 minutes.
- Place the finely chopped dark chocolate in a medium bowl. Heat 1/2 cup of the heavy cream in a small saucepan until it just simmers. Pour the hot cream over the chocolate and let it sit for 2 minutes, then whisk until smooth.
- Gently warm the bloomed gelatin until it is liquid, but do not boil. Whisk the liquid gelatin into the chocolate mixture. Whisk in the egg yolks, 2 tablespoons sugar, and vanilla extract. Let this mixture cool to room temperature, stirring occasionally.
- In a separate bowl, whip the remaining 1 cup of heavy cream until medium peaks form.
- Gently fold the whipped cream into the cooled chocolate mixture in three additions until you have a uniform, creamy mousse.
- Assemble the Cake: Once the base is completely cool, spread the chocolate mousse evenly over the top of the flourless base in the springform pan.
- Refrigerate the cake for at least 6 hours, or preferably overnight, until the mousse is firm and set.
- Before serving, carefully release the springform side. Dust the top with cocoa powder or decorate with chocolate shavings. Slice and serve this rich chocolate dessert.
Notes
- To make a stable chocolate mousse, ensure your melted chocolate mixture is cooled to room temperature before folding in the whipped cream. If it is too warm, the mousse will deflate.
- If you prefer a no bake mousse cake, you can use a pre-made, thin, moist chocolate sponge base instead of baking the flourless layer.
- For an extra luxurious flavor, use high-quality French chocolate.
Nutrition
- Serving Size: 1 slice
- Calories: 450
- Sugar: 30g
- Sodium: 120mg
- Fat: 32g
- Saturated Fat: 19g
- Unsaturated Fat: 13g
- Trans Fat: 0.5g
- Carbohydrates: 35g
- Fiber: 4g
- Protein: 8g
- Cholesterol: 150mg