
There’s just something magical when you take two unassuming things—cream and chocolate—and turn them into pure decadence, right? That’s the beautiful secret behind one of my all-time favorite kitchen staples: chocolate ganache. When I started Julia Meal, my focus was always to share recipes that deliver professional results without turning your kitchen into a science lab. This guide is all about demystifying that glossy, incredible **chocolate ganache** so you can master it today, using just two ingredients!
Whether you need a **silky chocolate glaze** for a stunning cake drip, a firm ganache filling for cake layers, or something light enough to be a fluffy topping, we cover all the ratios. Trust me, once you know the basic technique, you’ll never reach for a tub of store-bought frosting again. It’s accessible, fast, and truly the foundation for so many incredible desserts. Don’t you just love when simplicity wins?
- Why This Easy Chocolate Ganache Recipe is Your New Go-To
- The Essential Ingredients for Perfect Chocolate Ganache
- How to Make Chocolate Ganache: Step-by-Step Tutorial
- Mastering Chocolate Ganache Ratios for Different Uses
- Creating Whipped Ganache Frosting
- Variations: Dark Chocolate Ganache, Milk Chocolate Ganache, and White Chocolate Ganache
- Troubleshooting Common Chocolate Ganache Problems
- Serving Suggestions for Your Homemade Chocolate Ganache
- Storage and Reheating Instructions for Chocolate Ganache
- Nutritional Estimates for Chocolate Ganache
- Share Your Chocolate Ganache Creations
Why This Easy Chocolate Ganache Recipe is Your New Go-To
Why bother with complicated steps when perfection is this easy? If you’re stuck looking for an easy chocolate ganache recipe, this is it. Honestly, this 2 ingredient ganache method is my secret weapon.
Speed and Simplicity: Making Chocolate Ganache in Minutes
We’re talking under 10 minutes total! That’s right, this entire foundation for incredible **chocolate ganache** requires almost zero effort. It’s faster than calling for delivery, I promise you that. Just heat that cream, pour it over, and whisk!
Unmatched Versatility for Every Dessert Need
This is where you win big, friend. Depending on how we treat it, this one batch can become:
- A shiny glaze.
- A firm filling for cakes or tarts.
- Light, fluffy frosting if you whip it up.
It’s the ultimate baking shortcut. Feel free to check out my guides on quick and easy weeknight dinners, because I bring that same speedy philosophy to dessert!
The Essential Ingredients for Perfect Chocolate Ganache
Okay, so a proper **chocolate ganache** only needs two things, right? Heavy cream and chocolate. But that’s where quality becomes non-negotiable for me. We aren’t just throwing random bars in a bowl here; flavor integrity matters! For our base recipe, you need good heavy whipping cream and about 8 ounces of quality dark chocolate, which you have to make sure is finely chopped before we even start.
We’ll talk about milk chocolate and white chocolate variations in a bit, but know that they follow the same simple concept. Don’t forget to check out my tips for simple, delicious desserts—this ganache is a major player in that collection!
Ingredient Quality Matters for Rich Chocolate Ganache
Listen, this is my number one tip for achieving that incredible, deeply flavored, **velvety chocolate ganache**. Do not, and I mean do not, use standard chocolate chips if you can avoid it! Those chips have stabilizers in them so they hold their shape when baked—which is the exact opposite of what we want when we’re trying to dissolve them into liquid silk. Grab a good quality chocolate bar, 60% to 70% cacao if you’re using dark, and chop it up as small as you possibly can. It melts faster and blends smoother, giving you that flawless finish every time.
How to Make Chocolate Ganache: Step-by-Step Tutorial
Alright, let’s get down to the satisfying part! Knowing how to make chocolate ganache is easier than you think, but the timing is crucial. We’re aiming for that perfect emulsion where the fat and liquid combine lovingly. Remember, this method works for dark, milk, or white chocolate, but always use that finely chopped chocolate we talked about—it melts so much faster and more evenly!
Preparing the Chocolate and Heating the Cream
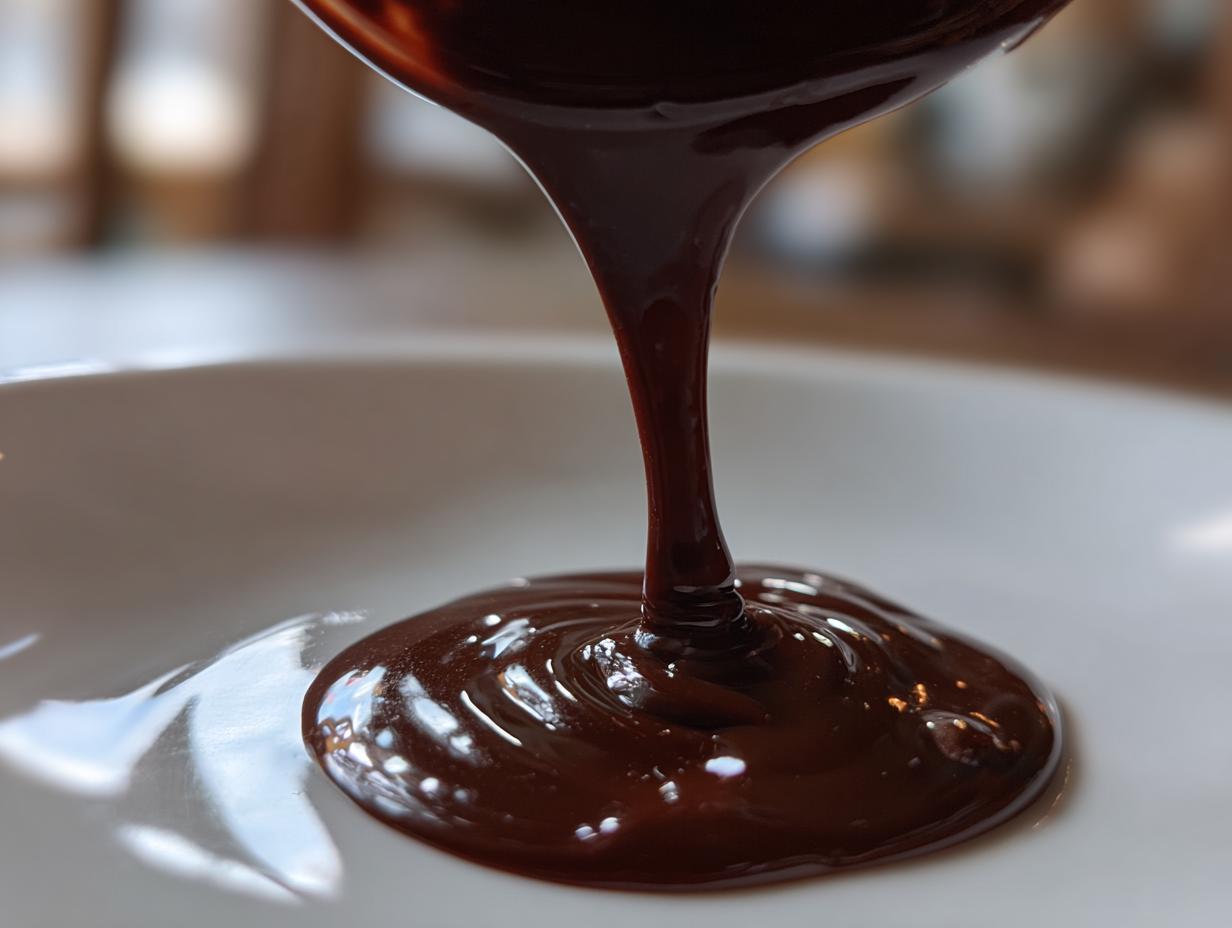
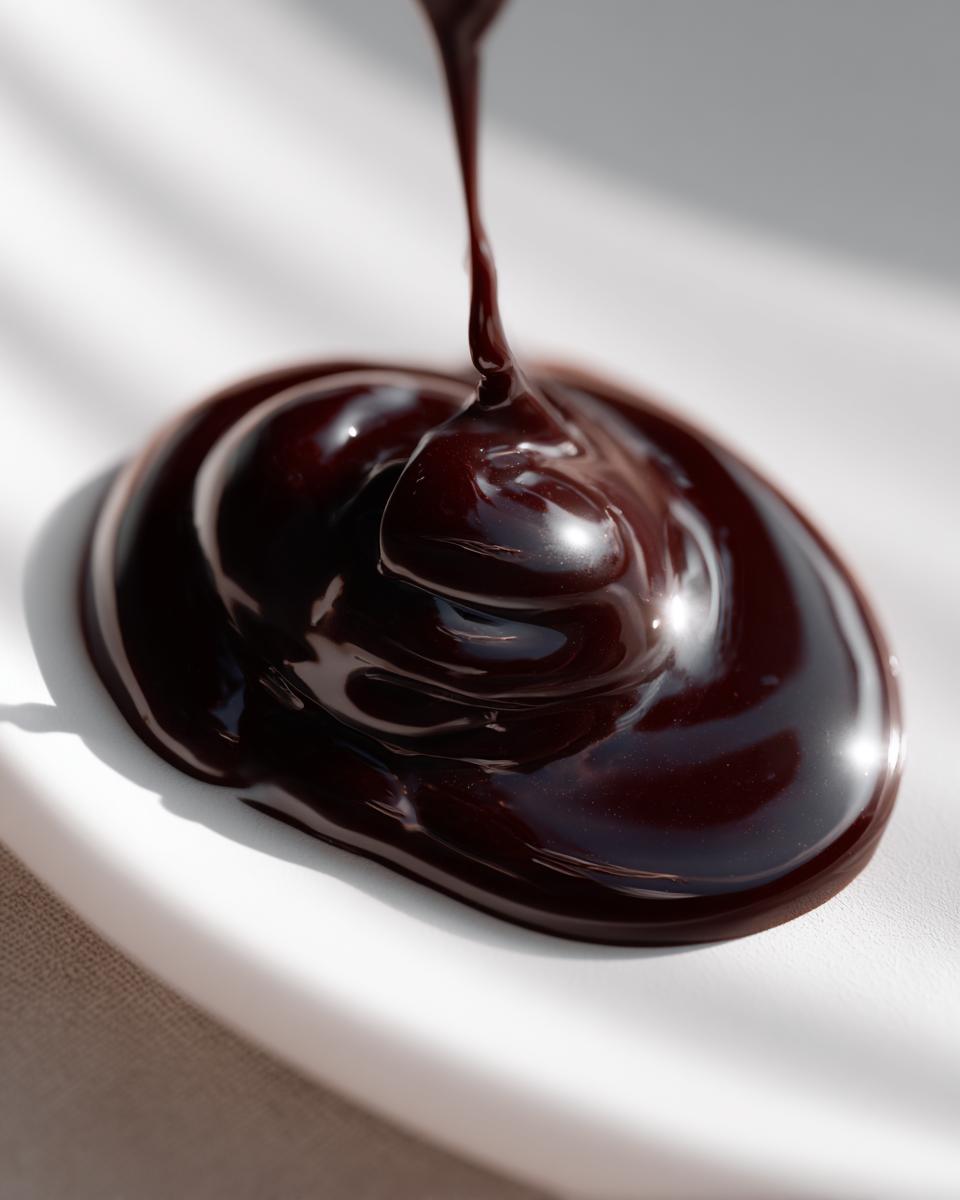
First, pop your chopped dark chocolate into a nice, sturdy heatproof bowl. Now, take your heavy whipping cream and put it in a small saucepan over medium heat. You aren’t looking for a rolling boil here! Watch it closely. Once you see tiny little bubbles just starting to form around the edges and the cream looks happy and hot, take it right off the stove. That’s the visual cue you need. Carefully pour that hot cream directly over your waiting chocolate pile.
Achieving Silky Chocolate Glaze Consistency
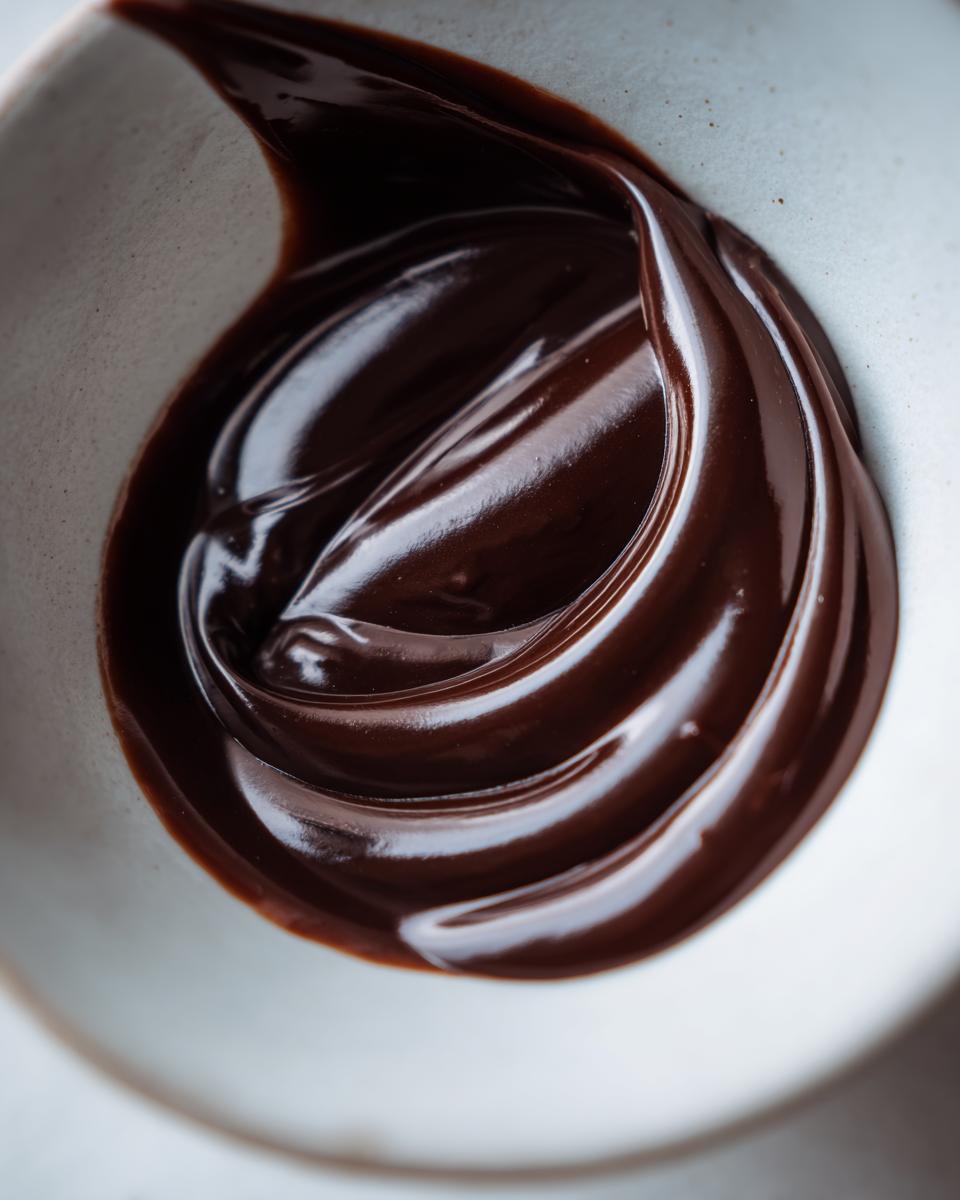
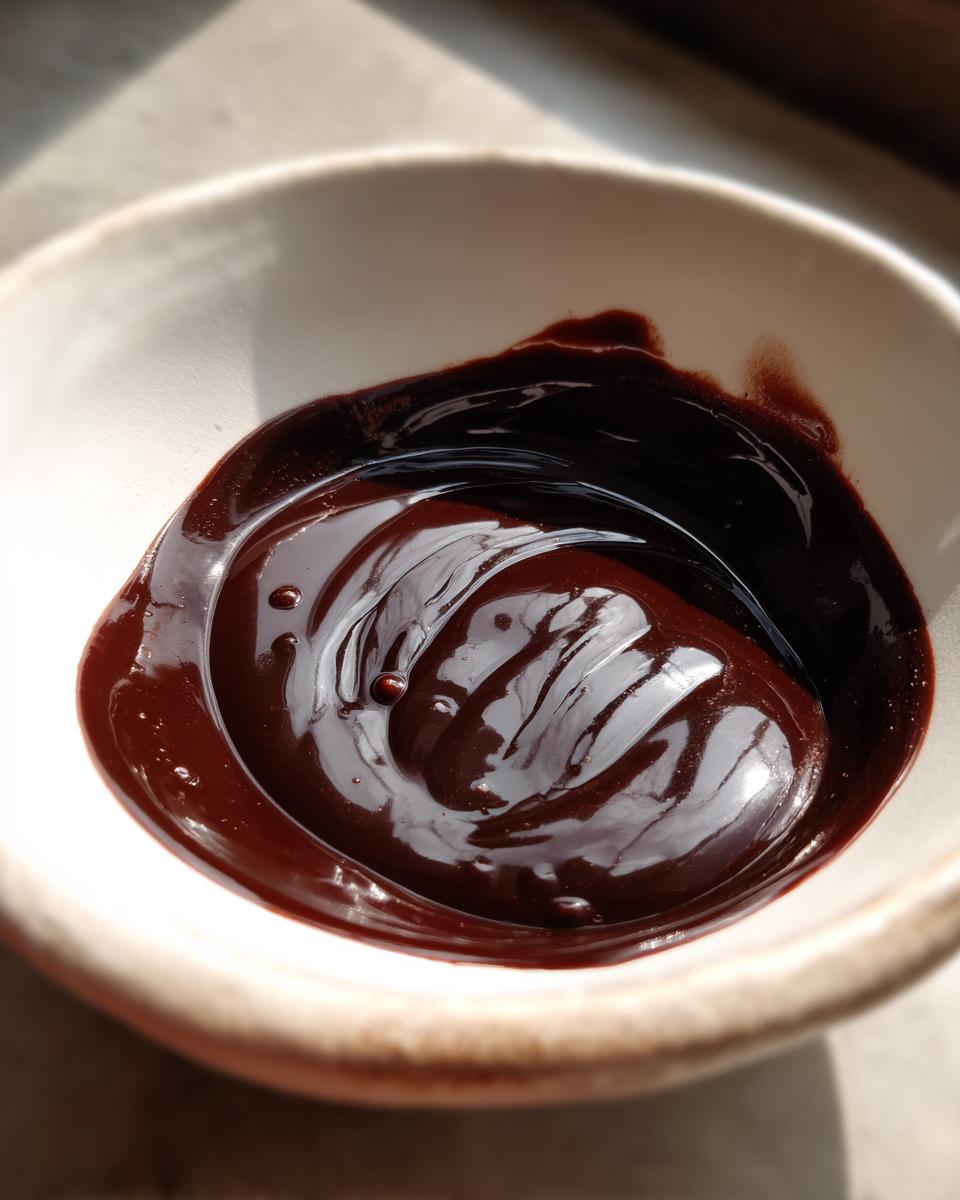
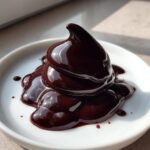
This is the magic moment, but resist the urge to stir right away! Let that hot cream sit on the chocolate for a full five minutes. Seriously, walk away. This gives the heat time to do the heavy lifting. After five minutes, grab a whisk—I like a silicone one—and start gently whisking, starting right in the center and working your way outward in slow circles. Keep going until everything comes together into this beautiful, uniform, glossy mixture. Boom! You have achieved a liquid, silky chocolate glaze consistency. It’s ready for drizzling right now if you want that perfect drip!
If you’re planning on using it as a firm ganache filling for cake later, just let this bowl sit on the counter until it cools down completely. Patience pays off!
Mastering Chocolate Ganache Ratios for Different Uses
This is the secret sauce, the part that takes you from just knowing how to melt chocolate to being a true ganache artist! When people ask me about chocolate ganache ratios, I always tell them it really depends on what you plan to do with it. You can dramatically change the texture just by tweaking how much chocolate versus cream you use. It’s super flexible, which is why I love whipping up a batch as a simple, delicious dessert base.
Ratio Guide: Ganache for Cake Drip vs. Firm Filling
For a perfect, shiny, pourable ganache for cake drip, you want an almost equal amount of both ingredients by weight. Think 1 part cream to 1 part chocolate. If you want something much firmer—say, for rolling truffle centers or using as a thick ganache filling for cake—you need more chocolate. Try a 2:1 ratio (two parts chocolate to one part cream). That double dose of chocolate ensures it sets up nice and stiff!
If you are curious about exploring ratios for different types of chocolate, I found this guide on chocolate ganache ratios really helpful if you plan on branching out past the dark chocolate we used initially.
How to Achieve Perfect Chocolate Ganache Consistency
Remember that moment when we first mixed it? It was liquid and gorgeous—that’s your drip consistency! If you want that perfect, spreadable texture for frosting later, the key is absolutely temperature control. You need to let that warm mixture cool down completely at room temperature. Don’t rush it in the fridge, though! Cooling slowly helps it thicken evenly. Once it’s cool, give it a gentle stir, and you’ll see it transition into the perfect chocolate ganache consistency—thick enough to hold its own shape but still creamy!
Creating Whipped Ganache Frosting
Now, let’s transition this smooth, luxurious **chocolate ganache** into the lightest, fluffiest frosting you’ve ever piped! This step is specifically for those of you desperate for a whipped ganache frosting that tastes amazing but isn’t heavy like a traditional buttercream. Remember, for this to work, your ganache has to be completely cool—room temperature is perfect. If it’s even a tiny bit warm, it will just turn into soup when the mixer hits it. Ask me how I know, ha!
Once it’s totally cooled and has that thick, spreadable texture we talked about, put it into your mixer bowl. Start whipping it slowly at first—we don’t want chocolate shrapnel flying around the kitchen! Gradually increase the speed to medium-high. Watch the magic happen! It will start lightening up, getting fluffy, and taking on a distinctly paler shade of brown. Keep going until you have soft, billowy peaks. It’s totally different from the intense, dark look of the original glaze. This airy creation is perfect for spreading thickly on cakes or piping cute swirls on cupcakes. If you love fluffy toppings, you have to check out my guide on cream cheese frosting too, but this ganache version is pure chocolate heaven!
Variations: Dark Chocolate Ganache, Milk Chocolate Ganache, and White Chocolate Ganache
What I absolutely adore about this basic technique is how adaptable it is across the chocolate spectrum. We started with dark chocolate, but once you understand the mechanism, you can pivot to whatever flavor you’re craving! Just remember, we are working with different sugar and fat contents, so sometimes you need tiny tweaks, especially when moving to the lighter varieties. If you enjoy rich chocolate flavors, you probably already know that this base makes for an amazing German chocolate cheesecake recipe!
Tips for Dark Chocolate Ganache
When using dark chocolate, you really control the intensity. If you want that deeply decadent, slightly bitter edge—the kind that cuts through sweet cake layers beautifully—go higher on the cacao percentage. Using 70% or even 80% dark chocolate makes a gorgeous, bold **dark chocolate ganache**. It sets up quite firm too, which is great for that sturdy filling consistency we discussed earlier.
Working with Milk Chocolate Ganache
Milk chocolate is definitely sweeter, and it has a lower melting point because of the added milk solids. Because of that extra sugar, it tends to be a bit softer overall. If you’re aiming for a filling using **milk chocolate ganache**, I really suggest slightly bumping up your chocolate amount, maybe going from a 1:1 ratio to a 1.25:1 chocolate-to-cream ratio. It helps it firm up correctly after cooling!
And for the white stuff? Oh boy, **white chocolate ganache** is its own adventure. Since white chocolate is mostly cocoa butter and sugar, it’s much softer. When working with it, you almost always need more chocolate—sometimes even doubling the amount of white chocolate compared to the cream to get it to set like the others. It’s sweeter, so it’s wonderful when you add a little citrus zest to balance it out!
Troubleshooting Common Chocolate Ganache Problems
Hey, look, even in my professional kitchen days, things went wrong sometimes. It happens! That’s why learning how to fix ganache problems is just as important as knowing the basic method. When you’re making something as simple as **chocolate ganache**, sometimes the emulsion just decides it doesn’t want to cooperate, and it separates into a greasy puddle. Don’t panic and don’t dump it out; we can usually save it!
Fixing an Oily or Separated Chocolate Ganache
If you look down and see an oily sheen on top or the mixture looks grainy, it means the fat and liquid separated on you. This is super common! The fix is surprisingly easy, though. Just whisk in one teaspoon of *hot* water into the messy ganache. If that doesn’t grab it, try one more teaspoon of heavy cream. Whisk slowly and intentionally. That little bit of extra liquid helps pull everything back together into that beautiful, smooth texture we love. Keep going until it’s looking glossy again, and then let it cool as normal. You’ll find this little trick saves the day almost every time, keeping your dessert flowing smoothly, just like the recipes over at simple, delicious desserts.

Serving Suggestions for Your Homemade Chocolate Ganache
So you’ve got this gorgeous, rich **chocolate ganache**—now what’s the best way to put it to use? While I love whipping it up for a full frosting, sometimes you just need a quick drizzle, right? If you are using it when it’s still warm and fluid, boom, you have an instant, quick chocolate sauce! Drizzle that over vanilla ice cream or some fresh strawberries. Instant gourmet!
If it’s cooled slightly to that medium thickness, it’s the ultimate decadent chocolate topping for brownies or cheesecake. Honestly, the versatility of this two-ingredient wonder means you’ll use it far more often than you think. For more ways to incorporate it into quick treats, check out my favorite roundup of simple, delicious desserts!
Storage and Reheating Instructions for Chocolate Ganache
This is a really practical question because where you store your **chocolate ganache** totally depends on what you made! If you made a thinner glaze or a drizzle that you plan on using right away or the same day, leaving it covered at cool room temperature is usually just fine. It’ll stay pourable, like a lovely, thick syrup.
But if you made a firm filling or you whipped it up into that glorious **homemade chocolate frosting**, you absolutely need to get it into the fridge. Cover that bowl tightly with plastic wrap, making sure the wrap touches the surface of the ganache itself—this stops it from forming that annoying skin. When refrigerated, it will get quite hard, almost like a fudge block, especially if you used a higher ratio of chocolate.
Now, what if you didn’t use it all and it’s set rock-hard? Don’t toss it! You can bring it back to life easily. If you need it back to a thick filling, just let it sit on the counter for an hour or two until you can press it easily with a spoon. If you need it back to pourable, this is where you have to be cautious:
- Never microwave a big lump! It heats unevenly.
- Take out what you need and put it in a microwave-safe bowl.
- Heat in very short bursts—maybe 10 seconds at a time—stirring well in between each blast.
You want it just warm enough to become smooth and shiny again. It’s so satisfying to revive leftovers! For other easy ways to use up leftovers, you know I always point back to my guide on simple, delicious desserts!
Nutritional Estimates for Chocolate Ganache
Okay, let’s talk turkey for a minute. While this **chocolate ganache** is pure, unadulterated joy, it’s definitely more of a treat than a health food, haha! Since we are looking at a rich mix of cream and dark chocolate, the fat and sugar content is what you’d expect from something this decadent. I always tell folks not to sweat the small stuff when you’re making something this simple and delicious, but for those of you keeping track, here are the estimates based on using that dark chocolate base recipe we just made (this is based on about a quarter cup serving).
Please remember, these numbers shift dramatically based on the chocolate you use—white chocolate will spike the sugar way up, for instance! These are just general guidelines to keep in mind:
- Serving Size: 1/4 cup
- Calories: 450 (It’s rich, remember!)
- Fat: 38g (Most of this is the good fat from the chocolate and cream!)
- Saturated Fat: 22g
- Carbohydrates: 30g
- Sugar: 25g
- Protein: 5g
- Sodium: 15mg
See? High in fat, high in flavor! It’s worth every single bite when you are aiming for that perfect **velvety chocolate ganache** finish on a cake. Don’t forget that the fat content is what gives us that incredible, silky mouthfeel we’re chasing!
Share Your Chocolate Ganache Creations
Now that you know all my secrets for turning cream and chocolate into that magnificent **chocolate ganache**, I genuinely want to see what you whip up! Sharing food is the heart of cooking, just like my family always believed. I’ve poured all my knowledge into making this process absolutely foolproof, so hit those stars and tell me how you liked it!
Did you go for that mirror-like sheen with the pourable ratio? Did you chill it down and beat it into a gorgeous, tall **whipped ganache frosting**? Maybe you used exactly the right ratio for a firm **ganache filling for cake** layers. I want to hear every detail!
Drop a comment below and let me know your favorite way to use this versatile liquid gold. And hey, if you’re super proud of your creation—that perfect drip or the silkiest glaze you’ve ever achieved—tag me on social media! Seriously, nothing makes my day brighter than seeing one of our recipes out in the world making someone’s dessert dreams come true. Come say hello over on my About page too, and tell me about your kitchen adventures!
PrintThe Ultimate Easy Chocolate Ganache: Ratios, Recipes, and Uses (2-Ingredient Dark, Milk, and Whipped Variations)
Learn how to make perfect chocolate ganache using just two ingredients. This guide provides the exact ratios for achieving pourable glaze, firm filling, or light whipped frosting consistency for dark, milk, and white chocolate.
- Prep Time: 5 min
- Cook Time: 5 min
- Total Time: 10 min
- Yield: About 1.5 cups 1x
- Category: Dessert Component
- Method: Stovetop/Melting
- Cuisine: General
- Diet: Vegetarian
Ingredients
- 1 cup heavy whipping cream
- 8 ounces high-quality dark chocolate (60-70% cacao), finely chopped
- 1 cup heavy whipping cream (for milk chocolate variation)
- 8 ounces milk chocolate, finely chopped (for milk chocolate variation)
- 1 cup heavy whipping cream (for white chocolate variation)
- 12 ounces white chocolate, finely chopped (for white chocolate variation)
Instructions
- Prepare the chocolate: Place your finely chopped dark chocolate into a heatproof bowl.
- Heat the cream: Pour the heavy whipping cream into a small saucepan. Heat the cream over medium heat until it just begins to simmer around the edges. Do not let it boil rapidly.
- Combine: Pour the hot cream directly over the chopped chocolate. Let it sit undisturbed for 5 minutes to allow the heat to melt the chocolate completely.
- Whisk until smooth: Gently whisk the mixture, starting from the center and working outward, until the chocolate ganache is completely smooth, glossy, and uniform. This creates a pourable glaze consistency.
- Cool for different uses: For a cake drip or glaze, use immediately while warm. For a filling or frosting, let the ganache cool completely at room temperature (about 2 hours) until it thickens to a spreadable consistency.
- To make whipped ganache frosting: Once the ganache is completely cool and firm, use an electric mixer to whip it on medium-high speed until it becomes light, fluffy, and pale in color, similar to traditional frosting.
Notes
- For a pourable cake drip, use a 1:1 ratio of chocolate to cream by weight. For a firmer filling or truffle base, use a 2:1 ratio (twice as much chocolate as cream).
- Always use high-quality chocolate bars or wafers for the best flavor and texture; chocolate chips often contain stabilizers that prevent smooth melting.
- If your ganache separates or looks oily, whisk in one teaspoon of hot water or extra cream until it comes back together into a smooth emulsion.
Nutrition
- Serving Size: 1/4 cup
- Calories: 450
- Sugar: 25g
- Sodium: 15mg
- Fat: 38g
- Saturated Fat: 22g
- Unsaturated Fat: 16g
- Trans Fat: 0g
- Carbohydrates: 30g
- Fiber: 3g
- Protein: 5g
- Cholesterol: 110mg