
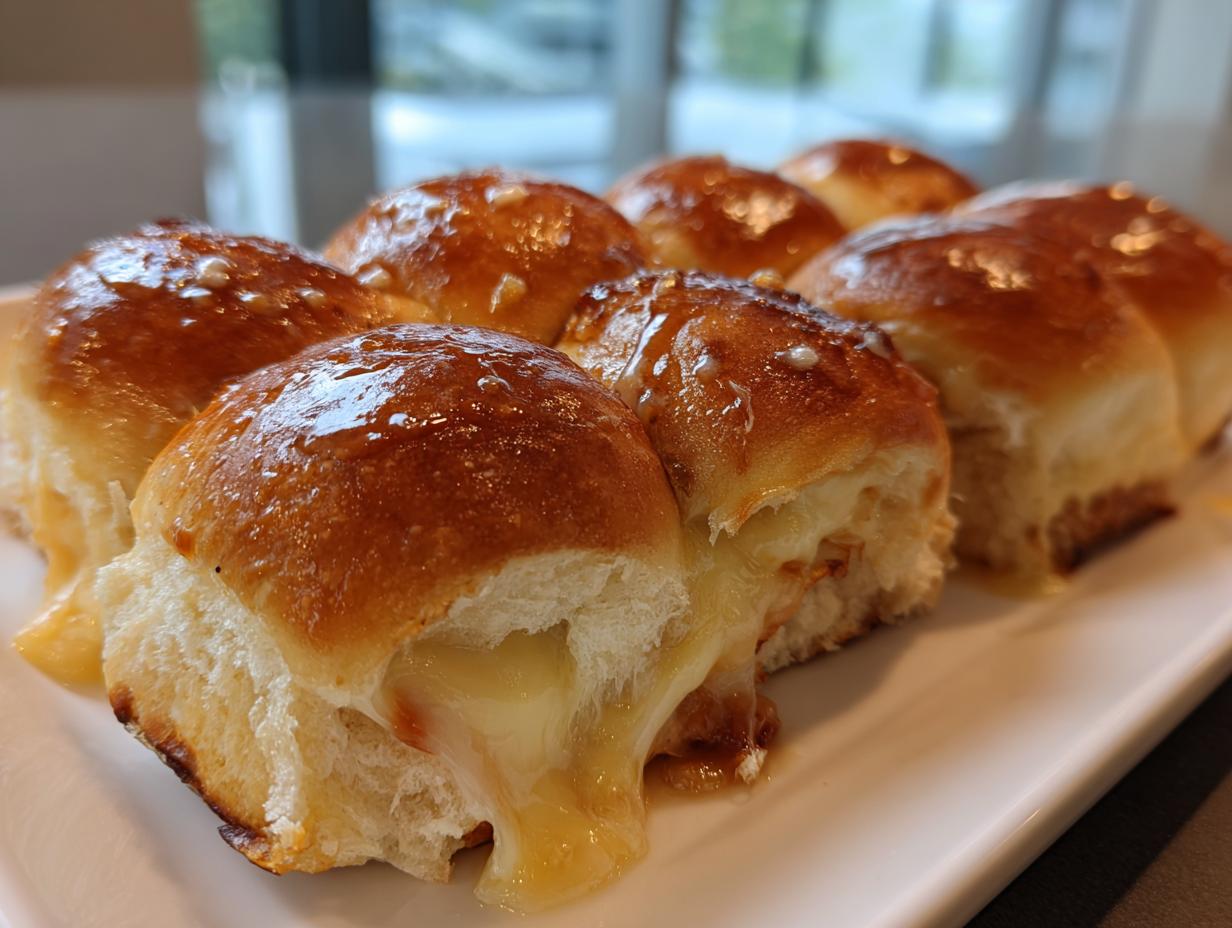
You know, sometimes the best food isn’t the one that takes three hours of complicated maneuvering. It’s the food that brings everyone together fast, smells incredible bubbling out of the oven, and vanishes the second you put it down. That’s the magic of these ham and cheese sliders. I remember being a kid and watching my aunt assemble a tray just like this before a big football game—it was the highlight of the spread, always. We aren’t just making sandwiches here; we’re building sweet, savory portals to instant comfort using those wonderful Hawaiian rolls and a killer garlic butter glaze. If you love easy entertaining, you’ll adore this method; it reminds me of why I started this whole journey in the first place: connecting over simple, delicious food. If you want another great handheld meal for your next gathering, check out my recipe for baked ham and cheese croissants.
- Why These are the Best Easy Ham and Cheese Sliders
- Gathering Ingredients for Your Ham and Cheese Sliders
- Essential Equipment for Perfect Ham and Cheese Sliders
- Step-by-Step Instructions for Baked Ham and Cheese Sliders
- Tips for Making the Best Ham and Cheese Sliders
- Variations: How to Customize Your Ham and Cheese Sliders
- Serving Suggestions for Your Quick Weeknight Sliders
- Storage and Reheating Instructions for Leftover Ham and Cheese Sliders
- Frequently Asked Questions About Ham and Cheese Sliders
- Nutritional Estimate for These Oven Baked Party Sliders
- Share Your Experience Making These Ham and Cheese Sliders
Why These are the Best Easy Ham and Cheese Sliders
Look, if you need something fast that tastes like you spent hours on it, these are it. They are the definition of easy ham and cheese sliders. Seriously, they barely count as cooking! Here’s why I swear by them:
- They are lightning fast—I mean, 10 minutes of prep, tops!
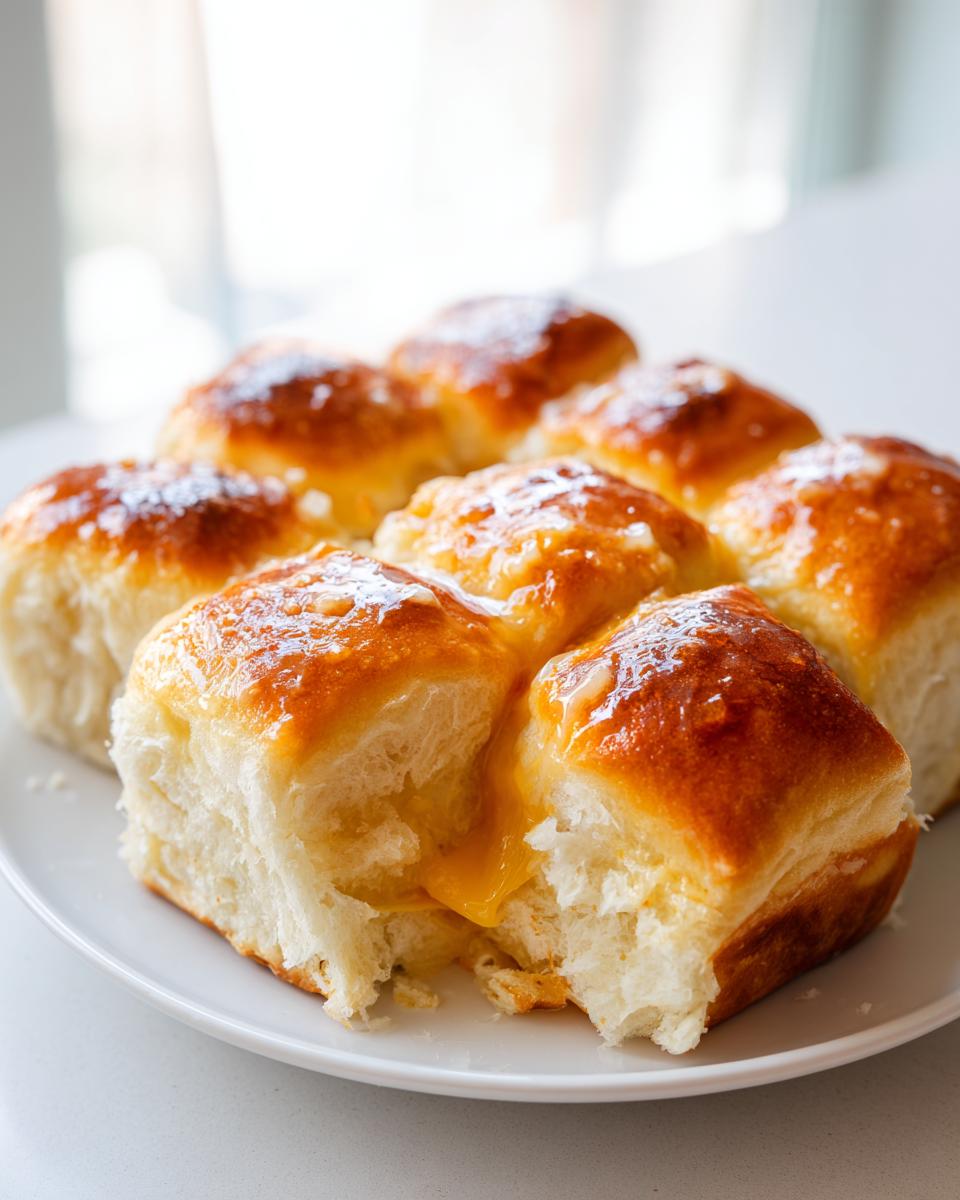
- The Hawaiian rolls keep these incredibly soft, making them perfect party appetizer sandwiches.
- That garlic butter glaze? It takes the flavor from standard to absolutely unforgettable.
If you like dipping things, these are amazing alongside my easy cranberry brie bites.
Gathering Ingredients for Your Ham and Cheese Sliders
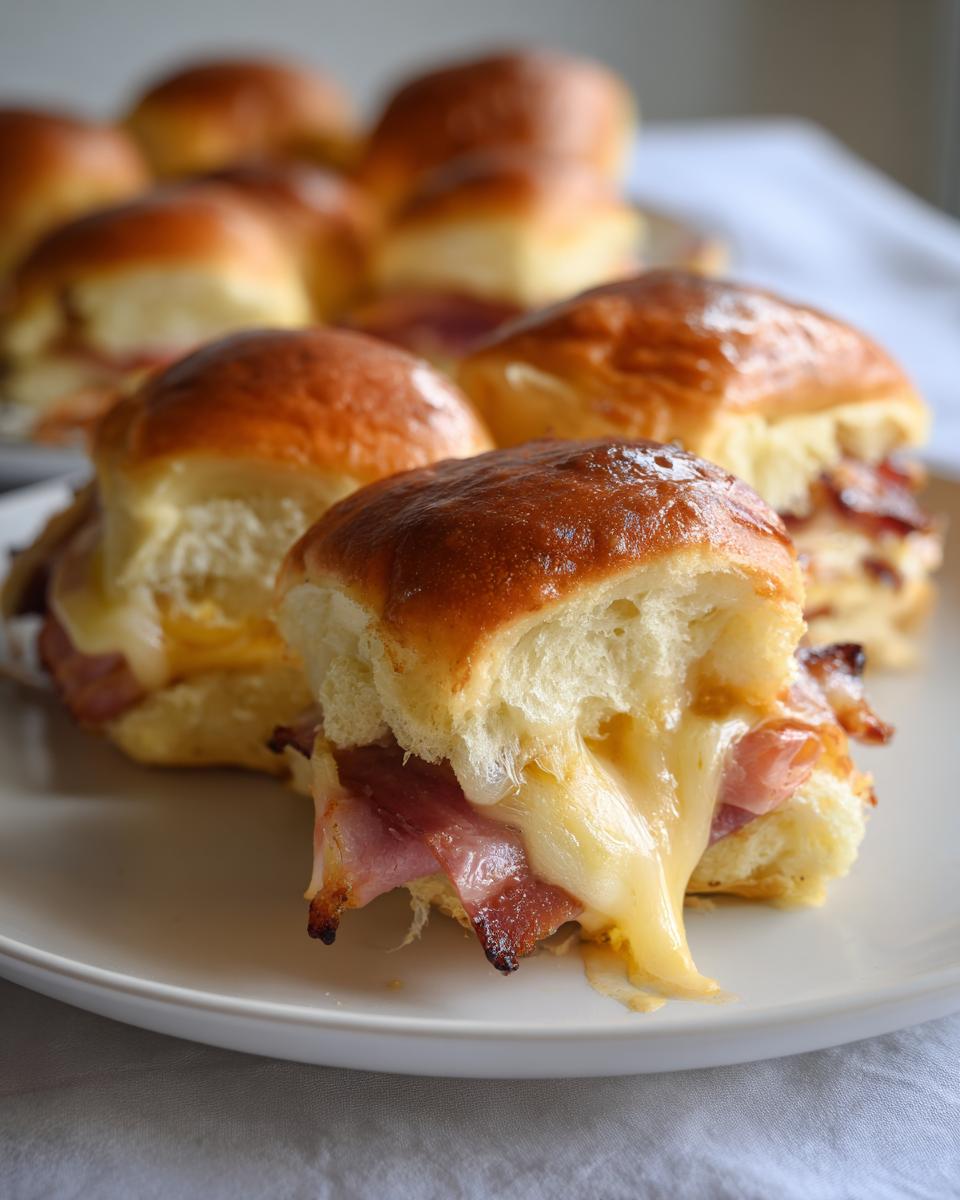
Okay, the beauty of these ham and cheese sliders is that the ingredient list is short and powerful. You probably have half this stuff in your pantry right now! Since we’re using so few items, the quality really matters, trust me. When I’m shopping, I always grab deli ham that isn’t too heavily spiced; something simple lets that sweet roll and garlicky topping really shine through. For the cheese, Swiss is classic here because it melts beautifully without getting oily, but don’t feel locked in!
Here’s exactly what you’ll need for 12 perfect sandwiches:
- One 12-count package of those sweet Hawaiian roll sliders recipe kings—you need the whole package!
- One full pound of thinly sliced deli ham
- 12 slices of Swiss cheese (or whatever you prefer, honestly)
- 4 tablespoons of unsalted butter, melted down perfectly
- 1 tablespoon of Dijon mustard (that little kick is key!)
- 1 teaspoon of Worcestershire sauce—don’t skip it!
- 1 teaspoon of dried minced onion
- 1/2 teaspoon of garlic powder
- A tiny pinch—1/4 teaspoon—of poppy seeds, just for crunch if you feel like being fancy.
If you want to try another great, simple sandwich, my honey mustard chicken salad is fantastic on a slightly toasted baguette!
Essential Equipment for Perfect Ham and Cheese Sliders
I’m a big believer that having the right tools makes the job so much easier, even when we’re making something this simple. You don’t need a massive arsenal for these ham and cheese sliders, but a few key items really help keep things tidy and ensure that beautiful, even bake. Trust me, a smooth process means less chance of a kitchen disaster later on!
Here is the bare minimum I always grab before I start layering:
- A 9×13 inch baking dish. This is non-negotiable because it holds the whole connected sheet of rolls perfectly.
- A small bowl for whipping up that amazing glaze.
- A small whisk or a fork. You just need to make sure that butter and Dijon get familiar with each other before you brush it on.
- Aluminum foil. This is our secret weapon for preventing the top from burning before the cheese inside is perfectly melted. Don’t forget this step!
Step-by-Step Instructions for Baked Ham and Cheese Sliders
Alright, now for the fun part! Once you have your ingredients ready, these ham and cheese sliders come together so quickly you’ll wonder why you waited so long to try them. Remember, precision matters here, especially with that first slice, so take your time so the whole tray stays intact. Once everything is layered, we hit it with that amazing sauce. If you want more ideas for fantastic party bakes, you have to check out my recipe for oven baked party sliders, which uses a similar assembly method.
Preparing the Rolls and Layering the Ham and Cheese
First thing: heat your oven up to 350 degrees Fahrenheit and give your 9×13 dish a quick light spray of cooking oil. Now, here’s the trick for these ham and cheese sliders: take your knife and carefully slice the entire package of rolls horizontally, seeing the bottom and top halves still connected in one big sheet. Place the bottom layer right into your buttered dish. From there, layer up! Put all your thin-sliced ham evenly across the bottom buns, and then lay those slices of Swiss cheese right on top. Place the top half of the rolls gently over everything, pressing down just a little bit so it all nests together.
Creating the Signature Garlic Butter Glaze for Your Sliders
This glaze is what sets these ham and cheese sliders apart from every other boring slider out there. Grab a small bowl! You’re going to whisk together the melted butter—make sure it’s not hot, just melted—with the Dijon mustard. Add in the Worcestershire sauce, the dried minced onion, and the garlic powder. Give it a good whisk until it’s all combined. If you’re feeling that extra little bit of texture, stir in your poppy seeds here too. You want this mixture to look glossy and smell absolutely irresistible. For more incredible flavor infusions, you must try my garlic butter sliders recipe!
Baking Instructions for Golden Brown Ham and Cheese Sliders
Time to bake! Take a pastry brush and paint that gorgeous garlic butter mixture right over the entire top surface of the rolls. Make sure every bit of exposed bun gets coated; that’s how you get that perfect, slightly crispy, golden top. Now, cover the whole dish tightly with aluminum foil. It needs to go into the oven for exactly 15 minutes. This first bake steams things slightly and melts that cheese inside. After 15 minutes, take the foil off and let them bake for another 5 to 10 minutes, or until you see those beautiful golden brown spots forming on the top. Pull ’em out, slice ’em up, and serve them hot!

Tips for Making the Best Ham and Cheese Sliders
I’ve tweaked this recipe countless times, and frankly, the small things make all the difference when turning these into the ultimate sweet and savory sliders. These are the insider secrets I learned from my testing—little notes scribbled on my first recipe cards that guarantee success every single time.
So, about that cheese: my note says Swiss is classic, but if you want a little more bite, feel free to swap it out for sharp cheddar or maybe even some creamy provolone. They all melt wonderfully for these ham and cheese sliders. Also, if you’re looking to sneak an extra layer of texture and tang in there, try adding thin slices of dill pickle chips right between the ham and the cheese. It cuts through the richness perfectly!
For more cheese variations, you should definitely check out my thoughts on ham and swiss sliders oven combinations for when you want to switch things up next time.
Variations: How to Customize Your Ham and Cheese Sliders
The base recipe for these ham and cheese sliders is fantastic, but honestly, half the fun of cooking for me is learning how to twist a classic until it’s uniquely yours. These sandwiches are so forgiving, which is why they are perfect for making ahead or adapting based on what’s hiding in your fridge. You don’t have to stick to just ham and Swiss, not by a long shot!
If you’ve got some leftover roasted turkey, go ahead and swap that in. Turkey and provolone are a match made in heaven, and trust me, it still gets that amazing sweet and savory profile from the rolls and the glaze. Sometimes, when I’m feeling ambitious (or just need to use up leftovers), I’ll even throw in some thinly sliced roast beef. It’s richer, but it works beautifully with sharp cheddar.
Now, if you really want to take these oven baked party sliders to the next level, you need to add depth. My favorite addition? Caramelized onions. Oh mama, they transform everything! That slow-cooked sweetness blends perfectly with the hint of tang from the glaze. If you’ve never made them before, it’s worth the effort, and I walk you through exactly how to get them perfect here: caramelized onions ultimate guide recipe. They add such a gourmet touch to these otherwise simple finger foods!
Serving Suggestions for Your Quick Weeknight Sliders
Part of the joy of making these ham and cheese sliders is knowing they aren’t just for big parties! They are absolutely perfect when you need a quick weeknight sliders solution that the kids (and yes, the adults too) will devour without complaint. Because they are already so satisfying—that sweet bread, melty cheese, salty ham—you only need a simple, bright side dish to round out the meal.
If you’re serving these up on a busy Tuesday night, I usually just grab some fresh carrot sticks or maybe some apple slices. But when the big game is on and these become a dedicated game day snack recipes star, we need something a bit more substantial! That’s when I pull out my favorite make-ahead sides.
My absolute go-to pairing is a light, tangy salad that keeps things from feeling too heavy. This is especially true when you’ve loaded the sliders up with extra stuff, like pickles or onions. You need that brightness to cut through the richness of the garlic butter glaze. I’ve got a fantastic, zesty recipe that never fails to disappear fast—you can find all the details here for my pickle pasta salad recipe, quick tangy side. It’s a winner every time, and it keeps well in the fridge if you actually have leftovers, which I highly doubt you will!
Storage and Reheating Instructions for Leftover Ham and Cheese Sliders
Even the best handheld creations sometimes end up with a few survivors, right? Don’t worry, these ham and cheese sliders taste fantastic the next day, but you have to store and reheat them the right way. We want to maintain that beautiful soft texture from the Hawaiian rolls and keep the cheese from turning rubbery. Nobody wants a sad, limp sandwich the day after the party!
If you have any leftovers, the absolute best move is to let them cool entirely before you cover them up. Once they are completely room temperature, pop them into an airtight container. Don’t try to use plastic wrap directly on the warm sandwiches, or you’ll just trap condensation, which is the enemy of good leftovers. They should keep perfectly well in the refrigerator for about three days.
When it comes time to bring them back to life, please, I beg you, skip the microwave! Microwaving these baked ham and cheese sandwiches just turns that glorious bread into a dense, chewy brick. For the best results, you need to bring back that golden-brown top we worked so hard for.
Here’s my preferred method to get them tasting almost freshly baked:
- Preheat your oven—or even a toaster oven if you are only reheating one or two—to about 300 degrees Fahrenheit. That lower temperature is intentional; we want to warm them through slowly.
- Place the leftover sliders directly onto a baking sheet. If you want to give them an extra boost, you can brush a tiny bit of plain melted butter onto the tops before they go in.
- Bake, uncovered, for about 8 to 12 minutes. Keep an eye on them! You are just looking for the cheese to get soft and gooey again, and for the bread to feel warm and slightly toasty, not crunchy.
This gentle reheating brings back all the wonderful sweet and savory notes of the original batch, making them a perfect kid friendly lunch idea the following day!
Frequently Asked Questions About Ham and Cheese Sliders
I know when you are getting ready to make a big batch of ham and cheese sliders, especially for a crowd, questions pop up about timing and substitutions. I’ve been right there with my notebooks open, trying to figure out the best flow! Here are the things I hear most often from folks diving into this recipe for the first time.
Can I make these ham and cheese sliders ahead of time?
Yes, you absolutely can—that’s why they are the best game day snack recipes! You have two main options, and I prefer the first one. You can assemble the entire thing—bottom rolls, ham, cheese—put the top on, brush it with the glaze, and cover it tightly with plastic wrap. Stick that whole tray in the fridge for up to 24 hours. When it’s party time, just pull off the plastic, cover with foil, and bake according to directions, adding maybe 5 extra minutes covered. If you bake them fully ahead of time, you’ll need to reheat them low and slow, like I mentioned earlier, or they can dry out a bit.
What is the best cheese to use besides Swiss for these baked ham and cheese sandwiches?
Swiss is classic because it mellows out that saltiness from the ham beautifully, but don’t feel trapped! For baked ham and cheese sandwiches, I love sharp cheddar when I want a bit more color and tang. Provolone is also a fantastic choice because it melts just as smoothly as Swiss. If you have Monterey Jack on hand, that works, too—it adds a super mild, creamy texture that pairs perfectly with the sweet rolls. It’s all about balancing that salty filling with the sweet and savory sliders vibe!

Are Hawaiian rolls necessary for the Hawaiian roll sliders recipe?
Look, if you want the *full* experience of the Hawaiian roll sliders recipe, yeah, you need those sweet little guys. Their slight sweetness and soft texture are what make the garlic butter glaze sing so well! However, if you’re in a pinch and don’t have them, you can absolutely use soft, plain slider buns. They might be called potato rolls or just plain white slider rolls at your grocery store. Just know that swapping them means you lose that signature sweetness, so you might want to add an extra tiny dash of brown sugar to your butter mixture next time to compensate. If you are looking for more simple, fun things to make for the kids, check out my collection of kid friendly lunch ideas!
Nutritional Estimate for These Oven Baked Party Sliders
I always get asked about this, and I feel it’s important to share what we know, even though in my kitchen, cookies and sliders tend to disappear before I get a chance to weigh them! We’re talking about comfort food here, not health food, but let’s have an honest look at what we’re putting on the table for these fantastic oven baked party sliders.
Based on the ingredients listed—using standard versions of Hawaiian rolls, deli ham, and Swiss cheese—here is a general estimate per serving (which is defined here as one slider):
- Calories: About 280
- Fat: Roughly 14 grams
- Saturated Fat: Around 7 grams
- Carbohydrates: About 25 grams
- Sugar: Approximately 10 grams (Thanks, Hawaiian rolls!)
- Protein: Around 15 grams
Now, please take this as a roadmap, not gospel! This is crucial for maintaining trust in the kitchen: these numbers are just estimates using standard ingredient assumptions. If you use thinner ham, add pickles, or use a different cheese, those counts will shift. I always tell folks that when you’re sharing food made with love, the focus should be on the joy it brings, but it’s smart to know the basics!
Share Your Experience Making These Ham and Cheese Sliders
Truly, the best part of opening my kitchen up to you like this is hearing back about what you’ve made! These ham and cheese sliders are such a staple in my life for quick meals and gatherings, and I always get the biggest kick out of seeing how they turn out at your homes.
Did you use dill pickles like I suggested? Did you stick faithfully to the Dijon, or did you throw in some spicy brown mustard instead? Maybe you even tried melting a slice of sharp cheddar instead of Swiss—I want to hear about your sweet and savory triumphs!
If you made it through the steps and ended up with a pan of golden, bubbly, ridiculously delicious sandwiches, please let me know! Drop a comment below with your rating and all your notes. It really helps out so many other folks who are looking for a reliable, crowd-pleasing recipe. And if you have any suggestions for what I should try adding next time to this amazing base, please send them my way! I’m always looking to connect and grow in the kitchen. If you need to get in touch directly, feel free to use my contact form!
PrintEasy Baked Ham and Cheese Sliders with Hawaiian Rolls and Garlic Butter Glaze

Make these simple, sweet, and savory ham and cheese sliders using Hawaiian rolls, baked until golden brown with a flavorful garlic butter topping. This recipe is perfect for parties or a quick weeknight meal.
- Prep Time: 10 min
- Cook Time: 25 min
- Total Time: 35 min
- Yield: 12 sliders 1x
- Category: Lunch
- Method: Baking
- Cuisine: American
- Diet: Vegetarian
Ingredients
- 1 (12 count) package sweet Hawaiian rolls
- 1 pound thinly sliced deli ham
- 12 slices Swiss cheese (or cheddar/provolone)
- 4 tablespoons unsalted butter, melted
- 1 tablespoon Dijon mustard
- 1 teaspoon Worcestershire sauce
- 1 teaspoon dried minced onion
- 1/2 teaspoon garlic powder
- 1/4 teaspoon poppy seeds (optional)
Instructions
- Preheat your oven to 350 degrees Fahrenheit. Lightly grease a 9×13 inch baking dish.
- Carefully slice the entire package of Hawaiian rolls horizontally, keeping the rolls connected in one piece. Place the bottom half of the rolls into the prepared baking dish.
- Layer the sliced ham evenly over the bottom layer of rolls. Top the ham with the slices of cheese, distributing them across the surface.
- Place the top half of the rolls over the cheese layer. Gently press the top down.
- In a small bowl, whisk together the melted butter, Dijon mustard, Worcestershire sauce, dried minced onion, and garlic powder. If using, stir in the poppy seeds.
- Brush the entire top surface of the slider buns evenly with the garlic butter mixture.
- Cover the baking dish tightly with aluminum foil. Bake for 15 minutes.
- Remove the foil and bake for an additional 5 to 10 minutes, or until the tops are golden brown and the cheese is fully melted.
- Slice the sliders apart between the rolls and serve immediately.
Notes
- For a slightly tangier flavor, substitute Swiss cheese with sharp cheddar or provolone.
- You can add thin slices of dill pickle chips between the ham and cheese layers for extra flavor.
- If you do not have Hawaiian rolls, use soft slider buns, but the sweetness will be less pronounced.
Nutrition
- Serving Size: 1 slider
- Calories: 280
- Sugar: 10
- Sodium: 750
- Fat: 14
- Saturated Fat: 7
- Unsaturated Fat: 5
- Trans Fat: 0.2
- Carbohydrates: 25
- Fiber: 1
- Protein: 15
- Cholesterol: 40