
When that sweet craving hits, and you need something instantly satisfying but don’t want the fuss of an ice cream maker, I have the answer. For years, I focused on complex restaurant desserts, but I realized the real magic—and the biggest connections—happen with the simplest things. That journey taught me that extraordinary food should be accessible to everyone right now. This banana ice cream recipe strips everything back to the core: three ingredients, zero churning, and pure, creamy joy. It’s honest cooking at its best. Trust me, mastering this simple frozen banana treat will become your go-to method for summer nights. If you’re looking for more quick ways to bring joy to the table, check out my collection of simple, delicious desserts.
- Why This 3-Ingredient banana ice cream Recipe Works So Well
- Gathering Ingredients for Creamy banana ice cream
- Step-by-Step banana nice cream Tutorial
- Tips for Perfecting Your banana ice cream
- Delicious Variations for Your homemade banana ice cream
- Serving Suggestions for this Healthy ice cream
- Storage and Keeping Your banana ice cream Fresh
- Understanding the Nutrition in this Guilt Free Dessert
- Share Your Creamy banana ice cream Creations
Why This 3-Ingredient banana ice cream Recipe Works So Well
I know what you’re thinking. How can three things turn into something as luxurious as a scoop from the freezer? It’s all about tapping into what the banana naturally wants to do when it gets super cold! This isn’t just luck; it’s good, honest food science happening right in your bowl. This simple preparation delivers a wonderful, creamy banana dessert without any weird stabilizers.
When you need something sweet fast, this process truly shines. We skip the overnight churning that traditional recipes demand. This method gets you from freezer to bowl in under 10 minutes, which is perfect for those unexpected warm evenings.
Achieving Creamy Texture Without a Machine
When bananas freeze solid, they form incredibly small ice crystals. Think about that dense, sugary paste that happens when you blend them in a high-powered machine. Those tiny crystals—when blended with just a splash of liquid—break apart and become incorporated into the mixture in a way that mimics the texture of soft-serve. It’s truly amazing; it freezes beautifully smooth!
The Benefit of Making banana ice cream for a Quick Dessert
Honestly, the cleanup is my favorite part! We’re not dealing with custard bases, mixing bowls full of cream, or washing out a big ice cream maker tub. Because this banana ice cream is based around frozen fruit, the cleanup is usually just the processor bowl. It’s one of the best quick dessert ideas when you are craving something that feels indulgent but is actually super straightforward.
If you prefer another classic creamy treat, you should definitely see how I make my easy banana cream pie recipe!
Gathering Ingredients for Creamy banana ice cream
To make the best banana ice cream that tastes like real, decadent ice cream, you can’t skimp on the quality of your starting ingredients. In my experience testing this for the site, the ripeness of the banana is everything! We only need three core things here, but treating them right makes all the difference for that smooth texture we are aiming for.
Essential Components for the Best banana ice cream Recipe
Here is exactly what you need to line up before you even think about slicing. Make sure those bananas are spotted and sweet; that’s where the natural sugar comes from, making this a truly healthy ice cream option.
- 4 large, very ripe bananas, peeled and sliced
- 1/4 cup milk (this can be dairy or a non-dairy option like almond milk for a dairy free ice cream base)
- 1 teaspoon vanilla extract
Step-by-Step banana nice cream Tutorial
This is where the patience really pays off, but don’t worry, it’s fast once you get started! Making this banana ice cream is all about setting up the ingredients correctly beforehand. I’ve learned that rushing the freezing stage leads to disappointment, so respect the time needed here. Once everything is frozen hard, the actual blending process moves really quickly, transforming that icy fruit into something wonderfully smooth. You’ll see why this specific banana nice cream tutorial has become my go-to method for instant gratification.
Preparation and Freezing: Setting Up Your banana ice cream
First off, we need those bananas absolutely solid. Take your 4 peeled and sliced bananas and put them into a freezer bag or a container that seals well. They need a minimum of six hours in the cold depths of your freezer, but honestly, overnight is always better. If they aren’t totally frozen through—rock hard, almost like granite—your processor will struggle and you won’t get that right texture for your banana ice cream.
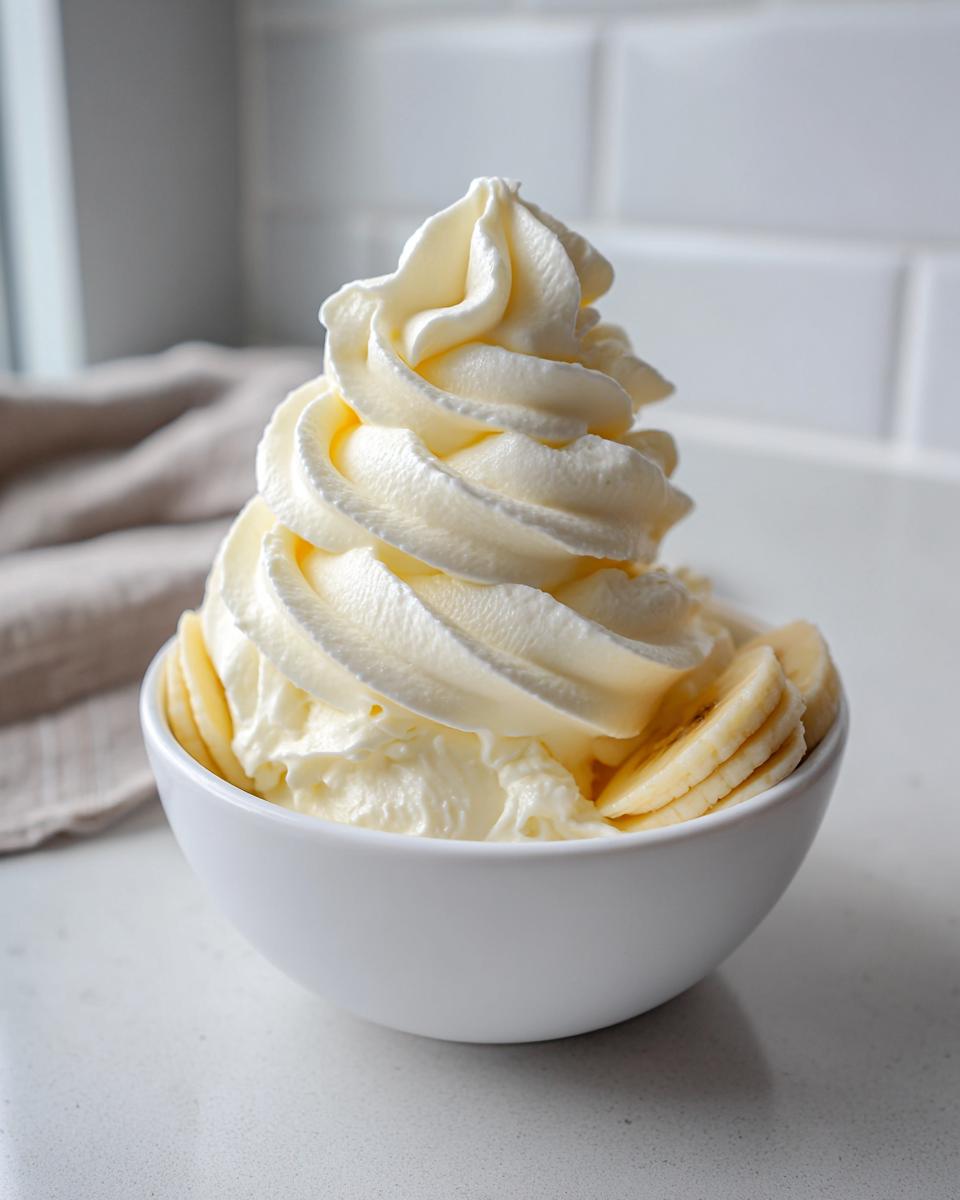
Processing for a Smooth, Creamy banana dessert
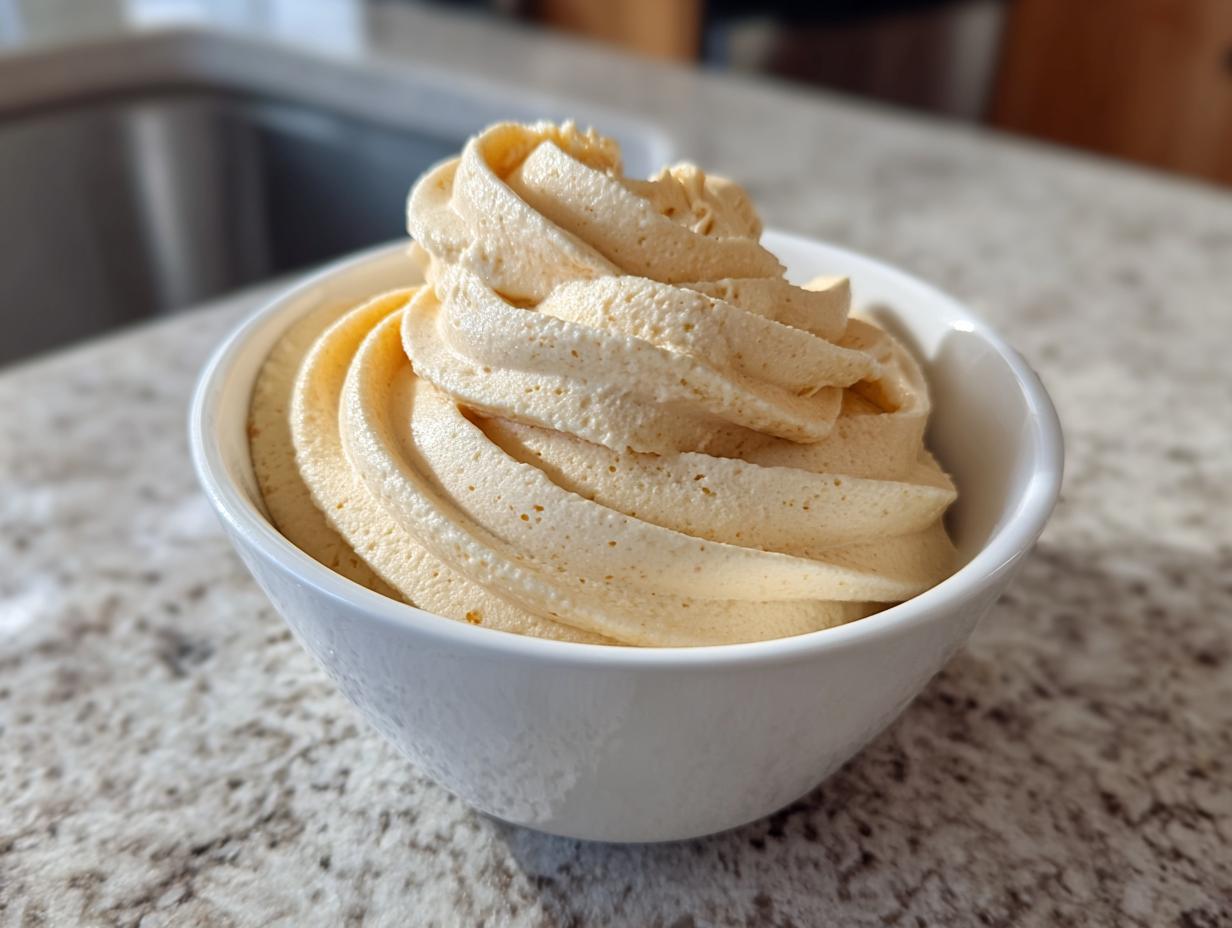
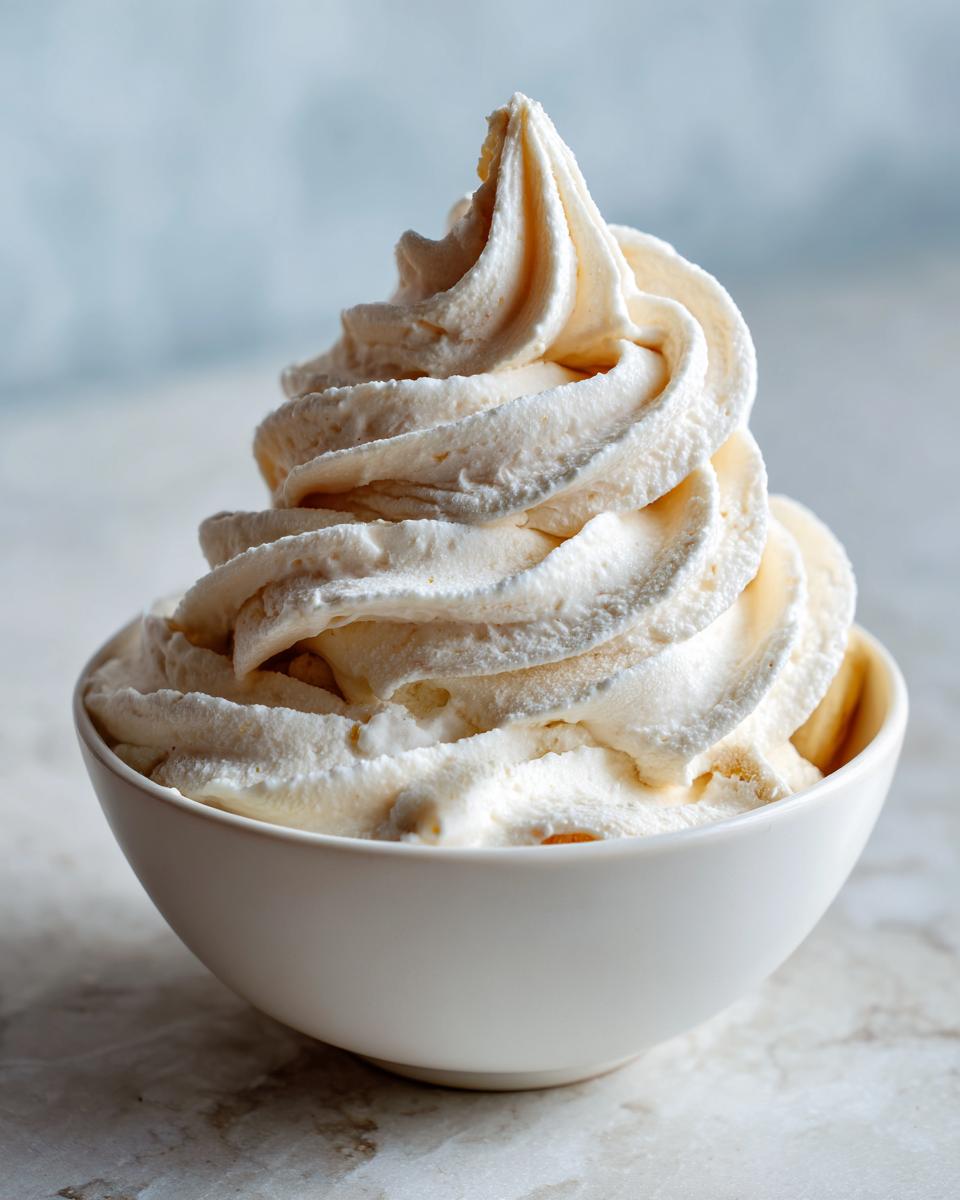
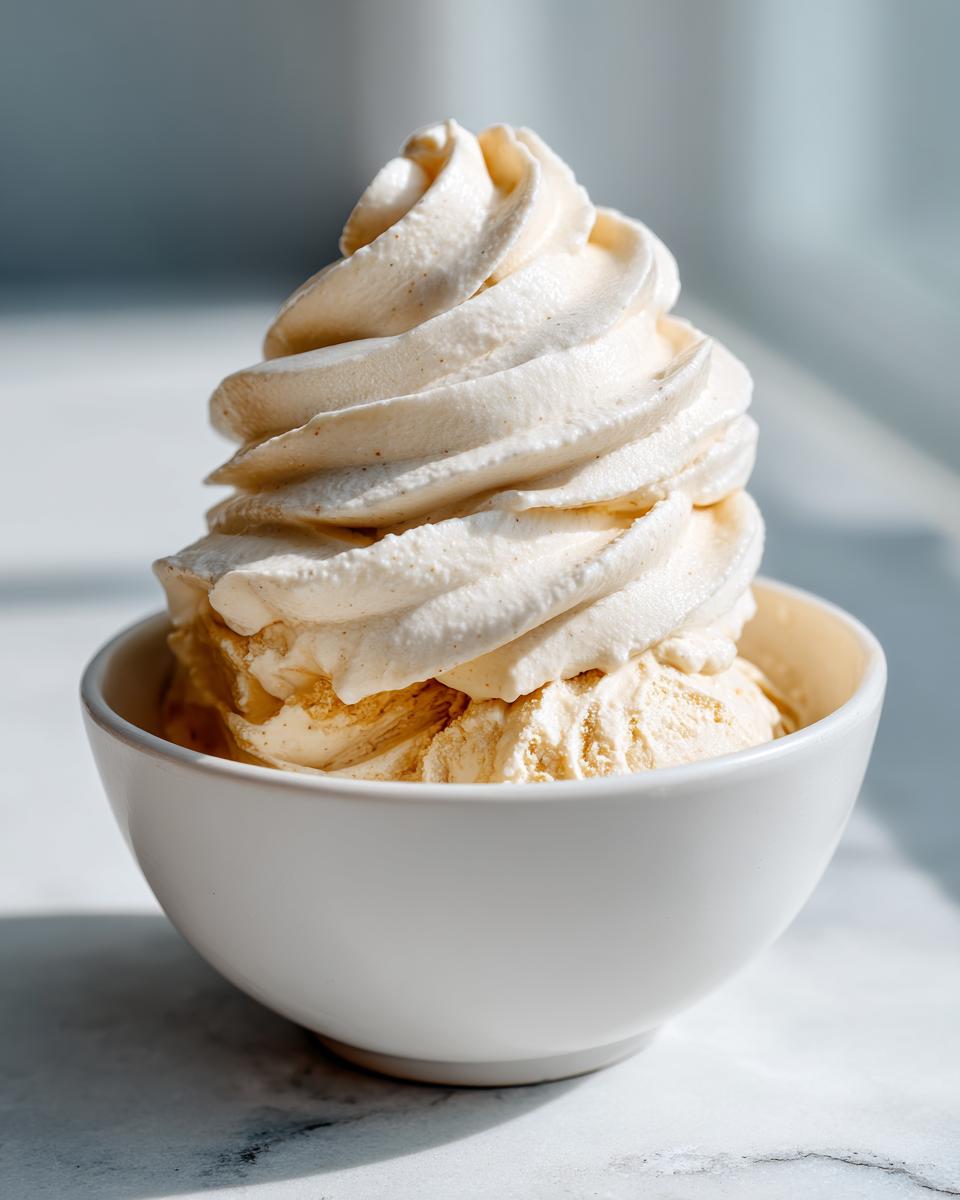
Next, go grab your strongest food processor—a blender works, but the food processor often handles the thickness better. Toss those frozen coins in, followed by the milk and vanilla extract. Now, start pulsing! At first, it looks like sad, snowy crumble. Stop the machine and scrape down the sides a couple of times—this is important! Keep going, and you’ll see it change from that crumble into a thick sludge, and then, just like magic, it will start swirling beautifully into that perfect, soft-serve creamy banana dessert consistency. This usually takes about three to five minutes.
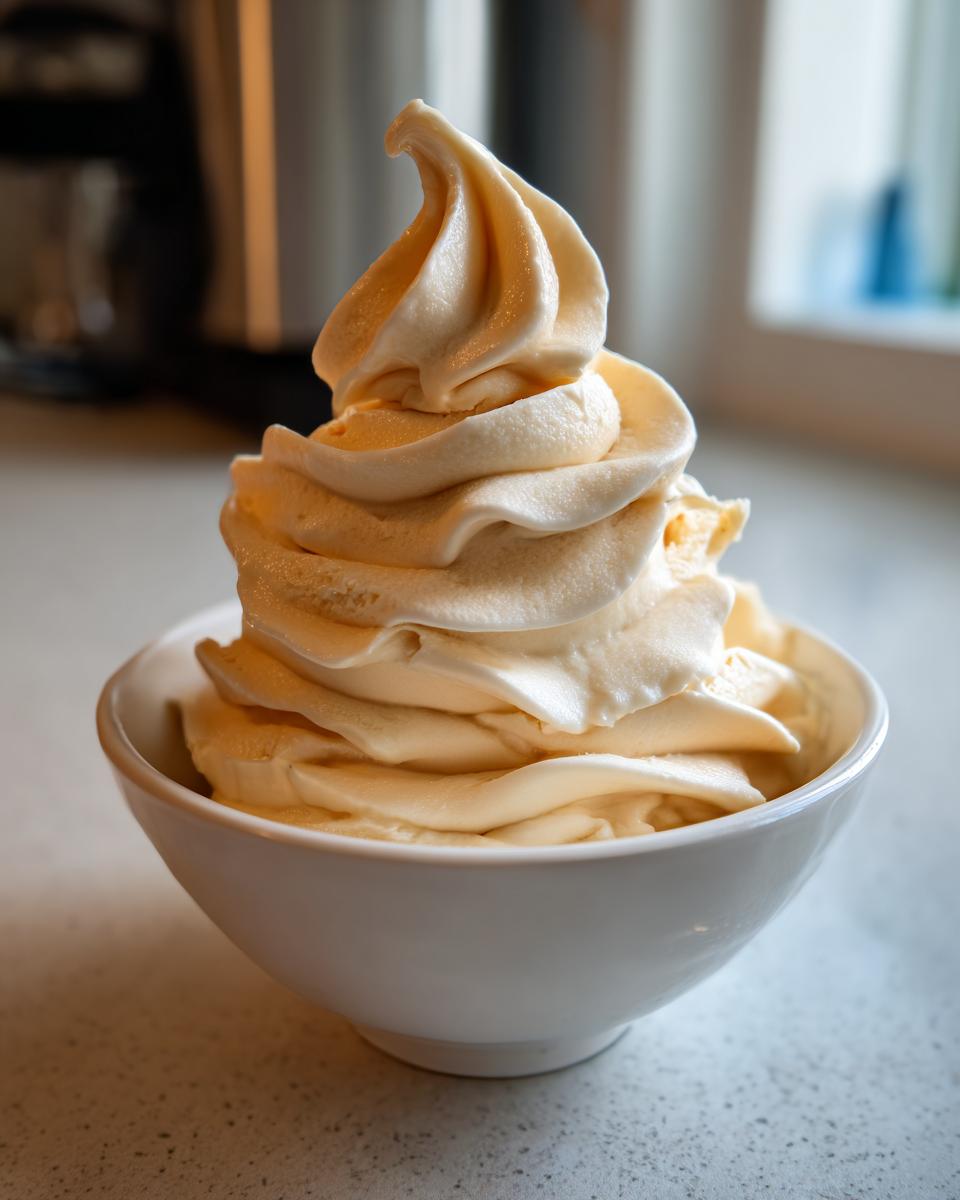
Serving the no churn banana ice cream Immediately or Firming Up
You have two beautiful options here. For immediate gratification, serve it straight out of the processor! It’s soft, creamy, and basically a healthy sundae sitting right in your bowl. But if you prefer that sturdy, scoopable experience you expect from proper no churn banana ice cream, transfer the mixture into a freezer-safe container. Pop it back into the freezer for just an hour or two to firm up. Don’t walk away for too long, or you’ll need to let it soften again before scooping! If you need inspiration for other creamy desserts, take a look at my steps for the easy banana cream pie recipe; sometimes you need a crust!
Tips for Perfecting Your banana ice cream
Even the simplest recipes can have little hiccups along the way, right? That’s why I always test three or four versions of a recipe before I’m truly happy with it. When making banana ice cream, the biggest variable is your equipment and the exact state of your fruit. Don’t be alarmed if your first batch isn’t absolutely perfect; that’s just part of the joy of cooking at home!
Achieving One Ingredient ice cream Success
If you’ve seen people online making this with just bananas—what they call one ingredient ice cream—I want to give you a heads-up. While it’s totally possible, you can only successfully skip the milk if you happen to own a commercial-grade, heavy-duty food processor. If your machine struggles with hard nuts or frozen cubes, adding that splash of milk is non-negotiable. The liquid gives the blades something to smoothly grab onto! Trust me, better to use two ingredients and have a perfect result than use one ingredient and burn out your motor.
Troubleshooting Your banana nice cream Consistency
Sometimes, if your bananas were *too* frozen, or if you’re not using a very powerful machine, the mixture can seize up. It stops swirling and just forms a hard, frozen lump that won’t move. If this happens, don’t panic and don’t add more milk right away! Just take the bowl off the machine, let it sit on the counter for five minutes—that’s all it takes—and the outer edges will soften just enough. Try blending again, and watch that smooth texture reappear. It always saves the batch!
If you ever want to try making cupcakes because you’re looking for something baked instead, my recipe for easy vanilla cupcakes is just as simple!
Delicious Variations for Your homemade banana ice cream
Now that you have mastered the basic, beautiful banana ice cream—the one that tastes like heaven right out of the processor—it’s time to play! The base is so clean and naturally sweet that it begs for mix-ins. I always encourage people to experiment here. This amazing method easily allows for big flavor swaps without turning your dessert into a complicated project. We want to keep that spirit of simple joy alive, even when adding extra ingredients.
Adding Richness: Peanut Butter or Cocoa Powder Swirls
If you are looking to make this feel like a truly indulgent treat, you have to try flavor additions! Right when you are about to finish blending, or just after the mixture has gone fully smooth, toss in one generous tablespoon of either creamy peanut butter or unsweetened cocoa powder. Blend it just until it’s incorporated, and watch the color change! The richness of the peanut butter works so well with the banana; it makes it feel almost like a traditional peanut butter ice cream, but totally healthy. For a deep, chocolatey version, the cocoa powder is unbeatable. If you want a full chocolate flavor experience that isn’t frozen, you could also try my favorite chocolate fudge cake recipe!
Making it a Dairy Free ice cream Experience
One of the biggest wins with this recipe is that it naturally caters to so many dietary needs. Remember how in the ingredient list, I mentioned using almond milk or another non-dairy option? That’s key! By simply sticking to plant-based milk—soy, oat, almond, whatever you love—you’ve instantly created a phenomenal dairy free ice cream. It doesn’t change the processing time or texture at all. This makes it such a wonderful vegan banana dessert that even die-hard dairy fans rave about. It’s naturally dairy-free and vegan because there is no cream or condensed milk involved!
Serving Suggestions for this Healthy ice cream
When it comes to serving this delightful, naturally sweet treat, you have a blank canvas! Because the base flavor is so pure—just sweet banana—it begs for toppings that add textural contrast or a little extra punch of flavor. I think toppings are where you can really make this simple dessert feel special and celebratory, even if you whipped it up five minutes ago on a Tuesday afternoon. Think about texture; we want things that crunch against that smooth, cold sweetness.
Toppings for Your Frozen Banana Treat
Keep it simple, or go wild—it’s up to you! If you’re looking for that perfect crunch factor, a sprinkle of toasted, chopped walnuts or pecans is fantastic. I also love a tiny drizzle of rich maple syrup right over the top, which enhances the natural caramel qualities of the banana. For an incredibly simple finish that smells amazing, just dust it lightly with cinnamon. It takes seconds! If you are feeling extra indulgent and want something chocolatey but still homemade, I highly recommend prepping a batch of my no-bake chocolate dipped pecan pie balls and chopping one up to crumble over the top. That combination is just heaven in a bowl, making this the ultimate frozen banana treat.
Storage and Keeping Your banana ice cream Fresh
So, maybe you made a double batch because, let’s be honest, who stops eating this once they start? Or maybe you just want to save some for tomorrow because you’re being really disciplined (good for you!). The problem with any homemade frozen treat is that ice crystals try to sneak back in once you refreeze it. That defeats the whole purpose of having that beautiful, creamy texture we worked so hard to achieve!
To keep this banana ice cream tasting just as good on Day Two as it did fresh out of the processor, you need to handle the refreezing process right. Always transfer any leftovers into a narrow, airtight container. The smaller the surface area exposed to the air, the better it will stay smooth. I like using a small loaf pan wrapped tightly in plastic wrap, and then tucking that into a freezer bag—extra protection!
Here’s the essential trick for these kinds of summer frozen treats: when you pull it out of the freezer to serve the next day, don’t try to scoop it immediately. It’s going to be rock solid! Let it sit on the counter for a good 10 to 15 minutes. You’re aiming for it to soften just slightly so it can be processed again briefly (or just agitated really well with a spoon) back into that creamy, lovely state. It takes five minutes of blending and it’s perfect all over again. Never try to eat it straight from deep freeze; you’ll just end up disappointed!
Understanding the Nutrition in this Guilt Free Dessert
When I first started playing around with frozen fruit recipes, I was mostly focused on making sure it tasted great, but soon people rightly started asking about the numbers. It’s wonderful when something tastes like a truly decadent dessert but is actually made primarily from whole fruit! Because we are skipping heavy cream, egg yolks, and massive amounts of added sugar, this recipe definitely fits the bill for a guilt free dessert you can feel good about enjoying more often.
I always want to be transparent about nutrition, because what you use for your milk really affects the final tally. These numbers are my best estimate based on using standard unsweetened almond milk, so remember that if you swap in whole milk or even oat milk, the fat and calorie count will shift a bit. It’s still a fantastic, light choice for a healthy ice cream base!
Estimated Nutritional Breakdown (Per Serving)
This chart breaks down the approximate values you can expect when you follow the main three-ingredient recipe. I always say that homemade is best because you control the ingredients, but here is the baseline we usually see when splitting the recipe into two servings:
- Serving Size: 1/2 of recipe
- Calories: 180
- Fat: 1g
- Carbohydrates: 45g
- Protein: 2g
If you want to explore another exciting way to make frozen delights at home without loads of cream, you should see my recipe for cottage cheese ice cream—it’s surprisingly light and texturally amazing!
Share Your Creamy banana ice cream Creations
Honestly, creating food is only half the fun; the most rewarding part for me is hearing about your kitchen adventures! Once you whip up this amazingly simple banana ice cream, I truly want to hear what you think. Did you try my suggestion of adding peanut butter? Or maybe you found a new mix-in that blew you away? This recipe is a building block, and seeing your honest feedback helps every other home cook feel more confident trying it out.
If you found this recipe helpful and you’re ready to make it your own, please consider leaving a rating below—five stars really helps other people find this little gem of a dessert! I read every single comment, so tell me about your texture success or share any tips you picked up along the way. If you have questions, or if you just want to send a quick note about how much you loved this frozen banana treat, you can always reach out through my contact page, too!
PrintCreamy 3-Ingredient No-Churn Banana Ice Cream (Nice Cream)
Make this creamy, naturally sweet banana ice cream without an ice cream machine. This simple recipe uses only three ingredients for a quick, healthy frozen treat.
- Prep Time: 10 min
- Cook Time: 0 min
- Total Time: 10 min
- Yield: 2 servings 1x
- Category: Dessert
- Method: Food Processor
- Cuisine: American
- Diet: Vegan
Ingredients
- 4 large, very ripe bananas, peeled and sliced
- 1/4 cup milk (dairy or non-dairy like almond milk)
- 1 teaspoon vanilla extract
Instructions
- Peel and slice the ripe bananas into coins. Place the slices in a freezer-safe bag or container. Freeze for at least 6 hours, or until completely solid.
- Place the frozen banana slices into a high-powered food processor or a strong blender.
- Add the milk and vanilla extract to the food processor.
- Process the mixture. Initially, it will look crumbly. Stop and scrape down the sides as needed.
- Continue processing. The mixture will go through stages: crumbly, then thick paste, and finally, it will transform into a smooth, soft-serve consistency. This usually takes 3 to 5 minutes of processing time.
- Serve immediately for a soft-serve texture. For a firmer texture similar to scooped ice cream, transfer the mixture to an airtight container and freeze for 1 to 2 hours before serving.
Notes
- For a one-ingredient ice cream, omit the milk and vanilla extract. You will need a very powerful food processor for this version.
- If the mixture becomes too hard to blend, let it sit on the counter for 5 minutes to soften slightly before continuing.
- Add 1 tablespoon of peanut butter or cocoa powder during the blending stage for flavor variations.
Nutrition
- Serving Size: 1/2 of recipe
- Calories: 180
- Sugar: 18
- Sodium: 5
- Fat: 1
- Saturated Fat: 0
- Unsaturated Fat: 1
- Trans Fat: 0
- Carbohydrates: 45
- Fiber: 4
- Protein: 2
- Cholesterol: 0