
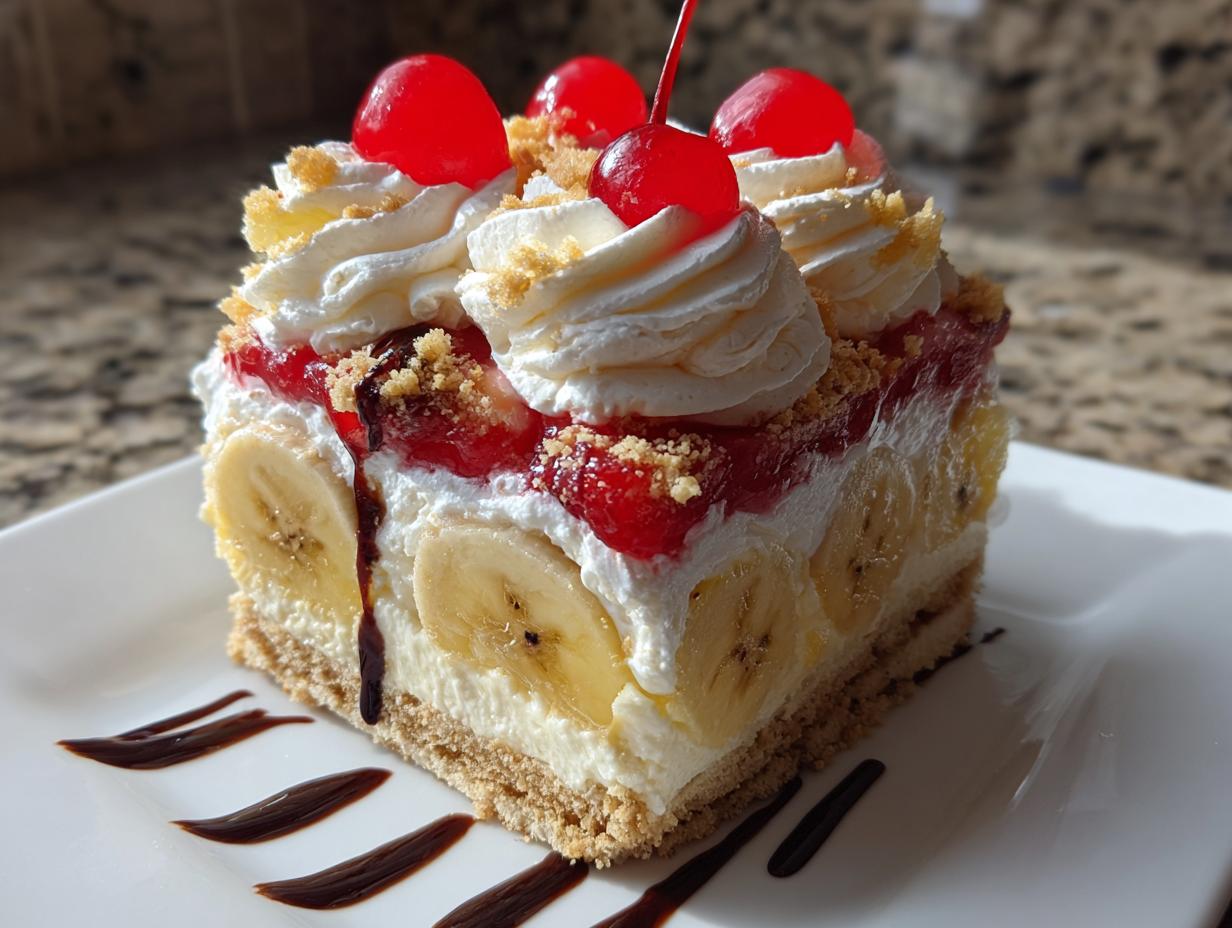
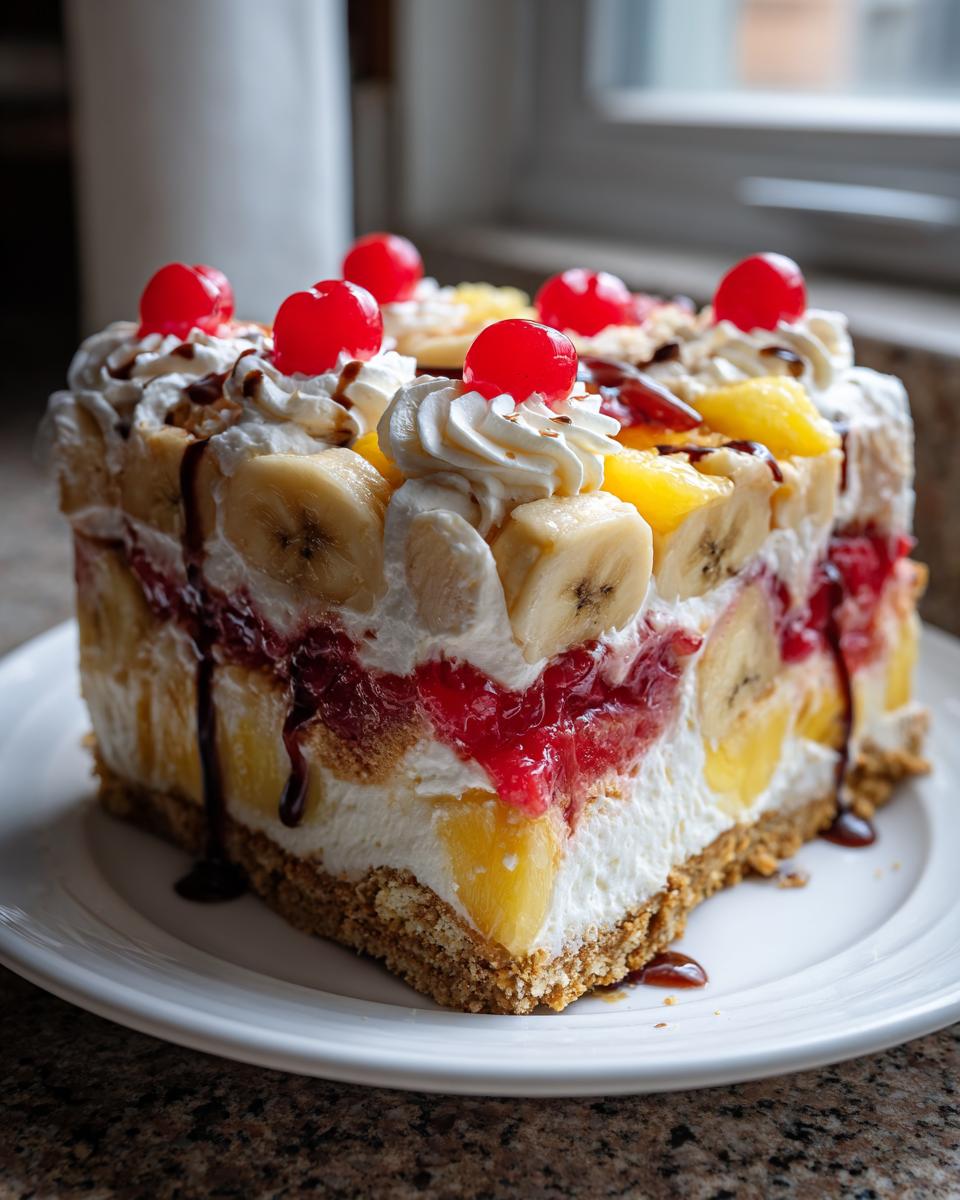
There’s nothing quite like the memory of a summer evening, the air thick with heat, and reaching for that perfect, ice-cold scoop of nostalgia. When I think about creating truly memorable, fuss-free desserts, my mind immediately goes to the classics that defined simple American indulgence. Forget turning on the oven—summer calls for something refreshingly easy. That’s why I simply adore this No-Bake Banana Split Cake. It takes every single flavor you love from that iconic ice cream sundae—the banana, the pineapple tang, the sweet strawberry—and layers it into one creamy, spectacular dish. This recipe honors that heritage but keeps the process streamlined, just for you, the home cook.
- Why This No-Bake Banana Split Cake Recipe Works for You
- Gathering Ingredients for Your Banana Split Cake Recipe
- How to Prepare Your Easy Layered Dessert Instructions
- Tips for Success Making a Perfect Banana Split Cake
- Storage and Make Ahead Dessert Options for Your Banana Split Cake
- Variations on the Classic Banana Split Flavors
- Quick Answers: Frequently Asked Questions About Banana Split Cake
- Estimated Nutritional Data for One Slice of Banana Split Cake
- Share Your Family Gathering Dessert Ideas
Why This No-Bake Banana Split Cake Recipe Works for You
Look, I know you’re busy, and sometimes the last thing you want to do when it’s 90 degrees outside is fire up the oven. That’s where this recipe truly shines as one of my favorite make ahead dessert options. It gives you that huge ‘wow’ factor without any fuss at all. This is pure, chilled comfort, ready when you are!
The Ultimate No Oven Required Treats Experience
- This is a fantastic No Bake Dessert! You get all those amazing Classic Banana Split Flavors without adding any heat to your kitchen. It’s cooling just thinking about it!
- It sets up beautifully in the fridge, turning into a dense, creamy slice reminiscent of those old-school ice cream shop treats.
Simple Party Desserts Assembly
- If you need a guaranteed hit for your next gathering, this is it. It truly is a Potluck Perfect Dessert because everyone loves the fruit layers.
- The assembly is practically foolproof. You are just layering components, kind of like stacking building blocks. Even if you’ve never made a layered dessert before, you’ve got this, I promise.
Gathering Ingredients for Your Banana Split Cake Recipe
Before we assemble this incredible, no-bake wonder, we need to make sure the pantry is stocked right! Getting these components ready is half the battle, and trust me, prep work is key, especially when we need everything to set up perfectly cold. Remember, since this is a chilled dessert, getting your fruit ready is super important for that creamy texture we’re aiming for. This Banana Split Cake Recipe doesn’t require an oven, but it does require a little patience when it comes to draining your pineapple!
Crust and Creamy Filling Components
This is where we build the foundation and the luscious, tangy center layer. Make sure your cream cheese is nice and soft so it blends like a dream. And remember that whipped topping needs to be thawed, but keep it cold until you fold it in!
- 1 1/2 cups graham cracker crumbs
- 1/2 cup melted butter
- 1/4 cup granulated sugar
- 1 (8 ounce) package cream cheese, softened
- 1 cup powdered sugar
- 1 (12 ounce) container frozen whipped topping, thawed, divided (That means half goes into the filling now, and half goes on top later!)
- 1 teaspoon vanilla extract
Fruit Layers and Classic Toppings for the Banana Split Cake
These are the stars of the show! The most crucial step here is making sure that pineapple is as dry as you can get it. Soggy fruit leads to a sad, runny bottom layer, and we absolutely can’t have that!
- 3 ripe bananas, sliced
- 1 (20 ounce) can crushed pineapple, **drained well**
- 1 (21 ounce) can strawberry pie filling
- Maraschino cherries, for topping
- Chocolate syrup, for topping
How to Prepare Your Easy Layered Dessert Instructions
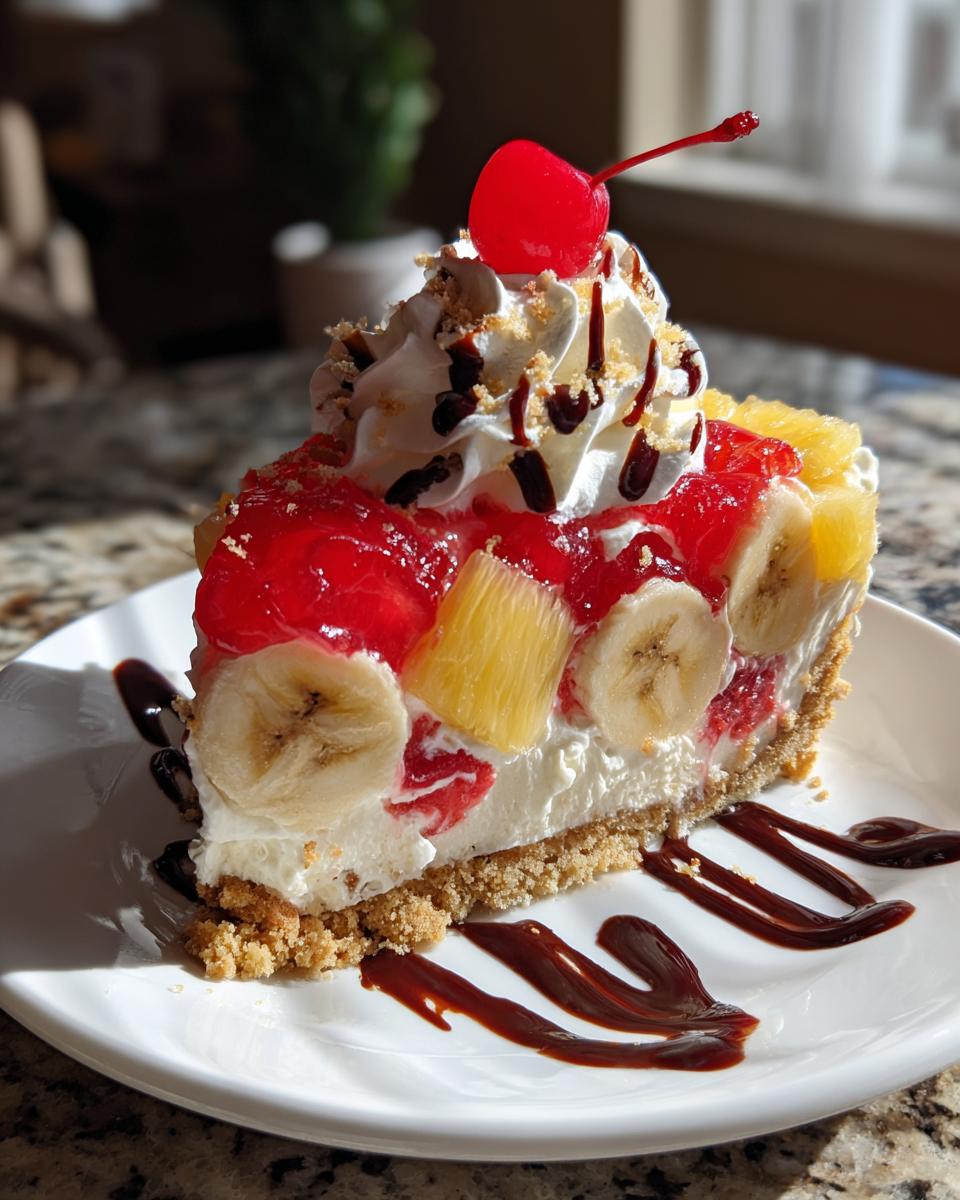
Okay, this is where the magic happens! Even though this is a make ahead dessert, the assembly goes super fast—I promise you can have this put together in under 30 minutes if you have your fruit ready to go. We’re essentially building an ice cream sundae, but in a sturdy, sliceable format. The key to success here isn’t complicated technique; it’s layering everything gently so those beautiful layers stack up nice and neat. Remember, this is meant to be a Chilled Creamy Dessert, so chilling time is mandatory, not optional!
Building the Graham Cracker Crust Dessert Base
First up, the crust! In a medium bowl, just mix those graham cracker crumbs with the melted butter and the quarter cup of sugar until everything looks nicely moistened. Then, press that mixture firmly into the bottom of your 9×13 dish. I mean *firmly*—use the bottom of a glass or measuring cup to really compact it down. This forms the solid base for our whole banana split cake. Pop that dish into the freezer while you whip up the next layer. Chilling it now keeps it from crumbling when we add the wet filling later.
Creating the Fluffy Whipped Topping Cake Filling
Time for that creamy center! Grab your mixer and beat that softened cream cheese until it’s completely smooth—no lumps allowed, please! Slowly trickle in the powdered sugar until it’s mixed in well. Now, this part requires a light hand. Take about half of your thawed whipped topping and gently fold it into the cream cheese mixture along with that teaspoon of vanilla. Once it’s just combined and fluffy, stop mixing! We don’t want to deflate all that air we just beat in.
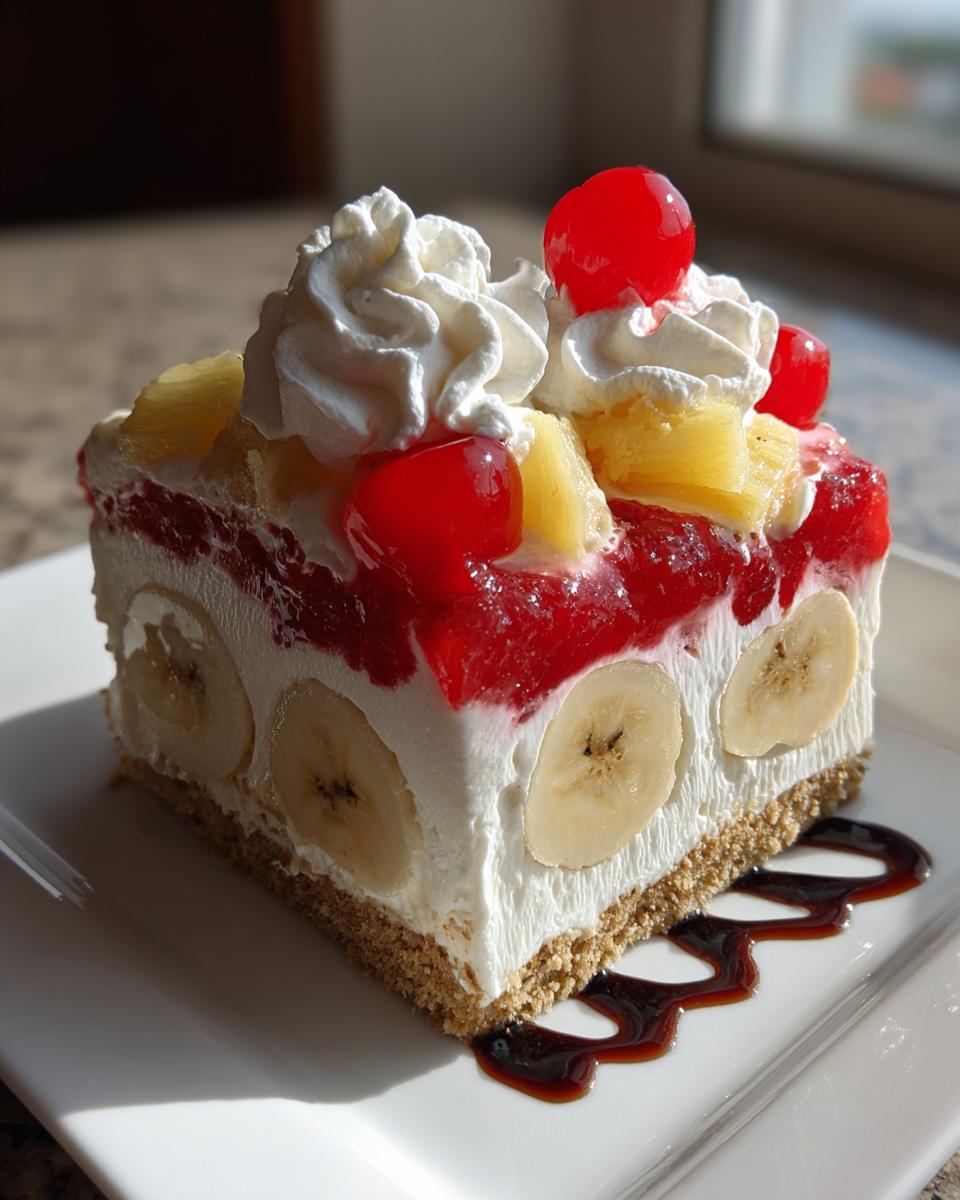
Layering the Banana Pineapple Strawberry Dessert
Now we move fast! Take the crust out of the freezer and gently spread that dreamy cream cheese mixture right over the top. Make sure you get it even to the edges. Next, we layer the fruit: arrange your sliced bananas neatly over the cream layer. Then, spread that well-drained crushed pineapple evenly across the bananas. Seriously, drain that pineapple until your arm hurts, or you’ll end up with soup! Finally, spoon the strawberry pie filling right on top of the pineapple layer. This layering sequence is what makes it look so great when you slice it.
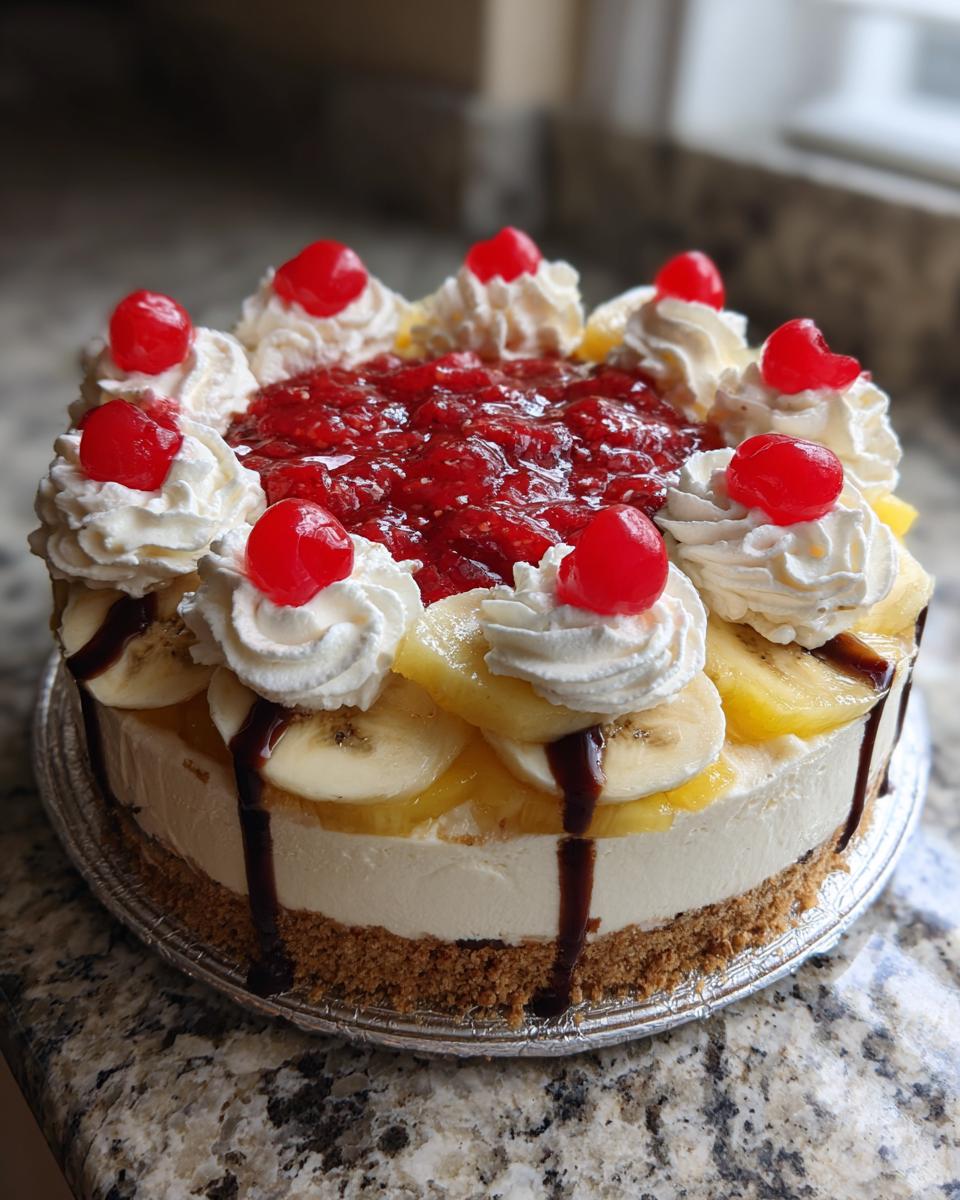
Chilling and Garnishing the Banana Split Cake
Spread the remaining half of the whipped topping gently over the strawberry layer—this is your final creamy cover. Cover the whole dish tightly with plastic wrap. Now, be patient! This cake needs at least four hours in the refrigerator, but honestly, overnight is where the **Banana Split Cake** truly becomes perfect and firm enough to serve. Once it’s chilled solid, pull it out, drizzle with chocolate syrup, and stick those bright red maraschino cherries right on top to finish the look!
Tips for Success Making a Perfect Banana Split Cake
Even though this is a simple no bake dessert, getting those layers to stay put is everything. I’ve learned a few tricks over the years that keep this cake looking as good as it tastes when you serve it for your next family gathering dessert idea. Trust me, a little extra attention during prep prevents a watery disaster later!
Ingredient Preparation for the Best Banana Split Cake
You absolutely cannot skip draining that crushed pineapple. I mean it! I actually press mine between a couple of layers of paper towels after pouring it out of the can—it makes a difference! Also, use bananas that are perfectly ripe, slightly yellow, but still firm enough to hold their shape when you slice them. If you’re feeling adventurous and want to skip the pie filling, you can absolutely mix up some fresh sliced strawberries with a tiny bit of sugar, but you must let them sit for 15 minutes and drain off any juice before layering them in.
Achieving the Ideal Chill Time
The biggest mistake people make with any Creamy Layer Dessert like this is getting impatient! Four hours in the fridge is the bare minimum, but I always recommend letting this chill overnight. That required chilling time isn’t just about making it cold; it allows the cream cheese filling to firm up solid so those fruit layers don’t ooze out when you try to slice it. Keep it covered and cold!
Storage and Make Ahead Dessert Options for Your Banana Split Cake
Because this is my go-to Make Ahead Dessert for summer gatherings, I often make it a day early. You definitely won’t be reheating this one—it’s meant to be served straight from the cold, like a fancy ice cream dream! Store your finished **Banana Split Cake** tightly covered in the refrigerator. It’s best eaten within two days, tops.
Now, the tricky part is the bananas. While the whipped topping and cream cheese filling will keep beautifully for several days, those sliced bananas start developing that slightly soft texture and browning color rather quickly. If you are planning to make this cake a day ahead, I suggest using a little trick to keep them looking brighter. A very light brush of lemon juice or even pineapple juice (if you saved some of the *drained* juice—though I usually don’t recommend that!) mixed with a teaspoon of water before layering them can help slow the oxidation down. This is similar to how I approach keeping fruit fresh for my easy freezer jam.
For true make-ahead success, you can prepare the crust and the cream cheese filling the morning before you plan to serve it. Just mix the crust, press it, and freeze it for an hour. Keep the filling covered in the fridge. Then, assemble everything in the late afternoon or evening before the party. That way, when you wake up the next morning, all you have to do is add the fruit layers and chill it down before covering it with the final topping and refrigerating it until serving time. It makes party day so much calmer!
If you want to try freezing leftovers—and I highly recommend against it for the best texture—you need to plan on a long thaw. If you freeze it, make sure to wrap it incredibly well, maybe adding an extra layer of plastic wrap and foil to combat freezer burn. However, since this uses a whipped topping base, the texture after thawing won’t be quite as fluffy. For the best experience, always plan on serving this fresh from the fridge, not the freezer!
Variations on the Classic Banana Split Flavors
Once you have this simple base down—the graham cracker crust, the creamy filling—you can really start having some fun with these classic flavors! I always encourage people to personalize their desserts. While the **banana split cake** is perfection as is, sometimes you want a little extra crunch or different textures for that next family gathering.
If you’re looking for crunch, try mixing about a quarter cup of finely chopped pecans or walnuts into that crust mixture before you press it in. It adds such a lovely, unexpected earthiness. Or, instead of relying solely on the chocolate drizzle, try sprinkling some candied pecans over the top layer before chilling! It makes it feel extra fancy.
And hey, if you hear people talking about a Banana Split Dump Cake variation, that usually means they are skipping the cream cheese layer entirely, maybe using softened ice cream or pudding mix, and skipping the neat layering for a quicker mix-and-bake method. But for this specific creamy, no-bake version, keep that crust firm and those layers neat. It’s worth the slight effort for that beautiful presentation!
Quick Answers: Frequently Asked Questions About Banana Split Cake
I get so many wonderful questions about making this **Banana Split Cake**, and honestly, it’s usually because people want to adapt it for their own gatherings! Since this is such a versatile easy layered dessert, I’m happy to share the answers right here. Just remember, baking is about flexibility, but some components of a no-bake cake need strict care!
Can I substitute the graham cracker crust in this No Bake Dessert?
Oh yeah, definitely switch up that crust if you want! The graham cracker crust is classic, but it’s not the only way to go for a good Graham Cracker Crust Dessert foundation. I often substitute vanilla wafer crumbs—they are fantastic and bake up just like the graham crackers do! Shortbread cookie crumbs are another winner; they give a slightly richer, buttery flavor that really complements the fruit layers. Just use the same ratio of butter to crumbs!
How long can I keep this Chilled Creamy Dessert refrigerated?
This is where you have to watch the fruit. Because this is a Chilled Creamy Dessert and not a baked one, the lifespan is dictated by the bananas and strawberries. If you need it to last, aim to eat it within 48 hours. The whipped topping on top stays nice, but after two full days, those banana slices tend to get a little soft and might start turning brown, even under the topping.
If you want to stretch it to three days, assemble everything *except* the bananas and the final whipped topping layer. Keep the crust and cream cheese mixture wrapped tightly. Then, the day before you plan to serve it, slice and layer your bananas, add your pineapple and strawberry, and then top with the final whipped layer. This keeps the banana fresh factor way up for the best slices!
Estimated Nutritional Data for One Slice of Banana Split Cake
When we talk about these wonderful, retro desserts, sometimes we need to keep track of what we’re taking in, right? Even though this No Bake Dessert is meant for pure enjoyment, I always like to provide the breakdown. Keep in mind that since this is a highly customizable treat—depending on how heavy your chocolate drizzle is or if you use fresh fruit instead of pie filling—these numbers are just an estimate! But it gives you a rough idea of what you’re enjoying per slice of this gorgeous **Banana Split Cake**.
- **Serving Size:** 1 slice
- **Calories:** 350
- **Sugar:** 35g
- **Sodium:** 180mg
- **Fat:** 18g
- **Saturated Fat:** 9g
- **Unsaturated Fat:** 9g
- **Trans Fat:** 0g
- **Carbohydrates:** 45g
- **Fiber:** 1g
- **Protein:** 4g
- **Cholesterol:** 35mg
See? Not too bad for something that tastes like the best summer day wrapped up in a cool, creamy package! It’s certainly much lighter than a traditional baked cake, which is another reason why this is such a popular choice for Potluck Perfect Desserts.
Share Your Family Gathering Dessert Ideas
Well, my friends, that is the complete journey to the most delightfully easy, no-fuss summer dessert around. We’ve built that perfect crust, layered up the creamy dream filling, and topped it with all the bright, classic fruit flavors that scream summer nostalgia. I truly hope this recipe for the **Banana Split Cake** finds its way to your next big family gathering dessert idea!
Now that you’ve made this, I want to hear all about it! Did your family immediately ask for seconds? Did you use fresh strawberries instead of the pie filling? Head over to the comments below and let me know! I always love seeing how you adapt these classic recipes for your own kitchen and for your own special occasions. Share your rating, tell me which party you served it at, and let me know if it earned its spot as a yearly tradition. I’m so thrilled to have shared this piece of my culinary journey with you from my kitchen to yours. Happy baking—or, in this case, happy chilling!
If you enjoyed this classic treat and are looking for more tried-and-true recipes that keep things simple and joyful, take a moment to learn a little more about our story here at Julia Meal and see what other simple American classics we’re celebrating!
PrintNo-Bake Banana Split Cake Recipe
You can create this creamy, layered No-Bake Banana Split Cake that captures all the classic ice cream parlor flavors. It is simple to assemble and perfect for summer parties or potlucks.
- Prep Time: 25 min
- Cook Time: 0 min
- Total Time: 4 hr 25 min
- Yield: 12 servings 1x
- Category: Dessert
- Method: No Bake
- Cuisine: American
- Diet: Vegetarian
Ingredients
- 1 1/2 cups graham cracker crumbs
- 1/2 cup melted butter
- 1/4 cup granulated sugar
- 1 (8 ounce) package cream cheese, softened
- 1 cup powdered sugar
- 1 (12 ounce) container frozen whipped topping, thawed, divided
- 1 teaspoon vanilla extract
- 3 ripe bananas, sliced
- 1 (20 ounce) can crushed pineapple, drained well
- 1 (21 ounce) can strawberry pie filling
- Maraschino cherries, for topping
- Chocolate syrup, for topping
Instructions
- Prepare the crust: Mix the graham cracker crumbs, melted butter, and 1/4 cup granulated sugar in a bowl. Press this mixture firmly into the bottom of a 9×13 inch baking dish. Place the dish in the freezer while you prepare the filling.
- Make the cream cheese layer: In a large bowl, beat the softened cream cheese until smooth. Gradually beat in the powdered sugar until fully combined. Fold in half of the thawed whipped topping and the vanilla extract until just blended.
- Assemble the layers: Spread the cream cheese mixture evenly over the chilled graham cracker crust.
- Arrange the fruit: Layer the sliced bananas over the cream cheese layer. Next, evenly spread the well-drained crushed pineapple over the bananas. Spoon the strawberry pie filling over the pineapple layer.
- Top the cake: Gently spread the remaining half of the whipped topping over the fruit layers.
- Chill: Cover the dish with plastic wrap and refrigerate for at least 4 hours, or preferably overnight, to allow the layers to set.
- Garnish and serve: Before serving, drizzle generously with chocolate syrup and top with maraschino cherries. Slice and serve this chilled creamy dessert directly from the refrigerator.
Notes
- Drain the crushed pineapple very well; excess liquid can make the cake runny.
- You can substitute the strawberry pie filling with fresh sliced strawberries mixed with a little sugar if you prefer less processed fruit.
- For a richer flavor, you can use a graham cracker crust recipe that includes a small amount of brown sugar.
Nutrition
- Serving Size: 1 slice
- Calories: 350
- Sugar: 35g
- Sodium: 180mg
- Fat: 18g
- Saturated Fat: 9g
- Unsaturated Fat: 9g
- Trans Fat: 0g
- Carbohydrates: 45g
- Fiber: 1g
- Protein: 4g
- Cholesterol: 35mg