
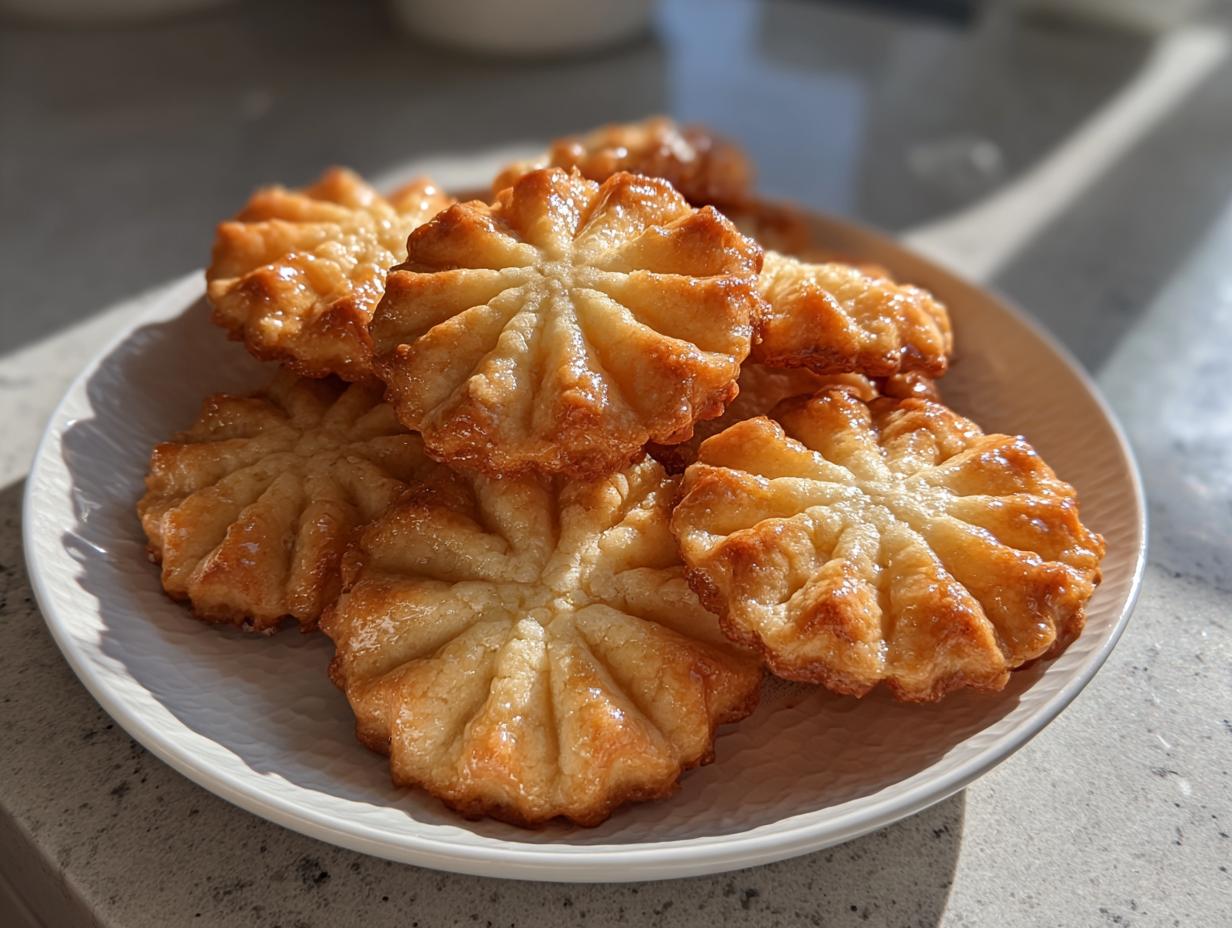
If you’ve ever opened one of those iconic blue tins and wondered how to get that exact, utterly irresistible texture at home, I know exactly how you feel. That search for the perfect, delicate, melt-in-your-mouth experience is what drove me to perfect this recipe. We aren’t talking about a tough shortbread here; we are aiming for something tender and rich. This recipe delivers the Classic Danish Butter Cookies, achieving that signature texture that makes them the best butter cookies you’ll ever bake from scratch. After years of testing in my kitchen, trying to honor the heritage of these simple treats, I finally landed on the magic formula. You can see how much I love exploring buttery classics in my recipe for classic buttery thumbprint cookies, but these Danish ones are special. Trust me, once you taste these, you’ll never look back; you can check out more insights on authentic versions, like the one found over at this great source, confirming this path is the right one.
- Why This Classic Butter Cookie Recipe Delivers Perfect Texture
- Gathering Ingredients for Your Melt In Your Mouth Butter Cookies
- Step-by-Step Instructions for Easy Homemade Butter Cookies
- Tips for Perfect Texture in Your Butter Cookies
- Variations on the Classic Butter Cookies Recipe
- Serving Suggestions for These Tea Time Cookies
- Storage and Reheating Instructions for Homemade Butter Cookies
- Frequently Asked Questions About Our Butter Cookies
- Estimated Nutrition for These Classic Butter Cookies
- Estimated Nutrition for These Classic Butter Cookies
Why This Classic Butter Cookie Recipe Delivers Perfect Texture
There’s a science to achieving that true, delicate, melt-in-your-mouth butter cookies quality, and it comes down to a couple of key players in the formulation. We’re ditching standard proportions to focus purely on richness. The generous amount of pure butter we use, combined with the secret weapon—cornstarch—is what makes these cookies so incredibly tender. That starch interferes slightly with gluten development, resulting in a less chewy and far more delicate structure, which is what sets these apart from standard, crispy buttery shortbread cookies.
If you want to dive deeper into the philosophy behind perfectly soft baking, check out the notes on textural perfection from folks similar to us over at Savory Skies. It pays off!
Key Ingredients for Rich Buttery Dessert Flavor
When you are making something as simple as butter cookies, every ingredient has to pull its weight. This is where using the absolute best ingredients counts. I always recommend unsalted butter; it allows us to control the salt level perfectly, making sure we get that pure, creamy flavor that defines a rich buttery dessert experience. If you can find a higher butterfat European-style butter, please use it—it seriously deepens the final taste that makes this recipe so authentic.
Gathering Ingredients for Your Melt In Your Mouth Butter Cookies
Alright, let’s get organized. With a recipe this pure, clarity is everything, and I want you to feel completely confident walking into this bake. You won’t need a pantry full of extracts and exotic flours here, thankfully! We rely on simple things done right. Make absolutely sure your butter is properly softened—that’s room temperature soft, but not oily! And don’t skip the cornstarch; that’s our texture secret for those beautiful melt in your mouth butter cookies.
- 1 cup unsalted butter, softened
- 1/2 cup granulated sugar
- 1 large egg yolk
- 1 teaspoon vanilla extract
- 2 cups all-purpose flour
- 1/4 teaspoon salt
- 1/4 cup cornstarch
- 1/4 cup unsalted butter, melted and cooled (for brushing)
Step-by-Step Instructions for Easy Homemade Butter Cookies
Now for the fun part! Getting these butter cookies piped beautifully takes a little technique, but stick with me, and you’ll be pulling trays of gorgeous rosettes out of the oven in no time. Remember, these are easy homemade butter cookies, but the final presentation really elevates them.
Creaming and Mixing the Butter Cookies Dough
Start by creaming that softened butter and the sugar together until it’s fluffy—it should look pale and almost cloud-like. Then, beat in that single egg yolk and the vanilla—make sure they are fully incorporated before you move on. When it comes to the dry ingredients (flour, salt, and cornstarch), add them slowly to the wet mixture. This is super important: mix only until the last streaks of flour disappear. Overmixing is the enemy of tender butter cookies, trust me on this one!
Piping, Chilling, and Baking Your Butter Cookies
Once the dough is ready, load it into a piping bag with that classic star tip. Pipe your cookies—little swirls or strips work perfectly—onto a parchment-lined sheet.
You MUST chill these cookies for at least 30 minutes; if you skip this, they’ll just spread into puddles. Preheat your oven to 350°F (175°C) while they chill. Bake them for about 10 to 12 minutes until the edges look barely golden.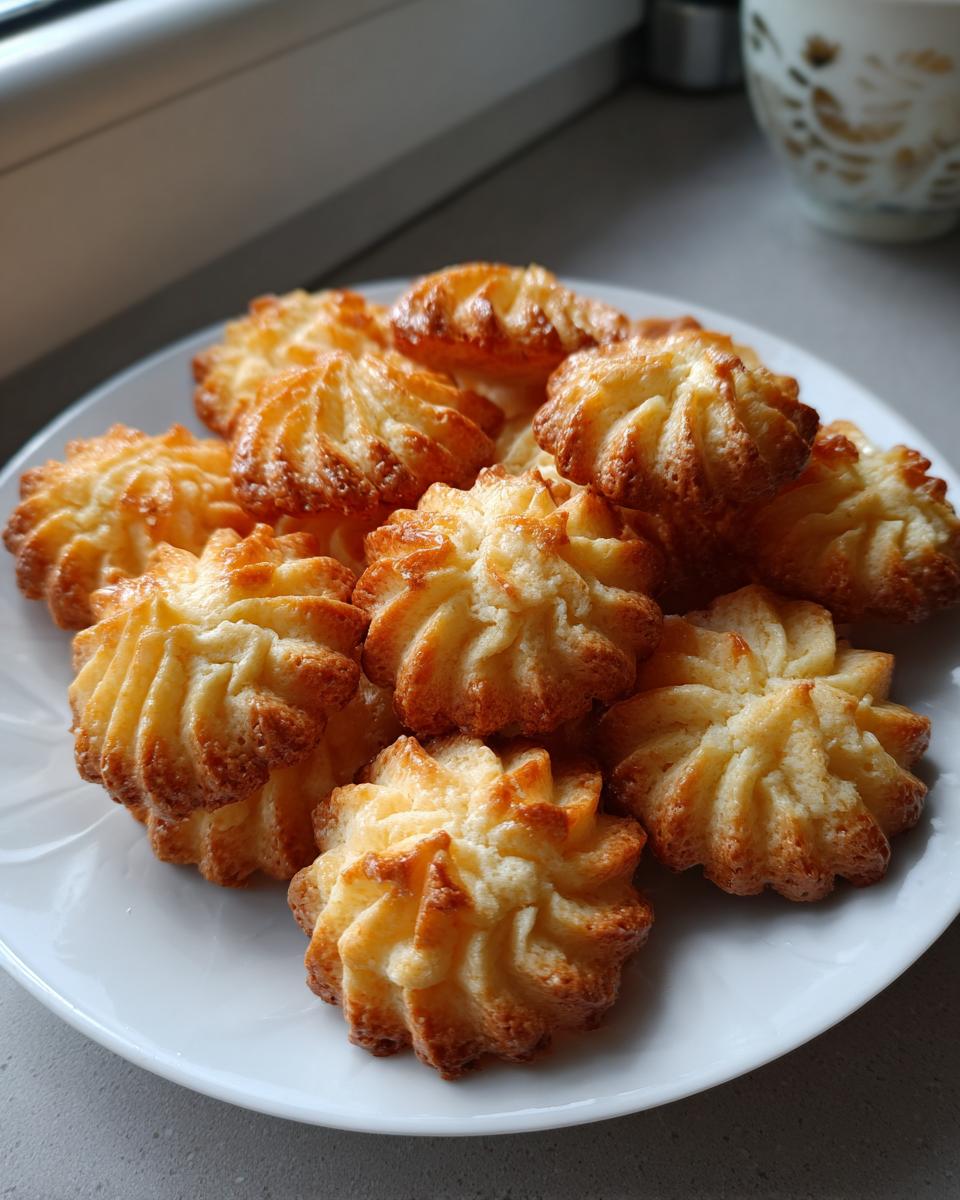
Here is the signature Danish step that makes them amazing: As soon as they come out, brush the tops lightly with that bit of cooled melted butter you prepared. It locks in moisture! Let them set on the pan for about five minutes before carefully moving them to a rack to cool down completely.
If you want more ideas on technique, especially around chilling and shaping, check out this resource for inspiration: this great melting cookie guide. And if you’re looking for other quick baking projects, my guide to light, fluffy shortcake might inspire you next!
Tips for Perfect Texture in Your Butter Cookies
If you want these to live up to the name Melt In Your Mouth Butter Cookies, technique matters more than almost anything else. The biggest enemy here is spreading. That’s why chilling the piped dough isn’t optional—it firms up the fat so the shape holds steady when it hits the heat!
If you see these start to rush in the oven, pull them out immediately. A slightly longer bake time will give you a drier, crispier cookie, leaning a bit closer to a classic buttery shortbread cookies experience, while pulling them out right when the edges turn light gold guarantees that signature tender bite.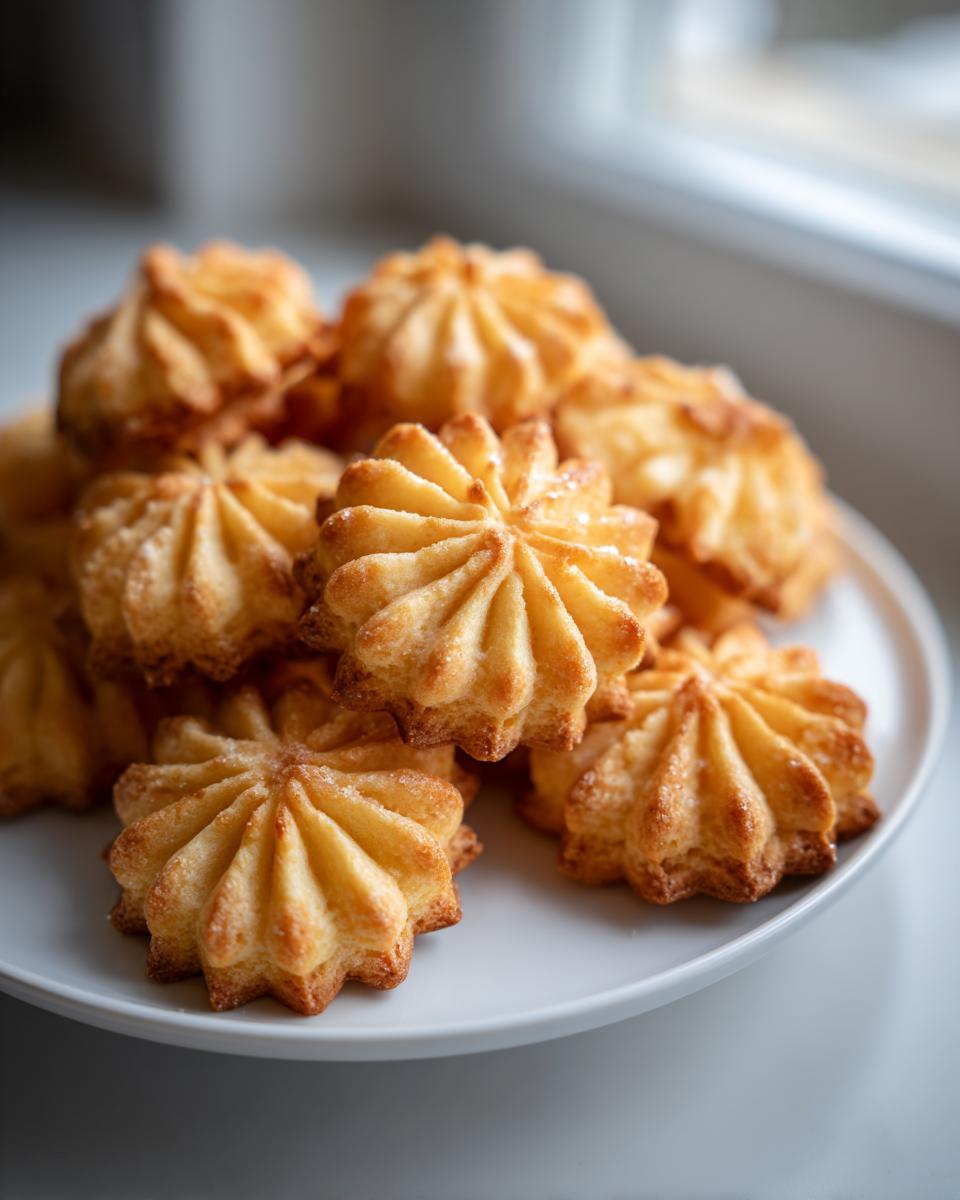
For extra richness in your frosting adventures later, you might want to bookmark my notes on making the best vanilla buttercream. But for these cookies, just focus on keeping that dough cold!
Variations on the Classic Butter Cookies Recipe
While the purest form of this Danish recipe is fantastic just as it is—seriously, it’s perfect for a quiet afternoon with coffee—I love seeing how home bakers make it their own. This base dough is so sturdy and flavorful that it takes additions beautifully without losing that essential buttery structure. It’s a great foundation for your holiday butter cookies collection, even if we aren’t going the gooey route!
If you want to try something fun without changing the core technique, consider adding extracts right when you add the vanilla. A quarter teaspoon of almond extract brings in a lovely, sophisticated nuttiness. Or, for a brighter flavor that screams springtime, try adding the zest of one small lemon or orange along with your sugar and butter when you cream them together. That citrus zest really brightens up the richness.
For toppings, don’t overthink it! After chilling (but before baking!), you can gently press the top of each piped cookie into colored sanding sugar. This gives you a lovely sparkle and a bit of crunch on the outside, which contrasts nicely with that tender interior. If you’re playing around with cinnamon, I also have a recipe for amazing chocolate cinnamon rolls that might get your gears turning for spice pairings, though keep the spice light here to honor the Danish focus!
Serving Suggestions for These Tea Time Cookies
These butter cookies are truly at their best when they’re served simply, allowing that rich buttery flavor to shine through. I find that the perfect moment to enjoy one of these Danish rosettes is mid-afternoon, usually when I need a little break from recipe testing. Honestly, they are the ideal accompaniment to a strong cup of black coffee or a fragrant cup of Earl Grey tea. That’s why I call them my favorite tea time cookies!
They are wonderful on a tray when friends stop by unannounced because they feel special even if you just pulled them out of the tin.
If you are serving them formally, try placing a small, thin piece of dark chocolate on top of each cooled cookie—the slight bitterness cuts through the richness beautifully. For a simple presentation, just stack them high! For more ideas on pairing treats, check out my secrets for getting the fluffiest pancake stacks when you need a breakfast treat.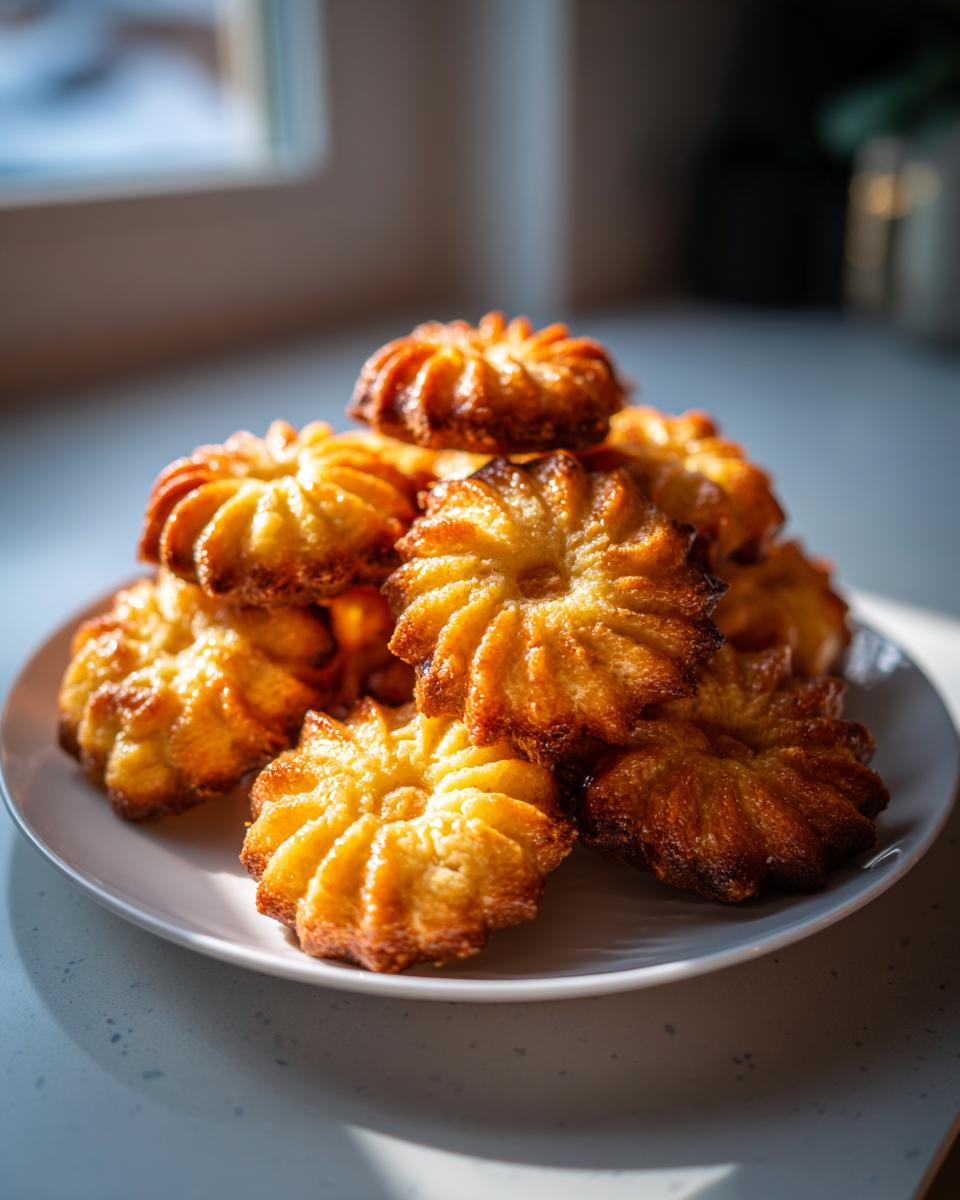
If you’re looking for people’s reactions to an already great recipe, there’s some fun inspiration over at Bite Bursting showing how people enjoy their batches. Honestly, though, nothing beats pairing these melt-away wonders with a warm drink on a quiet afternoon!
Storage and Reheating Instructions for Homemade Butter Cookies
The thing about a truly rich, buttery dessert like this is that you might not eat them all in one sitting—and that’s okay! Thankfully, these butter cookies are quite stable, but they need the right environment to keep that melt-in-your-mouth texture intact. We definitely don’t want them getting stale or absorbing any weird kitchen smells, right?
The absolute best way to keep these Danish treasures is in an airtight container at room temperature. Seriously, skip the fridge! Cold temperatures can actually change the texture of the butter slightly, making them seem a little harder than they should be. If you layer them, use a piece of parchment paper between the layers to prevent them from sticking together. They should stay perfectly good for about a week.
If you’re trying to make them ahead of time—maybe for the holidays or a big party—I have had success freezing them, but you have to handle them with care. Cool them completely, then arrange them in a single layer in a freezer-safe container with a layer of parchment between rows like I do when I prepare my no-canning freezer jam. They’ll keep well for about three months this way!
When it comes time to serve the frozen cookies, just pull out what you need and let them thaw on the counter for about 20 minutes. They should come right back to that beautiful, tender state. Trust me, you won’t even need to reheat them; they are fantastic served at room temperature!
Frequently Asked Questions About Our Butter Cookies
I always get a ton of questions when readers dive into this bake, especially since the texture is so specific. It’s totally normal! When you’re aiming for what I consider the Best Homemade Cookies recipe out there, people want to make sure they get it right. Here are some of the things I hear most often about perfecting these Danish Butter Cookie Recipe Authentic treats.
Can I skip the chilling step? I’m in a hurry!
Oh, I know the feeling! But if you skip chilling, you are swapping beautiful, decorative butter cookies for sad little buttery puddles. Chilling is absolutely required here. The cold temperature solidifies the butter so the delicate piped star shape doesn’t collapse immediately when it hits the hot oven. Give them at least 30 minutes—it’s worth the wait, promise!
What is the absolute best butter to use for these cookies?
I always push for high-quality, unsalted butter. Since butter is literally the star of the show here, using something highly concentrated in fat—like European-style butter—will give you a deeper, richer flavor that you just can’t get from standard American butter. That extra fat helps achieve that signature melt-in-your-mouth texture we are aiming for.
I don’t have a piping bag. Can I use a cookie press instead?
Yes, that’s a fantastic workaround! If piping feels a little fussy, a cookie press with a star or ribbon disc works like a charm. The dough is sturdy enough for the press, which is great news for anyone looking for Easy Homemade Butter Cookies that don’t require perfect piping skills. Just make sure you chill the dough logs or cookies on the tray before baking, just like we did with the piped ones.
Why add cornstarch to a butter cookie recipe?
This is the secret ingredient that keeps them so unbelievably tender! Cornstarch is super fine, and it cuts down on the gluten development from the flour. Less gluten means less chewiness and more of that delicate crumb that literally dissolves on your tongue. It’s essential for achieving that true Danish delicacy, rather than ending up with something too much like a traditional shortbread. If you want more insights into classic baking tips, feel free to look around my About page to understand my philosophy!
How long do these stay fresh?
Because of the high butter content, these stay surprisingly fresh! Stored correctly in an airtight container away from heat and light, they are excellent for about a week. For longer storage, freezing works great, as I mentioned before. For more reference on how others keep their delicious bakes fresh, check out tips from Yellow Bake.
Estimated Nutrition for These Classic Butter Cookies
Just so you have a general idea, especially if you’re planning for a gathering, here is the estimated nutritional breakdown for one of these beautiful, rich cookies. Remember, since these are from scratch butter cookies and quality ingredients vary, these numbers are an estimate based on the standard recipe components.
- Serving Size: 1 cookie
- Calories: 110
- Fat: 7g
- Carbohydrates: 10g
- Sugar: 5g
- Protein: 1g
Authentic Melt-in-Your-Mouth Danish Butter Cookies
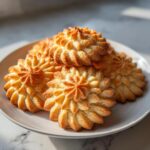
Follow this recipe to create rich, buttery Danish butter cookies that achieve the signature melt-in-your-mouth texture. These easy homemade butter cookies are perfect for gifting or tea time.
- Prep Time: 25 min
- Cook Time: 12 min
- Total Time: 67 min
- Yield: About 3 dozen 1x
- Category: Dessert
- Method: Baking
- Cuisine: Danish
- Diet: Vegetarian
Ingredients
- 1 cup unsalted butter, softened
- 1/2 cup granulated sugar
- 1 large egg yolk
- 1 teaspoon vanilla extract
- 2 cups all-purpose flour
- 1/4 teaspoon salt
- 1/4 cup cornstarch
- 1/4 cup unsalted butter, melted and cooled (for brushing)
Instructions
- In a large bowl, cream together the softened butter and granulated sugar until light and fluffy.
- Beat in the egg yolk and vanilla extract until fully combined.
- In a separate bowl, whisk together the flour, salt, and cornstarch.
- Gradually add the dry ingredients to the wet ingredients, mixing on low speed until just combined into a soft dough. Do not overmix.
- Transfer the dough to a piping bag fitted with a large star tip (like Wilton 1M) for the classic shape.
- Pipe small rosettes or strips onto baking sheets lined with parchment paper.
- Chill the piped cookies in the refrigerator for at least 30 minutes. This step is key for maintaining shape.
- Preheat your oven to 350°F (175°C).
- Bake the chilled cookies for 10 to 12 minutes, or until the edges are lightly golden brown.
- Immediately upon removing the cookies from the oven, brush the tops lightly with the cooled melted butter.
- Let the cookies cool completely on the baking sheet before carefully moving them to a wire rack.
Notes
- For the best melt-in-your-mouth texture, use high-quality European-style butter if available.
- If you do not have a piping bag, you can press the dough into a cookie press or roll small logs and slice them.
- Store these rich buttery dessert cookies in an airtight container at room temperature for up to one week.
Nutrition
- Serving Size: 1 cookie
- Calories: 110
- Sugar: 5g
- Sodium: 35mg
- Fat: 7g
- Saturated Fat: 4g
- Unsaturated Fat: 3g
- Trans Fat: 0g
- Carbohydrates: 10g
- Fiber: 0g
- Protein: 1g
- Cholesterol: 25mg