
If you’ve ever navigated the world of low-carb eating, you know the struggle: finding a pizza base that doesn’t immediately collapse into a soggy, flavorless mess when you try to add sauce and cheese. It’s frustrating! For years, I kept trying different binder methods in my kitchen, aiming to marry the keto requirement with something that actually tasted good. I’m thrilled to tell you that the search is over. We have finally perfected The Ultimate Crispy & Sturdy Cauliflower Pizza Crust. This recipe isn’t just another attempt; it’s the result of meticulous testing right here in my home kitchen, designed specifically to be robust enough for all your favorite pizza toppings while staying completely gluten-free. This sturdy cauliflower pizza crust brings all the joy back to low-carb dinner ideas. Trust me, this is a game-changer for making pizza night healthy again.
- Why This Cauliflower Pizza Crust Recipe Works (Expert Tips for Success)
- Ingredients for the Best Cauliflower Pizza Crust
- How to Prepare Your Sturdy Cauliflower Pizza Crust
- Tips for the Ultimate Crispy Cauliflower Crust Baking
- Serving Suggestions for Your Cauliflower Pizza
- Storage and Making Ahead: Freezer Friendly Cauliflower Pizza Crust
- Frequently Asked Questions About Cauliflower Pizza
- Nutritional Estimates for This Low Carb Pizza Crust
- Share Your Homemade Cauliflower Pizza Crust Experience
Why This Cauliflower Pizza Crust Recipe Works (Expert Tips for Success)
I know what you’re thinking: another cauliflower pizza crust recipe that promises crispiness but ends up a sad, wet pancake? I’ve been there, too. The main enemy of any good low carb pizza crust is water. Cauliflower is basically just hanging out, waiting to release moisture when it senses heat. Our success here hinges entirely on being aggressive about dehydration before the first bake. That’s the chef’s secret to getting that truly crispy cauliflower crust you crave.
When you manage to get nearly all the liquid out, the residual cheese and egg can actually bind the cauliflower solids properly, creating a firm base ready for baking, much like a perfect roast potato shell.
The Crucial Step: Squeezing Moisture from Your Cauliflower Pizza Crust
If you skip this part, you might as well order takeout. After microwaving, you have to let your cooked rice cool just enough so you don’t burn yourself. Then, put it in the thinnest, cleanest kitchen towel you own—or use cheesecloth if you have it. Wring that cauliflower rice out over the sink with all your might. I mean, really twist it until you seriously question how so much liquid was inside a single vegetable!
Ingredients for the Best Cauliflower Pizza Crust
Now that we’ve mastered the drying technique, let’s talk about what goes into making this sturdy cauliflower pizza crust hold together beautifully. Since this is a binding job, we rely on a little bit of dairy magic along with our cauliflower base. Every measurement needs to be exact here; we aren’t messing around when it comes to structure!
- 2 cups riced cauliflower (that’s about one medium head, freshly riced is best!)
- 1 large egg, which needs to be lightly beaten before mixing in
- 1/2 cup shredded mozzarella cheese—the low-moisture kind works best
- 1/4 cup grated Parmesan cheese for that salty punch
- 1/2 teaspoon dried oregano
- 1/4 teaspoon garlic powder
- 1/4 teaspoon salt
- A small pinch of black pepper
These simple components create a fantastic base. If you’re looking for some other comforting, cheesy recipes that pair well with pizza night, you must try my recipe for Southern baked macaroni and cheese!
How to Prepare Your Sturdy Cauliflower Pizza Crust
Okay, now we move from theory to action. Following these steps precisely is how we guarantee you get that satisfying, non-soggy base for your next cauliflower pizza night. We are treating this like baking an excellent fluffy buttermilk biscuit—it needs clear stages and patience!
Prepping and Drying the Cauliflower Rice
First things first: get your oven up to 400°F (200°C) and line a baking sheet with parchment paper. Then, microwave your riced cauliflower for about 4 to 5 minutes until it’s nice and softened up. The moment it’s cool enough to handle, transfer it to that thin towel I mentioned. Honestly, if you only take one thing away from this, let it be this: squeezing out every last bit of water is the difference between a stellar, healthy pizza alternative and a kitchen failure. Don’t be shy with the twisting!
Mixing and Forming the Cauliflower Pizza Crust Dough
Once you have your dry cauliflower rice, toss it into a bowl with the lightly beaten egg, both cheeses, and all your seasonings. Mix it up until it really starts looking like a dough ball—it should be tacky, not soupy. Now, scoop that mixture onto your prepared parchment. You need to press this into a firm 10-inch circle, keeping it about 1/4 to 1/3 inch thick. If you press it down hard and make sure the edges are slightly raised, you’ve built a strong foundation for your toppings.
Baking and Finishing the Cauliflower Pizza
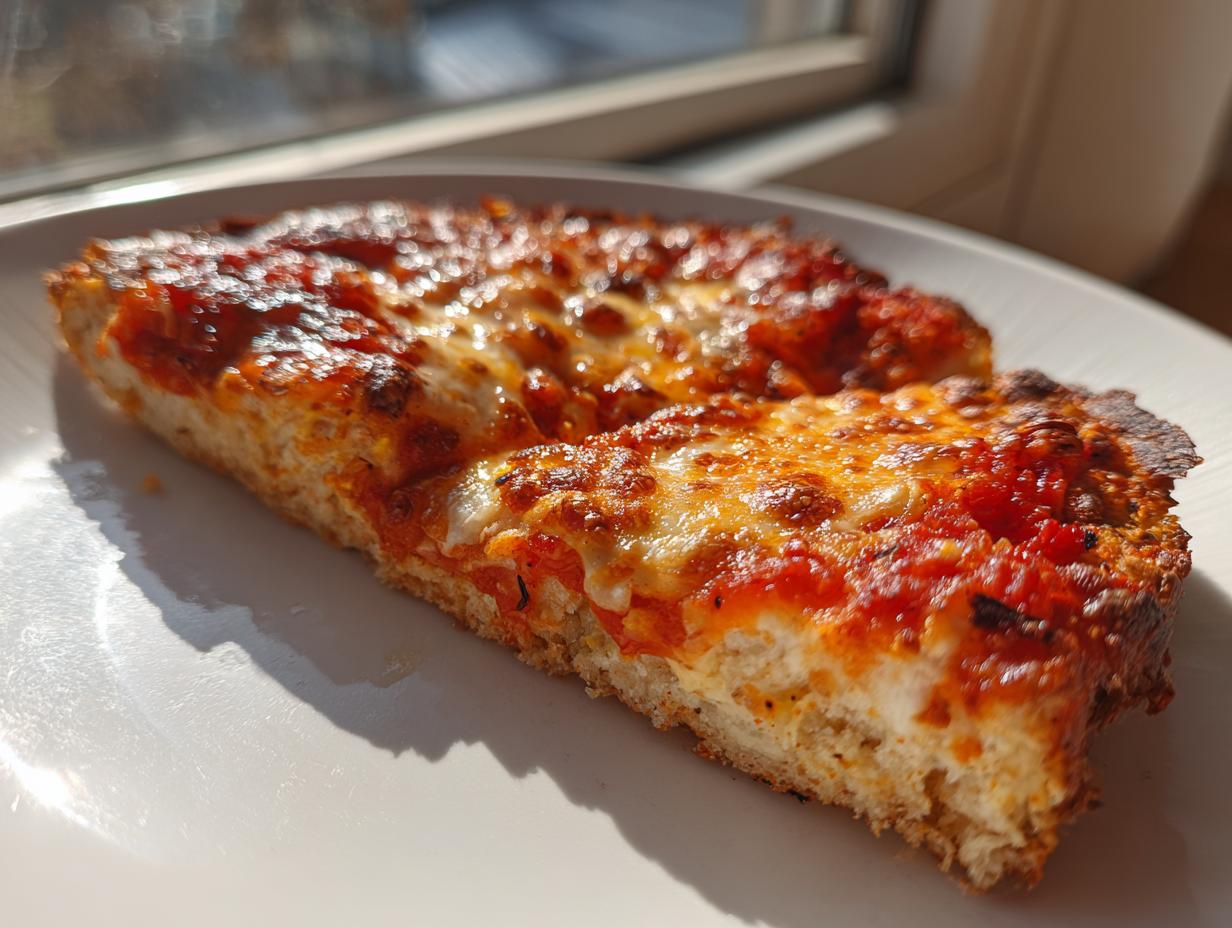
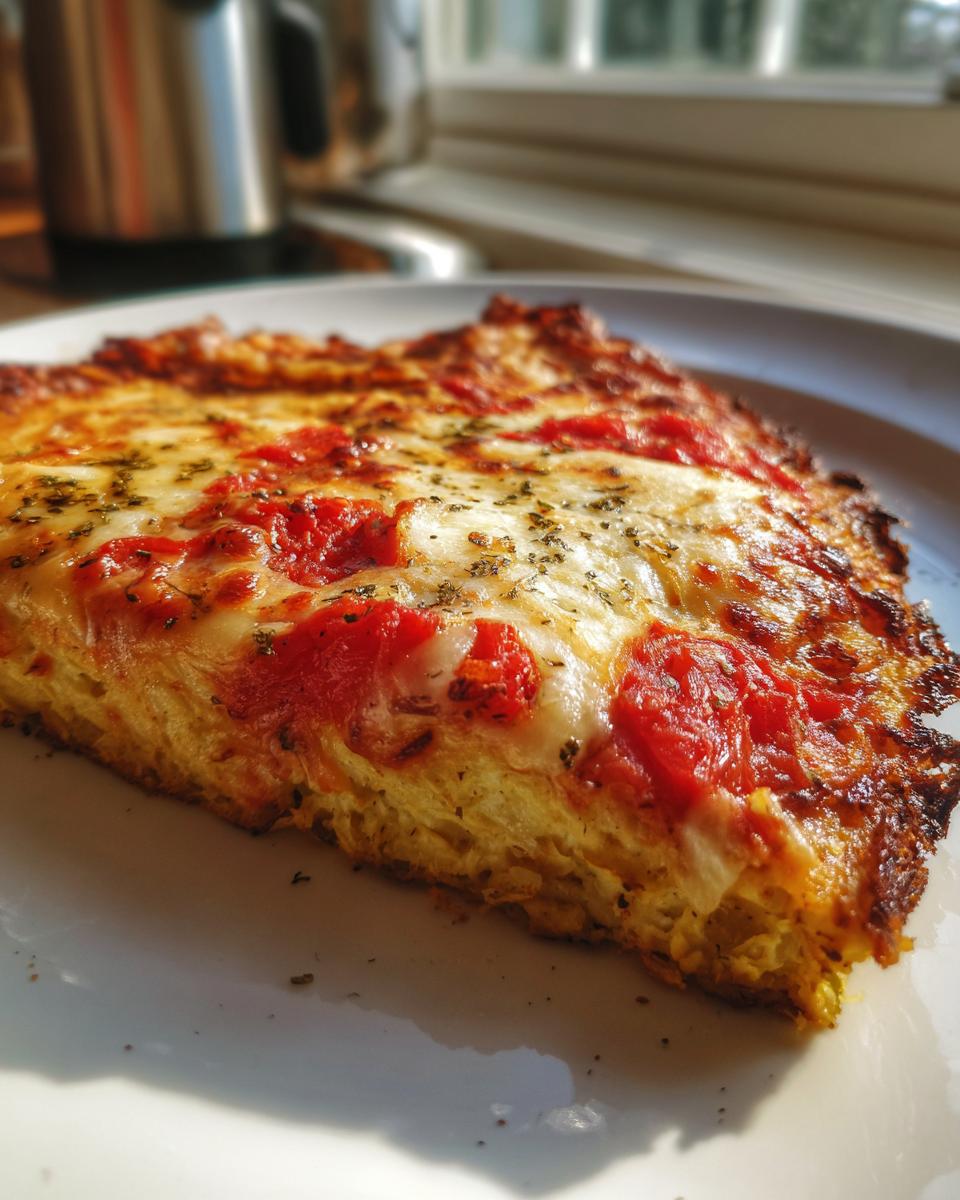
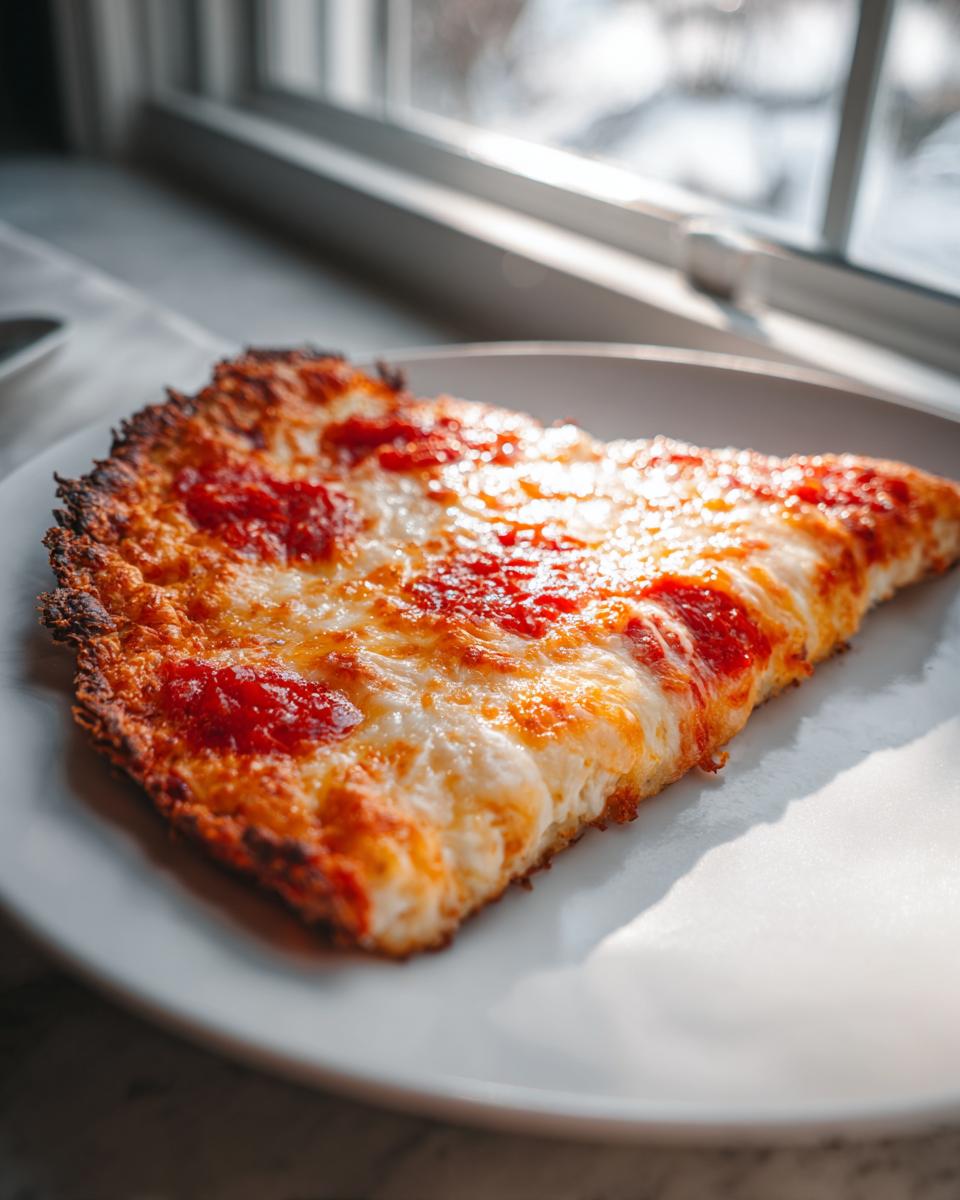
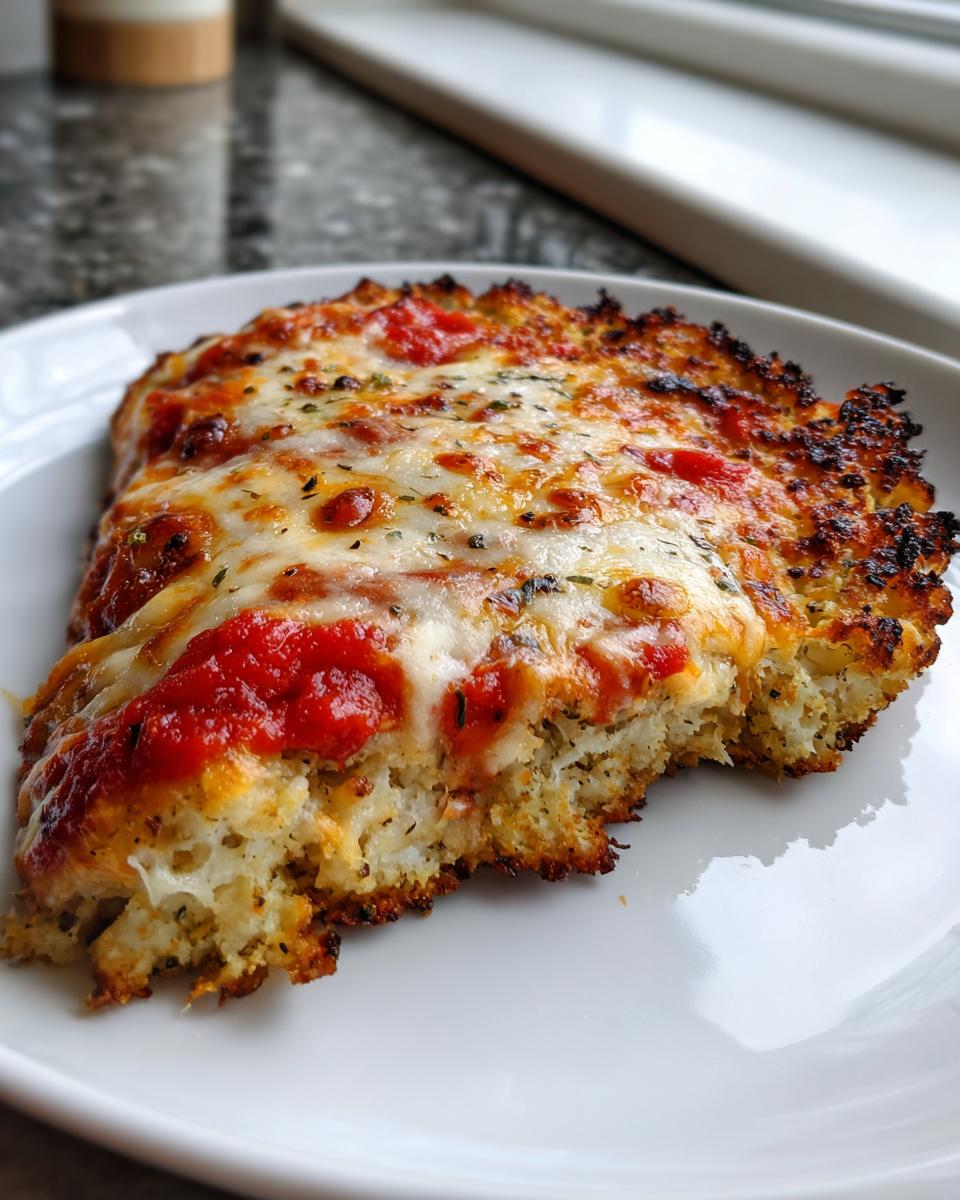
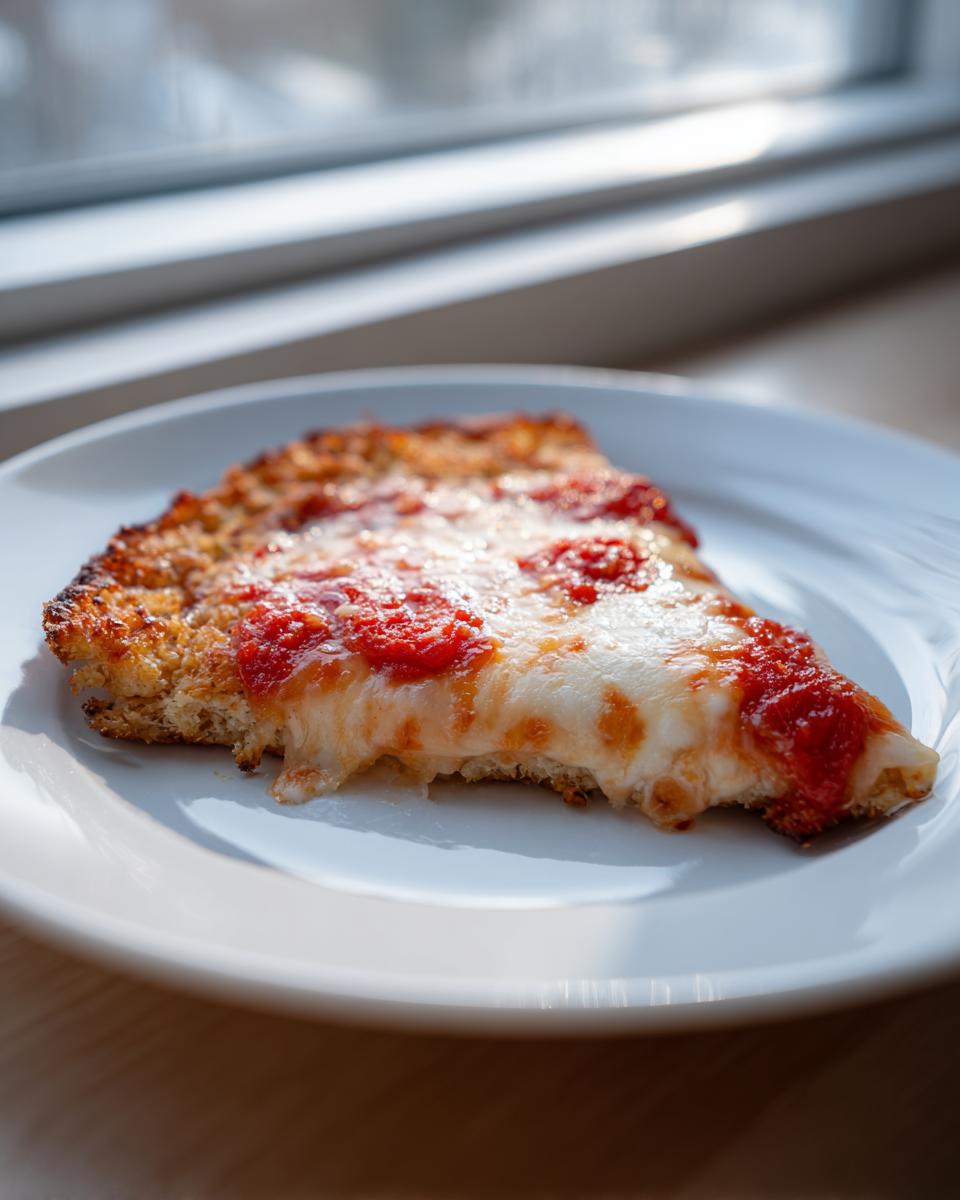
This is where the pre-bake magic happens! Bake that bare cauliflower pizza crust for 20 to 25 minutes until it looks golden and feels firm. Remove it, add your sauce and toppings—but go easy on the wet toppings, remember our mission here is crispiness! Then, pop it back in for another 8 to 12 minutes until that cheese is bubbly. The final, crucial move for any **keto pizza recipe** is letting it rest on the pan for 5 minutes after it comes out. This little pause lets the crust set its structure perfectly before you slice into your guilt-free pizza.
Tips for the Ultimate Crispy Cauliflower Crust Baking
Getting that perfect bake on our cauliflower pizza crust takes a little extra know-how beyond the basic baking time. Since we are aiming for a sturdy base that stands up to your favorite pizza toppings ideas, attention to detail really matters during these **pizza crust baking tips**. We need to build flavor while maintaining that crucial low-carb profile, which sometimes requires smart ingredient swaps.
Don’t forget that this isn’t just about avoiding sogginess; it’s about maximizing flavor too! If you love crispy edges, you might already know how much I adore my funnel cake recipe, and the principle of crispiness applies here too—dryness equals crunch!
Ingredient Swaps for a Low Carb Pizza Crust
If you’re watching dairy intake closely, you can absolutely make swaps in this **low carb pizza crust**. Instead of relying solely on mozzarella, try swapping in half the amount of almond flour. To keep that essential binding strength now that you’ve reduced the cheese, add approximately 1 tablespoon of psyllium husk powder. This powder is fantastic because it acts like super-glue, absorbing any stray moisture and guaranteeing your cauliflower pizza crust stays intact.
Serving Suggestions for Your Cauliflower Pizza
The beautiful thing about having such a sturdy veggie pizza crust is that you can actually load it up! But, I always preach balance, especially when you’ve worked so hard to get the base dry. For the crispiest experience, use a lighter layer of sauce—a thin swipe of something bright, like a fresh pesto or a simple crushed San Marzano tomato sauce works wonders.
When it comes to pizza toppings ideas, don’t be shy about your proteins or veggies now that the crust is holding strong! Things that used to weigh down weaker doughs—like crumbled sausage or roasted bell peppers—are totally safe here, provided you’ve pre-baked your base correctly. This is truly a fantastic base for a meatless Monday pizza too; just pile on the mushrooms and spinach.
For a great pairing when you want a really healthy meal, serve a slice alongside my quick Southwest Chicken Salad. It makes for a perfect, balanced, and totally guilt-free dinner!
Storage and Making Ahead: Freezer Friendly Cauliflower Pizza Crust
One of the best parts about mastering the cauliflower pizza crust is making extra! Honestly, once you’ve gone through the effort of drying all that cauliflower, you might as well double up the recipe and save yourself time later in the week. This crust is fantastic when made ahead, giving you the perfect grab-and-go base for a guilt free dinner idea.
The key to maintaining that beautiful structure is making sure you only freeze the crust *after* the initial baking stage. Never freeze the raw dough—it won’t bind correctly upon thawing. We are aiming for a truly freezer friendly pizza crust.
To freeze your pre-baked cauliflower pizza crust, let it cool completely after taking it out of the oven. Wrap the cooled crust tightly first in a layer of plastic wrap, making real contact with the surface, then add a layer of heavy-duty aluminum foil or place it inside a large freezer bag. It lasts beautifully for up to a month.
When you’re ready to use it, just unwrap it and slide the crust directly onto a baking sheet, top as usual, and add an extra 5-8 minutes to the final bake time to account for the chill. It reheats up beautifully, almost exactly like a fresh bake. If you’re looking for another great freezer meal idea, my air fryer frozen shrimp is a lifesaver!
Frequently Asked Questions About Cauliflower Pizza
I always get a ton of questions once people see how well this crust holds up! It’s natural; we’ve all had bad batches of gluten free pizza crust before. Here are a few things I hear most often about getting this specific cauliflower pizza recipe right.
Can I use fresh cauliflower instead of pre-riced?
Absolutely, and honestly, I prefer it! If you are aiming for the best healthy pizza alternative possible, grabbing a head of cauliflower and pulsing it in your food processor until it resembles rice is the way to go. Just make sure you measure 2 cups *after* you’ve cooked and aggressively squeezed absolutely all the water out. Fresh cauliflower is usually wetter than the bagged stuff, so be prepared to wring that towel for an extra minute!
What if I want a cheesier crust for my keto pizza recipe?
I totally get the craving for a mega-cheesy base! Since cheese is acting as a binder here, it helps structure the dough. You can easily add an extra 1/4 cup of high-moisture cheese, like mozzarella, into the dough mixture before the first bake. Just keep in mind that adding too much extra cheese means you might need to pre-bake it for an extra 3 to 5 minutes so it doesn’t weep liquid when you add your toppings later.
Can I skip the egg? I want a vegan version.
This is where it gets tricky for a truly sturdy base. The egg is a major binder and protein source holding everything together, especially since we aren’t using wheat flour. For a vegan approach, you will definitely need a substitute. I suggest using 1 tablespoon of flaxseed mixed with 3 tablespoons of water, letting it sit until gelatinous, and adding that in place of the egg. Just be aware that it might not achieve the same height, but it should still work for a thin low carbohydrate dinner style crust. If you’re having people over, my Hoagie Dip is a vegetarian crowd-pleaser too!
Nutritional Estimates for This Low Carb Pizza Crust
When we talk about making a **cauliflower pizza crust** that fits into a **low carbohydrate dinner** plan, it’s important to know what you’re starting with before you pile on the pepperoni. The base recipe itself is incredibly lean. Keep in mind these numbers are just for the crust, split into 8 slices, and don’t account for the sauce or toppings you choose!
- Calories: 110
- Total Fat: 7g
- Carbohydrates: 5g (with 2g Fiber)
- Protein: 8g
This is a great start for any keto pizza recipe! Because every family cooks differently, these values change based on the exact brand of cheese you use, so please treat this as a close estimate of your low carb pizza crust foundation. If you need a great main dish to follow this, my chicken piccata meatballs are always a winner!
Share Your Homemade Cauliflower Pizza Crust Experience
Listen, I’ve poured all my years of learning into making this the most reliable **healthy pizza alternative** out there, but the best proof is always when you try it in your own kitchen. If you’ve made this **cauliflower pizza crust**, please zip down to the comments below and let me know how it turned out!
Did you get that crispy edge? Did you try a crazy new topping combination? I truly love seeing your successes and hearing about any little tweaks you made to fit your family’s taste. Don’t forget to give the recipe a star rating if you loved it. If you need anything at all, feel free to reach out through my contact page. Happy baking!
PrintThe Ultimate Crispy & Sturdy Cauliflower Pizza Crust (Low Carb, Gluten-Free)

Make a sturdy, crispy cauliflower pizza crust that holds your favorite toppings. This recipe is low carb, gluten-free, and perfect for a healthy pizza night alternative.
- Prep Time: 15 min
- Cook Time: 35 min
- Total Time: 50 min
- Yield: 1 (10-inch) crust 1x
- Category: Dinner
- Method: Baking
- Cuisine: American
- Diet: Gluten Free
Ingredients
- 2 cups riced cauliflower (from about 1 medium head)
- 1 large egg, lightly beaten
- 1/2 cup shredded mozzarella cheese
- 1/4 cup grated Parmesan cheese
- 1/2 teaspoon dried oregano
- 1/4 teaspoon garlic powder
- 1/4 teaspoon salt
- Pinch of black pepper
Instructions
- Preheat your oven to 400°F (200°C). Line a baking sheet with parchment paper.
- Cook the riced cauliflower: Place the riced cauliflower in a microwave-safe bowl and microwave on high for 4 to 5 minutes until soft.
- Squeeze out moisture: Transfer the hot cauliflower rice to a clean, thin kitchen towel or several layers of cheesecloth. Let it cool slightly, then twist the cloth tightly and squeeze out as much liquid as possible. You need to remove about 1/2 cup of water for a sturdy crust.
- Mix the dough: In a medium bowl, combine the dried cauliflower rice, beaten egg, mozzarella cheese, Parmesan cheese, oregano, garlic powder, salt, and pepper. Mix until everything is well combined into a dough-like ball.
- Form the crust: Place the dough ball onto the prepared parchment paper. Press and flatten the mixture into a 10-inch circle, about 1/4 to 1/3 inch thick. Make the edges slightly higher for a defined crust.
- Pre-bake the crust: Bake the crust for 20 to 25 minutes, or until the edges are golden brown and the crust feels firm to the touch.
- Add toppings: Remove the crust from the oven. Add your preferred pizza sauce, cheese, and toppings. Keep toppings light to maintain crispiness.
- Final bake: Return the pizza to the oven and bake for another 8 to 12 minutes, or until the cheese is melted and bubbly.
- Cool and serve: Let the pizza cool on the baking sheet for 5 minutes before slicing. This helps the **crispy cauliflower crust** set completely.
Notes
- Squeezing the moisture from the cauliflower is the most important step for a non-soggy, sturdy crust.
- For an extra **low carb pizza crust**, use almond flour instead of mozzarella cheese, reducing the amount by half, and add 1 tablespoon of psyllium husk powder to help bind it.
- You can freeze the pre-baked crust for up to one month. Wrap it tightly before freezing.
Nutrition
- Serving Size: 1/8 of crust
- Calories: 110
- Sugar: 2
- Sodium: 250
- Fat: 7
- Saturated Fat: 4
- Unsaturated Fat: 3
- Trans Fat: 0
- Carbohydrates: 5
- Fiber: 2
- Protein: 8
- Cholesterol: 35