
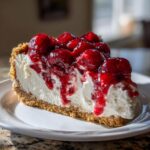
When that summer heat just won’t quit, the last thing you want to do is fire up the oven. I totally get it! That’s why I’m bringing you the recipe that pretty much defined my childhood pool parties: the Ultimate No-Bake Cherry Cheesecake. When my philosophy here at Julia Meal is all about simple, joyful cooking, this dessert delivers big time. It’s rich, unbelievably creamy, and yet, totally fuss-free. Trust me, this is the easiest way to create an impressive, fluffy no bake cheesecake filling that everyone will rave about. We’re ditching the bake time completely and letting the fridge do all the hard work! It’s one of those wonderful make ahead summer desserts that tastes even better the next day.
- Why This No-Bake Cherry Cheesecake is Your New Favorite Summer Dessert
- Ingredients for the Ultimate No-Bake Cherry Cheesecake
- How to Make This Easy No Bake Cheesecake Recipe
- Tips for How to Make No Bake Cheesecake Set Perfectly
- Ingredient Notes and Substitutions for Your No-Bake Cherry Cheesecake
- Serving Suggestions and Storing Your Make Ahead Cherry Cheesecake
- Frequently Asked Questions About This Recipe
- Nutritional Estimates for Your No-Bake Cherry Cheesecake
- Share Your Creamy No Bake Cherry Dessert Experience
Why This No-Bake Cherry Cheesecake is Your New Favorite Summer Dessert
When you think about the perfect easy no bake cheesecake recipe, what comes to mind? For me, it’s speed and unbelievable creaminess that doesn’t require adding five things to the grocery list. This is the ultimate quick no bake dessert when you need something impressive handled fast. You’re going to love how little effort it takes!
-
Zero Oven Time Needed
This is pure summer magic! No heat necessary means your kitchen stays cool, and you spend less time actually cooking and more time visiting. It’s my go-to when I need the best cherry cheesecake no oven solution.
-
Incredibly Creamy No Bake Cherry Dessert Filling
We load this up with heavy cream whipped just right so you get that phenomenal light and airy no bake dessert with cherries texture. It sets up beautifully, resulting in a dessert that tastes incredibly rich but feels wonderfully light.
If you’re looking for more great, simple recipes like this, check out my guide to simple delicious desserts!
Ingredients for the Ultimate No-Bake Cherry Cheesecake
When you’re relying on chilling instead of heat to do the work, ingredient quality and temperature count for everything! I made sure this list is short, sweet, and gets you that perfect texture. Don’t try to swap things out willy-nilly here; we want that creamy, impressive result!
-
For the No Bake Graham Cracker Crust Cheesecake Base
- 1 1/2 cups graham cracker crumbs (Make sure they are fine!)
- 1/4 cup granulated sugar (for crust)
- 6 tablespoons unsalted butter, melted (Don’t skimp or overheat this!)
-
For the Fluffy No Bake Cheesecake Filling
- 16 ounces cream cheese, softened (This HAS to be room temperature, trust me on this one.)
- 1 cup powdered sugar (Sifted, if you’re feeling fancy, but not strictly necessary.)
- 1 teaspoon vanilla extract
- 1/4 cup lemon juice, fresh (That little bit of acid brightens everything up!)
- 1 cup heavy whipping cream, cold (I mean fridge-cold, straight from the carton!)
- 1 (21 ounce) can cherry pie filling (The star topping!)
For more simple, incredible recipes like this one, take a peek at my guide on easy 3-ingredient chocolate mousse!
How to Make This Easy No Bake Cheesecake Recipe
This is where the magic happens, and I promise, it moves fast! Since we aren’t dealing with oven temperatures, the pace is all about getting the layers mixed and into the cold box ASAP. Follow these steps, and you’ll have locked in that amazing, creamy texture for your no bake cherry cheesecake.
Creating the No Bake Graham Cracker Crust Cheesecake
First things first, let’s make that base. Grab your graham cracker crumbs and that small amount of sugar and mix them up real good in a bowl. Pour in your melted butter and stir it around until every crumb looks dark and wet—like wet sand you can squeeze. Press that mixture down *firmly* into the bottom of your 9-inch springform pan. I like to use the bottom of a measuring cup to really pack it tight. Now, stick that pan straight into the freezer while you handle the filling. That chilling time is essential for the crust!
Whipping the Cream for a Light and Airy No Bake Dessert with Cherries
Time for the filling! Get your softened cream cheese beat up in a big bowl until it’s smooth, smooth, smooth—no lumps allowed! Then, slowly add in the powdered sugar, vanilla, and lemon juice, beating until everything looks uniform. Now, here’s the key for that unbelievable texture: take a separate, clean bowl and whip your cold heavy cream until you have stiff peaks. When you try to lift the whisk, those peaks should stand up straight without flopping over! Gently, gently fold that whipped cream into the cream cheese base. I mean gently! We are keeping all that lovely air we just whipped in there so you get that satisfyingly light and airy no bake dessert with cherries feel.
Assembling the Simple Cherry Topping Cheesecake
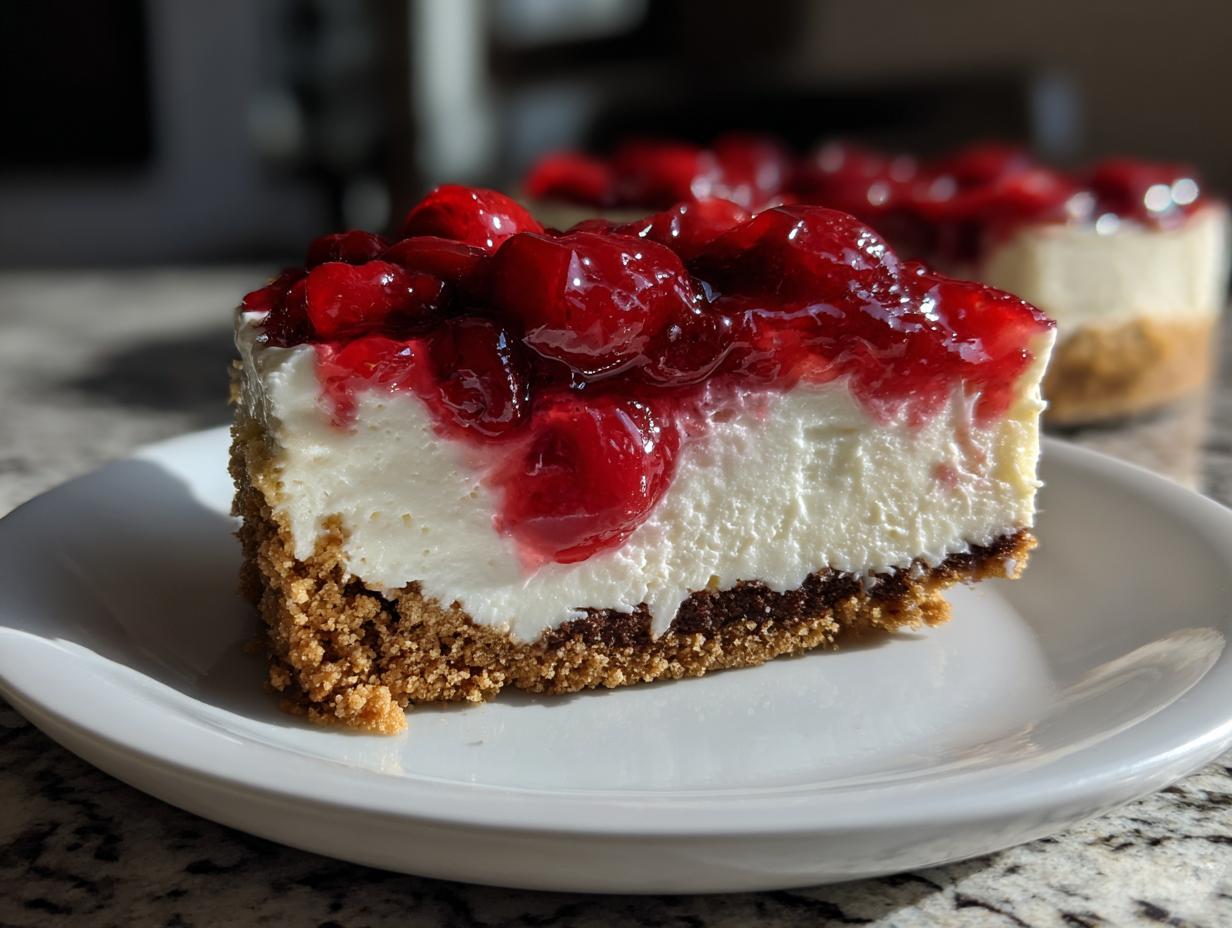
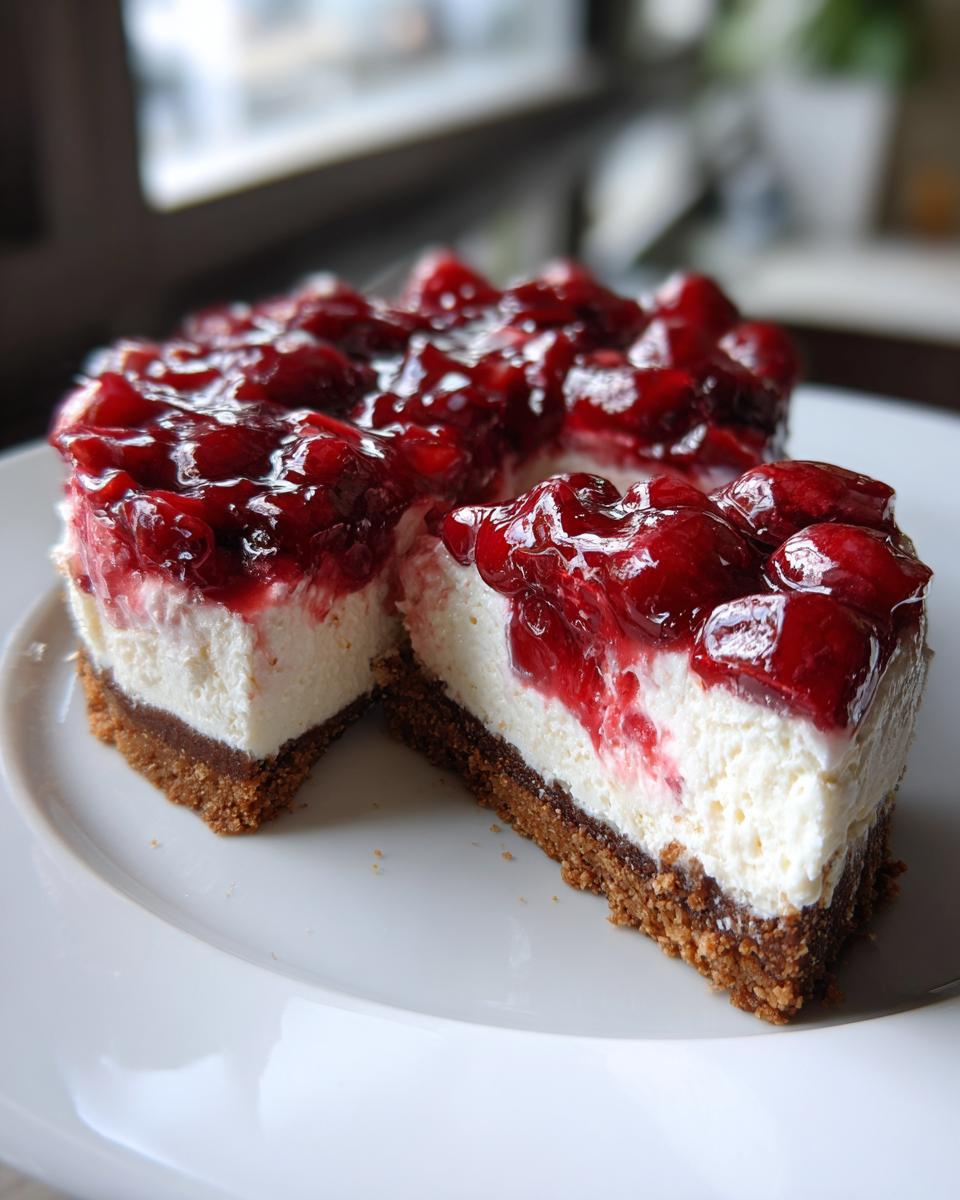
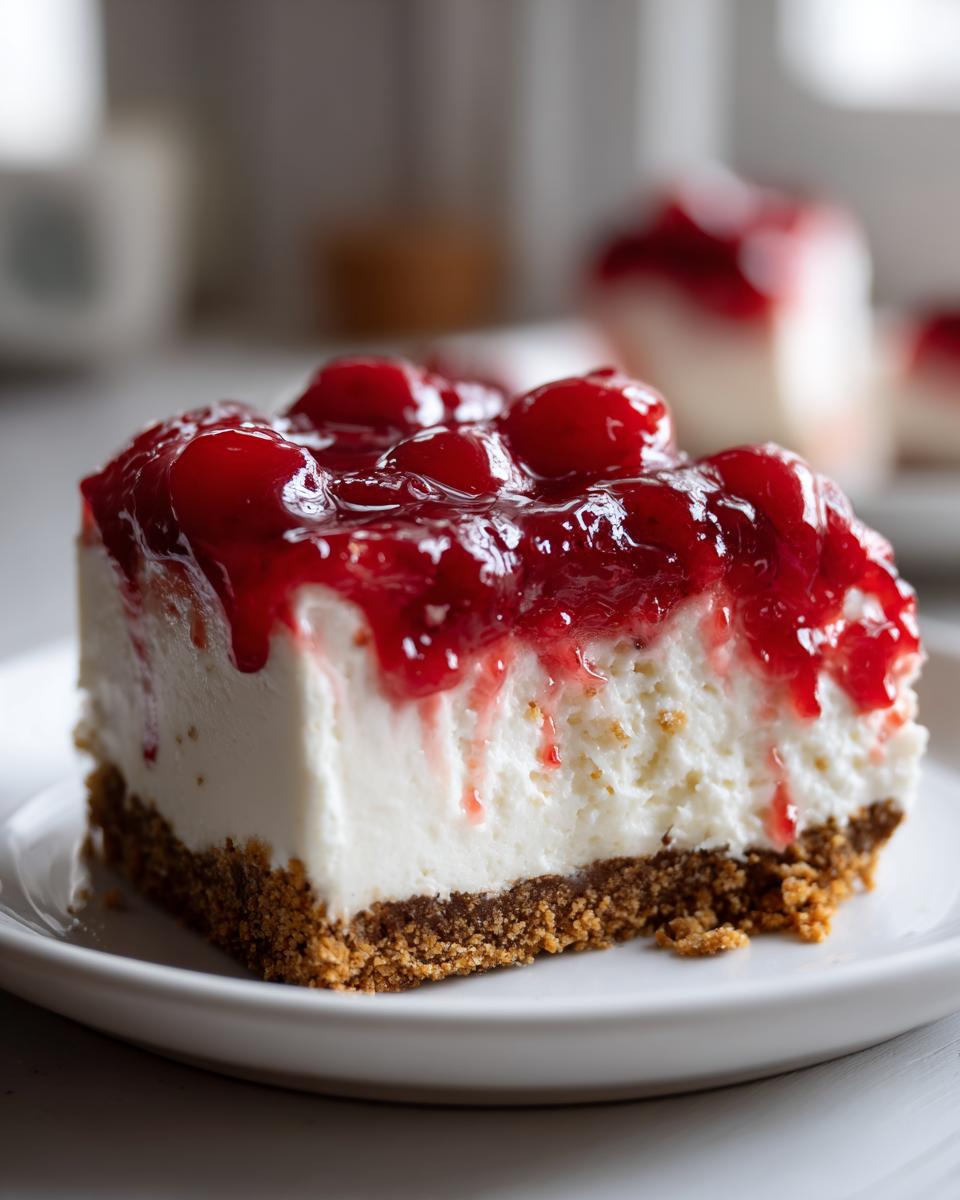
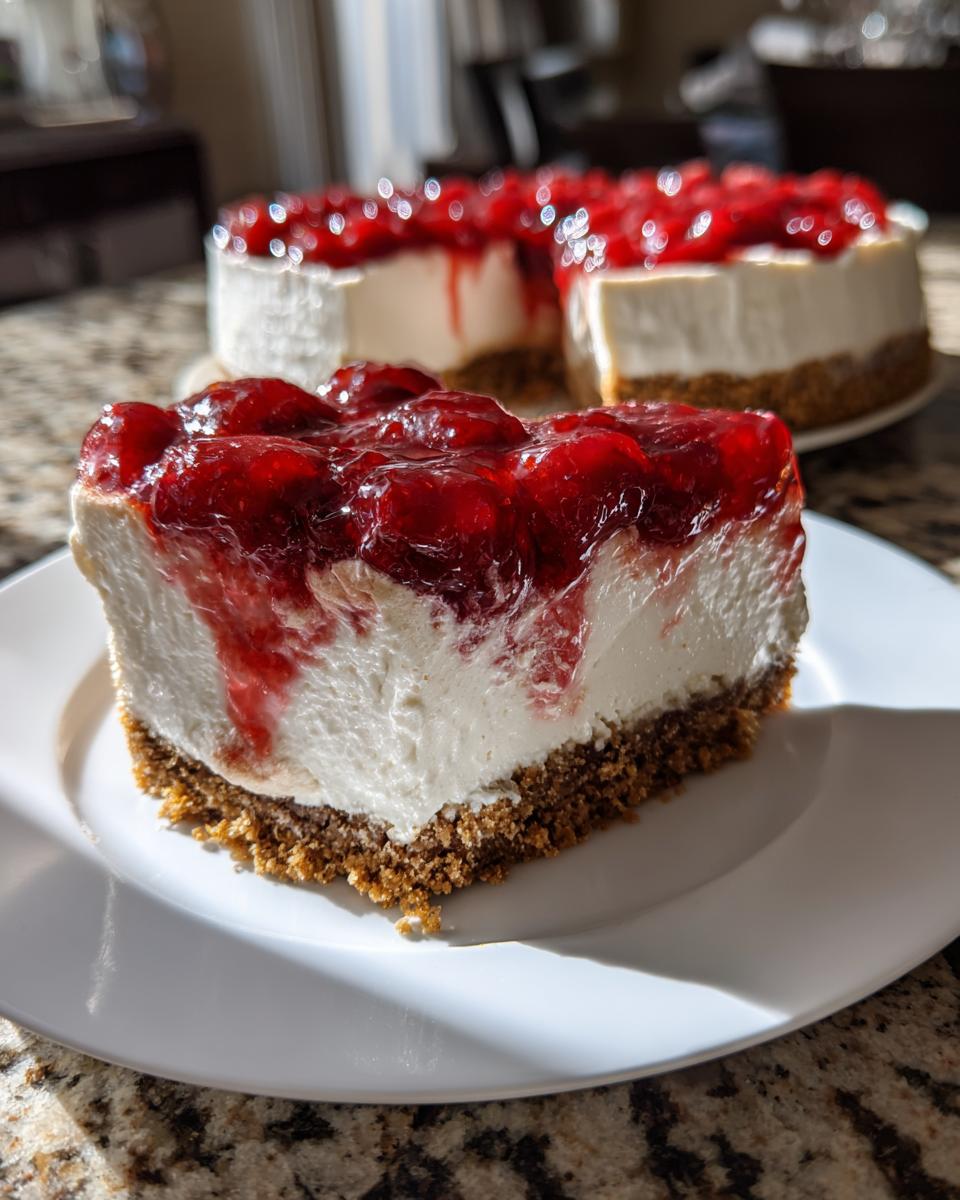
Okay, take your crust out of the freezer. Spread half of that beautiful cream cheese mixture evenly over the top. Now, grab half of your canned cherry pie filling and gently spoon it over that white layer. Try not to drip it down the sides—we want defined layers for presentation! Then, top with the rest of the cream cheese, spread it smooth, and finish with the rest of those gorgeous, jewel-toned cherries right on top. This whole layering process sets up your fantastic make ahead cherry cheesecake!
Tips for How to Make No Bake Cheesecake Set Perfectly
Look, I know you want to dig into this incredible no bake cherry cheesecake right away, but this step, chilling, is non-negotiable. It’s the ‘cooking’ part of this no-bake process! If the filling looks too soft when you pull it out, it’s almost always because someone got impatient and cracked the seal on the plastic wrap too early. Be patient; your reward is the creamiest dessert imaginable.
The Critical Chilling Time for Your No-Bake Cherry Cheesecake
The recipe calls for a minimum of six hours in the fridge, but I always tell people: aim for overnight. Seriously. That extra time allows the fats in the cream cheese and the volume from the whipped cream to truly stabilize. If you slice it too soon, it’ll look a little sad and sloppy when you cut it. You want that clean slice, right? Covering it loosely with plastic wrap just prevents the top from drying out or picking up any weird fridge smells. The chill is what transforms whipped cream and cream cheese into a sliceable slice!
Expert Tip: Adding Gelatin for Extra Firmness
Now, if you are making this for a big party, or maybe it’s unbelievably hot where you live, you can absolutely add a little insurance policy. I mentioned in the notes that you can use unflavored gelatin. This is a fantastic trick for any how to make no bake cheesecake set project. Dissolve one packet of gelatin completely in about a quarter cup of hot water—make sure it’s totally clear, no dry clumps floating around! Then, stir that liquid right into your cream cheese mixture *before* you gently fold in the whipped cream. It guarantees a perfectly firm texture, though you must respect the chilling time regardless!
Check out this guide if you want more detailed techniques on how to make no bake cheesecake set perfectly every time.
Ingredient Notes and Substitutions for Your No-Bake Cherry Cheesecake
I always stress paying attention to the details here because, without that oven heat, these ingredients have to do all the heavy lifting to create that perfect structure we’re looking for in a no bake graham cracker crust cheesecake. Let’s talk about swapping things out just in case.
The graham cracker crust is classic, but if my pantry is low on those crumbs, I go straight for chocolate sandwich cookies—the Oreos, wrappers and all! Crush about 20 of them up and use the same amount of melted butter. That gives you a rich, dark base that pairs surprisingly well with the tart cherry.
You asked about the cherries! The canned cherry pie filling is my secret weapon for speed and that perfect, thick, sweet syrup. If you insist on using fresh cherries, you absolutely can, but you have to cook them down first with sugar and a little cornstarch until they thicken up considerably. If they are too watery straight from the fruit, they will absolutely ruin the setting process for your filling. Honestly, for an easy no bake cheesecake recipe, sticking to the canned stuff saves you about 30 minutes right there!
Also, never underestimate the power of room temperature cream cheese. If it’s cold, it clumps up when you add the powdered sugar, and those clumps stick around forever, giving you an unwelcome bumpy texture instead of that smooth, lovely finish. A little patience here goes a long way!
If you want to explore more grab-and-go treats after you’ve mastered this cheesecake, check out my no-bake granola bars—another great thing to keep in the freezer!
Serving Suggestions and Storing Your Make Ahead Cherry Cheesecake
Alright, the hard part—waiting!—is over. Your make ahead cherry cheesecake is perfectly chilled, firm to the touch, and ready for its big moment. Before you even think about digging in, there’s one important detail for presentation, especially since we used a springform pan.
When you go to release the sides, grab a thin, sharp knife and gently run it all the way around the interior edge where the crust meets the metal. This tiny step makes all the difference between a clean release and tearing up the side of your beautiful, set cheesecake. Then, carefully unclasp and lift away the ring. It just pops right off! This is how you get that impressive, bakery-worthy look for your simple cherry topping cheesecake.
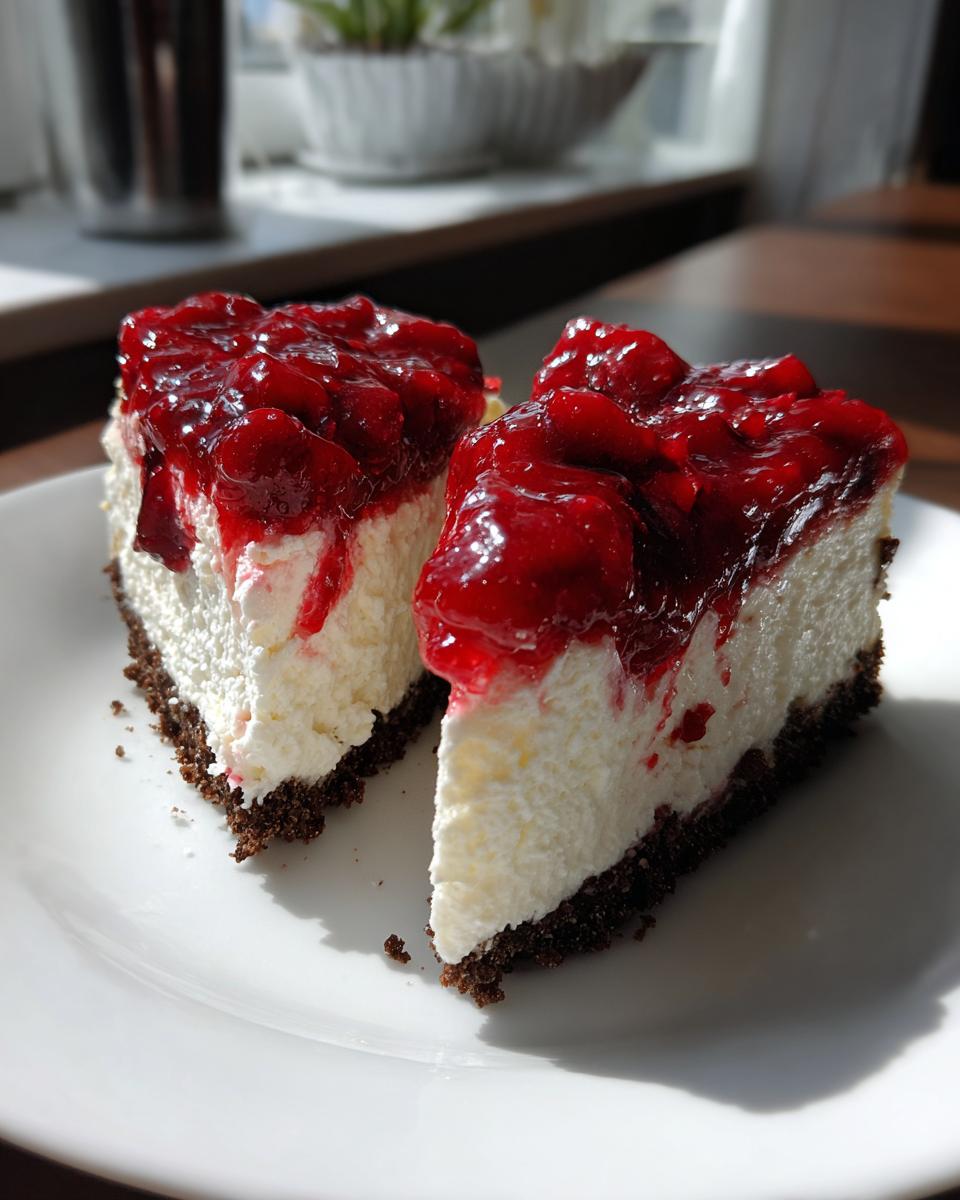
When serving slices, I love to top each individual piece with just a tiny dollop of extra whipped cream on the side and maybe two or three perfectly fresh, bright red cherries if I have them on hand. It looks so elegant!
For storage, this dessert is built for advance prep. It keeps wonderfully in the refrigerator. Make sure it’s covered tightly—plastic wrap pressed gently onto the surface, or a proper cake container—and it will stay creamy and perfect for about four to five days. It’s one of the best make ahead summer desserts because it actually *prefers* being made early!
Frequently Asked Questions About This Recipe
I always knew you’d have questions! When you’re making a recipe for the first time, especially an impressive one like this quick no bake dessert, it pays to double-check the tricky spots. Here are the things I hear most often about getting that perfect, fluffy result.
-
Can I use fresh cherries instead of canned pie filling in this no bake cherry cheesecake?
You absolutely can, but be warned: it changes the steps! Canned pie filling is already sweetened and thickened with that wonderful syrup that helps stabilize the top layer. If you use fresh cherries, you need to cook them down on the stovetop with sugar and a tablespoon of cornstarch until the liquid reduces to a thick, glaze-like consistency. If you skip that step, your beautiful no bake cherry cheesecake will weep watery liquid all over the counter! It’s not hard, but it adds time.
-
How long does this easy no bake cheesecake recipe last in the refrigerator?
Good news: it’s a marathon runner! Because this is a heavy cream and cream cheese mixture, it holds up really well. I find that it stays perfectly fresh and firm for about four days in the fridge when covered tightly. If you make it on Monday, it’s still fantastic for a Friday night treat. That’s why I love these quick no bake dessert options for entertaining!
-
What does the lemon juice actually do since I can’t taste it?
That’s such a great observation! You shouldn’t taste the actual lemon, but it plays a huge role in balancing the richness of the cream cheese and the sweetness of the powdered sugar and cherries. That tiny bit of acid cuts through the fat, making the whole creamy no bake cherry dessert taste brighter, lighter, and less heavy on the palate. It’s absolutely vital for that “light and airy” feeling!
Nutritional Estimates for Your No-Bake Cherry Cheesecake
Now, I know that when we’re focused on creating an incredible, simple dessert, nutrition usually takes a little backseat, right? But folks always ask, so I always like to provide a ballpark idea of what you’re diving into with this amazing treat.
Keep in mind, since we are using full-fat cream cheese and a butter-based crust, this is definitely a rich dessert—but totally worth every single bite! These numbers are based on dividing the whole cheesecake into 10 standard slices. Since I’m not a certified nutritionist, treat these figures as good estimates, not gospel. But it gives you a general idea of the calories, fat, and protein we’re looking at in one serving of this creamy no bake cherry dessert.
- Serving Size: 1 slice
- Calories: 380
- Fat: 24g
- Saturated Fat: 15g
- Carbohydrates: 38g
- Sugar: 35g (Yep, that cherry filling and powdered sugar add up!)
- Protein: 5g
- Cholesterol: 75mg
If you’re aiming for a lighter outcome, you can certainly try whipping a lower-fat cream cheese, but just be prepared—it might affect the structure a bit! I always suggest sticking to the full-fat version here because it really delivers on that perfect setting ability.
Share Your Creamy No Bake Cherry Dessert Experience
See? Wasn’t that simple? We took a little time, used our elbows to press the crust just right, kept our cream cold, and now we have this gorgeous, bright red, impressive dessert sitting in the fridge waiting for us. That’s the Julia Meal philosophy in a nutshell—maximum flavor and impact for minimum fuss!
I truly hope you make this creamy no bake cherry dessert next time you need a crowd-pleaser that doesn’t involve turning on the stove. It’s the perfect dish to share because it’s made with love, and you won’t be trapped standing over a hot oven while the party is going on!
Once you’ve had that first slice—and I hope you’ve run that knife around the edge perfectly so it slides right out—I would be absolutely thrilled if you came back and told me how it went! Rate this recipe down below, leave a comment, or better yet, snap a quick picture of your final masterpiece and tag us! Sharing our successes, especially the simple, sweet ones, is what cooking is all about. We build memories one delicious, no-bake slice at a time!
If you want to learn more about why we focus so much on honest, connected cooking here at Julia Meal, feel free to read up on our About page. Happy chilling, friends!
PrintUltimate No-Bake Cherry Cheesecake with Graham Cracker Crust
Make this creamy, light, and airy no-bake cherry cheesecake. It uses a simple graham cracker crust and canned cherries for a quick, impressive summer dessert that requires no oven time.
- Prep Time: 20 min
- Cook Time: 0 min
- Total Time: 6 hr 20 min
- Yield: 10 servings 1x
- Category: Dessert
- Method: Chilling
- Cuisine: American
- Diet: Vegetarian
Ingredients
- 1 1/2 cups graham cracker crumbs
- 1/4 cup granulated sugar (for crust)
- 6 tablespoons unsalted butter, melted
- 16 ounces cream cheese, softened
- 1 cup powdered sugar
- 1 teaspoon vanilla extract
- 1/4 cup lemon juice, fresh
- 1 cup heavy whipping cream, cold
- 1 (21 ounce) can cherry pie filling
Instructions
- Prepare the crust: Mix graham cracker crumbs and 1/4 cup granulated sugar in a medium bowl. Pour in melted butter and stir until the crumbs are evenly moistened. Press the mixture firmly into the bottom of a 9-inch springform pan. Place the crust in the freezer while you prepare the filling.
- Make the filling: In a large bowl, beat the softened cream cheese with an electric mixer until smooth. Gradually beat in the powdered sugar until fully combined. Mix in the vanilla extract and lemon juice.
- Whip the cream: In a separate, clean bowl, beat the cold heavy whipping cream until stiff peaks form. Gently fold the whipped cream into the cream cheese mixture until just combined. Do not overmix.
- Assemble the cheesecake: Spread half of the cream cheese filling evenly over the chilled crust. Spoon half of the canned cherry pie filling over the cream cheese layer. Top with the remaining cream cheese filling, spreading it carefully. Finish by spooning the remaining cherry pie filling over the top layer.
- Chill and set: Cover the pan loosely with plastic wrap. Refrigerate the cheesecake for at least 6 hours, or preferably overnight, to allow it to set completely. This step is important for a firm texture.
- Serve: Before serving, run a thin knife around the edge of the pan before releasing the springform side. Slice and serve this make ahead cherry cheesecake cold.
Notes
- For the best texture, ensure your cream cheese is fully softened to room temperature before mixing.
- If you want a slightly firmer set, you can add one packet of unflavored gelatin dissolved in 1/4 cup of hot water to the cream cheese mixture before folding in the whipped cream.
- Chill the bowl and whisk attachment for 10 minutes before whipping the heavy cream for faster, better results.
Nutrition
- Serving Size: 1 slice
- Calories: 380
- Sugar: 35
- Sodium: 250
- Fat: 24
- Saturated Fat: 15
- Unsaturated Fat: 9
- Trans Fat: 0
- Carbohydrates: 38
- Fiber: 1
- Protein: 5
- Cholesterol: 75