
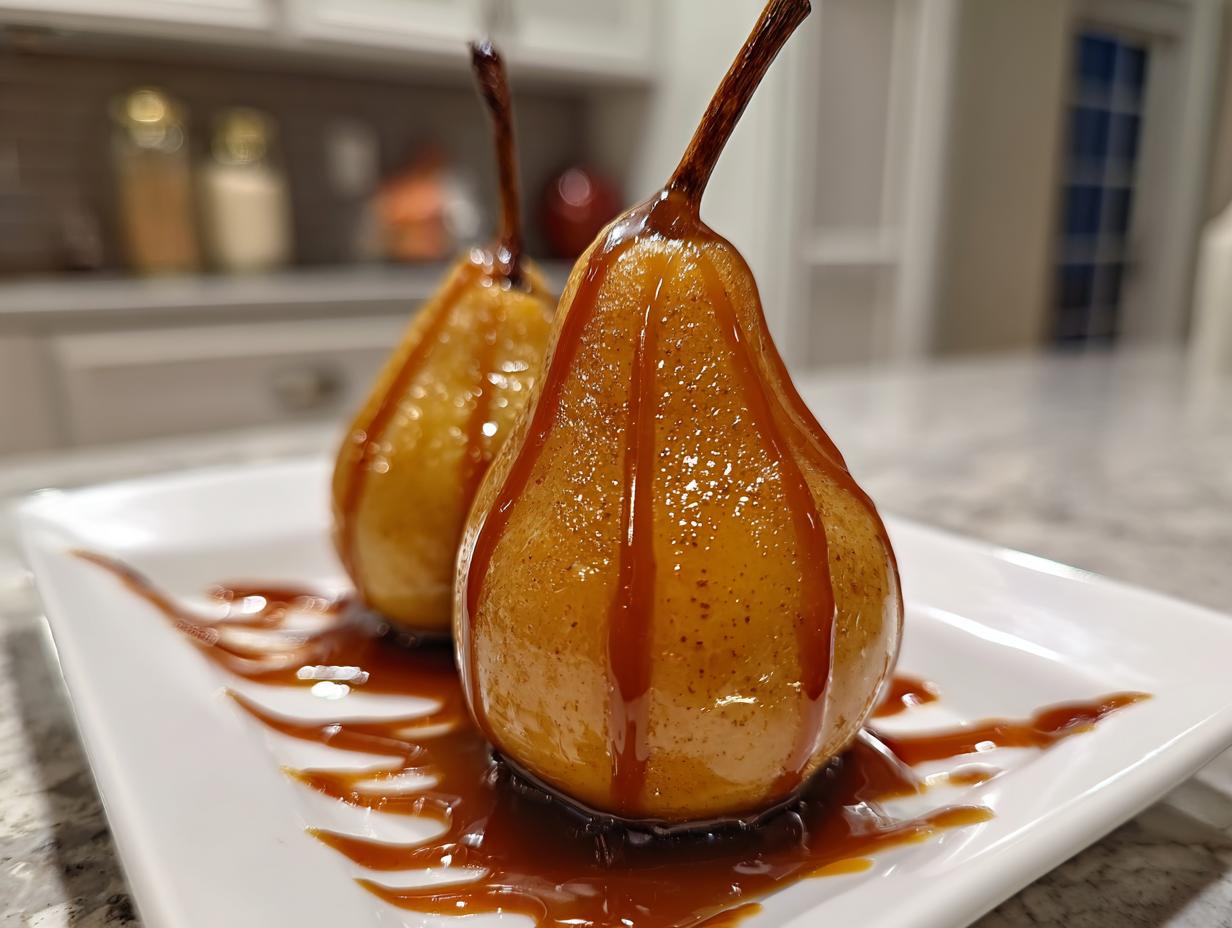
Sometimes, I just want a dessert that looks like it took hours in a fancy pastry kitchen but was actually a breeze to pull off at home. If you agree, then you are going to absolutely flip for these Vanilla Bourbon Poached Pears. Forget those tired old sheet cakes; these are truly show-stopping. Making perfect poached pears is one of those secrets I love sharing because they look incredibly gourmet but rely on simple simmering. They are tender, wonderfully spiced, and frankly, they smell like heaven while they cook. Trust me, this recipe makes you look like a dessert genius without breaking a sweat!
- Why You Will Make These Vanilla Bourbon Poached Pears Again and Again
- Essential Components for Perfect Poached Pears
- How to Prepare Tender Poached Pears Step-by-Step
- Tips for Success When Making Poached Pears
- Variations on Classic Poached Pears
- Make Ahead Elegant Dessert Storage and Reheating for Poached Pears
- Serving Suggestions for Your Poached Pears
- Frequently Asked Questions About Poached Pears
- Nutritional Estimates for Vanilla Bourbon Poached Pears
- Share Your Elegant Fruit Dessert Creations
Why You Will Make These Vanilla Bourbon Poached Pears Again and Again
These become my go-to when company is coming because they tick every single box. You get that incredible sophistication without stressing out your oven or your schedule. They are the definition of an elegant fruit dessert.
- They deliver that perfect tender poached fruit texture that just melts in your mouth.
- The bourbon and vanilla flavor profile is incredibly warm and complex—it feels fancy!
- You can completely make them ahead of time, meaning zero kitchen rush right before serving.
- They are naturally lighter than heavy cakes, but just as satisfying.
Essential Components for Perfect Poached Pears
Look, making something look easy takes homework, right? That’s what I learned moving from restaurant kitchens to my own home. For these poached pears to be truly spectacular—tender, flavorful, and holding their shape—we need the right starting pieces. Precision here pays off huge later. Don’t just grab whatever is sitting on the counter; pay attention to the fruit itself!
The key to keeping that beautiful, elegant shape is starting with a pear that is firm. If you use mushy fruit, you’ll end up with pear soup! I always go for Bosc or Anjou because they hold up beautifully to the simmering process. We want them ripe enough that they aren’t crunchy, but definitely firm to the squeeze.
Ingredients for Vanilla Bourbon Poached Pears
Here is exactly what you need to bring that warm, spiced vanilla flavor to life. The quality of the bourbon matters here because you are drinking the syrup, so choose something you wouldn’t mind having a small taste of on its own!
- Four firm but ripe Bosc or Anjou pears
- Four cups of water, which will turn into that amazing syrup
- One cup of granulated sugar for the poaching liquid
- One cup of good quality bourbon—don’t skimp here!
- One whole vanilla bean, split lengthwise and scraped for all that precious vanilla goodness
- One cinnamon stick for that underlying warmth
- One strip of orange zest—this really brightens everything up
- For the required drizzle: Half a cup of heavy cream, half a cup of granulated sugar, and two tablespoons of unsalted butter.
Necessary Equipment for Poached Pears
You don’t need a massive arsenal, but these specific tools make the job so much cleaner and easier. Trust me on the pot size!
- A saucepan large enough so that your four pears can stand up reasonably straight. If they are too cramped, they won’t poach evenly.
- A melon baller or a very small spoon for coring out the seed pockets from the bottom.
- A small, heavy-bottomed saucepan dedicated solely to making that decadent caramel drizzle.
How to Prepare Tender Poached Pears Step-by-Step
This is where the magic happens! Turning those firm fruits into something truly special requires just a bit of patience and attention to the heat. Don’t rush this part if you want genuinely **tender poached fruit**. When I first learned this, I was so nervous about messing up the beautiful presentation, but seriously, the low and slow method wins every time. We are going to create seriously flavorful **poached pears** that melt in your mouth.
Preparing the Pears and Poaching Liquid
First things first, we need our pears prepped. You must peel them carefully, but please, leave those pretty stems attached! It makes plating so much more elegant later. Now for coring: I always use a tiny melon baller straight up from the bottom because I find it leaves less damage on the sides than trying to pull it down from the top. Scoop out all those seeds gently. Once they’re ready, we build the poaching liquor. Combine your water, the first cup of sugar, that fantastic bourbon, the vanilla bean (seeds scraped right in—get every last bit!), the cinnamon stick, and that little strip of orange zest in your big pot. Bring this mixture up to a nice simmer, making sure all that sugar dissolves completely.
The Poaching Process for Perfect Poached Pears
Once your liquid is simmering nicely, gently nestle those prepared pears into the pot. You want them standing up if possible. It’s important that the liquid mostly covers them; if they are poking out too much, just add a splash more water. Now, pull the heat way back down to low. Low is key here—we are simmering, not boiling! A boil will break them apart, and we want them to stay whole. Cover the pot partially and just let them happily cook for 20 to 35 minutes. You’ll know they are done when you slide a knife point in, and it meets very little resistance. That’s your sign for perfectly tender poached fruit.
Reducing the Syrup and Making the Bourbon Caramel Drizzle
Once the pears are tender, carefully lift them out and set them someplace warm. Now, we turn that cloudy liquid into gold! Crank that heat on the pot to medium-high and let that poaching liquid truly boil down until it’s reduced by about half and looks like a nice, thin syrup. Strain out all those used spices—we don’t need them anymore. For the caramel, this next part needs your full attention: In a separate small saucepan, melt that half cup of sugar over medium heat without stirring it at first. Let it turn a beautiful amber color. When it’s fully melted, pull it OFF the heat immediately and whisk in the butter, then slowly, slowly pour in the heavy cream. I’m telling you, it will bubble up like crazy! Whisk it smooth. That rich sauce is the crowning touch.
Tips for Success When Making Poached Pears
Look, even with an easy spiced pears recipe like this one, there are small tricks I picked up working near the dessert stations in fancy restaurants. These tips ensure you go from ‘pretty good’ to ‘absolutely stunning’ every single time you make these poached pears.
First tip: Don’t cut the pears in half! While slicing them open might seem faster, leaving them whole with the stem intact gives you that stunning, classic presentation. If you cut them in half, you risk the edges getting soft too quickly during poaching.
When you bring that liquid back to a simmer after adding the pears, reduce the heat immediately. If you keep it at a rolling boil, you’ll essentially be boiling the fruit, which makes them break down and turn mushy instead of achieving that prized, gourmet pear recipe texture. We want gentle bubbling—big, slow bubbles, not rapid-fire ones.
My favorite flavor hack? Once the pears are out and you are reducing the syrup, taste it. If it tastes a little thin, you can add a tiny extra tablespoon of sugar—but only after the bourbon has reduced slightly, as alcohol concentrates greatly. Also, don’t discard those whole spices when reducing; float the cinnamon stick and vanilla pod in the syrup as it cools. They release flavor slowly, making the final drizzle taste even more fragrant.
Variations on Classic Poached Pears
One of the things I love most about this base recipe for poached pears is how easily it adapts to whatever I have in the fridge or whatever flavor profile I’m craving. It’s why I see it as such an accessible, **easy gourmet recipe** for any time of year, not just the holidays. You have the rich vanilla bourbon base, but we can easily swap out the liquor or the liquid for something completely different and just as delicious!
If you’re looking for something a little deeper, maybe something that screams cozy autumn or winter festivity, you HAVE to try the red wine version. It gives the fruit such a gorgeous, deep color, and the tannins in the wine balance the sweetness perfectly. It transitions this from a simple fruit dessert to a true show-stopper.

For those of you maybe avoiding alcohol, or if you just want a brighter, tangier flavor, going with a juice base is fantastic. I even have a post on mixing things up with citrus flavors, which you might enjoy if you’re looking for something different than just the standard spiced syrup base. You can find some of my favorite flavor twists here: You can find some of my favorite flavor twists here.
Here are the two most popular swaps I make:
- The Red Wine Poached Pears Swap: This is famous for a reason! You just need to swap out most of the water for wine. The recipe notes mention using dry red wine like a Cabernet Sauvignon. Keep that one cinnamon stick and the orange zest, maybe ditch the vanilla bean this time so the wine shines. You’ll poach them exactly the same way, but the resulting syrup is just stunning.
- Juice Based Poaching (No Alcohol): If you need a kid-friendly or alcohol-free option, use good quality apple juice instead of the water and bourbon combo. You’ll still want to sweeten it with sugar, but you can add extra spice, like maybe a star anise pod or a few allspice berries, to make up for the missing depth from the liquor.
The general rule for any liquid you choose, whether it’s a spirit or straight-up juice, is that you must reduce it down at the end. That reduction step is what concentrates the flavor and turns it into that beautiful, glossy sauce that finishes the whole dish.
Make Ahead Elegant Dessert Storage and Reheating for Poached Pears
This is truly the best part for anyone hosting a large gathering, especially around the holidays. These poached pears qualify as an amazing make ahead elegant dessert because they actually taste better the next day! Once you’ve finished cooking them, let the pears cool completely while still submerged in their strained syrup. Store them in an airtight container—I usually use a nice glass jar—in the fridge for up to three days. They absorb even more flavor as they sit.
When it’s time to serve, just pull them out. You need to reheat them gently, maybe 10 minutes in a small saucepan over very low heat, or even briefly in the microwave. Don’t boil them! Drizzle that warm syrup over them, followed by that incredible caramel sauce, and you’ve got a stunning dessert ready to go. If you need more great make-ahead ideas, check out my favorites here.
Serving Suggestions for Your Poached Pears
So you’ve got these beautiful, perfectly tender poached pears shimmering in that vanilla bourbon syrup—what next? Presentation is everything, right? Like I always say when I’m doing a big holiday meal, the dessert should feel like the grand finale, not just an afterthought. These aren’t meant to be hidden away; they need to be shown off a little!
Serving them slightly warm, as a lovely warm fruit dessert, really wakes up those bourbon and cinnamon aromas. That glorious syrup you reduced? Don’t waste a drop! Spoon a generous amount right over the pear on the plate before you even think about adding anything else.
To really elevate this to a gourmet pear recipe experience, you need a textural contrast. Pears are soft, the caramel is soft, so we need something with a bit of bite or creaminess. Here are a few combinations that I absolutely adore:
- Classic Vanilla Kick: A single scoop of high-quality vanilla bean ice cream. The contrast of the warm pear against the cold ice cream is just heavenly, and the vanilla plays beautifully with the poaching liquid.
- Cheesy Sophistication: For something really unexpected, try serving the pear alongside a tiny dollop of very softly sweetened mascarpone cheese, maybe whisked with a tiny bit of powdered sugar. If you happen to be looking for my famous creamy side dish inspiration, check out my creamy potato recipe—similar idea, pure comfort!
- Crunch Factor: Sprinkle a few toasted, chopped pecans or walnuts right over the whole situation just before serving. It adds that satisfying crunch you didn’t know you needed.
And remember that caramel drizzle we worked so hard on? Drizzle that over the plate artistically—maybe in a little zig-zag pattern across the plate rim. It takes zero extra time but makes the whole plate look incredibly put-together and intentional. Enjoy showing off!
Frequently Asked Questions About Poached Pears
I always get questions when people see how stunning these turn out, yet how few steps they actually involve. Cooking should be straightforward, even when the results look this elegant! These frequently asked questions should clear up any final concerns you have before you start poaching.
What is the best type of pear for poaching?
You absolutely should stick to firm varieties—this is non-negotiable for keeping the shape! I highly recommend Bosc or Anjou pears. They are sturdy enough to handle the simmering time without turning to mush. If you use something already very soft, like a Bartlett that’s perfectly ripe for eating right now, it will likely break down way too fast during the poaching process. We want that tender poached fruit texture, but we need the structure to hold up while it’s in the bath.
Can I make this a wine poached pears recipe instead?
Yes, you totally can! That’s one of my favorite swaps, especially when I want a richer, darker color for a holiday spread. If you want to turn this into a classic wine poached pears recipe, you can easily substitute about three cups of the water in the beginning with a dry, full-bodied red wine, like a Cabernet Sauvignon or Merlot. Keep the bourbon amount around a cup, or just use all wine if you prefer no spirits! Just remember the cooking time might need a tiny adjustment, so always rely on the knife test, not the clock.
How do I get the syrup to thicken properly for my poached pears?
This is where the “gourmet” aspect really comes in! After you pull the soft pears out, you are left with all that flavorful liquid, but it’s too thin to drizzle nicely. The secret is reduction. You need to return that leftover poaching liquid to the heat—medium-high is great for this—and let it actively boil, uncovered. You’re basically evaporating the excess water. Keep boiling it until the volume has noticeably reduced, maybe by half, and it coats the back of a spoon. That concentrates all that vanilla, bourbon, and sugar into a fantastic syrup. Be patient; this usually takes about 10 to 15 minutes, but it’s worth every second for that glossy finish!
Nutritional Estimates for Vanilla Bourbon Poached Pears
Now, I want to be totally upfront with you. Since every single brand of bourbon is different, and whether you choose heavy cream or maybe use a lighter cream substitute drastically changes the final result, I can’t give you an exact blueprint for the calories here. Food blogging is serious business, and I always prefer honesty over fake precision!
The numbers you see online for dishes containing alcohol and sugar can swing wildly. So, please take this as a guideline: since these poached pears rely heavily on sugar for both syrup creation and the caramel drizzle, they are certainly a treat! If you are counting macros or watching sugar intake, the best way to control this lovely elegant fruit dessert is by being mindful of how much extra caramel you spoon over the top.
What I can tell you is that by poaching the fruit instead of baking it in a buttery pastry crust, you are keeping things much lighter overall. It’s a fantastic way to enjoy something truly decadent without totally derailing your day. Just know that the final count is an estimate, and I’m keeping my focus on the joy this dessert brings!
Share Your Elegant Fruit Dessert Creations
I truly hope you give these Vanilla Bourbon Poached Pears a try! Whether you’re whipping them up for a quiet Tuesday night treat or building an entire menu around them for your Christmas or Thanksgiving feast, they are guaranteed to impress. Food is meant to be shared, and seeing your beautiful results honestly makes my day!
When you finish plating these stunners, I would absolutely love it if you came back here and left a star rating. It helps other home cooks feel confident trying this recipe, and hearing how it worked in your kitchen is the best feedback I can get. Seriously, don’t hold back!
If you happen to share a photo of your spectacular elegant fruit dessert on social media—maybe showing off that gorgeous vanilla caramel drizzle—please tag me! I love seeing how you present them. And if you’re ever stuck on something else, or if you just want to tell me about a minor tweak you made, you can always reach out to me directly through the contact page right here. Happy cooking, and enjoy the spotlight these pears are about to get!
PrintVanilla Bourbon Poached Pears with Caramel Drizzle
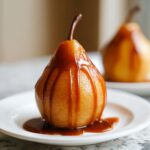
Make these elegant, yet easy, Vanilla Bourbon Poached Pears. They are tender, spiced fruit bathed in a flavorful syrup, perfect as a show-stopper dessert for holidays or special dinners.
- Prep Time: 20 min
- Cook Time: 45 min
- Total Time: 65 min
- Yield: 4 servings 1x
- Category: Dessert
- Method: Stovetop Simmering
- Cuisine: American
- Diet: Vegetarian
Ingredients
- 4 firm but ripe Bosc or Anjou pears
- 4 cups water
- 1 cup granulated sugar
- 1 cup good quality bourbon
- 1 vanilla bean, split and scraped
- 1 cinnamon stick
- 1 strip orange zest
- 1/2 cup heavy cream (for caramel)
- 1/2 cup granulated sugar (for caramel)
- 2 tablespoons unsalted butter (for caramel)
Instructions
- Peel the pears, leaving the stems intact. Use a melon baller or small spoon to carefully core the pears from the bottom, removing the seeds.
- In a saucepan large enough to hold the pears standing up, combine the water, 1 cup sugar, bourbon, vanilla bean seeds and pod, cinnamon stick, and orange zest. Bring the liquid to a simmer over medium heat, stirring until the sugar dissolves.
- Gently place the pears into the simmering liquid. The liquid should mostly cover the pears; if not, add a little more water.
- Reduce the heat to low, cover the pan partially, and poach the pears for 20 to 35 minutes, turning them occasionally, until they are tender when pierced with a knife. The time depends on the ripeness of your fruit.
- Carefully remove the pears from the liquid and set them aside.
- Increase the heat to medium-high and boil the remaining poaching liquid until it reduces by about half and thickens slightly into a syrup, about 10 to 15 minutes. Strain the syrup to remove the spices and vanilla pod.
- To make the caramel drizzle, combine the 1/2 cup sugar in a small, heavy-bottomed saucepan over medium heat. Do not stir initially; let the sugar melt and turn amber. Swirl the pan gently if needed.
- Once the sugar is fully melted and deep amber, remove from heat. Carefully whisk in the butter until melted, then slowly whisk in the heavy cream. The mixture will bubble vigorously. Whisk until smooth.
- To serve, place one or two warm poached pears on a plate. Spoon a generous amount of the reduced poaching syrup over the pears and drizzle with the bourbon caramel sauce.
Notes
- You can make these poached pears ahead of time. Store the cooled pears submerged in their strained syrup in an airtight container in the refrigerator for up to 3 days. Reheat gently before serving.
- For a red wine poached pears variation, substitute 3 cups of the water with a dry red wine like Cabernet Sauvignon.
- Serve these tender fruit with a scoop of vanilla ice cream or a dollop of mascarpone cheese for an extra gourmet pear recipe experience.
Nutrition
- Serving Size: 1 pear with syrup
- Calories: 450
- Sugar: 75
- Sodium: 10
- Fat: 12
- Saturated Fat: 7
- Unsaturated Fat: 5
- Trans Fat: 0
- Carbohydrates: 85
- Fiber: 8
- Protein: 2
- Cholesterol: 35