

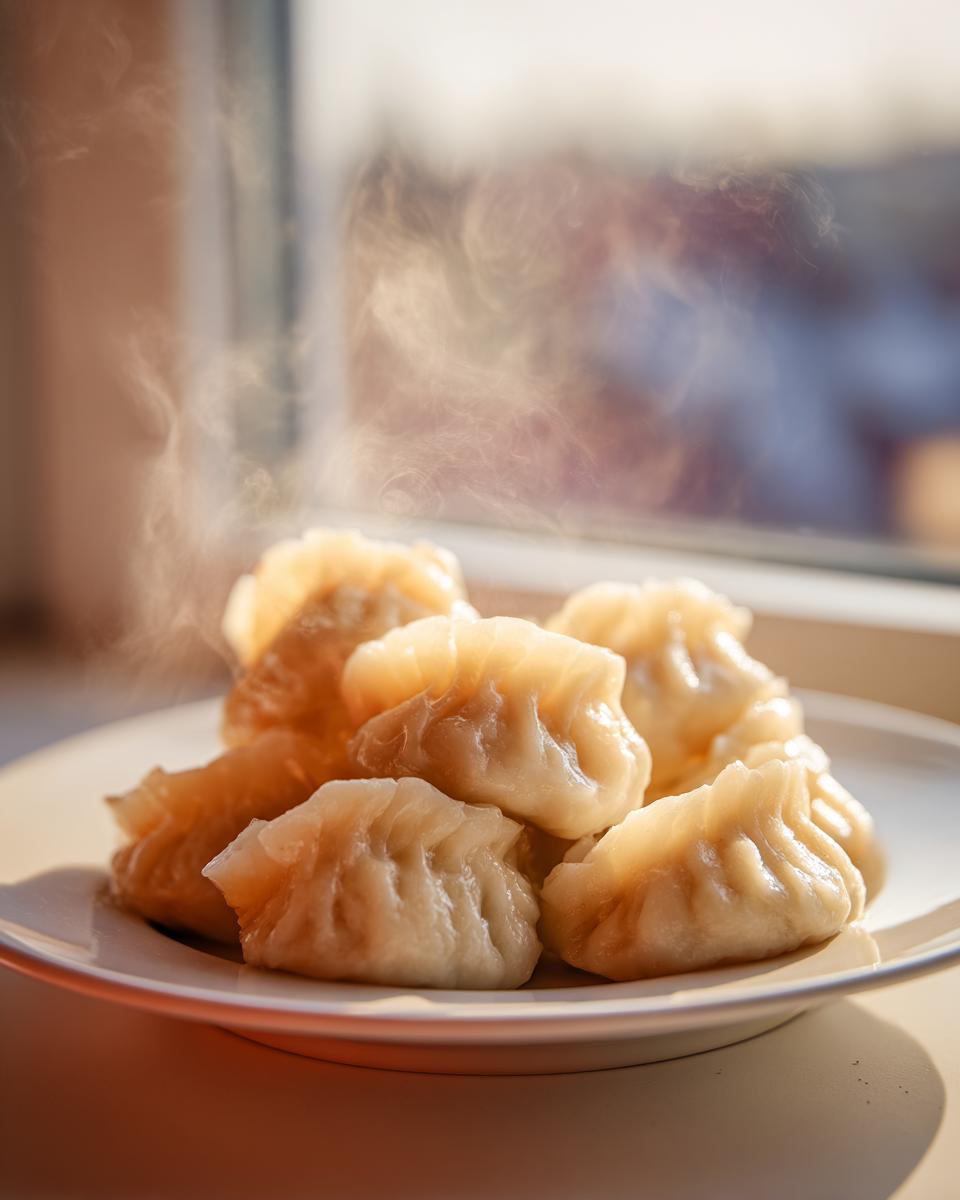
You just can’t beat the comfort that comes from a kitchen full of happy steam and the smell of fresh dough, right? That’s exactly what happens when you commit to making Traditional Chinese Dumplings from scratch—the whole process, wrappers and all! I spent years in professional kitchens learning technique, but my real education came from chasing down the real soul of dishes like these authentic jiaozi. Trust me when I say, I’ve tested this recipe endlessly across dozens of home setups so you don’t have to guess. This Chinese dumplings recipe is the real deal, built on patience and tradition.
We’re going all the way—from mixing the flour to sealing that final perfect half-moon. This commitment to authentic fare is the heart of what we do here at Julia Meal. If you’re looking to bring that true celebratory flavor to your table, even on a Tuesday, you’ve come to the right place. You can find a little more about our dedication to finding these genuine recipes over on our About Page, but for now, let’s get cooking!
- Why This Authentic Jiaozi Recipe Stands Out
- Gathering Ingredients for Traditional Chinese Dumplings
- Mastering Homemade Dumpling Wrappers for Traditional Chinese Dumplings
- Creating the Flavorful Pork Cabbage Dumplings Filling
- Assembling Your Traditional Chinese Dumplings: Rolling and Pleating
- Cooking Methods for Perfect Boiled Chinese Dumplings
- Tips for Freezing Traditional Chinese Dumplings for Later
- Frequently Asked Questions About Chinese Dumplings Recipe
- Sharing Your Traditional Chinese Dumplings Experience
Why This Authentic Jiaozi Recipe Stands Out
Look, there are a million dumpling recipes out there promising shortcuts, but when you want that true, satisfying bite of authentic jiaozi, you need something tested and true. That’s why I stand behind this one; it’s been meticulously checked against traditional standards to ensure the wrapper texture and pork cabbage dumplings filling are just right. We aren’t cutting corners here, we’re honoring the heritage!
This recipe proves that making it from scratch is totally worth the effort. You get these amazing benefits:
- The prep is actually faster than you think, fitting right into a busy weeknight schedule!
- It’s absolutely perfect for making a huge batch of Lunar New Year dumplings.
- The flavor payoff? Wow, the flavor is just so much superior to anything pre-made.
Quick Facts for Your Traditional Chinese Dumplings
Transparency is everything, so here are the essentials for getting started. Forty-five minutes of prep will net you about four servings, which means roughly 40 dumplings if you are careful! The actual boiling takes barely ten minutes once your water is ready. You can totally knock these out when you need a comforting meal fast.
Gathering Ingredients for Traditional Chinese Dumplings
Okay, this is where the magic starts, and honestly, using high-quality ingredients makes a massive difference in an authentic jiaozi. Since we are making the wrappers from scratch, you only need a few pantry staples for the dough. But the filling? Oh, the filling is where that rich pork cabbage dumplings flavor comes from. It’s simple, but every item needs to be accounted for. Don’t rush this part; having everything pre-measured makes the assembly process fly by later!
I pulled all the exact measurements right from my binder so you know you are getting the perfect ratio for juicy dumplings every time. Get your bowls ready!
For the Homemade Dumpling Wrappers
When making your own dough, accuracy matters, especially with the water. You want it warm, but not hot—think the perfect temperature for a baby bottle, you know? Use approximation for the water until that shaggy dough magically comes together.
- 2 cups all-purpose flour
- 1 cup warm water (approximate)
For the Pork Cabbage Dumplings Filling
Here is the heart of our Traditional Chinese Dumplings! Remember, the Napa cabbage needs to be chopped really fine, and you must, absolutely must, squeeze out the liquid later, or you’ll end up with soup instead of filling. You can swap out the pork for ground chicken if you aren’t feeling porky, but the ground pork keeps everything super moist.
- 1 pound ground pork
- 3 cups finely chopped Napa cabbage
- 1 tablespoon soy sauce
- 1 tablespoon Shaoxing rice wine
- 1 teaspoon sesame oil
- 1 teaspoon grated fresh ginger
- 1/2 teaspoon salt
- 1/4 teaspoon white pepper
Mastering Homemade Dumpling Wrappers for Traditional Chinese Dumplings
Alright, we’re moving onto instruction step one, and I have to tell you, making your own homemade dumpling wrappers is non-negotiable if you want these to taste truly authentic. It’s not hard, trust me, but it requires a bit of elbow grease and patience. We are aiming for a dough that’s smooth, elastic, and just begging to be filled. If you skip the resting time, your dough will snap back at you like hungry rubber bands when you try to roll it out later—and nobody has time for that fight!
You want that nice, slightly pillowy texture that holds up perfectly when you boil them. This foundational step creates the structure for all your future authentic jiaozi!
Kneading and Resting the Dough
First things first: combine your flour and warm water. Don’t worry if it looks messy at first; that’s normal. I mix it just until everything is shaggy, and then it’s time to get your hands in there. You need to knead this dough for a solid 8 to 10 minutes minimum. I like to do it right on the counter—no fancy mixer needed! You’re looking for a smooth, dull surface when you’re done, not shiny or sticky. It should feel firm.
Once you get that beautiful, smooth ball, this next part is critical: you must let it rest! Cover that little dough ball with an overturned bowl or wrap it tight in plastic wrap and just walk away for 30 minutes. Seriously, go make a coffee. This rest allows the gluten structure to relax. When you come back, that dough will be so much easier to work with, giving you those wonderfully pliable homemade dumpling wrappers that seal perfectly and don’t tear during boiling.
Creating the Flavorful Pork Cabbage Dumplings Filling
Now that our dough is resting (don’t peek!), we can focus all our attention on instruction step two: the filling! This is where those amazing pork cabbage dumplings really come alive flavor-wise. We need to combine that succulent ground pork with our finely chopped Napa cabbage, all those aromatics, and the seasonings. But listen up, this next part about the cabbage is the secret to avoiding soup at the bottom of your pot!
You absolutely have to squeeze every bit of excess water out of that chopped cabbage. I mean, really wring it out, maybe even put it in a clean kitchen rag and twist! If you skip this step, I promise you will end up with soggy, messy Traditional Chinese Dumplings that burst open when they hit the water. We want firm, flavorful filling, not sloppy mush!
Once the cabbage is dry and all the other filling ingredients are nestled in the bowl with the pork—the soy sauce, the rice wine, the ginger—it’s time for the binding trick. You need to mix everything thoroughly, but here’s the pro move: mix it all in one direction only! Keep stirring round and round until you can feel the mixture getting sticky and slightly paste-like. This action develops the proteins in the meat, which helps everything bind together. When you lift your spoon and the filling sticks to itself in a nice cohesive blob, you know your pork cabbage dumplings filling is ready to go. That sticky texture is your guaranteed ticket to delicious, well-behaved dumplings!
Assembling Your Traditional Chinese Dumplings: Rolling and Pleating
Okay, the dough has rested and the filling is perfectly sticky—it’s time for assembly, which is instruction steps 3 and 4! This is the most fun part, but where a lot of home cooks get intimidated. Don’t let the gorgeous pleats you see elsewhere scare you off. We are making Traditional Chinese Dumplings that taste incredible, and we can handle the looks later!
First, grab that rested dough. You should have divided it into four manageable sections earlier. Take one section and roll it into a long rope, kind of like a fat snake. Then, use a knife or a bench scraper to chop that rope into little 1-inch pieces. These little nuggets are what become your wrappers. If you roll them out now, they’ll dry out, so only roll what you can immediately use!
Rolling the Best Homemade Dumpling Wrappers
This takes practice, but you can totally nail it. Take one of those little dough pieces and flatten it slightly with your palm. Now, start rolling it out with a small rolling pin. You are aiming for a circle about 3 inches across. Here’s the pro tip for an even wrapper: keep turning the dough as you roll. You want the center to be slightly thicker than the edges. This is what helps the wrapper hold up to the boiling water without tearing at the edges where you pleat it.
Sealing and Pleating Your Authentic Jiaozi
Place about one teaspoon of that amazing pork cabbage dumplings filling right in the center of your wrapper. Don’t overfill it, or you’ll never seal it right! Dip just your fingertip in a little bowl of water and run it all the way around the edge of the wrapper—that’s your edible glue for sealing. Now, fold it in half to make that classic half-moon shape. You can do the simplest thing, which is just pressing the edges firmly together with your fingers so they seal shut. Total win!
If you want those beautiful, decorative folds—the classic pleats for authentic jiaozi—do them one side at a time. Pinch the top center edge, then create three or four small, tight folds toward the center, pressing each one firmly against the flat back edge of the wrapper as you go. It’s just like folding a tiny piece of fabric. Once sealed, gently curve the dumpling so the bottom flattens out a little bit. They should look plump and ready for the pot!
Cooking Methods for Perfect Boiled Chinese Dumplings
We’ve come all this way, rolled and pleated every single one of these beautiful packages—now it’s time for the final stage: cooking! Since these are classic Traditional Chinese Dumplings, we are sticking to the tried-and-true method: boiling. This is instruction step five, and it’s surprisingly quick once you have a rolling boil going in a big pot of water.
I can’t stress using a large pot enough. If you crowd the dumplings, they’ll stick together, cook unevenly, and you risk tearing those lovely wrappers you worked so hard on. You want plenty of swimming room for these guys!
Here is the moment of truth for getting perfect boiled Chinese dumplings every time. Don’t just dump them in! That’s a recipe for disaster. Gently slide them into the aggressively boiling water. I like to slide them off my lightly floured cutting board right into the water, making sure they don’t touch each other as they go in. And this is my number one pro tip: after you drop them all in, gently stir the water once or twice right away using a wooden spoon or spatula. Use the back of the spoon to very carefully nudge the bottoms of the dumplings away from the pot floor. This prevents them from sticking once they start to cook!
The visual cues when they are done are so clear! They will cook for about 5 to 7 minutes, but the real giveaway is when they float to the surface. Once they are bobbing happily on top, you can give them another minute just to be sure the rich pork cabbage dumplings filling is cooked through. When they float and look plump, use a slotted spoon to lift them right out. They’ll be tender, slightly chewy, and ready for that dipping sauce you prepared!
Tips for Freezing Traditional Chinese Dumplings for Later
I know what you’re thinking: Can I really save all these amazing Traditional Chinese Dumplings for a night when I’m too busy to make dough? Yes! You absolutely can, and you probably should! Making a huge batch of pork cabbage dumplings is the perfect freezer prep job. Storing them correctly means you can have that authentic taste with almost zero effort later on. We are turning this delicious afternoon project into genuine freezer friendly dumplings!
The key to making sure your frozen ones taste just as good as the fresh ones is all about preventing freezer burn and sticking. We want every dumpling to remain lovingly separate, not fused into one giant ice block. It’s such a high-value step, and honestly, it only takes an extra ten minutes setup time for weeks of easy meals!
Here is exactly how I handle the freezing process from our notes, which is my tried-and-true method:
- First, lay out a baking sheet—any standard size works—and make sure it is lined entirely with parchment paper. Don’t skip the parchment! If the raw authentic jiaozi touch the bare metal, they will stick permanently.
- Place your uncooked dumplings onto that lined sheet. Make sure there is a little space between each one so that they don’t touch. We need them to freeze individually, which is why we call this the ‘flash freeze’ step.
- Pop that entire baking sheet into the freezer, and let them sit until they are rock solid. Depending on their size, this usually takes about an hour or two. You want them to feel hard as little stones before you move them.
- Once they are fully frozen, you can transfer them all straight into heavy-duty, airtight freezer bags. Push out as much air as you can before sealing them up tight. They’ll keep safely like this for months, ready whenever that craving hits!
When you’re ready to cook those freezer friendly dumplings, just toss them straight from the freezer into the boiling water. You don’t need to thaw them at all! Remember to add about 2 or 3 extra minutes to the boiling time we discussed earlier, just to make sure that pork filling gets completely cooked through in the center. See? Easy weeknight dinner solved!
Frequently Asked Questions About Chinese Dumplings Recipe
I always get so many questions when people try making Traditional Chinese Dumplings for the first time—it shows how much you all care about getting it right! I pulled the most common ones right here so you can feel totally confident serving up your authentic jiaozi. It’s all about those little details that make a huge difference in the final bite!
What is the best way to serve authentic jiaozi?
Honestly, the flavor of the pork cabbage dumplings filling is so good that they don’t really *need* a sauce, but a good dipping sauce just ties the whole experience together, doesn’t it? I keep mine super simple! Mix up some good quality soy sauce with a splash of rice vinegar—that slight tartness really cuts through the richness of the pork. If you like a little heat, a tiny drizzle of chili oil is fantastic. That’s it! No need to overcomplicate things when the dumpling is this good.
Can I make these Traditional Chinese Dumplings ahead of time without freezing?
This is tricky! If you’ve assembled your Traditional Chinese Dumplings and you need to cook them within the next hour or so, you can totally just leave them on a lightly floured platter or cookie sheet in the fridge to chill. But here’s the warning: uncooked dough doesn’t like being refrigerated for a long time. After a few hours, the wrapper starts to dry out, and you risk tears when you try to boil them later. So, if you aren’t cooking them within about 90 minutes, please take the time to freeze them properly using the method I detailed above! We want perfect boiled Chinese dumplings, not sad, mushy ones.
How do I prevent my pork cabbage dumplings from tasting bland?
A bland filling usually comes down to not trusting your seasoning before cooking! Remember how we talked about mixing the pork cabbage dumplings filling until it got sticky? That mixes the salt and flavor evenly, but my biggest tip is to always taste a *tiny* bit of the raw mixture first (just a small nibble on a clean spoon!). Seasoning ratios might seem right on paper, but sometimes you need a pinch more salt or a little extra dash of that flavorful Shaoxing rice wine to really make the pork pop. The ginger and sesame oil are essential, so make sure you’re using a full teaspoon of each! They really brighten up the whole profile.
Just so you know, we’re really big on privacy here at Julia Meal, so if you ever have questions about how we handle information, our policy is right here. Happy cooking!
Sharing Your Traditional Chinese Dumplings Experience
And that’s it! You’ve done it! You’ve successfully made authentic, scratch-made Traditional Chinese Dumplings from the dough up. Doesn’t that feel amazing? Seriously, take a moment to admire those perfect little parcels before you dip them in sauce. I am so proud of you for taking the time to honor this amazing food tradition.
Now that you’ve mastered the art of homemade dumpling wrappers and nailed that perfect pork cabbage dumplings filling, I really, truly want to hear about it! Did you manage to get those beautiful pleats? Were these your first time making lunar new year dumplings? Don’t be shy! Head over and check out the contact page if you want to send me a picture or tell me how they turned out.
If you loved how these boiled Chinese dumplings turned out, please consider leaving a rating right on the recipe card when you finish reading. Those little stars help other home cooks feel confident enough to try challenging recipes like this one. Your feedback means the world to us here at the kitchen bench, and knowing you all enjoyed these authentic jiaozi makes all the testing worth it. Happy eating!
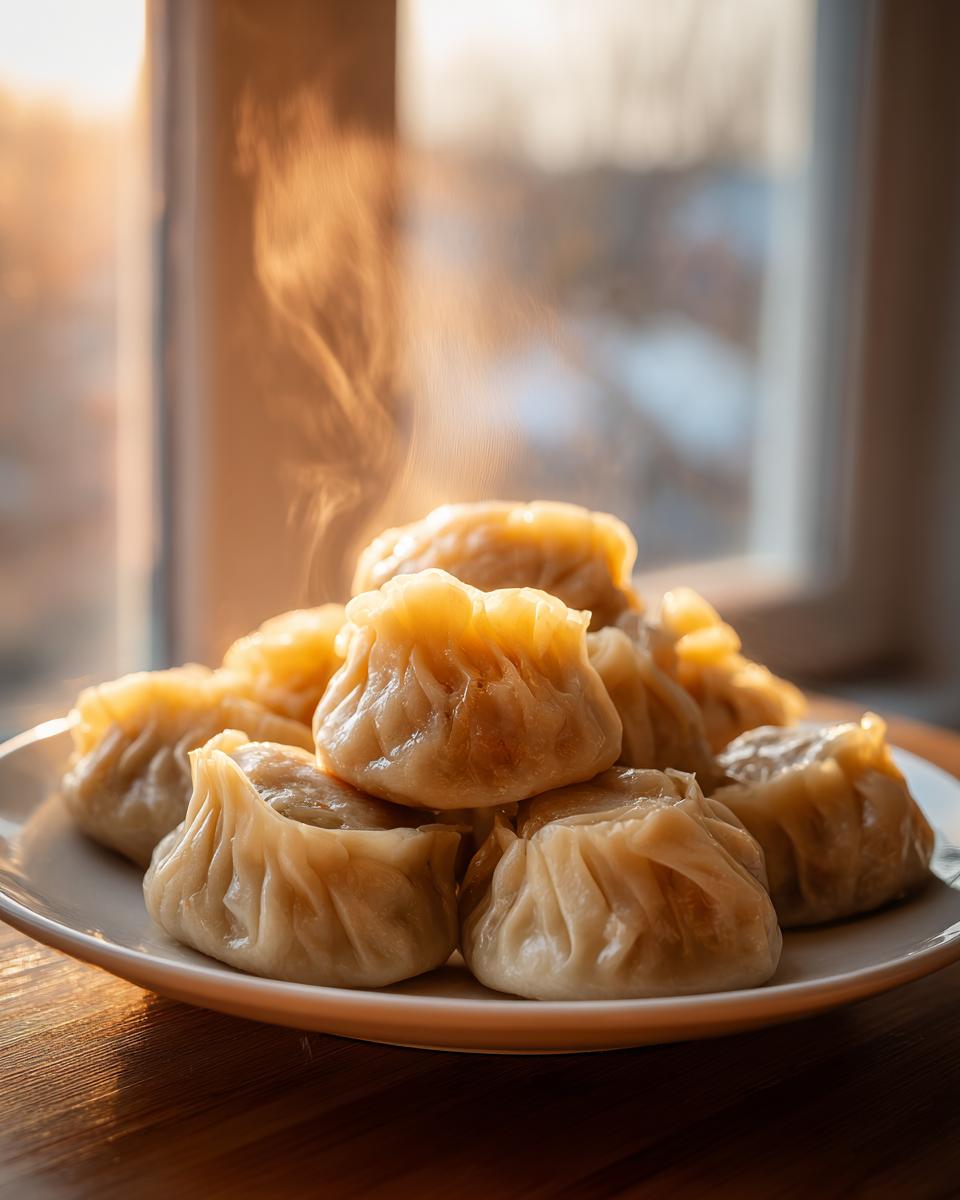
PrintTraditional Pork and Cabbage Jiaozi (Chinese Dumplings)

Make authentic Chinese pork and cabbage dumplings from scratch, including instructions for making homemade wrappers and freezing for later.
- Prep Time: 45 min
- Cook Time: 10 min
- Total Time: 55 min
- Yield: 4 servings 1x
- Category: Dinner
- Method: Boiling
- Cuisine: Chinese
- Diet: Low Fat
Ingredients
- 2 cups all-purpose flour
- 1 cup warm water (approximate)
- 1 pound ground pork
- 3 cups finely chopped Napa cabbage
- 1 tablespoon soy sauce
- 1 tablespoon Shaoxing rice wine
- 1 teaspoon sesame oil
- 1 teaspoon grated fresh ginger
- 1/2 teaspoon salt
- 1/4 teaspoon white pepper
Instructions
- Make the dough: Combine flour and warm water in a bowl. Mix until a shaggy dough forms. Knead on a lightly floured surface for 8-10 minutes until smooth. Cover and let rest for 30 minutes.
- Prepare the filling: Squeeze excess water from the chopped cabbage. In a large bowl, combine ground pork, cabbage, soy sauce, rice wine, sesame oil, ginger, salt, and pepper. Mix thoroughly in one direction until the mixture becomes sticky.
- Roll the wrappers: Divide the dough into four equal pieces. Roll each piece into a long rope and cut into 1-inch pieces. Roll each piece into a thin, round wrapper about 3 inches in diameter.
- Assemble the dumplings: Place about 1 teaspoon of filling in the center of a wrapper. Moisten the edges with water. Fold the wrapper in half to form a half-moon shape and crimp the edges to seal, creating pleats if desired.
- Cook the dumplings: Bring a large pot of water to a rolling boil. Gently drop the dumplings into the water, ensuring they do not stick together. Cook for 5-7 minutes, or until the dumplings float and the filling is cooked through.
- Serve immediately with your preferred dipping sauce.
Notes
- For freezing: Place uncooked dumplings on a parchment-lined baking sheet and freeze until solid. Transfer frozen dumplings to an airtight freezer bag. Cook directly from frozen, adding 2-3 minutes to the cooking time.
- To achieve the best texture, squeeze the liquid out of the cabbage after chopping.
- You can substitute ground chicken or turkey for the pork if you prefer.
Nutrition
- Serving Size: 10 dumplings
- Calories: 350
- Sugar: 2
- Sodium: 450
- Fat: 18
- Saturated Fat: 6
- Unsaturated Fat: 12
- Trans Fat: 0
- Carbohydrates: 30
- Fiber: 2
- Protein: 18
- Cholesterol: 60