
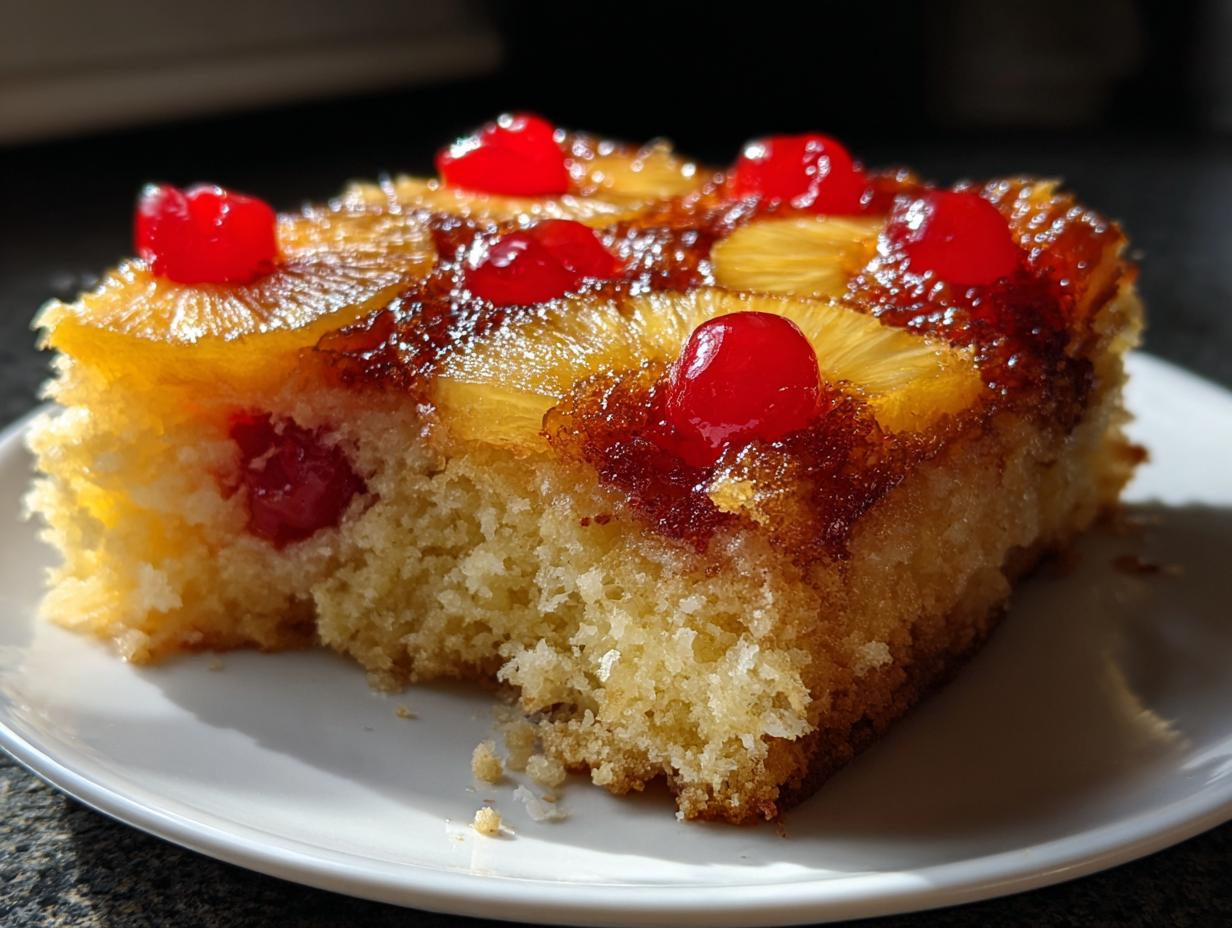
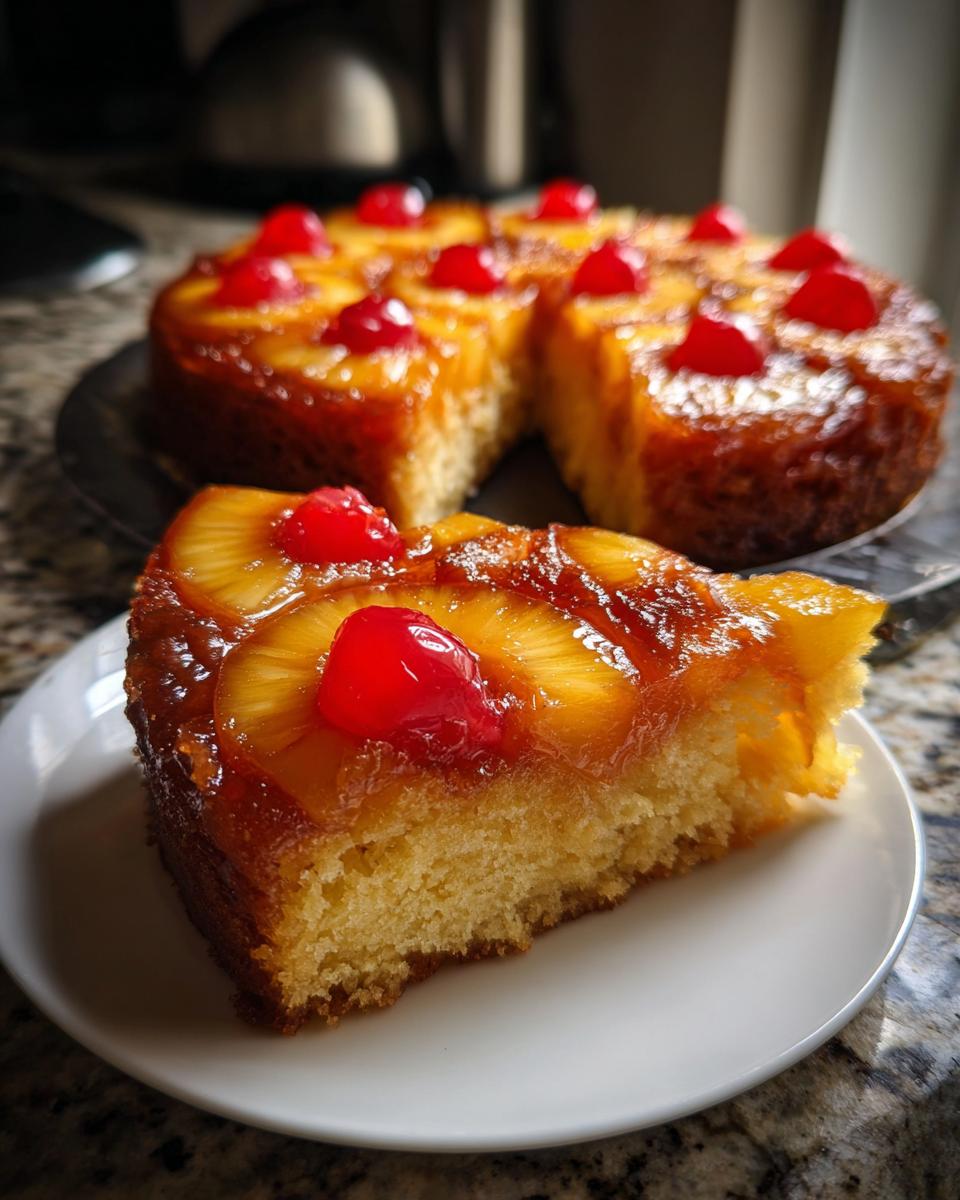
Oh, believe me, when you see that deep, golden-brown caramelized topping flip out onto the plate, you’ll understand why this pineapple upside down cake is the queen of all tropical desserts! It’s pure, sweet sunshine in cake form. Forget those dry, overly sweet versions you might have tried; Julian insists on making this Classic Moist Pineapple Upside Down Cake completely from scratch because, for him, it’s tapping right into the heart of authentic American home cooking. If you want to know more about the journey that brought this classic to our tables, check out our story over at the About page. This recipe works magical things with just butter, sugar, and fruit. It’s nostalgia you can bake, and trust me, it tastes so much better when you skip the mix!
- Why This Classic pineapple upside down cake Recipe Stands Out
- Essential Ingredients for Your pineapple upside down cake
- Step-by-Step Instructions for the Best pineapple upside down recipe
- Tips for Success with Your pineapple upside down cake
- Variations: From Bundt to Individual Serving Cakes
- Serving Suggestions for This Tropical Dessert Ideas
- Storage and Reheating Instructions for pineapple upside down cake
- Frequently Asked Questions About Pineapple Upside Down Cake Recipe
- Share Your Homemade pineapple upside down cake
Why This Classic pineapple upside down cake Recipe Stands Out
So many recipes slap some fruit on top of a plain yellow cake, right? Not this one. When we talk about the pineapple upside down cake, we are talking about building layers of flavor. Julian insists that homemade is the only way because you control the depth of flavor. It’s truly one of the best simple, delicious desserts you can make. You get a texture that is just unparalleled.
- We are starting from scratch, so you know the butter and sugar ratios are perfect.
- The fresh, warm caramel layer is miles beyond anything artificial tasting.
- It stays tender and moist for days—if it actually lasts that long!
Achieving the Perfect Caramelized Pineapple Dessert
This is where the magic happens, seriously. Forget about making a separate caramel sauce! For the best Caramelized Pineapple Dessert, you use the melted butter and the dark brown sugar right there in the bottom of the pan. You melt them together first, then sprinkle the sugar over it. When that bakes underneath the fruit, it creates this impossibly rich, deep amber layer that sticks perfectly. If you don’t do this initial melt and sprinkle, you just get sugary fruit juice—and that is a baking tragedy!
The Secret to a Moist Pineapple Cake
We hit that Moist Pineapple Cake goal in two ways. First, we let the pineapple slices drip right into that butter and sugar mixture, so you’re baking in extra tropical moisture. Second, we treat the cake batter right by creaming that softened butter and granulated sugar until it’s super fluffy. Don’t rush that part! Those air pockets we whip in early expand during baking, keeping the whole thing light, tender, and anything but dry.
Essential Ingredients for Your pineapple upside down cake
Okay, the beauty of this pineapple upside down cake is that most of this stuff is probably already hanging out in your pantry! We need to separate the ingredients for that amazing sticky topping from the ones we use for the cake batter itself. It feels very organized, which I like, because chaos in the topping layer is the last thing we need!
I always double-check that my canned pineapple is the good stuff—packed in juice, not heavy syrup—otherwise, that topping gets way too watery. If you want to see how I get those perfect chewy edges on my Maple Brown Sugar Cookies, check that post out later, but for now, let’s focus on the tropical gold we need here.
Topping Components
This is the easy, gooey part that makes the cake famous. Make sure you have these four things ready before you even think about turning on the oven:
- 1/2 cup unsalted butter (This one needs to be melted down first!)
- 3/4 cup packed light brown sugar (Packed tightly in the cup, please!)
- 1 (20 ounce) can pineapple slices in juice, undrained (Don’t drain it yet!)
- 14 maraschino cherries, stems removed (The bright red jewels!)
Sweet and Buttery Cake Batter Ingredients
This is where we build the structure of our beautiful Sweet and Buttery Cake base. Notice we use two types of sugar here—the brown for the topping and the white/granulated for the cake part. It keeps everything balanced!
- 1 1/2 cups all-purpose flour
- 1 1/2 teaspoons baking powder
- 1/2 teaspoon salt
- 1/2 cup unsalted butter, softened (This needs to be room temperature soft, not melty!)
- 3/4 cup granulated sugar (The white kind!)
- 2 large eggs
- 1 teaspoon vanilla extract
- 1/2 cup milk
Step-by-Step Instructions for the Best pineapple upside down recipe
Alright, let’s get baking! This might look fancy when it flips out, but honestly, the assembly is straightforward. We’re just building the top layer first, then pouring the batter right over it. Make sure you save this post because timing is everything with this pineapple upside down cake. If you need some quick inspiration for other easy bakes, you can check out my simple dessert ideas!
Preparing the Caramelized Fruit Layer
First things first: Preheat your oven to 350 degrees F right away. Grab that 9-inch round cake pan—that’s the size we are aiming for here, by the way! Step one is crucial: Melt that 1/2 cup of butter in the pan itself (yes, right in the pan, don’t use a separate bowl!). Once it’s melted and pooled nicely, sprinkle that 3/4 cup of brown sugar evenly over the top. Now, arrange your pineapple slices right on top of the sugar layer. Pop one cherry dead center in each ring, and then just tuck the rest of the cherries in wherever they fit around the edges. We want full coverage!
Mixing the Classic Pineapple Cake Batter
While the oven is warming up, we build the cake. In one medium bowl, whisk those dry things together: the flour, baking powder, and salt. Set that aside; it’s resting. Now, grab your big mixing bowl—this is where we work that butter and sugar. You need to cream the 1/2 cup of softened butter with the granulated sugar until it gets real light and fluffy. Take your time here! Beat in your two eggs one at a time, making sure each one is mixed in before adding the next. Don’t forget the vanilla! Finally, you add the dry mix and the milk, alternating them. Always start and end with the dry ingredients. Mix gently until it’s *just* mixed. Seriously, stop mixing the moment you don’t see flour streaks anymore. This prevents a tough Classic Pineapple Cake.
Baking and Inverting Your pineapple upside down cake
Carefully spoon all that beautiful batter right over the fruit layer you made earlier. Spread it evenly; don’t stir it down into the fruit or you lose the whole effect! Pop it in the preheated oven and let it bake for 40 to 45 minutes. You know it’s done when a wooden pick slips perfectly in and comes out clean in the center. Here is the most important moment: Take it out and let it cool for ONLY 5 minutes on a wire rack. Not more than five! Then, grab a serving plate, put it over the top of the pan, cover your hands, and flip it quickly! Lift the pan off slowly. That’s your stunning pineapple upside down cake!
Tips for Success with Your pineapple upside down cake
Look, success with a pineapple upside down cake really hinges on whether that gorgeous topping comes out intact. We’ve covered the basic technique, but here are the little secrets I’ve picked up over the years so you don’t end up crying over spilled, caramelized pineapple!
Ingredient Notes and Substitutions
While the recipe listed calls for strictly canned pineapple, I totally encourage a little tinkering if you want to personalize it. If you decide to swap out some of that milk for dark rum—which gives it a fantastic depth, honestly—just be careful not to add too much! Too much extra liquid throws off the structure of the cake batter. Now, if you are thinking about using fresh pineapple? You can, but you absolutely *must* sauté those rings in a little extra butter and brown sugar first before layering them. Fresh pineapple holds way more water than canned, and if you don’t cook it down, you’ll end up with a soupy, soggy mess at the bottom of your cake.
Handling the Inversion
This is the high-stakes moment! Don’t wait too long, but don’t rush it either. Once the cake comes out after that critical 5-minute rest, you need to be decisive. Before you flip it, take a small offset spatula or even a thin butter knife and run it *gently* all around the edge of the pan, right between the cake and the metal. This ensures that no part of the fruit layer has stuck to the sides during baking. If you feel any sticking, coax it free gently. When you flip it onto the plate, do it quickly and confidently. If a piece or two of pineapple sticks to the pan grid? No huge deal! Just grab it with your spatula and place it right back where it belongs before serving. A patched-up cake with perfect caramel is still a win in my book!
Variations: From Bundt to Individual Serving Cakes
The classic 9-inch round pan is wonderful, but let’s be real, sometimes you need presentation magic! People absolutely love seeing this fabulous pineapple upside down cake presented in different ways depending on the party. Whether you want the show-stopping height of a Bundt or the cute, grab-and-go factor of individual portions, this recipe handles it beautifully. If you haven’t seen my other showstopper ring cake, you need to check out my Red Velvet Bundt Cake post too—it proves the shape is half the fun!
Making a Pineapple Upside Down Bundt Cake
Turning this into a full-on Pineapple Upside Down Bundt Cake is surprisingly easy, but you have to respect the pan. Bundt pans have all those nooks and crannies, and if the caramel glaze sticks, you’ve got a disaster on your hands. You need to go overboard with your greasing and flouring routine here, just like you would for any elaborate cake. I usually use my cake goop mixture (you know, the oil/shortening/flour paste) and brush it *everywhere*. If you’re looking for a great starting reference for the technique, check out the advice on this Bundt variation. You might need to bake it about 5 to 10 minutes longer than the round cake, so keep an eye on it. The beautiful ridges will show off that caramelized topping perfectly when you flip it!
Creating Mini Pineapple Upside Down Cakes
This is my favorite variation for summer gatherings or when I just don’t want to deal with cutting a big cake! When converting this to muffin tins for Individual Serving Cakes, you have a couple of choices. If you want to be extra cautious about sticking, use standard cupcake liners—though they hide some of that pretty caramel edge. Honestly, I prefer just heavily greasing and flouring each section of the muffin tin. You’ll need to fill those cups about two-thirds full with batter over the fruit. Since they are smaller, they bake much faster—usually around 18 to 22 minutes. Keep an eye on the edges, and they pop right out! It’s fun to serve these alongside my fluffy vanilla cupcakes on a big dessert platter.
Serving Suggestions for This Tropical Dessert Ideas
This pineapple upside down cake is definitely rich because of all that buttery caramel, so we need things that truly cut through the sweetness when we serve it up. If you’re going for a truly decadent end to a meal, a small scoop of really good vanilla bean ice cream is non-negotiable. The cold creaminess just cuts right through the warm sugar perfectly. For an adult gathering, try serving a slice alongside a bright, tart drink! I always think the flavor profile screams for something fizzy and tart. Think about stirring up a batch of my Cranberry Pomegranate Margarita; it makes for fun Tropical Dessert Ideas that contrast beautifully with the baked pineapple.
Storage and Reheating Instructions for pineapple upside down cake
Well, I hate to say it, but this pineapple upside down cake might be even better the next day! The flavors have a chance to really settle into that buttery crumb. Since it’s so moist, though, you need to be careful about storage so you don’t make it soggy.
Here’s my rule: If you’re serving it within 24 hours and your house isn’t scorching hot, leave it right on the counter. Cover it loosely with a cake dome or tent some foil over it. Refrigerating it tends to dry out the cake part, and we absolutely cannot have that when we’re aiming for that beautiful Retro Fruit Cake texture.
If you absolutely must refrigerate it—maybe you made it two days early—make sure it’s sealed tight in an airtight container. Before serving, bring it back to room temperature for about an hour. That softens the butter again.
If you’re dying to eat it warm (and who isn’t?), reheating is key. I take a single slice and just give it a quick 10-second zap in the microwave. That little burst of heat softens the caramel layer without turning the cake into a rubber disc. If you want to learn how I get my incredibly rich homemade chocolate pudding to stay smooth, check that recipe out! It shares a similar rule about gentle warming.
Frequently Asked Questions About Pineapple Upside Down Cake Recipe
I know you probably have questions brewing, especially if you’re trying this pineapple upside down cake for the first time. It’s always better to ask than to risk a sticky flop! We want you to have the very best results, whether you’re whipping up a quick dinner solution—check out my quick, easy weeknight dinners for inspiration another night—or getting ready for dessert.
Can I use Pineapple Cake with Cake Mix Instead of Scratch?
Look, if you are in a serious pinch, you totally can! The recipe notes mention it briefly. You can use a box of yellow cake mix, but here’s the catch: You have to customize the liquid the box calls for. Instead of using whatever water or milk the box tells you to use, you should use the 1/2 cup of regular milk listed in our from-scratch recipe. That keeps the batter rich enough to handle the cooked fruit on top. It won’t be *quite* as good as this homemade one, but it’s still a gorgeous result!
What is the best way to prevent the topping from sticking?
This is truly job number one! When you put the melted butter and brown sugar down, you need to make sure that layer is perfect before the batter goes on. After it bakes, if you feel the edges sticking when you try to loosen it, run a thin, flexible spatula around the entire circumference of the pan *while the cake is still hot*. If you wait until it cools completely, the caramel hardens too much. Also, make sure you use real butter, not margarine, for that topping layer—it melts cleaner!
Can I add other fruits to this Classic Pineapple Cake?
You absolutely can play around with your fruit toppings on this Classic Pineapple Cake if you want to branch out from the usual cherries. Bananas are a fantastic addition! If you use bananas, slice them thick and lay them directly on top of the brown sugar mixture *after* you place your pineapple rings. Since bananas are so soft, they cook much faster than the pineapple, so you don’t want them submerged in the heavy caramel mixture from step one.
Share Your Homemade pineapple upside down cake
Whew! We made it! Now that you’ve mastered the art of the flip and your kitchen smells like a tropical bakery, I desperately want to see what you created. Seriously, nothing makes me happier than seeing friends and readers make these classic recipes their own!
This recipe for pineapple upside down cake is one of those dishes that people talk about long after dessert is over. I’d love to know how it went in your kitchen. Did the flip go smoothly? Did you stick with the classic cherries or try something new?
Please, please take a photo of that gorgeous, sticky topping and upload it! You can share it with me directly using the contact form here at Contact, or just tag me on social media. Don’t forget to leave a rating and tell me what you loved most about this Best Pineapple Upside Down Recipe in the comments below. Happy baking, friend!
PrintClassic Moist Pineapple Upside Down Cake
Make this classic, moist Pineapple Upside Down Cake from scratch. It features caramelized pineapple rings and cherries baked into a sweet, buttery cake base.
- Prep Time: 15 min
- Cook Time: 45 min
- Total Time: 60 min
- Yield: 8 servings 1x
- Category: Dessert
- Method: Baking
- Cuisine: American
- Diet: Vegetarian
Ingredients
- 1/2 cup unsalted butter
- 3/4 cup packed light brown sugar
- 1 (20 ounce) can pineapple slices in juice, undrained
- 14 maraschino cherries, stems removed
- 1 1/2 cups all-purpose flour
- 1 1/2 teaspoons baking powder
- 1/2 teaspoon salt
- 1/2 cup unsalted butter, softened
- 3/4 cup granulated sugar
- 2 large eggs
- 1 teaspoon vanilla extract
- 1/2 cup milk
Instructions
- Preheat your oven to 350 degrees F. Melt 1/2 cup butter in a 9-inch round cake pan. Sprinkle the brown sugar evenly over the melted butter.
- Arrange the pineapple slices on top of the brown sugar mixture in the pan. Place one cherry in the center of each pineapple ring, and place any remaining cherries around the edges.
- In a medium bowl, whisk together the flour, baking powder, and salt. Set this dry mixture aside.
- In a large bowl, cream together the 1/2 cup softened butter and granulated sugar until light and fluffy. Beat in the eggs one at a time, then mix in the vanilla extract.
- Gradually add the dry ingredients to the wet ingredients, alternating with the milk, beginning and ending with the dry mixture. Mix until just combined; do not overmix.
- Carefully spoon the cake batter over the pineapple and cherries in the pan, spreading it evenly.
- Bake for 40 to 45 minutes, or until a wooden pick inserted into the center comes out clean.
- Let the cake cool in the pan on a wire rack for 5 minutes. Place a serving plate over the cake pan. Invert the cake onto the plate. Remove the pan carefully. Serve warm.
Notes
- For a richer flavor, substitute 1/4 cup of the milk with 1/4 cup of dark rum when mixing the batter.
- If you prefer a quicker method, you can substitute the from-scratch cake batter with one box of yellow cake mix prepared according to package directions, omitting any liquid called for and using the milk specified above.
- This retro fruit cake tastes best when served warm.
Nutrition
- Serving Size: 1 slice
- Calories: 380
- Sugar: 35g
- Sodium: 250mg
- Fat: 18g
- Saturated Fat: 11g
- Unsaturated Fat: 7g
- Trans Fat: 0.5g
- Carbohydrates: 52g
- Fiber: 1g
- Protein: 4g
- Cholesterol: 85mg