
Oh, don’t even get me started on that sad, grainy stuff from a box. You know the one—it promises richness but always ends up feeling like eating chocolate-flavored paste in a bowl. I’ve been around kitchens professionally and at home, and I promise you, we don’t need those artificial flavors when real comfort food is this easy. Forget everything you think you know about quick desserts! I’ve perfected this velvety smooth homemade chocolate pudding that sings with real cocoa flavor and comes together start-to-finish in under 30 minutes. It’s that deep, satisfying hug in a bowl that connects right back to those classic, honest recipes I learned to master years ago. Trust me, this is the one you’ll want to make every time you need that decadent chocolate hit. You can read a little more about our philosophy on simple, joyful cooking over at our About Page, but for now, let’s get cooking!
- Why This Homemade Chocolate Pudding Recipe is Your New Favorite
- Simple Pudding Ingredients for Perfect Homemade Chocolate Pudding
- How to Prepare Creamy Homemade Chocolate Pudding: Step-by-Step
- Tips for Success with Your Best Pudding Recipe
- Variations on Classic Chocolate Pudding
- Serving Suggestions for Your Decadent Chocolate Treat
- Storage and Reheating Instructions for Homemade Chocolate Pudding
- Frequently Asked Questions About Homemade Chocolate Pudding
- Nutritional Estimates for This Rich Cocoa Pudding
- Share Your Creamy Chocolate Pudding Creations
Why This Homemade Chocolate Pudding Recipe is Your New Favorite
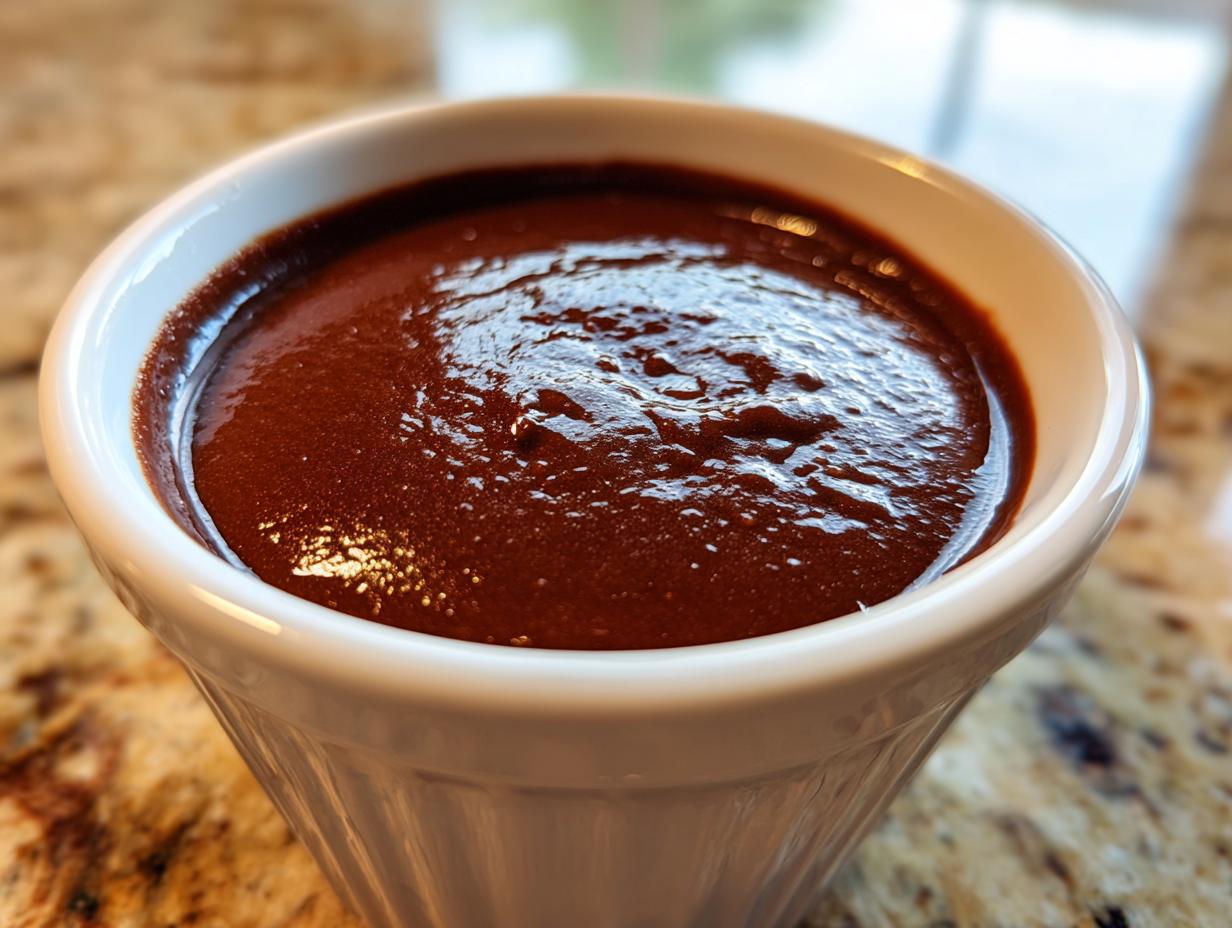
This isn’t just another chocolate pudding recipe; this is the rich cocoa pudding you dream about! We’re focusing purely on creating that dense, creamy chocolate pudding texture that screams decadent chocolate treat. It’s truly the best pudding recipe because it skips all the junk and gets right to the good stuff. It’s pure comfort food dessert, made from scratch, without any fuss.
Achieving Velvety Smooth Pudding Texture
Look, the biggest heartbreak in the kitchen is finding those little rogue lumps hiding in your otherwise perfect dessert. I learned early on that the secret to a truly velvety smooth pudding comes down to the dry ingredients. Before you even think about adding milk, you have to whisk the cocoa, sugar, salt, and cornstarch together like you mean it. Really work that whisk for a solid minute! This step completely disperses the cornstarch so it can work its magic instead of clumping up later.
Quick Chocolate Recipe Ready Fast
You don’t need to wait all day for amazing flavor! We keep the stovetop time short—only about 15 minutes of active cooking—plus 10 minutes of prep. That means you can whip up this easy homemade dessert right after dinner and be serving it chilled before the evening is over. It’s the perfect weeknight treat when you need something truly satisfying, fast.
Simple Pudding Ingredients for Perfect Homemade Chocolate Pudding
The beauty of this classic chocolate pudding recipe is that you probably have almost everything in your pantry right now! We rely on tried-and-true simple pudding ingredients to give us that amazing depth of flavor without needing fancy extras. I’ve made this so many times that the measurements are second nature now.
- 1/4 cup unsweetened cocoa powder
- 3/4 cup granulated sugar
- 1/4 teaspoon salt
- 1/4 cup cornstarch
- 2 cups whole milk
- 2 large egg yolks
- 2 tablespoons unsalted butter
- 1 teaspoon vanilla extract
See? Nothing scary in there! Just good, honest stuff that turns into magic on the stove.
Ingredient Notes and Substitutions
Let’s talk milk for a second. I strongly recommend using whole milk here. It’s essential because the fat content is what really carries the rich cocoa flavor and gives you that luxurious mouthfeel. If you want to push this into the stratosphere of decadent heaven, go ahead and swap out half a cup of that whole milk for heavy cream. Wow! That just amps up the richness big time.
The other key player here is the cornstarch. That’s our workhorse! It’s responsible for turning this liquid mixture into that thick, luscious final product. Make sure you measure it accurately, because it doesn’t play around when it comes to thickening. We don’t use any silly boxed mixes when simple cornstarch does the job perfectly over medium heat.
How to Prepare Creamy Homemade Chocolate Pudding: Step-by-Step
Okay, this is where the magic happens, and I’ll tell you, mastering the stovetop stage made all the difference between a good pudding and THE *best* pudding. You need patience here! I remember the first time I tried tempering the egg yolks—I panicked and dumped them in too fast, ending up with sweet scrambled chocolate bits. Oops! But now, I know the rhythm. It’s less about precise timing and more about constant, gentle attention until that glorious thickness hits.
Mixing Dry Ingredients and Milk
First things first, remember what I said about the lumps? Don’t skip Step 1! Whisk those cocoa, sugar, salt, and cornstarch ingredients until you see nothing but a uniform, fine powder. It has to be perfect flatness before the liquid comes in. Once dry-mixed, slowly drizzle in the 2 cups of whole milk while whisking constantly. You want it completely dissolved so it’s ready to go when it hits the heat.
Tempering Egg Yolks for Smoothness
This is the most important move to keep everything silky. Once your milk mixture is bubbling slightly after 8 to 10 minutes of stirring, you have to temper those yolks—that means slowly introducing the heat. Take about half a cup of the hot liquid and drizzle it *very* slowly into your whisked egg yolks while you whisk the yolks like crazy. You’re gently encouraging them to warm up without cooking immediately. Then, pour that warmed yolk mixture right back into the saucepan and stir hard for one more minute. Now it turns into luxurious, dark velvet!
Finishing and Chilling Your Homemade Chocolate Pudding
As soon as you take it off the heat—seriously, immediately—stir in that butter until it disappears completely. Then the vanilla. Now, for the big chill trick to avoid that weird skin: grab your plastic wrap. You have to press it directly onto the surface of the pudding. I mean, it should be touching the top! This stops air from drying the surface. Pop it in the fridge for at least two hours before serving. That time lets it set up perfectly cold!
Tips for Success with Your Best Pudding Recipe
Okay, you’ve mastered the whisking and the tempering—awesome! But to truly earn the title of “Best Pudding Recipe,” we have to think about the details. These little tweaks are what separate a good stovetop dessert from the kind of rich cocoa pudding people will ask you for again and again. I always feel like a mad scientist when I’m fiddling with these tiny adjustments, but they make a huge difference in the end result!
First off, let’s talk about your cocoa choice. Are you using natural unsweetened cocoa or Dutch-processed? If you want that deep, almost black, impossibly rich chocolate flavor, you really want to use Dutch-processed cocoa powder. It’s less acidic, which gives the pudding a smoother, less bitter profile, which everyone seems to love in a decadent chocolate treat. Natural cocoa works fine, but Dutch just seems to deepen the flavor here.
Another thing I always do is scrape the vanilla bean seeds if I have a vanilla bean on hand, but since we’re keeping this quick, that teaspoon of extract is perfect. Just make sure it’s real vanilla! Shake the bottle—if it smells like vanilla extract you used in grade school, maybe skip it.
When you’re cooking it down on the stove, even after you’ve tempered the eggs, keep that heat at medium, not medium-high. If you get a rapid, rolling boil, you might actually cook out too much moisture, or worse, burn the bottom—and cleaning burnt pudding is a fate I wouldn’t wish on anyone! Constant stirring keeps the bottom from scorching, which is the number one reason pudding gets those weird cooked bits.
If you want to see how another great cook approaches getting the best texture, you can check out this amazing recipe link I found for inspiration on getting that creamy finish: Best Chocolate Pudding Recipe. Honestly, though, stick to my tempering trick and you’ll stop buying the boxed stuff forever!
Variations on Classic Chocolate Pudding
This recipe is fantastic as is—it’s the classic chocolate pudding recipe we all grew up wanting—but sometimes you need a little twist, right? I love experimenting once I have the base perfected. It feels like cheating a little bit because you’re just adding a teaspoon of something extra, but the payoff is huge for this easy stovetop dessert.
If you’re craving something a little more grown-up, try turning this into a decadent chocolate treat with a mocha kick. This is so easy! Just grab some instant espresso powder—you don’t need fancy coffee, just the powder—and whisk about half a teaspoon right in with your dry ingredients when you mix the cocoa and sugar. It won’t taste like coffee, I promise! It just deepens the chocolate flavor so much. It turns it into this rich, dark delight.
Another variation that my nephew asks for constantly is a peanut butter swirl. You don’t need much. Once the pudding is cooked and you’ve poured it into your bowls for chilling, just drop a small spoonful of creamy peanut butter right onto the center of the cooling pudding layer.
The trick here is waiting until it’s starting to cool down for just a minute or two, but before it sets. Then, take a knife or a chopstick and gently swirl it through the top layer. Don’t mix it all the way down; you want those ribbons of salty peanut butter cutting through the sweet, creamy chocolate pudding. It creates this incredible texture contrast. Just remember, if you swirl it, still cover it with plastic wrap pressed right to the surface to stop that skin from forming!
And hey, if you happen to have some leftover chocolate chips lying around—semi-sweet or bittersweet—shove them in right at the end along with the butter. They melt down and add an extra layer of complexity that honestly makes this feel like an expensive dessert. It’s small changes like these that keep a simple comfort food dessert feeling special every time you make it.
Serving Suggestions for Your Decadent Chocolate Treat
Pudding is ready, it’s chilled, and it’s unbelievably creamy! But honestly, serving it plain, while still miles better than anything from the store, feels like leaving a perfect leather jacket in the closet. We need to dress this beauty up a little bit! This is where serving suggestions transform your easy homemade dessert into something truly show-stopping. You’ve earned this decadent chocolate treat, so let’s pile on the toppings!
My absolute favorite way to finish this rich cocoa pudding—and what I think really completes the comfort food dessert experience—is topping it with homemade whipped cream. Seriously, just take heavy cream, a little powdered sugar, and a splash of vanilla, and beat it until it holds soft peaks. Nothing beats that light, airy cloud on top of the dense, smooth pudding. It’s heaven!
If I’m feeling fancy, or if it’s a special occasion, I’ll grab a vegetable peeler and shave some high-quality dark chocolate right over the top of the cream. The slight bitterness of the dark chocolate against the sweet pudding is just divine. It adds texture, too, which is always a win.
But don’t forget about fresh fruit! Because this is such a deep, rich chocolate flavor, brighter flavors really pop against it. Fresh raspberries are my go-to; their tartness cuts right through the richness perfectly. You can also dice up some fresh strawberries or even use thinly sliced bananas. Imagine spooning that cool, velvety smooth pudding with some bright red berries and a dollop of cream—that’s what I call an easy stovetop dessert triumph!
For fun texture, try crushing some extra dark chocolate wafer cookies and sprinkling them on. It gives you that nice little crunch that contrasts with the pure silkiness of the pudding underneath. Whatever you choose, serve it cold, grab a spoon, and get ready to enjoy the best homemade chocolate pudding you’ve ever made!
Storage and Reheating Instructions for Homemade Chocolate Pudding
Now that you’ve made what I’m convinced is the ultimate rich cocoa pudding, we need to talk about keeping it amazing. The wonderful thing about this easy stovetop dessert is that it actually tastes *better* the next day once it’s fully settled and chilled, but you have to store it correctly. Listen to me: that plastic wrap rule is the most important preservation tip in this entire recipe!
You absolutely must press the plastic wrap directly onto the surface of the pudding every single time you store it. I mean, it needs to be touching the chocolate so no air gets in. If you leave a gap, you’ll wake up to a thick, rubbery layer of skin on your beautiful creation, and nobody wants that. That skin forms when the surface dries out, and it ruins the velvety smooth pudding consistency we worked so hard to achieve.
When stored properly, sealed tightly against the surface, this homemade chocolate pudding will last beautifully in the refrigerator for about four to five days. It’s perfect for making ahead if you’re planning a dinner party! I’ve actually found that the flavor deepens slightly on day two, making it an even better comfort food dessert later on.
As for reheating? Honestly, you shouldn’t! This is meant to be enjoyed cold. If you try to reheat it, the cornstarch and egg structure will break down, and you’ll end up with slop instead of a decadent chocolate treat. Just pull those individual bowls out of the fridge about 10 or 15 minutes before you plan to eat them to take the deep chill off, add your toppings, and dig in. Cold is the way to go for the best texture!
Frequently Asked Questions About Homemade Chocolate Pudding
I know when you move away from a boxed mix to a from scratch dessert, you’re going to have questions! It’s totally natural. I’ve tried to cover all the little hiccups over the years. If you have any other burning questions after making this easy stovetop dessert, please don’t hesitate to reach out via our Contact Page. Here are the things folks ask me most often.
Can I make this chocolate pudding recipe vegan?
That’s a great question about making it vegan! You absolutely can adapt it, but because we rely on both eggs and dairy for the ultimate creamy chocolate pudding, you have to swap out a couple of things. You’ll want to use a rich plant-based milk, like full-fat oat or cashew milk, instead of the whole milk. To replace the richness of the butter, use a high-quality vegan butter stick.
The real challenge is the egg yolks, since they provide structure and richness. For a vegan version, I usually recommend increasing the cornstarch slightly—maybe by another teaspoon—to compensate for the missing thickening power of the yolks. Keep cooking it gently until it’s good and thick. You might lose a tiny bit of that classic richness, but it will still be a delicious, decadent chocolate treat!
Why is my homemade chocolate pudding runny?
Ugh, the dreaded runny pudding! This usually boils down to one of two things, and it usually happens because we rushed the stovetop part. First possibility: you didn’t cook it long enough after adding the yolks back in. Remember, after tempering and returning the yolks, you need to let it *vigorously* stir for at least one full minute until it’s visibly thick. Second, and more common: you didn’t whisk your cornstarch properly in the beginning, so it didn’t fully activate its thickening power.
If it’s runny right off the stove, put it back on medium heat and stir constantly until you see it start to just barely bubble (and really thicken up). Don’t panic! It usually just needs a few more minutes of dedicated stirring to set properly.
What is the best way to use up extra egg yolks?
If you’re making a batch just for a few people and only need a couple of yolks, you might end up with an extra one after making this recipe! Don’t let it go to waste. I always keep a tiny container of egg whites specifically for scrambling later, but if you have extra yolks, they are liquid gold for other desserts. They are perfect for spiking a crème brûlée recipe—just a couple of extra yolks give it so much body!
If you’re feeling ambitious, use them up right away to make a small batch of lemon curd. Lemon curd uses only yolks and cooks up beautifully and quickly on the stovetop. It’s another fantastic, easy homemade dessert that pairs perfectly with the rich cocoa flavor of the pudding if you serve them side-by-side. It’s all about using everything we bring into the kitchen!
Nutritional Estimates for This Rich Cocoa Pudding
I always feel a little bit like a mad scientist when I pull out the nutritional facts for something this comforting! Remember, this is the best, rich cocoa pudding made from scratch, so it’s going to have real ingredients—real milk, real butter—which means it’s satisfying! The numbers below are just an estimate for one serving based on the ingredients listed, but they can absolutely change depending on what specific brands you use, especially for the milk and butter.
Don’t stress over these numbers too much; this is a comfort food dessert, meant to be enjoyed! But for those of you who like to keep track, here’s the simple rundown for one bowl of this glorious, creamy chocolate pudding:
- Calories: 305
- Fat: 12g
- Saturated Fat: 7g
- Carbohydrates: 47g
- Sugar: 38g (That’s from the real sugar and milk, not powders!)
- Protein: 7g
See? That protein count proves we’re getting great dairy goodness in here! Just keep in mind that since we are using whole milk and real butter, the fat content is perfectly normal for a truly decadent chocolate treat. If you swap to skim milk, those numbers will drop on the fat side, but honestly, you lose a bit of that velvety smooth pudding texture we worked so hard to create!
This is what makes homemade worthwhile—you control every single element going into your food. Enjoy it!
Share Your Creamy Chocolate Pudding Creations
Alright, the absolute best part of making any recipe—especially one as wonderfully comforting as this homemade chocolate pudding—is seeing it in your kitchens! Honestly, that’s why I write these down. I want to know if you ended up topping it with fresh raspberries or going full classic with homemade whipped cream. Did you manage to keep your plastic wrap perfectly flush against the surface, or did you end up with a little bit of skin? Tell me everything!
If you made this recipe, please, please leave a rating below! It truly helps other home cooks feel confident trying out this simple pudding recipe. Just a quick five stars tells me you got that perfect, velvety smooth texture we were aiming for. That feedback is so important to me as I keep testing and refining all these classic family favorites.
And when you share your gorgeous bowls of rich cocoa pudding on Instagram or Facebook, please tag me! I love seeing your beautiful dessert spreads. It lets me know that the language of family, comfort, and amazing food is truly coming through from my kitchen to yours. We’re building a little community here, one perfect spoonful of chocolate pudding at a time. Before you go, just a quick reminder about keeping things right here on the site, you can always check out our Privacy Policy if you have any concerns about your data. Happy scooping!
PrintThe Best Creamy Homemade Chocolate Pudding (From Scratch, Ready in 30 Minutes)

Make rich, velvety smooth chocolate pudding from scratch using simple pantry staples. This easy stovetop dessert beats any boxed mix and is ready quickly for a decadent comfort food treat.
- Prep Time: 10 min
- Cook Time: 15 min
- Total Time: 25 min
- Yield: 4 servings 1x
- Category: Dessert
- Method: Stovetop
- Cuisine: American
- Diet: Vegetarian
Ingredients
- 1/4 cup unsweetened cocoa powder
- 3/4 cup granulated sugar
- 1/4 teaspoon salt
- 1/4 cup cornstarch
- 2 cups whole milk
- 2 large egg yolks
- 2 tablespoons unsalted butter
- 1 teaspoon vanilla extract
Instructions
- In a medium saucepan, whisk together the cocoa powder, sugar, salt, and cornstarch until combined.
- Gradually whisk in the milk until the mixture is smooth.
- Place the saucepan over medium heat. Cook, stirring constantly with a whisk, until the mixture thickens and begins to bubble. This takes about 8 to 10 minutes.
- In a small bowl, whisk the egg yolks lightly. Temper the yolks by slowly whisking about 1/2 cup of the hot pudding mixture into the yolks.
- Pour the tempered yolk mixture back into the saucepan, whisking constantly. Continue to cook for 1 minute, stirring vigorously, until the pudding is very thick. Do not let it boil rapidly.
- Remove the saucepan from the heat. Stir in the butter and vanilla extract until the butter is completely melted and incorporated.
- Pour the pudding into individual serving bowls or a single large bowl. Press plastic wrap directly onto the surface of the pudding to prevent a skin from forming.
- Chill in the refrigerator for at least 2 hours, or until cold and set.
Notes
- For a lump-free consistency, ensure you fully whisk the dry ingredients together before adding any liquid.
- If you want a richer flavor, substitute 1/2 cup of the milk with heavy cream.
- For a mocha flavor, add 1/2 teaspoon of instant espresso powder with the dry ingredients.
Nutrition
- Serving Size: 1 serving
- Calories: 305
- Sugar: 38
- Sodium: 180
- Fat: 12
- Saturated Fat: 7
- Unsaturated Fat: 5
- Trans Fat: 0
- Carbohydrates: 47
- Fiber: 2
- Protein: 7
- Cholesterol: 75