
Oh, the holidays! That wonderful, frantic time when the very air smells like cinnamon and sugar. If you’re anything like me, you want your kitchen filled with **festive food for parties** and beautiful things to give away, but honestly, who has the time for complicated baking these days?
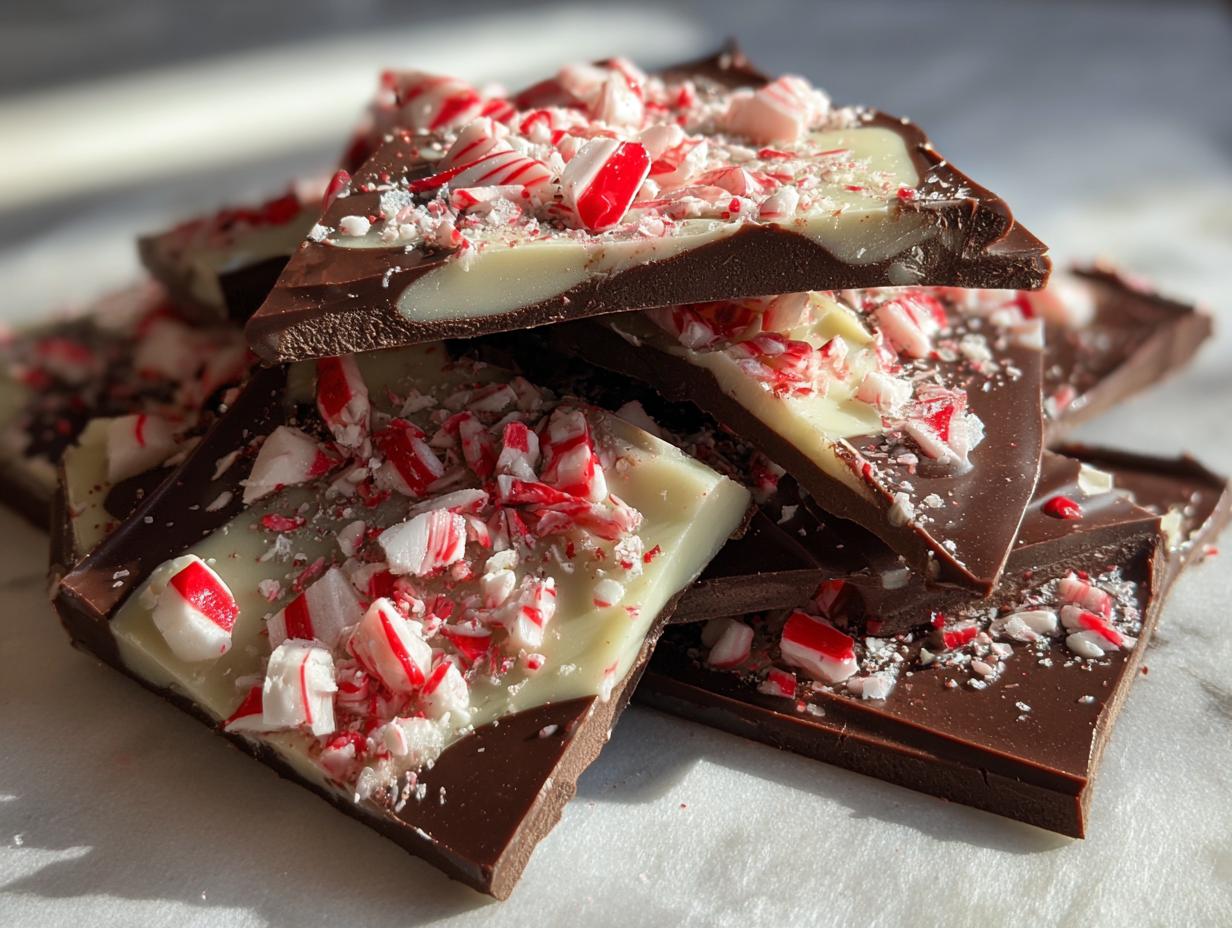
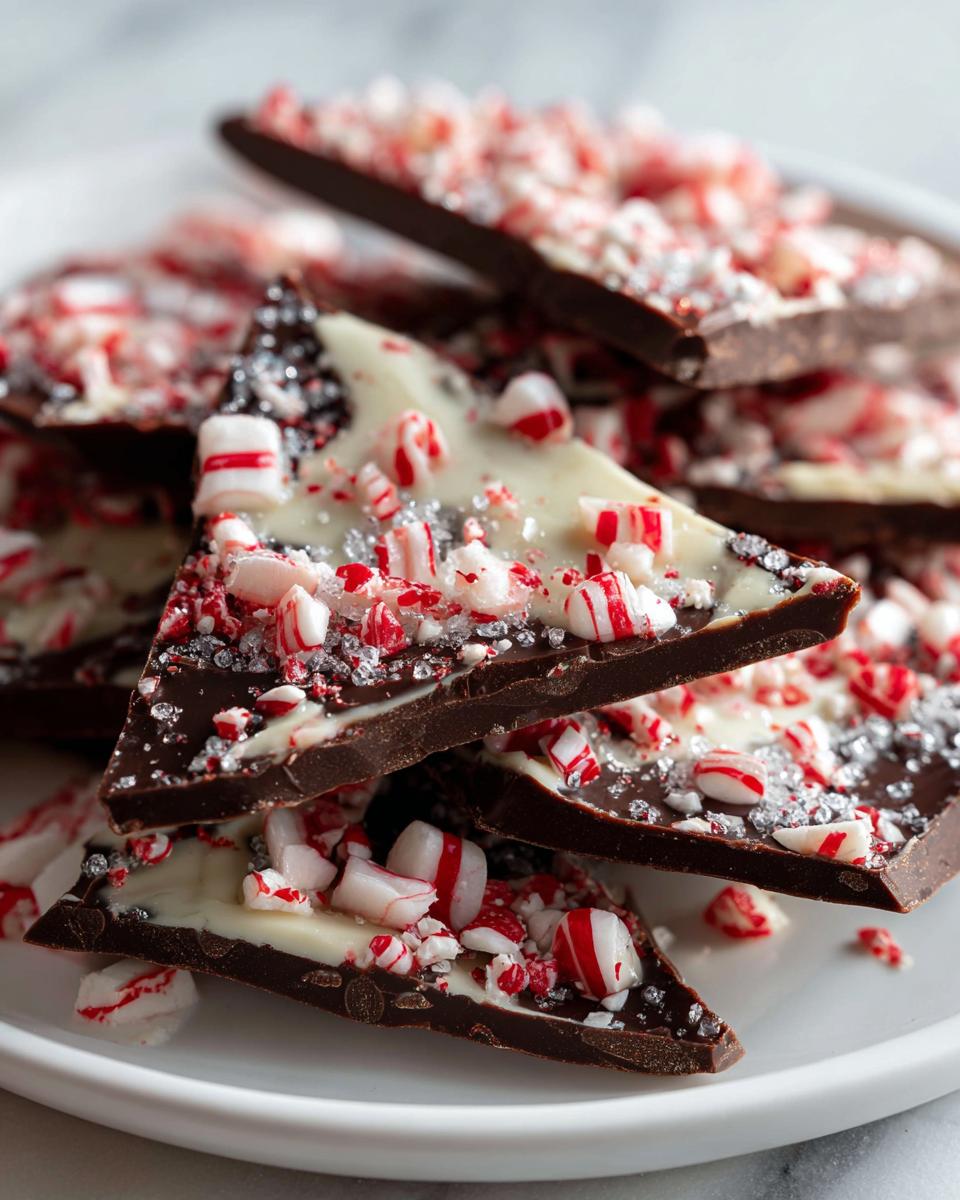
That’s why I’m thrilled to share what I truly believe is the ultimate **peppermint bark recipe**. This is my version of the **Easy Peppermint Bark Recipe**, and I promise you, it’s a lifesaver. It’s got just three ingredients, absolutely no baking involved, and looks fantastic when you wrap it up. If you love other quick holiday treats, you should also check out my guide for simple delicious desserts!
I’m Julian Maxwell, and after years in professional kitchens, my goal here at Julia Meal is always the same: taking those high-end techniques and making them totally accessible for your home kitchen. This candy is proof that simple ingredients, handled right, create magic. We are going to make the best **Homemade Peppermint Bark** together.
- Why This Easy Peppermint Bark Recipe Works for Everyone
- Ingredients for the Ultimate Peppermint Bark Recipe
- How to Make Homemade Peppermint Bark: Step-by-Step Instructions
- Tips for Success with Your Peppermint Bark Recipe
- Storage and Gifting: Making Your Homemade Peppermint Bark Last
- Festive Variations for Your Peppermint Bark Recipe
- Frequently Asked Questions About This Christmas Chocolate Bark
- Estimated Nutritional Snapshot for this Simple Peppermint Dessert
- Share Your Homemade Peppermint Bark Creations
Why This Easy Peppermint Bark Recipe Works for Everyone
When the holidays hit, you don’t need something fussy. You need something that looks like you spent all day on it but only took 20 minutes of active work. That’s the beauty of this **peppermint bark recipe**! It delivers maximum festive impact with minimum fuss. Seriously, it’s my secret weapon for holiday spreads.
Here’s why this **Christmas Chocolate Bark** keeps making it onto my kitchen counters every year:
- It needs only three core ingredients—chocolate, white chocolate, and candy canes. You probably have most of this already!
- It’s completely no-bake. Forget juggling oven times; this just needs space in the fridge.
- It sets up fast, meaning you get that satisfying snap in under an hour.
- It’s perfect for gifting. Wrap a few pieces up, and suddenly, you’re the master of **Homemade Candy Gifts**!
Quick Prep and Minimal Cleanup
Because this is a melt-and-pour situation, the active time for this **peppermint bark recipe** is ridiculously short. You’re mostly just melting and stirring. We aren’t creaming butter or whisking eggs—we’re just perfectly melting two types of chocolate. That means 10 minutes max of active hands-on time before you slide the whole thing into the fridge. Cleanup is basically just a bowl or two and the spatula you used for spreading. It’s the definition of a **Quick Christmas Candy**.
Ingredients for the Ultimate Peppermint Bark Recipe
The secret to making this **White Chocolate Peppermint Bark** look and taste expensive lies in using quality chocolate—not just any bag of chips will do! We are keeping this recipe down to three core components to make it truly easy. Remember, precision here leads to perfect layers.
Here is exactly what you need for about 16 beautiful servings of this **No Bake Holiday Candy**:
8 ounces semisweet chocolate, chopped
8 ounces white chocolate, chopped
1 cup crushed candy canes
Ingredient Notes and Substitution Options
I know baking with chocolate can be intimidating, so let me give you a few pointers. For the best flavor and texture, I always recommend using good quality bars that you chop yourself, rather than standard chocolate chips. Chips have stabilizers that keep them from melting beautifully smooth.
If you really need to stretch the ingredients for your **Festive Chocolate Treats**, you could make a **4 Ingredient Bark Recipe** by adding a tiny bit of peppermint extract to the white layer and skipping the second type of chocolate, but honestly, the dark layer really makes the flavor pop.
For the candy canes, if you can’t find the classic red and white, any peppermint hard candy will work! Just crush them up until you have a nice mix of fine dust and medium chunks. That variation in texture is part of the fun.
How to Make Homemade Peppermint Bark: Step-by-Step Instructions
Alright, now for the fun part! Following this **peppermint bark recipe** is less about hard baking and more about careful assembly. We need to respect the chocolate, which means treating it gently when we melt it down. This is where a lot of people go wrong, but I’ll show you how to get that professional, non-grainy finish you see in the stores.
First things first—get your pan ready. Line that 8×8 pan with parchment paper, making sure you leave some overhang on the sides. Trust me, using that overhang is how you get clean removal later! Once that’s done, it’s time to tackle the dark chocolate. We’re going straight to the microwave.
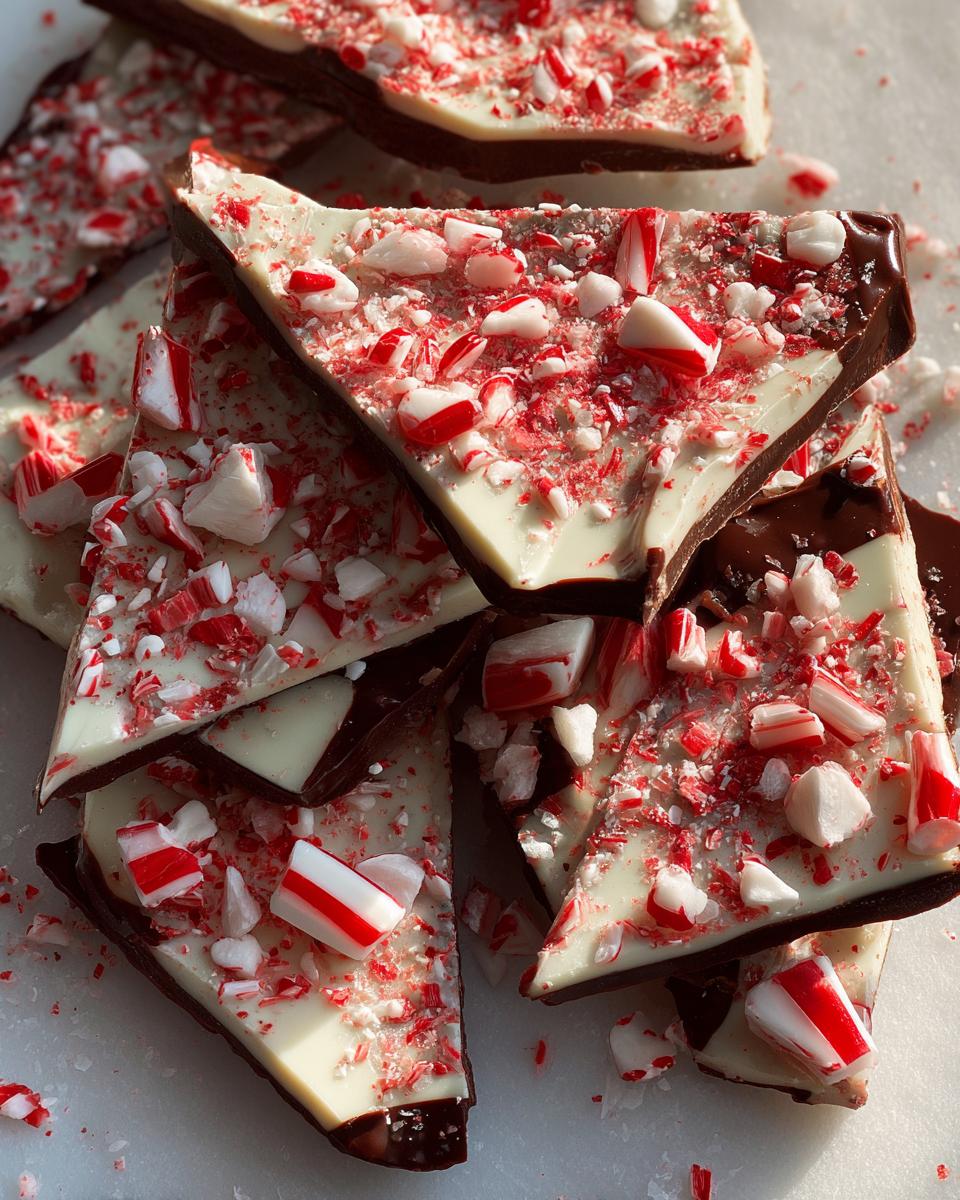
We only use low heat and short bursts for this **Layered Chocolate Bark**. Pop the chopped semisweet chocolate in there for 30 seconds, stir it thoroughly, then repeat in 30-second blasts, stirring every single time until it’s almost totally melted. Pour that beautiful dark layer into the prepared pan and use an offset spatula—or just the back of a spoon if you don’t have one—to spread it evenly. Slide it into the fridge to firm up for about 10 minutes.
Once that base is nice and firm, you can melt the white chocolate the same way. Once it’s silky smooth, pour it right over the set dark chocolate. This is the moment to hurry up! You want to get your candy canes sprinkled on top right away so they stick nicely. I’ve got more details on melting chocolate below, but for now, get it chilled for at least 30 minutes until it’s rock solid. If you want the full breakdown on melting chocolate smoothly, check out this guide on saltine cracker toffee recipe easy; the technique is identical!
Achieving Smooth Chocolate Layers for Your Layered Chocolate Bark
The biggest fear people have when working with chocolate is seizing, right? We want glossy, pourable liquids, not grainy clumps! The secret to keeping chocolate happy is gentle heat and zero steam. When microwaving, sticking to those 30-second bursts prevents pockets of the chocolate from overheating while the rest stays cold. Stirring evenly distributes that heat. This ensures both your dark and white layers are perfectly smooth for your **peppermint bark recipe**.
Now for an extra trick: if you’re working in a humid kitchen, add just one teaspoon of coconut oil or vegetable shortening to the bowl of chocolate before you start microwaving. It helps stabilize the melting process and gives you an even more luxurious, drippy texture. That little bit definitely boosts the quality of your final **Christmas Chocolate Bark**!
Crushing Candy Canes for the Perfect Crunch
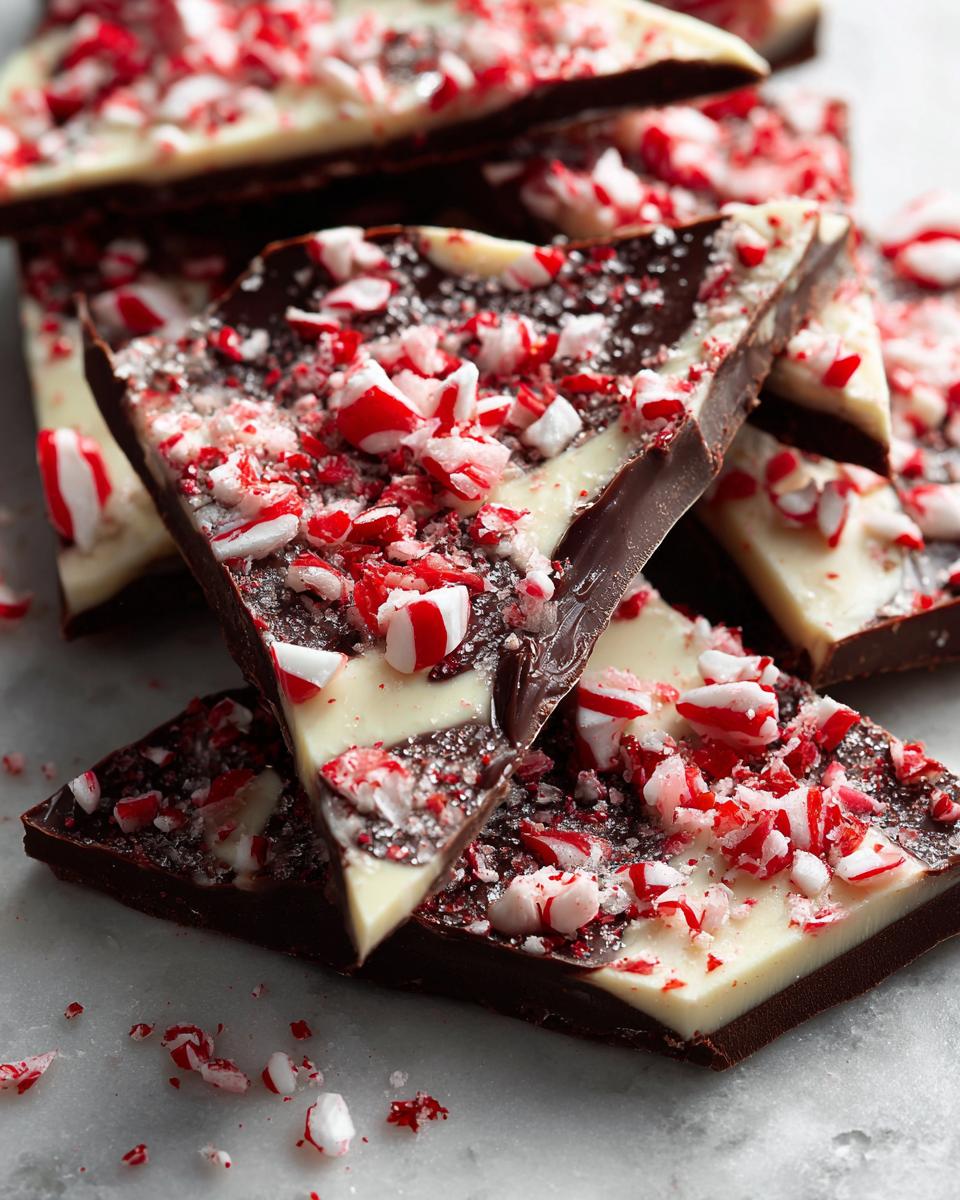
You can’t just throw whole candy canes on top, obviously! To get the best texture, take your hard candy canes—about a cup’s worth—and toss them into a heavy-duty zip-top bag. Seal it, push out most of the air, and then get aggressive with them using a rolling pin or the bottom of a heavy sauce pan. You want variation here: some dust, some small shards, and a few decent chunks. That unevenness makes every bite interesting!
As soon as you pour that final white chocolate layer, scatter those crushed mints right over the top. Don’t dump them all in one spot! Be generous and spread them out. Then, gently press them down with the palm of your hand or a clean spatula. You don’t need to mash them, just a gentle press ensures they anchor themselves into the white chocolate before it sets. If you skip this step, they just slide right off! For more tips on holiday spreading, take a peek over at Seasonal Crave’s peppermint bark guide!
Tips for Success with Your Peppermint Bark Recipe
Even though this is a super simple **peppermint bark recipe**, I have a few little secret moves that take it from “homemade” to “wait, did you buy this from a fancy chocolatier?” The texture and the clean break are everything here.
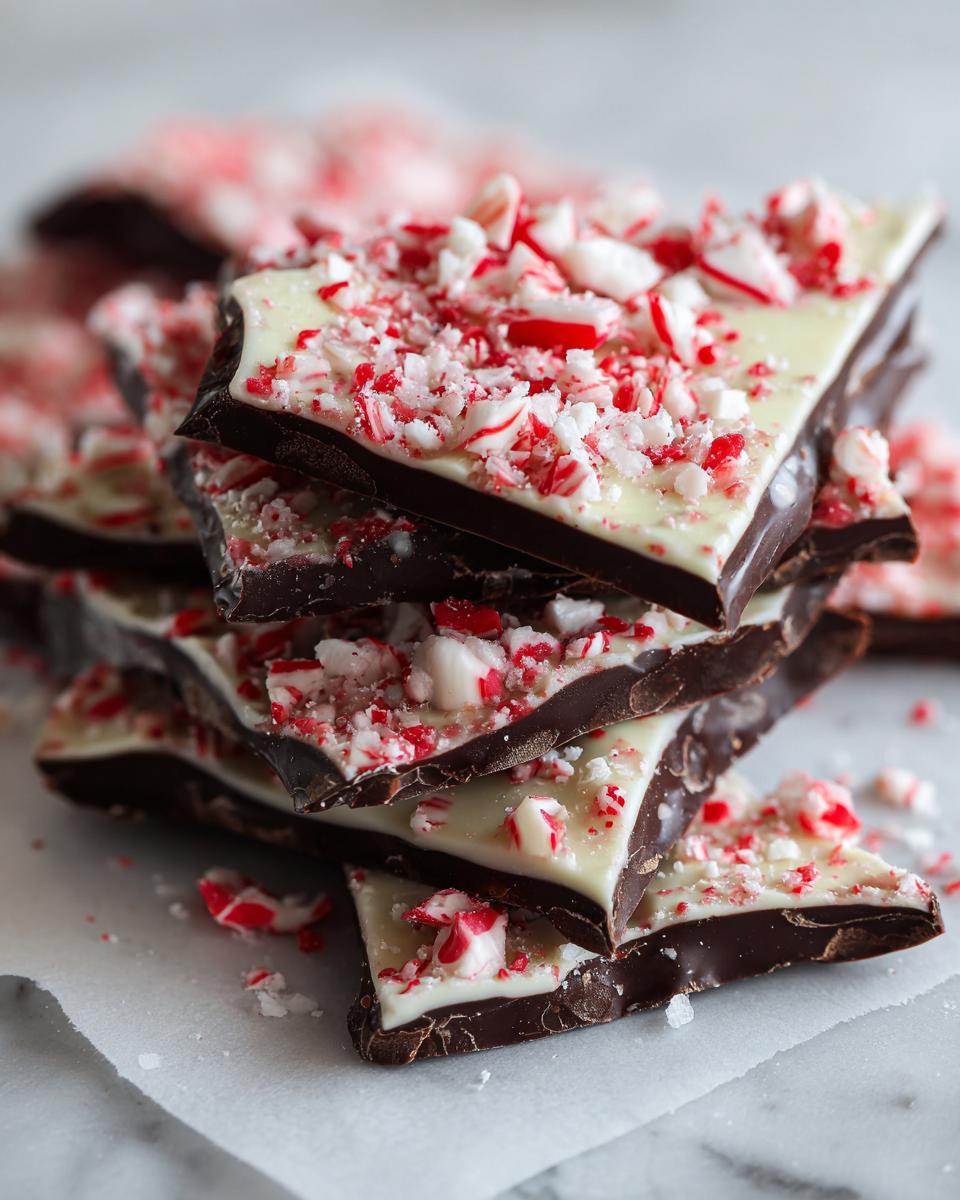
If you noticed your candy canes sinking down into the white chocolate layer when you made your first batch, that probably means your white chocolate wasn’t chilled enough before you topped it. The dark layer acts as the anchor! Make sure it’s very firm to the touch—not just cool—before you pour the next layer on top. This is crucial for beautiful **Layered Chocolate Bark**.
Another pro tip for keeping things pristine: Don’t try to break the bark while it’s still slightly room temperature or it will bend instead of snap! It *must* be fully chilled—like, refrigerator cold—before you lift it out using the parchment paper overhang. When you break it, snap it sharply rather than easing it apart. That’s how you get those sharp, professional edges people love.
If you’re looking for other rich, chocolatey things that are totally foolproof, you need to check out my recipe for homemade chocolate pudding recipe. It uses a similar technique of gentle heating that builds rich body!
Storage and Gifting: Making Your Homemade Peppermint Bark Last
I’m often asked if this incredible **Homemade Peppermint Bark** needs to live in the cold fridge. The answer, thankfully, is mostly no! Because we used quality chocolate and no delicate dairy fillings, this **Simple Peppermint Dessert** is quite stable.
For everyday storage, keep your broken pieces in a clean, airtight container at cool room temperature. It can happily sit on your counter for about a week. If your kitchen is really warm, though, or if you’re making it weeks ahead of time, definitely tuck it into the fridge. Just make sure you let it warm up for about 10 minutes before anyone tries to snap a piece; that slight temperature change helps bring back that perfect crisp texture.
Now, let’s talk holiday hustle—gifting! This is where your **peppermint bark recipe** really shines because it looks so impressive wrapped up. Don’t bother with fancy boxes. Buy some clear cellophane bags—the kind that gather at the top—and tie them off with some festive baker’s twine or a nice red ribbon.
When packaging it as **Chocolate Bark for Gifting**, try layering the pieces nicely inside the bag so your recipient can see both the dark base and the white topping. You can layer them with small squares of parchment paper between them if you’re worried about the chocolate sticking together during transport, but usually, they hold up fine.
If you are looking for other amazing, giftable treats that don’t involve turning on the oven, you absolutely need to check out my recipe for my pecan pie balls no-bake chocolate dipped recipe. They are always the first thing gone from the dessert tray!
For folks who want to see how others are wrapping theirs, I saw some gorgeous ideas over at Kitchen Martha that are perfect inspiration for presentation.
Festive Variations for Your Peppermint Bark Recipe
While this three-ingredient version is my go-to for speed and simplicity, sometimes you want to jazz things up, especially if you’re making a huge batch for a bake sale or just want to impress the family! I’ve experimented a lot with this **peppermint bark recipe** over the years, and I have a couple of easy upgrades that don’t ruin the fast, no-bake spirit.
If you really want that *intense* mint flavor that screams winter wonderland, you have to add pure **peppermint extract** right into your melted white chocolate. Don’t use vanilla; use mint! About a quarter teaspoon is plenty, because that stuff is strong. It makes the white layer zing!
Also, if you’re worried about running out of candy canes (it happens!), try turning this into a decadent, slightly crunchy treat by adding small marshmallows along with your crushed candy in the final step. It’s a lovely textural surprise. If you are looking for other rich, creamy holiday drinks to pair with your bark, you absolutely have to try my recipe for white hot chocolate recipe easy creamy.
For those who like a little savory contrast with their sweet, try lightly sprinkling some flaky sea salt over the dark chocolate layer *before* it goes into the fridge to set. It wakes up the chocolate flavor beautifully. For a similar flavor profile done really well, check out what my friend did over at Julie Blanner’s salted peppermint bark.
Frequently Asked Questions About This Christmas Chocolate Bark
It’s always the little questions that pop up when you’re deep into making a new **peppermint bark recipe**! I’ve answered the ones I hear most often from readers when they are trying to nail that perfect snap. Don’t worry if you have questions; that means you care about doing it right, and I respect that!
Can I use milk chocolate instead of semisweet for the base layer?
You certainly *can*, but you have to be careful! Milk chocolate contains more sugar and milk solids than semisweet, which means it melts faster and can get grainy more easily. If you use milk chocolate for that bottom layer of your **Christmas Chocolate Bark**, watch those microwave intervals *very* closely. It won’t be as deeply flavorful as the semisweet version, but if you love milk chocolate, go for it!
What happens if I skip the chilling time entirely?
Oh, honey, please don’t try to skip the chilling! This is a **No Bake Holiday Candy**, so chilling *is* the cooking process. If you try to peel the bark out before it’s totally firm, you’ll end up with a melted, sticky mess. The dark layer needs to be rock solid so it can support the white layer and the crushed candy canes. Rushing the set will result in a swirl rather than those beautiful, distinct layers.
Does this homemade peppermint bark need to be refrigerated once it’s set?
Generally, no, it doesn’t *need* it if you’re eating it within a few days and your kitchen isn’t hot. Chocolate keeps best at a consistent, cool room temperature. However, if you’re making your **Festive Chocolate Treats** weeks ahead of time for holiday gifting, or if you live somewhere warm, pop it into an airtight container in the fridge. If you refrigerate it, just remember to pull it out 10 minutes before serving so it gets that satisfying brittle snap back. If you’re looking for a completely different kind of dessert that does need refrigeration, my easy banana cream pie recipe is heavenly!
My candy canes turned the white chocolate pink/red! Why?
That’s a common visual struggle! It happens when you use canes that have bled their color. If you are using the classic red and white stripes, try to pick out any pieces where the color is already bleeding onto the white part of the cane. Also, make sure those crushed canes are completely dry before sprinkling them on. Any residual moisture can encourage the dye to run into your lovely white chocolate layer.
Estimated Nutritional Snapshot for this Simple Peppermint Dessert
Now, I know some of you folks watching your macros might be curious, but let’s be honest—this **Simple Peppermint Dessert** is a holiday indulgence, not a daily staple! Since we are dealing with pure chocolate and sugar here, these numbers are definitely estimates based on breaking the recipe into 16 decent-sized pieces. Don’t sweat the small stuff over the holidays; just enjoy the joy this candy brings!
If you’re tracking things closely, here is what the math works out to for one standard piece of this amazing **peppermint bark recipe**:
- Calories: About 180
- Total Fat: Around 12g (Be mindful of that saturated fat!)
- Carbohydrates: 19g net carbs, with 18g coming from sugar.
- Protein: A measly 2g, but hey, it tastes like a million bucks!
Keep in mind that any variations you make, like adding salt or using different types of chocolate, will shift these numbers around. But trust me, the reward of cracking a piece of this flawless **Christmas Chocolate Bark** far outweighs thinking too much about the details right now. Focus on the joy, my friends!
Share Your Homemade Peppermint Bark Creations
Well, that’s it! You’ve done it! You’ve successfully tackled the world of **Homemade Peppermint Bark**, and I bet yours looks absolutely stunning. Seriously, I hope the smell of chocolate and mint is floating through your kitchen right now.
This recipe is one of my favorites because it really connects everyone during the holidays, and I absolutely love seeing what you all create. Food is meant to be shared, so I’m asking you to take a moment after snapping off a couple of pieces for yourself, of course!
If this simple **peppermint bark recipe** saved your holiday dessert plans or became your new go-to gift, please, let me know! Head down to the comment section below and give this recipe a solid five-star rating. Your feedback really helps other folks find these easy, reliable holiday treats.
And please, tag me! If you post a picture of your perfectly snapped, crunchy **Christmas Chocolate Bark** on Instagram or Facebook, use the hashtag #JuliaMealCreations. I always peek in to see your beautiful layering work. It truly means the world when I see my recipes coming to life in your homes.
If you ran into any supply trouble or have a burning question that didn’t get answered in the FAQ, don’t hesitate to reach out directly through my contact page. Happy holidays, and enjoy every single crack and crunch of that magnificent **No Bake Holiday Candy**!
PrintThe Ultimate Easy 3-Ingredient Peppermint Bark: No-Bake Holiday Classic for Gifting and Parties
Make this classic Christmas candy with rich dark chocolate, creamy white chocolate, and crushed candy canes. This no-bake dessert is simple, quick, and perfect for holiday gifts or dessert boards.
- Prep Time: 15 min
- Cook Time: 5 min
- Total Time: 50 min
- Yield: About 16 servings 1x
- Category: Dessert
- Method: No-Bake
- Cuisine: American
- Diet: Vegetarian
Ingredients
- 8 ounces semisweet chocolate, chopped
- 8 ounces white chocolate, chopped
- 1 cup crushed candy canes
Instructions
- Line an 8×8 inch baking pan with parchment paper, letting the paper hang over the sides for easy removal later.
- Melt the semisweet chocolate in a microwave-safe bowl in 30-second intervals, stirring well after each interval until smooth. Do not overheat the chocolate.
- Pour the melted semisweet chocolate into the prepared pan. Spread it into an even layer using an offset spatula.
- Place the pan in the refrigerator to set for about 10 minutes, or until the chocolate is firm to the touch.
- While the dark chocolate sets, melt the white chocolate using the same method as above, stirring until completely smooth.
- Pour the melted white chocolate over the set dark chocolate layer. Spread it evenly across the surface.
- Immediately sprinkle the crushed candy canes evenly over the white chocolate layer. Gently press the candy canes into the chocolate so they adhere.
- Return the pan to the refrigerator and chill for at least 30 minutes, or until the bark is completely firm.
- Once firm, lift the bark out of the pan using the parchment paper overhang. Break the bark into irregular pieces.
- Store the homemade peppermint bark in an airtight container at room temperature or in the refrigerator.
Notes
- For the smoothest melt, add a teaspoon of coconut oil or vegetable shortening to each type of chocolate before microwaving.
- If you prefer a stronger mint flavor, add 1/4 teaspoon of pure peppermint extract to the melted white chocolate before spreading.
- To prepare candy canes for crushing, place them in a sturdy zip-top bag and crush them with a rolling pin or the bottom of a heavy pan.
- This festive chocolate bark makes an excellent homemade candy gift when wrapped in cellophane bags and tied with a ribbon.
Nutrition
- Serving Size: 1 piece
- Calories: 180
- Sugar: 18g
- Sodium: 20mg
- Fat: 12g
- Saturated Fat: 7g
- Unsaturated Fat: 5g
- Trans Fat: 0g
- Carbohydrates: 19g
- Fiber: 1g
- Protein: 2g
- Cholesterol: 5mg