
If there is one thing I learned from my grandmother, it’s that the most impressive food shouldn’t require you to pull an all-nighter in the kitchen. We all love those desserts that look like they took three days of delicate construction, but secretly, we want them to be simple. Well, my friends, I have one of those truly spectacular recipes for you today! This Italian love cake is the kind of dessert that makes people ask, “Did you really bake that?” because it naturally separates into three distinct, heavenly layers while it’s in the oven. Trust me when I say this simple magic is my go-to when I want to share something decadent without getting complicated. It’s pure generosity baked into a square. If you love easy, impressive sweets, you definitely want to bookmark this recipe, perhaps alongside my list of other simple, delicious desserts.
- Why This Magical Layered Italian Love Cake Recipe Works
- Gathering Ingredients for Your Italian Love Cake
- Step-by-Step Instructions for the Italian Love Cake
- Tips for Success with This Layered Ricotta Cake
- Making This Decadent Cake Ahead of Time
- Serving Suggestions for Your Italian Desserts
- Storage and Reheating Instructions
- Frequently Asked Questions About This Pudding Layer Cake
- Nutritional Estimates for This Decadent Cake Recipe
Why This Magical Layered Italian Love Cake Recipe Works
Now, the name alone—Italian love cake—sounds romantic, right? But the real romance happens inside the oven. This isn’t like your standard baking where you carefully layer batter and filling. No, this recipe is pure alchemy. We use a clever trick that relies on the density difference between our ingredients. If you love this kind of simple, impressive baking, you should also look at my guide on simple, delicious desserts.
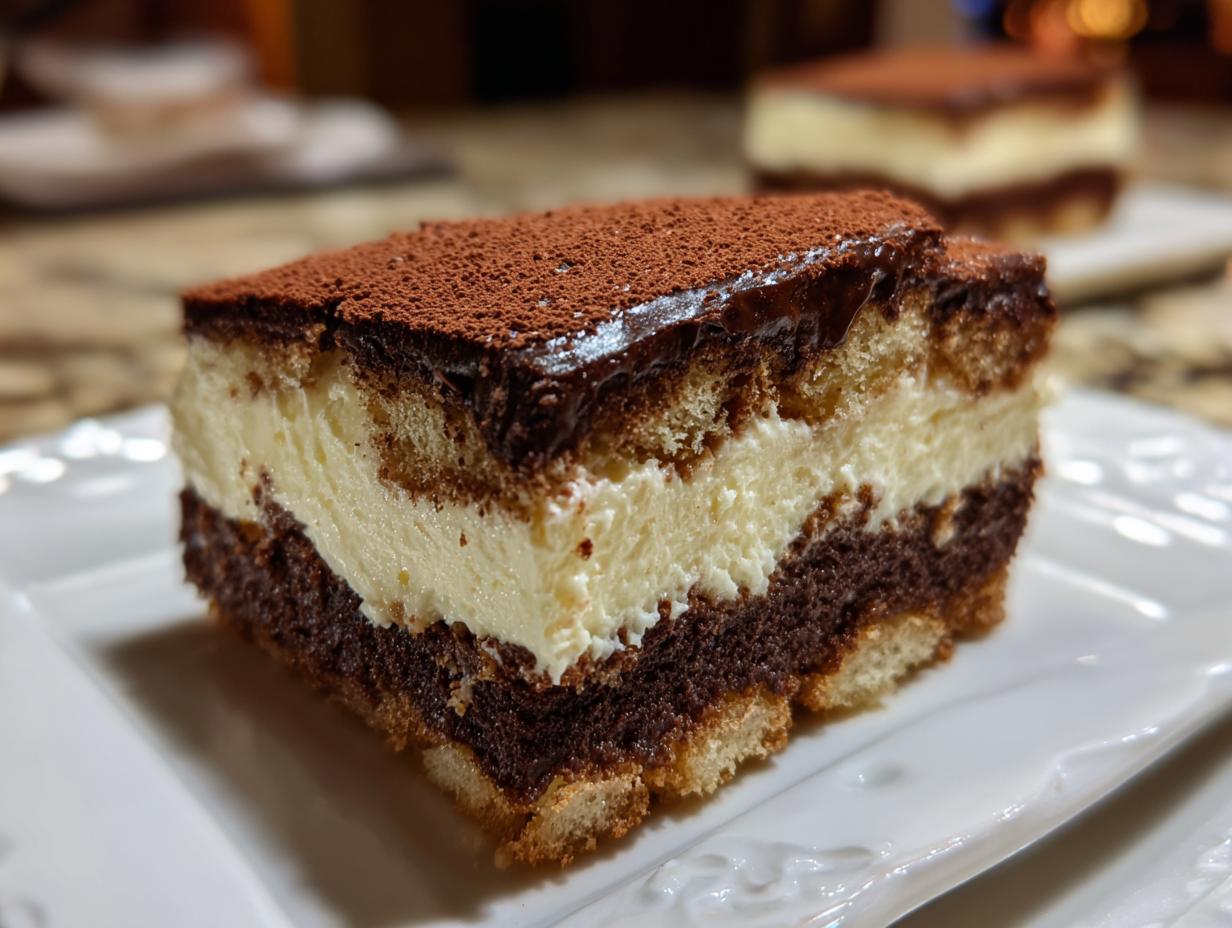
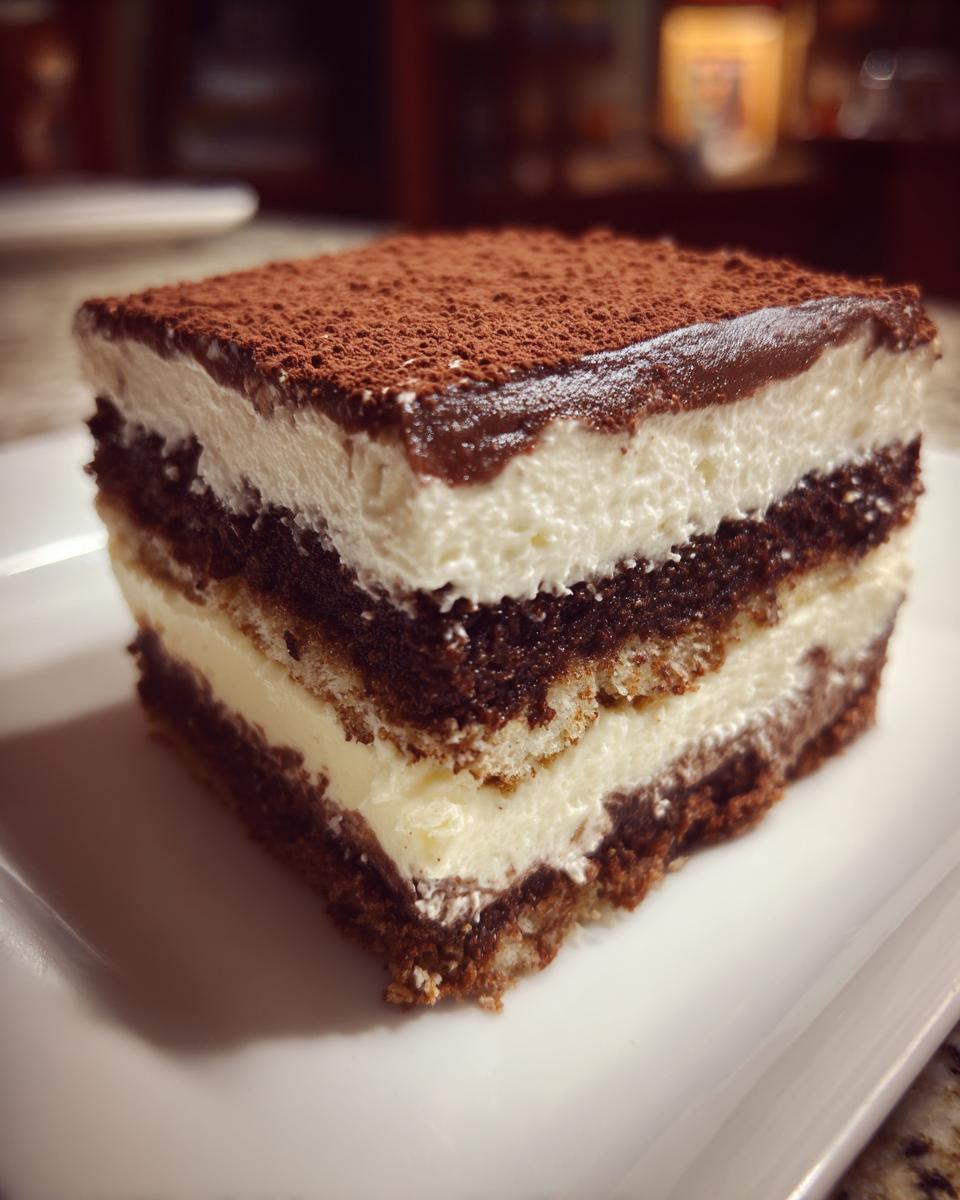
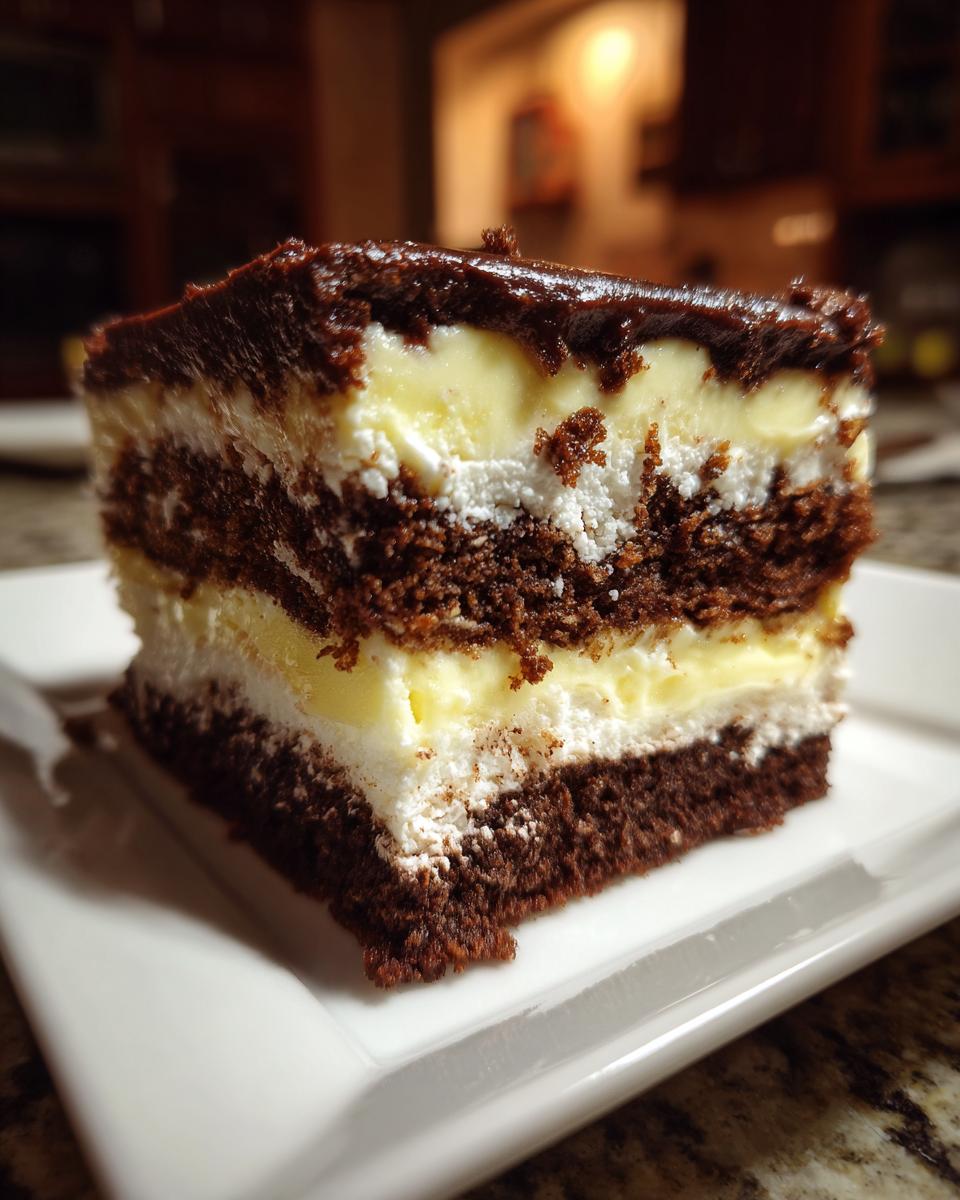
The basic chocolate cake batter goes in first on the bottom. Then, when we gently place the lighter, airy ricotta mixture on top, gravity takes over during the bake. That’s where the magic of magical baking desserts happens! The ricotta sinks down, creating that unbelievably rich, creamy middle layer—a true layered ricotta cake experience.
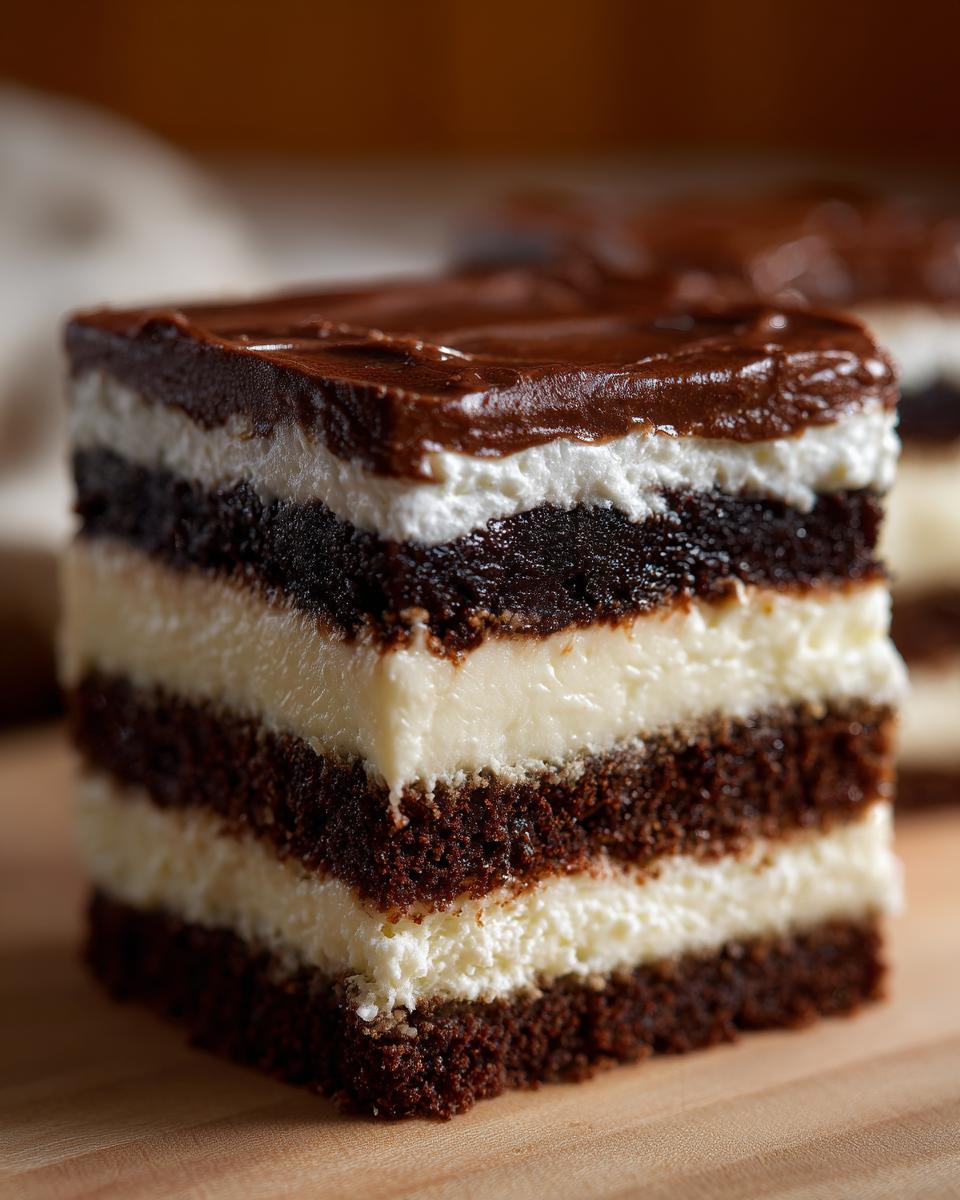
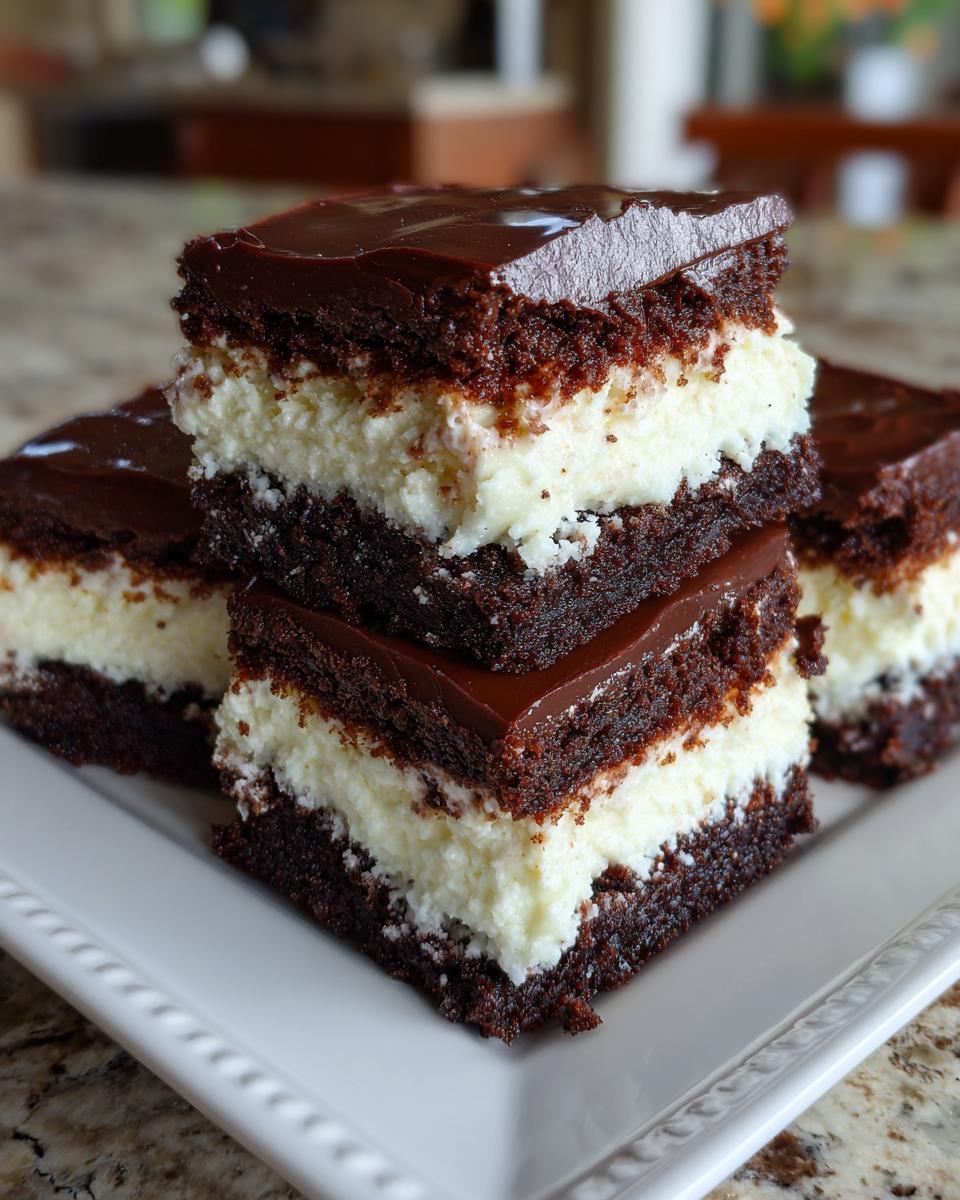
It’s superior because you get three textures in every single bite: the moist chocolate base, the dense, cheesecake-like center, and that tender, slightly custardy top layer that sets up almost like a pudding. It’s impressive without being fussy, and honestly, that’s the best kind of baking win.
Gathering Ingredients for Your Italian Love Cake
This recipe is fantastic because it leans heavily on pantry staples and a simple, high-quality ricotta. When we talk about an Italian love cake, the focus is on that creamy center, so quality truly matters there. Make sure you grab whole milk ricotta cheese; the low-fat stuff just doesn’t achieve that luscious, dense texture we are aiming for. It’s the backbone of this amazing layered structure!
We’re using a cake mix hack to keep things moving quickly, which is perfect for weeknight baking when you still want something impressive.
For the Chocolate Cake Base
- 1 box (15.25 ounces) chocolate cake mix
- 1 cup all-purpose flour
- 1 cup granulated sugar
- 1 teaspoon baking soda
- 1 teaspoon salt
- 1 cup water
- 1 cup vegetable oil
- 4 large eggs, separated (we only use the yolks here!)
For the Creamy Ricotta Filling
This part holds the secret to that gorgeous middle layer. Pay close attention to separating those eggs; the whipped whites are what give the ricotta mixture the lightness needed to eventually sink gracefully during the bake.
- 1 container (15 ounces) whole milk ricotta cheese
- 1 cup granulated sugar
- 1 teaspoon lemon zest (fresh is best for brightness!)
- 1 teaspoon almond extract
- 4 large egg whites (reserved from the base mixture)
For the Pudding Topping and Frosting
Don’t mix these until the cake is completely cool—we want a firm, smooth top layer, not a soupy mess!
- 1 package (3.4 ounces) instant vanilla or chocolate pudding mix
- 1 cup cold milk
- 1 tub (8 ounces) frozen whipped topping, thawed (for frosting)
Step-by-Step Instructions for the Italian Love Cake
Now, this is where the real magic happens, but please, don’t let the process intimidate you! Because we’re leveraging a cake mix hack and the science of density, the actual hands-on time is incredibly short. I’ve broken down the process just like I do it every time I make this decadent Italian love cake to ensure you get those perfect layers, especially since we are aiming for that supreme moist chocolate cake base. You can check out my dedicated guide on a moist chocolate cake recipe if you ever want to go the scratch route, but for this one, we stick to the easy way!
Preparing the Pan and Chocolate Batter
First things first, get that oven fired up to 350°F (175°C). Lightly grease and flour a 9×13 inch baking pan. We do this ritualistically to prevent sticking, especially with a moist cake like this one.
In your largest bowl, we combine the dry ingredients: the chocolate cake mix, the flour, the 1 cup of sugar, and the baking soda, along with the salt. Give that a good whisk together.
Next, add the liquids and the egg yolks—that’s the water, the oil, and those 4 egg yolks. Now, this is important: beat it on medium speed for a solid 2 minutes until it’s completely smooth. Don’t rush this; those two minutes help build the structure for that bottom layer. Pour this batter right into your prepared pan evenly. This is your base layer!
Creating the Ricotta Layer and Egg Whites
Now we shift focus completely to the filling. In a separate bowl, mix your ricotta cheese, the second cup of sugar, that splash of almond extract, and the lemon zest. Mix it until it’s totally smooth. You want no lumps here!
In another clean bowl—and I mean *clean*, because we need those egg whites to whip up nicely—beat those 4 reserved egg whites until they form soft peaks. They should hold their shape a bit when you lift the whisk.
This next part requires a gentle hand. Gently fold those fluffy egg whites right into the smooth ricotta mixture. Folding, not stirring, is key here! We want to keep all that lovely air trapped in the whites. This air is what helps the layer achieve that light texture before it sinks down to become the creamy center.
Assembly and Baking the Layers
Time to assemble! Take your ricotta mixture and very carefully spoon dollops of it evenly over the chocolate batter already in the pan. I mean it: do not stir it in and do not spread it. Just drop it across the top. Believe it or not, this is the crucial moment that sets up the layer separation. That’s when the magic of this delicious layered cake happens!
Slide that pan into the hot oven. You are looking at 45 to 55 minutes of baking time. During this time, your cake is doing all the work for you! The layers are separating beautifully. Test it near the edge with a toothpick; if it comes out clean, you’re good to go. Don’t worry if the top looks a little jiggly; that’s normal for this kind of structure.
Finishing with Pudding and Whipped Topping
Once it’s out, you absolutely have to let it cool completely on a wire rack. Why? Because if you try to put the pudding layer on a warm cake, it’s going to melt right into that chocolate layer, and we don’t want that mess! Patience pays off here.
When the cake is cool—seriously cool, room temperature—we prepare the pudding layer. Whisk your instant pudding mix with the 1 cup of cold milk until it thickens up, which usually takes just about two minutes. Spread that lovely pudding evenly over the top surface.
Finally, take your thawed whipped topping and spread it gently over the pudding. Now, here’s the big finish: cover it carefully and chill it for at least 2 hours, but honestly, overnight is even better. Chilling is essential for these layers to fully set so you can slice it into gorgeous, neat squares.
Tips for Success with This Layered Ricotta Cake
I’ve made this Italian love cake more times than I can count, and over those baking sessions, I found a few little secrets that really lock in that perfect texture. First, don’t get lazy with the ricotta! Ensure it’s whole milk, and make sure it’s mixed until it is absolutely baby-smooth before adding the air from the egg whites. You certainly don’t want grainy pockets in your beautiful creamy dessert squares.
Also, remember that pan prep! Because this cake is so moist, a good grease and flour job is non-negotiable. I always think about how I’d bake a tender moist lemon loaf—it needs that barrier to keep the bottom from sticking.
Finally, temperature is key for the layering. Don’t drop a cold ricotta mixture onto warm chocolate batter. Let the ricotta mixture sit on the counter for about 15 minutes while you whisk your egg whites. This slight temperature equalization helps the sinking process work smoothly and ensures you get those distinct layers every single time.
Making This Decadent Cake Ahead of Time
You know, sometimes the best part of an amazing dessert, especially one this decadent, is making it before the party starts. This makes it a dream for us home cooks who like to stay calm when guests arrive! This Italian love cake is actually one of the best make ahead desserts you can whip up.
While the recipe works fine if you serve it after a couple of hours of chilling, I always encourage folks to let it go overnight if they can manage it. Why? Because that extra time in the fridge is crucial for structure.
When you first pull the cake out after just two hours, those layers—the chocolate base, the ricotta filling, and the pudding topping—are still settling in. If you try to slice it immediately, you might get a beautiful flavor, but the slices won’t hold that perfect, neat square shape you want to show off.
Overnight chilling allows the pudding and the ricotta layer to firm up beautifully against the cake base. This means when you go to cut those glorious creamy dessert squares the next day, they hold their shape perfectly. It means less mess on the serving platter and more admiration from your guests. It just tastes better, too—all those flavors melding together while they rest!
Serving Suggestions for Your Italian Desserts
Once you’ve gone through all the fuss—ha!—to make this incredible Italian love cake, you want to make sure the presentation is as good as the taste, right? Since this cake already has a rich chocolate base and that creamy, sweet topping, you don’t need to overcomplicate things. This is one of those Italian desserts that truly stands on its own.
My favorite way to serve it is incredibly simple: just dust the top lightly with unsweetened cocoa powder or maybe even a little sifted powdered sugar right before bringing it to the table. It gives it that sophisticated bakery look without adding any extra sweetness.
If you’re feeling a little extra—maybe it’s Valentine’s Day, or you just earned bragging rights—a handful of fresh raspberries or sliced strawberries on the side works wonders. The little bit of tartness from the berries cuts right through the richness of the chocolate and ricotta perfectly. If you liked the caramel notes in my poached pears recipe, you could, in theory, drizzle just a tiny bit of that caramel on the plate next to the slice, but use it sparingly!
Lastly, forget complicated sauces. A strong, dark espresso or a quality cup of Italian roast coffee served alongside is the perfect pairing to balance out all that creamy sweetness.
Storage and Reheating Instructions
Since this Italian love cake needs that full chill time to truly set up those gorgeous layers, storage is just as important as baking! You are absolutely going to keep this cake refrigerated here on out. Don’t even think about leaving it on the counter overnight, not with that pudding and whipped topping calling for cold temperatures.
Take airtight care of it. Store the whole thing, or any leftovers, in an airtight container in the fridge. If it sits uncovered, that lovely whipped topping is going to get dry and start developing a skin—and we can’t have that!
Now, for reheating: this is the big caution zone. We generally do not reheat the structure of this cake as a whole. If you try to warm up the whole 9×13 pan, you are going to end up with melted pudding, dissolving whipped topping, and a sad, soupy mess where your distinct layers used to be. It just doesn’t handle microwave heat well.
However, if you want to enjoy a slice warm? You absolutely can, provided you isolate that slice! Take the individual square you plan to eat and let it sit on a small plate on the counter for about 20 to 30 minutes. That gives it just enough time to take the chill off, letting that creamy ricotta layer soften up beautifully again without actually melting the pudding top.
If you’re desperate for warm chocolate base (I get it!), you can zap just the slice for maybe 10 seconds on low power, but keep your eyes peeled! The goal is warm cake, not hot soup. Truly, though, this cake shines best when served cold or cool.
Frequently Asked Questions About This Pudding Layer Cake
I’ve gathered up some of the questions I get most often about this fun dessert. Seriously, folks are always amazed that this Italian love cake comes together so easily. If you’ve got more questions after reading through the recipe, feel free to drop them below, and I’ll get back to you as soon as I put down my whisk! You can also check out my thoughts on other simple recipes, like my easy clam dip recipe, for more straightforward wins.
Can I use homemade chocolate cake instead of a mix?
You totally can, but you need to understand that using the box mix is the shortcut that makes this a truly easy layered cake! If you bake from scratch, you need to be much more careful about the wet-to-dry ratio. Scratch recipes usually require less added liquid initially—just look closely at the cake mix box directions, as they are designed for specific hydration levels. If you use scratch cake batter, you risk making the chocolate layer too thin, which might get overpowered by the ricotta sinking down. Stick to the mix if you want guaranteed layers!
What happens if I stir the ricotta mixture into the chocolate batter?
Oh, don’t do it! If you stir the lightened ricotta mixture into the chocolate batter before baking, you stop the magic dead in its tracks. You’ll just end up with one giant, slightly marbleized, moist cake. It will still taste good, sure, because you still have that wonderful chocolate ricotta cake flavor profile, but you lose the distinct layers! The ricotta needs to sit right on top so that the difference in density can cause it to sink precisely where it needs to go during the bake, creating that beautiful pudding layer cake structure we love.
Is this cake suitable for Valentine’s Day cake celebrations?
Absolutely! This cake screams romance. It’s decadent, it’s rich, and it looks far more complicated than it actually is, which is the perfect way to celebrate someone special. We call it the Italian love cake for a reason! Whenever I make this for Valentine’s Day, people are just stunned by how creamy and rich those layers are. It’s a guaranteed crowd-pleaser for a romantic dessert or a sweet treat for a party.
Nutritional Estimates for This Decadent Cake Recipe
Look, I’m a cook, not a nutritionist! I want you to enjoy every rich, creamy, chocolatey bite of this Italian love cake without worrying too much about the numbers. But because I believe in transparency—and since it’s my job to give you the full picture—I’ve pulled together the general estimates for a single, generous square of this dessert.
Keep this in the front of your mind: These figures are just an educated guess based on the standard ingredients listed, especially that cake mix and the whole milk ricotta. If you substitute ingredients, or if you end up cutting your squares smaller (which I highly doubt you will!), the final count will vary. Basically, this is a rich dessert, meant for sharing and celebrating, not for daily eating!
- Serving Size: 1 square
- Calories: 450
- Sugar: 45g
- Fat: 22g
- Saturated Fat: 10g
- Carbohydrates: 60g
- Protein: 8g
Seriously, don’t let that sugar count scare you off. This cake is meant to be an occasional, truly decadent treat. The magic and the love you put into making it easily outweigh the calories on any special occasion!
PrintMagical Layered Italian Love Cake Recipe

You will bake this decadent, layered Italian Love Cake that magically forms its own layers, featuring a moist chocolate base, a creamy ricotta filling, and a smooth pudding topping. This is the best easy dessert for special occasions.
- Prep Time: 20 min
- Cook Time: 50 min
- Total Time: 170 min
- Yield: 12 servings 1x
- Category: Dessert
- Method: Baking
- Cuisine: Italian-American
- Diet: Vegetarian
Ingredients
- 1 box (15.25 ounces) chocolate cake mix
- 1 cup all-purpose flour
- 1 cup granulated sugar
- 1 teaspoon baking soda
- 1 teaspoon salt
- 1 cup water
- 1 cup vegetable oil
- 4 large eggs, separated
- 1 teaspoon vanilla extract
- 1 container (15 ounces) whole milk ricotta cheese
- 1 cup granulated sugar
- 1 teaspoon lemon zest
- 1 teaspoon almond extract
- 1 package (3.4 ounces) instant vanilla or chocolate pudding mix
- 1 cup cold milk
- 1 tub (8 ounces) frozen whipped topping, thawed (for frosting)
Instructions
- Preheat your oven to 350°F (175°C). Lightly grease and flour a 9×13 inch baking pan.
- In a large bowl, combine the chocolate cake mix, flour, 1 cup sugar, and baking soda. Mix well.
- Add the water, oil, and 4 egg yolks to the dry ingredients. Beat with an electric mixer on medium speed for 2 minutes until smooth. Pour this batter into your prepared baking pan.
- In a separate medium bowl, combine the ricotta cheese, 1 cup sugar, lemon zest, and almond extract. Mix until smooth.
- In another clean bowl, beat the 4 egg whites until soft peaks form. Gently fold the beaten egg whites into the ricotta mixture.
- Carefully spoon dollops of the ricotta mixture evenly over the chocolate batter in the pan. Do not stir or spread it.
- Bake for 45 to 55 minutes. The layers will form during baking; the ricotta mixture sinks, and a pudding layer forms on top. A toothpick inserted near the edge should come out clean.
- Let the cake cool completely in the pan on a wire rack.
- Prepare the pudding layer: In a bowl, whisk the instant pudding mix with 1 cup of cold milk until thickened, about 2 minutes.
- Gently spread the prepared pudding over the cooled cake.
- Top the pudding layer with the thawed whipped topping.
- Chill the cake for at least 2 hours before slicing and serving. This allows the layers to set properly.
Notes
- This cake is excellent when made a day ahead, as chilling helps the layers firm up.
- You can substitute the chocolate cake mix for a yellow cake mix if you prefer a vanilla base, but the chocolate base pairs well with the ricotta.
- For a richer flavor, use fresh lemon juice instead of just zest.
Nutrition
- Serving Size: 1 square
- Calories: 450
- Sugar: 45g
- Sodium: 350mg
- Fat: 22g
- Saturated Fat: 10g
- Unsaturated Fat: 12g
- Trans Fat: 0.5g
- Carbohydrates: 60g
- Fiber: 2g
- Protein: 8g
- Cholesterol: 110mg