
If you need an appetizer that vanishes the second it hits the table at a party or holiday gathering, you really can’t beat a perfect deviled egg. They are pure, simple nostalgia on a plate, aren’t they? But making them reliably creamy—without any sad, lumpy spots—is where most home cooks throw in the towel. Well, don’t you worry about that! I’m Julian Maxwell, and after spending years watching my grandmother perfect the staples of American home cooking, I took on the challenge of making the absolute best classic deviled eggs. This isn’t just another recipe; this is the foolproof guide to achieving that unbelievably smooth, tangy filling that everyone always asks for. If you love reliable party snacks, you’ll want to check out my recipe for easy cowboy caviar too, but first, let’s master these eggs. Trust me on this one; these are the ones you’ll be asked to bring every single time. For more inspiration on crowd-pleasing apps, this advice from Chef Uamami really validated my approach!
- Why This Is Your Go-To Recipe for Classic Deviled Eggs
- Gathering Ingredients for Classic Deviled Eggs
- Perfect Hard Boiled Eggs Tutorial: Foundation for Classic Deviled Eggs
- How to Prepare Your Classic Deviled Eggs Instructions
- Tips for Success Making Classic Deviled Eggs
- Make Ahead Party Food: Storing Your Classic Deviled Eggs
- Serving Suggestions for This Traditional Egg Appetizer
- Frequently Asked Questions About Classic Deviled Eggs
- Nutritional Snapshot of Your Classic Deviled Eggs
Why This Is Your Go-To Recipe for Classic Deviled Eggs
When I develop a recipe, especially for a staple like this, I want zero guesswork involved. You deserve appetizers that are always a hit, and this classic deviled eggs recipe is my iron-clad promise to you. We stick to the basics because they work! If you’re looking for another incredible party snack, you have to try my recipe for easy clam dip next.
- Guaranteed perfectly cooked eggs—absolutely no unsightly grey rings!
- The filling is whipped smooth and incredibly creamy every single time.
- It uses just the right amount of tanginess that makes people steal the last one.
Check out how the folks over at Mommy of Many Hats approach their southern style version; it confirms our need for that balance of tangy and creamy.
The Secret to Creamy Deviled Egg Filling
Listen, texture is everything here. We aren’t looking for crumbled yolk! The secret is patience when mashing the yolks. You have to mash them completely smooth with a fork until they resemble fine powder *before* you add any mayo or mustard. Once those yolks are perfectly pulverized, achieving that amazing creamy deviled egg filling is automatic. Skip this step, and you’ll end up with dry clumps, which is the ultimate tragedy.
Gathering Ingredients for Classic Deviled Eggs
Okay, now that we know the goal—perfection—we need to treat our ingredients with respect. Don’t try to skimp here; these few simple components are what make this traditional egg appetizer sing! Everything needs to be measured pretty exactly, especially the mustard and vinegar, because we are going for balance, not guesswork. If you’re planning other things for the party, you might want my honey mustard chicken salad recipe too; it uses similar flavor profiles!
- 12 large eggs (don’t use small ones, please!)
- 1/2 cup mayonnaise (full fat is best for texture)
- 2 teaspoons Dijon mustard (this brings the necessary bite!)
- 1 teaspoon white vinegar
- 1/4 teaspoon salt and 1/8 teaspoon pepper (to taste)
- Paprika for that perfect pop of color
Ingredient Notes and Substitutions
I always insist on using large eggs because they give you the ideal amount of yolk to white ratio to create the fluffiest filling. The Dijon mustard is crucial—it provides that sharp, classic flavor that elevates the whole dish into a true tangy yolk filling. If you absolutely hate Dijon, you can lean into yellow mustard, but you’ll need to cut back just a hair because it’s sharper. When it comes to mayonnaise, stick to the real stuff! I know some people try to use light mayo, but it just doesn’t create that necessary, rich texture we’re aiming for in the filling.
Perfect Hard Boiled Eggs Tutorial: Foundation for Classic Deviled Eggs
I’m going to let you in on a secret that drives me absolutely nuts: those ugly, dusty green-grey rings around the yolk? That’s the sign of an egg cooked too long or cooled too slowly, and it ruins the look of my beautiful classic deviled eggs, even if the flavor is fine. To banish that green ring forever, you need to follow my perfect hard boiled eggs tutorial to the letter. It’s all about speed once they’re done boiling!
We start them in cold water, bring it to a rapid boil, turn the heat off, and cover it for exactly 12 minutes. That gentle carry-over heat does the work perfectly. Then—and this is the non-negotiable part—they go immediately into an icy bath. You want them shocked! This rapid temperature drop stops the cooking right away and helps the shells slide right off. If you skip the ice bath, you’re risking a sad, green halo around your yolks later. For more egg mastery, check out my recipe for fail-proof classic egg custard. Even the folks at Downshiftology stress the ice bath; it’s that important!
How to Prepare Your Classic Deviled Eggs Instructions
Now that we have perfectly cooked, peeled eggs, it’s time for the fun part! We want to work quickly here, but precision is key to that cloud-like filling. First, we separate the whites from the yolks, setting the whites aside on your serving platter—I like to line mine with a bit of lettuce if I’m feeling fancy, but you don’t have to. Take all those beautiful yolks and mash them up real good in a bowl. I mean *really* mash them until all the dry lumps are gone. Seriously, get every bit of grit out of there before you even think about adding the liquids!
Once you’ve mastered the mashing, you’ll add your mayo, mustard, vinegar, salt, and pepper all at once. Stir it up until it’s uniform. Then, we move right into piping them back into those clean white cups. If you’re making these for a big crowd, you might want to check out my recipe for easy French bread on the side—perfect for dipping or soaking up sauces!
Achieving the Tangy Yolk Filling Texture
This is critical for that rich, wonderful mouthfeel. If you’ve mashed the yolks completely before adding the wet ingredients, you’re already halfway there! Use a fork first to vigorously beat the mayo, mustard, and vinegar into the yolk powder. You want zero resistance. Keep mixing until the mixture looks almost like thick, perfectly smooth frosting. That’s exactly the texture we need for a luxurious tangy yolk filling. Seriously, no lumps allowed!
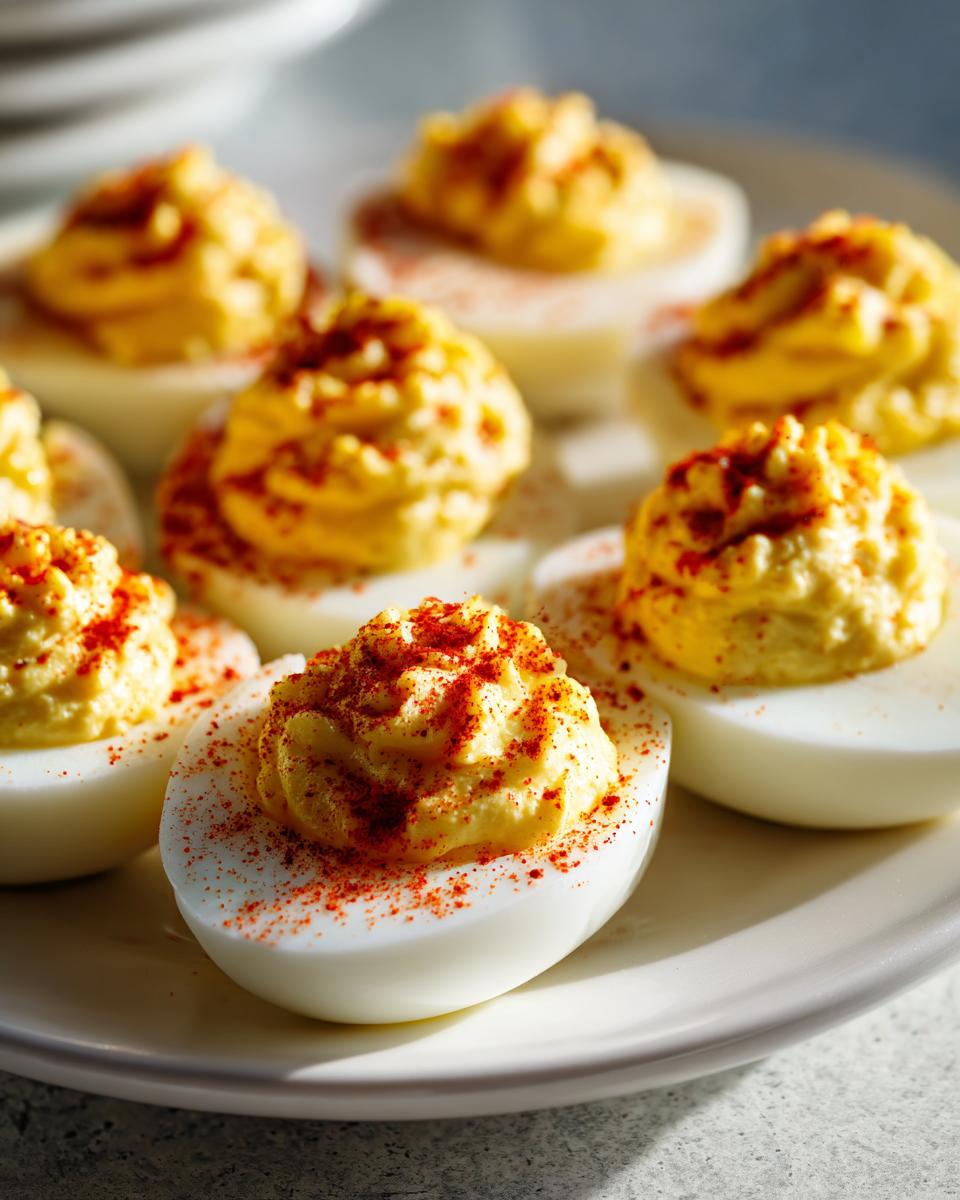
Simple Deviled Eggs Trick for Presentation
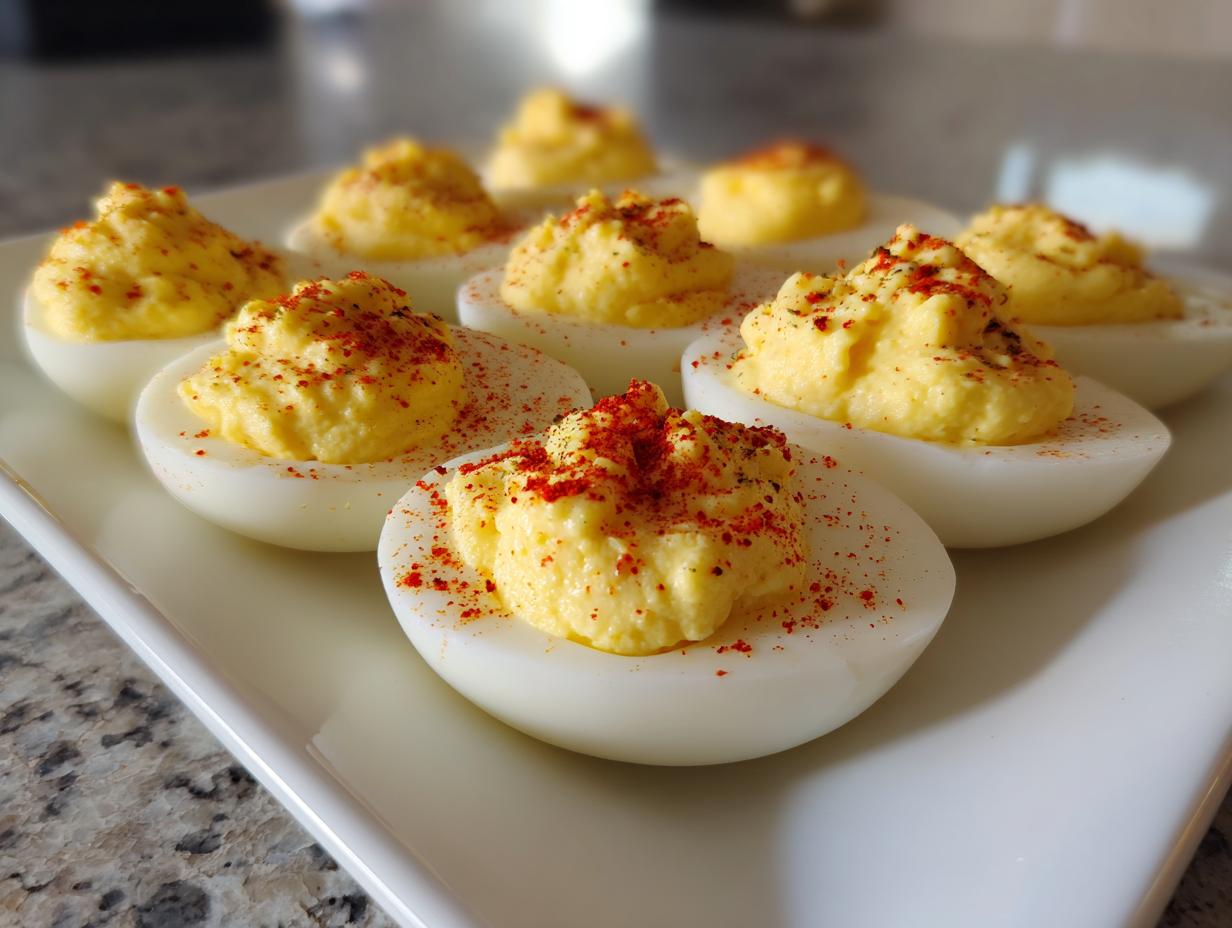
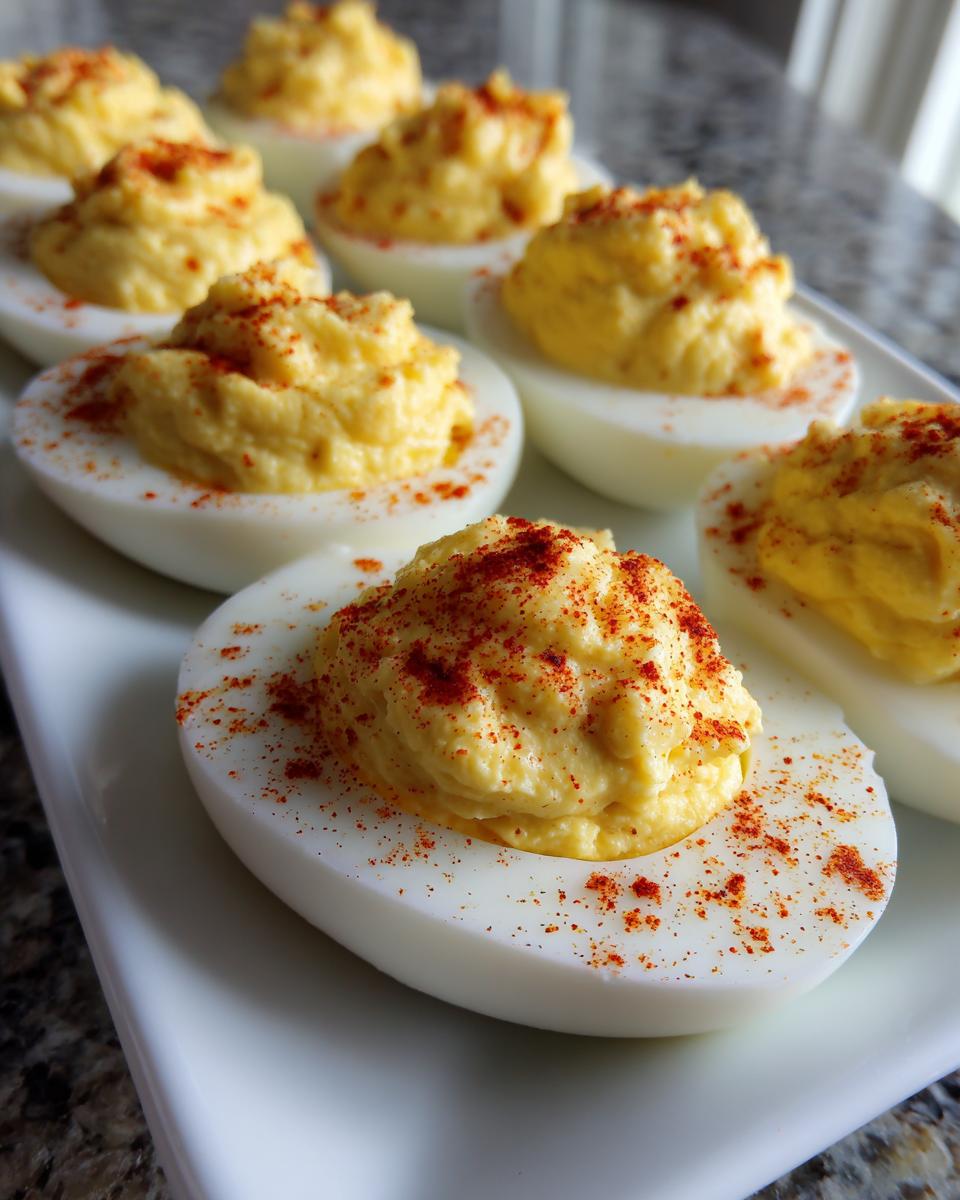
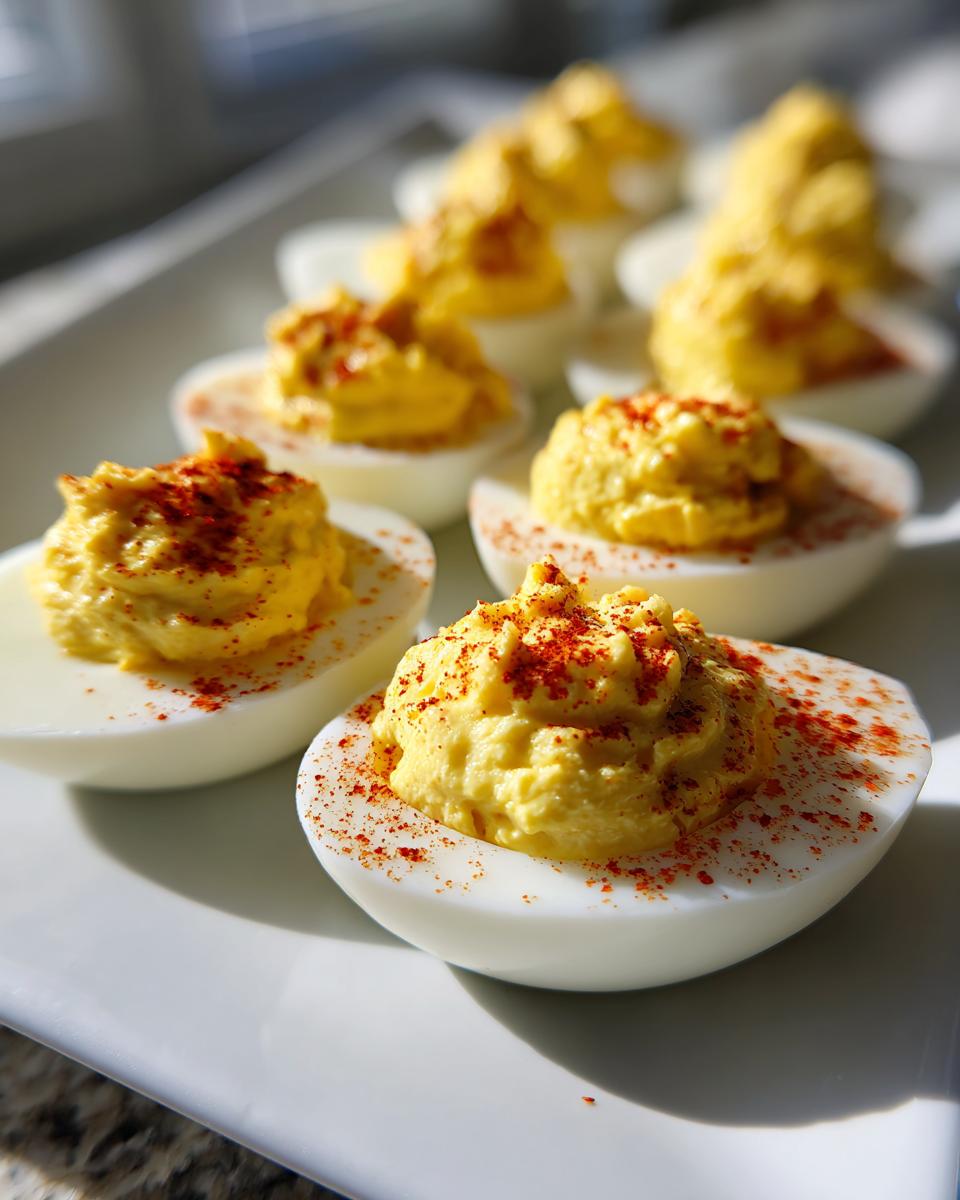
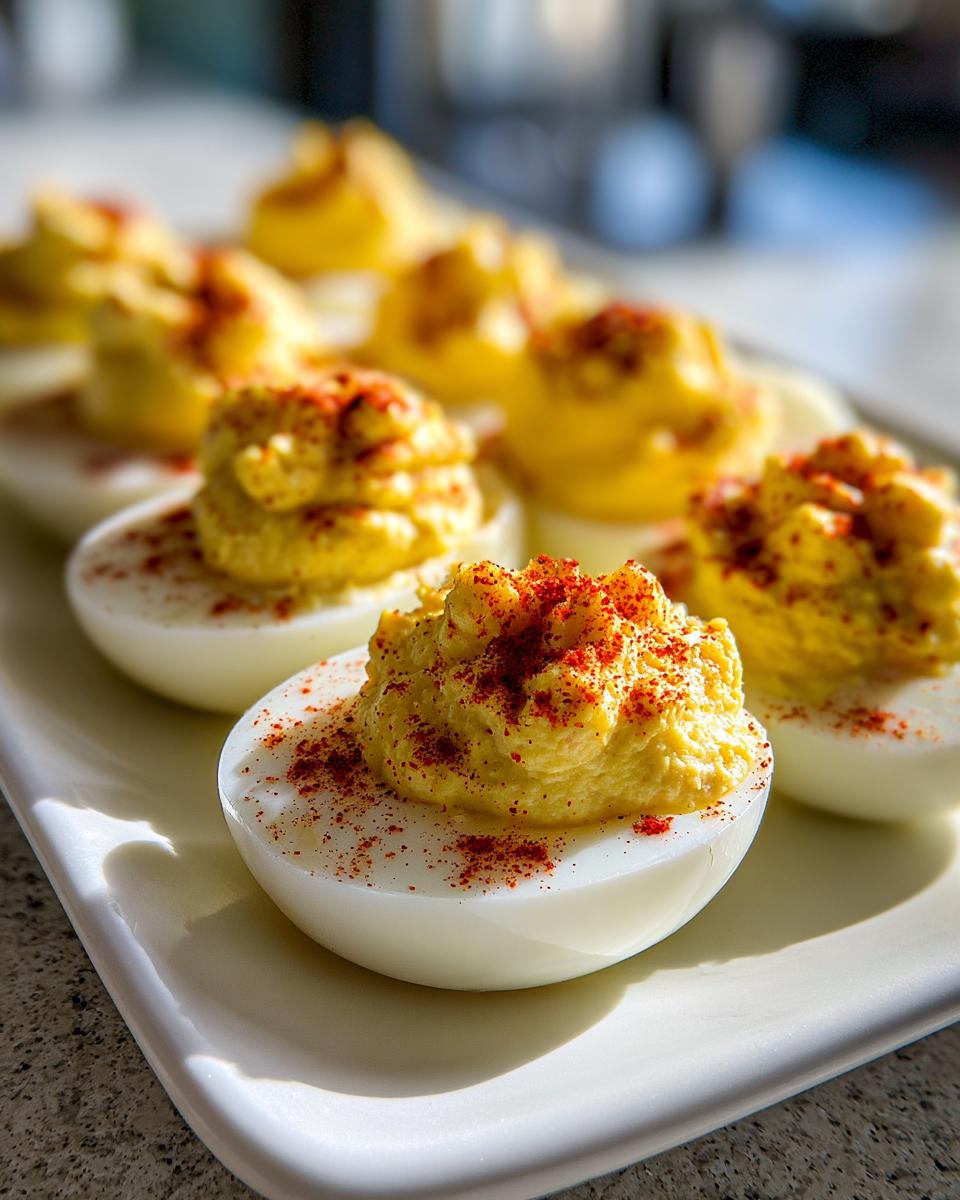
If you have a piping bag with a star tip, definitely use it! It makes these look like they came straight from a bakery case. If piping seems scary, just use a small spoon, but mound the filling up high in the egg white cup. That little pyramid shape looks professional! The ultimate simple deviled eggs trick is the final dusting. Grab that paprika and tap it gently right over the top of your filled eggs. Don’t overdo it; we want color, not bitterness!
Tips for Success Making Classic Deviled Eggs
I mentioned the ice bath already, and I have to stress it again: that’s how you guarantee beautiful, bright yellow yolks in your classic deviled eggs. Don’t let them just sit on the counter after boiling! Get them frigid fast. Also, you absolutely can make the filling ahead of time, which is a lifesaver when you’re juggling a thousand things before a party. This flexibility is why I love them so much.
If you’re experimenting with flavors for your next batch—maybe you want to spice up that tang—you could try adding a tiny dash of hot sauce to the filling, or maybe even some finely minced chives. For more of my tips on making complex flavors happen simply, take a look at my recipe for easy honey harissa chicken bowls. But for the classic version, keep it simple and rely on that ice bath technique, just like they do over at The Wooden Skillet!
Make Ahead Party Food: Storing Your Classic Deviled Eggs
Handling appetizers for a big crowd can be stressful, but these classic deviled eggs are the ultimate make ahead party food because you have options! My favorite trick is to split the work across two days. You absolutely can boil, peel, and mash your yolks the day before the party. Just keep the mashed yolks covered tightly in the fridge.
When it comes to storing the filling, never, ever fill the egg whites if you need to wait more than a few hours. The moisture from the filling starts to weep out and make the egg white bottoms soggy—we can’t have that!
Instead, save yourself time right before the party by mixing the creamy deviled egg filling and piping it into the whites just 30 minutes before guests arrive. If you need a good recipe to prep for storage and freezing, check out my guide for easy freezer jam!
Serving Suggestions for This Traditional Egg Appetizer
These little bites are so versatile! Because they are rich, savory, and completely satisfying, they truly are the best appetizer for parties you can make. Since you need other things on the table to round out the spread, I always pair my deviled eggs with something fresh or crunchy for contrast. Think about a big bowl of fresh sliced cucumbers or maybe some vegetable sticks.
They are also fantastic next to something creamy but different, like my easy dill dip if you are serving crackers or chips alongside. They feel right at home next to a platter of glazed cocktail meats or even sliced ham for a holiday brunch. They are the perfect finger food recipes that appeal to just about everyone!
Frequently Asked Questions About Classic Deviled Eggs
I get so many questions after I bring these to gatherings—people always want to know the secret to keeping them so fresh, or how long they last as a make ahead party food. Here are the most common things folks ask me about making these absolute staples!
Yes, you absolutely need to use the ice bath method I shared above (that’s the simple deviled eggs trick for avoiding the green ring!). If you skip that, no amount of mustard will save the color, even if the flavor is great. Also, for shelf life, the filling holds up well, but I always recommend sticking to a 24-hour rule if you can. Serving them chilled makes them the perfect holiday appetizer staple. You can find a fun link to my creamy hot cocoa mix here if you need a sweet treat after all that savory deviled egg goodness!
How do I get the best flavor for my tangy yolk filling?
While the Dijon and white vinegar give you that wonderful kick, I often play around with the wet ingredients to adjust the depth. If you want a real Southern style kick, skip the white vinegar and use the brine from a jar of sweet pickles instead! That little bit of sharp, sweet liquid really enhances that tangy yolk filling beautifully. A tiny dash of Worcestershire sauce can also add a savory bass note if you want something deeper than just the classic ingredients.
What type of mustard gives the best result?
If you want to nail that quintessential flavor profile that makes these classic deviled eggs so popular, stick with Dijon. It’s sharp, mustard-forward, and blends perfectly without overpowering the yolk. Yellow mustard is too mild, in my opinion, and it turns the filling a strange color. You want that mustard flavor to really stand up to the richness of the mayo.
Can I use these as easy picnic food ideas?
They make fantastic easy picnic food ideas, truly! But you need to take one extra step: transport them chilled in a cooler, and keep them out of the sun. If you are worried about them sweating or getting warm, don’t put the paprika on until you arrive at your destination. They hold up better than almost any other chilled appetizer!
Nutritional Snapshot of Your Classic Deviled Eggs
I always feel a little weird when people ask for precise nutritional counts on recipes like this. Look, these are classic deviled eggs—they are pure, wonderful indulgence, not something I track down to the decimal point!
Because we all use different brands of mayo, different sizes of eggs, and maybe you swap that Dijon for something else, the exact numbers can swing wildly. So, here is my honest disclaimer for all you health-conscious builders out there. The data I calculate is just an estimate based on standard supermarket brands, and your final count will definitely change based on what you put in your bowl. If you’re looking for some genuinely lighter ideas to start your day, you might want to check out my healthy breakfast ideas post instead!
Use this recipe because it tastes phenomenal and brings joy to parties, not because it fits perfectly into a strict macro count. That’s the spirit of home cooking!
PrintThe Best Classic Deviled Eggs: Creamy, Tangy Appetizer

Make the ultimate crowd-pleasing classic deviled eggs. This straightforward recipe delivers a perfectly creamy, tangy yolk filling every time, ideal for any party or holiday gathering.
- Prep Time: 15 min
- Cook Time: 12 min
- Total Time: 37 min
- Yield: 24 halves 1x
- Category: Appetizer
- Method: Boiling and Mixing
- Cuisine: American
- Diet: Vegetarian
Ingredients
- 12 large eggs
- 1/2 cup mayonnaise
- 2 teaspoons Dijon mustard
- 1 teaspoon white vinegar
- 1/4 teaspoon salt
- 1/8 teaspoon black pepper
- Paprika, for garnish
Instructions
- Place eggs in a saucepan and cover with cold water. Bring water to a rolling boil over high heat.
- Once boiling, remove the pan from the heat, cover it, and let the eggs stand for 12 minutes.
- Immediately transfer the eggs to an ice bath to stop the cooking process. Let them cool completely, about 10 minutes.
- Peel the cooled eggs. Slice each egg in half lengthwise. Gently scoop the yolks into a medium bowl. Place the egg white halves on a serving platter.
- Mash the yolks thoroughly with a fork until no lumps remain. This step helps create a smooth filling.
- Add the mayonnaise, Dijon mustard, white vinegar, salt, and pepper to the mashed yolks. Mix until the filling is completely smooth and creamy.
- Spoon or pipe the yolk mixture back into the hollowed-out egg white halves. For a professional look, use a piping bag fitted with a star tip.
- Chill the filled eggs for at least 15 minutes before serving.
- Just before serving, lightly dust the tops of the deviled eggs with paprika for color.
Notes
- For perfectly cooked eggs without green rings, ensure you cool the eggs rapidly in an ice bath after boiling.
- If you want a tangier flavor, substitute 1/2 teaspoon of the vinegar with sweet pickle juice.
- You can make the filling up to 24 hours ahead. Store it covered in the refrigerator, and fill the egg whites just before serving.
Nutrition
- Serving Size: 2 halves
- Calories: 90
- Sugar: 0.5
- Sodium: 110
- Fat: 8
- Saturated Fat: 2
- Unsaturated Fat: 6
- Trans Fat: 0
- Carbohydrates: 0.5
- Fiber: 0
- Protein: 3
- Cholesterol: 100