
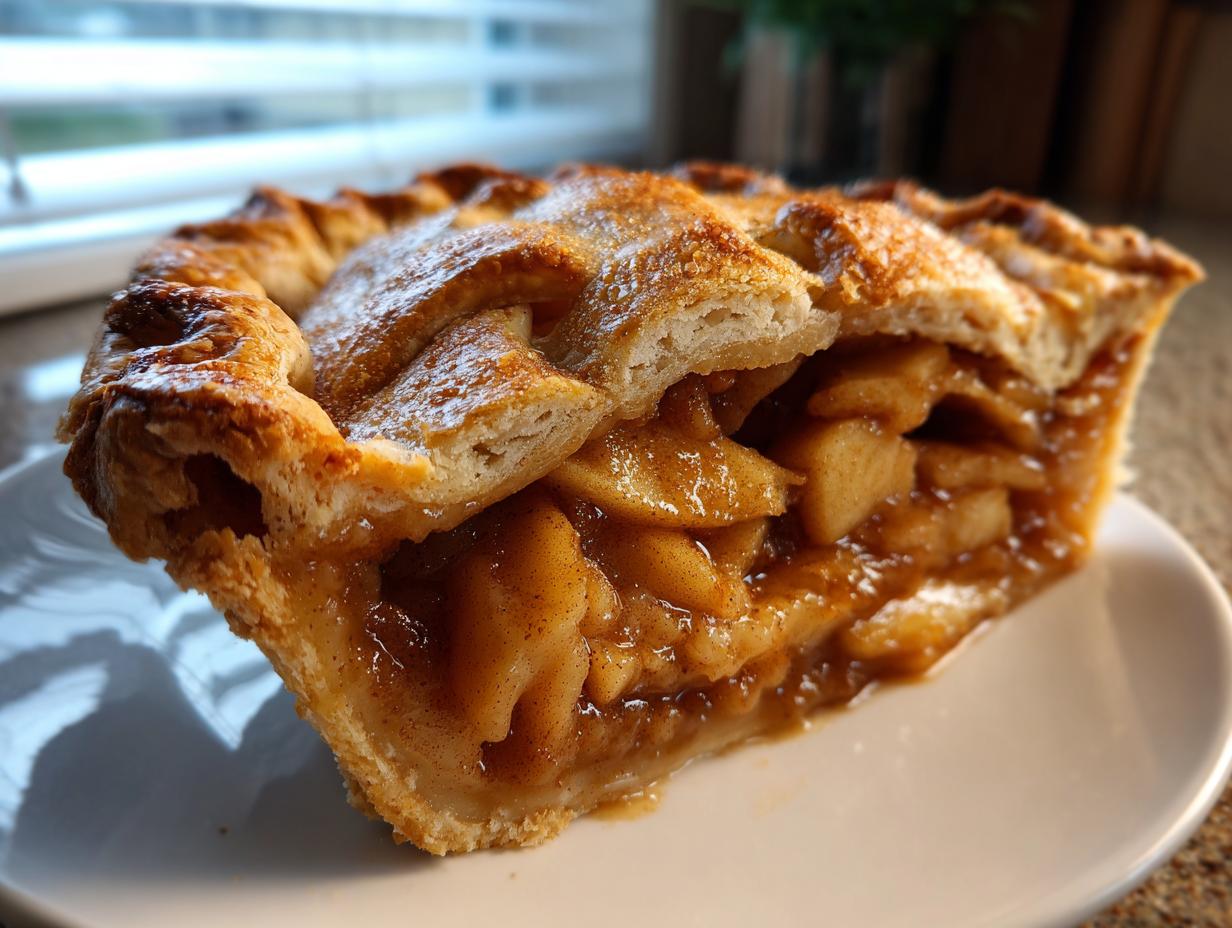
Oh, that smell! You know the one—that deep, warm wave of cinnamon and baked sugar that sinks into your kitchen, instantly making everything feel cozy and right. For me, that smell is homecoming, whether I’m in a fancy restaurant test kitchen or just kicking back on a Sunday. I spent years mastering techniques in professional settings, but what I really wanted to bring home was that perfect, nostalgic taste of tradition. That’s why after countless tries—and trust me, *so many* runny fillings—I finally perfected this recipe. This isn’t just any dessert; this is The Best Classic Homemade Apple Pie you’ll ever trust to make. We nailed the flaky double crust so it never gets soggy, and the filling? Pure, tender, spiced perfection. Say goodbye to mushy apples forever! If you ever want to try a different take on autumnal spice, I highly recommend checking out my apple crumb cake recipe, but honestly, nothing beats this classic. I even studied recipes like the one over at The Food Charlatan to make sure my crust technique was second to none.
- Why This Classic Apple Pie Recipe Works Every Time
- Gathering Ingredients for Your Homemade Apple Pie
- How to Prepare the Best Apple Pie From Scratch
- Essential Apple Pie Tips and Tricks for Beginners
- Variations: From Dutch Apple Pie to Rustic Apple Pie
- Serving Suggestions for Your Apple Pie
- Storage and Reheating Instructions for Leftover Apple Pie
- Frequently Asked Questions About Making Apple Pie
- Nutritional Estimates for Your Apple Pie Slice
- Share Your Classic Apple Pie Experience
Why This Classic Apple Pie Recipe Works Every Time
Honestly, making a great apple pie is more about avoiding disaster than getting everything right. I learned early on that amateurs make pies that weep liquid all over the pan, or the crust just turns into brittle pastry confetti when you try to slice it. We aren’t doing that here! This version is designed to give you that classic, comforting look without any of the messy pitfalls. It’s solid, reliable baking, every single time. If you’re looking for a smaller treat, you absolutely have to check out my flaky and buttery apple hand pies!
- Our method sets you up for success by demanding the coldest ingredients possible for the dough.
- We use a specific apple combination that prevents the filling from collapsing into sauce.
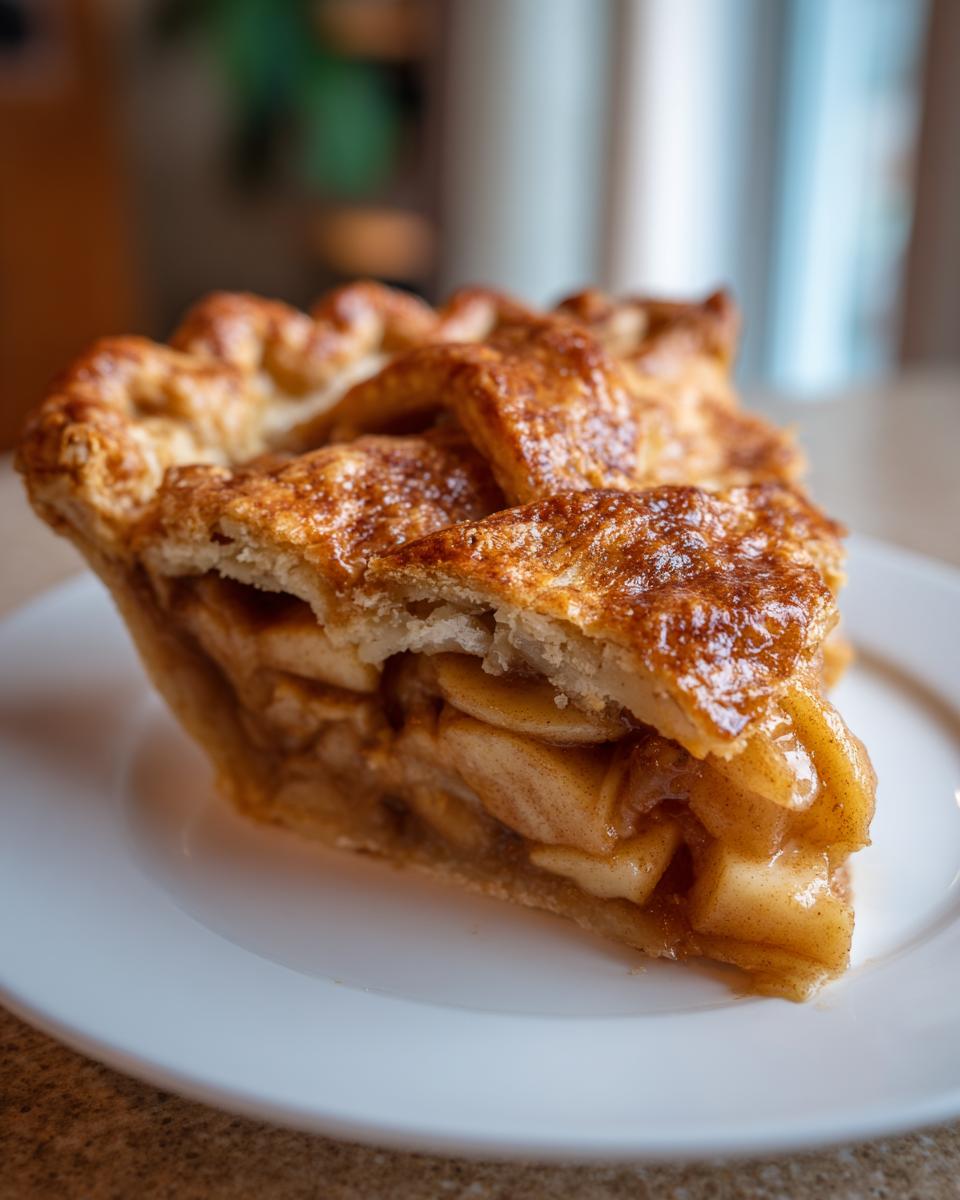
- The two-stage baking temperature locks in structure before allowing that beautiful golden color to develop.
Achieving the Perfect Flaky Pie Crust Tutorial
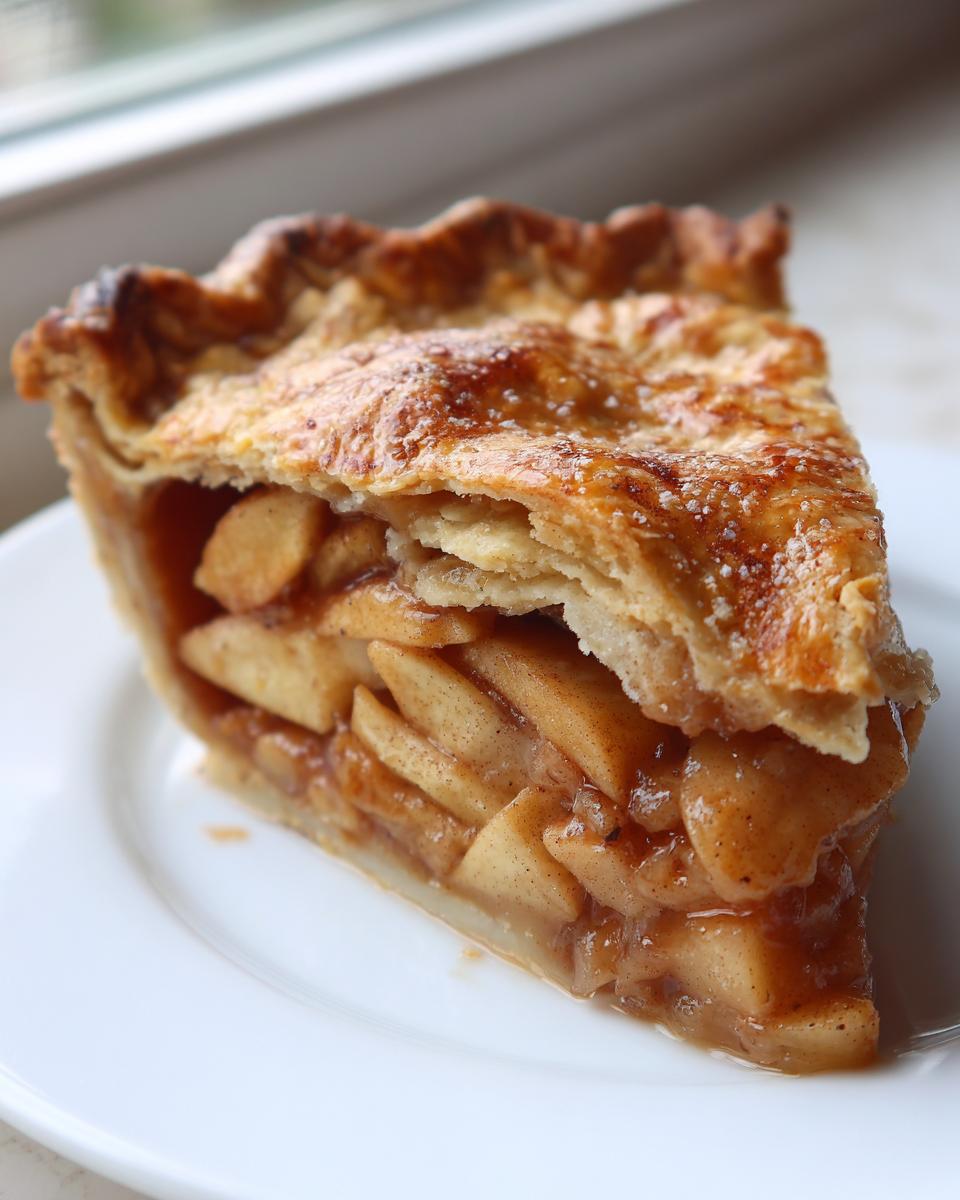
My Flaky Pie Crust Tutorial relies 100% on physics, my friend! The trick to that glorious shatter is keeping the butter chunks intact. As those tiny, cold pieces of butter hit the hot oven, they create steam pockets—that’s your flakiness! We use a double crust, because honestly, who wants a lattice where the top is just pretty little slits? A real, robust top crust holds everything in and shields the filling.
The Secret to the Perfect Apple Pie Filling
This is where most people fail, right? They end up with soup at the bottom! My secret for the Perfect Apple Pie Filling is not just the spices, but the apples themselves. I use Granny Smith for that necessary tart bite and Honeycrisp because they hold their shape beautifully. Tossing them with the sugar and flour early lets them weep just a little bit before they even hit the oven. That moisture mixes with the flour thickener *before* baking, so by the time you take the pie out, the juices have already set up into a gorgeous, thick glaze.
Gathering Ingredients for Your Homemade Apple Pie
Alright, let’s talk supplies! Before we even look at the mixing bowl, we need to make sure the temperature gods are on our side. Nothing sinks an apple pie faster than warm butter. Treat your butter and water like they are made of ice—because they practically are! Sourcing the right apples is just as key here. Get what you need ready before you start blending, because once the dough starts coming together, time isn’t your friend! Speaking of cozy flavors, you might also love this amish apple cinnamon baked oatmeal when you need that fall taste without the whole pie production.
For the Flaky Double Crust Apple Pie Dough
Remember, this dough needs to treat the butter like gold. You’ll need:
- 2 1/2 cups all-purpose flour
- 1 teaspoon salt
- 1 cup (2 sticks) unsalted butter, very cold and cubed
- 1/2 cup ice water, plus more if needed
For the Spiced Apple Filling
This combination gives us structure and flavor. Grab:
- 6 large Granny Smith apples, peeled, cored, and sliced 1/4-inch thick
- 6 large Honeycrisp apples, peeled, cored, and sliced 1/4-inch thick
- 3/4 cup granulated sugar
- 1/4 cup packed light brown sugar
- 1/4 cup all-purpose flour (this is for thickening!)
- 1 tablespoon lemon juice
- 1 teaspoon ground cinnamon and 1/2 teaspoon ground nutmeg, plus 1/4 teaspoon ground allspice
- 1/8 teaspoon salt
- 2 tablespoons unsalted butter, cut into small pieces (for dotting the top before the lid goes on)
For Finishing the Apple Pie
This is what gives us that gorgeous restaurant-level shine:
- 1 large egg, beaten with 1 teaspoon water (for the egg wash)
- 1 tablespoon coarse sugar for sprinkling
How to Prepare the Best Apple Pie From Scratch
This is where the magic, and your success, is baked in! Because we are making a homemade apple pie with a robust crust, we need to work quickly but thoughtfully. Remember that professional precision I mentioned? It mostly comes down to temperature control in this first stage. We handle the components separately almost like two different little baking projects coming together in the end. If you’ve ever wanted to try a different, but equally comforting apple bake, you must look at my Jewish Apple Cake recipe!
Making the Pie Dough: Keep Everything Cold
First things first: the dough demands coldness! Whisk your flour and salt together in a big bowl. Now, grab those cubed, icy sticks of butter. You need to cut that butter into the flour until you have texture, not paste. I look for crumbs ranging from fine sand up to little pea-sized pieces. Those peas are your golden tickets to flakiness, so don’t squish them all away!
Next, start introducing that ice water, just a tablespoon at a time. Mix it gently—I mean gently—until the dough barely holds together. If you squeeze a handful and it crumbles apart, add another splash of water. Once it just starts to look shaggy, stop! Divide it into two nice, flat disks, wrap them up tight, and stick them in the fridge for at least an hour. Seriously, an hour. Don’t rush this chilling time; it lets the gluten relax, which is your key to not having a tough crust.
Mixing the Apple Filling
While the dough is chilling out, we handle the apples. Get those beautiful Granny Smith and Honeycrisp slices into a giant bowl. We toss them with both sugars, the flour for thickening, all those lovely warm spices like cinnamon and nutmeg, and the lemon juice. Mix it all up really well until those apple pieces are completely coated and glistening. Now, here’s a crucial step: let this filling sit right there on the counter while your dough is chilling. This gives the sugar time to start pulling that initial moisture out of the apples, which we addressed earlier, ensuring we don’t end up with soup!
Assembling and Topping Your Double Crust Apple Pie
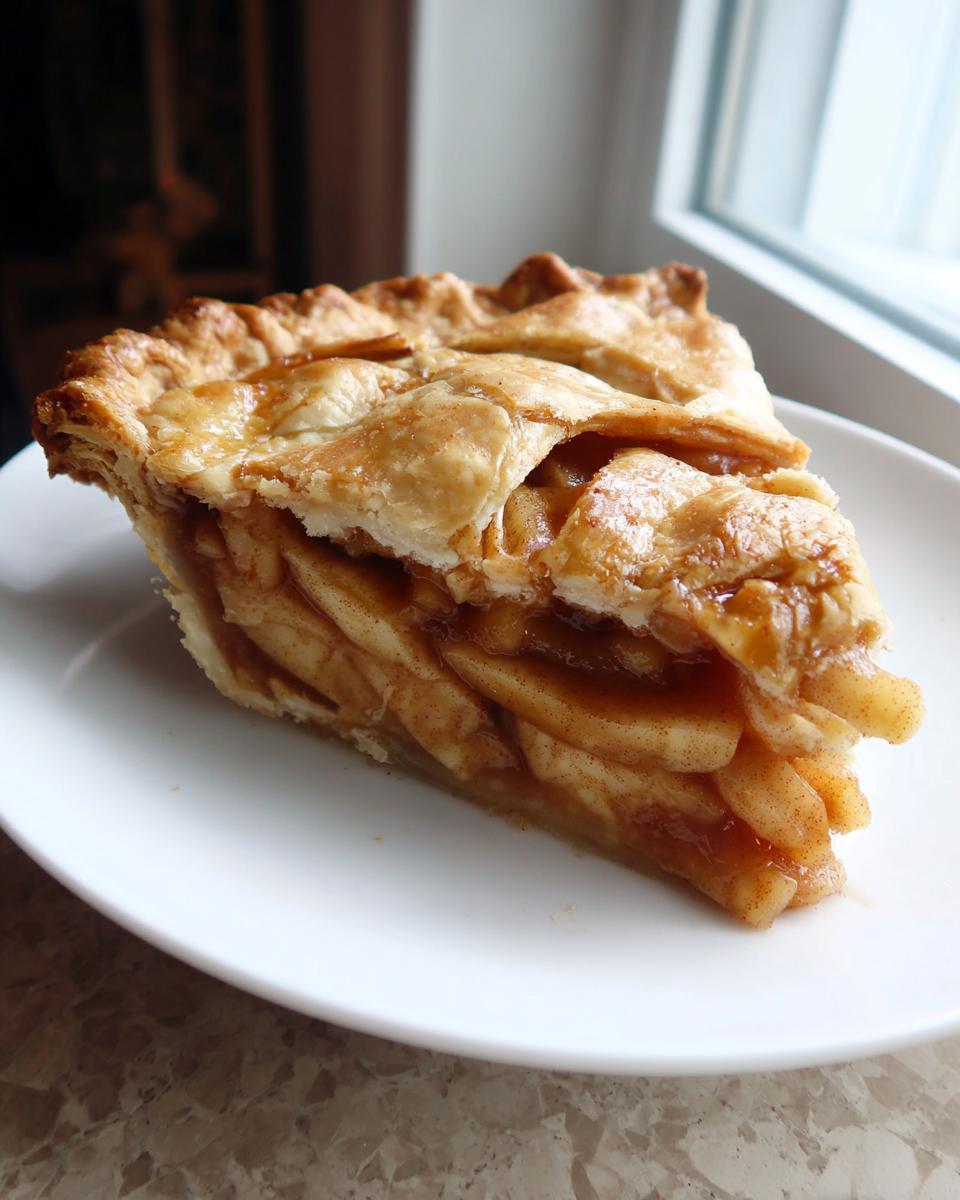
Once the dough is firm, flour your counter lightly and roll out the first disk—this is the bottom crust—into a big 12-inch circle. Ease it gently into your 9-inch pie plate, leaving about an inch of overhang. Now, pile in those seasoned apples, making a nice little mound in the middle so it doesn’t bake up sunken. Remember those two tablespoons of butter? Dot those little pieces right over the top of the fruit for extra richness.
Roll out your second dough disk for the top. Carefully lay this over the filling. Now, grab the edges of the top and bottom crusts and seal them up tight! Crimp them however you like—I usually use a fork for definition—but make sure they are sealed so everything stays inside. You absolutely MUST cut several slits in the top crust so the steam has somewhere to escape. You know it’s done when the crust is deep golden brown and you can hear the filling bubbling thick in the middle. You are making a proper Double Crust Apple Pie!
Baking Instructions for Golden Perfection
Preheat your oven to a hotter temperature first: 425°F (220°C). This initial blast is critical for setting that bottom crust and launching the steam in the butter pockets. Pop the pie onto a baking sheet—trust me, you need this if any filling bubbles over—and bake it for 15 minutes exactly.
After that initial heat, drop the temperature way down to 375°F (190°C) for the main bake, which will be about 45 to 55 minutes more. Keep an eye on those edges; they always want to burn before the center is done. If they start looking too dark too soon, just take some aluminum foil and make little loose tents to shield them. If you want more guidance on pie troubleshooting for a perfect bake, the folks over at Always Eat Dessert have some great tips, too.
Essential Apple Pie Tips and Tricks for Beginners
Okay, listen up, baking buddies! We’ve made the dough, we’ve filled the pie, and it’s glorious and golden, but you absolutely cannot be tempted to slice into it right away. This is where so many folks mess up their otherwise perfect apple pie!
The Critical Cooling Phase for Apple Pie
I know, I know, the smell is intoxicating. But you need to let this pie chill out for a minimum of three hours after it comes out of the oven. That’s non-negotiable! If you slice it while it’s piping hot, that beautiful filling we worked so hard to thicken will run right out onto your counter, making a sugary puddle. Patience here means you get that thick, recognizable slice you want. If you want to make some cute little treats while you wait, try my caramel apple cookies!
Choosing Apples for Baking with Apples
I keep telling you this because it truly matters for flavor balance! You need the tartness of Granny Smith mixed with the sweet crispness of Honeycrisp. If you just use one type, the flavor falls flat, or the texture turns into mush too quickly. That blend right there is what gives our apple pie that complex, delicious depth that makes people ask for the recipe. If you are curious about *why* sometimes the filling looks runny versus glossy, check out this great piece from The Kitchn on filling consistency.
Variations: From Dutch Apple Pie to Rustic Apple Pie
While this classic double crust recipe is my absolute go-to for a traditional experience, I know sometimes you want something a little different, right? Don’t worry, this base is super flexible! If you’re not feeling the top crust, you can easily pivot towards a stunning Dutch Apple Pie. All you do is skip step five for the top dough and instead pile on a buttery crumb topping—it’s crunchy heaven!
Or maybe you’re feeling a little more free-spirited? Then go for a Rustic Apple Pie! That just means you skip the fancy crimping and lattice work and let the edges slump naturally around the crimped bottom crust. It looks beautifully homemade and tastes just as amazing. If you love berry flavors sometimes too, you should absolutely try my blackberry pie recipe—it uses the same gorgeous crust technique!
If you want to see a fabulous example of a topping swap, check out this Dutch Apple Pie recipe I found online. It’s all about having fun with that top layer when making your apple pie!
Serving Suggestions for Your Apple Pie
This rich, spiced apple pie is fantastic on its own, but let’s be real—it’s practically begging for something cold and creamy to cut through that buttery richness. When you’re dealing with something this traditional and comforting, sticking to classic pairings just feels right. You want that delightful temperature contrast that makes every bite an event, especially after a big meal like Thanksgiving dinner!
The Classic Pairing: Apple Pie with Vanilla Ice Cream
If you aren’t serving this pie with a scoop of good vanilla ice cream, are you even enjoying it? I am huge on the contrast here. You pull that pie out of the oven, let it cool just enough so it doesn’t completely disintegrate when you cut it, and then drop a big, frosty scoop right on top. That cold vanilla ice cream starts melting immediately, creating a thin, creamy sauce that pools perfectly around the spiced apples. It’s simple, yes, but it’s iconic for a reason! For those cooler nights, a dollop of freshly whipped cream works too, but I always default to Apple Pie with Vanilla Ice Cream. It never fails to make everyone happy.
If you’re looking for a warm drink pairing to sip alongside that slice, you might want to try making my rich and creamy homemade hot cocoa!
Storage and Reheating Instructions for Leftover Apple Pie
Okay, so maybe you had a slice (or two) too many last night, and now you have some leftover apple pie staring at you from the counter. We need to make sure we keep that crust flaky and the filling safe! Don’t just cover the whole thing loosely and leave it out—that’s a recipe for a soggy bottom by morning. For food safety, unless it’s scorching hot outside, you can leave a fully cooled pie out on the counter under a cake dome or loosely tented with foil for about two days. But honestly, for longer storage, the fridge is your best bet.
If it’s going into the fridge, you need to cover it tightly with plastic wrap, and that crust might get a little soft—that’s just life with fruit pies! When you want to reheat those slices, skip the microwave aggression. I pop individual slices onto a baking sheet at about 350°F (175°C) for maybe ten minutes. That gentle heat crisps the crust right back up without turning the apples into molten lava. For softer, chewier results from another recipe, you might love my molasses cookies!
Frequently Asked Questions About Making Apple Pie
It’s natural to have questions when you’re tackling a classic like this! Baking an apple pie from scratch involves a few more moving parts than just tossing ingredients together, so I’ve gathered up the biggest questions I always get. Don’t hesitate to try these tips out; they really fix the things that trip people up the most. Whether you’re looking for a quick fix or the perfect bake, we’ve got you covered.
Can I use store bought crust for this apple pie recipe?
Look, I’m passionate about my flaky scratch crust—it takes this pie over the top! Having said all that, life happens! If you are serious about saving time, you totally can use a good quality store bought crust. That’s a fantastic Apple Pie Hack for busy weeknights. Just make sure you still treat it gently when rolling it out and dock (poke holes) the bottom crust to stop severe bubbling. But if you have the time, promise me you’ll try the homemade version at least once!
What is the best apple for an apple pie filling?
The absolute best flavor comes from variety! I don’t recommend sticking to just one type. You need a blend of apples that are both tart and hold their shape well during that long bake. That’s why I always use a mix of Granny Smith (for tartness) and Honeycrisp (for sweetness and structure). Putting a duo of apples in your apple pie filling stops it from tasting one-dimensional and keeps the texture from turning into total mush. It gives you that perfect balance between tender and firm slices.
How far ahead can I assemble this apple pie?
This is a tough one because assembled pies often leak juice overnight, making the bottom crust soggy. For the Best Apple Pie From Scratch, I recommend assembling the whole thing *just* before baking, or at most, 4 hours ahead of time if you are keeping it chilled and plan on baking it early the next morning. If you assemble too early, that moisture from the apples starts breaking down the crust prematurely. If you want something you can make ahead completely, I have a fantastic recipe for apple cider Moscow mules that are way easier for storing!
When you get time, try out these tips, and let me know how it goes! If you want more baking inspiration, check out my site again soon!
Nutritional Estimates for Your Apple Pie Slice
Now, let’s talk real talk about what’s in that glorious slice of apple pie. I’ve run the numbers based on the ingredients we used above—the butter-heavy crust, the sugar, the apples—just so you have a good ballpark idea. Since this is a decadent, from-scratch dessert, it’s definitely an indulgent treat, not your every-day snack! This calculation is an estimate based on dividing the entire pie into 8 generous servings, so take it as a guideline, not gospel.
If you’re looking for something equally comforting but maybe a little less rich later in the week, my sweet potato muffins are a wonderful way to satisfy that cozy craving! Here is the breakdown for one piece of our homemade apple pie:
- Serving Size: 1 slice
- Calories: Approximately 450
- Fat: Around 25g (Remember, that’s the glorious butter doing its job!)
- Saturated Fat: About 15g
- Carbohydrates: Roughly 58g
- Sugar: We’re looking at about 35g (That’s the fruit plus the added sugar for that perfect filling.)
- Protein: Just 5g or so
- Sodium: Around 250mg
See? It’s a rich treat! But every single calorie is worth it when you get that crunch from the crust and the warm spice from the apples. This information is strictly an estimate based on the components of this particular Classic Apple Pie Recipe, so consider it Option A in the world of dessert estimates!
Share Your Classic Apple Pie Experience
Seriously, this is the best part for me! It’s wonderful sharing this apple pie recipe with you, but seeing your creations is what makes coming back to the kitchen worthwhile. Did the crust turn out shatteringly flaky? Did you get those beautiful golden vents in the top crust? Don’t keep the joy to yourself!
I want to see what you made! Snap a picture of your finished pie—maybe served warm with that perfect scoop of vanilla ice cream next to it—and tag me on social media. It truly lets me know this recipe has found a good home and keeps me inspired to share more comforting American recipes like this one. And hey, if you found this recipe helpful, please leave a star rating right here on the page. It helps other new bakers find this recipe and learn how to make homemade apple pie that tastes like tradition. If you’re curious about my own baking journey, you can always read a bit more on my About page. Happy baking, everyone!
PrintThe Best Classic Homemade Apple Pie From Scratch

Make the best homemade apple pie with a perfectly flaky double crust and a tender, spiced apple filling. This classic American dessert is comforting and ideal for any gathering.
- Prep Time: 45 min
- Cook Time: 70 min
- Total Time: 115 min
- Yield: 8 servings 1x
- Category: Dessert
- Method: Baking
- Cuisine: American
- Diet: Vegetarian
Ingredients
- 2 1/2 cups all-purpose flour
- 1 teaspoon salt
- 1 cup (2 sticks) unsalted butter, very cold and cubed
- 1/2 cup ice water, plus more if needed
- 6 large Granny Smith apples, peeled, cored, and sliced 1/4-inch thick
- 6 large Honeycrisp apples, peeled, cored, and sliced 1/4-inch thick
- 3/4 cup granulated sugar
- 1/4 cup packed light brown sugar
- 1/4 cup all-purpose flour
- 1 tablespoon lemon juice
- 1 teaspoon ground cinnamon
- 1/2 teaspoon ground nutmeg
- 1/4 teaspoon ground allspice
- 1/8 teaspoon salt
- 2 tablespoons unsalted butter, cut into small pieces
- 1 large egg, beaten with 1 teaspoon water (for egg wash)
- 1 tablespoon coarse sugar for sprinkling
Instructions
- Prepare the Pie Crust: In a large bowl, whisk together the flour and 1 teaspoon salt. Cut in the cold butter using a pastry blender or your fingers until the mixture resembles coarse crumbs with some pea-sized pieces of butter remaining. Gradually add the ice water, one tablespoon at a time, mixing until the dough just comes together. Do not overmix. Divide the dough in half, form each half into a disk, wrap in plastic wrap, and chill for at least 1 hour.
- Prepare the Apple Filling: In a large bowl, combine the sliced apples, granulated sugar, brown sugar, 1/4 cup flour, lemon juice, cinnamon, nutmeg, allspice, and 1/8 teaspoon salt. Toss gently until the apples are evenly coated. Let the mixture sit while you roll out the bottom crust.
- Preheat Oven and Roll Dough: Preheat your oven to 425°F (220°C). On a lightly floured surface, roll out one disk of dough into a 12-inch circle. Carefully transfer the dough to a 9-inch pie plate. Trim the edges, leaving a 1-inch overhang.
- Assemble the Pie: Pour the apple filling into the bottom crust, mounding the apples slightly in the center. Dot the top of the apples with the small pieces of butter.
- Top Crust: Roll out the second disk of dough. Place it over the filling. Trim the top crust, leaving a 1-inch overhang. Crimp the edges of the top and bottom crusts together to seal. Cut several slits in the top crust to allow steam to escape.
- Bake: Brush the top crust with the egg wash and sprinkle with coarse sugar. Place the pie on a baking sheet to catch any drips. Bake at 425°F (220°C) for 15 minutes. Reduce the oven temperature to 375°F (190°C) and continue baking for 45 to 55 minutes, or until the crust is golden brown and the filling is bubbly. If the edges brown too quickly, cover them loosely with foil.
- Cool: Let the **perfect apple pie filling** cool on a wire rack for at least 3 hours before slicing. This allows the juices to thicken.
Notes
- For the flakiest pie crust, keep all your ingredients, especially the butter and water, very cold.
- If you prefer a Dutch Apple Pie, skip the top crust and use an apple crumb topping instead.
- Use a mix of tart and sweet apples, like Granny Smith and Honeycrisp, for the best flavor balance.
Nutrition
- Serving Size: 1 slice
- Calories: 450
- Sugar: 35g
- Sodium: 250mg
- Fat: 25g
- Saturated Fat: 15g
- Unsaturated Fat: 10g
- Trans Fat: 0g
- Carbohydrates: 58g
- Fiber: 3g
- Protein: 5g
- Cholesterol: 60mg