
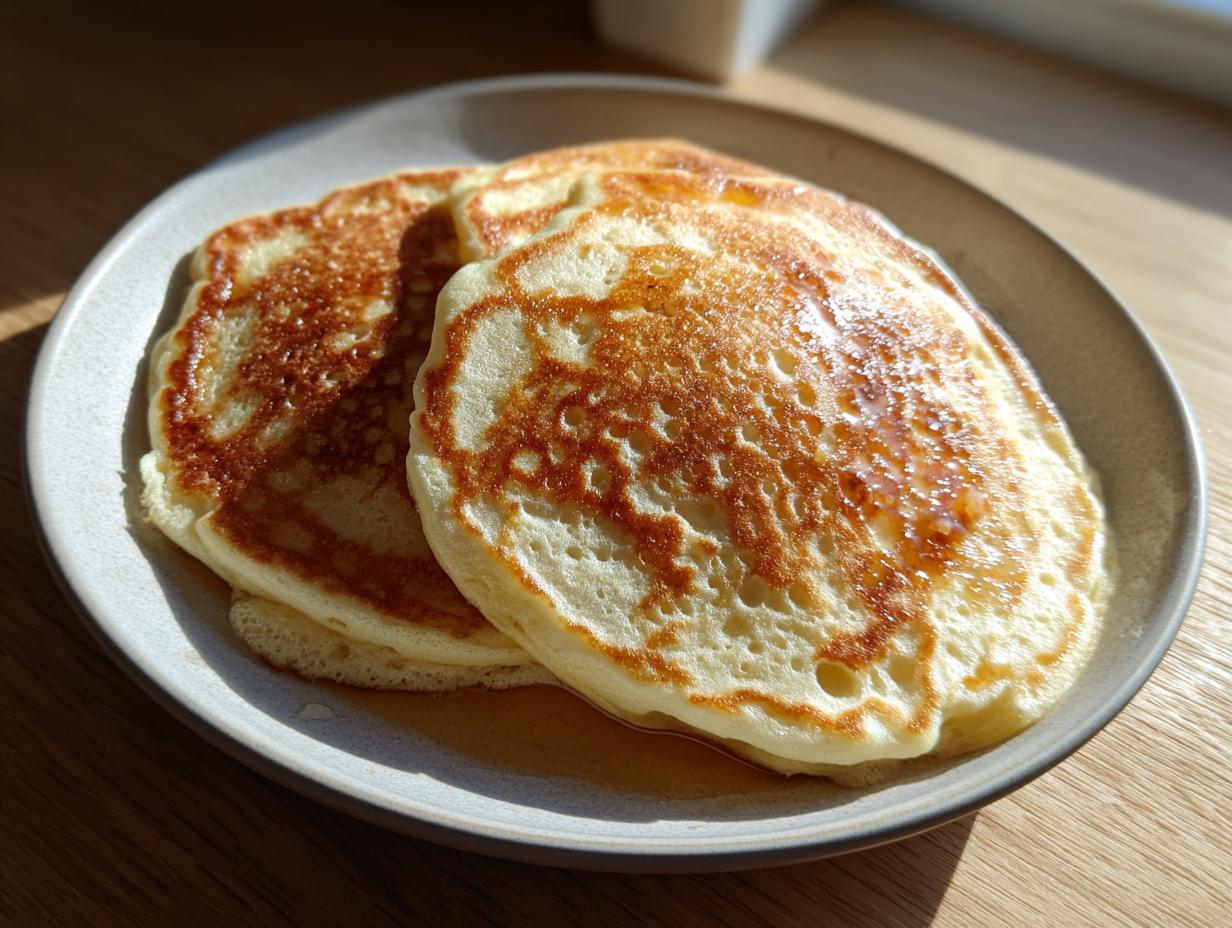
There’s just nothing better than waking up slow on a Saturday, smelling coffee brewing, and knowing you have time to dedicate to making a tower of genuine, melt-in-your-mouth buttermilk pancakes. Honestly, after years spent chasing perfect dishes in professional kitchens all over the country, I realized the greatest satisfaction comes from nailing the basics—the true cornerstones of American home cooking. Forget those sad, flat discs you get stuck with sometimes; I’m handing you the real deal. This recipe delivers those unbelievably fluffy buttermilk pancakes with that signature, delicate tang you crave. Trust me, this is the recipe I developed and repeatedly test to make sure your weekend breakfast is absolutely perfect.
We’re aiming for texture here—something light and airy—and that all starts with quality ingredients and a little bit of patience. My journey, which you can read more about here, taught me that precision matters, even in something as simple as breakfast. Let’s get this easy classic breakfast started!
- Why This Fluffy Buttermilk Pancakes Recipe Works Every Time
- Gathering Ingredients for Classic Old Fashioned Pancakes
- How to Make Pancakes with Buttermilk: Step-by-Step Instructions
- Tips for Success with Your Buttermilk Breakfast Treats
- Variations on Classic Buttermilk Pancakes
- Serving Suggestions for Making Pancakes for Brunch
- Storage and Reheating Buttermilk Pancakes
- Frequently Asked Questions About Buttermilk Pancakes
- Estimated Nutritional Data for This Recipe
Why This Fluffy Buttermilk Pancakes Recipe Works Every Time
When I was learning how to make the best homemade buttermilk pancakes, I learned quickly that the ingredients aren’t just suggestions; they are chemistry working together. This specific fluffy buttermilk pancakes recipe is famous in my family because I respect that science. We aren’t looking for average; we are aiming for the fluffiest pancakes ever, capable of holding up a whole stack of butter and syrup.
The Role of Buttermilk in Perfect Buttermilk Pancakes
Buttermilk is the secret weapon for that light and airy pancake texture. See, it’s acidic, right? When that acid hits the baking soda we use, it creates carbon dioxide bubbles instantly. These bubbles get trapped in the batter, and when they hit that hot griddle, boom—lift! This reaction gives you those beautiful, tender interiors instead of dense hockey pucks. It’s why I always insist on using real buttermilk for these traditional American pancakes.
Gathering Ingredients for Classic Old Fashioned Pancakes
Okay, before we even think about mixing, we need to gather our players. Remember, we’re going for deeply flavorful, best homemade buttermilk pancakes here, so using solid ingredients matters a ton. I’ve listed exactly what you need below. For me, achieving those classic old fashioned pancakes means sticking to the list and making sure your butter is actually measured correctly before melting. It’s the foundation of a great morning!
Ingredient Clarity and Preparation
Here is the exact lineup for about 12 beautiful pancakes. Don’t be tempted to swap things out without knowing the science—unless you check out my substitute note later!
- 2 cups all-purpose flour
- 2 tablespoons granulated sugar
- 2 teaspoons baking powder
- 1 teaspoon baking soda
- 1 teaspoon salt
- 2 cups buttermilk
- 2 large eggs
- 4 tablespoons unsalted butter, melted, plus more for the griddle
How to Make Pancakes with Buttermilk: Step-by-Step Instructions
Now for the exciting part—turning these measured ingredients into a truly perfect pancake batter! We’re making this from scratch pancake recipe shine. Follow these steps precisely, especially regarding mixing, and you’ll see why these are truly special for your next big brunch. It takes just a few minutes of active work, but that resting time is non-negotiable!
Mixing the Perfect Buttermilk Pancakes Batter
First things first: keep your bowls separate! In a big bowl, take your flour, sugar, baking powder, baking soda, and salt, and just give them a quick whisk together. We want everything evenly distributed before the liquids come in. In a second, smaller bowl, whisk those two eggs into the buttermilk until they’re just happy together. Now comes the crucial moment for achieving those fluffy thick pancakes.
Pour all the wet stuff into the dry stuff. Grab your whisk, but I beg you, whisk gently! We are mixing until *just* combined. If you look down and see a few stubborn lumps of flour hanging around, that’s good! That means you haven’t overmixed, which is the number one way to kill fluffiness and end up with tough pancakes. Once they are barely combined, gently fold in that melted butter. Give the whole thing a brief rest—about 10 minutes on the counter. This rest is vital; it lets the gluten relax and the baking soda really start doing its magic for maximum lift.
Griddle Temperature and Cooking Your Buttermilk Pancakes
While the batter is settling in, get your griddle or skillet warming up. You need medium heat, no hotter! I’ve seen people crank it up too high, and all that happens is the outside burns before the inside cooks, leaving you with raw centers. To test if your surface is ready for these buttermilk pancakes, try this: flick a tiny drop of water onto the pan. If it sizzles instantly and evaporates quickly, you’re golden. If it jumps around like a little ball of mercury and takes its time, it’s too cold. If it evaporates immediately with a loud hiss, it’s too hot!
Once the griddle is right, use a 1/4 cup measure for pouring—consistency is key for even cooking. Watch the top surface. You should see little bubbles popping up after about 2 to 3 minutes, and the edges will look set and matte. That’s your cue! Flip them over. They should have a gorgeous, even golden-brown color. Cook the second side for just 1 to 2 quick minutes more. Then, get them immediately onto a plate, because these are begging to be eaten hot!
Tips for Success with Your Buttermilk Breakfast Treats
Even with the right recipe, sometimes things go sideways, right? That’s where knowing a few professional guardrails helps turn this into your go-to easy classic breakfast. My best advice comes straight from watching countless batches get flipped perfectly. The absolute most important thing I learned is this: once your batter rests, do not touch it. Don’t stir it again, even if you think you need to smooth it out. Stirring means gluten, and gluten means chewy, tough pancakes. We want soft, tender ones! You can read more about my commitment to easy classic breakfast recipes here: this focus on fundamentals.
Also, remember that temperature control is everything on the griddle. Keep it steady at medium. This repetitive, focused cooking style guarantees that lovely golden finish every single time you drop batter down.
Buttermilk Substitute for Your Buttermilk Pancakes
Now, what if you’re ready to make these incredible buttermilk breakfast treats, but realized you’re totally out of actual buttermilk? Don’t worry, I’ve got you covered. You can whip up a perfect substitute in about five minutes. Take 2 cups of regular cold whole milk and whisk in 2 tablespoons of white vinegar or fresh lemon juice. Let that mixture sit on the counter for maybe five minutes. It will start to look a little curdled and thick—that’s exactly what you want! It mimics the acidity of real buttermilk perfectly, so you can still achieve those light and airy pancakes.
Variations on Classic Buttermilk Pancakes
While I absolutely stand by this recipe as the gold standard for traditional American pancakes, sometimes you just need a little something extra, right? That’s the beauty of a great base recipe—you can dress it up! When I make these for my own family on a lazier Sunday, I usually try one of these simple additions just before resting the batter. Remember, we rest the batter first, then gently fold in whatever extras catch your eye.
If you’re craving something sweet and decadent, folding in a half-cup of semi-sweet chocolate chips is just magic. Check out my tips for slightly different results on my chocolate chip pancakes recipe for specific guidance so they don’t sink to the bottom.
For a burst of freshness, you can’t beat blueberries. Use about a cup of fresh blueberries—don’t use frozen unless you toss them in a tiny bit of flour first so they don’t bleed blue all over your batter. Another fun one for a little texture? Toasted pecans or walnuts folded in right at the end. They bring a lovely crunch that contrasts so nicely with the soft, fluffy texture we worked so hard to achieve!
Serving Suggestions for Making Pancakes for Brunch
You’ve achieved perfection. The stack is golden, it’s steaming, and it smells like everything good about a relaxed weekend. Now comes the fun part: dressing up these treats for your big making pancakes for brunch event! The slight, pleasant tang of the buttermilk pancakes means they pair beautifully with sweeter, richer toppings.
Of course, you can never go wrong with the classics. A generous slab of good quality, real salted butter melting into those little air pockets, followed by a slow pour of pure, warm maple syrup—that’s the iconic American way, and it’s genuinely unbeatable. Make sure your syrup is warm; cold syrup actually cools down your beautiful, hot pancakes instantly, and we can’t have that!
But if you want to elevate things just a tiny bit for guests, try balancing that buttermilk flavor with something bright. A simple topping of fresh strawberries, sliced bananas, and a dollop of slightly sweetened homemade whipped cream takes these from great to unforgettable. For something richer, a drizzle of my favorite creamy topping (yes, even eggnog mixed with a little cream cheese!) offers a decadent contrast. No matter what you choose, serve them immediately so everyone enjoys that signature fluff!
Storage and Reheating Buttermilk Pancakes
Look, these pancakes are best eaten the second they leave the griddle. That initial tenderness and steam are unbeatable for your easy classic breakfast. But let’s be real, sometimes you make too many, or you just want one ready for Monday morning! Storing them properly is key to preventing them from turning hard and cracker-like.
If you have leftovers, let them cool completely on a wire rack first. Putting warm pancakes in an airtight container traps steam, which turns them soggy—and nobody wants soggy pancakes, even if they are amazing buttermilk pancakes.
Once totally cool, I stack them layered with a small square of parchment paper or wax paper between each one. This keeps them from sticking together. Place the stack in a heavy-duty freezer bag or an airtight container. They’ll last beautifully in the fridge for up to three days, or easily for two months in the freezer.
Reheating is where many people mess up, and you won’t! You can reheat them in the microwave for about 20 seconds, but they often lose their tenderness that way. The best way to reheat these light and airy pancakes is in the toaster oven or a regular oven set to about 350°F (175°C). Just a few minutes should do it until they are warmed through. That little bit of dry heat helps bring back some of that lovely texture on the outside!

Frequently Asked Questions About Buttermilk Pancakes
I get so many questions on social media about achieving that perfect stack, and honestly, most problems can be fixed with a tiny adjustment to technique! I want every person who tries this recipe to end up with pancakes that live up to the promise of being the absolute best. Here are a few things folks ask me about when they are trying to make these light and airy pancakes.
Can I use regular milk instead of buttermilk in this recipe?
Oh, I know the struggle when you run out! You certainly can use regular milk if you absolutely must, and I gave you the quick substitute method for making your own a little earlier. But listen, if you want the *true* tang and that amazing lift that makes these buttermilk pancakes famous, nothing beats actual, tangy buttermilk. The acid content is what really reacts with the soda to give you the biggest fluff possible. If you use regular milk without the acid, you’ll need to adjust the baking soda/powder ratio, and frankly, you might as well just start with a different recipe!
How do I get my buttermilk pancakes to be extra thick?
If yours are coming out flat, it usually boils down to two things I stressed above, so listen close! First, the rest time: that 10-minute period where the batter sits on the counter is when the magic happens. Don’t skip it! Second, and this is huge: do not overmix! That lumpy batter I mentioned? That’s your friend. The moment you start working out the lumps, you’re developing gluten, which causes the batter to stretch and flatten instead of rising tall. For truly fluffy thick pancakes, mix until barely combined, fold in the butter, and then walk away from the bowl until it’s griddle time.
My pancakes are burning on the outside but raw inside—what went wrong?
This is almost always a heat issue. Your griddle is simply too hot. If you try to cook your classic old fashioned pancakes on scorching heat, the outside cooks too fast and forms a hard crust before the heat has time to penetrate the middle. You need that reliable medium heat we talked about. Remember the water test: slow sizzle, quick evaporation. This allows the heat to gently move through the batter, cooking the center through while rendering that gorgeous, even golden-brown crust on the exterior. Consistency is your best friend for breakfast!
Why are my pancakes tough or chewy instead of tender?
Toughness, my friend, equals overmixing. It’s the common enemy of every good cook trying to make light and airy pancakes. Anytime you mix flour and liquid together for too long, you activate the gluten proteins in the flour, making the final product strong and elastic—like bread dough, not pancakes. Stop mixing the second the dry ingredients look incorporated. Lumps are totally fine! Remember, we’re aiming for a perfect pancake batter that looks slightly shaggy.
If you want to dive deeper into fixing common kitchen fails, my article on fixing things like pancake discards might give you some extra troubleshooting ideas!
Estimated Nutritional Data for This Recipe
I always put a little disclaimer here, because honestly, once you start adding maple syrup or maybe a dollop of whipped cream, the numbers change fast! What I’ve listed below is the estimate for one standard pancake made strictly according to the recipe above, before you start piling on the toppings.
For me, knowing the basics helps when I’m planning a big weekend meal, especially if I’m trying to keep track of things. This information is based on a standard serving size of one pancake made from this fluffy buttermilk pancakes recipe.
- Serving Size: 1 pancake
- Calories: 180
- Sugar: 5g
- Sodium: 350mg
- Fat: 7g
- Saturated Fat: 4g
- Carbohydrates: 25g
- Protein: 6g
Now, remember, this is just an estimate. If you use salted butter instead of unsalted, or if your eggs are extra large, those numbers shift a little bit! But it gives you a great baseline for enjoying these wonderfully tender, traditional American pancakes guilt-free.
PrintFluffy Buttermilk Pancakes: The Best Homemade Recipe

Make light and airy pancakes from scratch using buttermilk for a classic, tender texture and slight tang. This is the perfect weekend breakfast recipe.
- Prep Time: 10 min
- Cook Time: 15 min
- Total Time: 25 min
- Yield: About 12 pancakes 1x
- Category: Breakfast
- Method: Griddling
- Cuisine: American
- Diet: Vegetarian
Ingredients
- 2 cups all-purpose flour
- 2 tablespoons granulated sugar
- 2 teaspoons baking powder
- 1 teaspoon baking soda
- 1 teaspoon salt
- 2 cups buttermilk
- 2 large eggs
- 4 tablespoons unsalted butter, melted, plus more for the griddle
Instructions
- Combine dry ingredients: In a large bowl, whisk together the flour, sugar, baking powder, baking soda, and salt.
- Combine wet ingredients: In a separate bowl, whisk together the buttermilk and eggs until blended.
- Mix batter: Pour the wet ingredients into the dry ingredients. Whisk gently until just combined. Do not overmix; a few lumps are fine. Fold in the 4 tablespoons of melted butter.
- Rest the batter: Let the batter rest at room temperature for 10 minutes. This allows the gluten to relax and the leavening agents to activate, resulting in fluffier thick pancakes.
- Heat the griddle: Heat a large non-stick griddle or heavy skillet over medium heat. Lightly grease with butter. The griddle is ready when a drop of water sizzles and evaporates quickly.
- Cook pancakes: Pour 1/4 cup of batter onto the hot griddle for each pancake. Cook for 2 to 3 minutes until bubbles appear on the surface and the edges look set.
- Flip and finish: Flip the pancakes and cook for another 1 to 2 minutes until golden brown on the underside.
- Serve immediately: Serve your perfect pancake batter creation hot with your favorite toppings.
Notes
- For the fluffiest pancakes ever, do not stir the batter after it rests. Overmixing develops gluten, leading to tough pancakes.
- If you do not have buttermilk, you can make a substitute: Add 2 tablespoons of white vinegar or lemon juice to 2 cups of regular milk. Let it sit for 5 minutes before using.
- Maintain a consistent medium heat. If the griddle is too hot, the outside will burn before the inside cooks through.
Nutrition
- Serving Size: 1 pancake
- Calories: 180
- Sugar: 5
- Sodium: 350
- Fat: 7
- Saturated Fat: 4
- Unsaturated Fat: 3
- Trans Fat: 0
- Carbohydrates: 25
- Fiber: 1
- Protein: 6
- Cholesterol: 60