
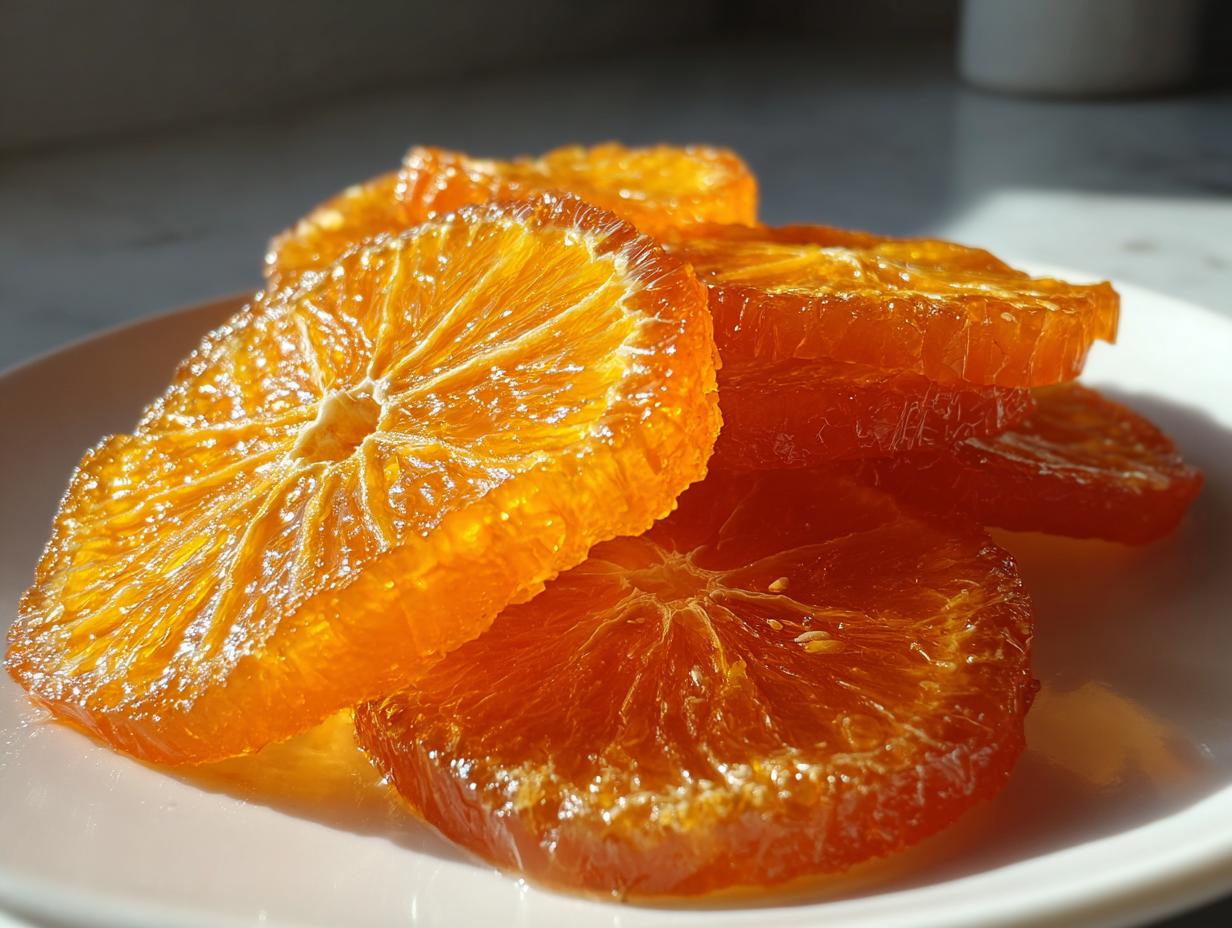
It’s amazing how simple, humble fruit can be transformed into something truly elegant, isn’t it? I want to show you how to make candied orange slices that shine like little jewels—they are glossy, perfectly chewy, and bursting with that sweet-and-tangy flavor we all crave. When I put these recipes together, my goal is always to take techniques that sound fussy, like making homemade citrus candy, and make them totally accessible for your home kitchen. Trust me, this recipe proves you don’t need professional training to achieve that beautiful translucent look you see in bakeries. If you enjoy easy, impressive treats, check out my collection of simple delicious desserts! Get those fresh oranges ready; we’re making something special!
- Why You Will Love This Easy Candied Orange Slices Recipe
- Ingredients for Perfect Candied Orange Slices
- How to Make Candied Orange Slices: Step-by-Step Tutorial
- Tips for Success Making Candied Orange Slices
- Variations: Chocolate Dipped Orange Slices and More
- Creative Ways to Use Your Homemade Orange Garnish
- Storage and Reheating Instructions for Candied Orange Slices
- Frequently Asked Questions About Candied Orange Slices
- Estimated Nutritional Information for Candied Orange Slices
- Share Your Homemade Candied Orange Slices Creations
Why You Will Love This Easy Candied Orange Slices Recipe
I know you’re looking for a recipe that actually delivers, and this one is a total winner. It’s all about bringing out that true citrus potential without turning things bitter or mushy. Here’s why these candied orange slices immediately landed in my top five favorite holiday treats:
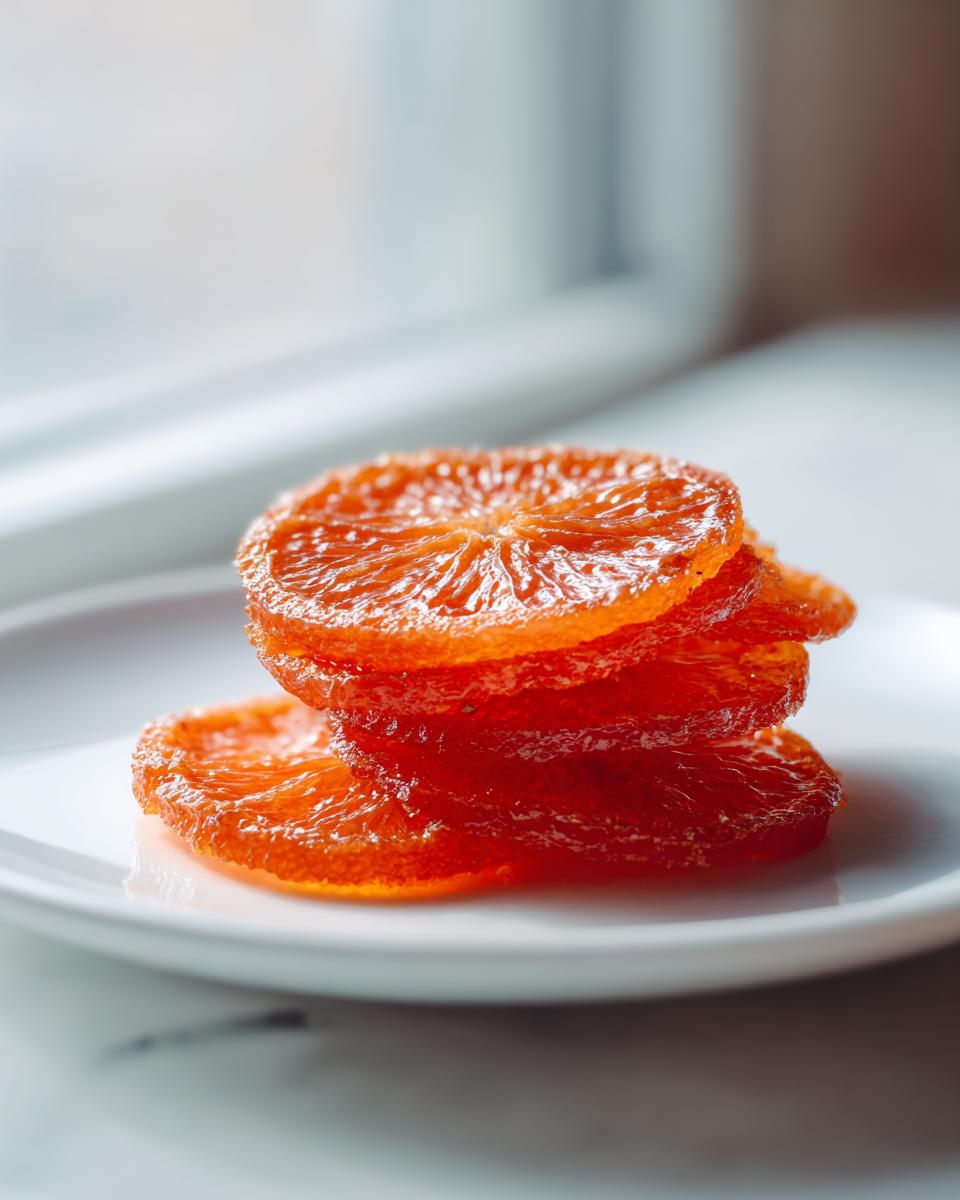
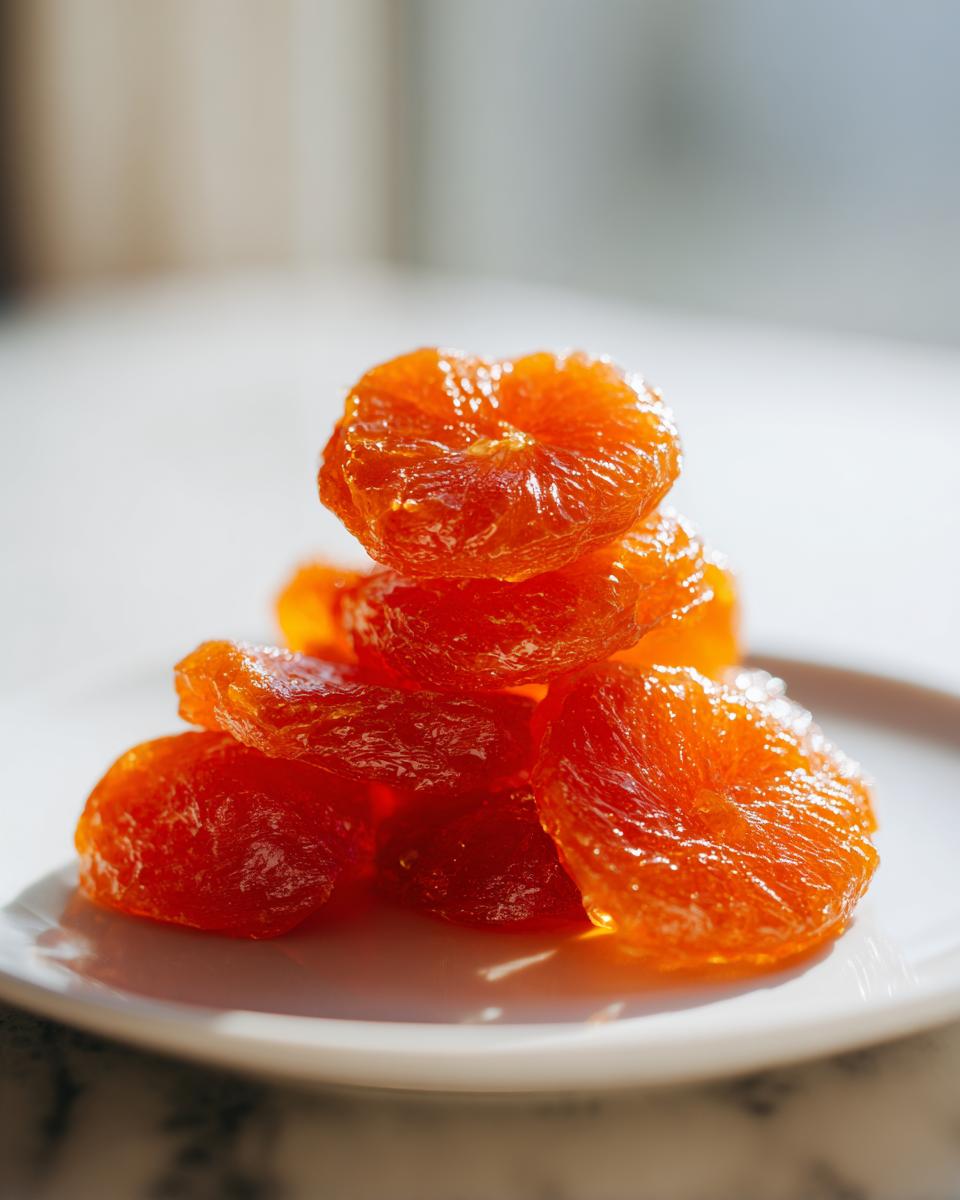
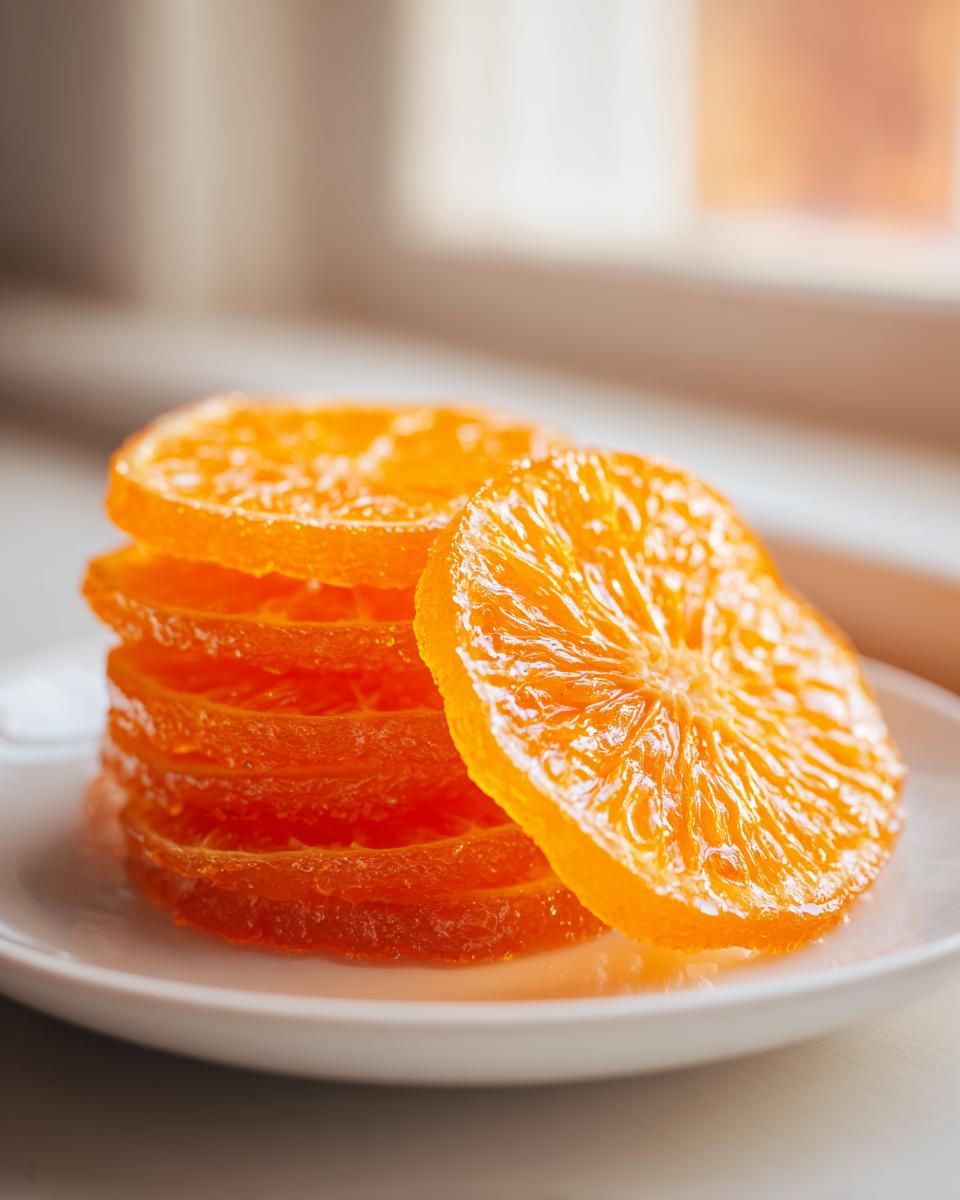
- The Texture is Spot On: They dry beautifully to be perfectly chewy—never hard or brittle.
- That Glossy Finish: Slow simmering in the simple syrup gives them that incredible, jewel-like shine that looks gourmet.
- Sweet and Tangy Perfection: We balance the sugar with natural citrus acidity, so it’s bright, not cloyingly sweet.
- Incredibly Versatile: Use them as an edible orange decoration on cheesecakes, toss them on a charcuterie board, or just snack straight from the jar.
Ingredients for Perfect Candied Orange Slices
When it comes to making candied orange slices, the quality of your starting ingredient really shines through. You can’t fake a great orange flavor, so grab the prettiest, firmest ones you can find at the market! If you’re making these near Valentine’s Day, grabbing some gorgeous blood oranges makes the final product stunning. Don’t forget to check out my recipe for cranberry orange bread if you have extra citrus on hand!
Here’s what you’ll need:
- 3 large navel oranges (or blood oranges for color), washed well and sliced crosswise, about 1/8 inch thick.
- 6 cups water, divided (for blanching).
- 3 cups granulated sugar (for the syrup).
- 1 cup water (for the syrup base).
- 1 tablespoon fresh lemon juice (to help stabilize the syrup and brighten the tang).
How to Make Candied Orange Slices: Step-by-Step Tutorial
Okay, here is where the magic truly happens. Making great candied orange slices is less about speed and more about patience—we’re coaxing the bitterness out and replacing it with glistening sweetness. Follow these steps closely, especially the blanching, and you’ll have that perfect chewy candied oranges texture in no time.
Preparing the Oranges and Blanching to Remove Bitterness
First things first: we need perfect rounds. Slice your oranges crosswise to about 1/8 inch thickness. Try to keep them uniform; this helps them cook evenly later! We need to remove any harsh bitterness from the peel, and that takes a little elbow grease. Place those slices in a big pot and cover them with 6 cups of water. Bring it to a rolling boil, drain it all out, and then—this is important—do it again. And again! We repeat this boil and drain cycle three times total. Don’t skip this, or your final result will have a harsh edge. This repeated step is my secret to a truly sweet final product.
Creating the Simple Syrup Orange Slices Base
Once those oranges are prepped, wipe out the pot and let’s build the simple syrup. You’re combining the 3 cups of sugar, 1 cup of fresh water, and that splash of lemon juice. Turn the heat to medium and stir constantly until every single grain of sugar has vanished. It has to be totally dissolved before the fruit goes in; otherwise, the sugar can crystallize weirdly. Once it’s crystal clear, turn the heat way down low.
Simmering for Glossy Orange Candy Recipe Perfection
Now, gently add your blanched orange slices right into that hot syrup. If you can, lay them in a single layer so they soak up the sugar evenly. We are going to let these simmer, not boil rapidly, for about 45 minutes up to a full hour. This long, slow simmer is what makes them translucent! You’ll see the white pith turn almost clear. Give them a gentle nudge with tongs every 15 minutes to make sure the bottoms don’t scorch.

Drying Your Chewy Candied Oranges
Once they look shiny and soft, carefully lift each piece out using tongs and place them on a wire rack set over a baking sheet. Let them drip off for about 15 minutes. This keeps the outside from staying too wet later. Now, for the drying—you have options! You can leave them out on the counter for a full 24 hours, which works fine for chewy candied oranges. But if you’re in a hurry, pop that rack into a very low oven, around 200°F, for 2 to 3 hours, flipping them halfway. You want them dry to the touch where they don’t stick to your fingers, but still pliable in the center. If you want easy homemade sweets, these are worth the wait!
Tips for Success Making Candied Orange Slices
Now that you have the steps down for making the perfect candied orange slices, I want to give you a few final pointers that I’ve picked up over the years. These little details are what take you from ‘good’ candied peel to truly ‘gourmet dessert garnish homemade’ quality!
First, let’s talk oranges. If you want those gorgeous colors, don’t stick only to standard navel oranges. Try using Cara Cara or even those deep red Blood Oranges. They provide such a stunning visual contrast when they become translucent. Choosing fruit that is heavy for its size usually means more juice and better flavor for your recipe for candied oranges.
Next, be gentle during the simmer. If you have your syrup bubbling too hard, it can actually start to break down the structure of the fruit too quickly, leading to mushy slices instead of that wonderfully chewy candied oranges texture we’re after. Keep it to a bare, lazy simmer—the heat should just barely break the surface of the syrup. This slow infusion process is key to getting that deep, sugary flavor into the rind.
Also, pay close attention to that drying step! If you try to roll them in sugar when they are still too wet, you just get a soggy, heavy coating. If you dry them too long in the oven, they become rock hard. You are looking for the point where they are tacky but no longer dripping moisture when they come off the rack. That gentle tackiness is exactly what you need if you plan on coating them in chocolate later!
Variations: Chocolate Dipped Orange Slices and More
Once you’ve mastered the gorgeous, glossy result of your candied orange slices, it’s time to dress them up a bit! They are fantastic just sitting on a wire rack, but a little extra flair makes them perfect for holiday platters or as a sophisticated homemade gift. If you didn’t coat them in sugar while they were warm, you can absolutely roll the fully dried slices in extra granulated sugar for a crisp exterior finish!
Now, for my favorite upgrade: making chocolate dipped orange slices. This only works if your slices are completely and totally dry—no moisture allowed, or the chocolate will seize up. Melt down some really good quality dark chocolate for that perfect bitter contrast. Dip about half of each slice and spin it gently to create a neat coating. I suggest sprinkling a tiny pinch of flaky sea salt right on top of the wet chocolate—it takes the sweet and tangy flavor to a whole new level! If you love that dark chocolate vibe, you absolutely have to try my recipe for a flourless chocolate torte. Place the dipped slices back onto parchment paper to set completely.
Creative Ways to Use Your Homemade Orange Garnish
Honestly, once you’ve made a batch of these beautiful candied orange slices, the hardest part is knowing what to do with all that sweet citrus sunshine! They are so bright and add instant elegance wherever you put them. Forget those sad little slices of fruit someone puts on a glass of water—these are treats meant to shine!
First off, let’s talk about elevating your baked goods. These make the most incredible edible orange decoration. Imagine a slice perched right on top of a dark chocolate cupcake or nestled over a swirl of tangy lemon curd. If you’re frosting a cake, especially with something classic like my vanilla buttercream frosting recipe easy, topping it with a few of these makes it look like you spent all day on it. They look especially stellar on holiday cakes, like a rich fruitcake or even a simple white cake!
But they aren’t just for cakes! These are fantastic for presentation in general. On a holiday platter, scatter them between cheeses and nuts for a gorgeous pop of color and flavor—they are a welcome addition to any charcuterie board. The sweet and tangy flavor cuts right through rich cheeses beautifully.
And please, don’t forget about gifting! If you’ve ever searched for best orange slices for gifts, this is it. Layer them neatly in a small cellophane bag, tie it with some festive twine, and you have a gourmet, thoughtful present in minutes. Everyone loves receiving something handmade that tastes this bright. Seriously, making these is a testament to how simple ingredients, treated with patience, turn into something truly special for others to enjoy.
Storage and Reheating Instructions for Candied Orange Slices
Phew! You’ve successfully made beautiful, glossy candied orange slices. The final hurdle is keeping them tasting perfect for when you need them for a garnish or just want a little chewy treat later. The good news is that these citrus candies keep really well since they are loaded with sugar!
For storage, you must ensure they are completely dry first. If they have any stickiness clinging to them, they can start to get soggy in storage. Once they are totally cooled and dry, place your chewy candied oranges in a single layer inside an airtight container. I prefer glass jars; they seal really well. You can keep these stored happily at cool room temperature for several weeks—sometimes even longer if your house isn’t too humid!
Now, if you were asking about leftovers—and honestly, who has leftovers of candied orange slices?—you might have that extra bit of simple syrup left over from the simmering process. This syrup is liquid gold! Please, do not throw it away! This concentrated, sweet, tangy citrus syrup is fantastic. I use it to sweeten my iced tea in the summer, or you can drizzle a spoonful over plain yogurt or vanilla ice cream. It brings the exact bright punch you need for cocktails, too, if you’re making something fancy like an Old Fashioned or a Gin Fizz.
If you do store the slices for a long time (say, over a month), or if your kitchen is particularly warm, go ahead and pop that airtight jar into the refrigerator. They hold their flavor beautifully, but they might get slightly softer. If they feel a little tacky upon pulling them out, just lay them back on a sheet of parchment paper for an hour at room temperature to dry out just a bit before using them as an edible orange decoration.
Frequently Asked Questions About Candied Orange Slices
It’s funny how many little things can throw off this recipe, but don’t worry! I want to make sure your efforts result in those perfect, glossy creations. Here are a few things I hear most often when people are learning how to make candied orange slices.
Why do my orange slices taste bitter, even after boiling?
If you’re tasting bitterness, it means you likely didn’t blanch those slices enough! Bitterness lives right in the white pith surrounding the fruit section. My standard advice for a successful tangy candied peel tutorial is to boil and drain the slices a minimum of three times, sometimes four if the oranges seem particularly thick-skinned. That simmering in sugar needs time to replace the bitter oils, and if you rush the blanching, the sugar can’t penetrate far enough.
Can I use other citrus, like lemons or grapefruit, for this recipe?
Oh, absolutely! This method works brilliantly for most firm citrus fruits. If you try lemons, you need to be much more vigilant about blanching, as their pith is usually much more bitter than an orange’s. Grapefruit slices are also wonderful when candied orange slices. Just remember, the thicker the rind, the longer it will take to absorb that simple syrup during the simmering stage!
How long does it take to properly dry the final product?
Drying is what gives you that perfect chewy texture versus a sticky mess. If you are air-drying at room temperature, plan on 24 hours. If you use the low oven method (200°F), it speeds things up to about 2 to 3 hours. You’ll know they are ready when you can touch the surface and it doesn’t feel moist or tacky. If they feel slightly soft inside, that’s great—that’s the ‘chewy’ part winning out!
What is the best way to use these as a dessert garnish?
As I mentioned, they are amazing atop almost anything! For a truly impressive look, try slicing a cooled cake, like a bright lemon cake recipe moist zesty from scratch, and place one candied slice right in the center of each serving wedge. They also look stunning decorating gingerbread houses during the holidays. They really bring that sophisticated, homemade touch!
Estimated Nutritional Information for Candied Orange Slices
Whenever I do a recipe that involves a lot of sugar, I always feel a little guilty putting up the nutrition box, but I know how much people rely on this information! Since these candied orange slices take simple fruit and turn it into a true candy, the sugar content is definitely the star here. Please know that these figures are just an estimate based on the whole batch volume, so they are here to give you a good ballpark idea of what you’re working with in one serving.
For a single serving of these glossy orange candy recipe treats, here’s the breakdown:
- Serving Size: 1 slice
- Calories: Roughly 85
- Sugar: Around 21g (Yep! It’s candy, after all!)
- Total Fat: Less than 1 gram, mostly negligible.
- Carbohydrates: Approximately 22g
- Protein: Very low, around 0.2g
The beauty of this treat is that you’re getting wonderful, natural citrus flavor from fresh oranges, but the process of candying does add a significant amount of sugar. Treat them as the gorgeous dessert garnish or holiday snack they are meant to be. If you’re looking for something less sweet but still bright, maybe swing back and try my lemon cake recipe moist zesty from scratch next time!
Share Your Homemade Candied Orange Slices Creations
Well, that’s it! We’ve gone from firm, slightly bitter oranges to dazzling, glossy orange candy recipe perfection. Seeing those jewel-toned slices cooling on the rack truly reminds me why I love being in the kitchen. Food, especially something as beautiful as these candied orange slices, is meant to be shared and celebrated!
This is where the Julia Meal family comes in. I pour my heart into testing these recipes so they work perfectly for you, and I absolutely love hearing about your successes! Did you manage to get those slices perfectly translucent? Are you using them on top of a pie, or are they destined for a holiday cheese board?
Please take a moment to rate this recipe right here on the page—those stars are so helpful for other home cooks looking to try making their own easy citrus candy recipe. If you ran into a snag or have a genius tip of your own for your homemade orange garnish, drop a comment below. Seriously, I read every single one!
And if you snapped a picture of those stunning final results, tag me online! Seeing your spreads and desserts makes my day and truly reinforces that cooking is an act of generosity and connection. If you need to reach out directly for recipe clarification or just want to chat about baking, you can always find a way to connect with me through the contact page. Happy baking, everyone!
PrintHomemade Candied Orange Slices: Sweet and Tangy Citrus Candy

Learn how to make glossy, chewy candied orange slices using a simple simmering method. These homemade citrus treats are perfect for garnishes, snacks, or edible gifts.
- Prep Time: 20 min
- Cook Time: 1 hr 15 min
- Total Time: 1 hr 35 min
- Yield: About 24 slices 1x
- Category: Dessert
- Method: Simmering and Drying
- Cuisine: American
- Diet: Vegetarian
Ingredients
- 3 large navel oranges (or blood oranges for color)
- 6 cups water, divided
- 3 cups granulated sugar
- 1 cup water (for syrup)
- 1 tablespoon fresh lemon juice
Instructions
- Wash the oranges well. Slice the oranges crosswise into uniform rounds, about 1/8 inch thick. Discard the ends.
- Place the orange slices in a large saucepan and cover them with 6 cups of water. Bring to a boil over high heat.
- Drain the water, return the slices to the pan, and cover with fresh water again. Bring to a boil and simmer for 10 minutes. Drain completely. Repeat this blanching process two more times to remove bitterness.
- In the same saucepan, combine the 3 cups of sugar, 1 cup of water, and the lemon juice. Bring this mixture to a boil over medium heat, stirring until the sugar dissolves completely to create a simple syrup.
- Reduce the heat to low. Carefully add the blanched orange slices to the simmering syrup in a single layer if possible. Simmer gently for 45 to 60 minutes, turning the slices occasionally. The slices should become translucent and slightly soft.
- Remove the slices from the syrup using tongs and place them in a single layer on a wire cooling rack set over a baking sheet. Let them drip for 15 minutes.
- Dry the candied orange slices. You can air dry them at room temperature for 24 hours, or dry them in a low oven (200°F or 95°C) for 2 to 3 hours, flipping them halfway through until they feel dry to the touch but remain chewy.
- For a sugar coat, roll the warm, slightly tacky slices in extra granulated sugar before they fully dry.
Notes
- For chocolate dipped orange slices, melt dark or milk chocolate. Dip the cooled, dried slices halfway and place them back on the rack. Sprinkle with flaky sea salt before the chocolate sets for an added flavor dimension.
- Use vibrant oranges like Cara Cara or Blood Oranges for a more colorful presentation.
- If you have leftover simple syrup, store it in the refrigerator; it makes a great addition to cocktails or iced tea.
Nutrition
- Serving Size: 1 slice
- Calories: 85
- Sugar: 21g
- Sodium: 1mg
- Fat: 0.1g
- Saturated Fat: 0g
- Unsaturated Fat: 0g
- Trans Fat: 0g
- Carbohydrates: 22g
- Fiber: 0.5g
- Protein: 0.2g
- Cholesterol: 0mg