
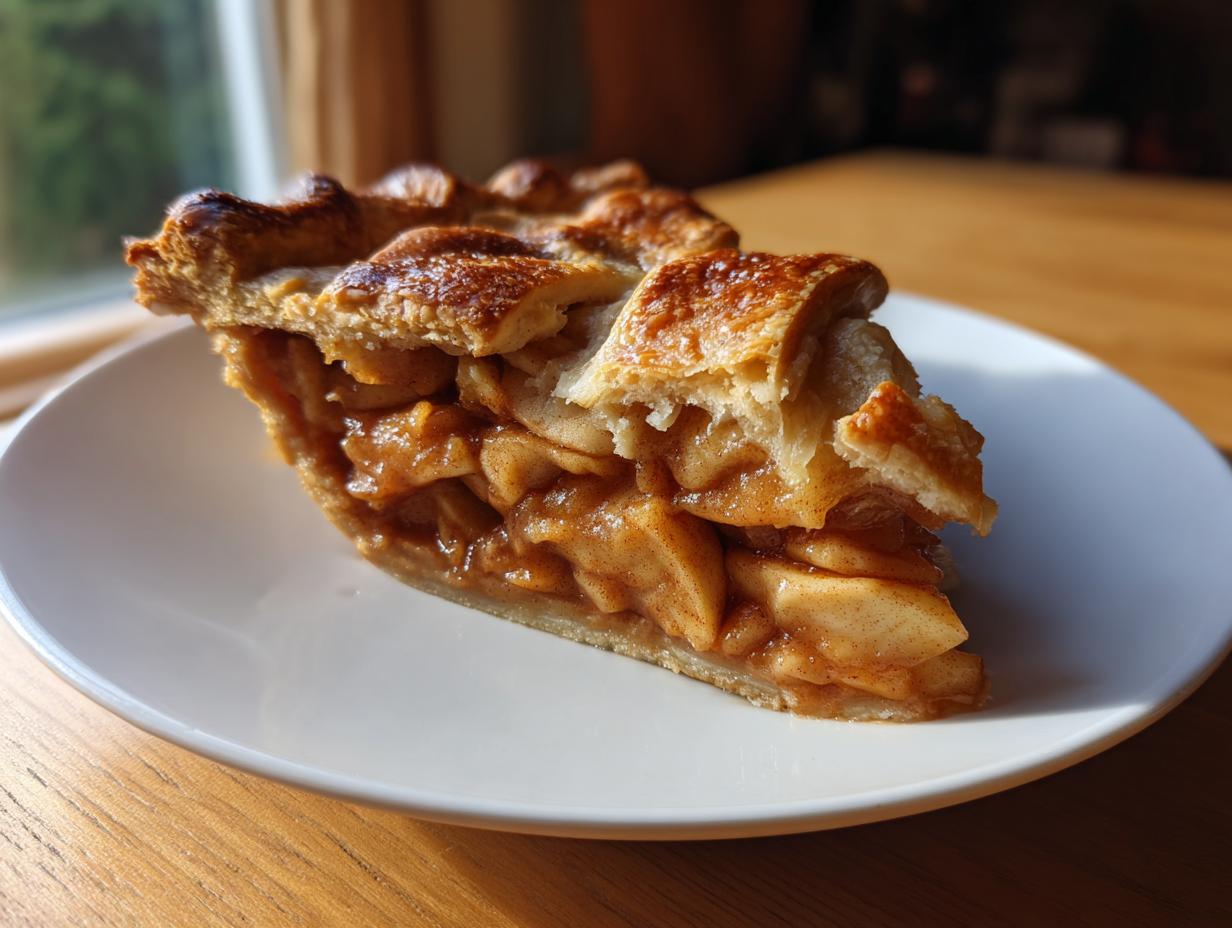
If you ask me what the most important culinary symbol of America is, my answer always comes out in a puff of steam and cinnamon: the perfect apple pie. Whether it’s Apple Pie Day or just a regular Tuesday, this dessert connects us right back to those warm, patient moments in my grandmother’s kitchen. It’s more than just a pie; it’s tradition baked in. I’ve taken everything I learned from the demanding precision of restaurant kitchens and blended it with that home-cooking heart to bring you this absolute no-fail recipe for a Classic apple pie from scratch.
Forget runny centers and tough dough! This recipe locks in that truly flaky crust you always dream about, combined with a perfectly spiced apple filling that tastes like autumn itself. I promise, this is the quintessential American dessert you can finally master. You can see the full guide for our best classic homemade apple pie right here: the best apple pie recipe starts now.
- Why This Classic Apple Pie from Scratch is Your Go-To Recipe
- Ingredients for the Ultimate Classic Apple Pie from Scratch
- Mastering the Homemade Pie Crust for Your Classic Apple Pie from Scratch
- Creating the Perfectly Spiced Apple Filling
- Assembling Your Classic Apple Pie from Scratch
- Baking Instructions for the Best Apple Pie Recipe
- Cooling and Serving This Traditional American Dessert
- Tips for Success and Variations on Your Classic Apple Pie from Scratch
- Frequently Asked Questions About Making Classic Apple Pie from Scratch
Why This Classic Apple Pie from Scratch is Your Go-To Recipe
I know there are fancy cakes and complicated desserts out there, but honestly, nothing hits the spot like this pie. It’s built on the promise of comfort. We strip away all the guesswork so you can focus on the joy of baking. This is truly the traditional american dessert you can rely on when you need a win.
- Flaky crust guaranteed—the cold butter works magic!
- A perfectly balanced spiced apple filling that isn’t too sweet or too runny.
- It smells like home, which is the best feeling when you’re baking.
Once you nail this, you’ll want to try our famous apple dapple cake next!
Ingredients for the Ultimate Classic Apple Pie from Scratch
You can’t rush greatness, and that’s especially true when we talk about the foundation of this pie. Getting your ingredients ready—mise en place, as the fancy chefs say—is half the battle won. For truly spectacular results, especially with that homemade pie crust, temperature control is everything. Make sure you have everything laid out and chilled before you start combining things. You’ll find the simplest ingredients make the most unbelievable flavor when handled right. If you want a deep dive into just the filling flavor, check out my standalone apple pie filling recipe guide!
For the Homemade Pie Crust
This is where the flakiness comes from, so pay attention to that butter! It has to be ice cold, trust me on this one.
- 2 1/2 cups all-purpose flour
- 1 teaspoon salt
- 1 cup (2 sticks) unsalted butter, very cold and cubed
- 1/2 cup ice water, plus more if needed
For the Spiced Apple Filling
This blend of apples and spices is what makes it the *classic*. That little bit of allspice really ties the cinnamon and nutmeg together beautifully.
- 6 medium baking apples (like Granny Smith or Honeycrisp), peeled, cored, and sliced 1/4-inch thick
- 3/4 cup granulated sugar
- 1/4 cup packed light brown sugar
- 1 teaspoon ground cinnamon
- 1/4 teaspoon ground nutmeg
- 1/8 teaspoon ground allspice
- 2 tablespoons all-purpose flour (for filling)
- 1 tablespoon lemon juice
- 1 large egg, beaten with 1 teaspoon water (for egg wash)
Mastering the Homemade Pie Crust for Your Classic Apple Pie from Scratch
Alright, let’s talk crust. This is where most people get nervous, but I’m telling you, the secret to that incredible, flaky texture in a homemade pie crust is keeping everything frigid! Seriously, your butter needs to be rock hard and cubed, and that water? It has to be ice water, maybe even with a few stray ice cubes floating in it. If you feel your kitchen heating up, toss your ingredients into the freezer for five minutes.
In a big bowl, I combine the flour and salt. Then, using my pastry blender—though my fingers work just as well if I’m quick—I cut in that cold butter. You’re looking for a crumbly mix, but you absolutely need to see some pea-sized chunks of butter. Those chunks turn into steam pockets, and those steam pockets are pure flakiness! Don’t blend it smooth, or you’ve just made shortbread instead of pie.
Next, add the ice water just a tablespoon at a time. Mix until it just barely holds together—stop the second it forms a shaggy ball. Don’t knead it! Divide that dough into two disks, wrap them tightly, and forget about them in the fridge for at least an hour. Chilling is non-negotiable; it lets the gluten relax so you can roll it out thin later without a fight. If you struggle with dough texture in baking generally, my guide on fluffy southern biscuits has some great dough handling tips!
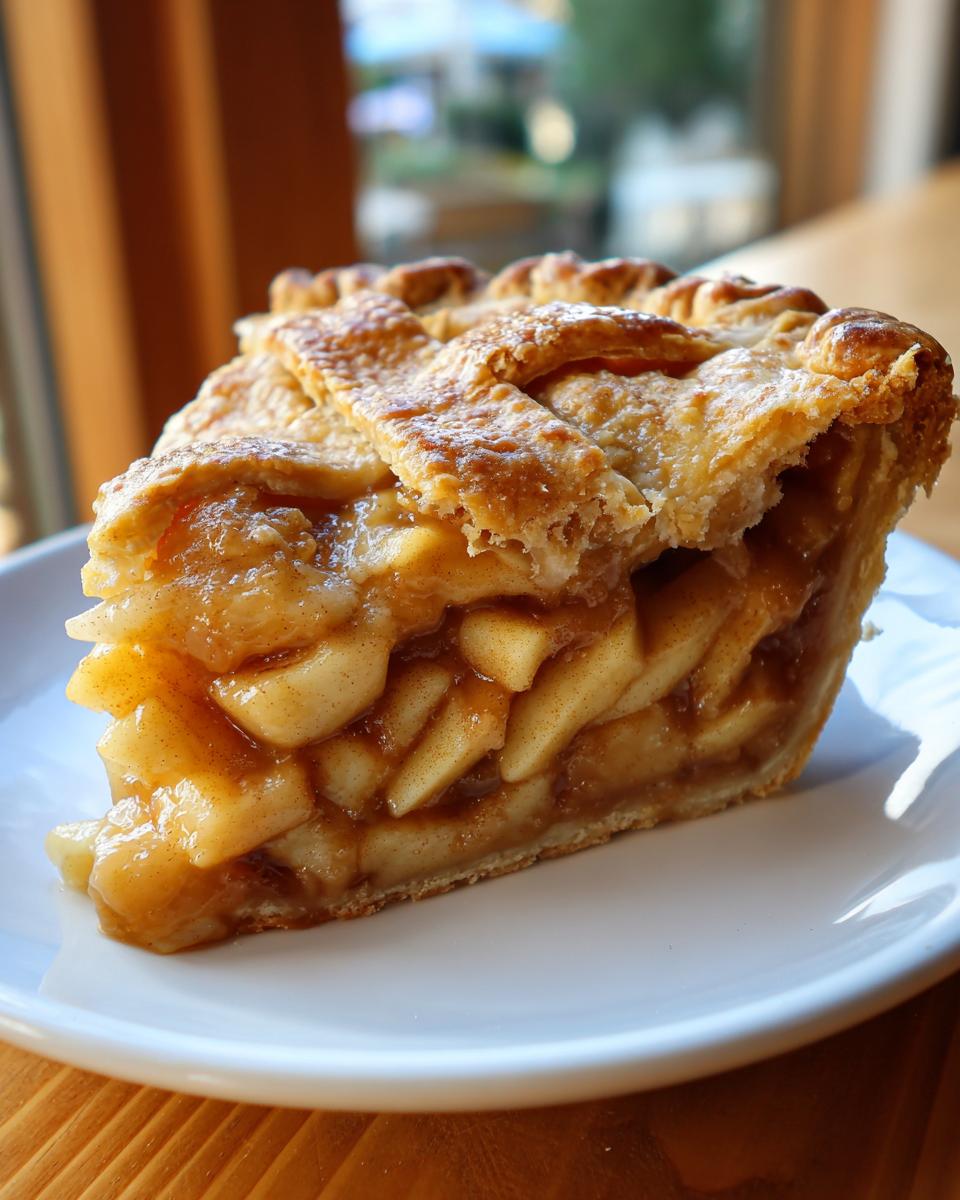
Creating the Perfectly Spiced Apple Filling
Now that the dough is getting happy in the fridge, we turn our attention to the star: that gorgeous, aromatic spiced apple filling. My trick for truly great flavor is using a mix of apples—usually a couple of tart Granny Smiths for structure and a couple of sweeter ones, like Honeycrisp, for balance. You want them sliced consistently, about a quarter-inch thick, so they all cook evenly.
Toss those slices gently in a big bowl with both the granulated and brown sugars—that brown sugar adds such deep caramel notes! Then comes the spice array: cinnamon, nutmeg, and that hint of allspice. Don’t just dump the flour in; whisk it together with the sugar first, if you can, so when you toss it with the apples, you don’t get little pockets of raw flour sitting sadly in the bottom of your pie. A splash of lemon juice brightens everything up. Seriously, the smell when you stir this together is unbeatable!
If you want another easy way to celebrate apples, you have to check out my recipe for a simple classic apple crumble!
Assembling Your Classic Apple Pie from Scratch
Okay, the dough has rested, the filling is ready—it’s time to put this beautiful classic apple pie from scratch together! You need to roll out that first chilled disk on a lightly floured surface into a circle about 12 inches wide. Take your time here; if the dough fights you and shrinks, just let it sit for five minutes and try again. Carefully lay that bottom crust into your 9-inch pie plate, leaving about an inch hanging over the edge.
Next, pile that incredible spiced apple filling right into the pie shell. Don’t be shy, but don’t mound it so high that the top crust won’t sit right. If you kept some little dots of butter aside, dot the top of the apples now—it adds richness! Then, roll out the second disk. You can always go for a traditional solid top, or if you’re feeling artsy for Apple Pie Day ideas, cut it into strips for a lattice. Lay the top crust over the apples.
We need to seal everything up tight to keep those juices in! Crimp the edges firmly with your fingers or a fork—this seals the edges and looks so much better than just leaving them hanging. Now, the venting! You absolutely must cut a few slits in the top crust so the steam can escape while baking. Nobody wants a soggy bottom or an exploding pie! Finally, brush the top crust with your egg wash—that’s what gives you that gorgeous golden shine. A little extra sugar sprinkled on top gives it that professional bakery look. If you want inspiration for smaller bakes, check out my guide on flaky apple hand pies!
Baking Instructions for the Best Apple Pie Recipe
This is the moment of truth for your best apple pie recipe! We’re using a two-stage temperature approach, which is my secret to getting that bottom crust cooked perfectly while keeping the top beautiful. Preheat your oven high to 425 degrees Fahrenheit. We start hot for about 15 minutes. This blast of heat sets the crust structure right away. It’s important you listen to the timer here!
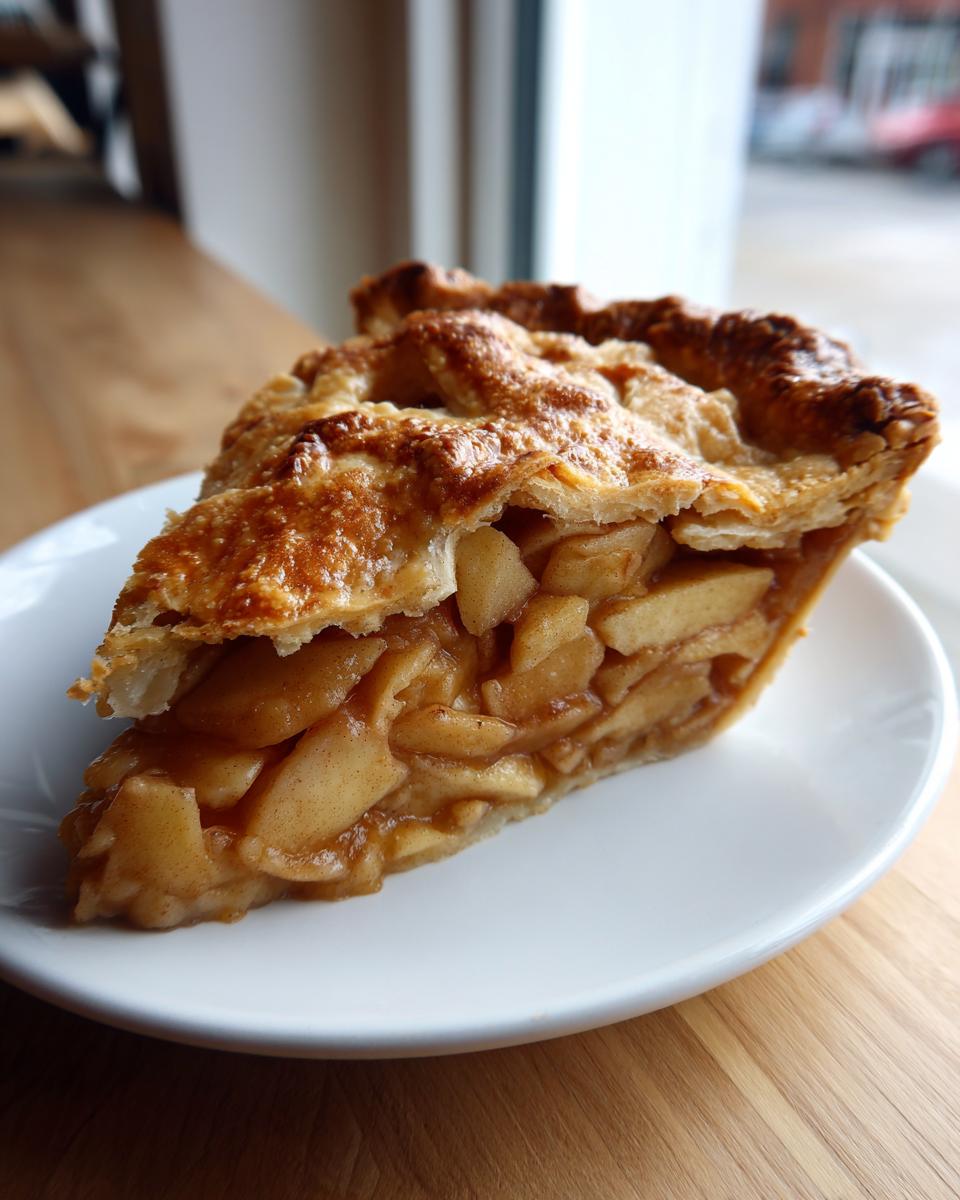
After those first 15 minutes, immediately drop the temperature down to 375 degrees Fahrenheit. Continue baking for another 40 to 50 minutes. You’re looking for two things: the crust should be deep, gorgeous golden brown, and when you peek through those steam vents, you need to see the apple filling actively bubbling. If you notice the outer edges of your crust looking a little too dark before the apples are done—and this happens with every pie—just tear off a few strips of aluminum foil and loosely cover those edges. Don’t let the edges burn while the center cooks! If you’re curious about what else cooks well in the oven at different temps, check out my guide on getting that perfect steak sear!
Cooling and Serving This Traditional American Dessert
You smell that? That golden-brown, sweet-cinnamon aroma filling your house? That means you did it! But now, I need you to trust me on the hardest part: waiting. You just pulled a beautiful, steaming traditional american dessert out of the oven, and you want to slice it immediately. Don’t do it! Seriously, step away from the pie server.
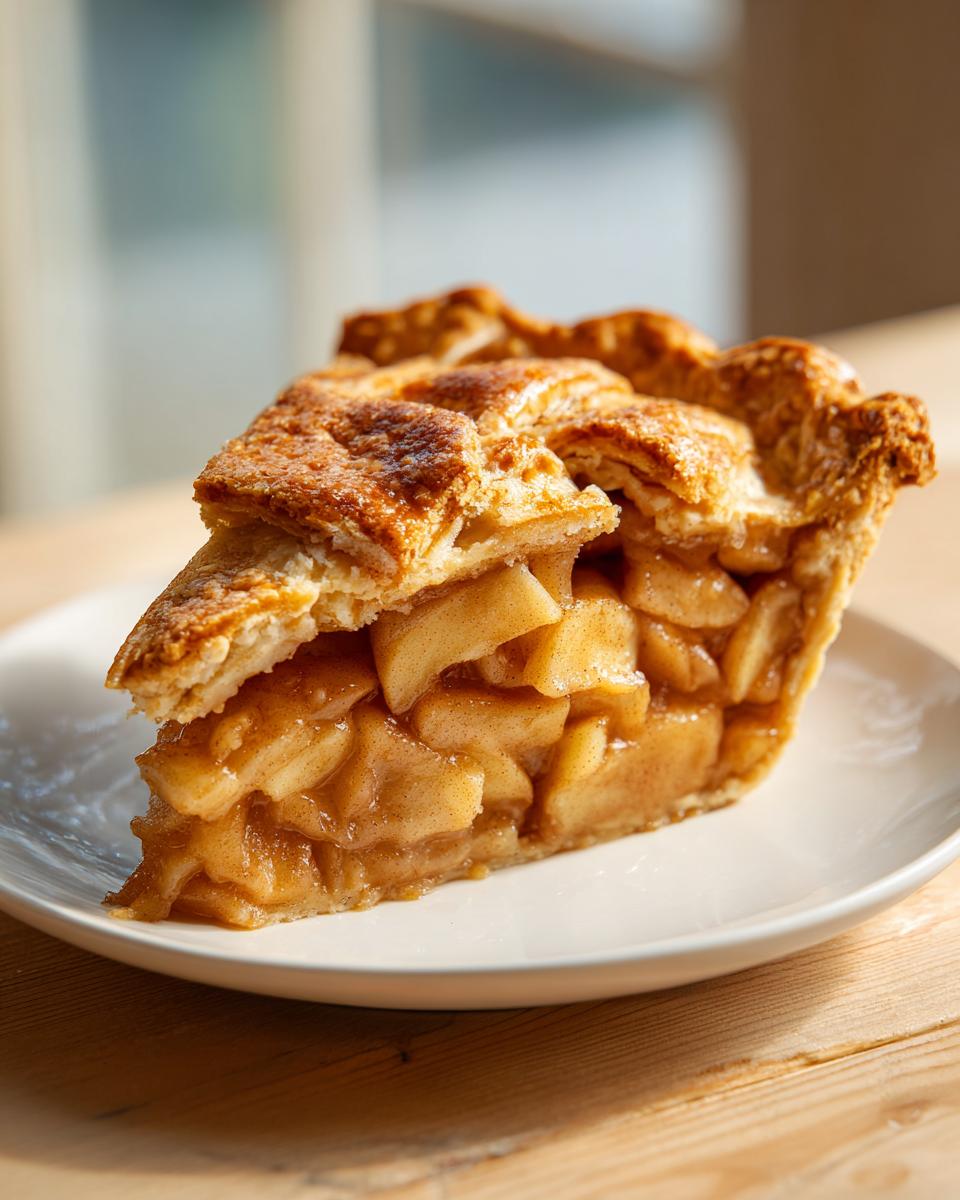
The filling inside is pure molten lava right now. If you cut into it, all that wonderful, thickened apple juice is just going to spill out, and your beautiful slice will collapse into a messy puddle. We need that filling to set up. This pie needs to cool on a wire rack for a minimum of two hours—maybe even closer to three if you baked it very hot. Think of this cooling time as mandatory resting for a champion athlete!
Once it’s cooled and you can see the filling looks set through the vents, that’s when you serve it. If you’re looking for simple serving ideas, you can’t beat a classic slice as is. But if you want to elevate things just a tad, a tiny scoop of vanilla bean ice cream that melts slowly down the warm edge, or even a simple dollop of freshly whipped cream is pure perfection. If you need some quick inspiration for simpler treats after this big bake, I’ve put together some of my favorite simple, delicious desserts!
Tips for Success and Variations on Your Classic Apple Pie from Scratch
You’ve mastered the technique, but the best cooks always keep tweaking, right? For your next attempt at this classic apple pie from scratch, always use a mix of apples—Granny Smith for that lovely tartness and something sweet like Honeycrisp to balance it out. If you’re getting bored with the basic top, try weaving a lattice! It looks impressive, but remember, it lets even more steam escape, so watch those edges.
Want to deepen the flavor of that spiced apple filling? I sometimes toss the apples with a tablespoon of good bourbon along with the sugar and spices; it just adds warmth. If you’re looking for other wonderful ways to use apples in desserts, my recipe for moist Jewish apple cake is truly special. Remember, the key to the best apple pie recipe is just paying attention to those little details!
Frequently Asked Questions About Making Classic Apple Pie from Scratch
It’s totally normal to have questions when you tackle a classic! Even after following every step for the best apple pie recipe, sometimes a little doubt creeps in. That’s okay! I’ve gathered the questions I get asked most often here to make sure your next traditional american dessert turns out flawless.
How do I prevent my homemade pie crust from shrinking?
This is almost always about temperature and handling, my friend. If your crust is shrinking when you roll it out or bake it, that means the gluten in the flour is too tight, and the butter, which creates the layers, has gotten too warm. Make sure you really let that dough chill for the full hour—or longer! When you roll it out, use gentle, even pressure and less flour. If you roll it out and the dough starts fighting you, roll it up loosely around your rolling pin like a jelly roll, let it rest for 10 minutes on the counter, and then unroll it onto the pie plate. That little break relaxes the gluten and stops the shrinkage!
Can I make the spiced apple filling ahead of time?
You absolutely can! Making the spiced apple filling ahead of time is actually great for those busy holiday weekends. After you mix the apples, spices, and sugar, let it sit in the fridge for maybe an hour or two. This lets the sugars pull some moisture out of the apples, which creates a nice little syrup. But here’s the key: drain off any excess liquid before you put that mixture into your bottom crust. We want that filling moist, not swimming!
What is the best way to store leftover Classic apple pie from scratch?
The rule of thumb for this kind of pie is simple: If you didn’t add any cream or custard to it, it’s fine on the counter for a short while. But for keeping that homemade pie crust firm and tasty, wrapping it well and keeping it at room temperature for a day or two works. If you are keeping it longer, wrap slices tightly in plastic wrap and then foil, and pop it in the fridge. You can freeze slices too, but let them cool completely first! If you want to know more about my kitchen philosophy in general, feel free to swing by my About Page.
PrintClassic Apple Pie from Scratch

Make the quintessential American dessert with this no-fail recipe for a traditional apple pie featuring a flaky crust and a perfectly spiced apple filling.
- Prep Time: 45 min
- Cook Time: 65 min
- Total Time: 110 min
- Yield: 8 servings 1x
- Category: Dessert
- Method: Baking
- Cuisine: American
- Diet: Vegetarian
Ingredients
- 2 1/2 cups all-purpose flour
- 1 teaspoon salt
- 1 cup (2 sticks) unsalted butter, very cold and cubed
- 1/2 cup ice water, plus more if needed
- 6 medium baking apples (like Granny Smith or Honeycrisp), peeled, cored, and sliced 1/4-inch thick
- 3/4 cup granulated sugar
- 1/4 cup packed light brown sugar
- 1 teaspoon ground cinnamon
- 1/4 teaspoon ground nutmeg
- 1/8 teaspoon ground allspice
- 2 tablespoons all-purpose flour (for filling)
- 1 tablespoon lemon juice
- 1 large egg, beaten with 1 teaspoon water (for egg wash)
Instructions
- Prepare the pie crust: In a large bowl, whisk together the flour and salt. Cut in the cold butter using a pastry blender or your fingers until the mixture resembles coarse crumbs with some pea-sized pieces of butter remaining.
- Gradually add the ice water, one tablespoon at a time, mixing until the dough just comes together. Do not overmix. Divide the dough in half, form each half into a disk, wrap in plastic wrap, and chill for at least 1 hour.
- Prepare the apple filling: In a large bowl, combine the sliced apples, granulated sugar, brown sugar, cinnamon, nutmeg, allspice, 2 tablespoons of flour, and lemon juice. Toss gently to coat the apples evenly.
- Preheat your oven to 425 degrees Fahrenheit.
- On a lightly floured surface, roll out one disk of dough into a 12-inch circle. Carefully transfer the dough to a 9-inch pie plate. Trim the edges, leaving about a 1-inch overhang.
- Pour the spiced apple filling into the crust. Dot the top of the filling with a few small pieces of leftover butter, if desired.
- Roll out the second disk of dough for the top crust. Place it over the filling. Trim the top crust, leaving a 1-inch overhang. Crimp the edges of the top and bottom crusts together to seal. Cut several slits in the top crust to allow steam to escape.
- Brush the top crust lightly with the egg wash. Sprinkle lightly with a little extra sugar, if you like.
- Bake for 15 minutes at 425 degrees Fahrenheit. Then, reduce the oven temperature to 375 degrees Fahrenheit and continue baking for another 40 to 50 minutes, or until the crust is golden brown and the filling is bubbly. If the edges brown too quickly, cover them loosely with aluminum foil.
- Cool the pie on a wire rack for at least 2 hours before slicing and serving. This allows the filling to set properly.
Notes
- For the flakiest homemade pie crust, keep all your ingredients, especially the butter and water, as cold as possible.
- If you prefer a lattice top, cut the top dough into even strips and weave them over the filling.
- Use a mix of tart and sweet apples for the best flavor balance in your spiced apple filling.
Nutrition
- Serving Size: 1 slice
- Calories: 450
- Sugar: 35g
- Sodium: 250mg
- Fat: 25g
- Saturated Fat: 15g
- Unsaturated Fat: 10g
- Trans Fat: 0g
- Carbohydrates: 58g
- Fiber: 3g
- Protein: 4g
- Cholesterol: 60mg