
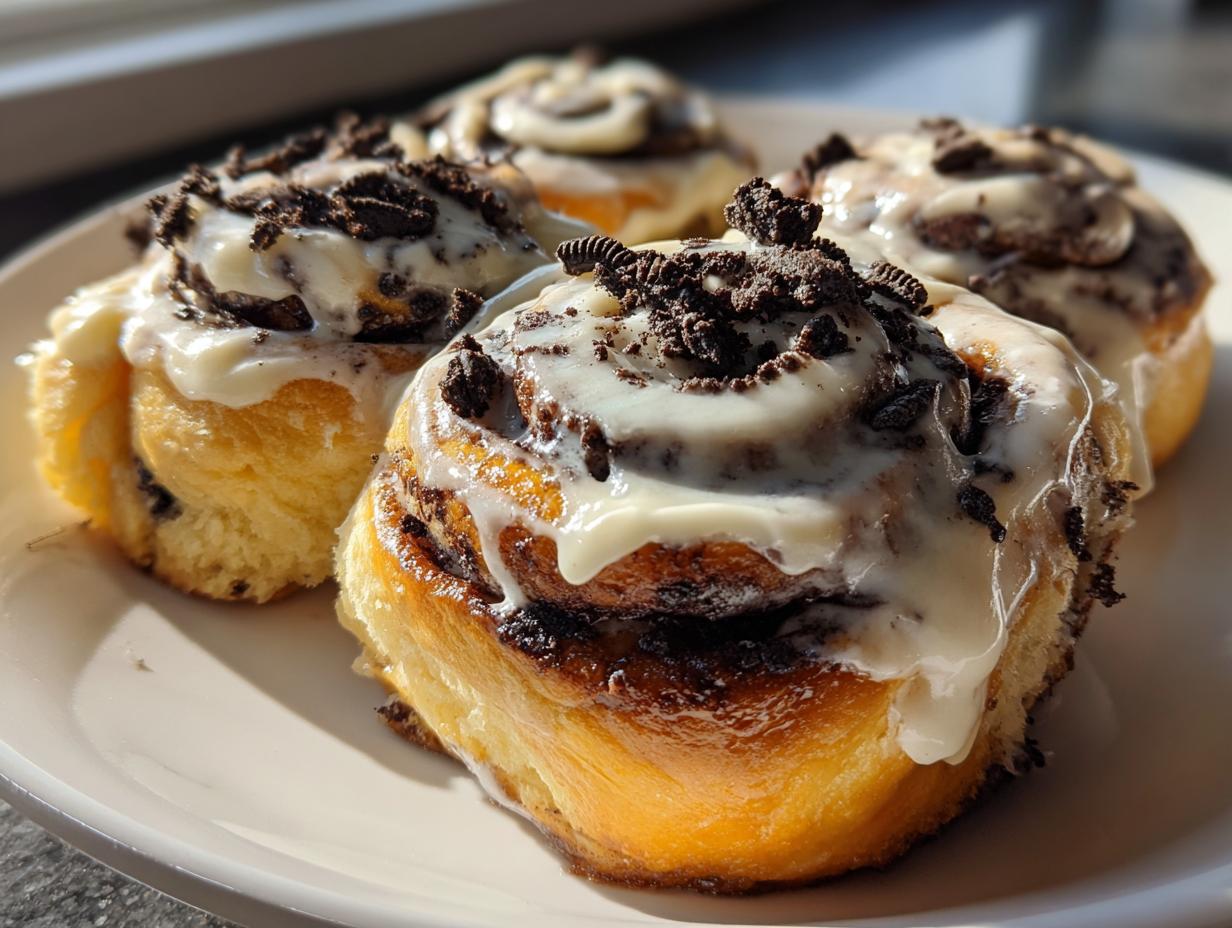
We all have those comfort foods that just stick with us, right? For me, it was always the warm, sticky cinnamon roll, the kind you dream about at 6 AM. But what happens when you take that perfect, soft structure and smash it together with the nostalgic crunch of everybody’s favorite black-and-white cookie? Magic happens. I’m talking about the BEST Gooey Homemade Oreo Cinnamon Rolls you will ever taste. Forget dry, forget tough—we are aiming for that pillow-soft center loaded with chocolatey crushed cookies. If you love the incredible springiness of a classic sweet roll, learning how to make these from scratch is going to revolutionize your weekend brunch game forever. You can check out my Cinnamon Roll Cake Recipe for another fun twist on this classic!
- Why You Will Make These Oreo Cinnamon Rolls Again and Again
- Gathering Ingredients for Your Oreo Cinnamon Rolls Recipe
- How to Prepare the Best Gooey Oreo Cinnamon Rolls
- Tips for Perfect Bakery Style Oreo Cinnamon Rolls
- Ingredient Notes and Substitutions for Cinnamon Rolls with Oreo Filling
- Serving Suggestions for Your Soft Baked Oreo Treats
- Storage and Reheating Instructions for Oreo Cinnamon Rolls
- Frequently Asked Questions About Gooey Cookies and Cream Rolls
- Nutritional Estimate for Your Indulgent Chocolate Breakfast Rolls
- Share Your Oreo Cinnamon Rolls Experience
Why You Will Make These Oreo Cinnamon Rolls Again and Again
So why bother making these from scratch when you can grab a can at the store? Honestly, the difference is night and day. I spent months perfecting the dough so these cookies and cream sweet rolls deliver on every single promise: extreme softness, that perfect, decadent filling, and a glaze that melts just right. When you follow this method, you aren’t just baking; you’re creating something truly bakery style.
- That Unmatched Gooey Texture: We achieve the absolute dreamiest center. By carefully combining the butter and brown sugar in the filling with the crushed Oreos, we ensure that the rolls steam themselves perfectly during the bake. Trust me, you want that ‘pull-apart’ moment!
- The Ultimate Flavor Fusion: It’s not just chocolate and cinnamon fighting for space; they are friends here! The slight earthiness of the cinnamon acts as the perfect anchor for the sweet, creamy flavor of the Oreo filling. It’s a classic combination, upgraded.
- Perfect for Any Occasion: Whether you need an easy Oreo dessert for brunch that steals the show, or you’re looking for an indulgent chocolate breakfast roll for a special weekend morning, these always deliver. They look difficult—but they’re surprisingly straightforward to make.
- The Cream Cheese Factor: That tang from the cream cheese frosting cuts through the richness of the chocolate and dough perfectly. It balances everything out, making you immediately want another bite. If you need more simple sweet inspiration, have a look at my list of simple delicious desserts!
Gathering Ingredients for Your Oreo Cinnamon Rolls Recipe
Alright, let’s talk about what you need to gather. Listen, when you’re making something this special—something that bridges that cozy feeling of a cinnamon roll with the dark magic of Oreos—the quality and state of your ingredients really matter. I always lay everything out before I start mixing. You’ll thank yourself later when you aren’t trying to find the salt while your dough is about to over-proof! Remember to check the recipe card details for precision; we want bakery results, not baking guesswork. If you ever get into making doughs from scratch, checking out my sourdough discard cinnamon rolls recipe shows you how temperature control sets the stage.
For the Fluffy Dough
This dough is what gives us that signature soft, fluffy texture we’re after. Everything needs to be at the right temperature here!
- 1 cup warm milk (make sure this hits between 105–115°F—too hot and you kill the yeast, too cold and it just won’t wake up!)
- 2 1/4 teaspoons active dry yeast
- 1/2 cup granulated sugar
- 1 large egg
- 1/4 cup unsalted butter (melted)
- 3 1/2 cups all-purpose flour
- 1 teaspoon salt
For the Cookies and Cream Filling
This is where the Oreo goodness happens! Having your butter perfectly softened is key here; it needs to be spreadable like room-temperature peanut butter, not melted or greasy.
- 1/2 cup unsalted butter (softened)
- 1/2 cup packed light brown sugar
- 1 tablespoon ground cinnamon
- 1 cup crushed Oreo cookies (about 12 cookies total—use the whole cookie, cream and all!)
For the Cream Cheese Frosting for Oreo Rolls
This frosting is my favorite part—that little zip of tanginess that balances the sweetness. Again, make sure your cream cheese and butter are truly softened so you don’t end up with lumps!
- 4 ounces cream cheese (softened)
- 1/2 cup unsalted butter (softened)
- 2 cups powdered sugar
- 1 teaspoon vanilla extract
- 1–2 tablespoons milk (just whatever it takes to get it pourable)
And don’t forget the final touch!
- For Topping: 1/2 cup crushed Oreo cookies
How to Prepare the Best Gooey Oreo Cinnamon Rolls
Getting these Oreo cinnamon rolls right is all about patience during the rise and precision when rolling them up. Don’t rush the dough; that’s the secret to getting that beautiful, fluffy texture everyone craves. We’re going to move through this assembly phase step-by-step, but I always tell folks, if you get your rise times right, everything else just falls into place. When you see those beautiful rolls coming out of the oven, golden and bubbling, you’ll know the hard work was worth it. If you want to see a great visual guide, check out Stephanie’s video here!
Activating the Yeast and Making the Dough
First things first, wake up that yeast! Take your warm milk—and I mean pleasantly warm, check that temperature, around 105–115°F—and sprinkle the yeast right over the top. Let that sit for about five minutes until it gets nice and foamy. That foam tells you you’re good to go!
Next, you’ll stir in the sugar, the egg, and that melted butter. Now, you add your flour and salt. Mix it up until you get a shaggy dough mass. Don’t worry if it looks messy at first; that’s normal! We need to introduce some structure.
First Rise and Preparing the Filling
Time to get physical! Turn that shaggy dough out onto a lightly floured surface and knead it. You need to work it for a solid 5 to 7 minutes until it feels smooth and elastic under your hands. It shouldn’t be sticky anymore. Once it’s perfect, pop it into an oiled bowl, cover it tightly, and let it sit in a warm spot for 1 to 1.5 hours, or until it has doubled in size. Don’t peek too much!
While that dough is puffing up happily, you can make your filling. In a separate bowl, just mix your softened butter, brown sugar, cinnamon, and that beautiful cup of crushed Oreos until it’s all combined into a thick, dark spread. See? Easy! This is why we do the filling while the dough is busy rising.
Shaping, Filling, and Second Rise for Fluffy Oreo Dessert
Once doubled, gently punch that dough down. Flour your surface again and roll it out into a 12×18 inch rectangle. Now, spread that thick Oreo filling evenly across the dough, but leave about a one-inch border bare along one of the long edges. This border is super important; it helps seal the log!
Starting on the long edge where the filling goes all the way to the edge, roll it up as tightly as you can into a log. Give that final seam a good pinch to seal it closed. Slice that gorgeous log into 12 even rolls.
Place them cut-side up into your greased 9×13 pan. You need to cover them loosely again and let them hang out for another 30 to 45 minutes—this second rise makes them extra puffy. I always recommend serving these fluffy homemade treats when they are warm!
Baking the Homemade Oreo Buns and Frosting
Preheat that oven to 375°F (190°C). Bake your homemade Oreo buns for about 18 to 22 minutes. You want them golden brown—check that they aren’t wet in the middle, but we’re aiming for soft, not dry!
While they are baking, you whip up that cream cheese frosting. Beat the softened cream cheese and butter first until they are smooth, then slowly add in the powdered sugar and vanilla. Add milk just a splash at a time until it’s perfectly spreadable.
The moment they come out of the oven, you must get that frosting on there! Spreading that rich, tangy cream cheese frosting immediately while the rolls are still hot is what makes them extra decadent. Finish with a sprinkle of those last crushed Oreos. That’s when you know you’ve nailed the indulgent chocolate breakfast rolls!
Tips for Perfect Bakery Style Oreo Cinnamon Rolls
Look, I believe in making things truly special, and when it comes to these bakery style Oreo cinnamon rolls, a couple of professional secrets can take them from ‘great’ to ‘I need the recipe right now’ territory. Since we are going from scratch here, we’ve already nailed the hardest part—the dough rise. But for that truly iconic, fall-apart, gooey center, take note of these tweaks. If you’re interested in a baking project that features a similar warm spice profile, you need to check out my coffee cake cookies!
The texture is everything. If you want those rolls to truly weep melted chocolate and butter when you bite in, here’s what you do:
- The Gooey Secret Weapon: Before you cover the pan for that second rise, grab about 1/2 cup of heavy cream—just regular, nice, fatty cream. Gently pour it over the rolls, letting it pool around their bases. As these gooey cookies and cream rolls bake, that cream steams the sides, resulting in the softest, most insanely moist final product you can imagine. Seriously, don’t skip this step if gooeyness is your goal; it works every single time.
- Don’t Worry About Perfection on the First Try: Your first homemade batch might not look perfectly uniform, and that’s okay! The beauty of a homemade roll is its rustic charm. As long as you ensure the dough rises correctly and the filling is evenly spread, you’ll be thrilled with the result. If you want to see a great visual guide, Chelsey has fantastic tips on her site here.
- When Time is Tight (The Semi-Homemade Swap): I’m all for the scratch method, but life happens! If you wake up craving these easy Oreo dessert dreams on a rushed morning, you absolutely can use refrigerated cinnamon roll dough. If you go this route, skip making the yeast dough entirely. Just unroll the tubes of dough, generously sprinkle your crushed Oreos over the surface—maybe even add a little extra cinnamon sugar—then roll them up as directed. They won’t have the same deep, yeasty flavor, but they are surprisingly fast and still delicious!
- A Note on the Oreos: We use the whole cookie here, cream and all, because that cream adds critical fat to the filling to keep things moist. But remember, the filling butter needs to be soft, not melted. If it’s melted, it soaks right into the dough instead of staying put as a filling layer, resulting in less defined swirls.
Ingredient Notes and Substitutions for Cinnamon Rolls with Oreo Filling
I get asked all the time if you can swap out ingredients in a recipe like this, especially when it comes to the star attraction: the Oreo. And look, I understand budget concerns or pantry shortages, but when we’re talking about creating the very best cookies and cream sweet rolls, some things just can’t be messed with. My philosophy, which I learned watching my own grandmother cook, is that if you change the heart of the recipe, you change the outcome entirely.
When dealing with the richness of these cinnamon rolls with Oreo filling, the specific cookies we use play a massive role. I strongly recommend sticking to the original Nabisco Oreo cookies. Why? Because those specific chocolate wafers use a black cocoa powder that gives that dark, rich color and a distinct flavor profile that generic ‘chocolate sandwich cookies’ just can’t replicate. That deep, slightly bitter cocoa note is what perfectly balances the sweetness of our brown sugar and cream cheese frosting.
Now, let’s talk milk for the dough. The recipe calls for warm milk to activate the yeast, which is crucial for a good rise. If you have whole milk on hand, please use it. The higher fat content in whole milk makes the final homemade Oreo buns richer and softer during the kneading and final bake. If you only have 2% or skim, it will work, but the dough might handle just a touch differently, perhaps being slightly less supple. It’s a small detail, but those small details are what move you from good baking to truly great baking.
If you are ever looking for a lighter frosting option or just want to perfect your finishing touch, check out my recipe for vanilla buttercream. While the cream cheese is classic here, knowing how to whip up a stable, delicious buttercream gives you options for future holiday baking!
Serving Suggestions for Your Soft Baked Oreo Treats
Okay, these soft baked Oreo treats are rich. I mean, we’re talking about layers of sweet dough, buttery filling, cream cheese frosting, and chunks of cookies. They are designed to be an indulgence! Because of that, they deserve the perfect supporting cast when you serve them up, whether it’s for a weekend brunch or a late-night dessert session.
My absolute number one rule here is to serve them warm. Seriously, pull them straight from the oven after they’ve cooled just long enough to frost them (or let them cool slightly if you frosted them ahead of time). When they are slightly warm, that frosting is perfectly melty, and the centers have that signature gooey quality we worked so hard to achieve. Don’t even think about eating them cold if you can help it!
To balance out all that wonderful chocolate and sugar, you need something bright and acidic on the plate. Think about serving these indulgent chocolate breakfast rolls alongside something fresh. A bowl of bright, mixed berries—strawberries, raspberries, maybe some blackberries—cuts right through the richness. That clean, slightly tart flavor makes every bite of the sweet roll taste brand new again.
And of course, you have to have the right beverage connection. Forget plain water; these demand something with a little backbone! A strong cup of black coffee is non-negotiable for me; the slight bitterness works wonders with the sugar. If you are serving these for brunch or a holiday morning, a cold glass of milk is always comforting. If you want a fun fruit pairing, I have an amazing recipe for fluffy strawberry pancakes that complement the sweet rolls perfectly on a big breakfast spread!
Bottom line: Serve them warm, cut the richness with fresh fruit, and always have a strong, dark coffee waiting nearby. That combination is the ultimate way to enjoy these gooey cookies and cream rolls!
Storage and Reheating Instructions for Oreo Cinnamon Rolls
Even the best oreo cinnamon rolls don’t usually last long around my house, but when they do manage to stick around—maybe I hide a few in the back of the fridge—I need to know how to bring them back to that fresh-out-of-the-oven state. Remember, we’re aiming for soft and gooey, not hockey puck status!
You can absolutely keep these leftovers for a couple of days. The heavy cream trick I told you about earlier really does its job, keeping the moisture locked in. For storage, just make sure they are covered completely. If they have frosting, try to leave the frosting layer exposed or cover the pan loosely with plastic wrap or foil. If you stack them, you might smudge that gorgeous cream cheese frosting everywhere, and that’s just a crime against baking.
You can store these tightly covered at room temperature for up to two days. Honestly, I find that room temperature is best for maintaining that soft texture for short-term storage. Putting them in the fridge might dry them out a bit faster, even with the cream, though they’ll last longer in there.
The Best Way to Reheat Your Cookies and Cream Sweet Rolls
Never, ever eat these cold if you can help it! The magic is in the warmth when the frosting melts slightly into the crevices. Reheating is super simple, but you need to be gentle so you don’t cook them again.
My favorite method is the microwave, hands down, because it’s fast and it restores that soft texture instantly. Take one (or a couple) of those cookies and cream sweet rolls and place them on a microwave-safe plate. Heat them for about 10 to 15 seconds. Start low! You’re just trying to warm them through enough so that the dough softens up and the frosting starts to get glossy again. If you heat them too long, the sugar in the frosting might separate, and nobody wants greasy frosting!
If you are reheating a whole pan, the oven is a better bet. Wrap the entire pan loosely in foil—this traps the steam—and heat at about 300°F (150°C) for about 10 minutes. That gentle heat warms the entire batch evenly. If you need more tips on managing doughs and times, maybe my guide to homemade breadsticks will help you get familiar with baking times!
If you manage to save any for a couple of days, I promise you, reheating them properly makes them taste almost as good as the first batch. For more inspiration on decadent, easy-to-manage bakes, you have to see what they are doing over at Magazine Meal!
Frequently Asked Questions About Gooey Cookies and Cream Rolls
It’s funny, even after writing out all the detailed steps, folks still have lingering questions about getting that perfect texture or timeline down. That’s totally normal! When you’re dealing with rich, yeasted dough, you want to ensure you don’t mess up that delicate balance. These are some of the things I hear most often regarding getting the very best results from these gooey cookies and cream rolls. If you are ever planning out delicious meals on a tight schedule, my guide to easy lunch meal prep is a lifesaver, but for these rolls, you just need patience!
Can I make these oreo cinnamon rolls ahead of time?
Oh yeah, you absolutely can! This is a baker’s secret weapon, especially if you want warm rolls for a weekend brunch without getting up at 4 AM. After you cut your rolls and place them into the prepared pan, cover them tightly—I mean really tight, maybe using plastic wrap followed by a layer of foil—and put the whole thing right into the refrigerator. They can chill overnight for up to 12 hours. When you wake up, let them sit on the counter for about an hour to take the chill off, then bake them as instructed! Remember, they might need 5 extra minutes baking time if they go into the oven ice-cold, so keep an eye on them.
What is the secret to fluffy Oreo dessert texture?
If you want that incredible fluffy Oreo dessert texture, you cannot cheat the dough work! The real secret lies in two places: step one is the kneading. You need to develop that gluten properly, giving you that nice, elastic structure we talked about. Don’t stop kneading until that dough is smooth; it needs to be strong enough to hold all that buttery Oreo filling without tearing apart while rolling. Step two is the rising! Both the first rise (doubling in size) and the second rise (getting puffy before the oven) are essential. The yeast creates the air bubbles that result in that signature soft feeling. If you skip that second rise, you end up with dense rocks, not fluffy clouds!
How do I get the filling extra rich and chocolatey?
Well, if you want your Oreo cinnamon rolls to lean harder into the chocolate side of the cookies and cream spectrum, I have a little trick. When you are crushing your Oreos for the filling, use a mix: about 75% regular Oreos (so you get the cream binder) and 25% of the *darkest* chocolate wafer cookies you can find, or even a teaspoon of black cocoa powder if you have some lurking! This deepens the color and intensifies that dark chocolate swirl without making the filling too dry. It just amps up the fudge factor beautifully!
Can I use regular milk instead of warm milk in the dough?
You have to use warm milk! I mentioned this when we talked about activating the yeast, but it bears repeating because it sets up the entire bake. Yeast is a living thing, and it needs that specific temperature window—105°F to 115°F—to wake up and start doing its job, which is creating all those lovely air pockets inside your soft baked Oreo treats. If you use cold milk, the yeast just chills out and won’t activate, leaving you with tough, non-risen dough. If your tap water is too hot, it actually kills the yeast instantly! So grab a quick-read thermometer—it’s your best friend for any yeasted recipe.
Nutritional Estimate for Your Indulgent Chocolate Breakfast Rolls
Now, let’s address the elephant in the kitchen. These indulgent chocolate breakfast rolls are truly a treat. They are piled high with butter, sugar, and cream cheese frosting, so they aren’t exactly a health food—and that’s perfectly fine! We bake these kinds of recipes because they bring joy, comfort, and incredible flavor to the table. Life is too short to skip the good stuff!
I always include this nutritional breakdown because I believe in transparency, but I want you to take these numbers with a grain of salt. These are professional estimates based on the recipe provided. The actual calories and sugar content can swing wildly depending on what brand of Oreos you use or how much frosting you generously—or perhaps excessively—pile on top. We are aiming for flavor heaven here, not counting macros!
For one single roll, here is the ballpark estimate. Remember, this is for one of the 12 servings:
- Serving Size: 1 roll
- Calories: 450
- Sugar: 35g
- Fat: 25g
- Protein: 6g
- Carbohydrates: 55g
See how the sugar and fat content climb? That’s the butter, the cream cheese, and those lovely Oreos doing their wonderful, delicious work! It’s important to enjoy these moderately, maybe share the pan with a friend, or make them for a special occasion. If you are looking for ways to balance out those richer mornings, check out my guide on healthy breakfast ideas for lighter weekday options. But for these incredible Oreo cinnamon rolls? Dive in without guilt, knowing you made something truly special.
Share Your Oreo Cinnamon Rolls Experience
Now that you’ve gone through all the steps—from waking up the yeast to delicately spreading that rich cream cheese frosting—the best part is seeing what magic you’ve created! In my kitchen, when these Oreo cinnamon rolls come out of the oven, they usually don’t last long enough for me to get a good picture, but I always want to hear about your bake!
Baking is a shared experience, and I truly cherish hearing how this recipe worked out for you. Did you get that textbook gooey layer I promised? Did your family give you the ‘best breakfast ever’ award? Don’t be shy! Drop a rating down below—five stars means you loved the softness, but I want to know the details!

If you made these gooey cookies and cream rolls and snapped a picture, please, please tag me on social media! Seeing those swirls, the dark Oreo chunks peeking out from the soft dough, and the way that frosting melts down the sides is the reason I share these recipes in the first place. It connects our kitchens, even if we are miles apart.
If you have any burning questions that weren’t covered in the FAQ, or if you tried a variation—maybe you used a different cookie brand or skipped the heavy cream drizzle—let me know in the comments; we can troubleshoot together! Or, if you just want to share how much better these are than anything you can buy in a store, I’m all ears. For more inspiration on truly memorable bakes, peek at what my friends are doing over at Old Recipes!
If you need to reach out directly with feedback or just want to send a virtual thank you, you can always use my contact form. Happy baking, friends. I can’t wait to see your beautiful, chocolate-swirled creation!
PrintThe BEST Gooey Homemade Oreo Cinnamon Rolls with Cream Cheese Frosting

Make soft, fluffy Oreo cinnamon rolls that are loaded with crushed cookies in the filling. Top these indulgent cookies and cream sweet rolls with a rich cream cheese frosting for a memorable breakfast or dessert.
- Prep Time: 45 min
- Cook Time: 20 min
- Total Time: 135 min
- Yield: 12 servings
- Category: Dessert
- Method: Baking
- Cuisine: American
- Diet: Vegetarian
Ingredients
- For the Dough: 1 cup warm milk (105-115°F), 2 1/4 teaspoons active dry yeast, 1/2 cup granulated sugar, 1 large egg, 1/4 cup unsalted butter (melted), 3 1/2 cups all-purpose flour, 1 teaspoon salt
- For the Filling: 1/2 cup unsalted butter (softened), 1/2 cup packed light brown sugar, 1 tablespoon ground cinnamon, 1 cup crushed Oreo cookies (about 12 cookies)
- For the Cream Cheese Frosting: 4 ounces cream cheese (softened), 1/2 cup unsalted butter (softened), 2 cups powdered sugar, 1 teaspoon vanilla extract, 1-2 tablespoons milk
- For Topping: 1/2 cup crushed Oreo cookies
Instructions
- Prepare the Dough: In a large bowl, combine the warm milk and yeast. Let it sit for 5 minutes until foamy.
- Add the sugar, egg, melted butter, flour, and salt to the yeast mixture. Mix until a shaggy dough forms.
- Knead the dough on a lightly floured surface for 5 to 7 minutes until it becomes smooth and elastic. Place the dough in a lightly oiled bowl, cover it, and let it rise in a warm place for 1 to 1.5 hours, or until doubled in size.
- Prepare the Filling: While the dough rises, mix the softened butter, brown sugar, cinnamon, and 1 cup of crushed Oreos in a small bowl until well combined.
- Shape the Rolls: Punch down the risen dough. On a lightly floured surface, roll the dough into a large rectangle, about 12×18 inches.
- Spread the Oreo filling evenly over the dough, leaving a 1-inch border on one long edge.
- Starting from the long edge opposite the border, tightly roll the dough into a log. Pinch the seam closed.
- Cut the log into 12 equal rolls. Place the rolls into a greased 9×13 inch baking pan.
- Second Rise: Cover the pan loosely and let the rolls rise again in a warm spot for 30 to 45 minutes, or until puffy.
- Bake: Preheat your oven to 375°F (190°C). Bake the rolls for 18 to 22 minutes, or until golden brown.
- Prepare the Frosting: While the rolls bake, beat the softened cream cheese and butter together until smooth. Gradually add the powdered sugar and vanilla extract. Add milk one tablespoon at a time until you reach a spreadable consistency.
- Frost and Serve: Remove the rolls from the oven and immediately spread the cream cheese frosting over the warm rolls. Sprinkle with the remaining crushed Oreos. Serve warm for the best gooey texture.
Notes
- For extra gooey results, pour 1/2 cup of heavy cream over the rolls before the second rise, just before baking.
- If you want a quicker option, you can substitute refrigerated cinnamon roll dough for the homemade dough, sprinkling the crushed Oreos over the dough before rolling.
- Store leftover rolls tightly covered at room temperature for up to two days. Reheat briefly in the microwave to restore softness.
Nutrition
- Serving Size: 1 roll
- Calories: 450
- Sugar: 35g
- Sodium: 350mg
- Fat: 25g
- Saturated Fat: 15g
- Unsaturated Fat: 10g
- Trans Fat: 0.5g
- Carbohydrates: 55g
- Fiber: 2g
- Protein: 6g
- Cholesterol: 50mg