
You know that moment. You’re halfway through a massive bowl of pasta or maybe just battling a craving, and all you can think about are those warm, impossibly soft, buttery sticks you used to get at your favorite chain restaurant. Well, stop dreaming, because I’m here to tell you: we can do better right here in the home kitchen. Forget everything you thought you knew about dry, challenging yeast doughs. My goal with these homemade breadsticks is simple: to create the ultimate, soft, chewy, copycat breadsticks that taste even better than what you remember. If it isn’t comforting, shareable, and utterly delicious, it doesn’t make it out of my kitchen, and I promise these golden beauties will be the first thing your family asks for when they walk in the door.
- Why This Homemade Breadsticks Recipe Delivers Soft and Fluffy Results
- Gathering Ingredients for Perfect Copycat Olive Garden Breadsticks
- Step-by-Step Instructions for Easy Breadsticks
- Tips for Making the Best Cheesy Breadsticks Variation
- Serving Suggestions for Your Soft Breadsticks
- Storage and Reheating Homemade Breadsticks
- Troubleshooting Common Breadsticks Issues
- Nutritional Estimates for These Garlic Breadsticks
- Share Your Copycat Breadsticks Experience
Why This Homemade Breadsticks Recipe Delivers Soft and Fluffy Results
When you’re chasing that deep, satisfying chewiness that defines restaurant-quality dough, you can’t just rush the yeast. I’ve seen people try to shortcut their way to these golden sticks, but trust me, skipping the yeast soak is like trying to start a fire with wet wood—it just won’t take! Activating the yeast correctly in that warm, sugary water is step one for getting the bubbles we need. That foam tells me the yeast is alive and ready to work its magic, giving us that incredible lift you’re looking for in **soft and fluffy breadsticks**.
It’s about structure, really. We want a breadstick that yields to pressure but snaps back a little. That delicate balance comes down to how much we work the dough afterward. It’s a foundational element that separates the good from the truly memorable. If you want that perfect tender crumb in the end, sometimes the technique needs to mirror other great scratch recipes, like how we treat the buttermilk in my fluffy biscuits—patience is everything.
Achieving Restaurant Style Breadsticks Texture
This is where we build character! If you’re using a stand mixer, you give the dough hook a good five minutes to go to work. If you’re doing what I love—tackling it by hand on the counter—you need a solid seven minutes of steady kneading. Don’t skimp on this part! We’re developing gluten structure here, which is what keeps your dough from collapsing into a puddle. This gluten network traps those yeast gases, making the final product delightfully chewy.
See, quick-mix recipes often result in something closer to a dense dinner roll. But for true **restaurant style breadsticks**, you need that elasticity. Once the dough is smooth, shiny, and springs back slowly when lightly poked, you know you’ve hit that perfect stage for maximum fluffiness after the rise. It’s worth the elbow grease, I promise!
Gathering Ingredients for Perfect Copycat Olive Garden Breadsticks
Okay, here’s the centerpiece of the operation! When you’re aiming for that specific, slightly sweet, supremely soft texture that only the best copycat versions achieve, ingredient quality really matters. I pulled these measurements straight from my testing notebook—the ones that produced the most satisfying results.
Don’t eyeball that water, please! It’s the single most important temperature check in this whole process. Too cold, and the yeast sleeps. Too hot, and you kill it dead. We need happy yeast!
Ingredients for the Soft and Fluffy Breadsticks Dough
- 1 cup warm water (This needs to be between 105-115°F—warm like a baby’s bottle!)
- 2 1/4 teaspoons active dry yeast
- 1 tablespoon granulated sugar
- 2 3/4 cups all-purpose flour, plus more if you need it for dusting later
- 1 teaspoon salt
- 2 tablespoons unsalted butter, melted, plus a little more for brushing the rising bowl
The Essential Garlic Butter Topping for Buttery Breadsticks
This topping is non-negotiable. Seriously, drown these things in it. A good quality, real butter makes all the difference here. Don’t even think about margarine; we need the richness!
- 1/2 cup (that’s one full stick) unsalted butter, melted down waiting for its moment
- 2 teaspoons garlic powder (Use a fresh jar, please, or it tastes dull!)
- 1 teaspoon dried parsley
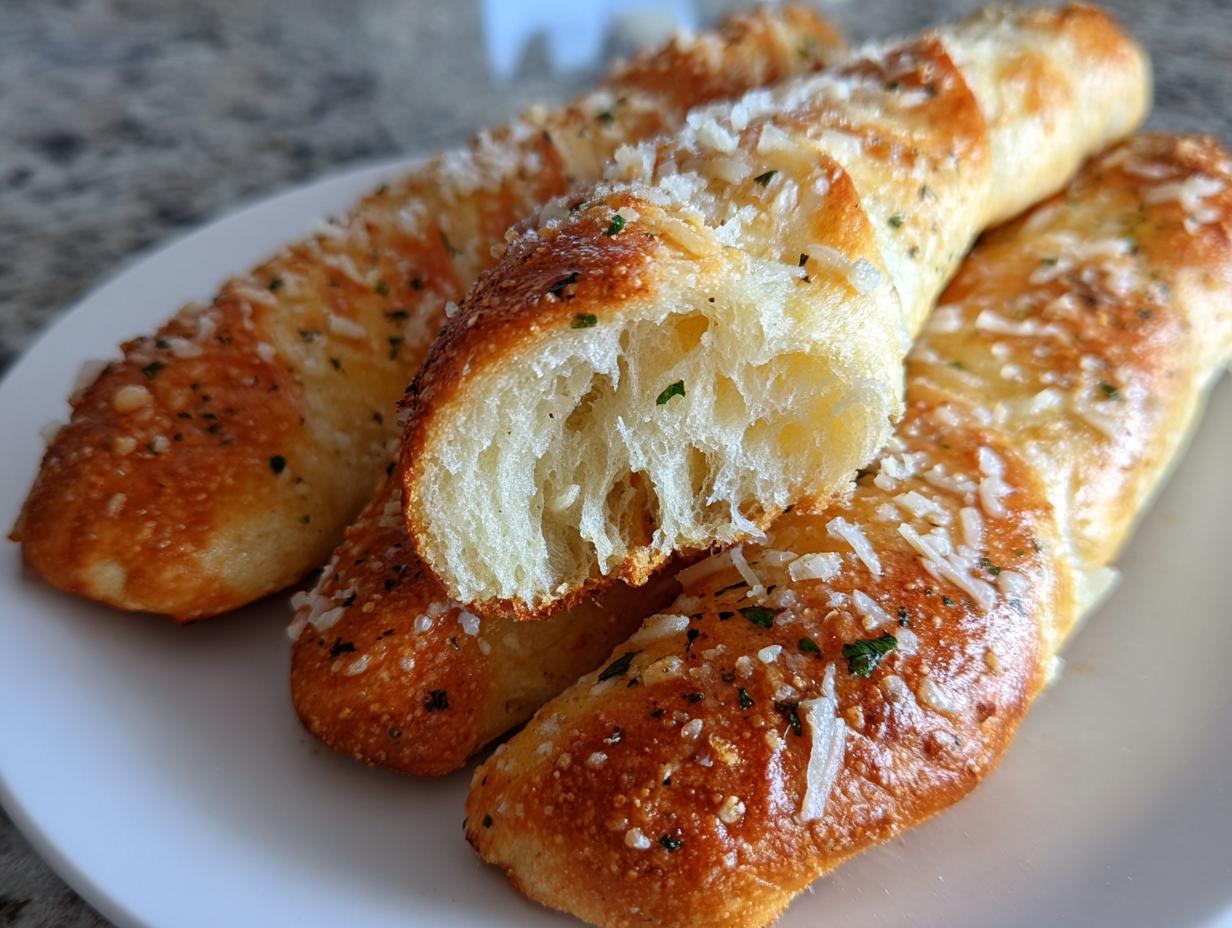
- 1/2 cup grated Parmesan cheese (The finely grated stuff melts best!)
Step-by-Step Instructions for Easy Breadsticks
Alright, now that we have our ingredients lined up, this is where the magic really happens—and honestly, this whole process is surprisingly fast once the yeast gets going. I love this no-fuss approach because it really streamlines the process, making these **breadsticks** a viable weeknight option rather than something reserved only for big holidays. We are aiming for that sheet pan ease here because nobody wants sticky countertops for an hour longer than necessary! If you check out my quick French bread recipe, you’ll see I love efficiency when yeast dough is involved.
Mixing and Kneading Your Homemade Breadsticks Dough
First things first: wake up that yeast! Pour the warm water into your mixing bowl, stir in the sugar, and toss in your yeast. Now, walk away for five to ten minutes. If you come back and it looks frothy, like the top of a creamy cappuccino, you’re golden. If it’s flat, dump it and start over; your water was either too hot or your yeast was old.
Once foamy, we add the salt, the 2 tablespoons of melted butter, and all that flour. Mix it until it looks like a messy ball of dough—shaggy is the perfect word. Now, it’s time to turn it onto a lightly floured surface. Knead this **homemade breadsticks recipe** dough for a solid 5 to 7 minutes until it stops fighting you and becomes smooth and pliable. If you’re using a mixer, let the dough hook handle it for about 5 minutes. Then, we let it rest in an oiled bowl an hour until it doubles its size. Easy, right?
Shaping and Proofing the Breadsticks Ropes
Once doubled, give that dough a gentle punch—it deflates beautifully. This recipe is scaled for about 12 sticks, so I usually divide the dough into 12 equal portions. You can eyeball this, but cutting it into 12 chunks ensures they all bake evenly, which is important for restaurant consistency.
Take one chunk and roll it out between your palms until you have a rope that’s nicely stretched, aiming for 10 to 12 inches long and about an inch thick. Lay them out on a sheet pan that’s lined with parchment paper; make sure to leave about an inch of space between each rope so they have room to grow a little more. Cover them loosely with a clean towel and let them chill out for 15 minutes while the oven gets screaming hot to 400°F (200°C).
Baking and Applying the Signature Garlic Breadsticks Glaze
Into the hot oven they go for about 10 to 12 minutes. You’re looking for a light golden color—don’t overbake them or they turn into crunchy sticks instead of fluffy ones!
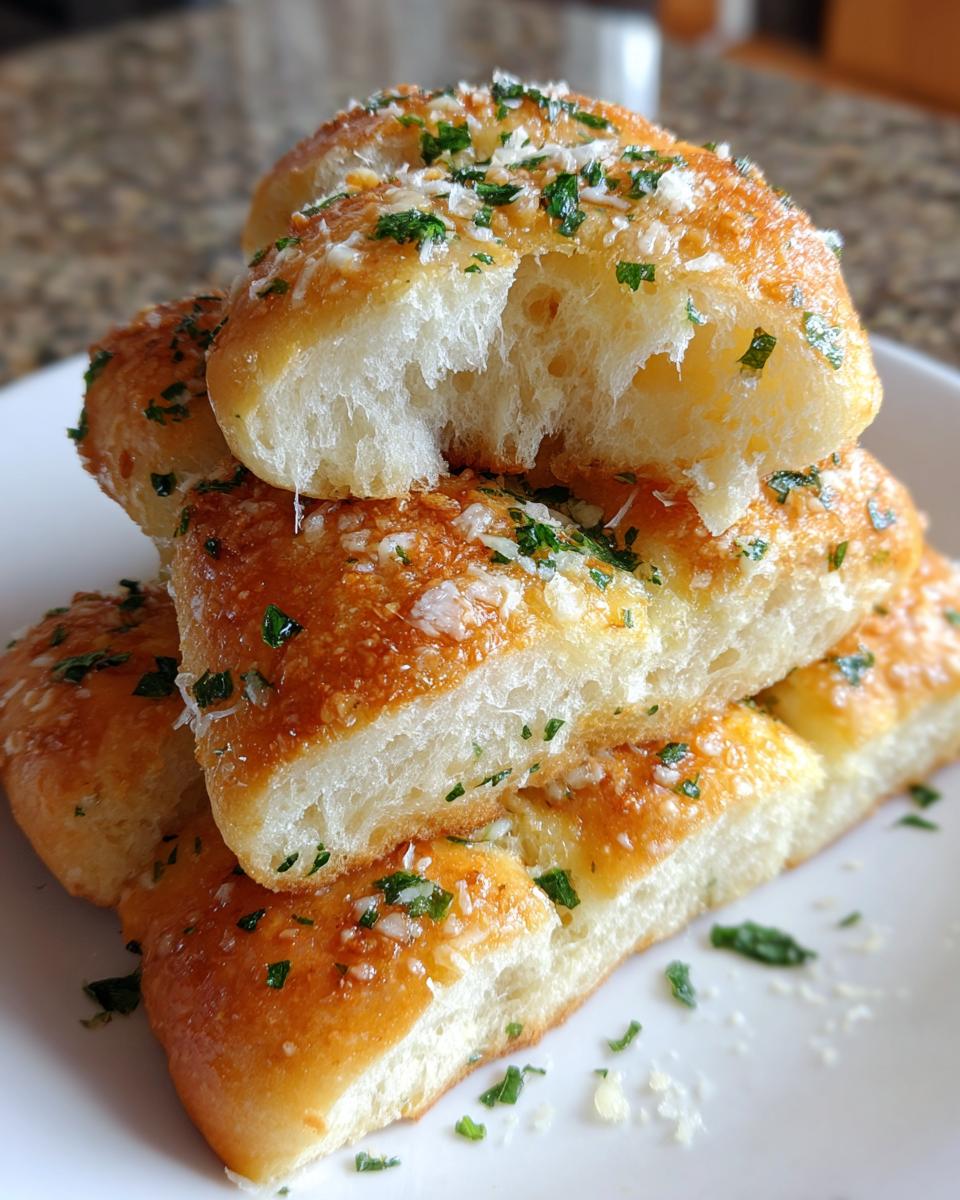
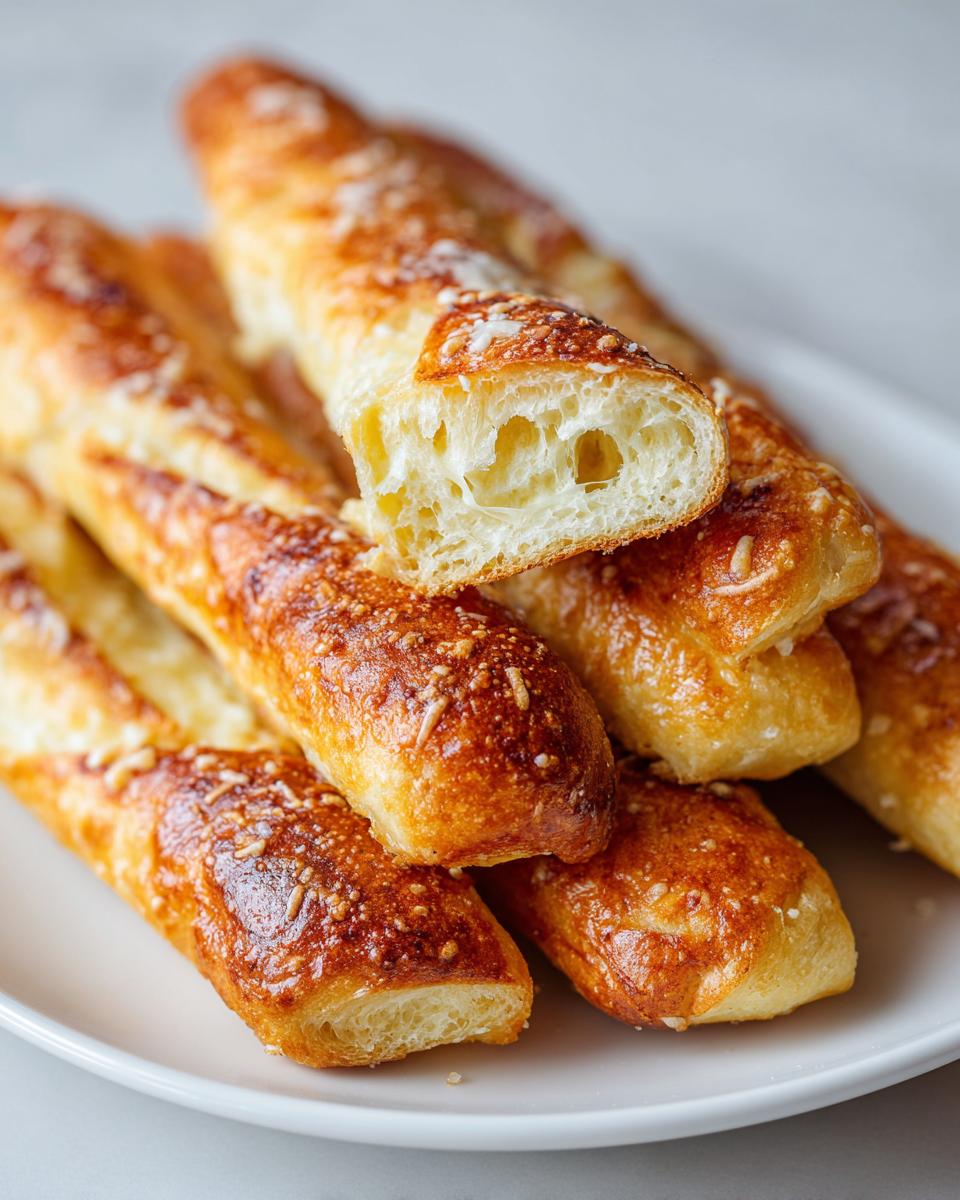
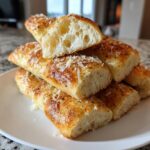
Here’s the secret: While they bake, mix up that gorgeous topping—your melted butter, garlic powder, and parsley. The second those **breadsticks** come out of the oven, brush them heavily and thoroughly with the garlic mixture. It melts right into the hot crust, locking in all that flavor. Quick trick: The second you pull them out, sprinkle that Parmesan cheese on top so it melts slightly onto the butter. These **breadsticks with garlic butter** are best eaten within five minutes of glazing!
Tips for Making the Best Cheesy Breadsticks Variation
So, you want to upgrade from garlic perfection to cheesy nirvana? I totally get it! While my core recipe is geared toward that classic garlic coating, turning these into **cheesy breadsticks** is ridiculously simple. If you want that classic mozzarella pull, you wait until the very last two minutes of baking. Pull the sheet pan out, quickly toss on your shredded mozzarella—don’t overload it, or the dough can get bogged down—and pop them back in until it’s just melted and bubbly.
For maximum impact, go heavy on the Parmesan in the topping stage, but if you want that gooey center, mozzarella is your friend. This topping variation is fantastic, especially if you plan on having marinara sauce nearby. These **breadsticks** take wonderfully to toppings, but remember the base needs to be soft!
If you need a creamy side to go along with this, I highly recommend checking out my recipe for creamy stovetop cheesy rice; it hits all the right comfort notes!
Serving Suggestions for Your Soft Breadsticks
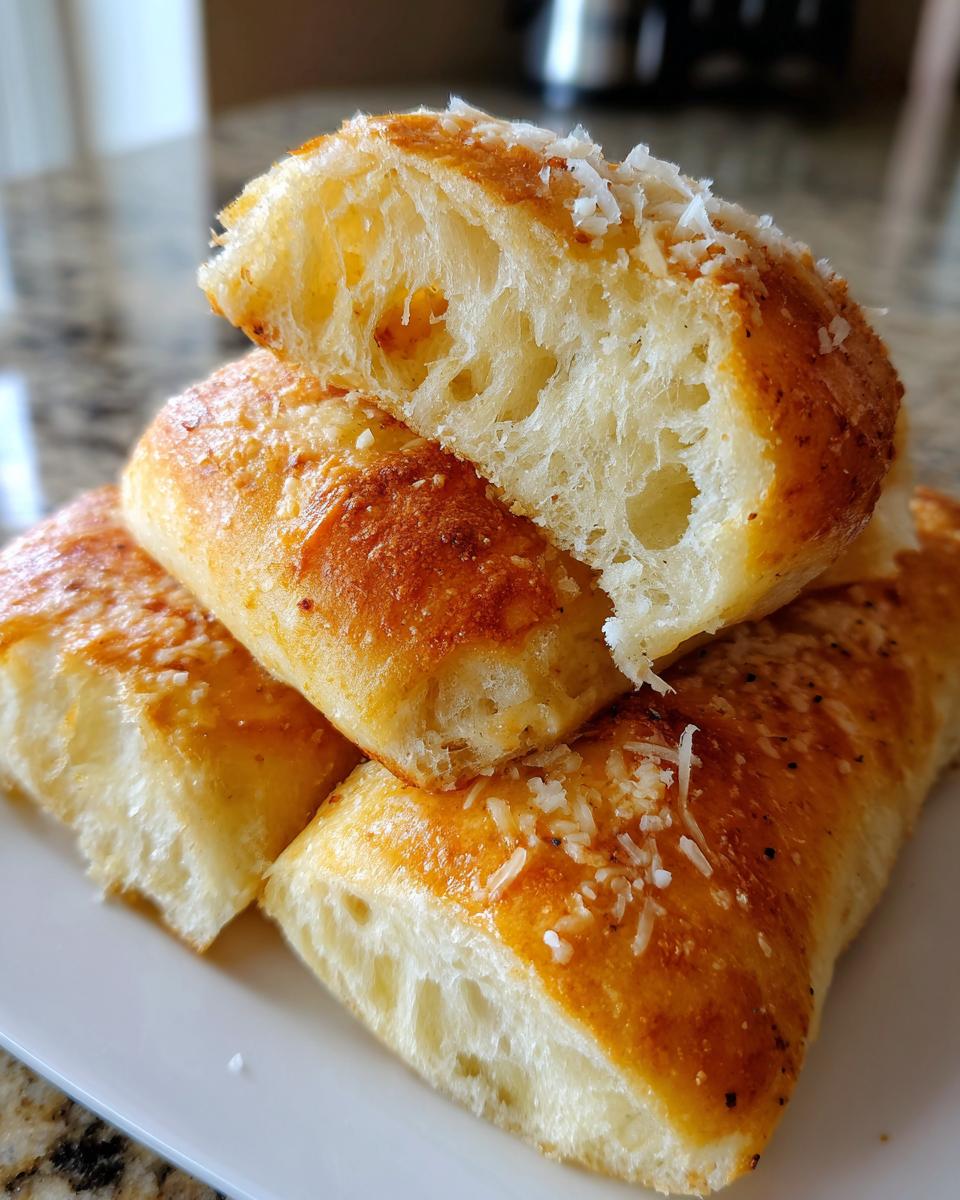
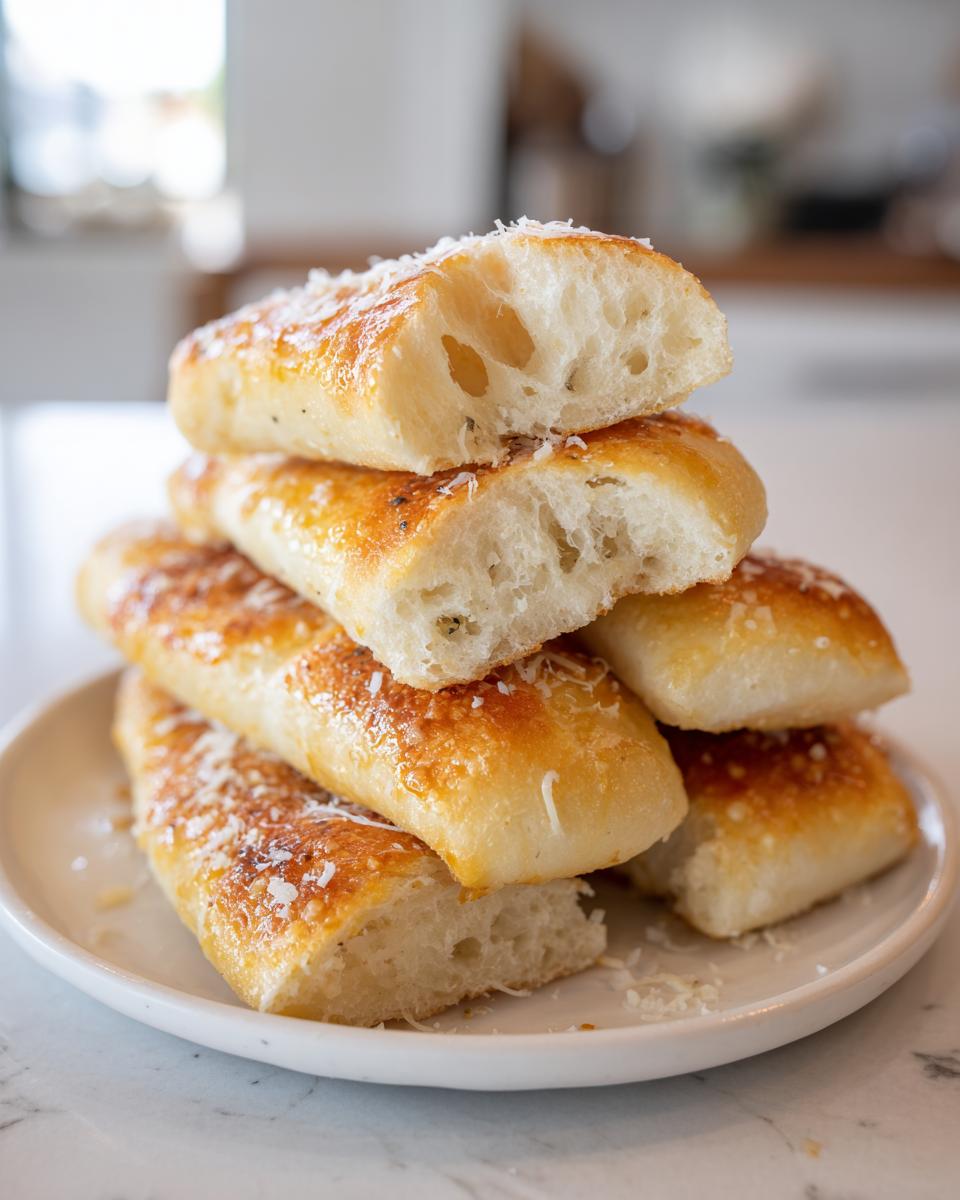
What’s the point of making something this incredible if you don’t serve it right? These soft sticks are born to complement a huge meal, and frankly, they are way better than anything you’ll get in a plastic basket at a restaurant. Because they are so soft and sturdy—thanks to that nice gluten development we worked so hard on—they are absolutely perfect for scooping up every last bit of sauce.
When I make a big batch of these **soft breadsticks**, I know they won’t last long. They shine brightest when they are still steaming hot, right off that sheet pan, acting as the perfect companion to any Italian-inspired dinner we’re having. Think about your favorite pasta night; these aren’t just a side dish, they are the main event for soaking up flavor!
Pairing Breadsticks with Sauces and Soups
You simply cannot have a breadstick this good without something fantastic for dipping! Marinara sauce is the classic choice, of course. Make sure it’s nice and warm, maybe even a little chunky, so you get great texture contrast against the buttery dough.
But don’t stop there! If you’re looking for something creamy, a good, tangy ranch dressing is completely addictive with that garlic topping. If we’re leaning into soup night—and I always serve these alongside my simple chicken tortellini soup—then sometimes I’ll even set out a small bowl of warmed cheese sauce. Don’t be shy about the dipping; these are classic **dipping breadsticks** territory, and you need a good pool of sauce waiting for them!
Storage and Reheating Homemade Breadsticks
Look, if you manage to have leftovers of these incredible **breadsticks**, you deserve a medal because we usually devour the whole pan while they’re still hot! But, if you do have some remaining, storing them correctly is vital so you don’t wake up to disappointment the next day. The enemy here is air exposure; air steals moisture, and moisture is the soul of a fluffy breadstick.
The best way to keep these fresh is to let them cool completely first—otherwise, condensation makes them soggy. Once completely cool, store them tightly wrapped in plastic wrap, and then place that wrapped bundle into an airtight container or a sturdy zip-top bag. They thrive when they are sealed off from the world. Stored like this on the counter, they should be good for a couple of days. Don’t bother with the fridge; it just dries them out faster, which is the opposite of what we want for that perfect chew!
Now, for the crucial part: reheating! If you just microwave them, you’ll get a sad, steamy texture that falls apart too easily. We need gentle heat to re-crisp the outside slightly while bringing back that inner chew we worked so hard to develop. I always recommend heading back to the oven for this. Wrap the sticks loosely in foil, just enough to trap the steam but not so tight that they suffocate. Pop them into an oven set to 350°F (175°C) for about 5 to 7 minutes. That gentle warmth brings them right back to life.
If you’re in a huge rush, a quick 15-second zap in the microwave works, but follow it up immediately by brushing them with just a tiny bit of fresh melted butter while they are warm. It sounds like extra work, but trust me, reviving that buttery goodness makes all the difference in keeping these **breadsticks** tasting like they just came out of the oven. Speaking of long-lasting softness, my recipe for soft and chewy gingerbread cookies uses a similar principle for maintaining texture over time—it’s all about moisture retention!
Troubleshooting Common Breadsticks Issues
Even in my kitchen, which has seen thousands of batches of dough, things sometimes go sideways. Don’t let a little hiccup ruin your night! When you’re working with yeast for the first time, or even the hundredth, you can run into a few common traps. Remember, making **breadsticks** is really just making a very simple bread, and all simple bread recipes have their little quirks. We just need to know how to talk back to the dough when it gets grumpy.
If you’re having trouble making these come out like the perfectly soft versions you see here, nine times out of ten, it’s not the recipe—it’s the temperature or the timing of your first rise. Let’s diagnose the most frequent trouble spots that pop up in the bakery!
Dough Won’t Rise or Rises Too Slowly
This is almost always a temperature issue related to that yeast activation we talked about. If your dough is stiff and refusing to budge after an hour, check the temperature of the water you used. If it was too cold (below 100°F), the yeast is sluggish. If it was hot (over 120°F), you probably killed it dead.
What can you do now? Resist the urge to throw in more yeast! Instead, help it along. Find the warmest spot in your house—maybe near a sunny window or inside an oven that’s been warmed for just 30 seconds and then turned off. Cover the bowl tightly and give it another 30 minutes. A slow rise usually still results in great flavor, it just takes patience. If you are really frustrated, sometimes starting over with fresh yeast is the only way forward for a **simple bread recipe** like this.
Breadsticks Popped Up Too Much and Baked Unevenly
Did your ropes spread out into one giant, thin flatbread instead of individual sticks? This means you let them rest (the second proof) for too long before baking. That 15-minute rest is important for relaxing the dough so it rolls out nicely, but if you let it go too long, they puff up immediately in the oven and then collapse when taken out, leading to a flatter final look.
Another reason for uneven baking is overcrowding the pan. Remember I said leave about an inch between them? If they are touching, they steam each other instead of baking evenly and browning correctly. For a better system next time, consider baking in two smaller batches rather than jamming 12 long ropes onto one sheet. If you really want a no-fuss path next time, you might look into techniques for **no-knead bread** starters, though this yeast dough is already quite straightforward!
The Final Sticks Are Hard or Too Crunchy
This is my least favorite outcome! Nobody wants a hard stick when they asked for soft and chewy. This invariably means one of two things: overbaking or missing the garlic butter finish. If you bake past 12 minutes, the moisture evaporates too quickly, and you get something closer to a breadstick cracker.
The other major culprit is skipping the essential final step. That melted garlic butter mixture we brush on *immediately* after they come out of the oven does more than add flavor—it seals in moisture. If you let them cool bare, they dry out fast. If your sticks are a little tough, try brushing them with a tiny bit more plain melted butter and wrapping them tightly in foil for five minutes before serving. It helps steam them back to life just enough!
If you’re intimidated by yeast doughs like this one, check out my guide on easy artisan bread without kneading; sometimes just changing the method entirely can give you the confidence boost you need!
Nutritional Estimates for These Garlic Breadsticks
Now, let’s talk numbers. I always try to include an estimate here because while these are comfort food, knowing what you’re eating is part of being a responsible cook. Please remember, these figures are just my best guess based on standard ingredient values, and they can swing wildly depending on how much butter you decide to brush on (and let’s be honest, you’re probably brushing on more than I listed!).
Every calculation assumes the recipe yields 12 even breadsticks, but if you stretch them longer or cut them shorter, your serving size changes, so adjust accordingly! This data is based on the dough and the standard garlic butter topping we used.
- Serving Size: 1 breadstick
- Calories: Roughly 180
- Fat: Around 9 grams (That real butter really adds up!)
- Saturated Fat: About 5 grams
- Carbohydrates: Approximately 22 grams
- Sugar: Very low, only about 1 gram
- Protein: Close to 4 grams
- Sodium: Approximately 250 mg (This is where the salt and Parmesan make their presence known)
This is meant to be a guide, not gospel. They are a delicious, filling side dish, and knowing they clock in around 180 calories is pretty good for something so wonderfully buttery and satisfying. Enjoy them guilt-free as the perfect accompaniment to your next hearty meal!
Share Your Copycat Breadsticks Experience
Well, we made it! We’ve gone from mixing simple pantry staples to pulling a sheet pan full of restaurant-quality, soft, chewy **breadsticks** out of the oven. That deserves a celebration, doesn’t it? But here’s the thing about recipes—they truly come alive when they leave my kitchen and enter yours. I poured my heart into making sure this copycat version lives up to your memories, and now I’m desperate to hear how they turned out for you!
Did you manage to keep them warm long enough to dip them in your sauce? Did you sneak an extra handful before dinner officially started? Tell me everything! Your feedback helps me immensely as I continue building this little culinary community here, and it helps other folks taking the leap on this recipe see just how reliable these results are.
Rate This Homemade Breadsticks Recipe
If you loved the incredible softness and that punch of garlic butter, please take a moment to leave a star rating below for this recipe. Five stars if they tasted like they were flown in straight from your favorite Italian spot! If you found a little tweak that made them even better for your family, definitely mention that too. We all learn from each other when we share these **breadsticks** successes.
If you need an amazing main dish to go with these, you absolutely must check out my recipe for the Million Dollar Pasta Bake—it’s unbelievably rich! And if you want to compare notes on achieving that perfect restaurant emulation, this external link has another take on the classic look: the original copycat recipe inspiration.
What’s Your Favorite Way to Eat Them?
I know I’m biased toward dipping them in warm marinara—it’s just the way I grew up eating them—but tell me what you paired them with! Did you turn them into little cheese-stuffed snacks? Did you use them to sop up the juices from a roast? Maybe you just stood over the sink and ate them all plain, which, honestly, I can’t judge.
I want to see your pictures! Snap a photo of your golden, buttery beauties and tag me on social media. Seeing those fluffy ropes emerge from your home ovens is truly the best part of sharing this journey with you. Happy baking, and thank you for welcoming this recipe into your home!
PrintCopycat Soft and Chewy Garlic Breadsticks (Better Than Olive Garden)
Make restaurant-style, soft and chewy breadsticks at home. This easy recipe delivers the buttery, garlicky flavor you crave, perfect as a side dish or appetizer.
- Prep Time: 20 min
- Cook Time: 12 min
- Total Time: 1 hour 32 min
- Yield: 12 breadsticks 1x
- Category: Appetizer
- Method: Baking
- Cuisine: American
- Diet: Vegetarian
Ingredients
- 1 cup warm water (105-115°F)
- 2 1/4 teaspoons active dry yeast
- 1 tablespoon granulated sugar
- 2 3/4 cups all-purpose flour, plus more for dusting
- 1 teaspoon salt
- 2 tablespoons unsalted butter, melted, plus more for brushing
- 1/2 cup (1 stick) unsalted butter, melted (for topping)
- 2 teaspoons garlic powder
- 1 teaspoon dried parsley
- 1/2 cup grated Parmesan cheese
Instructions
- Activate the yeast: In a large bowl, combine the warm water, yeast, and sugar. Let stand for 5 to 10 minutes until foamy.
- Mix the dough: Add 2 3/4 cups of flour, salt, and 2 tablespoons of melted butter to the yeast mixture. Mix until a shaggy dough forms.
- Knead the dough: Turn the dough out onto a lightly floured surface. Knead for 5 to 7 minutes until the dough is smooth and elastic. Alternatively, use a stand mixer with a dough hook for 5 minutes.
- First rise: Place the dough in a lightly oiled bowl, turning to coat. Cover the bowl with plastic wrap or a clean towel and let it rise in a warm place for 1 hour, or until doubled in size.
- Shape the breadsticks: Gently punch down the dough. Divide it into 12 equal pieces. Roll each piece into a long rope, about 10 to 12 inches long and 1 inch thick.
- Prepare for baking: Line a large sheet pan with parchment paper. Arrange the dough ropes on the sheet pan, leaving about 1 inch between them. Cover loosely and let rest for 15 minutes. Preheat your oven to 400°F (200°C).
- Bake: Bake for 10 to 12 minutes, or until the breadsticks are lightly golden brown.
- Make the garlic butter topping: While the breadsticks bake, combine the 1/2 cup melted butter, garlic powder, and parsley in a small bowl.
- Glaze and finish: Immediately after removing the breadsticks from the oven, brush them generously with the garlic butter mixture. Sprinkle evenly with the grated Parmesan cheese.
- Serve: Let cool slightly before serving warm. These are excellent for dipping.
Notes
- For extra cheesy breadsticks, sprinkle mozzarella cheese over the tops during the last 2 minutes of baking before applying the garlic butter.
- If you prefer a quicker rise, place the dough in a slightly warm oven (turned off) to speed up the process.
- Use fresh garlic instead of powder for a stronger flavor, finely minced and mixed into the melted butter.
Nutrition
- Serving Size: 1 breadstick
- Calories: 180
- Sugar: 1
- Sodium: 250
- Fat: 9
- Saturated Fat: 5
- Unsaturated Fat: 4
- Trans Fat: 0
- Carbohydrates: 22
- Fiber: 1
- Protein: 4
- Cholesterol: 20