
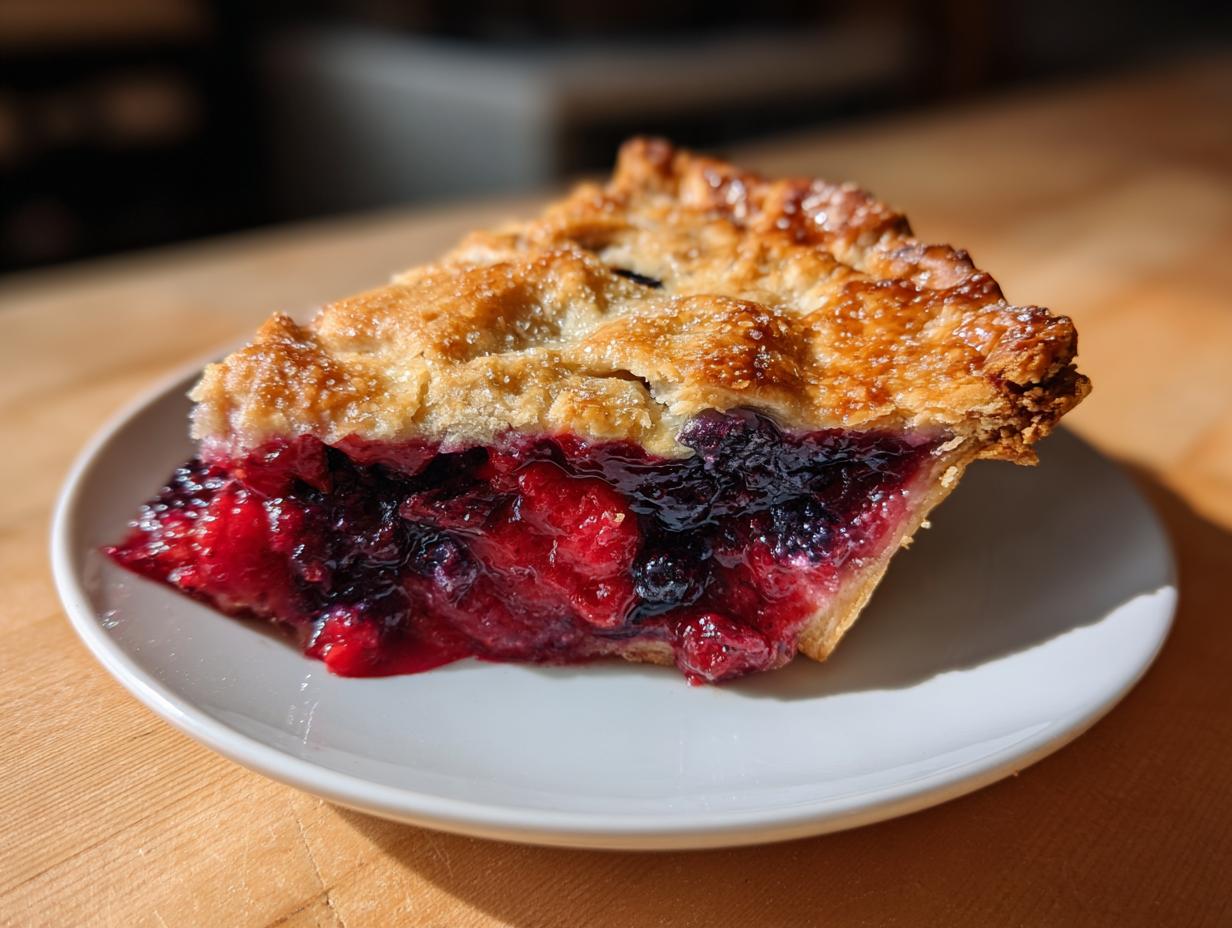
There is nothing in this world that screams ‘summer perfection’ quite like a slice of fruit pie, right? But let’s be real—most fruit pies are a disaster waiting to happen. You spend all that time rolling butter into flour only to end up with a soupy mess. Not here. Not today. This recipe for the ultimate **triple berry pie** is my promise to you: we nail the shatteringly flaky, all-butter crust, and we absolutely conquer that runny filling issue. This isn’t just another baking instruction; it’s built on the idea that the best moments happen around a shared table. Whether you’re using those gorgeous strawberries from the farmer’s market or relying on your freezer stash, this method works every single time.
I want you to have that moment of pure joy when you pull that first perfect slice. You can find more of my approachable, soul-filled baking guides when you look at my collection of simple, delicious desserts, but this berry pie? This one is special. It’s about making memories that stick, not spills that stain the counter.
- Why This is the Best Triple Berry Pie Recipe You Will Ever Make
- Ingredients for Your Ultimate Triple Berry Pie
- The Flaky Pie Crust Tutorial for Your Triple Berry Pie
- Assembling the Perfect Triple Berry Pie Filling
- Step-by-Step Assembly of Your Triple Berry Pie
- Baking Your Triple Berry Pie to Golden Perfection
- The Most Important Step for a Perfect Triple Berry Pie
- Tips and Triple Berry Dessert Ideas
- Frequently Asked Questions About Making a Triple Berry Pie
Why This is the Best Triple Berry Pie Recipe You Will Ever Make
Look, there are tons of summer desserts out there, but what sets this **best triple berry pie recipe** apart is that I obsessively solved the two biggest pie problems. This gets you that restaurant-quality result without needing to go to pastry school. My goal, always, is for you to finish baking and feel like a total boss. Trust me, this is the formula you’ll want to keep bookmarked.
- It delivers a filling that sets up beautifully—no sad, leaky slices here!
- It guarantees a crust so buttery and flaky you’ll swear you bought it from a professional bakery.
- Seriously, it works perfectly whether you’re using fresh berries or anything you’ve got stashed in the freezer.
You can check out some of my other simple fruit baking projects, like this easy fruit pie recipe guide, but this berry pie truly stands alone.
Achieving a Berry Pie Recipe No Runny Filling
It all comes down to ratios, friend. We use just the right amount of cornstarch—it’s the glue holding everything together while it bakes. But the real trick? You absolutely have to let it cool completely. That 4-hour minimum cooling time is the non-negotiable secret weapon for a sliceable pie. Don’t peek early!
The Secret to a Homemade Berry Pie Crust That Flakes
If you’ve ever struggled with a tough or crumbly bottom crust, this is where we fix that. We only use ice-cold butter cut into chunky pieces, and we mix it minimally. That temperature control is everything. It’s how we get those amazing layers that shatter when you press a fork into them. We’ll dive deep into the dough in the next section, but know this: the crust is an all-butter superstar.
Ingredients for Your Ultimate Triple Berry Pie
Okay, now that we’ve talked about *why* this is the pie to end all pies, let’s talk about what you need to haul out of the pantry. For this recipe, the quality of your ingredients matters, especially when we are aiming for that flaky crust that just melts away. My professional background taught me that precision starts right here, with the gathering of supplies. Don’t skip the chilling part later on!
I’ve got the list broken down into the dough elements and the glorious, juicy filling parts. If you want to check out my go-to recipes for things like flaky apple hand pies, go ahead, but come right back here before you start mixing!
For the All-Butter Flaky Pie Crust
This is where the magic starts. Listen closely: your butter needs to be arctic cold, and your water needs to be full of ice cubes. Seriously, don’t use room-temperature butter for this. It’ll turn into oily soup instead of flaky layers.
- Two and a half cups of all-purpose flour—that’s your base.
- One teaspoon of salt, just for flavor balance.
- One full cup (that’s two sticks!) of unsalted butter. Cube it small and keep it in the freezer for about 15 minutes right before you use it.
- About half a cup of ice water. You might not use it all, but you need those ice cubes ready!
For the Foolproof Triple Berry Filling
We are combining strawberries, blueberries, and raspberries here. If you have blackberries on hand? Toss ‘em in! More berries, more flavor, right? The key here is the cornstarch—it’s our liquid insurance policy.
- Six cups of your mixed berries—strawberries, blueberries, and raspberries are the trio, but whatever you have on hand works!
- One and a half cups of regular white granulated sugar.
- A quarter cup of cornstarch. This is what saves you from a runny mess, so don’t skimp!
- One tablespoon of bright, fresh lemon juice to wake up those berry flavors.
- Just a tiny pinch—about a quarter teaspoon—of ground cinnamon. It just adds warmth.
For Finishing
These last bits make it look and taste finished. The egg wash gives it that gorgeous shine, and the coarse sugar gives it a lovely little crunch on top.
- One large egg, beaten really well with maybe one teaspoon of water for an egg wash.
- One tablespoon of coarse sugar because every great pie needs bling, right?
The Flaky Pie Crust Tutorial for Your Triple Berry Pie
Alright, let’s get down to the real artistry here: the crust. Anyone can dump berries in a dish, but making a crust that is shatteringly **flaky pie crust tutorial** material takes a little bit of chef know-how. When I was working in professional kitchens, the mantra was always: *keep it cold*. That’s the game-changer. You’re cutting that super-cold butter into the flour until it looks like coarse crumbs, but you need those pea-sized chunks of butter to survive the mixing process.
Use a pastry blender or, honestly, just your fingertips—work fast so your hands don’t warm up the butter too much! When you add the ice water, only add enough so the dough *just* holds together when squeezed. If you overwork it trying to make it perfectly smooth, the gluten develops, and poof! Say goodbye to flakiness.
Once it barely comes together, immediately divide it into two disks, wrap them tight, and walk away. That’s where the next crucial step comes in, which I detailed below.
Chilling and Resting the Dough
I know, I know, waiting is the worst part of baking. But trust me, chilling this **homemade berry pie crust** dough for at least an hour isn’t optional; it’s essential downtime. While it chills, all that kneading action—the thing that toughens the gluten—gets to relax. When the gluten relaxes, your dough rolls out beautifully without snapping back at you, and when it bakes, those little cold butter pockets turn to steam, forcing those gorgeous, flaky layers apart.
If you want to see how I approach structure in other recipes, check out my guide on making fluffy buttermilk biscuits—the principle of keeping the fat cold is the same!
Assembling the Perfect Triple Berry Pie Filling
Now for the fun part where all those gorgeous berries finally meet their destiny! You want to handle these little jewels gently. We aren’t making a berry smoothie here; we want whole, delicious fruit that softens nicely during the bake.
Grab your biggest bowl—the one you used for the dry crust ingredients should be spotless now, but it’s always best to use a fresh one for the filling! Gently dump in your six cups of mixed berries. Remember, whether you’re using fresh-picked beauties or reaching into the freezer for those deep summer flavors, you do *not* thaw the frozen ones first. Seriously, don’t do it. Thawed berries release too much liquid too early, and we are fighting that runniness dragon!
Next, scatter your sugar over the top, followed by that crucial cornstarch layer. I like to pour the lemon juice over everything before I gently toss it all together. Use large, sweeping motions—think of folding a delicate blanket rather than aggressively stirring concrete. You just want everything coated evenly. That cornstarch needs to touch every berry surface so it can activate properly in the oven and turn all that lovely juice into a perfect, thick syrup.
Once that’s mixed, you can pause and let it sit for just a few minutes while you roll out that beautiful dough you chilled. If you’re interested in other ways to preserve that sweet summer taste, I have a great little guide on easy freezer jam that might inspire you later, but right now, your focus needs to be on getting this gorgeous, perfectly coated berry mixture into that bottom crust!
Step-by-Step Assembly of Your Triple Berry Pie
We’ve got the structure (the crust dough) resting beautifully, and we’ve got the glorious flavor bomb (the berry filling) all mixed up. Now it’s time to put this beautiful **triple berry pie** together! Take one of those chilled dough disks out of the fridge—it should handle so much better now that it’s had its little nap.
Flour your surface lightly, roll that disk out into a circle, and give yourself about a 12-inch diameter. You want it big enough to drape nicely over the edges of your 9-inch pie plate. Gently ease that dough into the plate. Don’t stretch it! If it shrinks or tugs, just let it sit for five minutes before you press it into the corners. Trim that overhang to about an inch—that’s what we’ll use later to seal everything up tight.
Go ahead and pour in all that glorious berry filling. Distribute it as evenly as you can. If it looks like a mountain, that’s okay; it will settle down while baking. This is when you decide the top treatment! If you’re going for that classic, rustic look that everyone loves, you can cut strips for a beautiful triple berry pie with lattice top, which is probably my favorite way to show off those colorful layers.
If you go the simple route and use the second dough disk as a full top crust, make sure you cut a few decent-sized slits right in the middle. Those vents are non-negotiable; they let the steam escape so your crust doesn’t explode or get soggy underneath.
Once the top is on—lattice or solid—you crimp those edges tight to seal the deal between the top and bottom crusts. Then, grab that little bowl with your egg wash—that beaten egg and tiny splash of water. Brush it lightly but thoroughly over the whole top surface. This is what helps it turn that perfect golden brown color. Finally, sprinkle that coarse sugar over the top. It adds the best little crunch!
Here’s the last bit of patience needed for a truly great **homemade berry pie crust**: pop the assembled pie back into the refrigerator for a solid 30 minutes before it hits the oven. This final chill firms up the butter one last time before the heat hits it, which significantly cuts down on shrinking and helps those layers stay distinct. If you want to see another stunning pie application, check out my post on flaky apple strudel; the crust principles are identical!
When you’re ready to bake, just remember that the final result—the perfect, clean slice you’ve dreamed of—also depends on letting it cool, which we’ll cover in a bit. For now, get that pie chilled and go preheat that oven! If you’re curious about crust styles, you can always peek at how the folks over at Tastes Better From Scratch handle their assembly too.
Baking Your Triple Berry Pie to Golden Perfection
Okay, the suspense has built long enough! We’ve got our chilled, beautiful **triple berry pie** assembled, and now we need to give it the perfect bake. If you have a baking stone or a thick baking sheet, grab that now, because we are going to use it. Why? Because the intense, direct heat hitting the bottom crust helps it cook through properly before the filling has time to liquefy everything. Trust me on this; it’s another professional trick I picked up early on.
First thing: preheat your oven to a nice hot 400°F (200°C). You want that blast of heat to set the crust structure immediately. Pop that pie onto your preheated baking sheet and slide it into the hot oven. We run it hot for the first 20 minutes. This initial high heat wakes up the butter in the crust and starts encouraging those thin, flaky layers to separate!
After those 20 minutes are up, it’s time to settle in for the long bake. Reduce the temperature down to 375°F (190°C). This lower heat allows the interior to cook through evenly without scorching the delicate berries or burning the edges of your beautiful crust. You’ll bake at this temperature for another 35 to 45 minutes. Keep an eye on it!
Here’s where you need to be present: if you notice those outer edges start getting too dark—maybe turning a deep, alarming brown before the center is bubbly—interrupt the process gently. Grab a strip of aluminum foil, fold it loosely into a ring, and drape it over the edges of the pie plate. This shields the rim while the center finishes cooking. You know it’s done when you can see the filling bubbling thick and slow in the center vents. It should look jammy, not watery. If you can only see clear juice bubbling, it needs more time!
The Most Important Step for a Perfect Triple Berry Pie
Okay, folks, gather ’round, because this last step is where most people fail, and I refuse to let that happen to your beautiful creation. You have mastered the flaky crust, you’ve tamed the berry filling, and the aroma pouring out of your oven right now is spectacular. Now comes the hardest part of all: walking away. I mean it!
The single most crucial, non-negotiable, must-do step for our **triple berry pie** concerns cooling. You must let this pie cool on a wire rack for a minimum of four hours. I usually tell people to make it in the morning and plan to serve it for dinner.
Why am I such a stickler? Remember that cornstarch we used? It’s our hero against soupiness, but it doesn’t fully activate and lock everything into that perfect, sliceable gel until it drops in temperature. If you cut into that pie when it’s piping hot, you’ll slice right through that beautiful bottom crust and the filling will run out like a lava flow. That defeats the whole purpose of our **berry pie recipe no runny filling** guarantee!
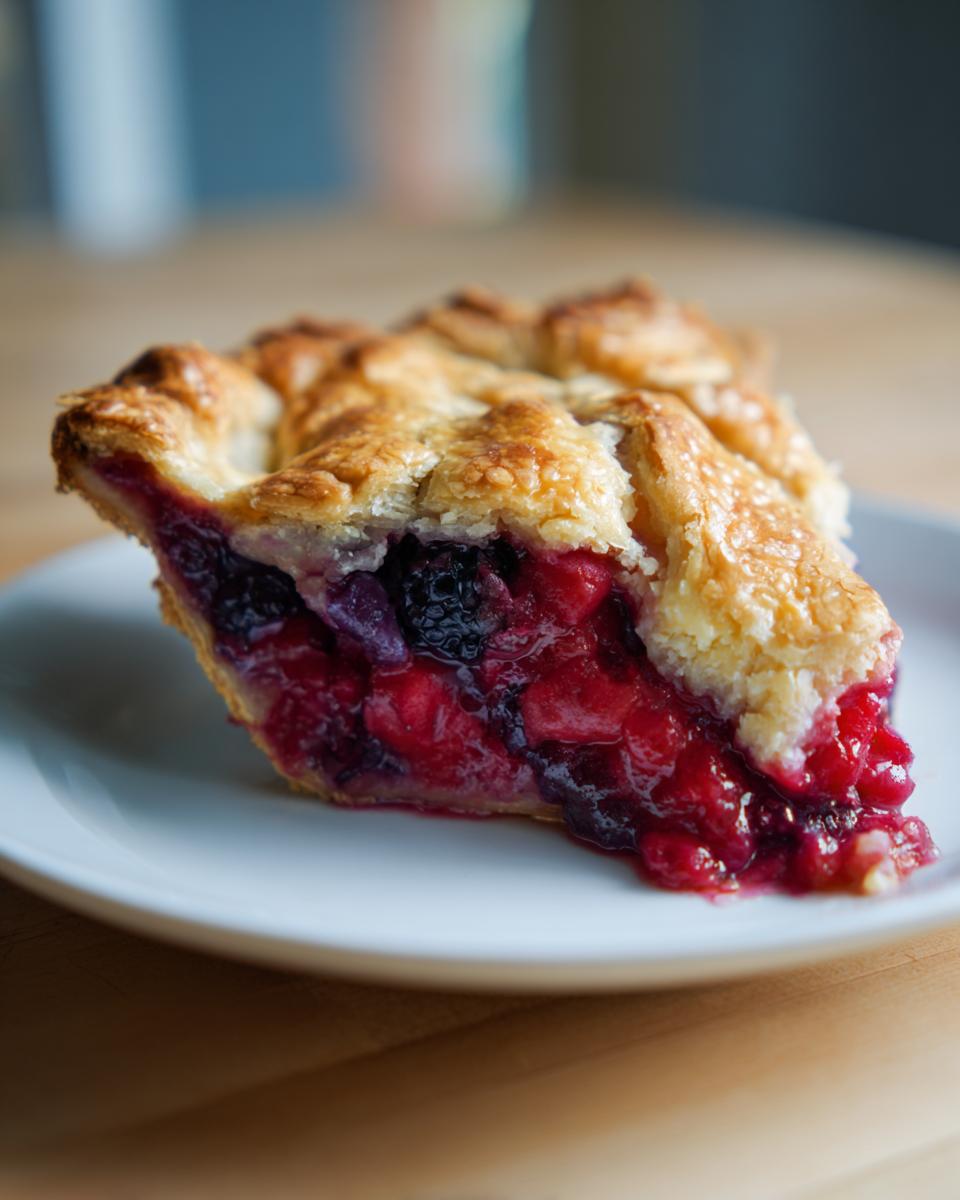
I know you’re eager. Who wouldn’t want a slice warm with vanilla ice cream? But hold the line! Patience here is the ultimate act of generosity you can give yourself. Let it set up firm. When it’s cool, you’ll get that clean, beautiful slice, just like you see in all those gorgeous pictures you pinned.
You can revisit my favorite collection of simple, delicious desserts while you wait for that timer to tick down.
If you want to see how the experts handle the cooling process to ensure that perfect structure, take a look at the tips they share over at Bake & Savor.
Tips and Triple Berry Dessert Ideas
Whew! You made it. Now that you have this fantastic, non-runny **triple berry pie** cooling on the rack, let’s talk about making the experience perfect, and maybe making your next version even more fun. Remember how I said you should always bake it on a preheated baking sheet? That’s a tip I never skip! It sets that bottom crust fast, preventing sogginess, which, frankly, is criminal in pie making.
When it comes to serving, plain vanilla bean ice cream is always the classic, but sometimes you want to dress this berry beauty up a little more. A dollop of fresh, lightly sweetened whipped cream is heavenly, or if you want something richer, a drizzle of homemade caramel sauce goes surprisingly well with the tartness of the raspberries. Check out my caramel apple cookies guide—that caramel base is perfect for drizzling!
If you’re looking to switch things up next time, don’t feel locked into the top crust we used! Many bakers love the rustic look of a **triple berry crumb topping pie**. That’s super easy—just skip the top dough entirely and pile on a crunchy mixture of flour, sugar, butter, and oats before baking. It gives the pie a whole different, wonderfully textural feel!
Also, a little flavor injection never hurt anyone. If you want to step outside the traditional cinnamon/lemon profile, try adding just half a teaspoon of ground cardamom to your filling mixture. It adds such a complex, almost floral lift to the berries that people always ask what my secret ingredient is! No matter how you top it or what spices you decide to play with, this foundation for a **triple berry pie** is simply the best starting point for all your summer baking adventures.
Frequently Asked Questions About Making a Triple Berry Pie
I know when you bake something this spectacular, you end up with a few lingering questions! I get it; baking is always a bit of a balancing act, especially when you’re aiming for that perfect, clean slice. I put together answers to the things I hear most often from people tackling their first **triple berry pie** or trying to get that crust just right.
Can I substitute the berries in this triple berry pie?
Absolutely! That’s one of the joys of this recipe. If you don’t have both strawberries and raspberries, or maybe you found a bag of blackberries you love, go for it! The general rule of thumb is to keep the total volume the same—stick close to that six-cup measure. If you’re using berries that are much more watery than the trio listed, you might want to bump up your cornstarch by just a teaspoon. But generally, feel free to mix and match!
How do I store leftovers of my triple berry pie?
This is important: after you resist cutting it for the initial four hours (remember that?), you want to treat this pie like any other baked good with a high fruit content. If it’s a cool day and you’re planning on eating the rest within 24 hours, leaving it on the counter lightly tented with foil is totally fine. If your kitchen is warm, or you plan to keep it longer than that, wrap it well and stick it in the fridge. When you want to serve leftovers, I like to let it sit on the counter for about 30 minutes to take the chill off, or you can give it a quick 15-second zap in the microwave. Seriously, only 15 seconds, or you risk running the filling again!
Can I make the homemade berry pie crust ahead of time?
Yes, you certainly can make the dough ahead of time, and I highly recommend it if you’re making this for a big gathering! After you divide the dough into two disks, wrap them tightly in plastic wrap. You can store them in the refrigerator for up to two days. Any longer than that, and the flour starts to dry out too much. When you pull it out to use it, let it sit on the counter for about 10 minutes before rolling, just so it’s pliable enough not to crack.
If you’re looking for ideas on meal planning around your baking projects, I always try to keep things simple during the week, check out my guide on easy lunch meal prep for some inspiration!
PrintUltimate Flaky Triple Berry Pie with Foolproof Filling

Make the best triple berry pie featuring strawberries, blueberries, and raspberries in a shatteringly flaky, all-butter crust. This recipe guarantees a perfectly set, non-runny filling, working well with both fresh and frozen berries.
- Prep Time: 45 min
- Cook Time: 65 min
- Total Time: 5 hours 55 min
- Yield: 8 servings 1x
- Category: Dessert
- Method: Baking
- Cuisine: American
- Diet: Vegetarian
Ingredients
- 2 1/2 cups all-purpose flour
- 1 teaspoon salt
- 1 cup (2 sticks) unsalted butter, very cold and cubed
- 1/2 cup ice water, plus more if needed
- 6 cups mixed berries (strawberries, blueberries, raspberries), fresh or frozen
- 1 1/2 cups granulated sugar
- 1/4 cup cornstarch (for thickening)
- 1 tablespoon lemon juice
- 1/4 teaspoon ground cinnamon
- 1 large egg, beaten with 1 teaspoon water (for egg wash)
- 1 tablespoon coarse sugar, for sprinkling
Instructions
- Prepare the All-Butter Pie Crust: In a large bowl, whisk together the flour and salt. Cut in the cold butter using a pastry blender or your fingers until the mixture resembles coarse crumbs with some pea-sized pieces of butter remaining.
- Gradually add the ice water, one tablespoon at a time, mixing gently until the dough just comes together. Do not overmix. Divide the dough in half, form each half into a disk, wrap in plastic, and chill for at least 1 hour.
- Prepare the Berry Filling: In a large bowl, gently combine the mixed berries, granulated sugar, cornstarch, lemon juice, and cinnamon. If using frozen berries, do not thaw them first. Set the filling aside while you roll out the bottom crust.
- Roll out the bottom crust and carefully place it into a 9-inch pie plate. Trim the edges, leaving a 1-inch overhang.
- Pour the berry filling evenly into the crust.
- Roll out the second dough disk. You can cut strips for a lattice top or place the whole sheet over the filling. If using a full top crust, cut several slits in the top to allow steam to escape. Crimp the edges to seal the top and bottom crusts together.
- Brush the top crust or lattice with the egg wash and sprinkle evenly with coarse sugar.
- Chill the assembled pie in the refrigerator for 30 minutes before baking. This helps the crust hold its shape.
- Preheat your oven to 400°F (200°C). Place the pie on a baking sheet to catch any drips.
- Bake the pie at 400°F for 20 minutes. Then, reduce the oven temperature to 375°F (190°C) and continue baking for another 35 to 45 minutes, or until the crust is golden brown and the filling is bubbling thickly in the center. If the edges brown too quickly, cover them loosely with foil.
- Cool the pie completely on a wire rack for at least 4 hours before slicing. This step is crucial for the filling to set properly and prevent a runny pie.
Notes
- For the flakiest crust, keep all your butter and water extremely cold. Work quickly when mixing the dough.
- If you notice the filling is not bubbling thickly after 30 minutes of baking at the lower temperature, you can carefully lift the top crust slightly to allow more steam release.
- Serve this homemade berry pie warm or at room temperature with vanilla ice cream for the best experience.
Nutrition
- Serving Size: 1 slice
- Calories: 410
- Sugar: 35g
- Sodium: 210mg
- Fat: 22g
- Saturated Fat: 14g
- Unsaturated Fat: 8g
- Trans Fat: 0g
- Carbohydrates: 52g
- Fiber: 3g
- Protein: 4g
- Cholesterol: 55mg