
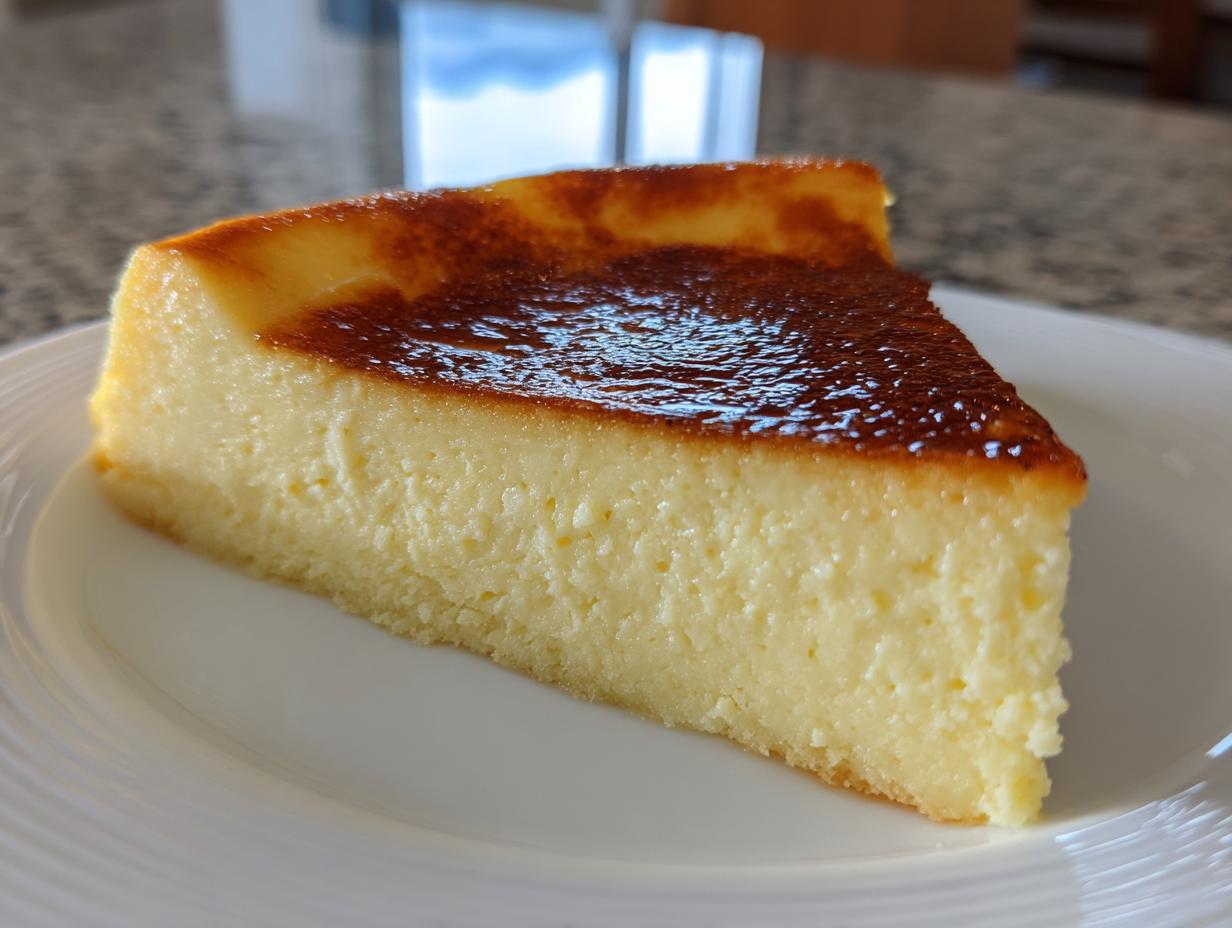
Gotta be honest, I used to dread making custard. You know that moment? When you pull it out and it’s all bubbly, or worse, looks like sad, pale scrambled eggs? That texture nightmare is exactly what sent me running from my professional kitchen days, determined to crack the code on achieving the perfect classic egg custard.
That’s why I spent years learning the precision needed for truly great desserts. I worked in everything from high-pressure fine dining spots to cozy neighborhood cafes, all while collecting the best traditional methods for American comfort food. I wanted to bottle that authentic, silky smooth dessert experience for you.
This isn’t just another recipe pulled off the internet; this is the fail proof dessert I developed after countless tests. Trust me, this method for homemade custard takes the guesswork out of getting that unbelievably creamy, jiggly texture we all crave. Once you try this technique, you won’t fear the bake again!
- Why This Classic Egg Custard Recipe Works Every Time
- Ingredients for Your Fail-Proof Egg Custard
- How to Prepare Your Easy Baked Egg Custard Instructions
- Tips for Achieving Silky Smooth Dessert Texture
- Serving Suggestions for Your Simple Egg Dessert
- Storage & Reheating Instructions for Classic Egg Custard
- Variations: From Crustless Custard to Pie Filling
- Frequently Asked Questions About Egg Custard
- Share Your Perfect Baked Dessert Experience
Why This Classic Egg Custard Recipe Works Every Time
So, why is ours different? Well, after years of tasting those rubbery, bubbly disappointments, I had to lock down the crucial steps. My goal wasn’t just making a dessert; it was crafting a guaranteed silky smooth dessert experience. This recipe is a true fail proof dessert because it respects the delicate nature of eggs. We’re aiming for the kind of incredible results you’ll find when you browse through beautiful simple and delicious desserts.
We focus on two non-negotiable rules that separate the amateur attempts from truly gorgeous, classic results.
The Secret to a Creamy Custard Recipe: Gentle Handling
The biggest mistake people make is whipping air into the eggs, which causes those awful bubbles during baking. You want to whisk the eggs gently—just until the yolks and whites barely combine. Then, when you add the warm milk, you pour it in slowly while constantly whisking. This gentle incorporation is the key to a smooth, luxurious creamy custard recipe. No aggressive beating allowed!
Mastering Water Bath Baking for a Perfect Baked Dessert
My second major secret weapon is the water bath, or what we call water bath baking. Putting your custard dishes inside a larger pan filled with hot water insulates the custard. This makes sure the heat rises slowly and evenly around the dish. That even cooking keeps the temperature below boiling point, which stops the proteins in the egg from seizing up. It’s the only way to ensure that soft, familiar texture of an old fashioned custard.
Ingredients for Your Fail-Proof Egg Custard
Okay, once you’ve mastered the technique, you’ll see that the ingredients list for this homemade custard is beautifully simple. That’s the beauty of a true classic! We rely on simple pantry staples, but we need the right amounts to hit that perfect set point. I listed everything out below. Remember, precision matters a ton here, even though we’re keeping things easy overall.
You can make most of this in under 15 minutes of prep time, which is why this makes such a wonderful, quick homemade treat when guests show up unexpectedly!
- 4 large eggs
- 1/2 cup granulated sugar
- 1/4 teaspoon salt
- 1/4 teaspoon ground nutmeg
- 2 cups whole milk (or 1 3/4 cups milk and 1/4 cup buttermilk for a slight tang)
- 1 teaspoon pure vanilla extract
- Optional: 1 unbaked 9-inch pie crust (for pie version)
Dairy and Flavorings for Smooth Vanilla Egg Custard
For richness, I always stick to whole milk. It really helps give our smooth vanilla egg custard that decadent mouthfeel we’re aiming for. But here’s a little trick I learned: if you want a tiny bit of complexity, swap out about a quarter cup of that milk for buttermilk. It gives the slight tanginess that really pulls the vanilla and nutmeg flavors together beautifully. Don’t skip that vanilla, though! Using pure extract makes all the difference here.
How to Prepare Your Easy Baked Egg Custard Instructions
Alright, this is where the magic happens, and trust me, keeping things calm and measured here is what turns this into a real Comfort Food Dessert instead of a baking disaster. Since this is meant to be an easy baked custard, we’re going step-by-step so you can watch your very first batch turn out perfectly! Even if you’re nervous about baking, approach this like a gentle journey, not a race.
Setting Up for Water Bath Baking
First things first, get your oven warmed up to 325 degrees Fahrenheit. Before you touch a bowl, get your baking apparatus ready. Find a large roasting pan—big enough to hold your 9-inch pie plate or whatever ramekins you’re using. Put your pie plate (or ramekins, if you’re going crustless custard style) inside that roasting pan *now*. If you are making pie custard, gently press your crust in; don’t fuss with crimping yet. Getting everything set up first avoids frantic scrambling later when liquids are involved. This preparation is crucial!
Mixing the Egg Custard Base Gently
Now for the delicate part. In a separate bowl, you’re going to lightly whisk your eggs. I mean it—lightly! We are not trying to whip air in here; we just want the whites and yolks vaguely acquainted. Once they are just combined, whisk in the sugar, salt, and nutmeg until the sugar seems mostly dissolved. Next, gently warm your milk on the stovetop until it’s warm but absolutely not boiling whatsoever. Slowly, ever so slowly, drizzle that warm milk into your egg mixture while you whisk constantly but gently. Finishing this by straining the whole thing through a fine-mesh sieve is the move that absolutely guarantees a smooth result. Don’t skip the straining step!
Baking the Perfect Baked Dessert
Once your liquid egg custard base is strained and in the pie plate, it’s time to employ the water bath. Carefully place the roasting pan onto the oven rack—it’s easier to pour the water in once it’s situated. Now, pour very hot water into the roasting pan until it comes about halfway up the sides of your dish. This is how we create that lovely, perfect baked dessert texture. Bake this for 45 to 55 minutes. You’ll know it’s done when the edges look set, but if you nudge the pan, the very center still has a slight, lovely jiggle to it. It will continue to set as it cools off the rack.
Tips for Achieving Silky Smooth Dessert Texture
We’ve got the water bath and the gentle mixing down, but expert cooks always have a few more tricks tucked away to elevate a simple bake, right? Achieving that true, luscious egg custard texture is all about paying attention to the details of your dairy choices. Even your choice of milk can impact the final jiggly quality of your dessert.
If you want to treat yourself and make this an extra-special, incredibly rich treat, I highly recommend swapping out just half the whole milk for half-and-half. That extra fat content yields an even silkier, most luxurious result. It’s fantastic when you need that ultimate, decadent feel. If you prefer something a little brighter—something that sings a little on the tongue—then definitely lean into that buttermilk option we discussed.
Ingredient Choices for Richer Homemade Custard
That little bit of tang from the buttermilk keeps the sweetness balanced, which is fantastic if you’re serving this as an afternoon treat instead of a supper dessert. It moves it slightly away from the pure old fashioned custard profile toward something just a hair brighter. If you want pure richness, though, swap half the milk for heavy cream. Just know that the richer the dairy, the longer it might take to bake because fat slows down heat transfer. For the absolute smoothest result on your homemade custard, I actually suggest using all whole milk with that touch of buttermilk if you’re nervous about the bake time. It’s a beautiful balance!
If you want to see another recipe where using the right dairy makes all the difference, you should check out my secrets for an amazing rice pudding recipe. Trust me, it’s worth checking out other sites for inspiration too, like how they handle their easy and creamy fail-proof egg custard recipe elsewhere online.
Serving Suggestions for Your Simple Egg Dessert
The best thing about a truly perfect, silky egg custard is that it needs almost nothing to shine. It’s the ultimate simple egg dessert because the texture *is* the star of the show! However, if you’re serving this after a big meal or want to dress it up slightly, I have a couple of favorite ways to present it.
First off, a light dusting of fresh cinnamon or nutmeg right before serving is classic for a reason—it smells incredible. If you did the pie version, a very thin layer of simple granulated sugar sprinkled on top before chilling sets into a very slight, almost crystalline crust that’s fun to break through.
For something a little more substantial, this custard pairs unbelievably well with bright, tart fruit. I often serve a small spoonful of homemade blueberry compote or, for a real treat, a warmed apple crumble recipe on the side. The warmth and tartness of the fruit just wakes up the cool, creamy vanilla notes perfectly. It’s pure nostalgia on a plate!
Storage & Reheating Instructions for Classic Egg Custard
Patience is bitter, but the fruit is sweet, right? After all that work getting the texture perfect, we absolutely cannot rush the setting part. You need to let your classic egg custard chill in the refrigerator for a minimum of four hours. Seriously, aim for overnight if you can pull it off! This solidifies the structure so it doesn’t weep or slump when you slice it.
This is one of those nostalgic desserts that tastes best serving chilled. It just doesn’t reheat well, especially if you didn’t use a pie crust. If you must reheat, do it in a very low oven, but honestly, I think the fresh, cool taste is the intended experience.
Keep leftovers tightly covered with plastic wrap right on the surface of the custard to avoid any skin forming. If you’re storing a whole pie, I like to wrap the entire thing; it keeps fresh in the fridge for about three days. For tips on other things you can make ahead, check out my guide on easy freezer jam—another one of my favorite make-ahead treats!
Variations: From Crustless Custard to Pie Filling
One of the fantastic things about this master recipe for egg custard is how adaptable it is. We already discussed making it in a 9-inch pie plate, but what if you don’t want a crust, or maybe you need individual servings for a party? Don’t worry, the technique stays exactly the same!
If you want a pure, creamy, spoonable version—your crustless custard dream—then just skip adding that pie crust altogether. Simply pour that strained liquid base right into your ramekins or even small oven-proof custard cups. Because they are smaller and have more surface area exposed to the heat, they cook faster than a full pie.
When baking ramekins, keep an eye on them. They usually only take about 35 to 40 minutes, though you still rely on that slight jiggle in the center. If you’re making a batch of custard pie filling for several individual cups, make sure they are all the same size so they finish at the same time!
If you’re ever looking for other rich, creamy holiday takes, you should check out my recipe for homemade eggnog—it uses similar principles of tempering warmth and eggs perfectly. And if you want to see how others handle their fail-proof methods, take a peek at what the folks over at Cooking by Felix are doing with their easy egg custard recipe!
Frequently Asked Questions About Egg Custard
I know you might still have a few sneaky questions buzzing around, especially after diving into the technical side of water bath baking! It’s normal. When you’re striving for that perfect, creamy custard recipe, sometimes a quick clarification can save the day. Ask away!
Why did my egg custard crack on top?
Oh, that’s the dreaded issue! Nine times out of ten, cracking happens because the custard baked too fast or too hot. This means the edges cooked way ahead of the center, pushing the moisture up and causing the top layer to set too firmly and then crack as it cools. That gentle heat from the water bath is your defense! If you skip it, you usually end up with a bubbly or cracked top, definitely not a silky smooth dessert.
Can I use heavy cream instead of whole milk?
You absolutely can! Using heavy cream instead of whole milk will result in an even richer, denser, more decadent homemade custard. This is a fantastic swap if you’re focused on making a truly luxurious dessert. Just be aware that because heavy cream has more fat, it might need an extra five or ten minutes in the oven to set up properly. It’s worth it if you love ultra-rich flavors!
Is this considered an Old Fashioned Custard or a modern take?
This recipe is fundamentally an old fashioned custard, rooted in simple ingredients—eggs, milk, sugar, and nutmeg! My contribution is making the technique accessible. We are taking those tried-and-true methods that guarantee success and presenting them in an easy baked custard format. If you’re looking for those incredible, nostalgic flavors without the fuss, this is it.
Can I eat this for breakfast, or is it strictly a dessert?
It depends on your morning mood, honestly! Since it’s a simple egg dessert with minimal sugar compared to a cake, it’s definitely hearty enough for breakfast, especially if you go for the crustless custard version. It’s close to a baked French toast Casserole, just smoother! Serve it alongside some fresh fruit or maybe a sprinkle of cinnamon, and you have a wonderful, protein-packed start to your day.
Share Your Perfect Baked Dessert Experience
Well, that’s it! You’ve got the secrets, you’ve got the technique, and now you have the power to make a truly gorgeous, fail proof dessert. I’m already picturing that perfect, silky wobble when you take the dish out of the oven!
Now, I’d absolutely love to know how it went for you. Did you stick to the traditional pie crust? Were you brave enough to try the crustless version for a lighter meal? Pop down below and give me a star rating—it helps the next person who is nervous about baking their first egg custard feel confident jumping in.
If you managed to capture a picture of your perfectly set, creamy result, tag me on social media! Every share truly means the world to me, as it keeps the spirit of sharing classic recipes alive in our kitchen. If you have any last questions, or want to talk about swapping out nutmeg for cardamom next time, head over to my contact page. Happy baking, I hope this becomes your new favorite tradition!
PrintFail-Proof Classic Egg Custard: Silky Smooth and Creamy

Follow this recipe to create a truly fail-proof classic egg custard. We use gentle mixing and a water bath to guarantee a silky-smooth, old-fashioned dessert texture every time you bake.
- Prep Time: 15 min
- Cook Time: 50 min
- Total Time: 65 min
- Yield: 8 servings 1x
- Category: Dessert
- Method: Baking
- Cuisine: American
- Diet: Vegetarian
Ingredients
- 4 large eggs
- 1/2 cup granulated sugar
- 1/4 teaspoon salt
- 1/4 teaspoon ground nutmeg
- 2 cups whole milk (or 1 3/4 cups milk and 1/4 cup buttermilk for a slight tang)
- 1 teaspoon pure vanilla extract
- Optional: 1 unbaked 9-inch pie crust (for pie version)
Instructions
- Preheat your oven to 325 degrees Fahrenheit. Place a 9-inch pie plate or individual ramekins in a large roasting pan.
- If making a pie, gently press the pie crust into the pie plate. If making crustless custard, skip this step.
- In a large bowl, whisk the eggs lightly until just combined. Do not over-beat the eggs; this prevents bubbles.
- Whisk in the sugar, salt, and nutmeg until the sugar dissolves.
- In a separate saucepan, gently heat the milk (and buttermilk, if using) until warm, but do not let it boil. Remove from heat.
- Slowly pour the warm milk mixture into the egg mixture while whisking constantly and gently. Stir in the vanilla extract.
- Strain the custard mixture through a fine-mesh sieve into a large measuring cup or bowl to remove any chalazae or unmixed bits, which helps achieve a silky smooth dessert.
- Carefully pour the strained custard into the prepared pie plate or ramekins.
- Place the roasting pan with the custard on the oven rack. Pour very hot water into the roasting pan until the water reaches halfway up the sides of the pie plate or ramekins. This water bath baking technique is essential for a perfect baked dessert.
- Bake for 45 to 55 minutes, or until the edges are set but the center still jiggles slightly when the pan is nudged.
- Carefully remove the custard from the water bath. Let it cool completely on a wire rack before chilling in the refrigerator for at least 4 hours, or until fully set.
Notes
- For the smoothest texture, avoid incorporating air when mixing. Gentle folding is better than vigorous whisking.
- If you skip the water bath, your custard is likely to crack or become bubbly. The water bath ensures gentle, even cooking.
- You can substitute whole milk with half-and-half for a richer, creamier custard.
Nutrition
- Serving Size: 1 slice
- Calories: 180
- Sugar: 18g
- Sodium: 150mg
- Fat: 7g
- Saturated Fat: 4g
- Unsaturated Fat: 3g
- Trans Fat: 0g
- Carbohydrates: 17g
- Fiber: 0g
- Protein: 9g
- Cholesterol: 105mg