
Oh, the sheer joy of a dessert you can just grab and go! Forget wrestling with slices of pie on a paper plate; we’re talking about pure hand-held bliss. These **apple hand pies** are, quite honestly, my favorite portable apple dessert to make, especially when fall rolls around. My mission here at Julia Meal, as the Julian Maxwell who learned everything in a cozy Ohio kitchen, is to take techniques I learned in professional settings and make them accessible for your home. That’s why this recipe nails the absolute perfect combination: an unbelievably flaky, buttery crust wrapped around a warm, cinnamon-spiced apple filling. They are easy, they travel beautifully, and they taste like home. Trust me, these are the best little pockets of happiness you’ll ever bake.
- Why This is the Best Apple Hand Pies Recipe for You
- Gathering Ingredients for Easy Apple Hand Pies
- Step-by-Step: How to Make Hand Pies
- Tips for Perfect Apple Hand Pies Every Time
- Serving Suggestions for Your Portable Apple Dessert
- Storage and Make Ahead for Apple Hand Pies
- Variations on Hand Pies for Parties
- Frequently Asked Questions About Apple Hand Pies
- Nutritional Estimate for These Apple Hand Pies
- Share Your Easy Apple Hand Pies Creations
- Nutritional Estimate for These Apple Hand Pies
- Share Your Easy Apple Hand Pies Creations
Why This is the Best Apple Hand Pies Recipe for You
I’ve tested countless handheld apple treats, and this particular **apple hand pies recipe** always wins. It’s where technique meets comfort, giving you something that travels better than any slice of pie. We’ve hit that sweet spot where flavor and simplicity actually get along!
-
Perfectly Portable Apple Hand Pies
These are the ultimate grab-and-go sweet handheld treats. Seriously, pack them for a lunchbox or set them out for a party—no forks needed! These individual apple desserts make serving for a crowd ridiculously easy.
-
The Secret to a Flaky Buttery Pie Crust Recipe
The crust is everything here. I learned that the key to that incredibly flaky **buttery pie crust recipe** isn’t fancy equipment; it’s using butter so cold it feels like ice chips. That’s the professional trick I bring right into your kitchen to guarantee the flakiest pockets, every single time.
If you love this kind of spiced fruit dessert, you should definitely check out my classic apple crumble recipe too; it has a similar warm spice vibe!
Gathering Ingredients for Easy Apple Hand Pies
Alright, let’s get down to brass tacks. You can’t make great **easy apple hand pies** if your ingredients aren’t up to snuff! Especially when we are aiming for that flaky pastry, the temperature of your fat is non-negotiable. I promise, a little attention here saves you headaches later. Check out how I structure my shopping list; it keeps the dough components separate from the warm filling elements. If you need a refresher on handling dairy well, my guide to fluffy southern biscuits has some great reminders on keeping things chilled!
-
For the Flaky Apple Hand Pies Dough
This is where the magic starts for those buttery pastry pockets. You need:
- 2 1/2 cups all-purpose flour
- 1 teaspoon salt
- 1 cup (2 sticks) unsalted butter, very cold and cubed
- 1/2 cup ice water, plus more if needed
-
For the Cinnamon Apple Filling
Pre-cooking this filling is essential so your crust doesn’t get soggy! You’re going to use:
- 6 medium apples (I love Granny Smith or Honeycrisp), peeled, cored, and diced
- 1/2 cup granulated sugar and 1/4 cup packed brown sugar
- 1 tablespoon lemon juice for brightness
- 1 teaspoon ground cinnamon and 1/4 teaspoon ground nutmeg—that’s your warm spice mix!
- 1 tablespoon cornstarch to thicken things up
Don’t skimp on the butter here—that cold fat creates the steam needed for perfect layers in your **apple hand pies**!
Step-by-Step: How to Make Hand Pies
Making beautiful, flaky **apple hand pies** is all about organization and not rushing the dough. I know, patience isn’t always fun, but trust me, the payoff is worth it when you see those golden-brown, sealed pockets emerge from the oven. We’re going to walk through this methodically so you feel confident making these amazing handheld apple pies from scratch!
-
Creating the Buttery Pie Crust Recipe
First things first: we need that dough chilled. After you mix your flour and salt, you take that very cold butter and cut it in until it looks like coarse crumbs—you want those pea-sized chunks of butter intact! Those chunks are going to steam in the oven and give you that flaky finish. Slowly add the ice water until it just barely comes together. Seriously, stop mixing when you think you should stop mixing! Divide the dough into two disks, wrap them well, and let them hang out in the fridge for an hour. This resting time is crucial for that amazing **buttery pie crust recipe**.
-
Preparing the Warm Cinnamon Apple Filling
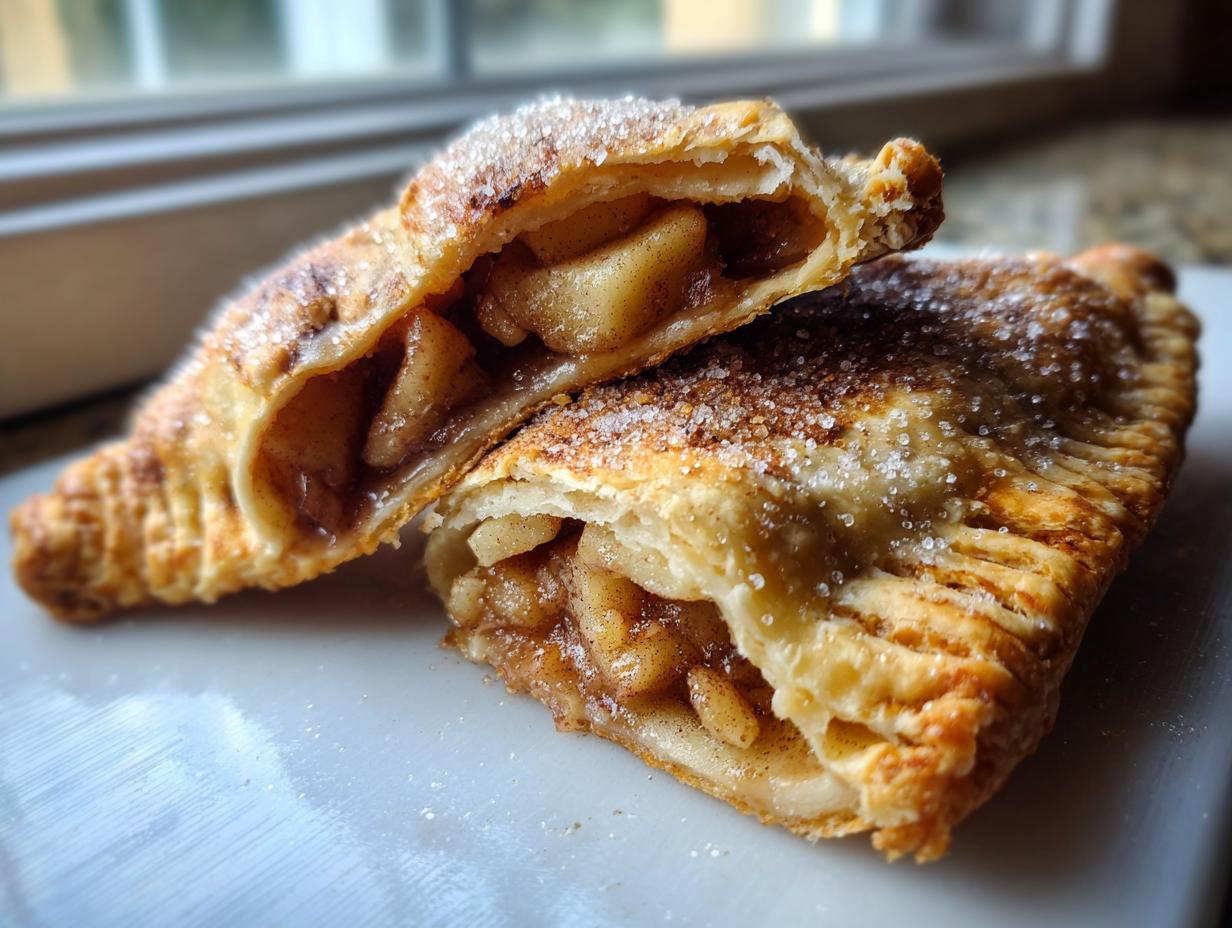
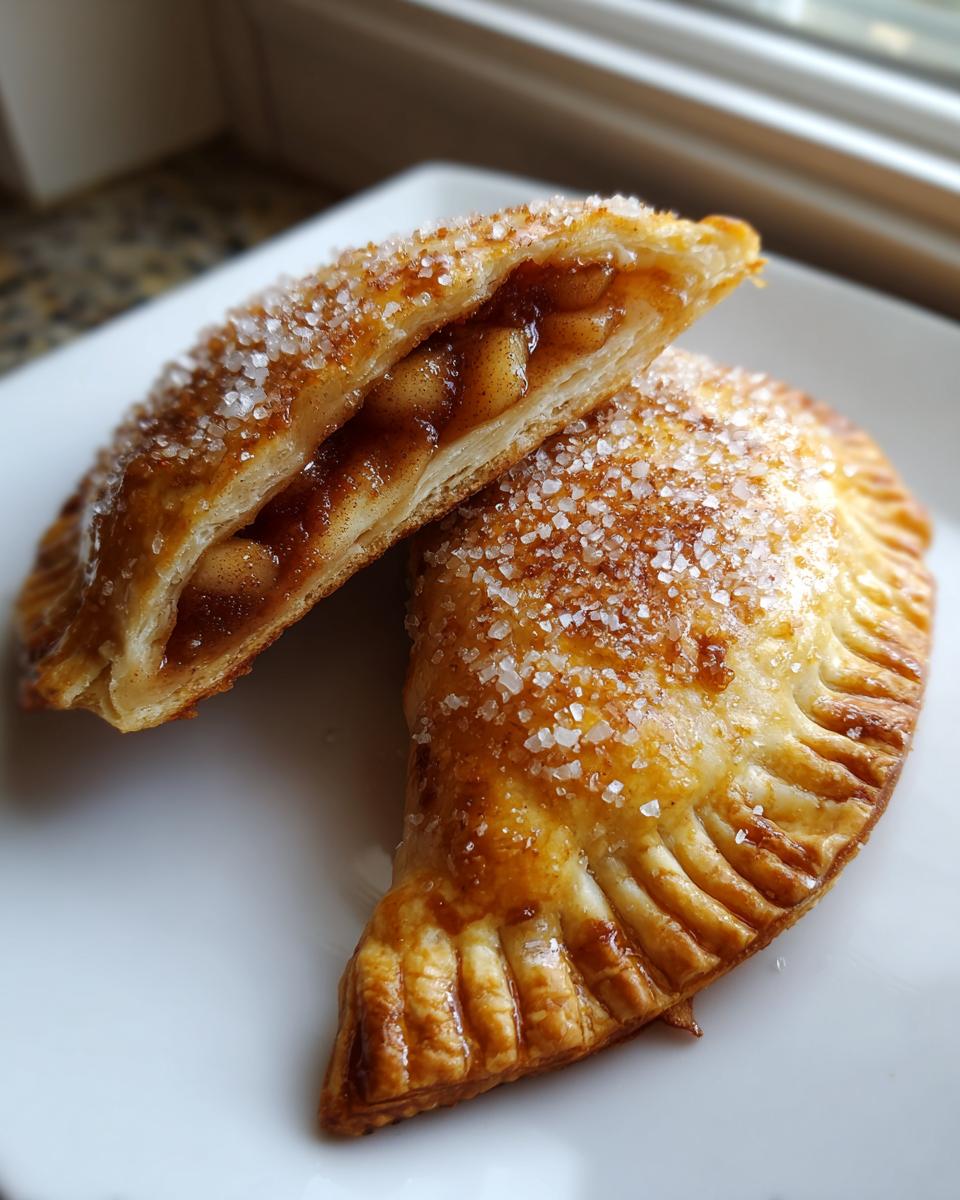
While the dough chills, let’s tackle the filling. Combine your apples, sugars, lemon juice, and those lovely spices—cinnamon and nutmeg always sing together. Cook this mixture until the apples start to get tender, but stop before they turn into mush! We want them soft, but they still need to hold their shape inside the pastry. Stir in that cornstarch right near the end so it thickens up nicely. After simmering, you absolutely must let this filling cool down completely. If you try to fill warm dough with hot apples, you’re asking for a soggy bottom, and we don’t do soggy here!
-
Assembling Your Handheld Apple Pies
Now for the fun part! Preheat your oven to 400 degrees Fahrenheit—don’t start assembling until that oven is hot. Roll out the chilled dough about 1/8-inch thick and cut 4-inch circles. Place about 1 to 1.5 tablespoons of the cooled filling onto one half of the dough circle. Then, brush the edges with your egg wash—this is our glue! Fold the dough over into that classic half-moon shape and crimp the edges really tightly with a fork so none of that delicious filling sneaks out. Finally, cut two small slits right on top of each pie to vent the steam.
-
Baking the Perfect Baked Apple Hand Pies
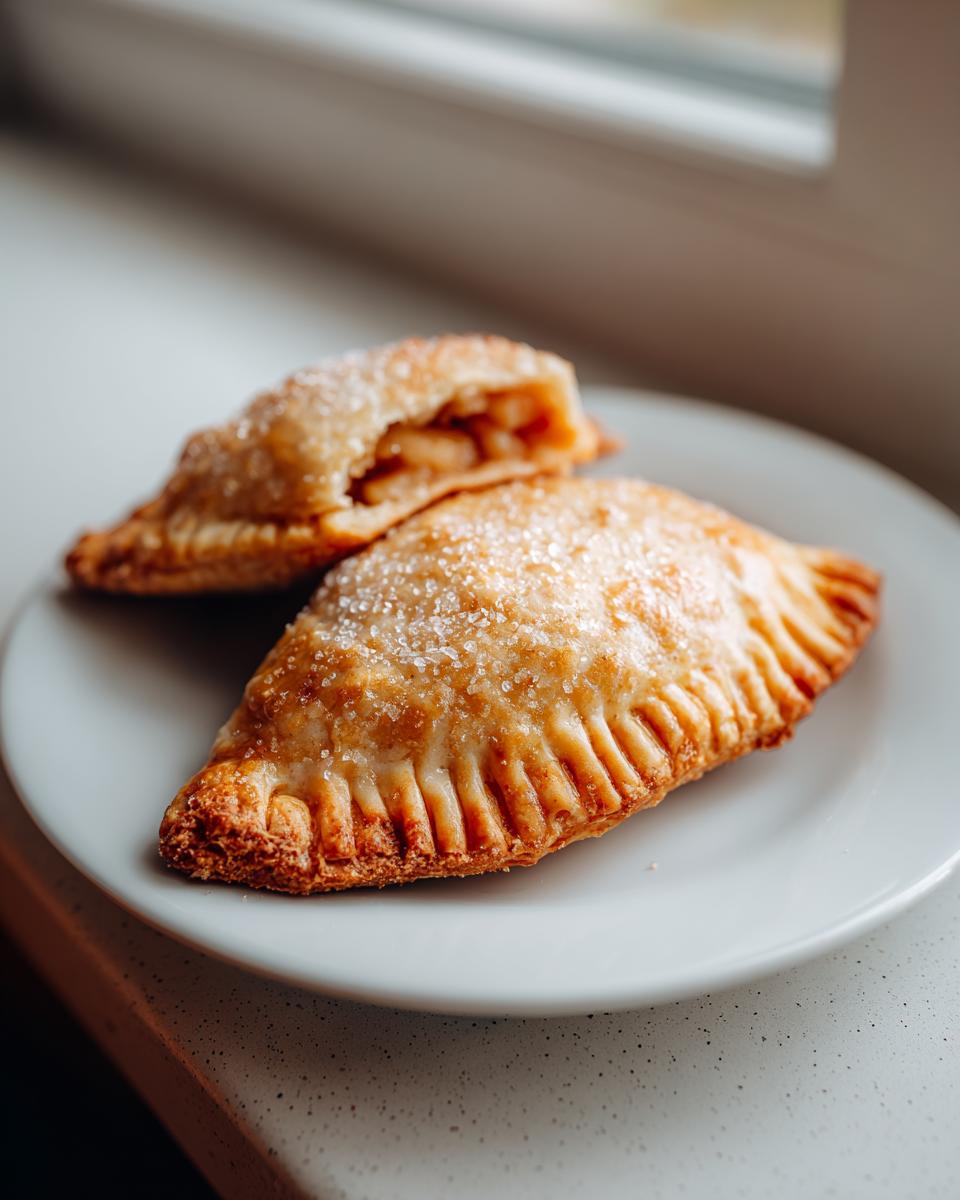
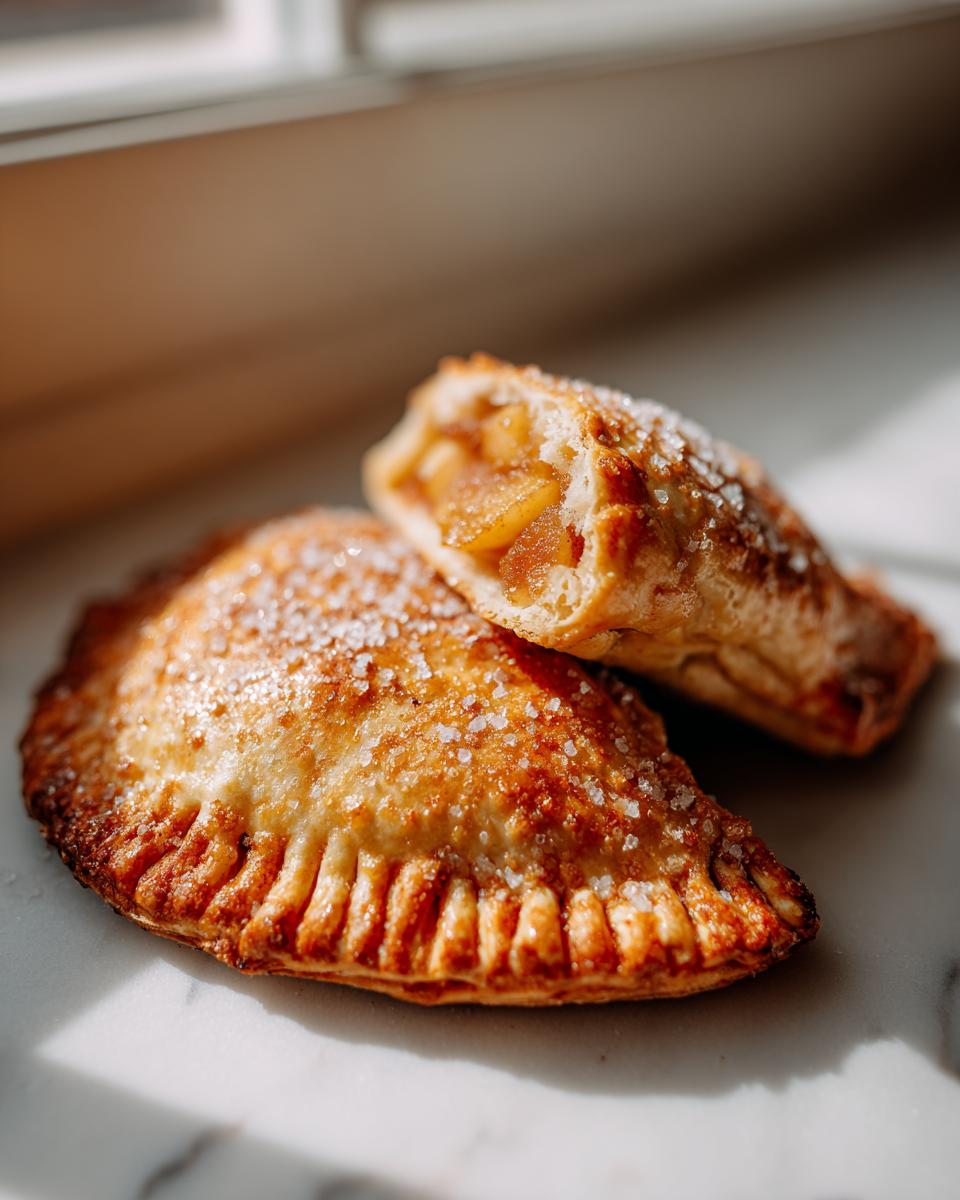
Once they’re all sealed up, give the tops a nice brush of the leftover egg wash. This is what makes them shiny! Then, sprinkle generously with coarse sugar—that adds the perfect crunch. Pop them into the 400°F oven and bake them for 18 to 22 minutes. You’re looking for that beautiful, golden-brown pastry perfection. Seriously, take a look at how gorgeous these hand pies look when they come out!
If you’re looking for a shortcut when you’re in a real rush, remember you can use pre-made crusts, but nothing beats the texture you get from a scratch pastry like the one we just made. If you want more tips on dough handling, read my thoughts on making no-knead French bread; the principles of handling dough gently are the same!
Tips for Perfect Apple Hand Pies Every Time
Even with a solid recipe, sometimes things go a little sideways, right? I’ve spent years tinkering with these apple hand pies to make them foolproof, but I also have my favorite shortcuts for those days when I need easy apple hand pies faster than I can say “flaky crust.” It’s all about knowing which corners you can cut without sacrificing that wonderful texture we worked so hard for!
-
Ingredient Notes and Substitutions for Apple Hand Pies
Let’s talk apples first. I love Granny Smith because they hold up beautifully and give a nice tartness to balance the sugar, but don’t be afraid of Honeycrisp or Braeburn if that’s what you have! Just avoid Red Delicious; they just turn to mush on you, and we want substance in these little handheld treasures.
Now, if you are truly pressed for time—and who isn’t sometimes on a busy weeknight?—you can absolutely use those refrigerated pie crusts instead of making the dough scratch. It changes the texture slightly; it won’t be quite as layered as the from-scratch buttery pastry pockets, but they still bake up golden and delicious. Just make sure you chill that refrigerated dough for 20 minutes before you roll it out; it helps immensely!
If you’re looking for another way to incorporate that warm spice flavor into a baked good, you absolutely must try my moist apple brownies sometime. They really capture that cozy fall feeling!
When you’re aiming for that super flaky texture, remember the secret is always COLD. If at any point your dough feels warm or sticky while you’re cutting or sealing, pop it back into the fridge for 10 minutes! For more on creating a truly crisp finish, check out the great techniques discussed over at the flaky apple hand pies recipe source I trust.
Serving Suggestions for Your Portable Apple Dessert
Part of the fun of these **apple hand pies** is how beautiful they look when they come out of the oven, all golden and sparkling! They truly are gorgeous as individual apple desserts, but sometimes you just want a little extra something to dress them up, especially if you’re serving them warm after dinner rather than packing them up for later.
The spiced apples already have such depth, but a swirl of richness on top really elevates them. My go-to is a simple vanilla glaze. You don’t even need to make a full frosting! Just a quick drizzle of my ultimate vanilla buttercream—thinned down with just a splash of milk until it pours smoothly—is divine.

If you want something colder to cut through the warmth of the cinnamon apple filling, you can’t beat a small dollop of vanilla bean ice cream right on the side. Or, for an adult gathering, a small dish of slightly sweetened, lightly whipped cream is just elegant enough. These **sweet handheld treats** are so adaptable; they are fantastic on their own, but totally spoilable with a little extra touch!
Storage and Make Ahead for Apple Hand Pies
Now, here’s the thing about making a big batch of **apple hand pies**: you know you won’t eat them all in one sitting! And that’s okay, because these little beauties are fantastic keepers. Whether you’re planning snacks for the week or want to prep ahead for a party, knowing how to properly store your **buttery pastry pockets** is key to keeping that flaky goodness intact.
If you have leftovers—which usually only happens if I hide a couple away from my family—storage is simple. These are sturdy enough that they don’t need refrigeration unless they have a glaze on them that contains dairy. If they are plain, you can keep them fine sealed in an airtight container on the counter at room temperature for about two days. If you need them to last longer, pop them in the fridge, but bring them back to room temperature for about 20 minutes before eating so that crust softens up a bit again.
But my favorite trick? I love prepping these as **make ahead pie pockets** for busy days. You can freeze them before they ever see the oven! Here’s my method, which has saved me countless times when I needed a quick dessert:
Use only unbaked, sealed pies for freezing. You don’t want to freeze already baked goods; the texture just doesn’t reheat well.
- Assemble your **handheld apple pies** completely—dough cut, filled, crimped closed, and vented. Make sure to brush them with the egg wash and sprinkle with sugar *before* freezing, or you can add that step later.
- Lay the filled pies out on a baking sheet lined with parchment paper, making sure none of them are touching. This is called flash freezing.
- Pop that whole sheet into the freezer for about an hour, until they are rock solid. That prevents them from squishing together!
- Once they are solid little bricks, transfer them into a heavy-duty freezer bag or airtight container. They’ll keep beautifully for up to three months.
When you decide it’s time to bake your frozen gems, don’t thaw them first! Just pull them right off the sheet and bake them straight from frozen. You will need to add about 5 to 10 minutes to the normal bake time, but they come out just as golden and flaky as fresh ones. Seriously, having these around makes fall baking legendary. If you love freezing things, you’ll want to try my guide for easy freezer jam, too!
For more solid baking and storage tips for pastry, I always trust the advice over at Bake & Savor when I’m looking to maximize shelf life on baked treats.
Variations on Hand Pies for Parties
So, you’ve mastered the classic warm cinnamon apple filling, but maybe you want to shake things up for your next get-together? That’s the beauty of apple hand pies—the basic structure is a dream canvas! It’s all about swapping out the center or changing how you cook them to get a totally different texture for your hand pies for parties.
If you want to play with fruits, the filling recipe is so sturdy that you can easily swap out half the apples for fresh blueberries or even diced peaches if they are in season. You’ll want to add a little extra cornstarch or perhaps a tiny splash of lemon juice to balance the sweetness, but those swaps work beautifully.
Spice It Up or Go Nutty
Don’t feel limited to just cinnamon and nutmeg! If you’re feeling adventurous, try adding a pinch of allspice or even a little cardamom into the mix for a much deeper, more complex flavor profile in your buttery pastry pockets. For those who love texture, folding in 1/4 cup of finely chopped pecans or walnuts right before you seal the pies gives a fantastic little crunch against the soft fruit.
Cooking Method Changes: Air Fryer or Fried
For those of you who have embraced the Air Fryer, I have fantastic news: these bake up incredibly well in there too! If you want perfectly golden, crisp air fryer apple hand pies without heating up the whole oven, you can test them in the basket. Just keep the temperature slightly lower than baking, around 375°F, and check them often since they cook faster. I’ve seen great success using techniques outlined by experts like those at Bellyfull when trying this gadget!
Now, if you’re really feeling retro and want that classic, deeply satisfying crunch reminiscent of those old-school fast-food treats, you can absolutely shallow fry them! Just heat about an inch of neutral oil (like canola) to 350°F. Carefully slip the sealed pies into the hot oil, turning them once halfway through until both sides are deep golden brown. This makes for incredible fried apple hand pies, though they will soak up a little more fat, obviously. It’s maybe not for every day, but definitely for a special treat!
If you’re just looking for something equally warm and spiced but don’t need the pastry, you should definitely whip up my recipe for rhubarb crisp. It uses similar spice elements but offers a completely different texture.
Frequently Asked Questions About Apple Hand Pies
I get asked the same few things all the time when people try making my **apple hand pies** for the first time. It usually comes down to texture or speed! Don’t sweat the small stuff; that’s what I’m here for. Let’s get those last little sticky points cleared up so your baking adventure is a total success.
-
Can I skip pre-cooking the cinnamon apple filling?
Honestly, you could skip it, but I spend so much time ensuring the crust is flaky and perfect, I wouldn’t risk it! If you seal raw, uncooked apples inside your dough, they release a ton of water as they cook. That moisture has nowhere to go but down, right into your beautiful dough. This usually results in a mushy, soggy bottom crust, and that is the enemy of a great **apple hand pies recipe**. Pre-cooking the **cinnamon apple filling**—just until it’s slightly tender and thickened—takes care of most of that moisture before it ever touches the pastry. It’s worth those extra 10 minutes, I promise!
-
How do I get a truly flaky apple hand pies crust?
This goes back to the butter! It’s the number one rule for any great pastry. You need to keep your butter and your water so cold they practically hurt your fingers. When you mix that butter into the flour blend, you must leave visible pieces of butter—think small peas or maybe even lima beans, depending on your preference. When those cold butter chunks hit the hot oven, they melt instantly, creating steam pockets. That steam forces the layers of dough apart, resulting in that airy, flaky finish we are chasing in our **apple hand pies**.
-
What is the best way to cook handheld apple pies besides baking?
Baking is my personal favorite because it gives the most consistent, golden-brown finish, but I totally get the desire for variety! If you want ultimate crispiness, you can certainly shallow fry them. Heat up about an inch of neutral oil to 350°F and fry them for just a few minutes per side until deeply golden. That gives you a texture wildly different from the baked version. If you want faster, less messy results, the air fryer works wonders too! You’ll get gorgeous, crisp **handheld apple pies** by air frying them at around 375°F, though you’ll have to work in batches. It’s a fun way to change things up!
When you’re done creating, you might want to look up my recipe for funnel cake; it’s another favorite deep-fried-style recipe that has that satisfying crunch!
Nutritional Estimate for These Apple Hand Pies
I always like to give a general idea of what you’re looking at here, but please take this with a grain of salt! Since these are homemade and you might use Granny Smith versus Honeycrisp, or use a little more sugar in your filling, please consider this a baseline estimate rather than strict dietary fact. As a foundational note, I always recommend consulting a professional for precise dietary needs.
For one of these beautifully baked **apple hand pies** (based on 8 servings using the recipe above):
- Calories: About 350
- Fat: Around 19g (Remember, much of that is from the glorious butter in the crust!)
- Carbohydrates: About 42g
- Sugar: Approximately 18g
- Protein: Roughly 4g
These are truly a wonderful treat, perfect for a dessert tray or just a sweet afternoon snack. Enjoy them knowing you made that flaky crust yourself!
Share Your Easy Apple Hand Pies Creations
I really hope you loved following along to make these **easy apple hand pies**. Honestly, seeing your finished products is my favorite part of this whole process! That buttery crust recipe can be tricky the first time, so don’t be shy if you had to re-chill the dough half a dozen times—we’ve all been there!
When you finish baking, I’d love for you to come back here, give the recipe a star rating, and let me know in the comments how they turned out. Did you stick purely to my method, or did you try one of the variations we talked about?
If you took some gorgeous photos of your finished, flaky delights, please feel free to share them! You can always reach out to me directly through my contact page, or if you prefer, check out what everyone else is making over at the Recipe Dot link. Happy baking, friends. May your crust always be flaky!
PrintEasy Homemade Apple Hand Pies with Flaky, Buttery Crust

Make perfect, portable apple hand pies with a flaky, buttery crust and a warm, cinnamon-spiced apple filling. These individual desserts are simple to prepare and ideal for snacks or parties.
- Prep Time: 35 min
- Cook Time: 20 min
- Total Time: 55 min
- Yield: 8 servings 1x
- Category: Dessert
- Method: Baking
- Cuisine: American
- Diet: Vegetarian
Ingredients
- 2 1/2 cups all-purpose flour
- 1 teaspoon salt
- 1 cup (2 sticks) unsalted butter, very cold and cubed
- 1/2 cup ice water, plus more if needed
- 6 medium apples (like Granny Smith or Honeycrisp), peeled, cored, and diced
- 1/2 cup granulated sugar
- 1/4 cup packed brown sugar
- 1 tablespoon lemon juice
- 1 teaspoon ground cinnamon
- 1/4 teaspoon ground nutmeg
- 1 tablespoon cornstarch
- 1 large egg, beaten (for egg wash)
- 1 tablespoon coarse sugar (for sprinkling)
Instructions
- Prepare the Dough: In a large bowl, whisk together the flour and salt. Cut in the cold butter using a pastry blender or your fingers until the mixture resembles coarse crumbs with some pea-sized pieces of butter remaining. Gradually add the ice water, one tablespoon at a time, mixing until the dough just comes together. Do not overmix.
- Divide and Chill: Divide the dough in half, form each half into a disk, wrap tightly in plastic wrap, and refrigerate for at least 1 hour.
- Make the Filling: In a medium saucepan, combine the diced apples, granulated sugar, brown sugar, lemon juice, cinnamon, and nutmeg. Cook over medium heat, stirring occasionally, for about 8 to 10 minutes, until the apples begin to soften slightly but still hold their shape. Stir in the cornstarch and cook for 1 more minute until the mixture thickens. Remove from heat and let the filling cool completely. Pre-cooking the filling prevents a soggy bottom crust.
- Assemble the Hand Pies: Preheat your oven to 400 degrees Fahrenheit (200 degrees Celsius). Line two baking sheets with parchment paper. On a lightly floured surface, roll out one disk of dough to about 1/8-inch thickness. Use a 4-inch round cutter (or a plate as a guide) to cut out circles.
- Fill and Seal: Place about 1 to 1.5 tablespoons of the cooled apple filling onto one half of each dough circle, leaving a 1/2-inch border. Brush the edges with the beaten egg wash. Fold the dough over to create a half-moon shape. Crimp the edges firmly with a fork to seal.
- Vent and Bake: Cut two small slits in the top of each hand pie to allow steam to escape. Brush the tops with the remaining egg wash and sprinkle with coarse sugar.
- Bake for 18 to 22 minutes, or until the pastry is golden brown and flaky.
- Cool: Transfer the baked apple hand pies to a wire rack to cool before serving. These portable apple desserts are wonderful warm or at room temperature.
Notes
- For an extra flaky apple pie crust, keep all ingredients, especially the butter and water, very cold before mixing.
- If you are short on time, you can substitute the homemade dough with two refrigerated pie crusts, which makes this a quick & easy apple hand pies recipe.
- These handheld apple pies freeze well. Place unbaked, sealed pies on a baking sheet, freeze until solid, then transfer to a freezer bag. Bake from frozen, adding a few extra minutes to the bake time.
Nutrition
- Serving Size: 1 hand pie
- Calories: 350
- Sugar: 18
- Sodium: 250
- Fat: 19
- Saturated Fat: 11
- Unsaturated Fat: 8
- Trans Fat: 0
- Carbohydrates: 42
- Fiber: 2
- Protein: 4
- Cholesterol: 45