
When the weather finally breaks and you see those first beautiful stalks of rhubarb, you know it’s time to bring out the big guns of sweet-tart desserts. Forget fussy pastries; we’re going straight for pure comfort with the ultimate easy rhubarb crisp. My goal here, based on decades of learning what home cooks truly need, is not just a simple recipe, but a reliable technique. This homemade rhubarb crisp delivers that signature balance—that shocking, delightful tartness from the fruit smoothed out by just the right amount of sugar, all hidden under a gloriously crunchy topping dessert. This is classic American baking, tried and true.
- Why This is the Best Rhubarb Crisp Recipe Ever
- Gathering Ingredients for Your Classic Rhubarb Crisp
- Mastering the Oat Topping Crisp: How to Make Crisp Topping
- Step-by-Step Instructions for Easy Rhubarb Crisp
- Tips for the Ultimate Homemade Rhubarb Crisp Success
- Serving Suggestions for Your Comfort Food Desserts
- Storage and Reheating Instructions for Leftover Rhubarb Crisp
- Frequently Asked Questions About Rhubarb Crisp Recipe
- Sharing Your Rhubarb Crisp Baking Journey
Why This is the Best Rhubarb Crisp Recipe Ever
I’ve made countless fruit desserts over the years—from my time in professional kitchens to quiet evenings testing recipes for you—and this stands out because of the texture. Truly, the best rhubarb crisp achieves a perfect marriage: a warm, jammy filling that melts in your mouth, topped by a topping that snaps back when you press it. It’s one of those magnificent sweet tart desserts that feels both rustic and unbelievably luxurious. The secret is the topping ratio; I never skimp on the cold butter relative to the oats and flour. That’s what guarantees that satisfying, golden crunch every single time.
Perfect for Spring Rhubarb Recipes and Summer Fruit Crisp
This whole dessert sings loudest when rhubarb is at its peak, which is right at the start of the season. That vibrant pink and green brings such exciting color to the table, and frankly, it tastes the freshest. While it’s obviously a staple of spring rhubarb recipes, it transitions perfectly into a light summer fruit crisp once strawberries join the party. It’s just that easygoing, welcoming dessert we all crave when the weather warms up.
Gathering Ingredients for Your Classic Rhubarb Crisp
Alright, you’ve decided to make this masterpiece, and that’s exciting! The key to nailing this is measuring precisely, especially when it comes to the filling ingredients versus the topping. Because rhubarb can really vary in its tartness, I’ve given you a range for the sugar, but trust your taste buds when you mix it up! If you’re already getting into making crumble-style toppings, you might want to check out my tips on easy homemade granola bars for crushing techniques.
For the filling, you need simplicity itself: fresh, chopped rhubarb, granulated sugar, a little flour to help thicken the juices, vanilla for warmth, and just a splash of water so it doesn’t scorch early on. Now, the topping—this is where the magic happens. You need your flour, your old-fashioned rolled oats, light brown sugar for that molasses depth, cinnamon, and salt. But the most important component here? The butter. Seriously, it has to be cold butter, cubed small. Don’t cheat on this step; cold butter creates those lovely little pockets that turn into crunch when they bake.
Optional Strawberry Rhubarb Crisp Variation Ingredients
If you want to ease into the flavor profile or just have some beautiful strawberries ready to go, swapping half the rhubarb is genius. It mellows out the tartness beautifully, making an incredible summer dessert. For this version, you simply take the standard filling measurements and substitute two cups of your chopped rhubarb with two cups of hulled and sliced fresh strawberries. That’s it! No need to change any of the sugar or flour amounts—the berries mingle perfectly with the rhubarb and thicken up just right alongside it. Grab those berries and get ready for one of the easiest fruit desserts you’ll ever make!
Mastering the Oat Topping Crisp: How to Make Crisp Topping
Okay, listen up, because the filling is dead simple, but the topping—that’s where we make greatness happen. We are going for that iconic, golden, crunchy topping dessert, and it all comes down to technique when you learn how to make crisp topping. For our glorious rhubarb crisp, the dry ingredients (flour, oats, brown sugar, cinnamon, salt) need to be perfectly mixed first. Make sure those oats are there; they give us that necessary sturdy crunch!
Now for the crucial part: cutting in the butter. Remember, that 1/2 cup of butter has to be straight out of the fridge and cubed small, right? I prefer using my clean fingertips for this—it sounds old-fashioned, but I can *feel* the texture developing better than any gadget. You’re rubbing that cold fat into the dry mix until it looks like coarse sand, maybe with a few pea-sized bits of butter still lurking around. Those little pockets are the secret weapon to an uneven, wonderfully crunchy surface. Don’t blend it until it’s one uniform paste; we want crumbles! When you sprinkle this over your fruit, don’t press it down. Let it lie loose so it can get perfectly golden and crispy while baking.
Step-by-Step Instructions for Easy Rhubarb Crisp
This is where all that prep pays off! I promise you, making this easy rhubarb crisp is honestly easier than making toast if you follow these steps. Since we want this to be a success for all my fellow beginner baking desserts enthusiasts, let’s take it slow. First thing: get that oven preheated to 375 degrees F. Then, grab your 9-inch pie dish—or an 8×8 pan works too—and give it a light grease. We don’t want anything sticking later!
Next, deal with the filling. You just dump the chopped rhubarb, granulated sugar, that small bit of flour (which helps!), vanilla, and water right into a bowl. Give it a gentle toss so everything gets coated, and then slide it all into your greased dish. Don’t fret if it looks like a lot of fruit; it cooks down dramatically. Now, take your beautiful crumb topping mixture you just prepared and sprinkle it evenly over the fruit. And here’s a tip: please, please, please do not press that topping down! Let it sit loose and fluffy on top.
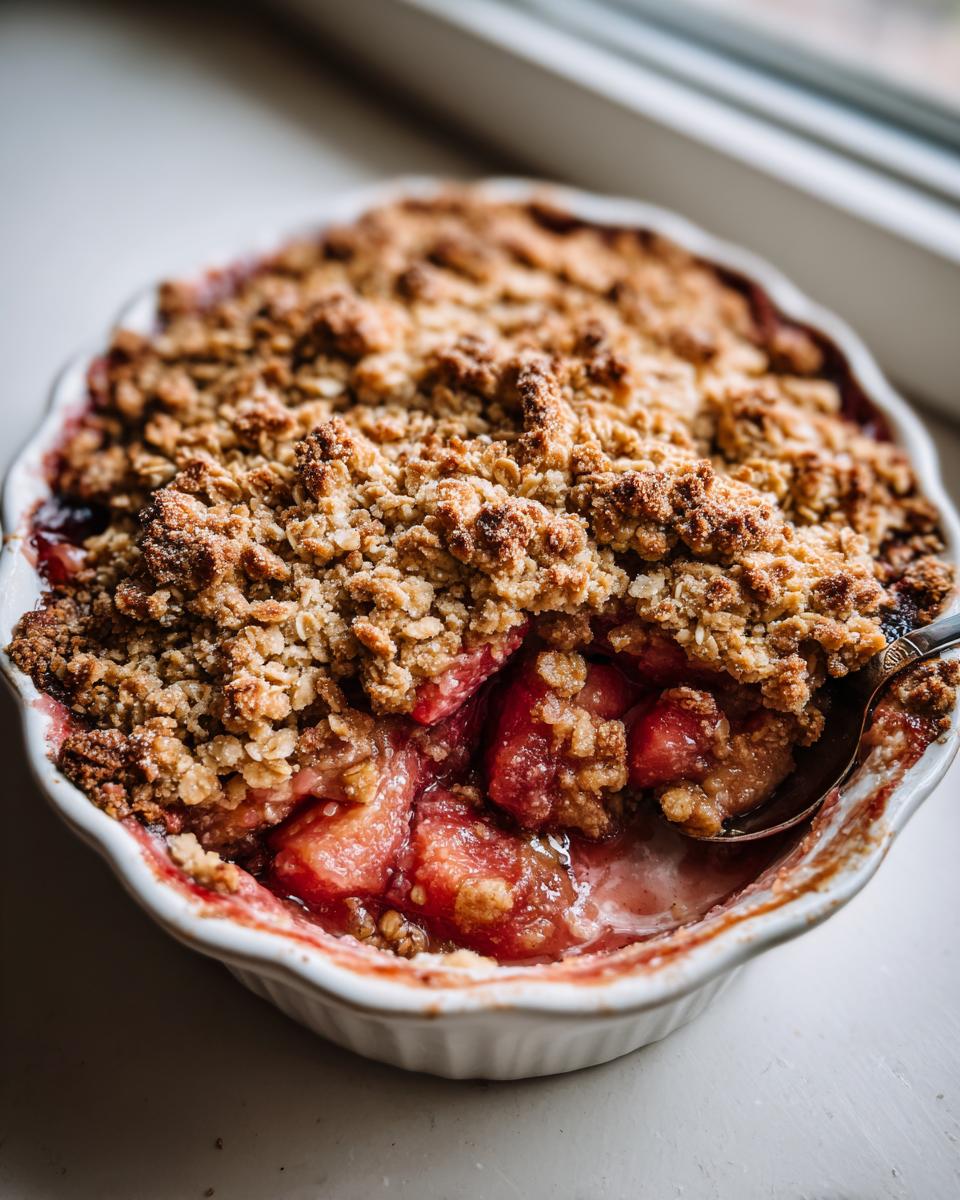
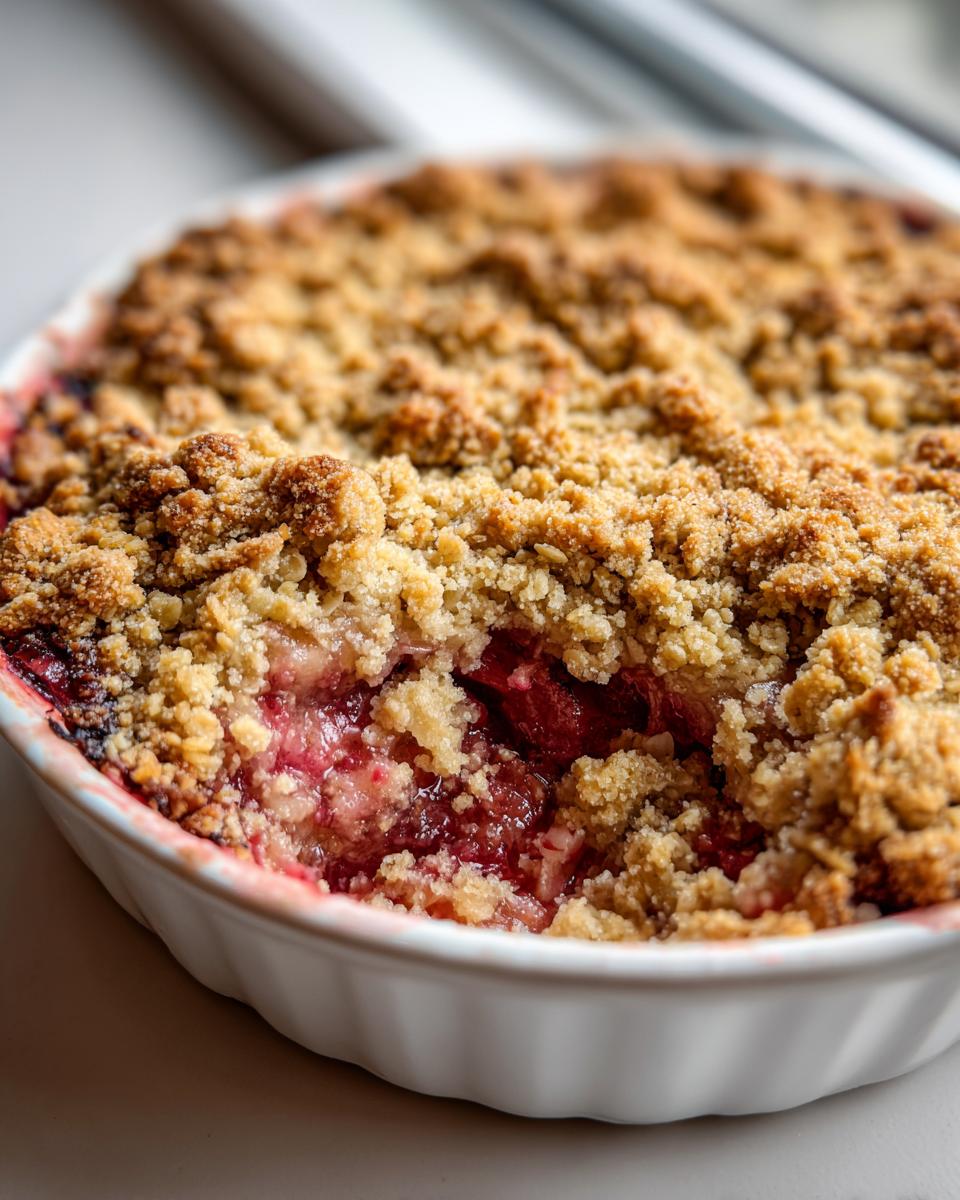
The final step before eating is baking! Put that dish on a baking sheet—this is just a safety net in case the juices decide to bubble over, which they usually do, and we want to save yourself oven scrubbing later! Bake it until you see those wonderful signs of doneness. Once it’s out, the most important rule for a truly set filling is patience. You absolutely must let the easy rhubarb crisp cool on a wire rack for at least 20 minutes before you even think about slicing into it. It needs that time to set up, otherwise, you’ll just have hot fruit soup!
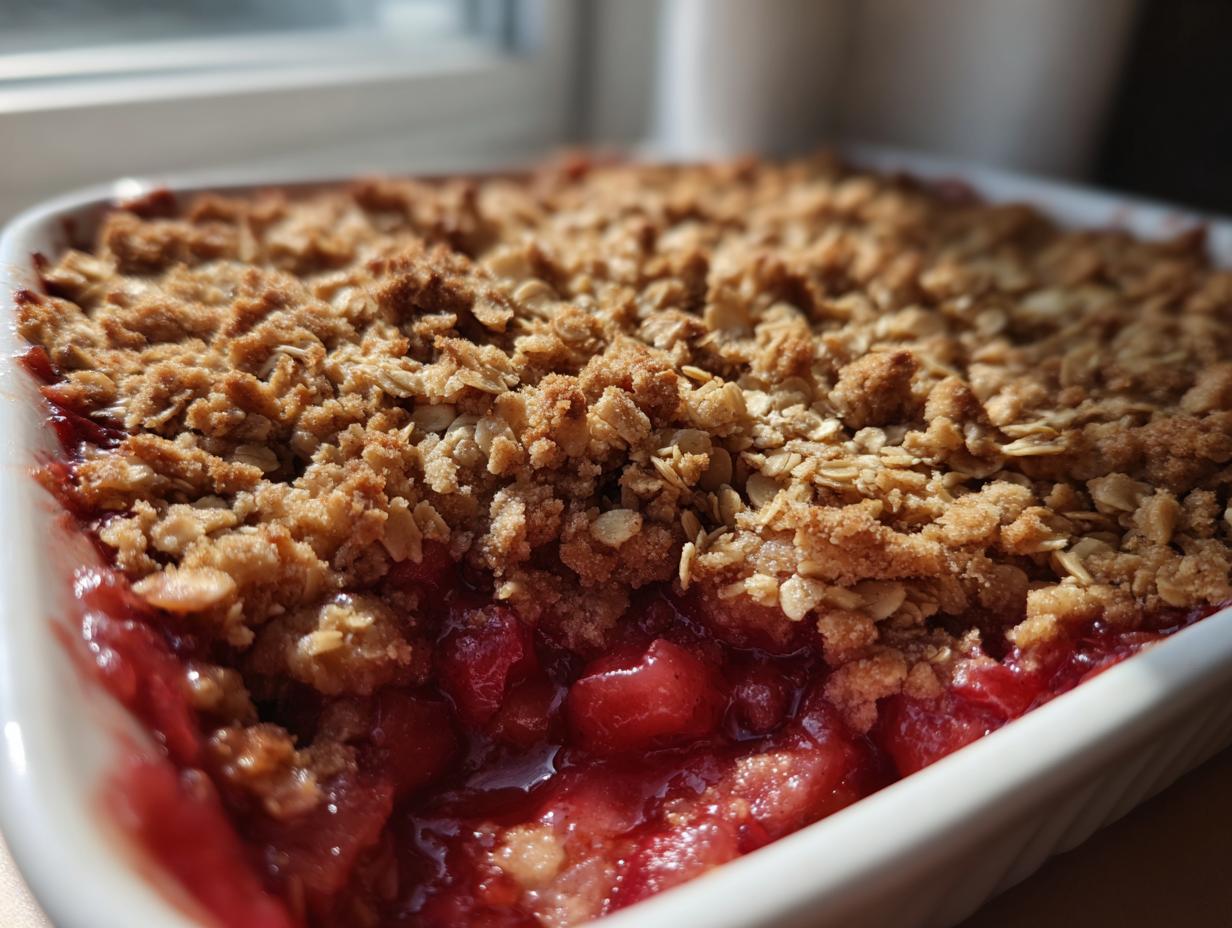
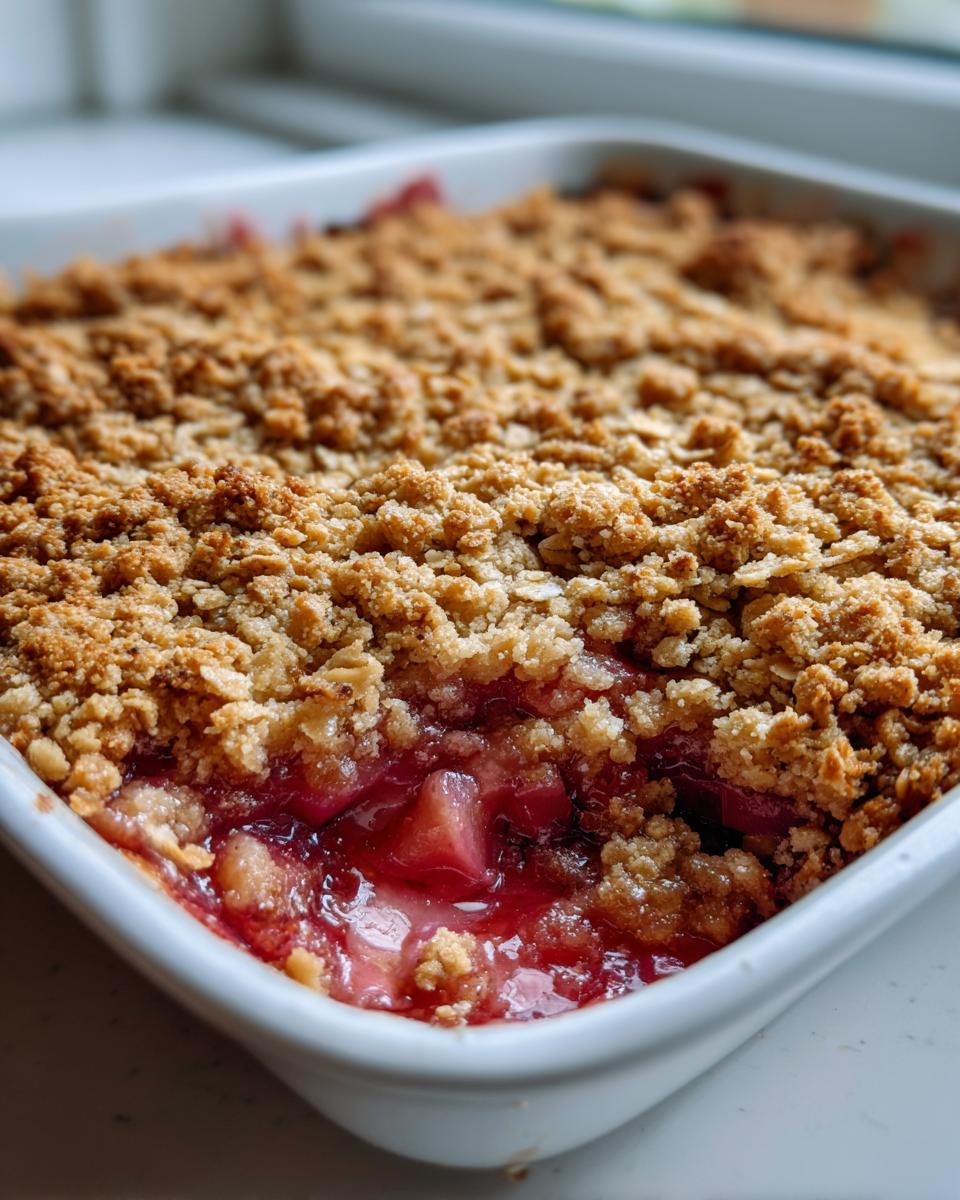
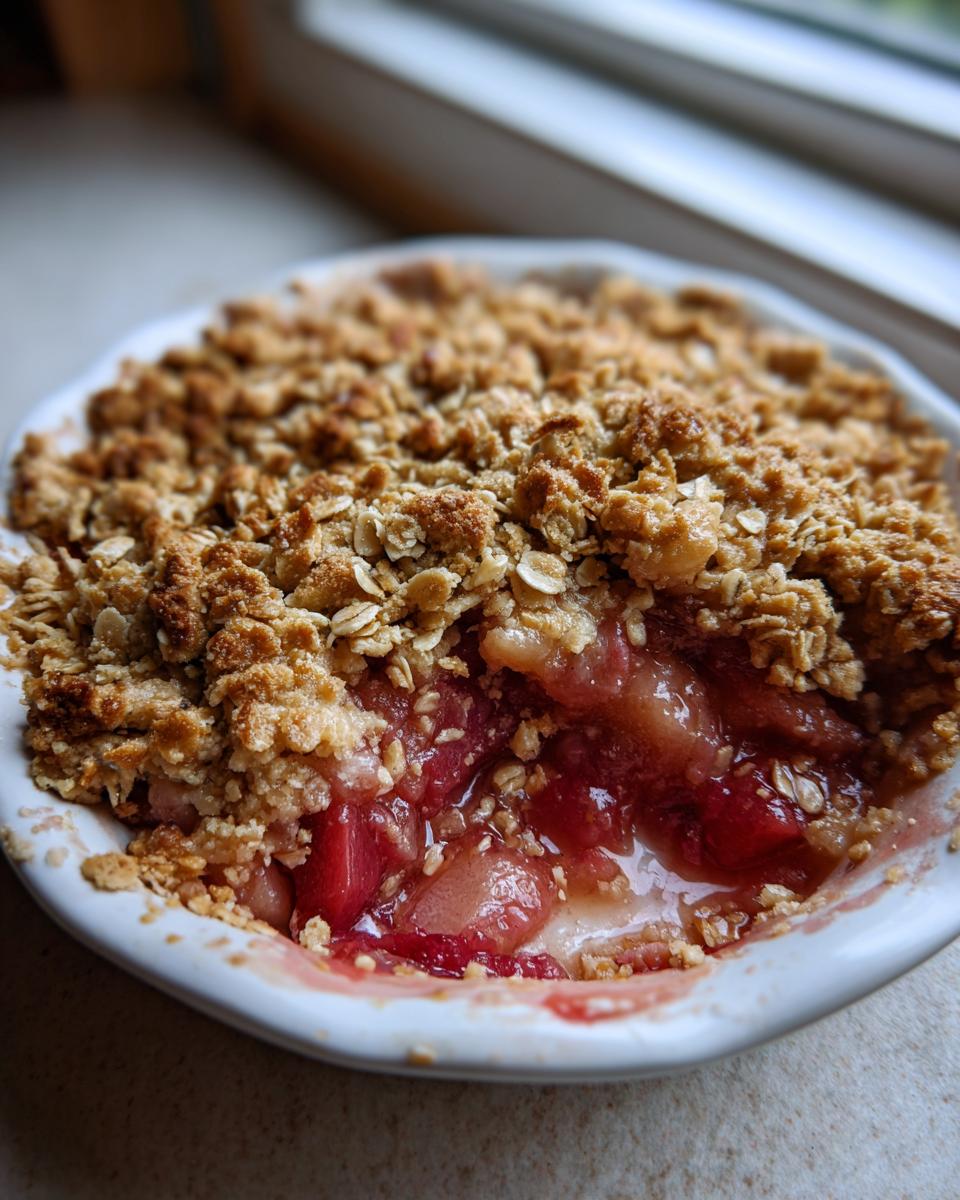
Baking Time and Visual Cues for Perfect Rhubarb Crisp
When is it done? You are looking for two main visual cues. First, the topping should look deep golden brown and smell nutty—that means the butter and brown sugar have done their job creating that perfect crust. Second, you need to see the filling actively bubbling thickly around the edges of the pan. If it’s just simmering, give it five more minutes. When you see those thick, molten bubbles popping up, that tart rhubarb filling is cooked down perfectly and wonderfully jammy. That’s your signal to pull it out and let it rest!
Tips for the Ultimate Homemade Rhubarb Crisp Success
Okay, once you’ve made this basic rhubarb crisp recipe a few times, you start experimenting, right? That’s where the real fun begins! My biggest tip, especially when baking with fresh vegetable fruit like this, is to taste your filling before it goes into the oven. Rhubarb is notoriously erratic—some stalks are mouth-puckeringly tart, and others are surprisingly mild. If yours tastes like lemon juice when raw, go ahead and stir in an extra tablespoon or two of granulated sugar. Don’t stress about the recipe measurements if the main ingredient isn’t cooperating!
If you want to elevate this to the next level—and I highly recommend you do this for company—skip the cold butter in the topping and use browned butter instead. You just melt the butter slowly until the milk solids toast and smell nutty. Let it cool just enough so it’s still liquid but not scorching hot, then quickly cut it into your dry topping mix. It adds this incredible, caramel-y depth that pairs perfectly with the tart fruit. Trust me, taking that extra minute to brown the butter turns this into the most unforgettable homemade rhubarb crisp.
Serving Suggestions for Your Comfort Food Desserts
A crisp this good deserves the perfect accompaniment. Honestly, I rarely serve it without something cold melting right on top. The classic pairing, which I know you all expect, is a generous scoop of high-quality vanilla ice cream. The contrast between the warm, spicy fruit and the cold cream is just unbeatable comfort food perfection!
If you’re doing whipped cream, make sure it’s just lightly sweetened—we already have plenty of sugar in that jammy filling and crunchy topping. A simple homemade vanilla buttercream, like the one we whip up here, can also be spooned over the top for an ultra-rich experience. It’s all about making that first bite feel like a celebration, really!
Storage and Reheating Instructions for Leftover Rhubarb Crisp
So, you managed to have something left over—impressive! Don’t think this rhubarb crisp tastes any less amazing the next day, but we have to protect that gorgeous topping. If you have leftovers, first let the crisp cool completely. Then, cover the dish tightly with plastic wrap or foil and keep it on the counter for up to two days if your kitchen isn’t too warm. Any longer, and you risk that topping getting soft!
If you need longer storage, pop it in the fridge for up to four days. When it’s time to reheat, the microwave is your enemy here because it steams the oats! Instead, spread a portion onto a small baking sheet and warm it in a 350-degree oven for about 10 minutes until it’s hot and the topping has crisped back up slightly. You can also freeze baked portions for up to three months. Just thaw overnight in the fridge, then reheat as planned!
Frequently Asked Questions About Rhubarb Crisp Recipe
I totally get it—baking should be fun, not stressful! When people write to me with questions about their rhubarb crisp recipe, nine times out of ten, it comes down to texture. You want that jammy filling, yes, but that topping has to hold up! This recipe is designed to be super reliable for any beginner baking desserts project, but here are the common hurdles I help home cooks clear up so you get the best rhubarb crisp every time.
Can I use frozen rhubarb in my rhubarb crisp?
Oh yes, absolutely! Sometimes the season is short, and we need to rely on frozen stalks. If you’re using frozen rhubarb, the main thing is do not thaw it first. Just measure out what you need while it’s still frozen solid and toss it right into the filling mixture with the sugar and flour. Because frozen fruit releases more liquid, I sometimes add an extra teaspoon of flour to that filling mixture just to be safe, but otherwise, follow the instructions normally. It still bakes up beautifully!
How do I prevent a soggy bottom on my fruit crisp?
The soggy bottom is the number one enemy of any good fruit crisp! The flour in the filling helps a lot because it absorbs some of that cooking juice, but here are my two best defensive measures. First, make absolutely sure you are mixing the ingredients for the filling gently; you don’t want to crush the rhubarb and release all its juices before it even hits the oven. Second, and this is crucial: always place your baking dish on a rimmed baking sheet before it goes into the oven. That tray catches any overflow, keeps the bottom of your pan hotter, and helps the heat circulate evenly around the base, promoting a nicer set for your rhubarb crisp.
Sharing Your Rhubarb Crisp Baking Journey
Now that you’ve created this gorgeous, sweet-tart masterpiece, I really want to hear how it went! Have you served it with vanilla ice cream or maybe tried whipping up that brown butter drizzle? If you made the optional strawberry variation, let me know how you liked the blend. Please leave a rating below and share your thoughts in the comments. Your feedback helps me keep these classic recipes trusted and true for everyone!
PrintClassic Rhubarb Crisp with Crunchy Oat Topping
Make this easy rhubarb crisp for a perfect balance of sweet and tart flavor. This recipe focuses on achieving a moist, jammy filling beneath a buttery, crunchy oat topping. It is a simple dessert perfect for spring and summer fruit.
- Prep Time: 15 min
- Cook Time: 45 min
- Total Time: 60 min
- Yield: 6 servings 1x
- Category: Dessert
- Method: Baking
- Cuisine: American
- Diet: Vegetarian
Ingredients
- 4 cups fresh rhubarb, chopped into 1-inch pieces
- 1 cup granulated sugar (adjust based on rhubarb tartness)
- 2 tablespoons all-purpose flour
- 1 teaspoon vanilla extract
- 1/4 cup water
- 1 cup all-purpose flour (for topping)
- 1 cup rolled oats (old-fashioned)
- 3/4 cup packed light brown sugar
- 1/2 teaspoon ground cinnamon
- 1/4 teaspoon salt
- 1/2 cup (1 stick) cold unsalted butter, cut into small cubes
Instructions
- Preheat your oven to 375 degrees F. Lightly grease a 9-inch pie dish or an 8×8 inch baking pan.
- Prepare the filling: In a large bowl, combine the chopped rhubarb, granulated sugar, 2 tablespoons of flour, vanilla extract, and water. Toss gently until the rhubarb is evenly coated. Pour the mixture into your prepared baking dish.
- Prepare the crunchy topping: In a separate medium bowl, whisk together the 1 cup of flour, rolled oats, brown sugar, cinnamon, and salt.
- Cut in the butter: Add the cold, cubed butter to the dry topping mixture. Use your fingers or a pastry blender to cut the butter into the dry ingredients until the mixture resembles coarse crumbs, with some pea-sized pieces remaining. This creates the best crisp texture.
- Assemble the crisp: Sprinkle the topping evenly over the rhubarb filling in the baking dish. Do not press it down.
- Bake the crisp: Place the dish on a baking sheet (to catch any drips) and bake for 40 to 50 minutes. The topping should be golden brown and the filling should be bubbling thickly around the edges.
- Cool and serve: Let the rhubarb crisp cool on a wire rack for at least 20 minutes before serving. This allows the filling to set. Serve warm, perhaps with vanilla ice cream.
Notes
- For a Strawberry Rhubarb Crisp variation, substitute 2 cups of the rhubarb with 2 cups of hulled and sliced fresh strawberries.
- If your rhubarb is very tart, you may increase the granulated sugar in the filling by 1 to 2 tablespoons.
- To achieve an extra nutty flavor, substitute the cold butter in the topping with browned butter. Let the butter cool slightly before cutting it into the dry ingredients.
Nutrition
- Serving Size: 1 serving
- Calories: 350
- Sugar: 35g
- Sodium: 150mg
- Fat: 16g
- Saturated Fat: 9g
- Unsaturated Fat: 7g
- Trans Fat: 0g
- Carbohydrates: 52g
- Fiber: 4g
- Protein: 5g
- Cholesterol: 35mg