
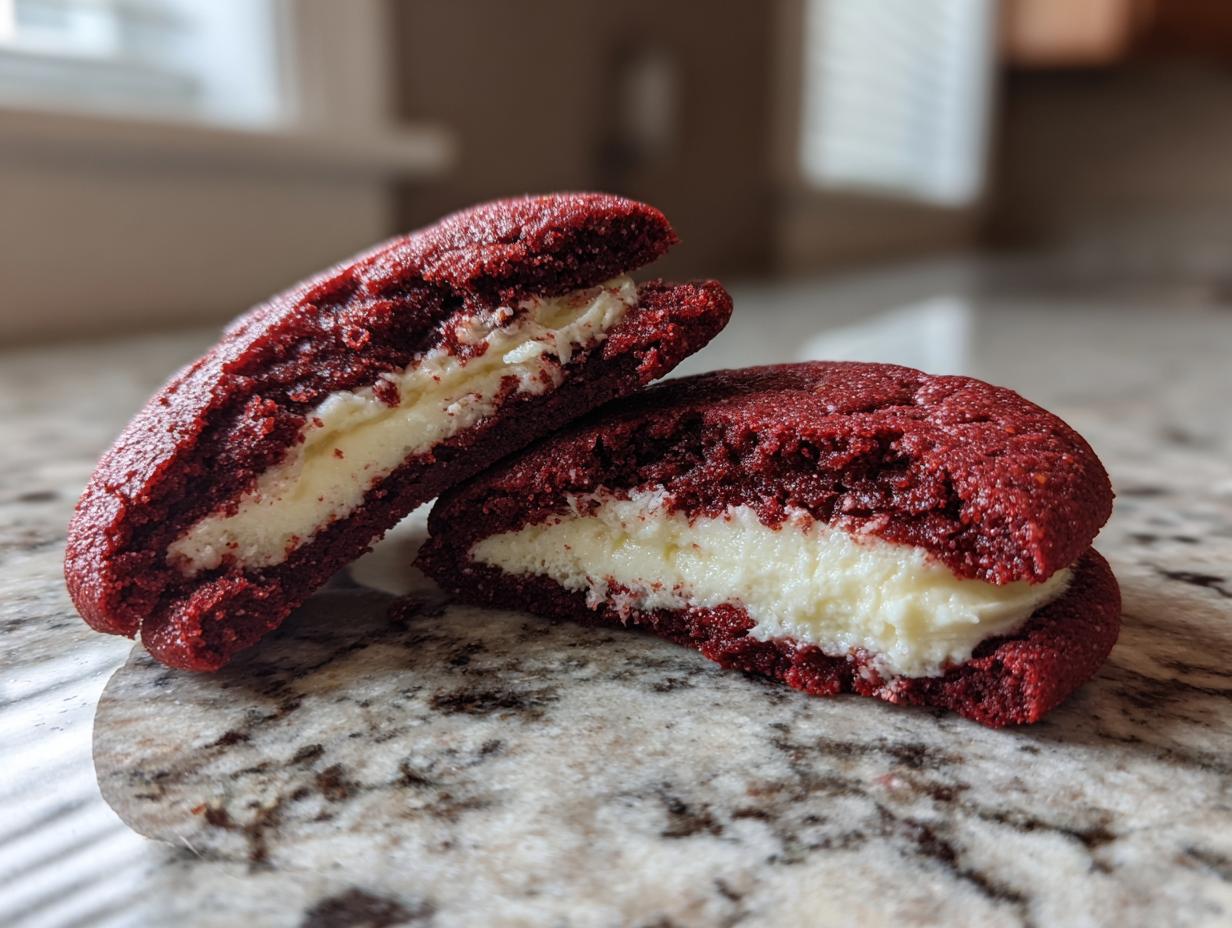
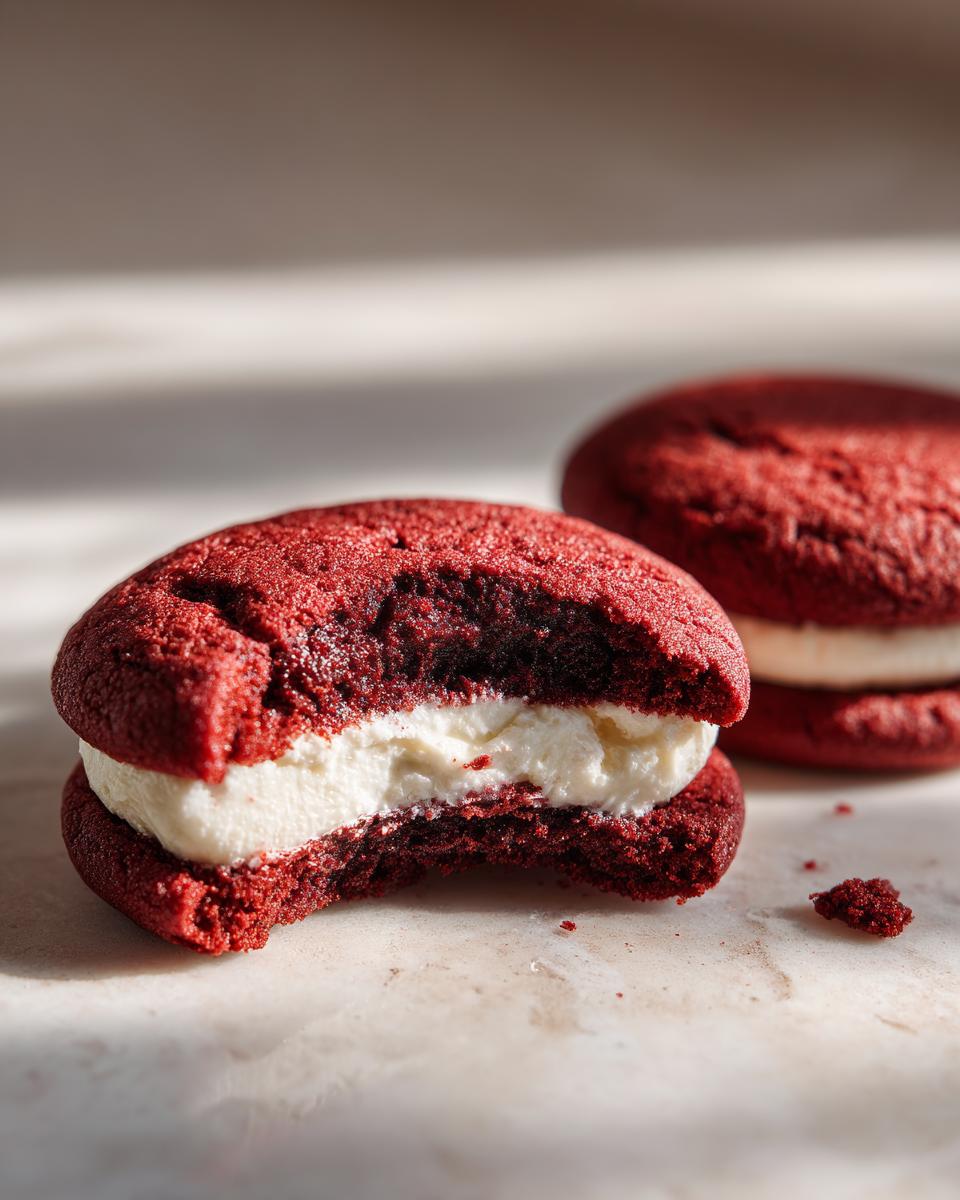
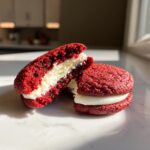
Sometimes, you just need a dessert that announces itself. Forget subtlety when it comes to true indulgence; we’re talking about treats so rich they stop conversation mid-sentence. That’s exactly what we’ve achieved here with our incredible cheesecake stuffed red velvet cookies. When I started Julia Meal, my goal was always to take the precision I learned in professional kitchens and translate it into something joyful and manageable for you at home. This recipe delivers that breathtaking, showstopping look without needing you to be a pastry chef. Trust me, sealing that creamy center inside the perfect red velvet dough is easier than you think, and the payoff is unbelievable.
If you’re looking for a showstopper that pairs that beautiful cocoa flavor with a bright, tangy surprise, you need to try my technique. You can see how much inspiration these crimson and cream desserts have generated online, but my version focuses on a soft and chewy cookie base that perfectly complements the filling. When you’re ready to move on to another classic, check out my guide on making an amazing moist red velvet poke cake.
- Why You Will Bake These Cheesecake Stuffed Red Velvet Cookies
- Gathering Ingredients for Perfect Cheesecake Stuffed Red Velvet Cookies
- Mastering the Cheesecake Center for Your Stuffed Cookies Recipe
- Step-by-Step Instructions for Cheesecake Stuffed Red Velvet Cookies
- Expert Tips for Perfect Cheesecake Stuffed Red Velvet Cookies
- Storage and Make-Ahead for These Stuffed Cookies Recipe
- Frequently Asked Questions About Cheesecake Stuffed Cookies
- Nutritional Estimates for Cheesecake Stuffed Red Velvet Cookies
- Share Your Ultimate Cheesecake Stuffed Red Velvet Cookies Creation
Why You Will Bake These Cheesecake Stuffed Red Velvet Cookies
I keep coming back to these cookies because the texture contrast is just addictive. Seriously, I think they should be your next stop if you’re looking for something that definitely wows a crowd. If you’re after simple, delicious desserts that impress, look no further. These fantastic treats are where it’s at.
Texture and Flavor Profile
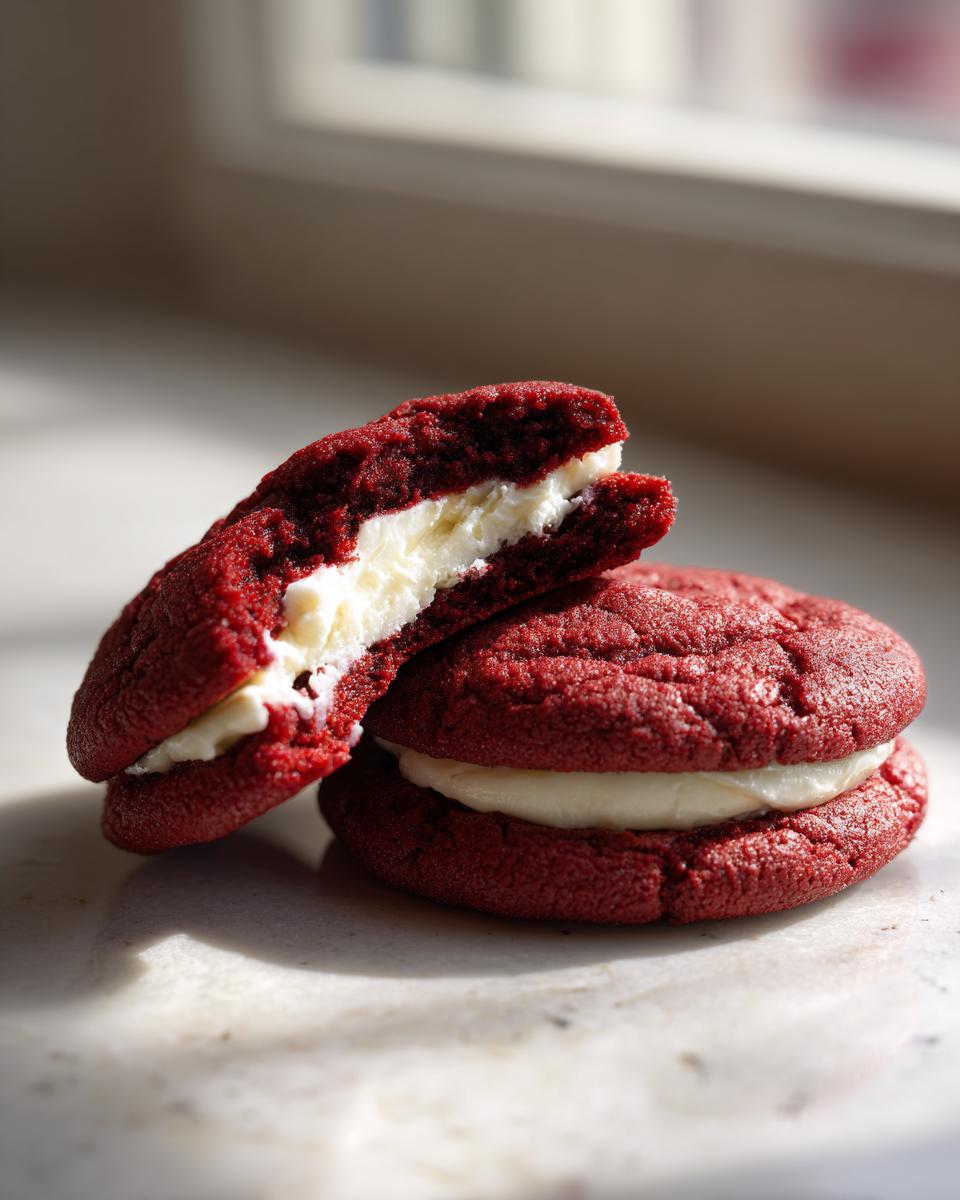
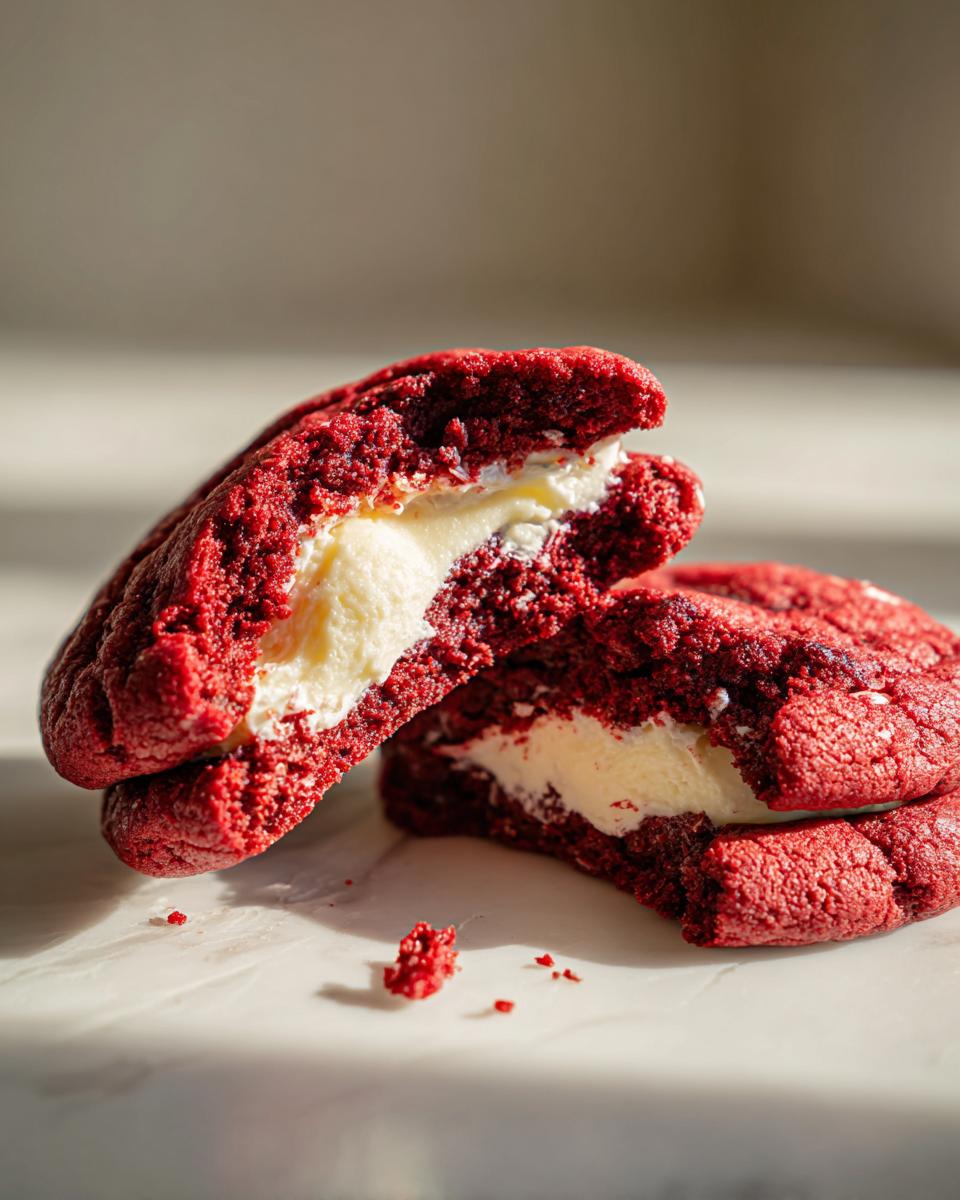
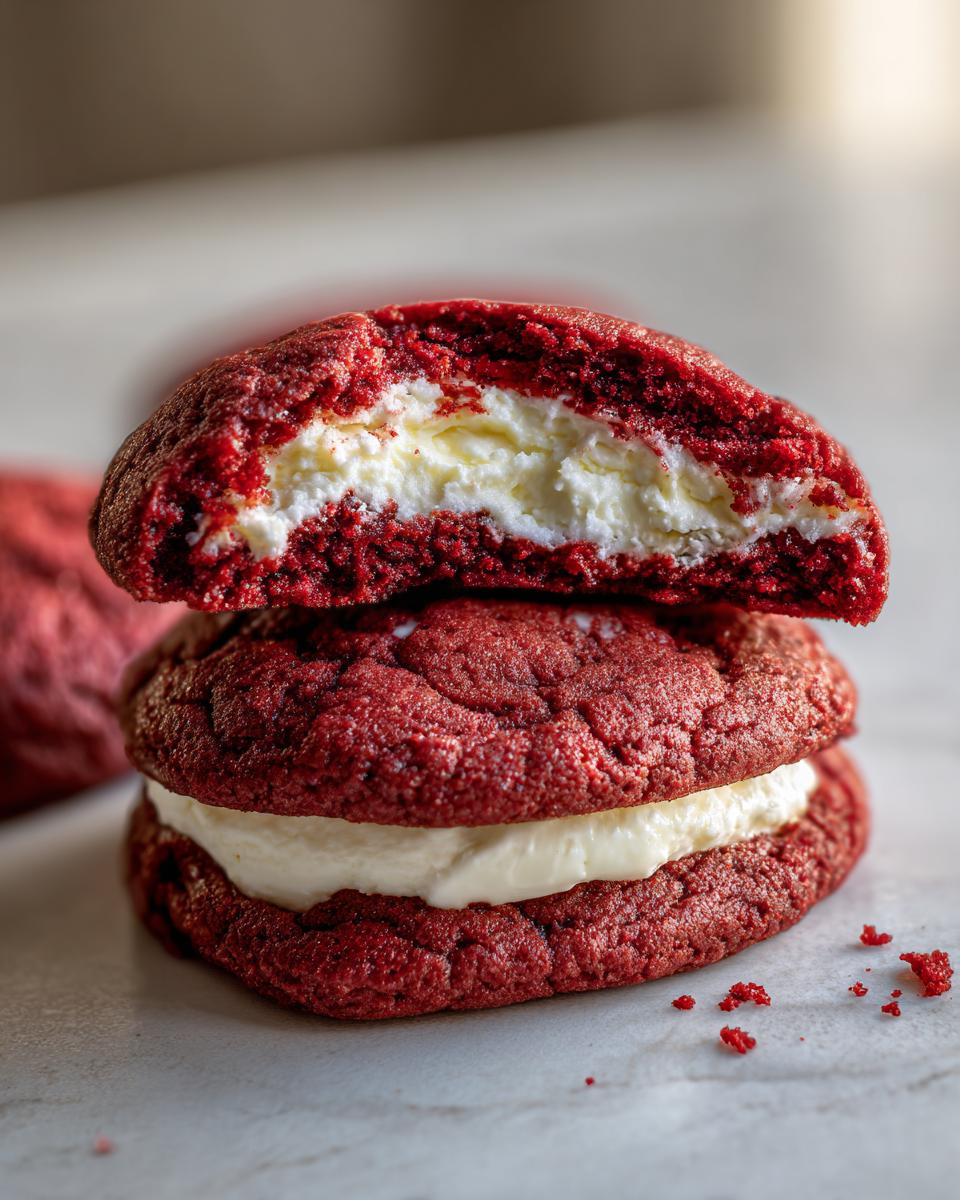
Imagine biting through a rich, almost fudgy red velvet cookie exterior, only to find a blast of cool, tangy cream cheese filling right in the middle. That’s the magic of these cheesecake stuffed red velvet cookies. It’s honestly the best two-in-one dessert experience.
Ideal for Special Occasions
Because of that vibrant look, these instantly become your star holiday baking cookies. They look like they came from a fancy bakery but take less effort than you think. They are absolutely perfect for making Valentine’s Day desserts unforgettable or boosting any holiday cookie swap.
Gathering Ingredients for Perfect Cheesecake Stuffed Red Velvet Cookies
To whip up these gourmet cookie recipes, we need to be serious about our components. Since we’re making two delicious parts—the filling and the dough—I’ve broken down the supplies just like I do in my own kitchen notes. Remember, precision here is what guarantees that amazing texture contrast in your final cheesecake stuffed red velvet cookies.
Don’t forget, if you love the red velvet flavor profile, my recipe for a classic moist red velvet cake uses some similar foundation flavors!
For the Cream Cheese Filling Cookies Center
This part is simple, but it needs attention. You absolutely must use cream cheese that is totally softened—nothing hard! That slight tang really cuts through the richness of the cookie dough.
- 6 ounces cream cheese, softened
- 1/2 cup powdered sugar
- 1/2 teaspoon vanilla extract (just a half!)
For the Red Velvet Cookie Dough
For the dough, room temperature ingredients are non-negotiable; that’s how we get those bakery-style cookies. Also, please skip the liquid coloring; we need that vibrant red, so make sure you grab the gel kind. That Dutch processed cocoa powder makes a difference in the depth of flavor, too.
- 1/2 cup unsalted butter, softened
- 1/2 cup light brown sugar, packed
- 1/2 cup granulated sugar
- 1 large egg, room temperature
- 1 large egg yolk, room temperature
- 2 teaspoons vanilla extract
- 1 teaspoon red gel food coloring
- 1/3 cup Dutch processed cocoa powder
- 1 3/4 cups all-purpose flour
- 1 teaspoon baking powder
- 1/4 teaspoon baking soda
- 1/2 teaspoon salt
- 1/2 cup granulated sugar, for rolling (this is optional, but fun!)
Mastering the Cheesecake Center for Your Stuffed Cookies Recipe
Okay, let’s talk about the heart of this indulgence: the creamy filling. This step is where many people get nervous, but trust me, getting rich, decadent cookies with a clean center is all about preparation. We aren’t just mixing up some frosting; we’re creating a sturdy, tangy core for our cheesecake stuffed red velvet cookies.
In a small bowl—just like we reviewed in the ingredient list—we beat that softened cream cheese with the powdered sugar and just a tiny bit of vanilla until it looks perfectly smooth. If you’re struggling with soft cream cheese frosting in general, you might want to check out my guide on making the easiest cream cheese frosting—same basic principle!
Chilling: The Key to Easy Cheesecake Center Cookies
This cannot be rushed. Once the filling is mixed, cover it up and make sure it chills for at least one full hour. Why the wait? If it’s too soft when you try to scoop, it will smear everywhere when you try to wrap the dough around it. That’s a recipe for a messy disaster, and we want those showstopping cookies!
Once it’s firm, scoop it into tiny, one-teaspoon balls onto a parchment sheet. Then, you must freeze them solid—I mean rock solid—for at least 30 minutes before you even touch the red velvet dough. These frozen little jewels are what guarantee you get that perfect, gooey center in your final stuffed cookies recipe!
Step-by-Step Instructions for Cheesecake Stuffed Red Velvet Cookies
Alright, oven preheated to 350 degrees Fahrenheit, baking sheets lined with parchment—we are ready to assemble these gorgeous, decadent cookies! Remember, the key to success with these cheesecake stuffed red velvet cookies is having that filling super frozen. Let’s get this dough mixed up first. Before you move on, if you ever want to explore another fantastic drop cookie that uses that creaming method, my brown butter sugar cookies recipe is a real winner too.
Mixing the Red Velvet Cookie Dough
Start by creaming that softened butter with both the brown and granulated sugars until it gets light and fluffy. Don’t rush this part; we’re building structure! Next, beat in the egg and the extra egg yolk one at a time. When they look combined, drizzle in the vanilla and drown it all in that vibrant red gel food coloring. Who doesn’t love that crimson color?
Now, in a separate bowl, whisk together all your dry things: the flour, cocoa powder, baking soda, baking powder, and salt. Add these dry ingredients slowly to the wet mixture, mixing only until you just barely see the last streaks of flour disappear. I mean it—do not overmix! Overmixing is what turns soft cookies tough. If you want chewy cookies, stop mixing when there are still tiny hints of flour.
Assembling and Sealing the Cookies
Time for the fun part! Take your frozen cheesecake balls—they should be like little red velvet hockey pucks by now—and scoop out about two tablespoons of the red dough. Flatten that dough right in your palm into a circle. Pop one frozen center right in the middle. Carefully fold the dough up and around the filling. You have to pinch those seams closed tightly to completely seal the cheesecake inside. If there’s a gap, trust me, the filling will escape!
Once sealed, gently roll it into a smooth ball. If you want that slightly crisp outer shell, give it a quick roll in the optional reserved granulated sugar. Place these on your parchment-lined sheets with about two inches between them.
Baking and Cooling for Soft and Chewy Cookies
Bake them for 10 to 12 minutes at 350°F. I tend to pull mine out right around the 11-minute mark. The edges will look set, but the center is going to look soft—that’s exactly right for achieving our perfect texture. Don’t panic! They need to rest right there on the hot baking sheet for a full five minutes. This resting period is crucial; it lets the cookie set up slightly so it won’t fall apart when you move it, and it allows the center of the cheesecake stuffed red velvet cookies to firm up just enough.
After five minutes, carefully transfer them to a wire rack to cool completely. As they cool, that cheesecake filling stabilizes beautifully.
Expert Tips for Perfect Cheesecake Stuffed Red Velvet Cookies
Look, tasting like a professional baker is all about the little secrets, right? I learned quickly that when you skip a simple step, the whole batch suffers. For these incredible cheesecake stuffed red velvet cookies, a couple of details really separate ‘good’ from ‘showstopper.’ These little tweaks are what elevate the whole experience from a standard cookie to a gourmet treat.
For instance, if you’re hunting for truly impressive results, definitely check out the method for my chewy oatmeal lace cookies—it uses a similar focus on ingredient quality.
Ingredient Temperature Matters
You saw it called for in the recipe, but I want to stress why room temperature butter, eggs, and yolk are critical for the cookie dough. When those ingredients are slightly warm, they emulsify beautifully when creamed with the sugar. This creates those microscopic air pockets we want for that soft and chewy texture. Cold ingredients fight each other in the bowl, leading to a dense, greasy dough instead of a light, fluffy base for our filling.
Preventing Cheesecake Filling Leaks
This is the moment of truth for your stuffed cookies recipe. If the cheesecake filling isn’t frozen solid—and I mean rock hard, like an ice cube—it will melt faster than the cookie dough can wrap around it. You need that frozen core for structure. Beyond freezing, you must take the time when assembling to pinch every single seam closed completely. I usually give them a little extra pinch just to be safe. If you want to see another fantastic take on this concept, folks over at Modern Honey have a great perspective on them, too!
Storage and Make-Ahead for These Stuffed Cookies Recipe
Nobody wants to rush eating these beauties, so knowing how to store them properly is key. Once completely cool, these decadent cookies do best tucked away in an airtight container at room temperature. They stay wonderfully soft and chewy for about three to four days. Don’t worry about the filling at all; it stays perfectly set inside that cookie shell.
Now, if you’re planning ahead, which I often do during the holidays, freeze the raw, fully stuffed dough balls—not the baked cookies! Lay them flat on a tray until frozen, and then transfer them to a sturdy freezer bag. When the craving hits, you can pop them straight onto the pan and add about 3-4 minutes to the bake time. It’s the easiest way to have a fresh batch of treats ready whenever you need them. If you’re interested in other items you can prep ahead, my guide to easy freezer jam might give you some inspiration!
Frequently Asked Questions About Cheesecake Stuffed Cookies
I know you might have a few lingering questions once you start pulling these together. It’s intense baking, and it’s smart to ask! Here are the most common things I hear once people start making these rich cocoa cookies and other **stuffed cookies recipe** variations. If you have other questions, don’t hesitate to reach out through my contact page!
Can I use liquid food coloring instead of gel for the Red Velvet Cookies?
Oh, please don’t! I really wouldn’t recommend it for these specific **red velvet cookies**. When you use liquid coloring, you have to add so much more of it to get that signature crimson color you see in the pictures. All that extra liquid messes up the perfect ratio of flour and butter, and it can thin out your dough too much. That’s why the gel coloring is so important—it packs maximum color with minimum liquid. It keeps our dough perfectly textured.
How do I get a truly gooey center in my Stuffed Cookies Recipe?
The secret to that amazing, molten core in your **gooey center cookies** isn’t guesswork; it’s the timing! Remember how I said to pull them out when the edges seem set but the middle still looks a little soft? That’s key. They continue cooking slightly on that hot sheet after you pull them out of the oven. Then, as they cool completely on the rack, the cheesecake filling firms up just enough so it’s creamy, not runny, when you bite into it!
Can I substitute the cocoa powder?
For a true classic **red velvet flavor**, you really need that Dutch-processed cocoa powder. That’s what gives the cookie its deep, smooth chocolate base that plays so nicely against the tang of the cream cheese. If you swap it out for natural cocoa, the chemical reaction with the baking soda will be different, and you won’t get that beautiful, rich color or that specific, mild cocoa flavor we are aiming for. Stick to the Dutch-processed; it makes a difference in these **rich cocoa cookies**.
Nutritional Estimates for Cheesecake Stuffed Red Velvet Cookies
Because we’re using rich ingredients like full-fat cream cheese and butter to make these cookies so decadent, it’s always smart to know the general idea of what you’re working with. Please remember these numbers are just estimates based on the breakdown of ingredients in the recipe provided, and they can change based on what brands you use! If you’re looking for other ways to enjoy a slightly lighter treat in the morning, check out some of my takes on healthy breakfast ideas.
- Serving Size: 1 cookie
- Calories: 280
- Fat: 15g
- Carbohydrates: 34g
- Protein: 4g
- Sugar: 25g
Share Your Ultimate Cheesecake Stuffed Red Velvet Cookies Creation
Honestly, seeing your bakes is the best part of my week! I truly hope these cheesecake stuffed red velvet cookies bring joy to your kitchen, just like they do mine. If you loved the blend of textures or have a great tip for serving them up, please leave a rating below.
I always love hearing from you and seeing how you embrace these recipes from my kitchen to yours. Next time you’re looking for culinary inspiration, remember the heart of Julia Meal is connection! You can always read more about our philosophy here!
PrintCheesecake Stuffed Red Velvet Cookies
Bake soft, chewy red velvet cookies with a hidden, creamy cheesecake center. This recipe delivers a showstopping dessert perfect for holidays or special occasions.
- Prep Time: 30 min
- Cook Time: 12 min
- Total Time: 182 min
- Yield: 18 cookies 1x
- Category: Dessert
- Method: Baking
- Cuisine: American
- Diet: Vegetarian
Ingredients
- 6 ounces cream cheese, softened
- 1/2 cup powdered sugar
- 1/2 teaspoon vanilla extract
- 1/2 cup unsalted butter, softened
- 1/2 cup light brown sugar, packed
- 1/2 cup granulated sugar
- 1 large egg, room temperature
- 1 large egg yolk, room temperature
- 2 teaspoons vanilla extract
- 1 teaspoon red gel food coloring
- 1/3 cup Dutch processed cocoa powder
- 1 3/4 cups all-purpose flour
- 1 teaspoon baking powder
- 1/4 teaspoon baking soda
- 1/2 teaspoon salt
- 1/2 cup granulated sugar, for rolling (optional)
Instructions
- Prepare the cheesecake filling: Beat the cream cheese, powdered sugar, and 1/2 teaspoon vanilla extract in a small bowl until smooth. Cover and chill the filling for at least 1 hour.
- Prepare the cookie dough: In a large bowl, cream together the softened butter, light brown sugar, and 1/2 cup granulated sugar until light and fluffy. Beat in the egg and egg yolk one at a time, then mix in 2 teaspoons vanilla extract and the red gel food coloring until combined.
- In a separate bowl, whisk together the cocoa powder, flour, baking powder, baking soda, and salt. Gradually add the dry ingredients to the wet ingredients, mixing on low speed until just combined. Do not overmix.
- Scoop the cheesecake filling into small balls, about 1 teaspoon each, and place them on a parchment-lined tray. Freeze for at least 30 minutes until solid.
- Preheat your oven to 350 degrees Fahrenheit. Line baking sheets with parchment paper.
- Form the cookie dough: Scoop about 2 tablespoons of red velvet dough and flatten it into a circle in your palm. Place one frozen cheesecake ball in the center. Carefully wrap the dough around the filling, pinching the seams closed to fully enclose the cheesecake center. Roll the dough ball gently between your hands.
- If desired, roll the dough ball in the extra 1/2 cup of granulated sugar for a slight crust.
- Place the stuffed cookie dough balls onto the prepared baking sheets, leaving 2 inches between them.
- Bake for 10 to 12 minutes. The edges should be set, but the centers will look slightly soft.
- Let the cookies cool on the baking sheet for 5 minutes before transferring them to a wire rack to cool completely. The cheesecake filling will firm up as they cool.
Notes
- Use high-quality red gel food coloring for the most vibrant color in your red velvet cookies.
- Chilling the cheesecake filling is necessary; if it is too soft, it will leak out during baking.
- For bakery-style cookies, slightly underbake them; they will continue to set as they cool.
Nutrition
- Serving Size: 1 cookie
- Calories: 280
- Sugar: 25
- Sodium: 180
- Fat: 15
- Saturated Fat: 9
- Unsaturated Fat: 6
- Trans Fat: 0.2
- Carbohydrates: 34
- Fiber: 1
- Protein: 4
- Cholesterol: 55