
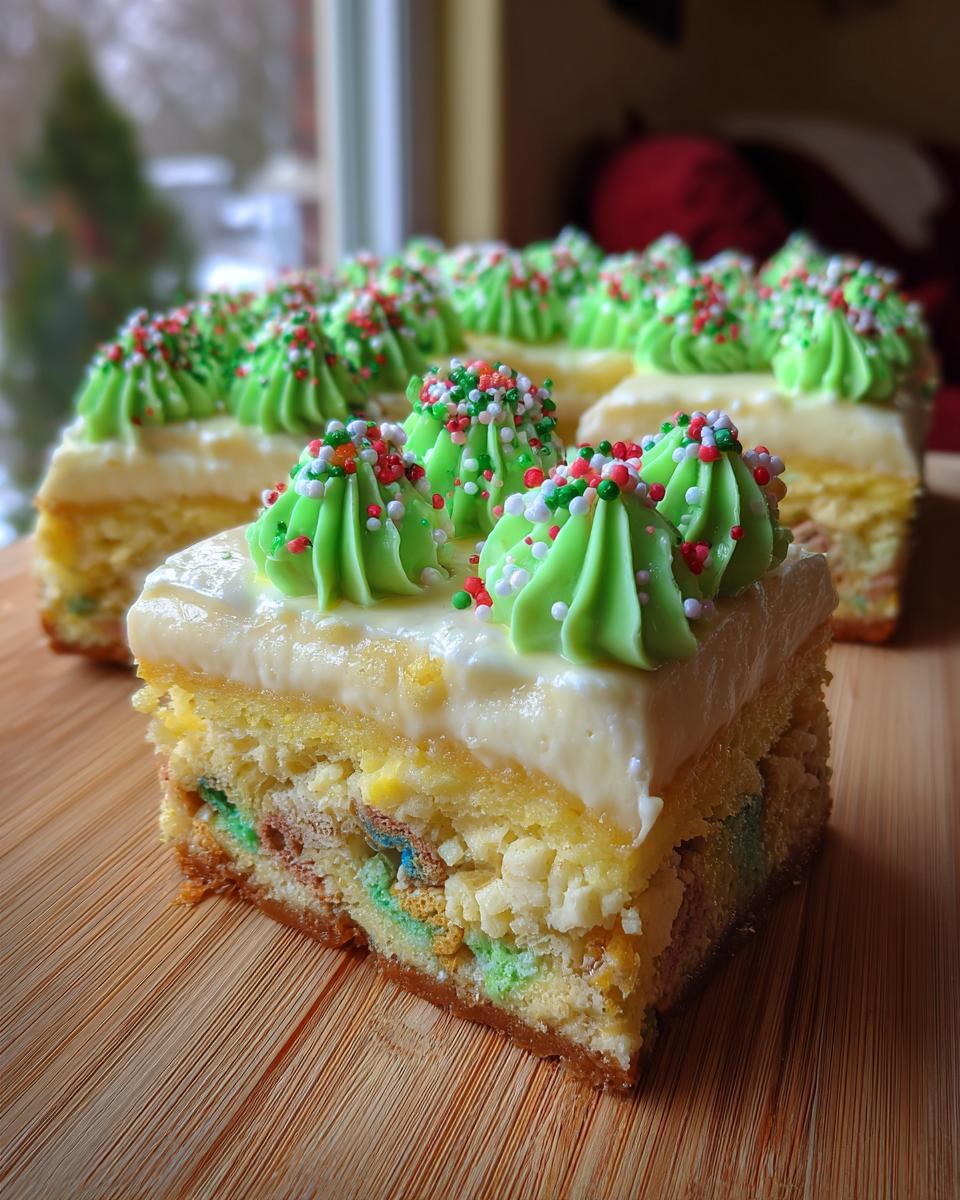
When the holidays roll around, I always think about my grandmother’s lessons on creating a true feast—and that means we need a showstopper dessert! Something that stops everyone mid-conversation as they look across the table. Forget fussy cakes this year; we’re going straight for pure, accessible holiday magic. I’m talking about baking something truly unforgettable: the Little Debbie Christmas Tree Cake Cheesecake. This isn’t just dessert; it’s edible nostalgia wrapped in the creamiest, richest cheesecake batter we can make. Trust me, this is the centerpiece your holiday gathering deserves.
- Why This Showstopper Christmas Tree Cheesecake Works (E-E-A-T)
- Gathering Ingredients for Your Christmas Tree Cheesecake Recipe
- Step-by-Step Instructions for the Baked Christmas Tree Cheesecake
- Decorating Your Showstopper Holiday Cheesecake
- Tips for the Best Christmas Tree Cheesecake Success
- Making a No Bake Christmas Tree Cheesecake Variation
- Storage and Reheating for Your Festive Holiday Cheesecake
- Frequently Asked Questions About This Christmas Tree Cheesecake Recipe
- Sharing Your Holiday Baking Creations
Why This Showstopper Christmas Tree Cheesecake Works (E-E-A-T)
I’ve learned over the years, from professional kitchens to my own Ohio kitchen gatherings, that the best holiday moments come from things that feel familiar but look spectacular. That’s exactly what this recipe delivers. It’s rooted in comfort, but the presentation is pure ‘wow.’
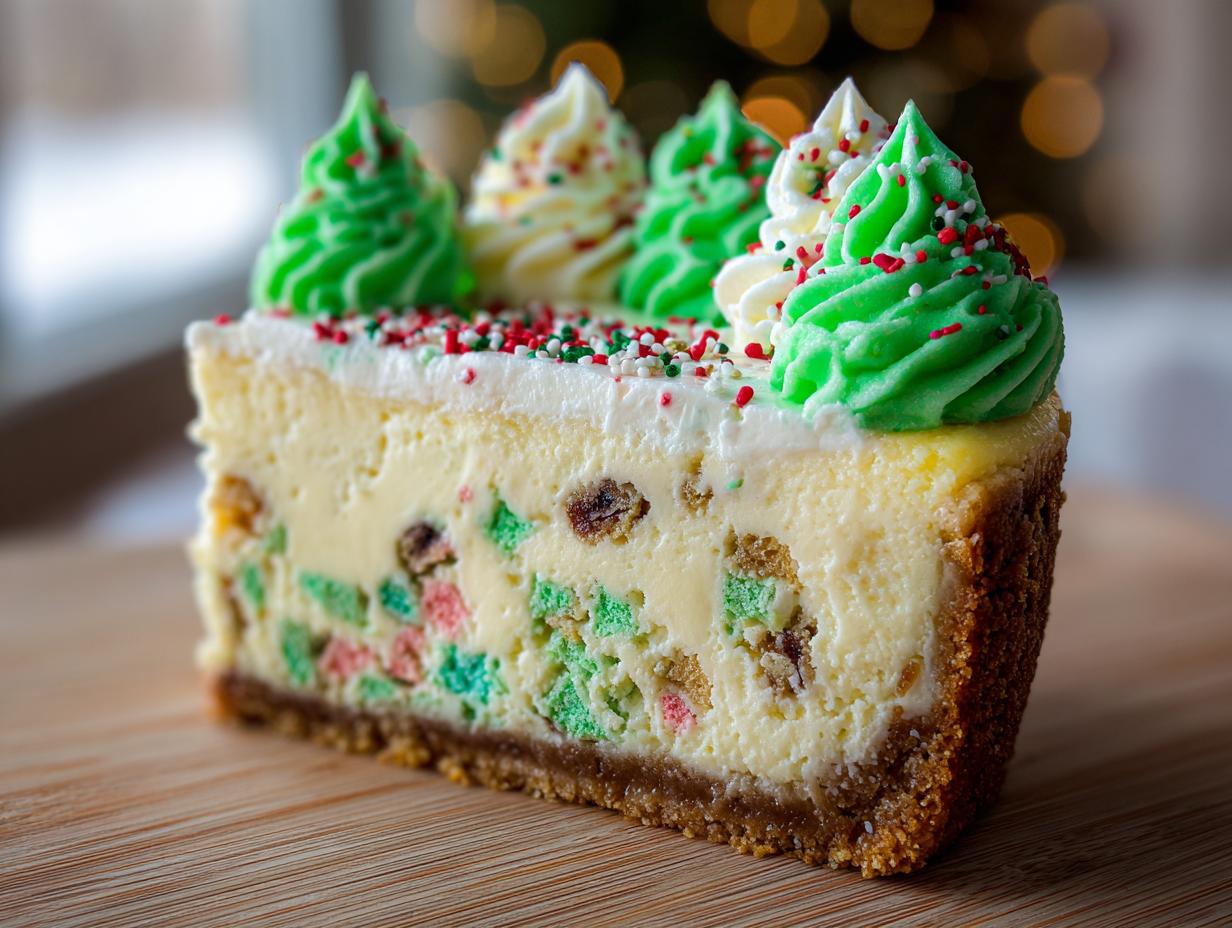
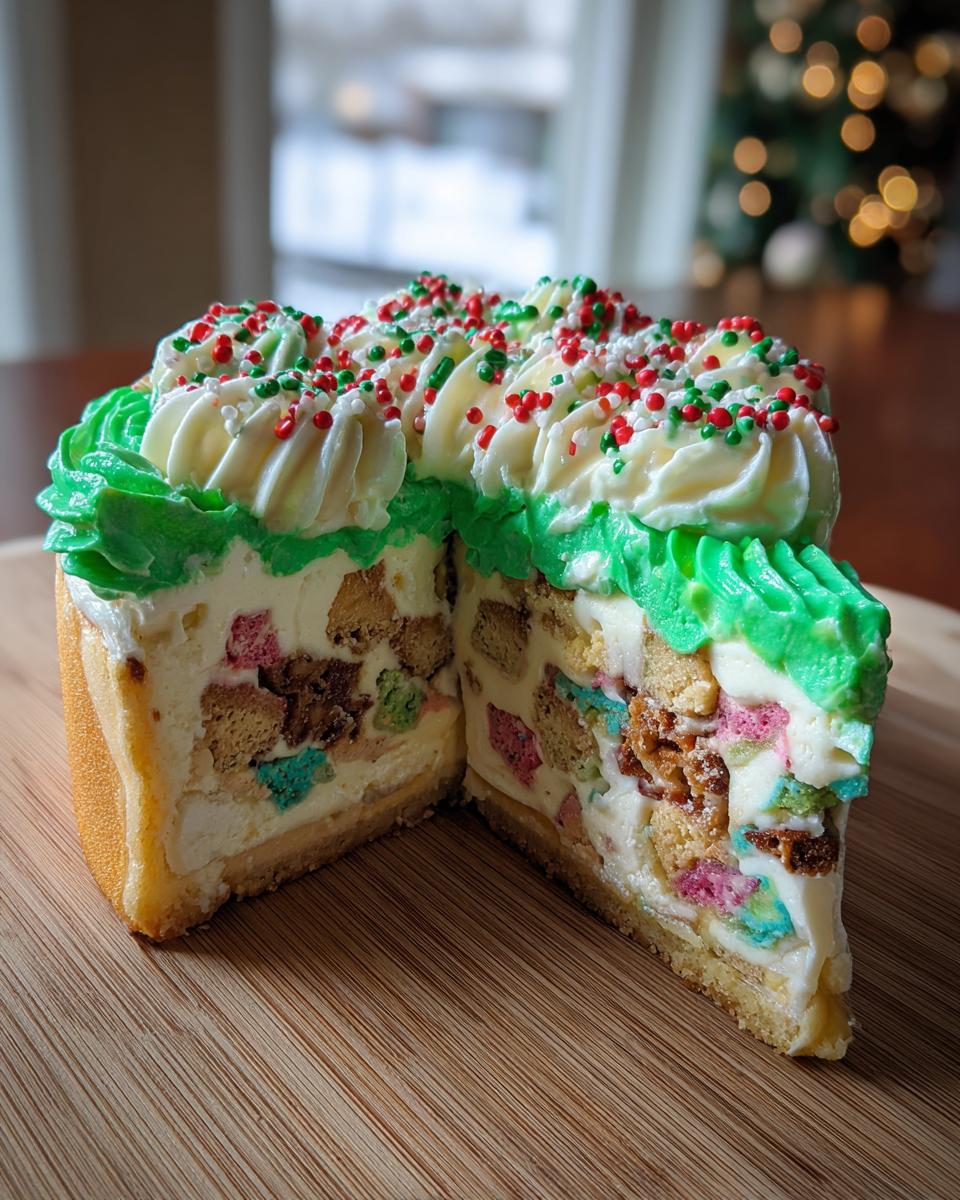
Incorporating those nostalgic Little Debbie cakes into a rich, creamy cheesecake filling is genius. You get that dense, velvety texture we expect from a great cheesecake, but then you hit those bites packed with the familiar vanilla and coconut flavor of the snack cake. It’s a flavor combination that sparks joy immediately.
This becomes the ultimate Christmas Party Centerpiece Dessert because the final decoration—that swirly green topping—actually makes the whole thing look like a decorated tree without needing complex shaping skills. It’s sophisticated yet totally fun, making it the perfect Festive Holiday Cheesecake for sharing memories.
If you love the texture of a classic baked cheesecake but want that nostalgic holiday hit, this is where you’ll find it. We build on that creamy foundation with flavors that everyone recognizes. If you’re looking for another essential holiday pairing, you absolutely have to try my homemade eggnog alongside this treat!
Gathering Ingredients for Your Christmas Tree Cheesecake Recipe
When I map out a recipe, especially for a big holiday moment like this, the first thing I do is lay out every single ingredient. It’s an old chef’s trick—you can’t rush the gathering phase. Being precise with what we use here is how we ensure that rich, foundational flavor comes through, balancing perfectly against the nostalgic sweetness we’re adding in. Precision here means success later, especially when that creamy texture is on the line.
If you are making my classic vanilla buttercream frosting later, you’ll have most of these components ready to go!
Crust Components
- 1 3/4 cups graham cracker crumbs
- 1/2 cup granulated sugar (for crust)
- 8 tablespoons unsalted butter, melted
Creamy Christmas Tree Cheesecake Filling Ingredients
- 4 (8 ounce) packages cream cheese, softened
- 1 1/2 cups granulated sugar (for filling)
- 1 teaspoon vanilla extract
- 1/4 teaspoon salt
- 4 large eggs
- 1 (5.5 ounce) box white chocolate instant pudding mix
- 1/2 cup milk
- 1 (12 ounce) container frozen whipped topping, thawed
- 12 Little Debbie Christmas Tree Cakes, roughly chopped
For Decoration: Festive Whipped Cream Topping
- Green food coloring (gel coloring works best here)
- Assorted holiday sprinkles and candies for decoration
Step-by-Step Instructions for the Baked Christmas Tree Cheesecake
Okay, now for the fun part! Baking this centerpiece requires patience, but honestly, most of the time is just waiting for it to chill completely—which you should absolutely respect because it makes the flavor so much better. We need to handle this batter delicately to keep everything creamy. I always use the same slow-build method for my cheesecakes, much like I do when developing a perfect cookie recipe.
Preparing the Crust and Preheating
First thing: get your oven revved up to 325 degrees Fahrenheit. You need to wrap the bottom of that 9-inch springform pan really well with heavy-duty foil; this is key for our water bath later. Mix your graham cracker crumbs, crust sugar, and melted butter until it’s all combined. Press that mixture firmly into the bottom of the wrapped pan. Pop it in the oven and let it bake for exactly 10 minutes, then pull it out to cool down a tiny bit while you mix the filling.
Mixing the Velvety Christmas Cheesecake Filling
Grab your softened cream cheese—it *must* be soft, or you get lumps! Beat that until it’s buttery smooth. Slowly add the main sugar, vanilla, and salt. Now, the eggs go in one at a time; I mean it, one at a time, mixing just until it disappears. Do not overmix here; that’s how cracks happen later! In another bowl, whisk up your white chocolate pudding mix and milk until it’s lump-free. Gently fold that pudding mixture *and* your thawed whipped topping into the cream cheese base. Finally, fold in those chopped Little Debbie Christmas Tree Cakes—save a few chunks for decorating later. Pour this gorgeous filling right over your crust.
Baking and Cooling the Christmas Tree Cheesecake
To get that perfect, velvety texture in our christmas tree cheesecake, we absolutely need a water bath. Place your foil-wrapped pan into a larger roasting pan, and carefully pour hot water into the roaster until it’s about halfway up the sides of your springform pan. Bake this setup for about 60 to 75 minutes. You want the edges set, but the very center should still have a gentle wobble. When time is up, turn the oven OFF, crack the door open, and let your cheesecake sit like that for a full hour. After it comes out, let it finish cooling on a rack before you chill it for at least six hours, or better yet, overnight. This slow transition is my secret weapon!
Decorating Your Showstopper Holiday Cheesecake
Now that we have baked and chilled this beauty, it’s time to turn the creamy base into the holiday showstopper it’s meant to be! This is where we create the ‘tree’ look, and it’s much easier than you think. You don’t need complicated piping skills; you just need a little enthusiasm.
Take that extra portion of whipped topping—the plain stuff—and gently mix in just a few drops of green food coloring. Gel color is my preferred choice because it gives you that vibrant, deep green without watering down your topping, which is critical for a beautiful Festive Whipped Cream Topping.
Use an offset spatula or even just the back of a spoon to spread that green topping over the entire surface of your cold cheesecake. Don’t aim for perfection! Spread it slightly unevenly, using sweeping motions to mimic the look of tree branches draping down. This technique makes for a wonderfully Decorated Christmas Cheesecake.
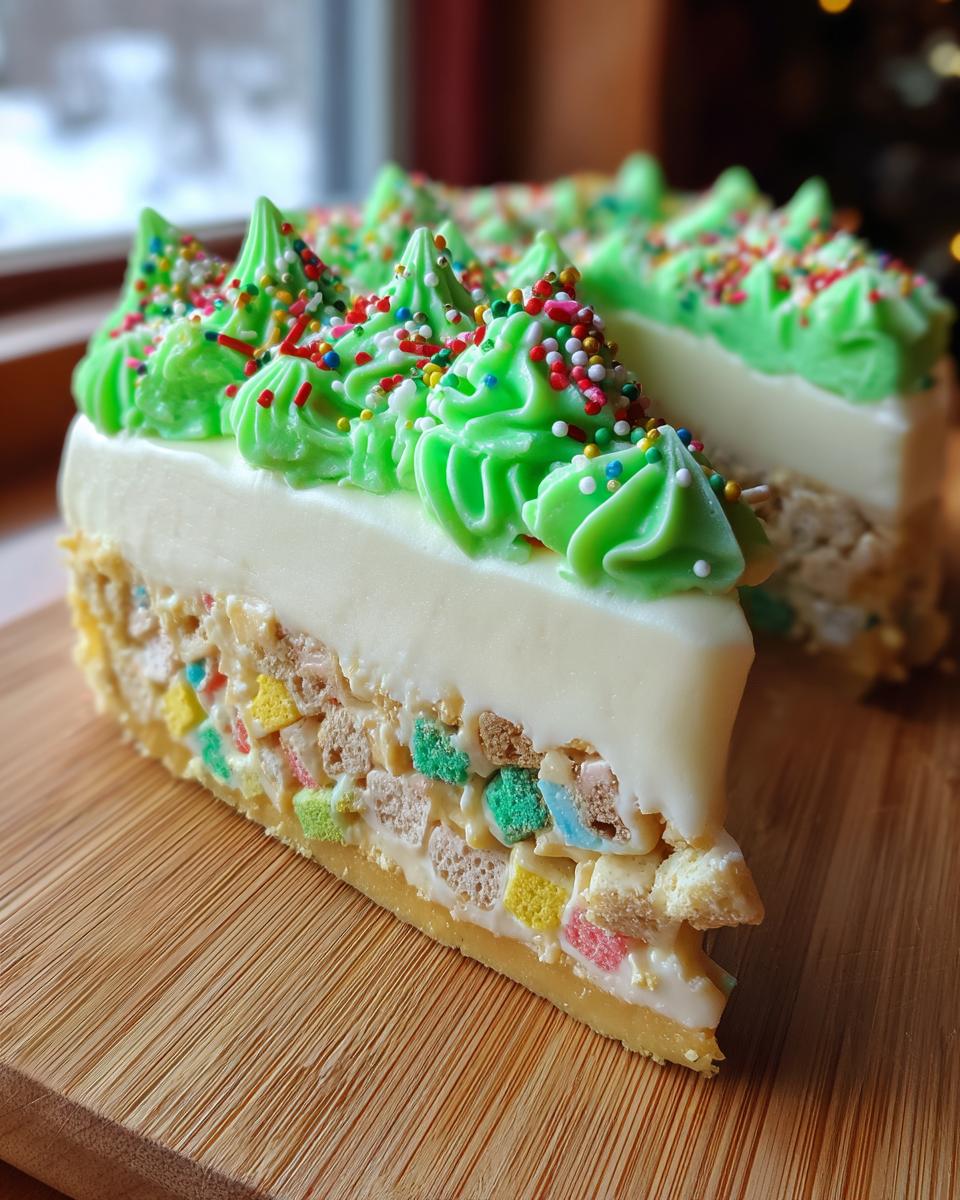
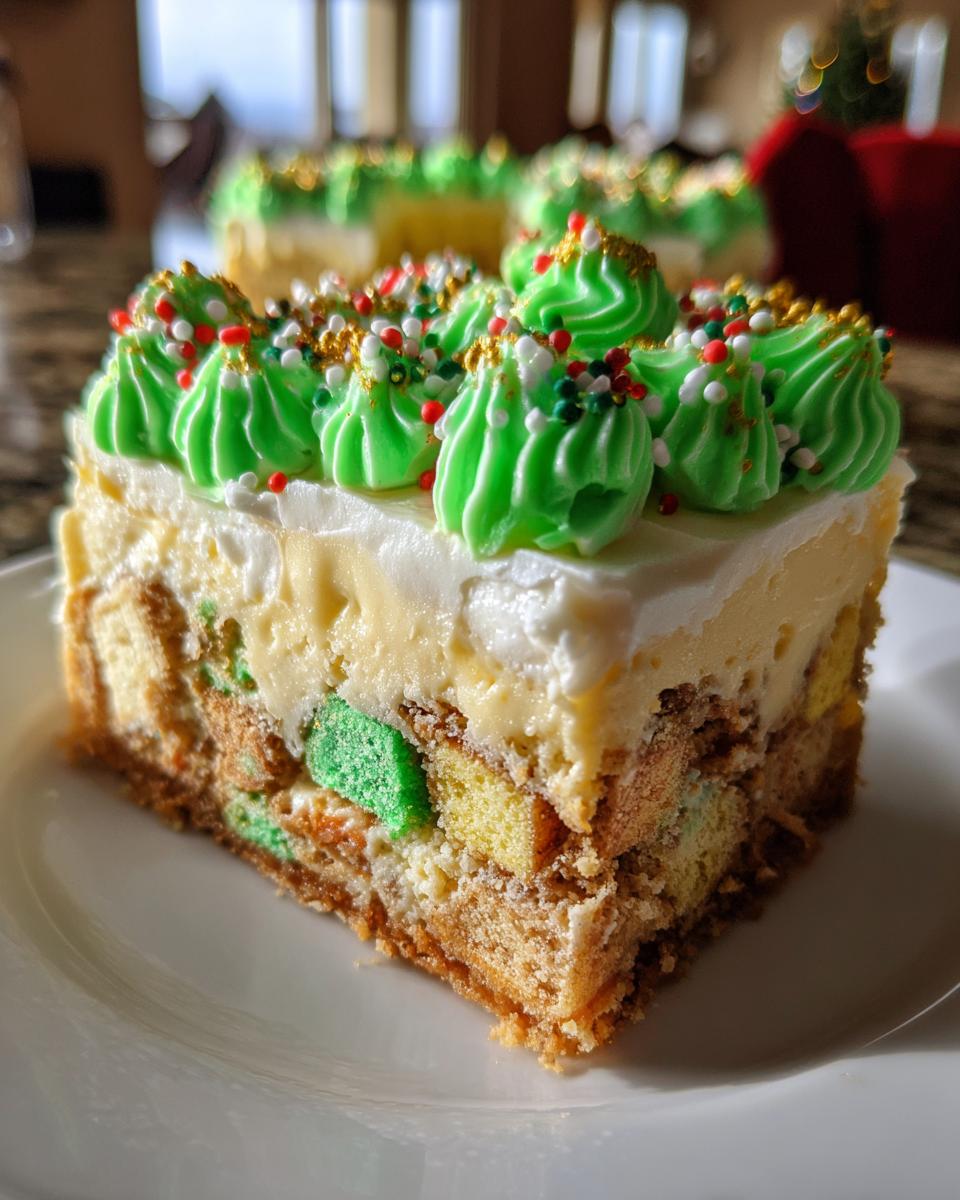
Finally, scatter those reserved chunks of Little Debbie cake, some bright sprinkles, and maybe a few candy candies lightly over the green topping to look like ornaments and tinsel. This final topping makes the whole christmas tree cheesecake feel complete and ready for the holiday table. I love how much joy this decoration brings! We might even need to make a batch of chocolate cinnamon rolls afterward, just for contrast!
Tips for the Best Christmas Tree Cheesecake Success
Look, I know baking can feel intimidating, especially when you’re trying to nail the centerpiece for your big holiday meal. But the thing about cheesecake is that it respects the process. If you follow a few simple rules—rules I learned the hard way when I was just starting out—you skip all the drama, like cracks or curdling. This christmas tree cheesecake relies on technique more than complicated ingredients, surprisingly!
If you want that wonderfully rich, complex flavor profile, sometimes you need to peek at how others tackle it. For example, checking out how Sophie handles her topping is a great idea if you feel nervous about the decoration stage: savorbysophie recipe is worth a look!
Achieving a Crack-Free Surface
The number one request I get is, “Julian, how do I stop my cheesecake from cracking?” It’s usually one of two things: temperature shock or over-beating the eggs. Remember how I talked about the water bath? That’s your absolute insurance policy. The steam creates a humid environment in the oven, keeping the top from drying out too fast and pulling away from the filling. That’s half the battle won right there.
The other half is the slow cool-down. You can’t just yank a hot cheesecake out of a hot environment and stick it straight into the fridge. That temperature snap causes contractions, which means cracking. That full hour cooling inside the turned-off oven—door slightly ajar—is non-negotiable. It lets the filling set gently so it stays gorgeous on your stand.
Incorporating the Snack Cakes
When we fold in those precious Little Debbie chunks, timing is everything. You want them evenly distributed throughout, right? If you add them too early—say, when you are beating in the eggs or the pudding—they’ll just break down into mush during the long bake time. We want distinct little pockets of that sweet, nostalgic flavor hiding in the creamy body.
So, make sure you fold them in as the very last step before pouring the batter into the crust. And don’t chop them too fine! I usually aim for a rough chop—think maybe the size of a large grape or a small walnut. We want those chunks to surprise you when you cut into a slice; we don’t want them dissolved into the background. It’s all about that texture contrast because we’re making something truly special here, not just a smooth vanilla slab! If you’re looking for another great base to build on, check out my guide to making easy fluffy shortcake; the mixing principles are surprisingly similar when it comes to gentleness.
Making a No Bake Christmas Tree Cheesecake Variation
I know not everyone has time for a full oven bake during the crazy holiday rush, and sometimes, frankly, you just don’t want to risk any cracks! So, if you are looking for something quicker, we absolutely can pivot this into an amazing No Bake Christmas Tree Cheesecake. It trades the baked structure for pure, indulgent coolness, and it’s super fast to assemble.
The main modification starts with the eggs—we leave those out entirely! Since they aren’t there for structure, we need to rely on the other elements to set up firmly in the fridge.
If you want that firm, traditional slice, you’ll need to incorporate a setting agent. I often use instant pudding because it thickens up beautifully, just like we did in the baked version, but you could also carefully whisk in a small packet of unflavored gelatin mixed with a quarter cup of warm milk according to package directions before folding it into the cream cheese base.
For the no-bake route, you’ll make the crust exactly the same way, but you bake it for less time—maybe just 8 minutes—to set the butter, or you can skip the baking entirely if you’re using something like an Oreo crust. Then, simply mix up your filling ingredients (leaving out the eggs!), fold in those Little Debbie chunks, pour it over the crust, and chill it hard. We are talking a minimum of 8 hours, but honestly, overnight is far better for that truly firm, sliceable texture. It saves you the water bath drama and gives you an incredibly Creamy Holiday Cheesecake that’s ready when you are. You can find some other great pointers for chilled desserts in my guide on making an easy no-bake peanut butter pie because the chilling mechanics are similar!
If you haven’t tried a no-bake option for the holidays, this is the time to do it! You can even look at how others approach the no-bake method for inspiration; this site gives some great ideas on stabilizing a chilled base if you want to go that route.
Storage and Reheating for Your Festive Holiday Cheesecake
Alright, you’ve made this incredible centerpiece, and you might have some leftover—which, let’s be honest, is highly likely because it tastes so good! Since we are dealing with a rich cream cheese base, storage is super important, but the good news is this Creamy Holiday Cheesecake keeps beautifully.
First things first: do not, and I mean do not, try to reheat cheesecake. Cheesecakes are meant to be served chilled or just slightly warmer than fridge temperature. Trying to warm up a cheesecake is just asking for a melted, sad mess. It’s not like a casserole that benefits from being reheated; this dessert needs that cold density!
The most critical step happens right after baking and cooling: chilling. You absolutely must give your finished christmas tree cheesecake at least six hours in the refrigerator before you try to serve it. Seriously, even if you are desperate for a peek, wait! Six hours lets the white chocolate pudding and the cream cheese fully firm up so you get those clean slices we all dream about.
Now, for keeping it fresh after the party. If you have leftovers, cover the cheesecake tightly right in the springform pan base or transfer it to an airtight container. Kept properly covered in the cold part of your fridge, it stays fantastic for about four to five days. It actually tastes better on the second day, as those snack cake flavors really meld into the filling.
If you somehow made this way too early for your holiday plans, freezing is an option! Wrap that completely cooled and chilled cheesecake (you can even skip the whipped topping decoration and add it fresh before serving) very tightly in a couple of layers of plastic wrap, followed by a layer of foil. It freezes perfectly for up to two months. When you’re ready to thaw, just move it, still wrapped, to the fridge overnight. While you’re thinking about long-term food storage, you should check out my tutorial on making easy freezer jam for a different kind of future-proofing in the kitchen!
Frequently Asked Questions About This Christmas Tree Cheesecake Recipe
Folks always have great questions when they’re tackling a showstopper dessert like this, and I’m happy to walk you through the little details that make a huge difference in your final results! Believe me, I’ve fussed over every point of this recipe, so hopefully, I can save you some trial and error. If you’re planning your week, remember that planning ahead is the key to any great holiday menu, which is why I keep notes in my meal prep guides!
Can I shape this cheesecake into a true tree shape instead of round?
That’s a fantastic visual idea, and if you have a specialized tree-shaped springform pan, go for it! Run with it! However, for most home cooks, I have to admit that trying to force this rich, heavy batter into a very angular shape can sometimes lead to uneven baking or sticking right at those sharp corners.
For this specific recipe, where we are relying on the whipped cream topping to create the ‘tree’ texture, it works best in a standard 9-inch round pan. You get a beautiful, high, domed top that is the perfect canvas for the green ‘branches’ and sprinkles. If you desperately wanted a physical tree shape, you’d have to construct the crust in a tree template on a flat board, which is definitely a whole other level of baking architecture! For maximum holiday impact with minimal fuss, I strongly suggest sticking to the classic round pan for this Decorated Christmas Cheesecake.
What if I cannot find Little Debbie Christmas Tree Cakes?
Oh, that’s a tough one! Those little cakes are what make this version so special, but sometimes the seasonal supply isn’t what we hope for. If you are stuck, don’t panic; you can still make a phenomenal cheesecake!
You need that cake texture folded in for the best contrast. If you can’t find the Christmas Trees, try chopping up a good quality store-bought vanilla or yellow pound cake—make sure it’s slightly stale or dried out so it doesn’t absorb too much moisture from the filling. You can also use vanilla wafers, though you’ll want to crush those a bit more finely, or even chunks of vanilla snack cakes if you have those on hand. You won’t get that exact nostalgic flavor, but you will retain that wonderful texture surprise that makes it a great Cheesecake with Snack Cakes. The flavor profile will shift from that specific coconut-vanilla note to a more classic vanilla base, but it will still be delicious!
How far ahead can I make this Easy Christmas Dessert?
This is fantastic news for anyone hosting a big holiday meal: you should absolutely make this ahead! Cheesecakes are one of those magical desserts that actually improve after a good, long chill. While the absolute minimum chilling time is six hours to make it sliceable, I always push for overnight. Seriously, letting it sit for 12 to 18 hours ensures the flavors of the white chocolate pudding and the incorporated snack cakes fully marry into the cream cheese base.
You can bake the entire thing, cool it completely, and chill it for two full days before you decorate. I recommend saving the green whipped topping and scattering your candy ornaments on the day you plan to serve it. Those decorative elements are best placed right before presentation so the colors stay bright and the topping stays firm. This makes this specific Easy Christmas Dessert a lifesaver for holiday scheduling!
Sharing Your Holiday Baking Creations
Now that you have managed the water bath, folded in the nostalgic treats, and perfected the decoration, all that’s left is the best part: sharing this beautiful creation with the people you love. Food, as my grandmother always taught me, is meant to be a communal experience, a language spoken best when plates are full and everyone is gathered around the table.
I truly hope this Showstopper Little Debbie Christmas Tree Cake Cheesecake brings that kind of moment to your holiday table. If you give this a try—and I really hope you do—I want to see it!
Please leave a rating for the recipe right here on the page. That feedback helps me understand what is working best in your kitchens across the country, and it helps other home cooks trust the process.
More importantly, if you share a photo on social media, tag us! I love seeing your finished centerpieces, the way you decorated them, and hearing the stories of the reactions they got. You can connect with us anytime through the contact page. Let’s celebrate the joy of accessible, show-stopping holiday baking together!
PrintShowstopper Little Debbie Christmas Tree Cake Cheesecake
Create a festive centerpiece dessert by transforming nostalgic Little Debbie Christmas Tree Cakes into a rich, creamy baked cheesecake. This recipe delivers holiday cheer and impressive flavor.
- Prep Time: 30 min
- Cook Time: 75 min
- Total Time: 9 hours 45 min
- Yield: 12 servings 1x
- Category: Dessert
- Method: Baking
- Cuisine: American
- Diet: Vegetarian
Ingredients
- 1 3/4 cups graham cracker crumbs
- 1/2 cup granulated sugar (for crust)
- 8 tablespoons unsalted butter, melted
- 4 (8 ounce) packages cream cheese, softened
- 1 1/2 cups granulated sugar (for filling)
- 1 teaspoon vanilla extract
- 1/4 teaspoon salt
- 4 large eggs
- 1 (5.5 ounce) box white chocolate instant pudding mix
- 1/2 cup milk
- 1 (12 ounce) container frozen whipped topping, thawed
- 12 Little Debbie Christmas Tree Cakes, roughly chopped
- Green food coloring
- Assorted holiday sprinkles and candies for decoration
Instructions
- Preheat your oven to 325 degrees Fahrenheit. Wrap the bottom of a 9-inch springform pan tightly with heavy-duty aluminum foil.
- Prepare the crust: Combine graham cracker crumbs, 1/2 cup sugar, and melted butter. Press the mixture firmly into the bottom of the prepared springform pan. Bake for 10 minutes. Let cool slightly.
- Prepare the cheesecake filling: In a large bowl, beat the softened cream cheese until smooth. Gradually add 1 1/2 cups sugar, vanilla extract, and salt, beating until combined. Beat in the eggs one at a time, mixing just until incorporated after each addition. Do not overmix.
- In a separate bowl, whisk together the white chocolate pudding mix and milk until smooth. Gently fold this mixture and the thawed whipped topping into the cream cheese base.
- Fold in most of the chopped Little Debbie Christmas Tree Cakes, reserving some for topping decoration. Pour the filling over the cooled crust.
- Create a water bath: Place the foil-wrapped springform pan into a larger roasting pan. Carefully pour hot water into the roasting pan until it reaches halfway up the sides of the springform pan.
- Bake for 60 to 75 minutes, or until the edges are set and the center has a slight jiggle.
- Turn off the oven, crack the door open slightly, and let the cheesecake cool in the oven for 1 hour. Remove from the water bath and cool completely on a wire rack. Chill in the refrigerator for at least 6 hours, preferably overnight.
- Decorate the tree: Once chilled, remove the cheesecake from the pan. Tint a portion of extra whipped topping with green food coloring. Pipe or spread the green topping over the top of the cheesecake to mimic tree branches.
- Place reserved chopped cakes and sprinkles/candies onto the green topping to resemble ornaments and garland. Serve cold.
Notes
- For a no-bake option, skip the water bath and oven steps. Chill the filling mixture for at least 8 hours until firm.
- If you want a deeper green color for the topping, use gel food coloring sparingly.
- You can use a store-bought graham cracker crust to save time.
Nutrition
- Serving Size: 1 slice
- Calories: 450
- Sugar: 35g
- Sodium: 300mg
- Fat: 30g
- Saturated Fat: 18g
- Unsaturated Fat: 12g
- Trans Fat: 0.5g
- Carbohydrates: 40g
- Fiber: 1g
- Protein: 7g
- Cholesterol: 100mg