

It’s a universal truth at any party: If you put out deviled eggs, they vanish before the chips and dip even get noticed! Everyone loves a good deviled egg, but so many people are scared of making them because of peeling disasters or bland filling. Well, stop worrying right now, because this is the foolproof **deviled eggs recipe** you’ve been searching for—guaranteed creamy and tangy every single time. When Julian set out to document the soul of American cooking, learning how to perfect this **classic appetizer** was top of his list for ensuring your spread is always a giant hit.
- Why This is the Best Deviled Eggs Recipe for Your Next Gathering
- Gathering Ingredients for Classic Deviled Eggs
- Step-by-Step Instructions: How to Make Deviled Eggs
- Tips for Making the Ultimate Deviled Eggs
- Storage and Serving Suggestions for Your Deviled Eggs
- Frequently Asked Questions About Deviled Eggs
- Estimated Nutrition for Classic Deviled Eggs
- Share Your Perfect Deviled Eggs Experience
Why This is the Best Deviled Eggs Recipe for Your Next Gathering
I know, I know, everyone claims they have the **best deviled eggs recipe**, but mine is truly different because it cuts out all the stress! We focus on three things that make these the most reliable **easy deviled eggs** you’ll ever put on a platter:
- Perfectly plump, bright yellow yolks that mix up velvety smooth—no clumps allowed!
- A guaranteed peeling system so you aren’t wrestling with shells in front of your hungry guests.
- That classic, perfectly balanced tangy flavor that makes people ask for the recipe immediately.
Trust me, once you nail the egg-boiling part, making the filling is such a snap. This is how you guarantee a platter disappears first at any potluck!
Achieving Perfectly Peeled Eggs Every Time
This is the secret weapon when you’re making **deviled eggs**, honestly. If the eggs don’t peel nicely, the whole mission is a failure! We use the heat-shock method. Bring those eggs to a rolling boil, then kill the heat, cover the pan, and just let them sit off the burner for exactly 12 minutes. They cook perfectly inside without getting rubbery.
The most important step? Immediate transfer right into an ice bath. You need to shock those cooked eggs right away so they cool fast and the membrane naturally separates from the white. If you’re having trouble even after that, try peeling them gently under cool running water. It’s like magic; the shell just slips right off!
Gathering Ingredients for Classic Deviled Eggs
Okay, the ingredient list here is super simple because we are sticking to tradition—that’s what makes these the absolute **best deviled eggs**! You’ll need 12 large eggs, of course, and the creamy filling comes from about half a cup of mayonnaise. Don’t skimp here; if your mayo is good, your filling will be fantastic.
Then we hit the tang: 2 tablespoons of yellow mustard and just 1 tablespoon of white vinegar. That vinegar is crucial for that little zip! Don’t forget your salt and pepper, and always, always, dust them with paprika at the end for color. These simple components make the flavor profile so satisfying.
Step-by-Step Instructions: How to Make Deviled Eggs
Now that we’ve got our ingredients ready, let’s walk through exactly **how to make deviled eggs** that look professional and taste heavenly. We break this down into three main phases: setting up the eggs, whipping the filling, and finally, plating them up beautifully for your lucky guests.
The Boiling and Cooling Process for Perfect Eggs
Remember what I said about sticking? We skip that problem with this method. Take your dozen eggs and lay them gently in a saucepan. Cover them completely with cold water—I mean, give them an inch or two of water over the top. Bring that water to a really fast, rolling boil over high heat. This is important: the second it starts boiling hard, kill the burner, slam that lid on tight, and just walk away for 12 minutes. Don’t peek!
When the timer buzzes, you need action! Scoop those hot eggs out immediately and plunge them straight into a giant bowl of ice water. They need to be completely cold, which takes about 10 minutes in the bath. This rapid cooling is the key to stopping the cooking process so you never see that gross, greenish-gray ring around your beautiful yellow yolks. That’s where our expertise comes in!
Creating the Smooth Filling for Your Deviled Eggs
Once cooled, peel those eggs. Remember, gently crack and peel under running water if you need an assist! Slice them straight down the middle lengthwise. Carefully scoop every bit of that cooked yolk into a bowl—don’t leave any behind for the whites. Line your serving platter with all those empty white boats.
Now, mash those yolks with a fork until they are practically powder. Then, stir in the mayonnaise, mustard, vinegar, salt, and pepper. Mix it until it’s completely uniform and smooth. If you really want the absolute **best deviled eggs**, take an extra minute and push that yolk mixture through a fine-mesh sieve—it makes it unbelievably creamy, almost like velvet. It’s worth the extra dishwashing, promise!
Assembly and Final Garnish for Party Finger Food
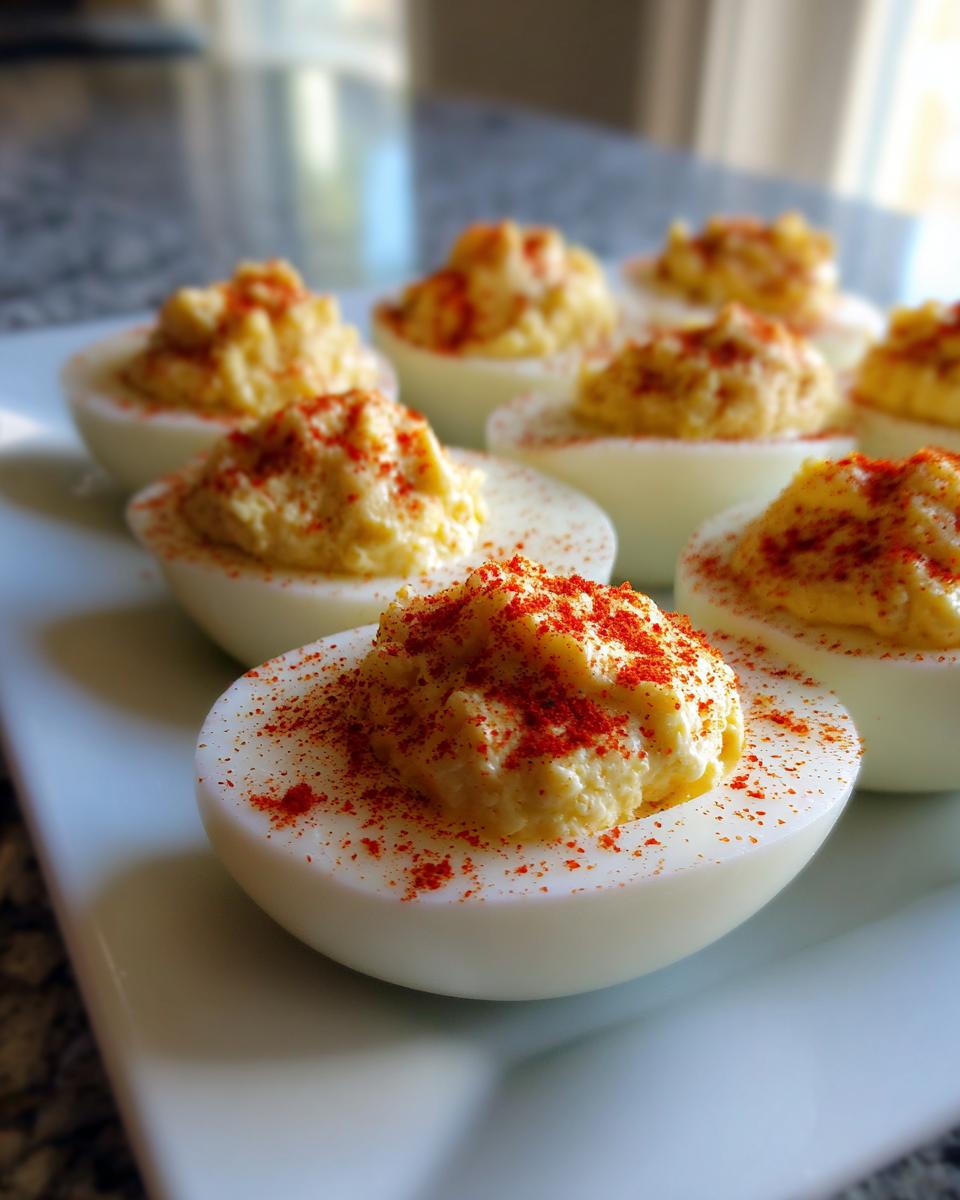
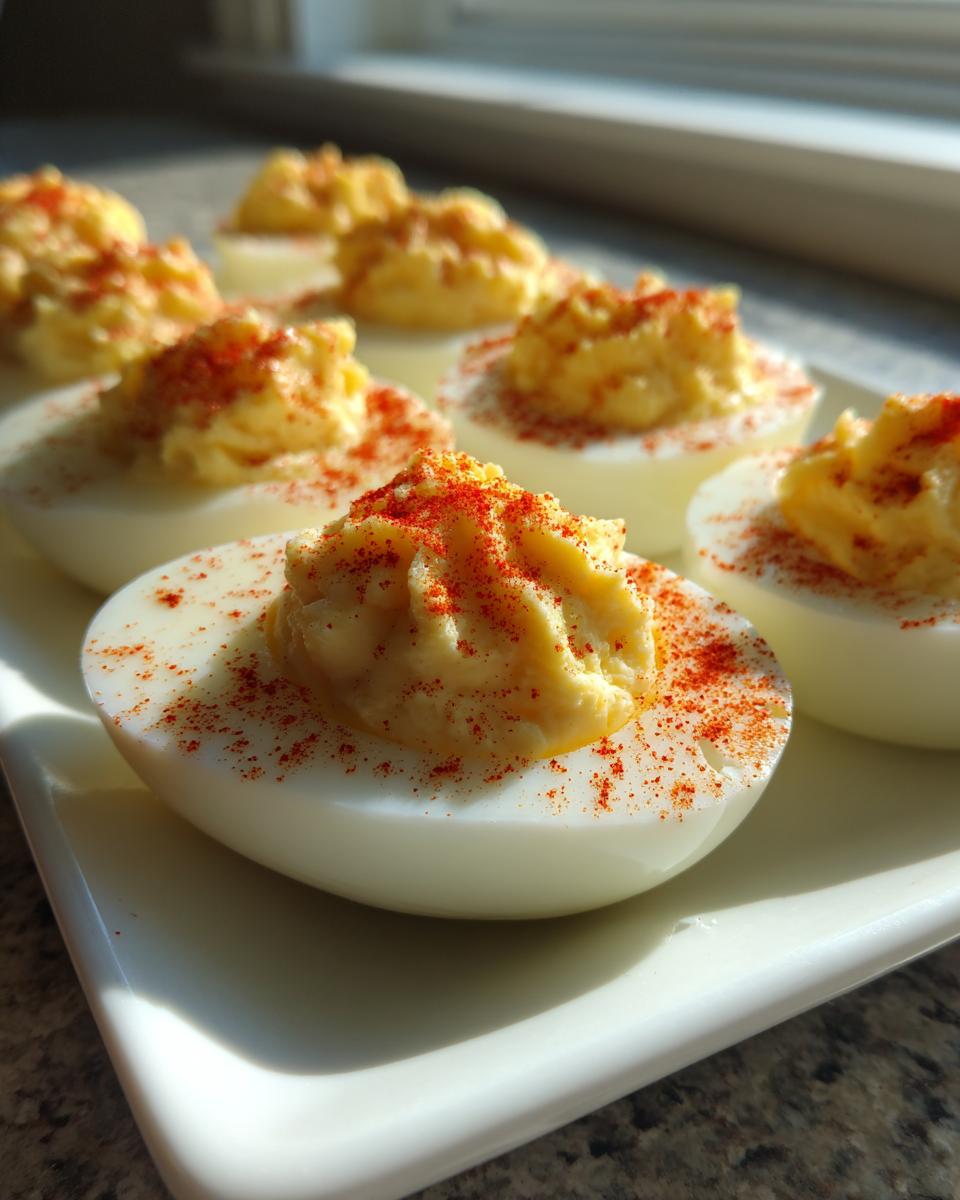
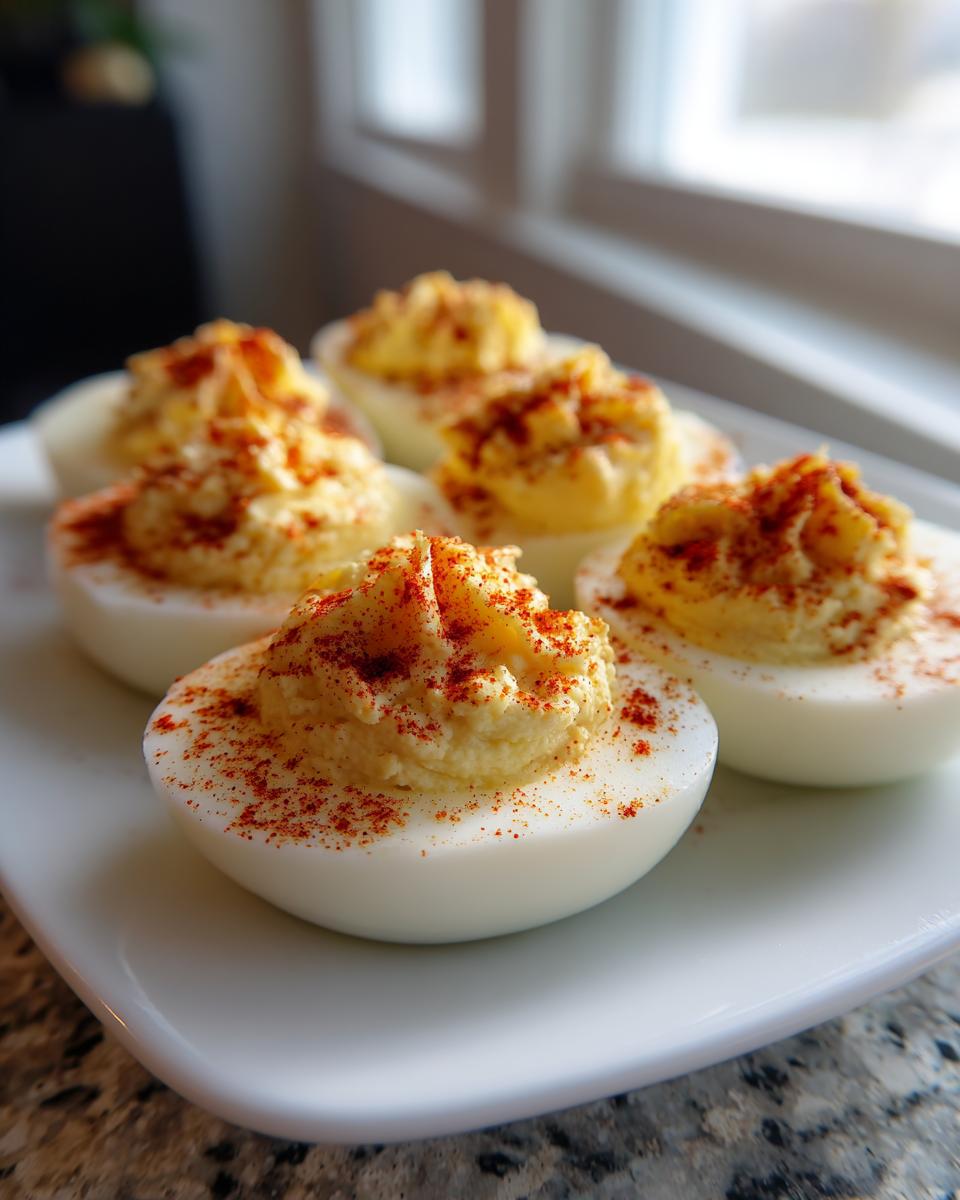
It’s time for the grand finale! You can use a small spoon to drop the filling back into the egg white cups, or you can transfer the filling to a piping bag with a star tip for that fancy, restaurant look. Make sure they look beautifully mounded.
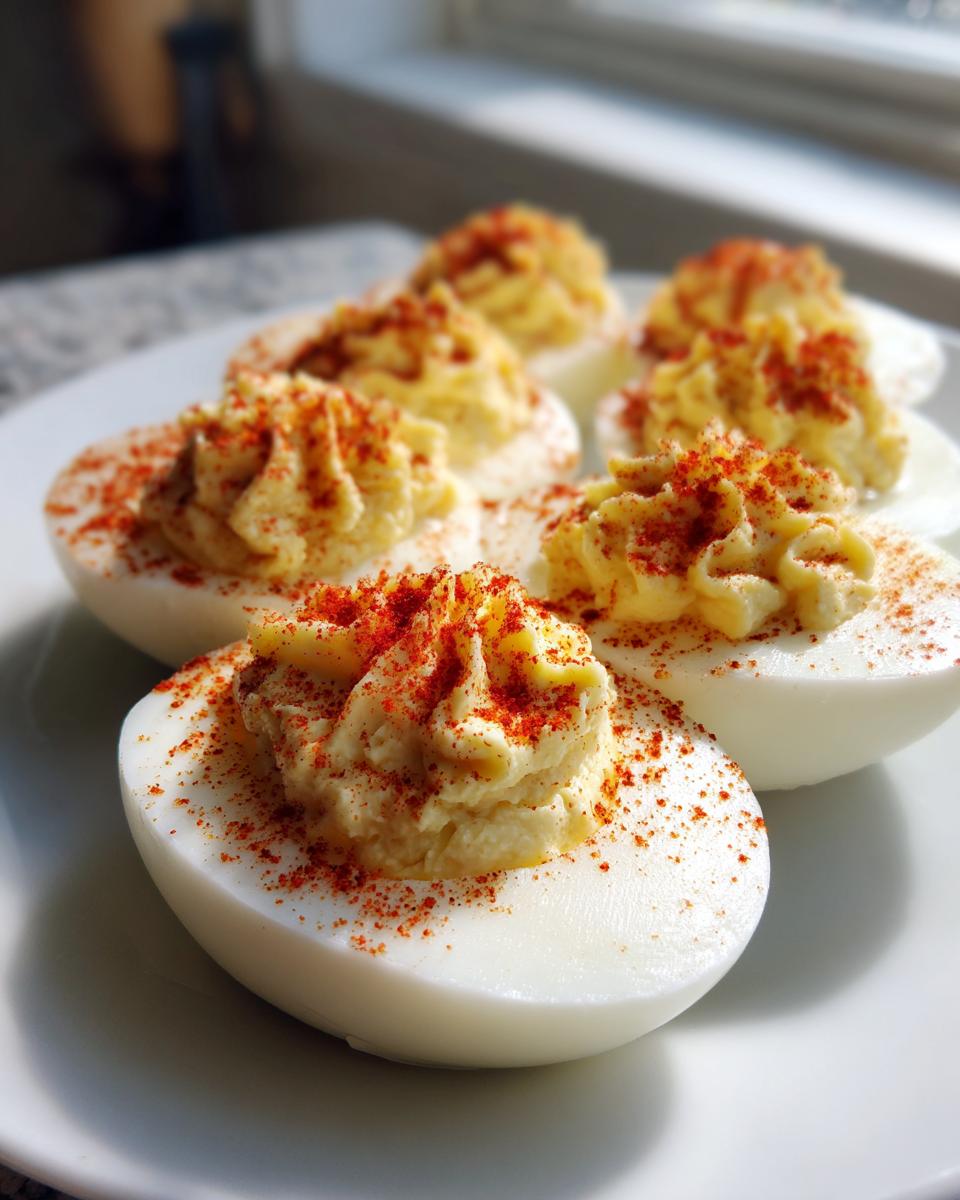
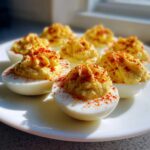
The final touch that screams **party finger food**? A light dusting of paprika right over the top of each mound. Pop them in the fridge for at least half an hour before serving—that resting time really lets all the tangy flavors marry up beautifully. You can learn more dedication to classic recipes like this over on our About Page!
Tips for Making the Ultimate Deviled Eggs
We’ve got the foolproof base down, but making the **best deviled eggs** means knowing when you can tweak things just a tiny bit to make them *yours*. Since this is such a core **deviled eggs recipe**, it handles extra flavor additions really well. Don’t be afraid to taste the filling as you mix it—that’s how you know exactly what it needs for your crowd!
I find that sometimes the yolks need a little more punch than the base recipe calls for, especially if the mayonnaise I grabbed that week is milder. That’s where you experiment!
Ingredient Adjustments for Tangy Deviled Eggs
If you like things really sharp, add another half teaspoon of vinegar, or bump up the mustard dosage a bit. Remember to taste after every adjustment! For those who love a little sneaky heat, I sometimes stir in the tiniest dash of your favorite hot sauce—just enough to give a warm background note, not enough to overwhelm the classic flavor.
Another fabulous addition that I adore, especially for a summer picnic **party finger food**, is folding in a spoonful of finely minced sweet pickle relish. Make sure you drain that relish really well first, or it can ruin the texture of your filling. It keeps the creamy foundation of the **deviled eggs recipe** intact while adding a lovely crunch and sweetness!
Storage and Serving Suggestions for Your Deviled Eggs
You’ve made two dozen gorgeous, creamy bites—24 perfect halves! Now we need to keep them safe until it’s time to serve your **party finger food**. The number one rule for **deviled eggs** storage is keeping them cold, always.
You absolutely should make them ahead, but don’t assemble them until just before you need to leave for the party or have guests arriving. If you make the filling ahead of time, store it covered tightly in the fridge. When you’re ready to serve, fill those whites right before heading out.
If they are fully assembled, you must keep them refrigerated until serving time. They are always best served cold, so skip worrying about reheating! Just make sure they stay chilled so that creamy filling stays perfectly firm and safe for everyone to enjoy.
Frequently Asked Questions About Deviled Eggs
I get so many questions about making **deviled eggs** because everyone wants that perfect, picnic-ready batch! It’s normal to have questions when you want your appetizer to be flawless, so here are a few things I always get asked about this recipe.
Can I make the filling for these deviled eggs ahead of time?
Oh yes, you absolutely can, and I often do! This is a great way to speed things up when you’re prepping for a big crowd. You can make the creamy yolk filling—the whole mayo/mustard/vinegar mash—and keep it covered tightly in your refrigerator for up to two days. It gets even tangier overnight, which I love. However, wait to mix it into the egg whites until the day you plan to serve them. Filling the whites just before serving stops the white from absorbing moisture from the filling and getting slightly damp.
What makes this the best deviled eggs recipe?
It all comes down to technique, honestly, which is why this is the **best deviled eggs recipe** out there! First, the 12-minute standing boil followed by the ice bath guarantees you get beautiful, easy-to-peel eggs—that’s the make-or-break step! Second, the ratio of mayonnaise to mustard to vinegar is perfectly balanced for that classic, satisfying tang without being overly heavy or too sour. These **easy deviled eggs** are simple but refined!
Estimated Nutrition for Classic Deviled Eggs
Since we are focused on making the absolute best, most reliable **deviled eggs recipe**, I always want to be transparent about what goes into them, even when it comes to the numbers! Please remember that these figures are estimates based on the standard ingredients I use—if you swap out full-fat mayo for light mayo, or use a different brand of mustard, those counts are going to shift a little bit.
But for a standard serving of two halves of these delicious little bites, here’s the breakdown based on the recipe provided. It’s pretty great that this satisfying **classic appetizer** is relatively low-carb, too!
- Serving Size: 2 halves
- Calories: 80
- Fat: 7g
- Protein: 3g
- Carbohydrates: 0.5g
- Sugar: 0.5g
- Sodium: 120mg
I always tell people not to stress too much about the sodium number with appetizers like this—when you’re making something specifically for a party, a little salt goes a long way for flavor! But overall, these are satisfying, protein-packed bites that are worth every bit of that rich yolk.
Share Your Perfect Deviled Eggs Experience
Whew! Now you have absolutely everything you need to make the most loved, most requested **deviled eggs** at your next event. I truly believe this recipe is the one that will become your family standard—it’s just that good and that reliable.
I pour so much care and historical knowledge into testing these classics, and I really want to know what you think! Did they disappear instantly? Was the peeling process smooth as butter for you?
When you make this batch of **classic appetizer** perfection, please do me a huge favor: hop down below and leave a rating! Five stars if they were everything you hoped for!
I also absolutely love hearing about your little twists! Did you add a pinch of cayenne? Maybe you used smoked paprika instead? Snap a photo and share your results in the comments. Knowing that this recipe is making its way from our kitchen to yours, building memories around the table, is why we do all of this testing and documenting.
We take your privacy here at Julia Meal very seriously, so you can read more about that on our Privacy Policy page before you sign up to comment. Now go get cracking—I can’t wait to hear how your **easy deviled eggs** turned out!
PrintClassic Deviled Eggs Recipe
A reliable recipe for making traditional, creamy, and tangy deviled eggs, perfect for any gathering.
- Prep Time: 20 min
- Cook Time: 12 min
- Total Time: 32 min
- Yield: 24 halves 1x
- Category: Appetizer
- Method: Boiling and Mixing
- Cuisine: American
- Diet: Gluten Free
Ingredients
- 12 large eggs
- 1/2 cup mayonnaise
- 2 tablespoons yellow mustard
- 1 tablespoon white vinegar
- 1/2 teaspoon salt
- 1/4 teaspoon black pepper
- Paprika, for garnish
Instructions
- Place eggs in a saucepan and cover with cold water. Bring water to a boil over high heat.
- Once boiling, remove the pan from the heat, cover it, and let the eggs stand for 12 minutes.
- Immediately transfer the eggs to an ice bath and let them cool completely, about 10 minutes.
- Peel the cooled eggs. Slice each egg in half lengthwise.
- Carefully scoop the yolks into a medium bowl. Place the empty egg white halves on a serving platter.
- Mash the yolks with a fork until fine. Add mayonnaise, mustard, vinegar, salt, and pepper. Mix until the filling is smooth.
- Spoon or pipe the yolk mixture back into the egg white halves.
- Sprinkle paprika over the top of each filled egg half before serving.
Notes
- For easier peeling, gently crack the shell all over and peel under cool running water.
- If you want a smoother filling, press the mashed yolks through a fine-mesh sieve before mixing in the other ingredients.
- Chill the finished deviled eggs for at least 30 minutes before serving for the best flavor.
Nutrition
- Serving Size: 2 halves
- Calories: 80
- Sugar: 0.5
- Sodium: 120
- Fat: 7
- Saturated Fat: 1.5
- Unsaturated Fat: 5.5
- Trans Fat: 0
- Carbohydrates: 0.5
- Fiber: 0
- Protein: 3
- Cholesterol: 75