
There are few things in this world that scream pure, unadulterated comfort quite like warm bread soaked in butter and drowning in melted cheese. Seriously, if I need a quick win—whether it’s for a busy weeknight or a last-minute gathering—this is my go-to move. Forget spending hours kneading and waiting; we are diving straight into the easiest, but somehow most decadent, homemade cheese bread you’ll ever make. This isn’t just some flat loaf; this is glorious, gooey, garlic-infused, savory magic designed for pulling apart. It takes me less than 15 minutes to prep, and honestly, stepping back into that home-comfort feeling is exactly why I started this whole site in the first place. Trust me, you deserve this cheesy indulgence tonight.
- Why This Garlic Pull Apart Cheese Bread Recipe Will Become Your Favorite
- Gathering Ingredients for Your Homemade Cheese Bread
- Step-by-Step Instructions for Easy Cheese Bread
- Tips for Making the Best Cheese Bread Every Time
- Serving Suggestions for Your Cheesy Side Dish
- Storage and Reheating Instructions for Leftover Cheese Bread
- Frequently Asked Questions About Making Cheese Bread
- Estimated Nutritional Data for This Cheese Bread
- Share Your Experience with This Amazing Cheese Bread
Why This Garlic Pull Apart Cheese Bread Recipe Will Become Your Favorite
Look, I’ve made crusty sourdough and complicated brioche, but sometimes you just need that immediate rush of happiness that only cheese bread can deliver. This recipe nails that satisfying feeling without requiring any actual bread-making stress. It truly shines as one of the best cheese bread options for quick entertaining. Honestly, it’s my secret weapon.
- It delivers incredibly **soft cheese bread** thanks to the shortcut dough.
- The intense garlic and seasoning creates a truly **buttery cheese bread** experience.
- It’s supreme among all appetizer bread recipes—it disappears first at every single party I host.
Quick Prep for Maximum Flavor
This is where we take the easy route, and I am not ashamed! We’re using refrigerated biscuit dough. You just cut it up, toss it in the flavor bath, and you’re basically done with prep in about ten minutes flat. That’s less time than it takes to perfectly chop onions for a more complicated dish! That level of speed for this payoff? Unbeatable.
The Perfect Cheesy Side Dish Texture
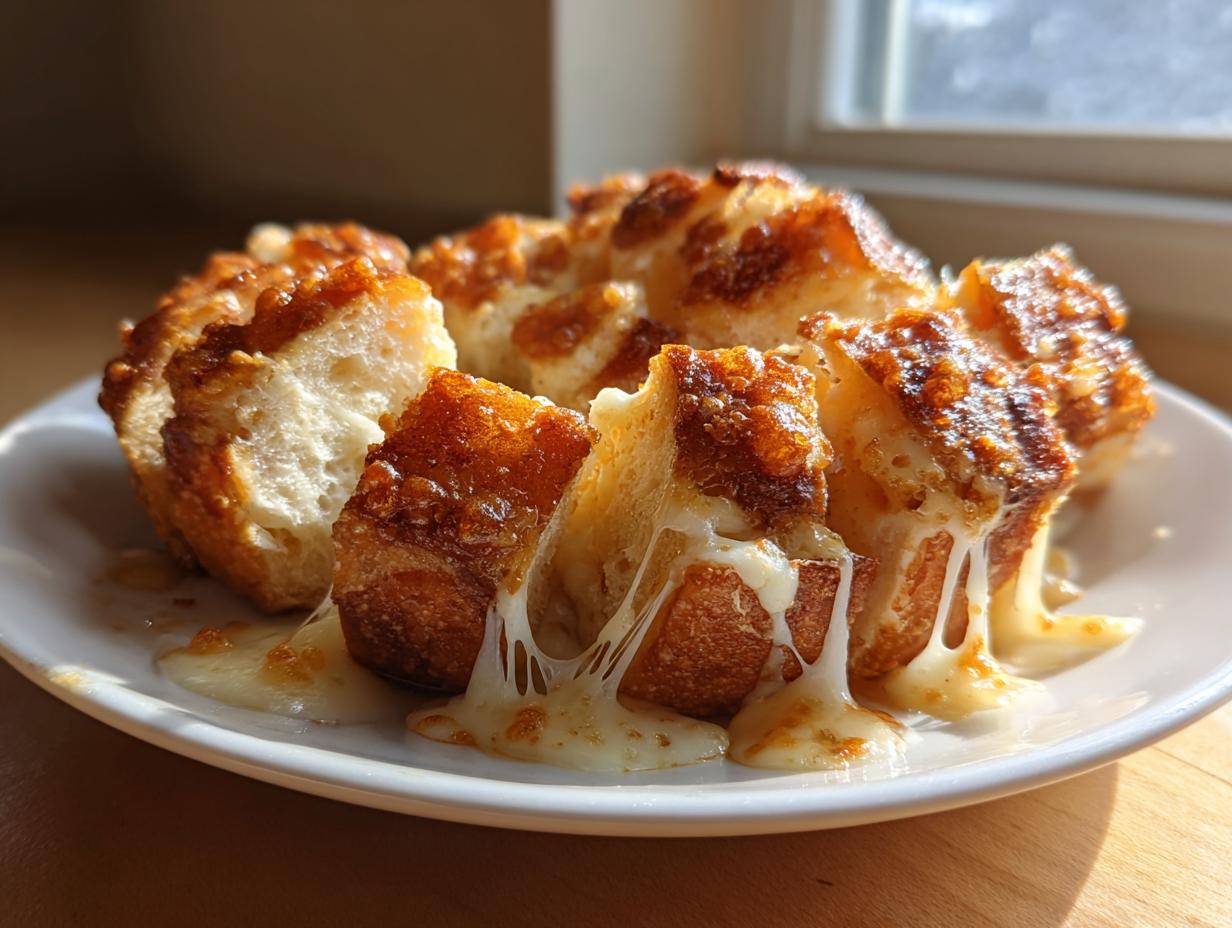
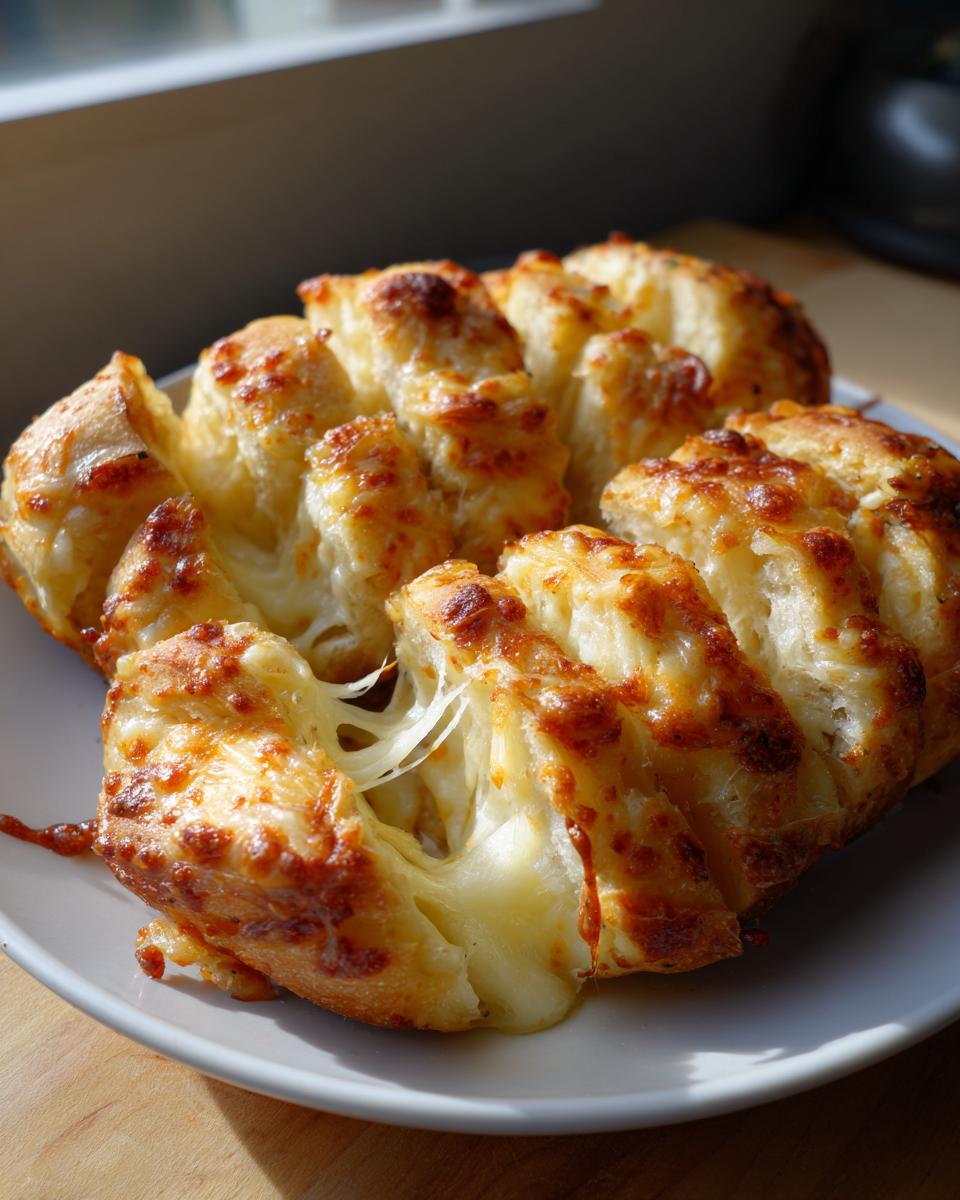
When you pull this apart, you want that picture-perfect cheese stretch, right? We achieve that by layering the cheese in the middle and on top. The result is a wonderfully soft interior where every piece is drenched in garlic butter, contrasting against that beautiful, slightly crispy, bubbly cheese crust. It’s designed for dipping—whether it’s into pasta sauce or just straight into your fingers.
Gathering Ingredients for Your Homemade Cheese Bread
Okay, listen up, because even though this is an easy cheese bread recipe, the quality of what goes in absolutely dictates the joy you get out. Since we use such simple components, we need to be precise with our measurements here. Don’t just eyeball that butter! We need exactly half a cup of unsalted butter melted down, ready to mingle with our flavor boosters. The foundation of great flavor, as always, comes from the fresh stuff. If you can swing it, please use fresh garlic, minced finely. That jarred stuff just doesn’t carry the same pungent punch that makes this recipe truly shine.
The biscuits are the structure, the cheese is the reward, and the butter/garlic mix is the beautiful, savory glue holding the whole cheesy party together. For the best result, I always go with that specific mozzarella and sharp cheddar mix; it gives you that fantastic stretch and a nice salty bite. Don’t worry if you deviate slightly; this is adaptable! And honestly, when I’m not making this, I often find myself craving the flavors you get in a good garlic parmesan chicken pasta, which just proves how versatile garlic and butter are!
Ingredient Notes and Substitution Advice
The recipe calls for a classic duo, but you shouldn’t feel boxed in by the cheese. If you’re feeling bolder, feel free to swap out some of the cheddar for something like Provolone—it melts beautifully and brings a slightly smokier note. Monterey Jack is another winner if you want a milder flavor profile that still gives you that excellent gooey texture. But whatever you choose, make sure it’s shredded! Pre-shredded often has stabilizers that stop it from melting as smoothly as the block cheese you grate yourself. That’s a pro tip for maximum melt factor!
Step-by-Step Instructions for Easy Cheese Bread
Alright, we’ve got our ingredients lined up, and now we get to the fun part: assembly! Seriously, if you can cut a biscuit into quarters, you can make this bread. The first thing you absolutely must do is get that oven warm; 350 degrees F is our magic number. Make sure you grease your pan well—I use a 9×5 loaf pan, but you can use a Bundt, too. That initial prep is crucial so your beautiful creation doesn’t get stuck to the metal later!
This recipe is so fast, you might even want to whip up a batch of my easy one-pot chicken and dumplings while you wait for the oven to heat up. See? Seamless entertaining!
Preparing the Buttery Garlic Cheese Bread Coating
In a medium bowl—nothing fancy required—we’re whisking together that melted butter, the fresh minced garlic, the Italian seasoning, and just a pinch of salt. This liquid gold is what flavors every single bite of our upcoming cheesy breadsticks. Now, open up that can of biscuits and cut every single one into four little pillow-sized pieces. You want to add these biscuit quarters to the butter mixture and toss them super gently. I mean GENTLY. You aren’t kneading dough here; you just want a light coating so they don’t absorb too much before baking.
Layering and Baking Your Pull Apart Bread
Time to layer! Put half of your buttered biscuit pieces into the prepared pan. Sprinkle about half of your combined mozzarella and cheddar cheese right over those pieces. Repeat that process: the rest of the biscuits go in, followed by the remaining cheese blanket on top. This layering is what ensures that gorgeous, gooey stretch when you pull it apart later. Pop the whole thing into that 350°F oven for about 25 to 30 minutes until it looks deeply golden brown and the cheese is absolutely bubbly. Don’t forget to let it rest in the pan for five minutes after it comes out. Trust me on this—it helps the melted cheese bread set up just enough so it doesn’t collapse when you flip it out!
Tips for Making the Best Cheese Bread Every Time
As much as I love keeping things simple—and trust me, this recipe is already pretty foolproof—I always lean in with a few little tricks I picked up over the years to push any savory bread baking project over the edge. These aren’t complicated, but they are the difference between bread that’s just good and bread that makes everyone stop talking while they eat it. When you’re working with this much delicious cheese, a tiny adjustment can make a huge visual impact, especially when it comes to that golden-brown finish. Speaking of amazing comfort bakes, if you ever need a guide for softer bread outside of these quick recipes, don’t forget to check out my tips on making homemade dinner rolls!
Achieving a Golden, Bubbly Top on Your Cheese Bread
Sometimes, even after 30 minutes, that cheese on top just looks a little pale, especially if your oven runs cool. If you’re almost there but need that deep, beautiful color, this is where we bring in the broiler, but you have to treat the broiler like a dragon—respect it and watch it constantly! Once your bread is fully cooked through (bubbly and heated), move the serving pan or the oven-safe rack right up close to the heating element. You want to turn the broiler on high. Now, stand right there. I mean it! Seriously, go grab your coffee and watch it like a hawk. Because the cheese is already melted, it will brown up incredibly fast, usually in about 60 to 90 seconds. The second you see those beautiful dark spots start to form, pull it out immediately. It goes from golden to scorched faster than you can say “extra cheese,” so don’t walk away!
Serving Suggestions for Your Cheesy Side Dish
So, you have this amazing, piping hot pan of glorious, buttery, and utterly irresistible cheese bread. What now? Well, that’s the best part—this stuff works for almost any eating occasion! While it’s certainly a showstopper on its own as an appetizer bread recipe, it truly hits its peak when paired with something hearty that needs a perfect dipping companion. It’s definitely the most requested snack when we’re just hanging out on a Friday night.
If you’re making a big Italian meal, forget the plain side bread; this is what you need. It’s fantastic alongside a big bowl of spaghetti with marinara, or if you are feeling something a little richer, I always recommend pairing it with a creamy soup. Seriously, try dipping a chunk of this garlic-butter goodness into my Chicken Gnocchi Soup—it’s a game-changer. The soft interior soaks up just enough broth while the cheese melts perfectly. It elevates any simple family dinner into something truly special and indulgent!
Storage and Reheating Instructions for Leftover Cheese Bread
I know, I know. Thinking about leftovers when this cheese bread is fresh seems crazy, but trust me, there are usually a few pieces left the next day after a big group comes over. The great news is that this bread holds up surprisingly well, but we have to treat the cheese right, or we end up with chewy, rubbery slices instead of that glorious, gooey texture we worked so hard to achieve.
When storing what’s left, you need to keep the air out, plain and simple. I let the bread cool down completely—and I mean cool—and then I wrap it tightly in plastic wrap first, and then slip the wrapped bread into a good quality, airtight container. This locks in whatever moisture is left. You can generally keep it on the counter for a day if your kitchen isn’t too warm, but for longer storage, the fridge is best for up to three days.
Reheating is where we prevent textural sadness! Please, please resist the temptation of the microwave. A quick zap heats it up, sure, but it steams the bread and makes the biscuits tough. We want to revive that soft interior and get the cheese molten again. The absolute best way to bring back that fresh-from-the-oven feel is to use your actual oven first. Pop the container onto a baking sheet and warm it up at a lower temperature, say 300 degrees F, for about 8 to 10 minutes. This gently warms everything through.
Now, if you’re in a major hurry and only reheating one or two small pieces, the toaster oven works wonders too, using a slightly lower heat setting to avoid burning the cheese crust while the interior warms up. Think of it like giving your wonderful melted cheese bread a little spa treatment to refresh its texture. If you pair it with something like my Creamy Tuscan Chicken Skillet later in the week, nobody will ever know it wasn’t baked moments before serving!
Frequently Asked Questions About Making Cheese Bread
It happens to all of us! Even when a recipe seems super straightforward, once you actually sit down to bake, a few questions always pop up. That’s totally fine! The beauty of home cooking is learning to adapt and troubleshoot. I’ve gathered a few of the questions I get most often about this cheesy side dish, especially when folks are trying to deviate or tweak it for their next party. Hopefully, this helps you feel confident tackling this recipe! If you’re ever looking for a sweet companion to this savory bake, check out my tips for tops using the biscuit topping.
Can I use homemade dough instead of refrigerated biscuits for this cheese bread?
You absolutely can! If you have a favorite recipe for soft, yeasted dough or even quick bread dough, go for it. That will give you a different, usually softer, crumb structure than the canned biscuits, which tend to be a bit sweeter and flakier. The main thing you must adjust is the baking time. Since canned biscuits are already partially proofed and consistent in size, they bake predictably. Homemade dough will need more time to cook through, especially because we are layering it so thickly. Start checking it around the 35-minute mark, and make sure the internal temperature feels right before you pull it out so you don’t end up with raw dough hidden under that gorgeous cheese!
What is the best way to get a strong garlic flavor in my cheese bread?
If you are serious about flavor—and I know you are, because you’re here—fresh garlic is non-negotiable for that punchy, almost spicy garlic flavor. Don’t just toss the raw minced garlic into the butter! Here is my favorite little trick for deepening that flavor before we even coat the biscuits: gently warm your half-cup of butter over very low heat on the stovetop. Once it’s melted, add the minced garlic and let it simmer—barely, just tiny bubbles—for about 60 seconds. You are trying to infuse the fat with the garlic essence, not brown or burn it. Then, pull it off the heat and let it cool for just a minute or two before you toss in your seasonings and biscuits. This little step makes a world of difference in the final aroma and taste of your garlic cheese bread!
Estimated Nutritional Data for This Cheese Bread
Now, let’s talk realities for a minute. Because this recipe is pure, decadent comfort food—loaded with buttery biscuits and glorious melted cheese—it’s definitely not the lightest thing on the menu! But hey, who’s eating this bread expecting a salad? This is for savoring, celebrating, and enjoying deeply. When I whip this up, I always tell everyone to enjoy every single piece because it’s made with love (and a decent amount of sharp cheddar).
The values provided here are estimates, of course, based on the ingredients listed and yielding 8 generous servings. If you use leaner cheese or skip some of that butter soak, your numbers will shift, but this reflects the rich experience you’re signing up for when you make this version of cheese bread.
- Serving Size: 1 Slice
- Calories: Approximately 280
- Total Fat: About 16g (with 9g Saturated Fat—that’s where the flavor lives!)
- Carbohydrates: Around 25g
- Protein: 9g
- Sodium: Be warned, it’s flavorful at 550mg
It’s rich, it’s satisfying, and it pairs perfectly with a simple main course. Enjoy it, and don’t worry about the numbers too much—that’s what a light salad is for tomorrow!
Share Your Experience with This Amazing Cheese Bread
And there you have it! We’ve gone super simple, intensely flavorful, and ended up with what I truly believe is the apex of easy, homemade comfort food. This incredible cheese bread, drenched in garlic butter and loaded with that gooey cheese stretch, is the kind of recipe that just connects people. It brings folks right back to the happiest moments around the dinner table, just like the memories that inspire so much of what I cook for you here.
I really hope you take the time this week to mix up a batch. Seriously, the smell alone while it’s baking is worth every single second of the 10 minutes of prep. Once you pull that golden loaf out of the oven and serve it hot—watching everyone reach in for that first cheesy piece—that’s the memory we’re trying to make, isn’t it?
I want to hear all about it! Did you use sharp cheddar like I suggested? Or did you get adventurous and throw in some Provolone? Please, leave a rating below so other home cooks can see how much you loved this Comfort Food Bread. And if you snapped a picture of the cheese pull, tag me on social media! You can reach out directly through my contact page if you have any lingering questions. Happy baking, friends. I’m already looking forward to seeing your incredible results!
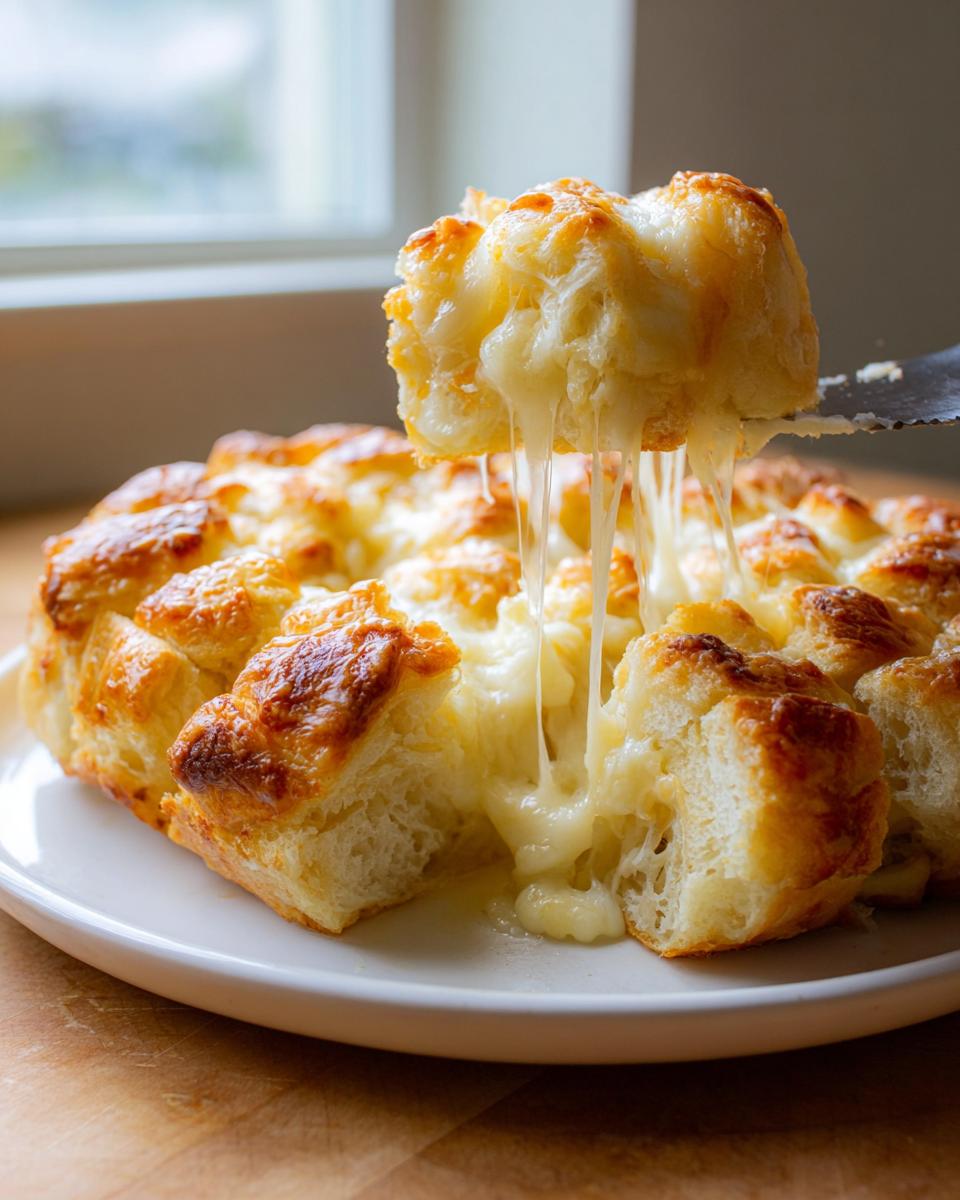
PrintIrresistible Cheesy Garlic Pull Apart Bread
Make soft, buttery garlic cheese bread with a gooey, melted cheese top. This pull apart bread is perfect as a savory side dish or appetizer for any gathering.
- Prep Time: 10 min
- Cook Time: 30 min
- Total Time: 40 min
- Yield: 8 servings 1x
- Category: Appetizer
- Method: Baking
- Cuisine: American
- Diet: Vegetarian
Ingredients
- 1 (13.8 ounce) package refrigerated biscuit dough
- 1/2 cup unsalted butter, melted
- 4 cloves garlic, minced
- 1 teaspoon dried Italian seasoning
- 1/4 teaspoon salt
- 1 1/2 cups shredded mozzarella cheese
- 1/2 cup shredded sharp cheddar cheese
Instructions
- Preheat your oven to 350 degrees F. Lightly grease a 9×5 inch loaf pan or a 1.5-quart bundt pan.
- Open the biscuit dough and cut each biscuit into quarters.
- In a medium bowl, whisk together the melted butter, minced garlic, Italian seasoning, and salt.
- Add the biscuit pieces to the butter mixture and toss gently until they are fully coated.
- Layer the coated biscuit pieces into the prepared pan. Sprinkle half of the mozzarella and cheddar cheese over the biscuit layers.
- Top with the remaining cheese.
- Bake for 25 to 30 minutes, or until the bread is golden brown and the cheese is melted and bubbly.
- Let the bread cool in the pan for 5 minutes before inverting onto a serving plate. Serve warm for that perfect cheesy pull apart experience.
Notes
- For extra flavor, use fresh garlic instead of jarred minced garlic.
- You can substitute the cheese blend with Monterey Jack or Provolone for a different melt.
- If you want a crispier top, place the pan under the broiler for the last minute, watching closely to prevent burning.
Nutrition
- Serving Size: 1 slice
- Calories: 280
- Sugar: 2
- Sodium: 550
- Fat: 16
- Saturated Fat: 9
- Unsaturated Fat: 7
- Trans Fat: 0.5
- Carbohydrates: 25
- Fiber: 1
- Protein: 9
- Cholesterol: 35