
There’s just nothing better on a chilly evening than wrapping your hands around a giant, steaming mug of hot chocolate, right? That deep, comforting chocolate warmth just melts the stress away. My goal with this recipe was to capture that exact feeling—that cozy hug—and put it right into a cookie. Seriously, these hot chocolate cookies are not just chocolate cookies; they are an experience!
We call them the ‘Ultimate Soft & Chewy Hot Chocolate Cookies with Marshmallow Center,’ and that name isn’t an exaggeration. I took the foundational principles of classic American comfort baking—the kind you learn at home—and applied the precision I picked up working in professional kitchens. We’re combining rich cocoa flavors with that gooey, surprising center that only proper technique can achieve.
If you’ve ever wanted to easily make the best comfort dessert for winter, or if you need a showstopper for your next holiday gathering, trust me, this is the one. We’ll walk through every step together to make sure you get that perfect, soft-baked result every single time, just like a warm sip of your favorite cocoa. Want to take your hot cocoa game even further? You should check out my recipe for the best creamy homemade hot cocoa mix!
- Why You Will Love These Hot Chocolate Cookies
- Gathering Ingredients for Your Hot Chocolate Cookies
- Expert Tips for Perfect Hot Chocolate Cookies
- Step-by-Step Instructions to Make Hot Chocolate Cookies
- Making Hot Cocoa Cookies Look Picture Perfect
- Storage and Reheating Instructions for Soft Baked Cookies
- Variations on Classic Hot Chocolate Cookies
- Frequently Asked Questions About Hot Chocolate Cookies
- Nutritional Estimate for These Cozy Dessert Recipes
Why You Will Love These Hot Chocolate Cookies
I know there are a million chocolate cookies out there, but honestly, these are in a league all their own. They hit all those cozy notes we crave when the weather turns cold. When you’re looking for something that truly mimics that nostalgic winter drink, these are your people.
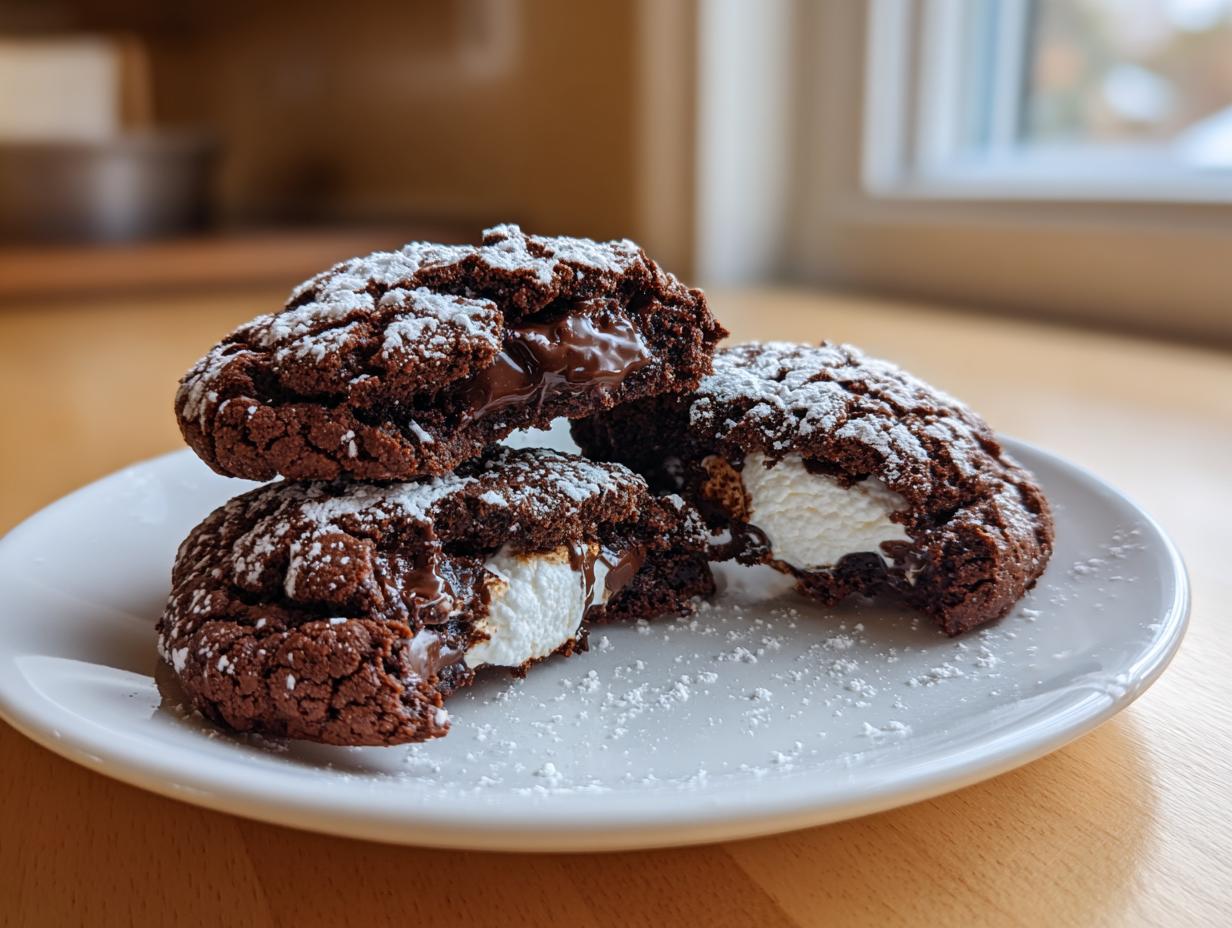
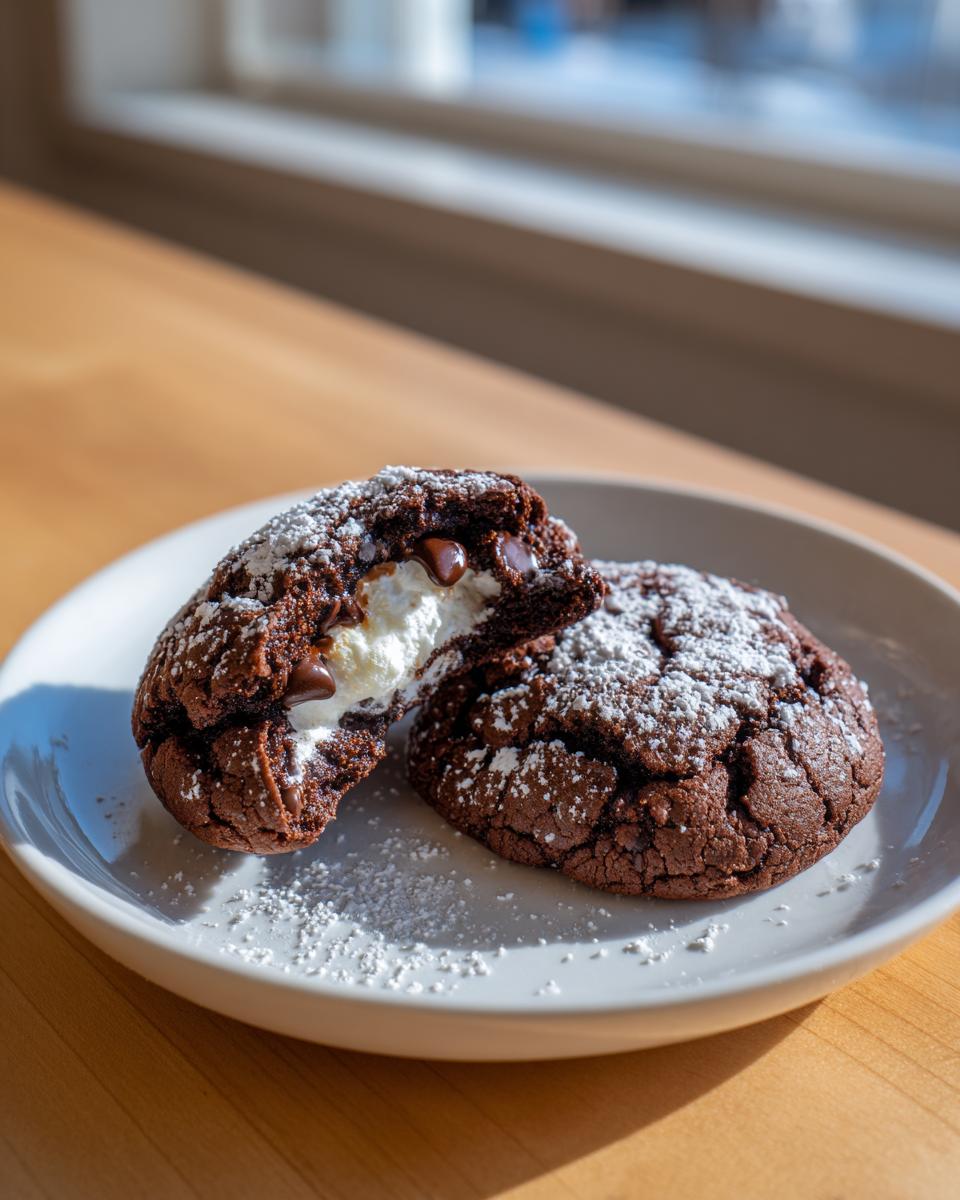
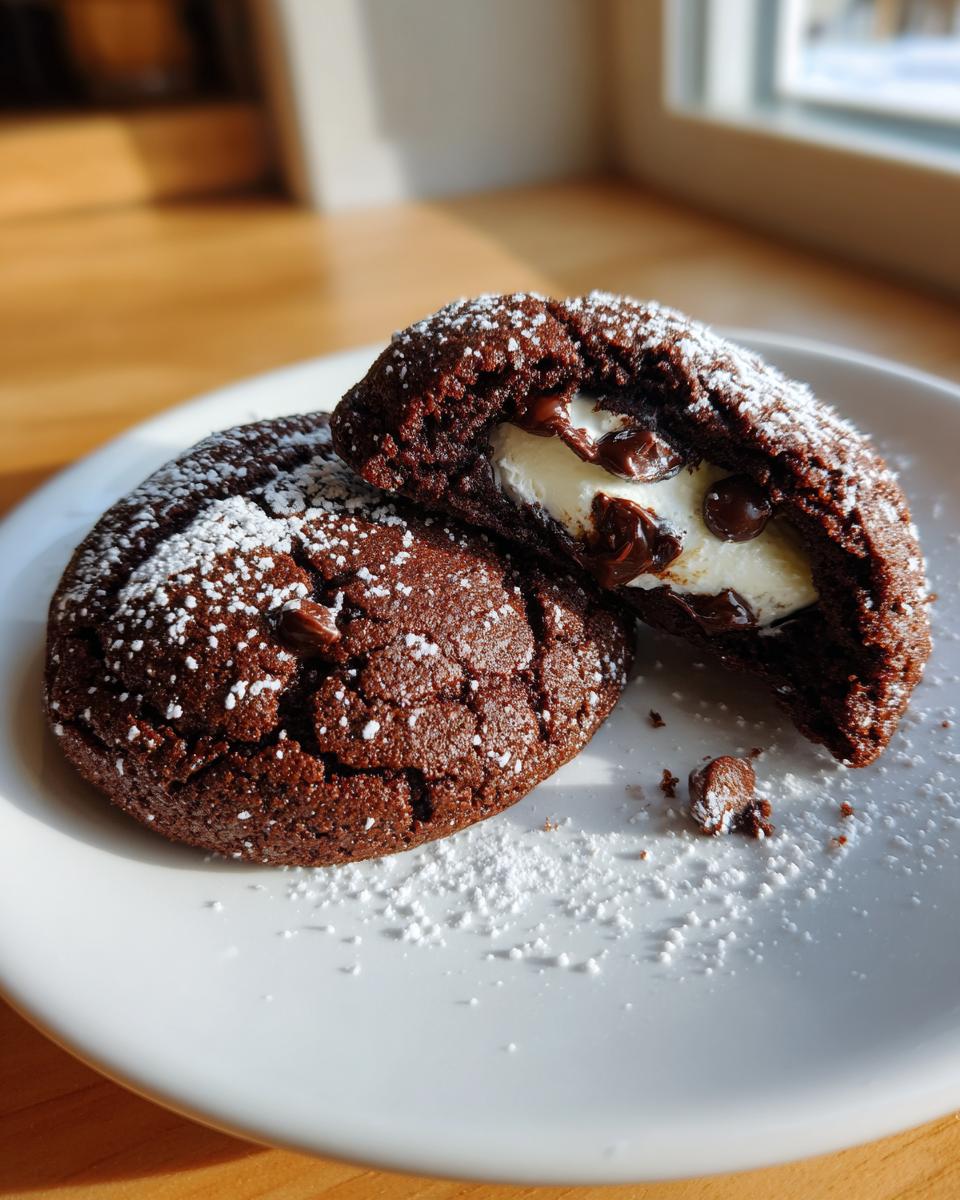
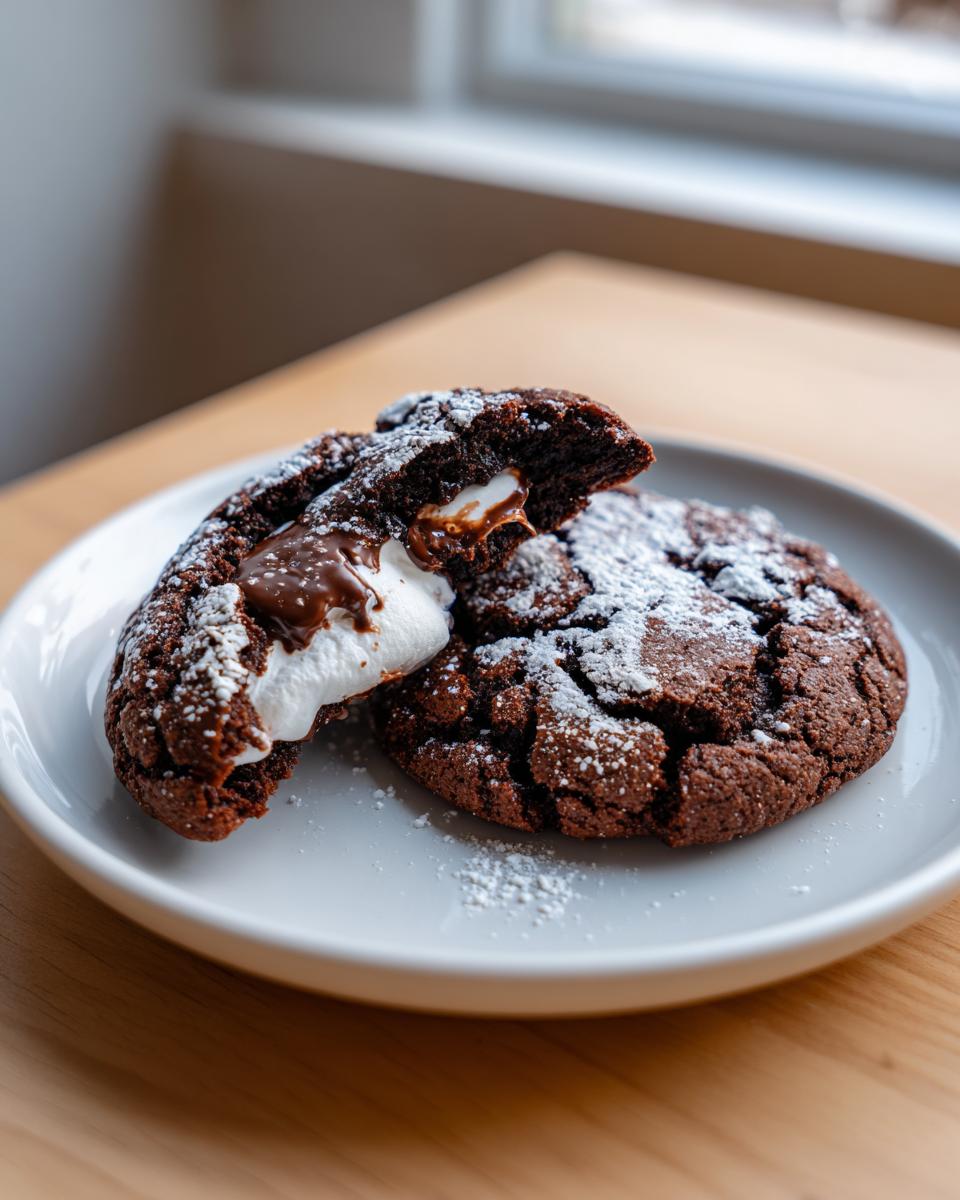
- That Perfect Gooey Center: You aren’t just getting chocolate chips here; we’re hiding a melted marshmallow surprise right in the middle. When you bite in, it’s pure, molten magic.
- Texture That Won’t Quit: They stay incredibly soft and chewy for days—if they last that long! We nail the ratio so they never turn dry or crumbly on you.
- Deep, Authentic Cocoa Flavor: Mixing both regular cocoa powder and instant hot chocolate mix means you get that signature, slightly sweetened taste reminiscent of a really good mug of hot cocoa.
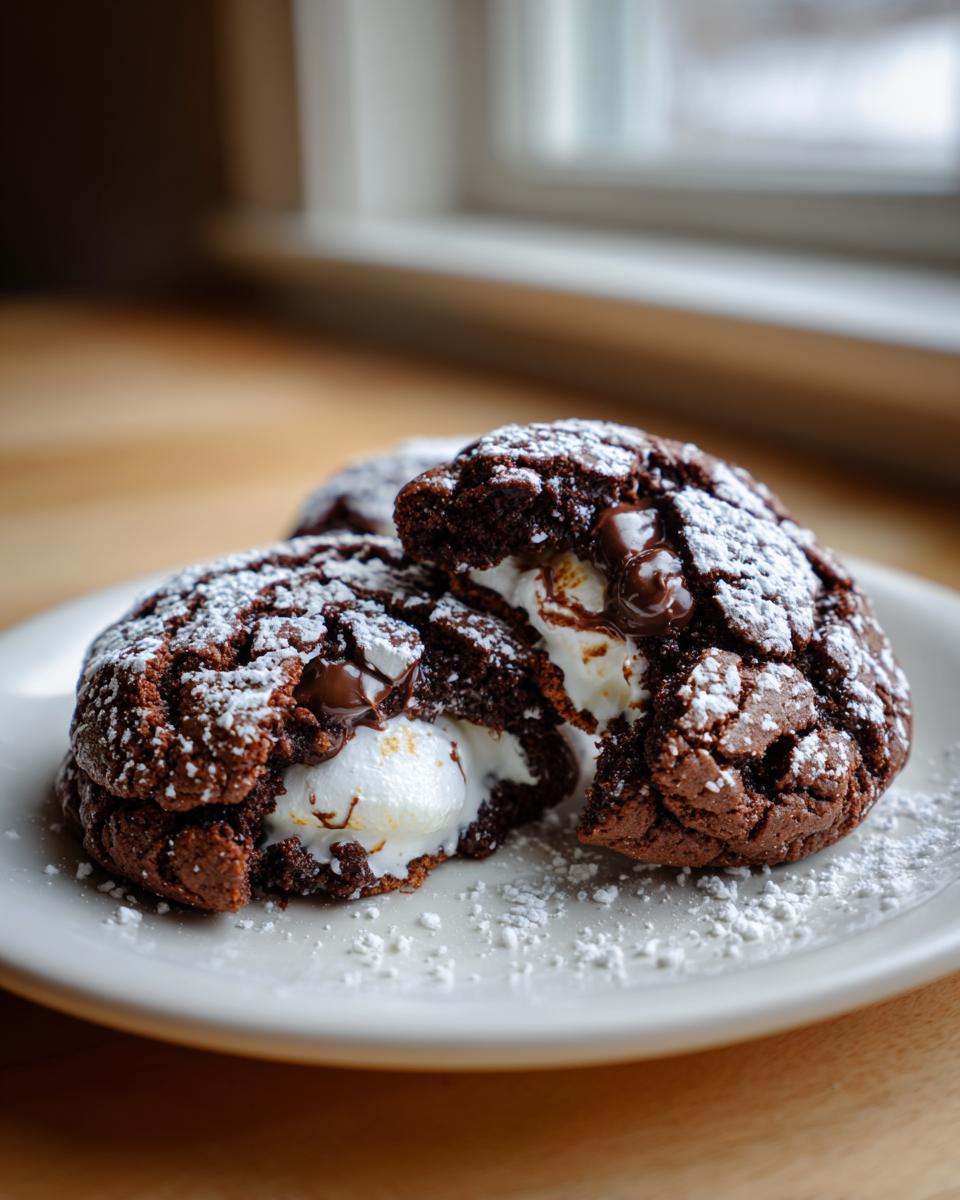
- Perfect for Holiday Cookie Exchanges: They look beautiful dusted in that snowy powdered sugar, which makes them an instant favorite when you bring a tray to any winter gathering or Christmas event.
- Simple Enough for Weeknights: Even though they taste totally decadent, they come together fast! You can be pulling these fudgy chocolate cookies out of the oven in under 40 minutes total.
Gathering Ingredients for Your Hot Chocolate Cookies
Okay, I want you to gather everything up before you even think about turning on the mixer. With baking, especially when you are trying to build that perfect texture, having everything measured and ready makes the difference between joy and total chaos! Since we are aiming for those hot chocolate cookies that taste just like the real thing, we need a few specific components.
Here is the list. Make sure you don’t swap out the brown sugar for white sugar—that’s key for moisture and that slightly caramelized flavor we need!
- 1 cup (2 sticks) unsalted butter, softened
- 1 cup packed light brown sugar
- 1/2 cup granulated sugar
- 2 large eggs
- 1 teaspoon vanilla extract
- 1 3/4 cups all-purpose flour
- 3/4 cup unsweetened cocoa powder
- 1 teaspoon baking soda
- 1/2 teaspoon salt
- 1/2 cup hot chocolate mix (like Swiss Miss or similar – this is our secret flavor booster!)
- 1 cup semi-sweet chocolate chips
- 1 cup mini marshmallows (these are sneaky—make sure they are designated for the center!)
- 1/2 cup powdered sugar (for dusting)
- 1/4 cup mini marshmallows (for topping, optional—but trust me, you want these!)
Don’t worry if your butter seems too soft; we’ll talk about dough chilling later! But for now, just make sure you have your rich cocoa powder and those chocolate chips lined up. We are building something special here, and the right ingredients make these chewy chocolate cookies sing!
Expert Tips for Perfect Hot Chocolate Cookies
Look, anyone can mix flour and cocoa, but if you want these to taste like the absolute boss of soft baked cookies, you need to pay attention to a few small details. I learned these little secrets back when I was trying to nail down the perfect chocolate brownie, and they work beautifully for these hot chocolate cookies, too!
First off, I highly recommend using a Dutch-process cocoa powder if you can find it. Not only is it darker and more dramatic looking, but it gives you that deep, less acidic chocolate flavor that really mimics actual hot cocoa powder. You want richness, not bitterness!
If you’re feeling rushed, don’t skip chilling the dough. I know, I know, warm dough is easier to scoop, but those extra 30 minutes in the fridge—or even an hour—really solidifies the fats. This stops the cookies from spreading too thin! Plus, firmer dough means better structure when you’re trying to seal in that gooey center.
Achieving the Ultimate Chewy Chocolate Cookies Texture
Chewiness comes down to two things in this recipe: the sugar ratio and the bake time. Never, ever let anyone tell you to swap all your brown sugar for white sugar here. The molasses in the light brown sugar is hygroscopic, meaning it holds onto moisture like a champ, which is precisely why these stay soft and not cakey.
When you bake them, watch them closely. If you bake them until a toothpick comes out perfectly clean, you’ve gone too far and you’ve made a cracker! For that perfect pull, I pull mine out when the edges look set but the center still looks just a tiny bit underdone or puffy. They finish baking on the hot pan after they leave the oven, keeping that essential melt.
If you want to dive deeper into how fat ratios affect texture, you should take a peek at my notes on how I achieve chewiness in my brown butter sugar cookies. The principles are exactly the same for nailing down that perfect cookie structure!
Step-by-Step Instructions to Make Hot Chocolate Cookies
Alright, let’s get baking! These instructions follow the recipe exactly, but I’ll be right here coaching you through it, step by step, to ensure you get those beautiful, deeply flavored, and perfectly gooey hot chocolate cookies. Remember, precision doesn’t mean being stiff; it means paying attention to the rhythm of the mixing!
- First thing’s first: fire up your oven to 350°F (175°C). Get those baking sheets lined with parchment paper. Trust me, parchment paper is your best friend when dealing with rich chocolate recipes—it helps with cleanup and those cookies slide right off when they’re done.
- We start with the classic foundation. In a large bowl, you’re going to cream together that softened butter, the packed light brown sugar, and the granulated sugar. You want this mixture to get really light and fluffy, almost pale yellow. This is where we start building those air pockets that keep the cookie from baking up like a dense brick.
- Once you’ve got that creamy base, beat in your eggs one at a time, making sure each one is fully incorporated before you add the next. Then drizzle in that vanilla extract and mix until it looks homogenous.
- Now, switch bowls for a second. In a separate bowl, take a moment to properly whisk together your flour, your cocoa powder, the baking soda, the salt, and that vital ingredient—the instant hot chocolate mix. Whisking everything here ensures you don’t get any weird pockets of unmixed soda or just dry cocoa powder hiding in your final bake.
- Slowly, and I mean slowly, add those dry ingredients into your wet mixture. Keep the mixer on low speed. As soon as you see the last streaks of flour disappear, stop mixing! Overmixing at this stage develops the gluten too much, and that instantly turns your dream of soft baked cookies into something tough.
- Time for the chocolate boost! Gently fold in your cup of semi-sweet chocolate chips. Use a rubber spatula for this—you don’t want to deflate all the air you just worked so hard to incorporate.
- This is the fun part—the surprise center! Scoop about 1.5 tablespoons of the cookie dough and flatten it out a bit in your palm so you have a little disc. Place 3 or 4 of those mini marshmallows right in the middle of that disc. Then, carefully fold the dough up and around those marshmallows, pinching them closed completely to form a nice little ball. We have to seal them tight!
- If you want that beautiful, snowy look that screams cozy winter baking, gently roll your dough balls in powdered sugar now. Place them on those prepared baking sheets, leaving about 2 inches between them so they have space to spread out like little chocolate planets.
- Bake them for 9 to 11 minutes. Keep an eye on them! The edges should look set, like they’ve decided to stay put, but that center still needs to look a little soft. If they look totally dry, you’ve waited too long, but don’t panic—they will still be delicious!
- Pull them out! Immediately after they come out of the oven, press just a few more of those little mini marshmallows right on top of each warm cookie. They will melt beautifully from the residual heat. Let them sit right there on the hot baking sheet for about 5 minutes; this lets the structure firm up just enough before you transfer them carefully to a wire rack to cool completely.
Mixing the Wet and Dry Components for Hot Chocolate Cookies
When we’re combining these two groups of ingredients, we’re aiming for balance. The wet ingredients—butter, sugars, eggs—need to be whipped until they are light. Why? Because we are physically beating air into that fat and sugar mixture! Those tiny air bubbles act as structure when they bake, making sure these aren’t flat, oily discs. You want that texture to be light and almost cloud-like before you introduce the flour.
Once you start adding the dry stuff—the flour, the cocoa, the soda—you must slow down. Seriously, drop the speed down low on your mixer, or just switch to folding by hand. If you see flour clinging to the side of the bowl, use your spatula to scrape it down quickly and mix for maybe five more seconds until it vanishes. That’s it. Stop mixing immediately. Overdeveloping the flour here equals tough cookies, and nobody wants a tough hot chocolate cookie! If you’re looking for other recipes where technique makes all the difference in texture, you really need to check out my tips for chocolate crinkle cookies; the principles for keeping them fudgy are nearly identical.
Assembling the Marshmallow Center in Your Hot Chocolate Cookies
This is the crucial part that takes these straight from good chocolate cookies to *the best* hot chocolate cookies. The secret to getting that beautiful, gooey, slightly messy pull when you break one in half is making sure those marshmallows are completely encased in dough. I’m talking zero exposed marshmallow poking out!
When you wrap the dough around, treat it like you’re making a little dough dumpling. You want a good, thick layer of dough—about a quarter inch all the way around—between the marshmallow and the outside world. If you don’t seal it perfectly, that marshmallow melts out too fast in the oven, burns a little on the bottom of the pan, and you end up with a sad, flat chocolate cookie instead of a thick, **gooey chocolate dessert**.
Also, if you chilled the dough (and I hope you did!), let the dough balls sit on the counter for about ten minutes before you start enclosing the centers. It makes shaping so much easier, and you won’t accidentally tear the dough wrapper trying to stretch it around that little marshmallow heart. These tricks ensure every bite is soft, fudgy, and has that satisfying, melty core!
Making Hot Cocoa Cookies Look Picture Perfect
Now that you’ve mastered the inside—the rich dough and that melted marshmallow core—we have to talk about how these beautiful hot chocolate cookies look when they come out of the oven. This is when they really transform into those stunning winter treats! Plus, this step is incredibly easy, but it makes all the difference, especially if you’re taking them to a party or putting them next to some other showstopping holiday cookie recipes.
The easiest way to get that iconic look, like a perfect little snowball sitting on your plate, is the powdered sugar dusting. Remember Step 7 in the instructions? If you rolled the dough balls in powdered sugar before baking, they come out looking fantastic. The heat of the oven slightly melts that outer layer, setting it into a gorgeous, slightly crackled, matte finish that just screams cozy dessert.
If you didn’t dust them before baking, or if the powdered sugar melted off a bit too much, don’t worry! You can always give them a light sift of powdered sugar once they are completely cooled down. Just use a fine-mesh sieve over the cooling rack, and dust gently. It hides any imperfections instantly!
But the real showstopper, the thing that truly reminds you of sipping a fresh mug of cocoa, is adding those final marshmallows. You absolutely must add these *after* they come out of the oven, while the cookies are still piping hot. If you put them on before baking, they’ll just melt away entirely or burn.
Take those few extra optional mini marshmallows, press them right onto the surface of the cookie as soon as you take the tray out, and let them sit for those five minutes while they cool on the pan. The residual heat softens them just enough so they become that slightly tacky, gooey, beautiful topping. They look incredible, and the texture contrast between the chewy cookie and that warm, soft top is just heavenly. Seriously, these hot cocoa cookies look professional with almost zero extra effort!
Storage and Reheating Instructions for Soft Baked Cookies
One of the biggest issues with amazing cookies is trying to keep them amazing! Since these are designed to be ultra-soft and chewy, we need to treat them right, or that fantastic moisture we worked so hard to trap inside with the marshmallow filling will escape. The good news is that these soft baked cookies actually hold up really well if you follow a couple of basic rules.
First, patience is required before storing. You must let them cool completely on the wire rack first—I mean, totally cool. Trying to seal up warm cookies creates steam, and steam equals sogginess, which is the total opposite of what we want for these rich chocolate treats. Once they are completely room temp, put them into a truly airtight container.
If you’re storing them on the counter, they should easily last a good four to five days. Because of that gooey center, I wouldn’t push them past the fifth day, just to be safe. If you need them to last longer, storing them in the freezer is absolutely the way to go! Wrap them well in plastic wrap first, then pop them into a freezer-safe bag or container. They actually freeze beautifully for up to three months.
Now, if you tried freezing them or just left them on the counter for a couple of days and they are feeling a little firm, don’t toss them! We can bring that delicious, gooey center right back to life. This is my favorite trick for reheating them, especially on a cold day when you want that cocoa experience.
To revive your hot chocolate cookies, simply pop one or two onto a microwave-safe plate. Heat them in short bursts—start with 10 seconds, check them, and go for another 5 seconds if needed. The microwave works fast to soften the butter and melt that hidden marshmallow just enough so it oozes when you bite it. Just be careful not to overheat, or the cookie will get tough quickly. A few seconds, and these cozy dessert recipes feel like they were just pulled from the oven!
Variations on Classic Hot Chocolate Cookies
Part of the fun of having a solid base recipe, like this one for hot chocolate cookies, is knowing you can tweak it without worrying about the whole thing collapsing! We’ve got the perfect soft, brownie-like cookie texture established by the sugar and cocoa mix, so we can play around with flavors on top. Think of these as your foundation for the best winter baking ideas.
If you wanted these to be slightly more intense and less sweet, I highly recommend swapping out those semi-sweet chips for bittersweet or dark chocolate chunks. The bitterness of the dark chocolate cuts through the sweetness of the powdered sugar dusting and really makes the cocoa powder flavor pop. It pushes them right into that rich, fudgy category.
Another thing I love to do, especially around Christmas time, is lean into those peppermint notes. Peppermint and chocolate are just a match made in heaven, aren’t they? You can add just 1/4 teaspoon of pure peppermint extract right in with your vanilla when you cream the wet ingredients. It’s not overpowering, but it gives the cookie a bright, refreshing lift.
And speaking of flavor boosts, if you’ve ever tried my peppermint brownies, you know how good mint and dark chocolate are together. You can even use chopped-up peppermint bark instead of some of the chocolate chips for texture, just be sure to chop it pretty finely so it doesn’t create a strange bump in your finished cookie shape!
If you are looking to experiment with other flavor pairings that work well with chocolate and cozy desserts, my recipe for peppermint brownies has some wonderful ideas on maximizing that mint-chocolate synergy that you could adapt here if you wanted an extra layer of festive flavor in these hot cocoa cookies!
Frequently Asked Questions About Hot Chocolate Cookies
I know when you dive into a new recipe, especially one as important as the ultimate cozy treat, you’re going to have questions. Baking should be fun, not stressful! I’ve gathered the questions I get most often about these hot chocolate cookies to help you feel 100% confident when you step into the kitchen.
Can I skip the marshmallow center in these hot chocolate cookies?
You absolutely *can*, if you must! But know that you are skipping the step that truly makes them taste like a mug of hot cocoa! If you skip the center, you aren’t going to have that surprise molten core. If you skip it, just make sure you still fold in the full cup of chocolate chips, and perhaps add an extra tablespoon of your instant hot chocolate mix to the dry ingredients to boost that cocoa flavor, since you’re missing the marshmallow moisture.
How do I make these fudgy chocolate cookies instead of chewy?
That’s a great question that touches on texture science! To push these toward a more fudgy chocolate cookie or brownie-like texture, you need to chill the dough. I recommend chilling the entire batch—after you’ve rolled them into balls—for at least an hour, or even up to overnight. Chilling solidifies the fat, which limits spread and concentrates the density. Also, remember what I said about baking time? For fudgy, bake them until the toothpick comes out with just a few moist crumbs clinging to it—not completely clean. That little bit of underbaking guarantees that intense, gooey texture!
Are these considered good holiday cookie recipes?
Oh, without a doubt! These are premium holiday cookie recipes. They check every box: they are rich, they involve chocolate (always a crowd-pleaser), and when you dust them with that powdered sugar, they look like little snowy nuggets. They are excellent for cookie exchanges because they travel well (as long as they are cooled) and they are always the first one gone on any cookie platter. If you are looking for more festive inspiration, I have a whole roundup of my favorite best Christmas cookies!
Can I use cake flour instead of all-purpose flour?
I wouldn’t recommend swapping 1:1 here. Cake flour has a lower protein content, which makes things incredibly tender—which sounds good, right? But because this recipe relies on the stability of having that little bit of gluten structure to contain that melting marshmallow, using cake flour might actually make the structure too fragile. You could end up with a soft cookie that crumbles apart instead of a satisfyingly chewy chocolate cookie. Stick to all-purpose flour for the tested success here!
Nutritional Estimate for These Cozy Dessert Recipes
Now, I know that when we are deep in the comfort zone making things like these amazing hot chocolate cookies, nutrition isn’t usually the first thing on our mind. But I always like to give you folks a general idea of what you are working with, just so you can plan accordingly!
I pulled these estimates based on the exact ingredient weights listed in the recipe above, but keep in mind that these numbers are just that—estimates. They can change slightly depending on the brands of cocoa powder, chocolate chips, or the exact size of your eggs. They certainly don’t account for any extra powdered sugar you might dust on top, which can add a little something extra to the sugar count!
This keeps everything transparent, allowing you to see the breakdown for one cookie, assuming this recipe makes its intended yield of 24. We are dealing with a rich, chocolatey treat here, so enjoy them responsibly!
- Serving Size: 1 cookie
- Calories: 210
- Sugar: 22g
- Fat: 11g (Includes 7g Saturated Fat)
- Carbohydrates: 28g
- Protein: 3g
- Sodium: 110mg
See? Not too bad for something that tastes like you dipped a spoonful of fudge right into melted marshmallows! These are perfect for those cozy winter nights when you just need that little bit of chocolate comfort. Enjoy every single bite of these cozy dessert recipes!
PrintUltimate Soft & Chewy Hot Chocolate Cookies with Marshmallow Center
Make these soft, chewy chocolate cookies that taste just like a warm mug of hot cocoa. They feature a rich cocoa dough, chocolate chips, and a gooey marshmallow surprise inside, making them the perfect cozy dessert for winter baking or holiday cookie exchanges.
- Prep Time: 20 min
- Cook Time: 11 min
- Total Time: 31 min
- Yield: 24 cookies 1x
- Category: Dessert
- Method: Baking
- Cuisine: American
- Diet: Vegetarian
Ingredients
- 1 cup (2 sticks) unsalted butter, softened
- 1 cup packed light brown sugar
- 1/2 cup granulated sugar
- 2 large eggs
- 1 teaspoon vanilla extract
- 1 3/4 cups all-purpose flour
- 3/4 cup unsweetened cocoa powder
- 1 teaspoon baking soda
- 1/2 teaspoon salt
- 1/2 cup hot chocolate mix (like Swiss Miss or similar)
- 1 cup semi-sweet chocolate chips
- 1 cup mini marshmallows (for the center)
- 1/2 cup powdered sugar (for dusting)
- 1/4 cup mini marshmallows (for topping, optional)
Instructions
- Preheat your oven to 350°F (175°C). Line baking sheets with parchment paper.
- In a large bowl, cream together the softened butter, brown sugar, and granulated sugar until light and fluffy.
- Beat in the eggs one at a time, then mix in the vanilla extract.
- In a separate bowl, whisk together the flour, cocoa powder, baking soda, salt, and hot chocolate mix.
- Gradually add the dry ingredients to the wet ingredients, mixing on low speed until just combined. Do not overmix.
- Fold in the chocolate chips.
- Scoop about 1.5 tablespoons of dough and flatten it slightly in your palm. Place 3-4 mini marshmallows in the center, then wrap the dough around them to seal the marshmallow inside, forming a ball.
- Roll the dough balls in powdered sugar for a snowy effect, if desired. Place them on the prepared baking sheets, about 2 inches apart.
- Bake for 9 to 11 minutes. The edges should look set, but the center should still look slightly soft.
- Remove from the oven and immediately press a few extra mini marshmallows onto the tops of the warm cookies. Let the cookies cool on the baking sheet for 5 minutes before transferring them to a wire rack to cool completely.
Notes
- For the best gooey center, ensure the marshmallows are fully enclosed by the dough before baking.
- If you prefer a fudgier cookie, chill the dough for 30 minutes before scooping and rolling.
- You can substitute the mini marshmallows inside with chocolate chunks for a richer chocolate flavor.
Nutrition
- Serving Size: 1 cookie
- Calories: 210
- Sugar: 22
- Sodium: 110
- Fat: 11
- Saturated Fat: 7
- Unsaturated Fat: 4
- Trans Fat: 0
- Carbohydrates: 28
- Fiber: 2
- Protein: 3
- Cholesterol: 35