
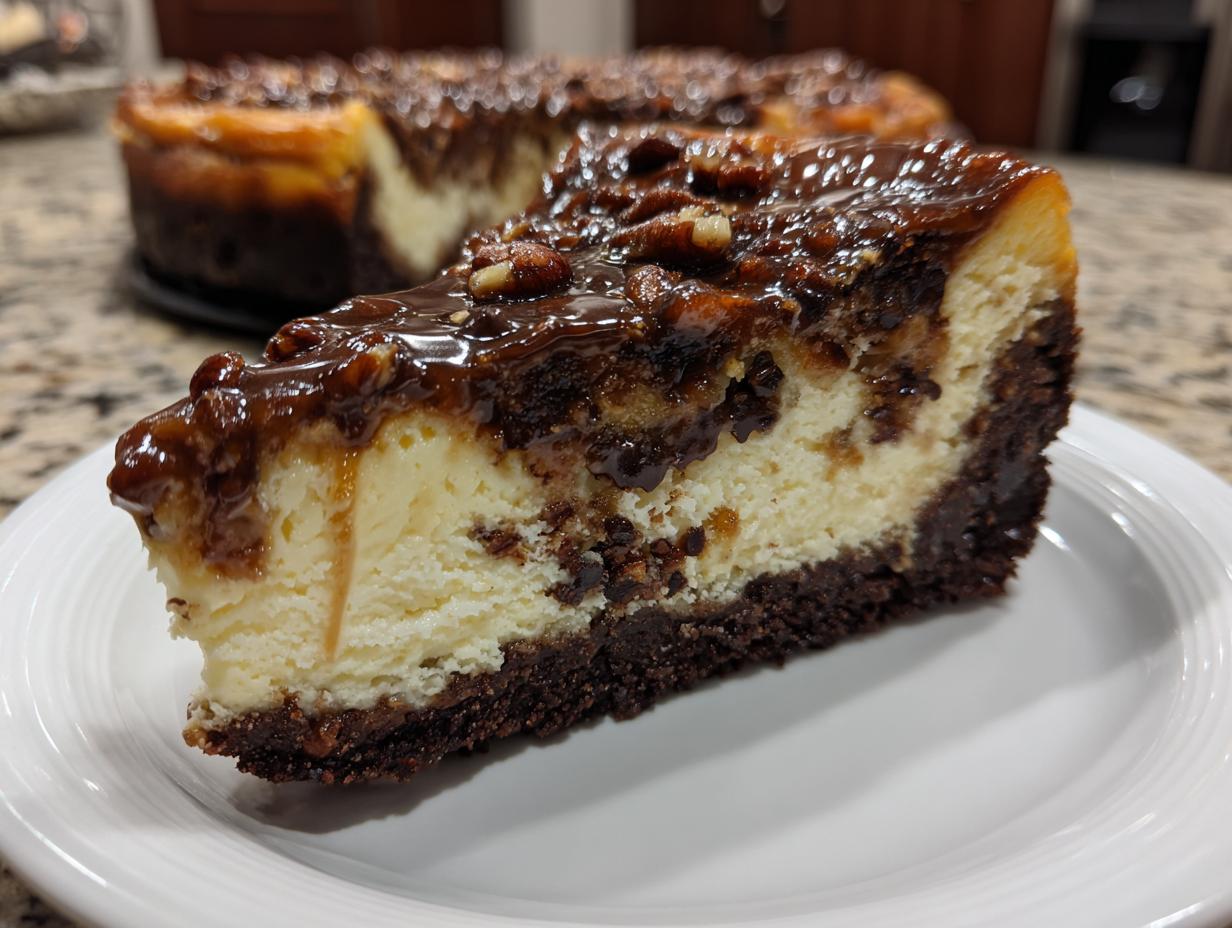
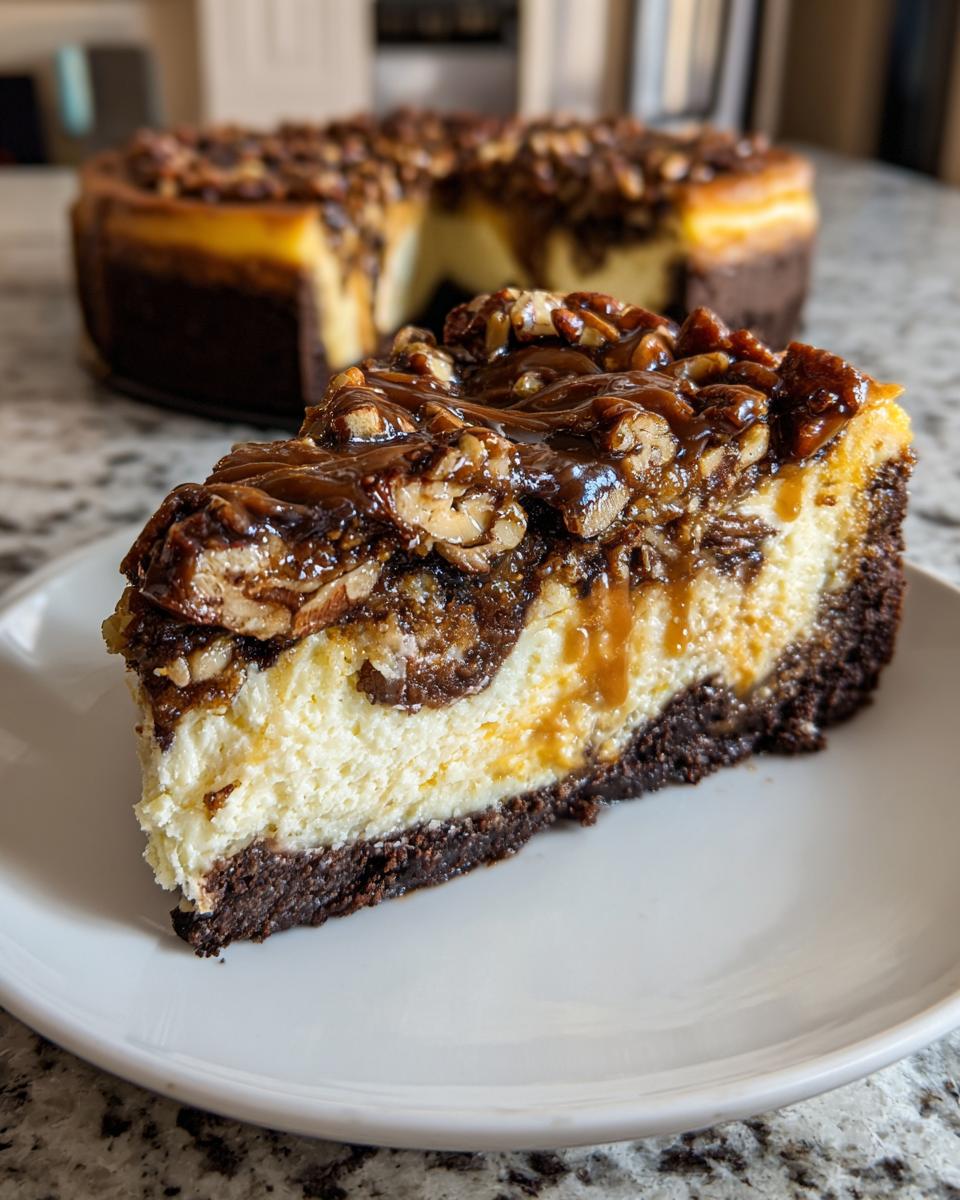
When you need a dessert that truly stops the show, forget the casual treats. We’re diving headfirst into pure indulgence. Every home baker needs one knockout recipe up their sleeve, and for me, that definitive showpiece is this Ultimate Decadent Baked Turtle Cheesecake. Forget those lighter, no-bake versions for a moment; we’re aiming for supreme richness here. My entire journey, from professional kitchens back to the home table, has focused on mastering classic American desserts, and this Turtle Cheesecake is the culmination of perfecting that creamy, crunchy, gooey balance. Trust me, this recipe is going to be your new holiday staple.
- Why This Ultimate Decadent Turtle Cheesecake Recipe Stands Out
- Gathering Ingredients for Your Turtle Cheesecake
- Step-by-Step Instructions for the Best Turtle Cheesecake Recipe
- Tips for Success with Your Decadent Cheesecake Recipe
- Variations on the Classic Turtle Cheesecake
- Serving Suggestions for This Chocolate Caramel Pecan Dessert
- Storage and Make Ahead Desserts Guidance
- Frequently Asked Questions About Turtle Cheesecake
- Estimated Nutritional Data for This Rich Chocolate Dessert
- Share Your Showstopper Turtle Cheesecake Creation
Why This Ultimate Decadent Turtle Cheesecake Recipe Stands Out
I know there are tons of quick desserts out there, but nothing beats the true elegance of a baked cheesecake. This isn’t some flimsy, refrigerated treat; this is a rich, Showstopper Dessert designed to leave an impression. The baked method gives us that signature density and texture you just can’t get otherwise. We load it up with all the turtle goodness: chocolate, tons of caramel, and those fantastic toasted pecans. It’s the ultimate indulgence for any celebration. You can find some of my other easy treats for planning ahead right here.
When people talk about the Best Turtle Cheesecake Recipe, they are talking about the texture, and that’s where the focus has to be.
Achieving the Perfect Creamy Cheesecake Filling
The secret to that incredibly smooth, Creamy Cheesecake Filling—the kind that melts in your mouth—comes down to two non-negotiable steps: the water bath and the slow cool-down. Using hot water in the oven creates gentle, steamy heat. This humidity keeps the top from drying out or cracking while the center sets perfectly. Then, letting it hang out in the turned-off oven for an hour is crucial. Don’t skip it! This slow transition keeps the structure stable, guaranteeing a smooth final slice every single time. It’s worth the extra planning when serving a dessert this decadent.
Gathering Ingredients for Your Turtle Cheesecake
Alright, before we even think about turning on the mixer, we need to talk about supplies. When you’re aiming for a show-stopping, Decadent Cheesecake Recipe like this one, ingredient prep is everything. I’ve meticulously broken down what you need below, organized by how it goes into the pan. Please, don’t substitute the cream cheese! It needs to be full-fat and definitely, absolutely softened to room temperature—otherwise, you get lumps, and we spent all that time perfecting the water bath for nothing!
Also, if you want truly fantastic pecans, take five minutes to toast them first! It wakes up all those nutty oils, making them incredible. If you need a guide for that, check out my method for perfect nuts right here. This attention to detail is what turns a good Turtle Cheesecake into the *best* one.
Ingredients for the Chocolate Crust
- 1 3/4 cups chocolate wafer crumbs (about 35 cookies)
- 1/4 cup granulated sugar
- 6 tablespoons unsalted butter, melted
Ingredients for the Creamy Turtle Cheesecake Filling
- 3 (8 ounce) packages cream cheese, softened
- 1 1/2 cups granulated sugar
- 1/4 cup all-purpose flour
- 1 teaspoon vanilla extract
- 1/4 teaspoon salt
- 3 large eggs
- 1/2 cup sour cream
Toppings and Swirls for the Turtle Cheesecake
- 1 cup caramel sauce, divided (make sure you have extra for drizzling later!)
- 1 cup chopped pecans, toasted
- 1/2 cup semi-sweet chocolate chips
Step-by-Step Instructions for the Best Turtle Cheesecake Recipe
Now for the exciting part! This is where we turn those lovely ingredients into the most incredible Turtle Cheesecake you’ve ever sliced into. Baking cheesecake sounds intense, but honestly, once you have your layers ready, it’s more about watching and waiting. Just follow these steps precisely, especially around the mixing and cooling, and you’ll avoid 99% of the usual cheesecake drama. If you happen to be making your own luscious caramel topping, maybe check out my sea salt caramel recipe for an extra layer of flavor!
Preparing and Pre-Baking the Chocolate Crust
First things first: 325 degrees F is our target oven temperature. Before anything else, wrap the outside of your 9-inch springform pan completely and tightly with heavy-duty aluminum foil. You need a good seal because this pan is going into a water bath later! For the crust, mix your chocolate wafer crumbs with the sugar, add the melted butter, and mash it all together until it feels like wet sand. Press that mixture firmly into the bottom and about an inch up the sides of your foil-wrapped pan. Pop it into the oven for just 10 minutes to set it. Let it cool down a touch while you start the important part—the filling.
Mixing the Creamy Cheesecake Filling
This is where technique matters most for a smooth texture. Take your softened cream cheese—remember, room temp is key!—and beat it until it’s absolutely lump-free. Then, gently add the 1 1/2 cups of sugar and the flour, mixing until it just comes together. Now for the eggs: Add them one at a time, mixing *only* until you see the yolk disappear before adding the next one. Seriously, don’t overbeat once those eggs are in; we don’t want air bubbles causing issues later. Finish by stirring in the vanilla, salt, and sour cream gently by hand.
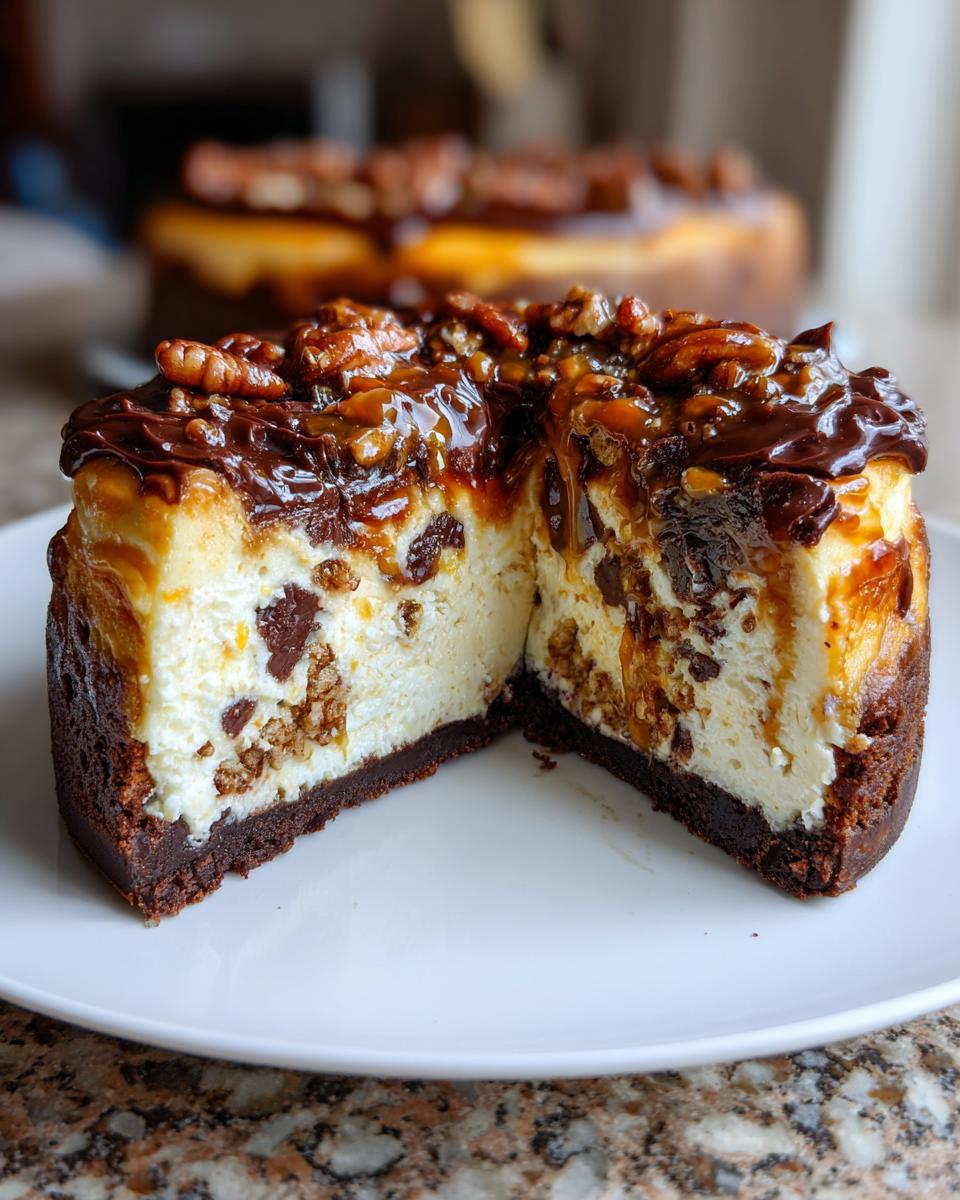
Layering and Swirling the Turtle Cheesecake
Time to build the layers that make this a true Turtle Cheesecake! Pour about half of that gorgeous, creamy batter right over your cooled chocolate crust. Now, grab half of your caramel sauce and drizzle it over the batter. Then sprinkle half of your toasted pecans and half of those semi-sweet chocolate chips right on top of the caramel. Repeat! Pour the remaining batter, drizzle the rest of your caramel, and top with the remaining pecans and chips. You’re creating these beautiful pockets of goodness throughout the cake.
Baking the Turtle Cheesecake Using a Water Bath
Take that foil-wrapped springform pan and set it inside a larger roasting pan. Carefully pour hot water into the roasting pan until it comes about halfway up the sides of your cheesecake pan. This water bath insulates the cake and keeps things super moist! Slide the whole setup into that 325-degree oven. You’re looking at 60 to 75 minutes. It’s done when the edges look set, but the very center still has that tiny, nervous little jiggle when you nudge the pan.
The Essential Slow Cooling Process
Resist the urge to pull it out immediately! If you cool a cheesecake too fast, it shrinks away from the sides and cracks on top. After that 60 to 75 minutes, just turn the oven off completely. Prop the oven door slightly open—I usually stick a wooden spoon in the door jam—and let the cheesecake relax in that residual heat for a full hour. Trust me, this slow cool-down is the secret weapon against cracks. After the oven hour? Take it out of the water bath, let it cool on a rack, and then it’s chilling time—at least six hours, or better yet, overnight!
Tips for Success with Your Decadent Cheesecake Recipe
Making a show-stopping dessert like this Turtle Cheesecake requires a little precision, but honestly, it’s all about respecting the ingredients. We’re aiming for true Gourmet Cheesecake Baking quality, which means paying attention to small details. If you nail these few key points, you’ll move from just a good baker to someone who serves truly impressive desserts that everyone raves about. If you love decadent baking, you might also enjoy my rich recipes for chocolate cinnamon rolls!
Ingredient Temperature Matters for the Turtle Cheesecake
I can’t stress this enough: your cream cheese and your eggs need to be at true room temperature. If your cream cheese is even slightly cold, it will clump up, no matter how powerful your mixer is. Pull them out at least two hours before you plan to start. If your eggs are cold, they can shock the cream cheese mixture, leading to a less smooth texture overall. A room temp starting point gives you that beautiful, velvety base layer for our caramel and pecans to sit on.
Preventing a Cracked Turtle Cheesecake Surface
Dealing with cracks is the number one fear when making a baked cheesecake, but fixing it is easy if you remember the three golden rules. First: you absolutely must use that water bath we discussed; it’s non-negotiable for even cooking. Second: do not, I repeat, do not overmix once those eggs are in the batter. Mix just until combined. And finally, the slow cool-down is your safety net. Letting it hang out in the cooling oven for that hour is what settles the structure gently. Follow those three things, and your final Turtle Cheesecake will look pristine!
Variations on the Classic Turtle Cheesecake
One of the amazing things about a truly great flavor profile, like the one we have in this Chocolate Caramel Pecan Dessert, is how adaptable it is! While I strongly believe this baked version is the ultimate experience, I know sometimes you need speed or a different format. That’s where Classic Cheesecake Variations come into play. We can still capture that wonderful combination of chocolate, caramel, and nuts in different ways, which is perfect for parties or when you just don’t want to turn on the oven.
If you’ve mastered this one, I always encourage people to get creative! If you love chocolate goodness, you have to see my recipes for chocolate chip cheesecake cookies and my fudgy brownie cookies—just to keep that indulgent streak going!
Making No Bake Turtle Cheesecake
So, you’re craving a Turtle Cheesecake but it’s August and seventy degrees outside? I completely get it. For a No Bake Turtle Cheesecake, the main thing you have to swap out is the filling structure, obviously, since we aren’t baking! You’ll still want that rich chocolate crust, but instead of using eggs and flour, you’ll rely on heavy cream whipped stiffly or whipped topping folded into the cream cheese mixture. To ensure it sets up firm, you’ll need a stabilizer. Gelatin is the usual suspect here; dissolve it in a bit of hot caramel or water, let it cool slightly, and then gently fold it into your cream cheese base right before assembling. It sets up beautifully in the fridge.
Creating Mini Turtle Cheesecakes
If you are making Mini Turtle Cheesecakes—maybe for a buffet or just portion control (wink, wink)—the prep is almost identical, but the baking time changes drastically. You can use standard muffin tins lined with paper liners, or even use large silicone cupcake molds. The key thing to remember is that because the batter depth is so thin, they bake much, much faster. Instead of that 60 to 75 minutes we bake the full-size cake, your minis will likely be done in about 20 to 25 minutes. Always check them right at the 20-minute mark, looking for that set edge and slight jiggle in the center. They need that slow cool-down too, but it will be quicker in the oven!
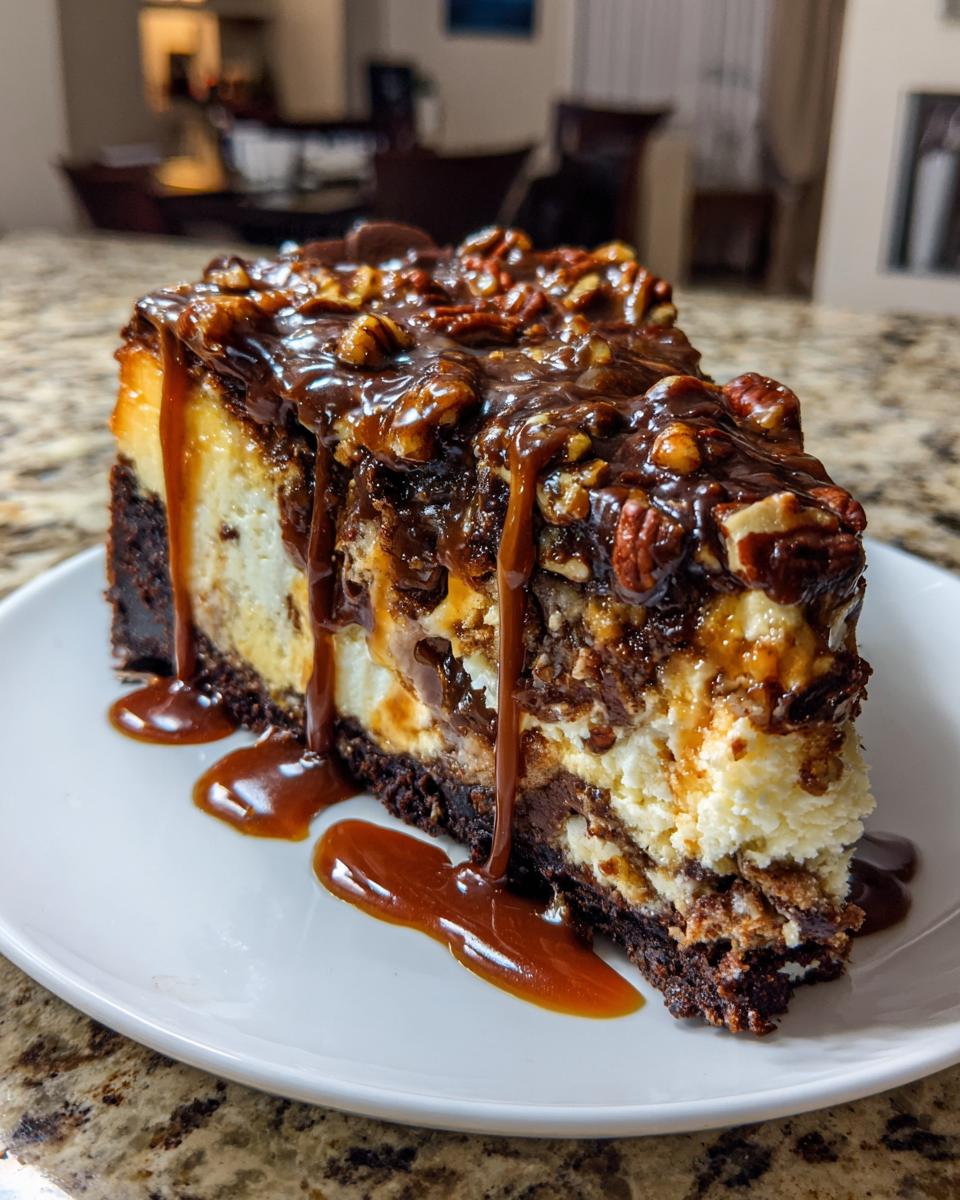
Serving Suggestions for This Chocolate Caramel Pecan Dessert
This ultimate Turtle Cheesecake is rich, right? It’s intense! Because it’s such an indulgent sweet treat, you don’t need a million sides competing with it, but the right pairing can truly elevate the experience. My go-to suggestion is a seriously good cup of black coffee, maybe an espresso, to cut through that creaminess. If you need something lighter, a small dollop of freshly whipped cream on the side is lovely—nothing sweetened, just pure, airy cream.
For a holiday setting, especially if you’re serving this as one of your main Holiday Dessert Recipes, you could pair it with a small glass of something rich, like my homemade eggnog recipe when the season is right. It’s pure decadence all around!
Storage and Make Ahead Desserts Guidance
The best news about this incredible Turtle Cheesecake is that it absolutely thrives on patience! Seriously, you can’t rush the chill time, but that makes it fantastic for planning. I always consider this one of my favorite make ahead desserts because it needs time to fully set up. After you’ve gone through the entire slow-cooling process, you need to cover that beautiful cake tightly—plastic wrap followed by foil is my preference—and get it into the refrigerator.
You need a minimum of six hours for it to chill through, but if you want that perfect, firm slice, overnight is the way to go. When it’s kept well-covered in the fridge, this decadent treat stays gorgeous and creamy for about four or five days. Yes, even with all that caramel and those pecans, it holds up wonderfully! This means you can bake it on a Thursday for your weekend bash, and it will still taste absolutely divine when you serve it on Saturday. Just remember to let it sit on the counter for about 20 minutes before slicing so it tempers just slightly from fridge-cold.
Frequently Asked Questions About Turtle Cheesecake
Whenever I share a recipe this grand, I always get a stream of questions coming in, and that’s great! It just means you’re thinking ahead about making your Turtle Cheesecake perfect. Usually, the questions center around structure, serving, and keeping things simple. I’ve gathered the most common ones right here so you can plan your baking day with total confidence.
Can I use a graham cracker crust instead of chocolate for my turtle cheesecake?
You absolutely can swap out that crust! If you prefer a lighter base, a standard graham cracker crust works just fine. You’d mix the crumbs with sugar and melted butter just like we did with the chocolate ones. But here’s my personal take: the traditional ‘turtle’ flavor profile really relies on that deep, slightly bitter chocolate crust to balance the intense sweetness of the caramel. For the absolute, Best Turtle Cheesecake Recipe experience, I really suggest sticking with the chocolate wafers.
What is the best way to reheat cheesecake?
This is a tricky one, because the answer is—you really shouldn’t reheat it! Cheesecake is meant to be enjoyed cold from the fridge or allowed to sit out for maybe 20 or 30 minutes to temper, which brings out that incredible Creamy Cheesecake Filling flavor. Heating it up will almost certainly cause it to sweat, soften too much, and potentially even crack or weep caramel. If you’ve stored it properly, it will taste just as amazing on day three as it did on day one, no reheating required!
Is this considered an Easy Homemade Cheesecake?
Well, that depends on what you call easy! If “easy” means mixing everything in one bowl in 15 minutes, probably not, because this is a baked, layered dessert. However, if “easy” means straightforward steps without fussy professional techniques—then yes, I absolutely consider this an Easy Homemade Cheesecake! The water bath sounds fancy, but it’s just a pan of water. The crucial steps are slow cooling and not over-mixing the eggs. If you can follow those three things, you’re good to go. It’s accessible, I promise!
Estimated Nutritional Data for This Rich Chocolate Dessert
Look, when you’re diving into a slice of the Ultimate Decadent Baked Turtle Cheesecake, you know you aren’t reaching for a low-calorie snack! This is meant to be an indulgent sweet treat, a true celebration centerpiece. Because every single ingredient—from the chocolate wafer crust to the thick caramel swirls—is rich, the nutrition reflects that glorious reality. Keep in mind that these figures are just estimates based on standard portion sizes and ingredient quantities used in the recipe above. They should give you a general idea, but everyone’s slicing technique is a little different, right?
This kind of Rich Chocolate Dessert is best enjoyed in moderation, maybe alongside that cup of coffee we talked about earlier! Here is the breakdown for one generous slice, assuming 12 slices from the whole cake:
- Serving Size: 1 slice
- Calories: 550
- Sugar: 45g
- Fat: 35g
- Saturated Fat: 18g
- Carbohydrates: 55g
- Protein: 10g
- Cholesterol: 100mg
- Sodium: 350mg
That fat content is mostly due to that beautiful, dense cream cheese and butter content—it’s what gives us that satisfying, melt-in-your-mouth texture we worked so hard for! Enjoy every single bite of this masterpiece.
Share Your Showstopper Turtle Cheesecake Creation
Whew! If you’ve made it to the end, you have successfully navigated the path to making what I consider one of the most impressive Holiday Dessert Recipes out there. Seriously, every time I make this Turtle Cheesecake, I feel a genuine surge of pride when I slice into it.
Now that you’ve tasted the deep, gooey glory of this Chocolate Caramel Pecan Dessert, I really want to hear what you think! Did the water bath work its magic? Did the chocolate crust hold up perfectly? Please, hop down to the comments section below.
I’d be so grateful if you could leave a rating for the recipe—five stars if you agree it’s the best! And if you tried any of my suggestions, like adding a little something extra to your caramel swirl, share your secrets!
If you’re looking for another centerpiece idea for your next party, I’ve got a fantastic savory option too. You should definitely check out my recipe for a delicious holiday cheese ball to balance out all that sweetness. Happy baking, friend!
PrintThe Ultimate Decadent Baked Turtle Cheesecake with Chocolate Crust
Make this show-stopping Turtle Cheesecake featuring a rich chocolate crust, creamy filling, gooey caramel swirls, and crunchy pecans. This decadent recipe is perfect for holidays and special occasions.
- Prep Time: 30 min
- Cook Time: 75 min
- Total Time: 120 min
- Yield: 12 servings 1x
- Category: Dessert
- Method: Baking
- Cuisine: American
- Diet: Vegetarian
Ingredients
- 1 3/4 cups chocolate wafer crumbs (about 35 cookies)
- 1/4 cup granulated sugar
- 6 tablespoons unsalted butter, melted
- 3 (8 ounce) packages cream cheese, softened
- 1 1/2 cups granulated sugar
- 1/4 cup all-purpose flour
- 1 teaspoon vanilla extract
- 1/4 teaspoon salt
- 3 large eggs
- 1/2 cup sour cream
- 1 cup caramel sauce, divided
- 1 cup chopped pecans, toasted
- 1/2 cup semi-sweet chocolate chips
Instructions
- Preheat your oven to 325 degrees F. Wrap the outside of a 9-inch springform pan tightly with heavy-duty aluminum foil.
- Prepare the crust: In a medium bowl, combine the chocolate wafer crumbs and 1/4 cup sugar. Pour in the melted butter and mix until the crumbs are evenly moistened. Press the mixture firmly into the bottom and about 1 inch up the sides of the prepared springform pan. Bake for 10 minutes. Let cool slightly.
- Prepare the cheesecake filling: In a large bowl, use an electric mixer to beat the softened cream cheese until smooth. Gradually beat in the 1 1/2 cups sugar and flour until just combined. Mix in the vanilla extract and salt.
- Beat in the eggs one at a time, mixing only until each egg is incorporated. Gently stir in the sour cream. Do not overmix the batter once the eggs are added.
- Pour half of the cheesecake batter over the cooled crust. Drizzle 1/2 cup of the caramel sauce over the batter. Sprinkle with half of the chopped pecans and half of the chocolate chips.
- Pour the remaining cheesecake batter over the top. Drizzle the remaining 1/2 cup caramel sauce over the top layer. Sprinkle with the remaining pecans and chocolate chips.
- Place the foil-wrapped springform pan into a larger roasting pan. Carefully pour hot water into the roasting pan until the water reaches halfway up the sides of the springform pan (this is a water bath).
- Bake for 60 to 75 minutes, or until the edges are set and the center has a slight jiggle.
- Turn off the oven, crack the oven door open slightly, and allow the cheesecake to cool inside the oven for 1 hour. This slow cooling prevents cracking.
- Remove the cheesecake from the water bath and let it cool completely on a wire rack. Once cool, cover and refrigerate for at least 6 hours, or preferably overnight, before serving.
Notes
- To toast pecans, spread them on a baking sheet and bake at 350 degrees F for 5 to 8 minutes, watching closely to prevent burning.
- For a professional look, use a high-quality, thick caramel sauce for the topping.
- If you prefer a brownie bottom cheesecake, substitute the chocolate wafer crust ingredients with a layer of pre-baked, fudgy brownie batter pressed into the pan bottom.
Nutrition
- Serving Size: 1 slice
- Calories: 550
- Sugar: 45g
- Sodium: 350mg
- Fat: 35g
- Saturated Fat: 18g
- Unsaturated Fat: 17g
- Trans Fat: 0.5g
- Carbohydrates: 55g
- Fiber: 2g
- Protein: 10g
- Cholesterol: 100mg