
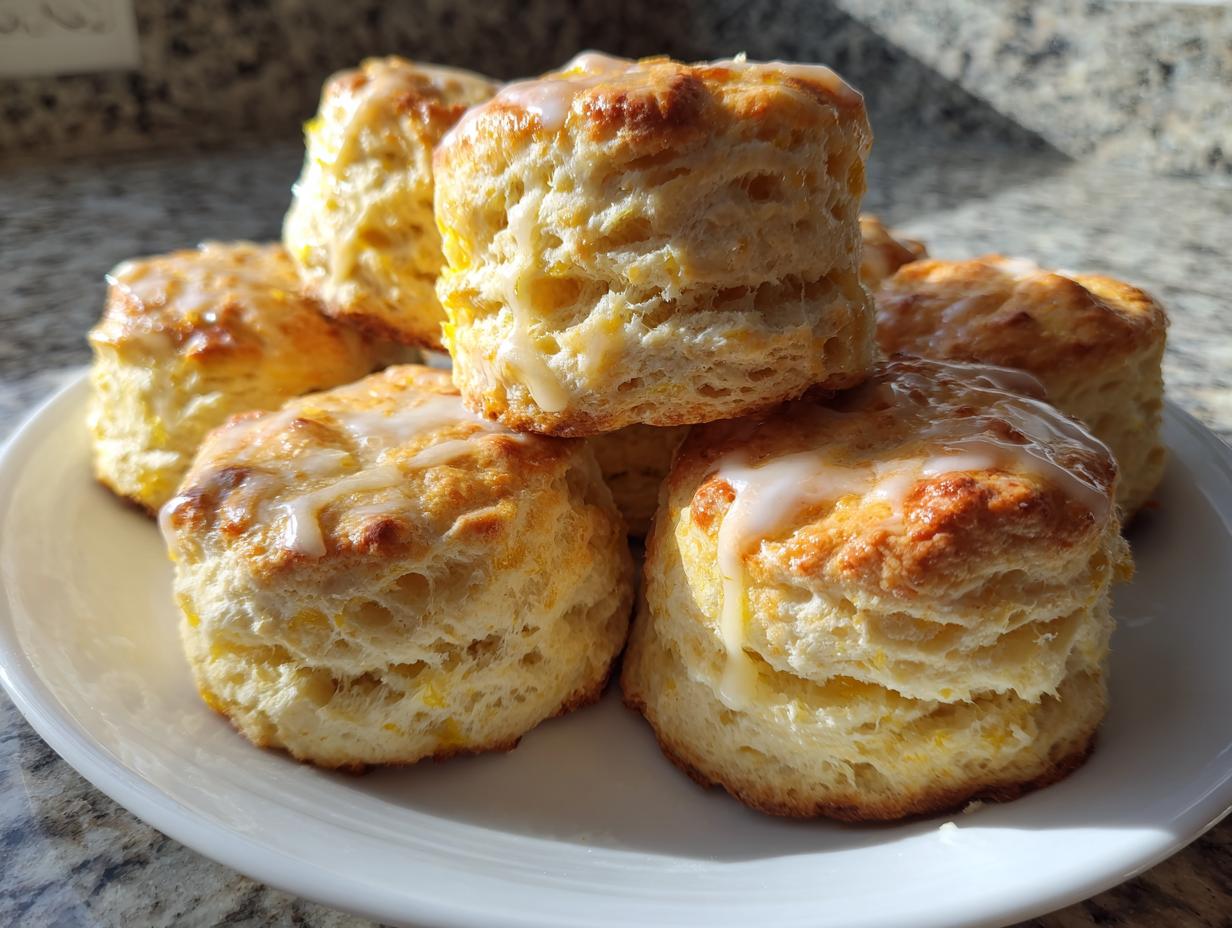
If you’ve ever taken a bite of a truly magnificent scone—one that’s both towering and tender, buttery enough to melt on your tongue, and light enough to float—you know the difference between a good baked good and a great one. I spent years chasing that perfect texture, studying everything from British tearoom classics to our own American brunch favorites. I realized the secret wasn’t complexity; it was coldness and commitment to classic technique. Trust me, perfecting these scones is one of the most rewarding things you can do in the kitchen. This Classic Buttermilk Scones recipe is the culmination of that work, ensuring you get flaky, tall results every single time, just like the ones I remember from my grandmother’s table.
We honor the heritage of classic American baking here, but we’re not afraid to get hands-on. Making great buttery baked goods is achievable for everyone! When you master the fundamentals in this recipe, you’ll feel like a true professional baker, ready to tackle any brunch or afternoon tea spread. You won’t need complicated equipment, just a keen attention to keeping things icy cold. If you’re looking for a simple way to elevate your weekend breakfast (and maybe use up some buttermilk), you’ve come to the right place. We’re aiming high—literally—for scones that practically stand at attention on the plate. Ready to get started? This recipe is so straightforward, you might want to check out my tips for fluffy shortcake next!
- Why This Classic Buttermilk Scones Recipe Works (The Secrets to Tall Scones)
- Gathering Ingredients for Your Buttery Baked Goods Scones
- Step-by-Step Instructions for Making Scones
- Tips for Perfect Homemade Afternoon Tea Treats Scones
- Serving Suggestions for Best Tearoom Scones
- Storage and Reheating Instructions for Scones
- Frequently Asked Questions About Making Scones
- Estimated Nutritional Data for Classic Scones
- Share Your Perfect Scones Creations
Why This Classic Buttermilk Scones Recipe Works (The Secrets to Tall Scones)
When I first started baking, my scones always came out flat, dense little discs. I thought I was doing something wrong with the flour, but the real culprit was warmth! The biggest of my Tall Scones Secrets revolves around temperature control. If you want those beautifully layered, flaky results that rival the best tearooms, you have to keep everything frigid. I learned this the hard way—I once tried to rush things by cutting the butter in when it was slightly soft, and the dough just melted together. No steam pockets, no rise! Follow these simple rules for how to make flaky scones, and you’ll get height and incredible tenderness every time.
The Importance of Cold Ingredients for Fluffy Scones Recipe
The magic happens in the oven when those tiny, un-melted chunks of butter hit the heat. They instantly turn to steam, creating little explosions that push the dough up, giving you that airy loft. Cold buttermilk works just as hard, reacting perfectly with the baking powder for maximum lift. Don’t let your ingredients warm up!
The ‘No Twist’ Rule for Cutting Perfect Scones
This might sound silly, but it’s critical for height. When you use your biscuit cutter, press straight down firmly, and then lift straight up. Do *not* twist the cutter as you pull it out. Twisting seals the edges of the dough together. When the edges are sealed shut, the steam can’t escape upward when baking, and your beautiful fluffy scones recipe turns into sad, squat mounds. Press straight down; trust me on this one.
Mastering these basics is what transforms simple ingredients into truly luxurious buttery baked goods. If you want to see another example of using simple techniques for amazing results, check out my guide on making moist blueberry banana bread.
Gathering Ingredients for Your Buttery Baked Goods Scones
Alright, let’s talk about what actually goes into these show-stopping scones. As you know, the quality of your ingredients directly impacts how buttery and tender they turn out. For this recipe, the word ‘cold’ is our mantra. Everything needs to be chilled—I mean seriously cold—to ensure we get that beautiful lift we talked about earlier. You’ll want to have everything measured out before you even start mixing, which is part of my general approach to stress-free baking. We’ll divide everything clearly so you know exactly what goes into the dough and what’s reserved for that delightful sweet crown.
When you’re shopping, if you can find high-quality, cold buttermilk, it makes a world of difference. It really helps produce the most moist scone recipe possible. And speaking of deliciousness, once you get comfortable with this base, you can start playing with optional additions, like making my favorite creamy eggnog during the holidays to flavor things up later!
Base Ingredients for Tender Scones
This is the heart of our classic cream scones. Get these ready and make sure they are waiting in the fridge until the second you need them.
- 2 cups all-purpose flour
- 1 tablespoon baking powder (this gives us that crucial spring!)
- 1/2 teaspoon salt
- 1/4 cup granulated sugar (just enough sweetness)
- 1/2 cup (1 stick) cold unsalted butter, cut into small pieces
- 3/4 cup cold buttermilk (non-negotiable for texture!)
- 1 large egg, beaten (for the wash)
- 1 tablespoon milk (to thin out that wash a bit)
Optional Lemon Glaze Toppings
If you want to upgrade your buttery baked goods to true coffee shop style status, you need this glaze. It only takes two minutes, but it makes such a difference.
- 1 cup powdered sugar
- 2 tablespoons fresh lemon juice (the zest pairs brilliantly with a classic scone!)
Step-by-Step Instructions for Making Scones
Okay, now that we have our perfectly cold ingredients assembled, we move into the fun part! Believe me, watching these little dough rounds puff up in the oven is incredibly satisfying. Remember what I always say: baking is all about trust—trust your recipe, trust your tools, and trust that cold butter is your best friend. We’re aiming for a total active time of about 30 minutes, so this is perfect for a spontaneous weekend baking project or when you need quick breakfast pastries that taste like you spent all morning on them.
Mixing Dry Ingredients and Cutting in Butter
First things first: get that oven preheated to 400°F (200°C) and line that baking sheet. It needs to be hot when the scones hit it! In your biggest bowl, whisk together the flour, baking powder, salt, and sugar. Now for the butter. Take your cold butter pieces and gently work them into the dry mix. I like using my trusty pastry blender for this, but your fingertips work just fine if you move fast! Stop mixing when you have coarse crumbs, and you can still see some pieces of butter about the size of small peas. Those pea-sized bits are what make glorious layers!
Forming and Cutting the Scones Dough
Pour that cold buttermilk in all at once. Use a fork to gently bring everything together until it just looks combined—it should be shaggy, not smooth. Seriously, if it looks too dry or too messy, you’re doing it right! Turn that shaggy dough out onto a lightly floured surface. We keep the kneading here to an absolute minimum—just 3 or 4 gentle folds until it holds its shape. Pat it out to about 3/4 of an inch thick. Now, grab your biscuit cutter (dipped in flour!) and press straight down, making sure not to twist. Place those lovely rounds snug next to each other on the sheet. A little closeness helps them bake up taller!
Baking and Applying the Glazed Scone Toppings
Before they go into that hot oven, we give them a little egg wash. Just whisk that egg with a tablespoon of milk and brush the tops lightly. This is what gives you that beautiful, deep golden color that makes them look like they came straight from a fancy bakery trying to achieve coffee shop style scones. Bake them for 12 to 15 minutes until they are nicely browned. While they cool slightly on the rack, whisk up your powdered sugar and lemon juice for the glaze. Drizzle that bright glaze over them while they are still warm—that’s the ultimate indulgence! If you want to see another quick-bake recipe that uses a similar mixing theory, take a look at my recipe for easy artisan bread.
Tips for Perfect Homemade Afternoon Tea Treats Scones
You’ve mastered the technique, and now you have this fantastic, reliable base dough. That’s the real achievement! Because this recipe is so versatile, it’s the perfect starting point for all sorts of homemade afternoon tea treats. We want to make sure your moist scone recipe stays consistent, whether you jazz it up with fruit or go savory. I’ve taken notes from years of testing, and here are the crucial adjustments and fixes to keep your scones looking and tasting like they came from the best London bakery—truly reaching coffee shop style scones quality right in your own oven!
Flavor Variations for Your Scones
The basic buttermilk dough is wonderful on its own, especially with that bright lemon glaze, but don’t stop there! If you want to mimic flavors you often see around the holidays or in seasonal menus, it’s super easy with this recipe. For something like a Cranberry Orange Scone, just fold in about 1/2 cup of dried cranberries and add the zest of one orange into your dry ingredients when you mix them up. Voila! Instant seasonal flavor.
For a cozy fall treat, swap in 1 teaspoon of cinnamon and 1/2 teaspoon of nutmeg blended right into the flour. That’s how you get those fragrant Cinnamon Scones everyone loves warming up with on a chilly morning. And for those who claim they can’t bake but love savory goods? Omit the 1/4 cup of sugar completely and mix in about 1/2 cup of sharp, shredded cheese—cheddar works beautifully. I even have a whole guide on making traditional Irish soda bread if you enjoy that quick bread style!
Troubleshooting Common Issues with Scones
Even with the best instructions, baking can be unpredictable, but usually, the problems are simple to fix next time. If your scones come out tough, I can almost guarantee you overworked the dough. The moment the buttermilk goes in, you stop mixing as soon as it *just* comes together. Sticky dough is better than tough dough! If they came out flat instead of soaring upwards, you either forgot to chill the butter thoroughly or you twisted that biscuit cutter. Remember that straight press! If you love these simple methods, you should look into how I handle making my best butter cookies to keep that tender texture consistent in all your baking.
Serving Suggestions for Best Tearoom Scones
Now that you have these beautiful, golden, and perfectly tall scones cooling on the rack, the real fun begins: figuring out how to eat them! Since we set out to create something worthy of the finest teatime, presentation really matters here. While the optional lemon glaze is delicious, nothing beats the true classic setup. Think of them as the humble but essential centerpiece for any excellent brunch or afternoon gathering.
For the ultimate experience, you simply cannot skip the accompaniments. I always serve these warm—maybe reheated for just a minute in the oven—alongside small bowls of high-quality strawberry jam and, of course, clotted cream. If you can find clotted cream, get it! If not, a generously whipped heavy cream, slightly sweetened, works beautifully.
I also love making them part of a larger spread. These buttery baked goods are fantastic alongside other morning meals. They are just as good dunked into a strong cup of English Breakfast tea as they are served alongside my recipe for French Toast Muffins if you’re hosting a large brunch crowd. Imagine setting out a platter of these flaky treasures—it instantly elevates the entire occasion from ‘just breakfast’ to ‘a delightful planned event’. If you’ve been inspired by fruit flavors and are looking for more ideas, you should definitely check out that strawberry cream scones recipe I saw getting so many saves online; it highlights how lovely fruit additions can be!
Storage and Reheating Instructions for Scones
These scones are truly at their peak the day you bake them. That crisp exterior and tender interior just fade a little overnight, but don’t worry! I have a few tricks so your buttery baked goods still taste like they just came out of the oven the next morning. Keeping them fresh means protecting that lovely crumb structure we worked so hard to achieve.
The most important rule for storage is using an airtight container. Whether you’re storing them for one day or three, sealing them up is key to retaining moisture. If you plan to keep them for more than 24 hours, I actually prefer freezing them immediately after they cool completely. They freeze beautifully!
Keeping Scones Fresh at Room Temperature
If I know we’ll eat them within a day, I just place the cooled scones in a large zip-top bag or a good high-quality airtight food container. Keep them away from anything too warm or humid, like sitting right near the stove. If you made the lemon glaze, it’s best to apply that *after* reheating, as the sugar can sweat and get sticky when stored airtight.
If you’re making quick jam to go along with them, you can check out my recipe for easy freezer jam—it pairs perfectly with these!
The Best Way to Reheat Stale Scones
Never, ever microwave a scone if you want it to remain flaky! The microwave steams them and makes them immediately tough and chewy. For the best results, reheat them in a conventional oven or an air fryer set to 300°F (150°C).
If they were stored at room temperature, give them about 5 to 7 minutes. If they were frozen, place them on a baking sheet and heat for about 10 to 12 minutes. You want them piping hot all the way through. Once they come out, they’ll snap back to life—that buttery interior softens up, and the edges regain a slight crispness. That’s when you drizzle on your glaze or add a smear of butter!
Frequently Asked Questions About Making Scones
I always get questions coming in after people try this recipe for the first time, and that’s fantastic! It shows you’re being thoughtful about your baking, which is exactly what leads to great results. Whether you’re new to baking or looking to refine your technique for the *best* scones, here are the things readers ask me most often about achieving that perfect, flaky texture we talked about.
Can I use regular milk instead of buttermilk in this easy scone technique?
You absolutely can substitute it in a pinch! Buttermilk truly shines here because its acidity is needed to tenderize the gluten slightly, giving us that lovely soft interior. If you don’t have buttermilk for this easy scone technique, don’t fret. Just take regular whole milk (about 3/4 cup) and stir in one teaspoon of white vinegar or lemon juice. Let it sit on the counter for about five minutes until it looks slightly curdled. That’s your makeshift buttermilk! The lift might be just a tiny bit less dramatic than the real deal, but you’ll still get fantastic buttery baked goods.
What is the best way to achieve a moist scone recipe?
If you want that moist scone recipe that stays soft for days, it all comes down to two things, and we covered them well above. First, make sure your butter and buttermilk are ice cold. Second, and I can’t stress this enough: *do not overmix* once you add the liquid. The second the dry ingredients disappear into the buttermilk, stop stirring. A shaggy, slightly uneven dough is the key to keeping them perfectly moist and tender. If you mix until it looks smooth, you’ve developed too much gluten, and that leads to tough, dry scones, which is exactly what we don’t want for our next batch of lemon scones!
Are these scones suitable for a quick breakfast pastries?
Oh, yes, they are perfect! That’s one of the major reasons I love this recipe so much. From starting the mixing bowl to them coming out of the oven, your active time is only about 15 minutes. Seriously! Because the prep is so fast, they make for wonderful, elevated quick breakfast pastries when you don’t have time for longer sourdoughs or doughs that require proofing. Just make sure you have your oven preheating while you’re doing the final few folds of the dough, and you’ll be eating warm, flaky treats in under 30 minutes!
Estimated Nutritional Data for Classic Scones
Like any truly satisfying, made-from-scratch recipe, these scones are best enjoyed for their flavor and texture rather than their nutritional label! I’ve put together an estimate based on the ingredients listed above, but please remember this is just a guideline. Ingredient brand, butter amount, and whether or not you decide to use that wonderful lemon glaze—that all plays a huge role in the final count.
If you’re watching your intake, remember that the base ingredients create a wonderful, tender result, so you can always skip the glaze for a less sweet treat, or try my savory version for less sugar overall. It’s just part of enjoying homemade buttery baked goods—understanding the ingredients is half the fun!
- Serving Size: 1 scone
- Calories: 280
- Sugar: 12g
- Sodium: 350mg
- Fat: 15g
- Saturated Fat: 9g
- Unsaturated Fat: 6g
- Trans Fat: 0g
- Carbohydrates: 32g
- Fiber: 1g
- Protein: 5g
- Cholesterol: 55mg
This is an estimate, though! If you’re interested in how using different types of flour might change things, I’d highly recommend looking into my whole-grain alternatives listed when I talk about Irish soda bread, though for the flakiest scones, all-purpose flour is still my go-to base!
Share Your Perfect Scones Creations
Well, we’ve done it! We’ve conquered the chilling, we’ve avoided the twist, and I bet you have a tray of the most gorgeous, tall, flaky scones cooling right now. That’s the real reward, isn’t it? That feeling of accomplishment after making a truly classic baked good from scratch.
But my journey in the kitchen, and I hope yours too, is never truly finished without sharing that success! I absolutely live to see what you all create when you try my tried-and-true methods. Did you stick to the bright lemon glaze, or did you go wild with one of those flavor variations, like the Cranberry Orange combo we talked about? Let me know in the comments below!
I truly want to see the results of your hard work! When you share photos on social media, please tag me. Seeing those beautiful, buttery rounds reminds me why I spend so much time testing and perfecting these nostalgic, wonderful recipes for all of us. It’s proof that the old ways of baking—with patience and good quality ingredients—still yield the best results!
If you have any lingering questions or just want to say hello, don’t hesitate to reach out through my contact page. Happy baking, friends. Come back soon—I’ve got a fantastic new recipe for sourdough discard crackers I think you’ll love!
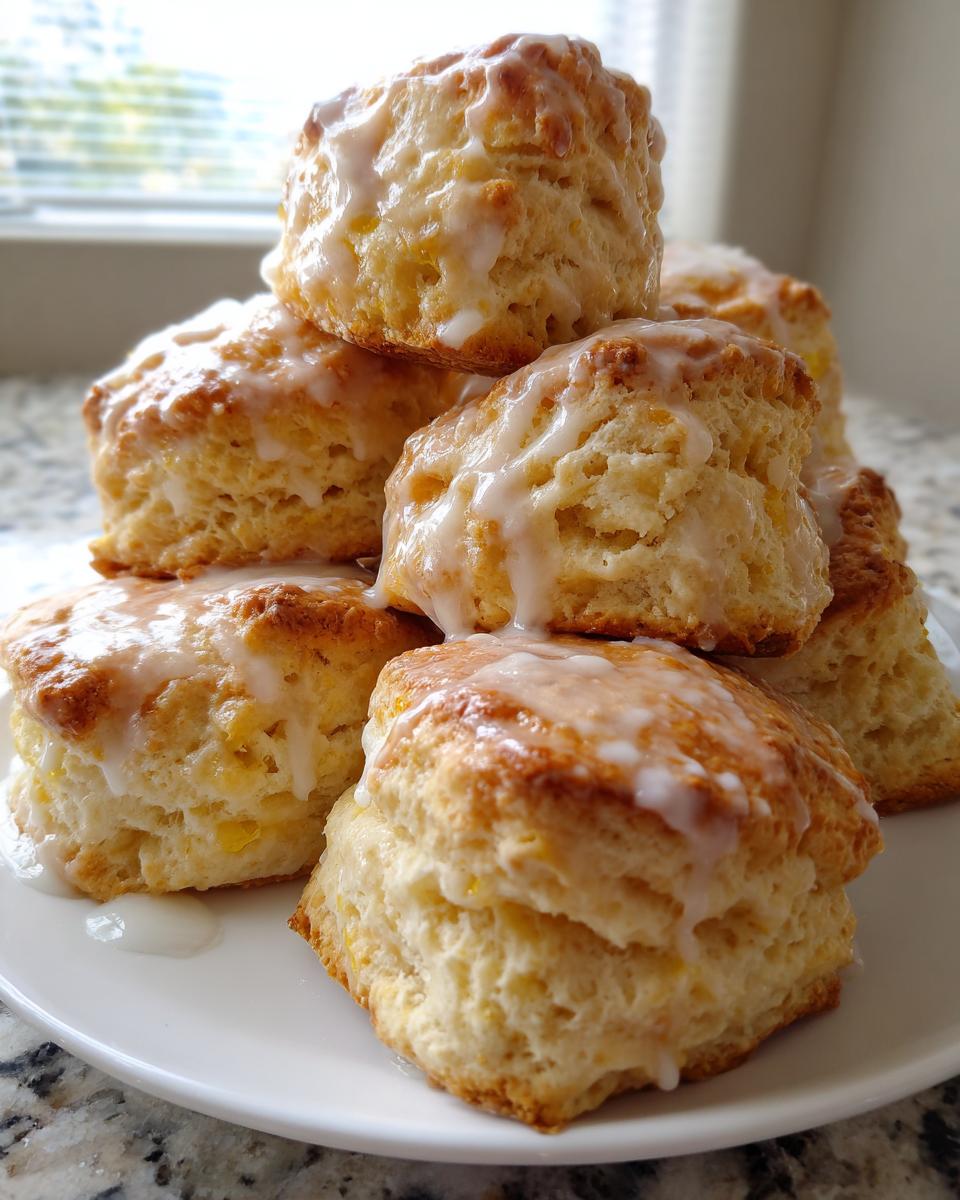
PrintClassic Buttermilk Scones with Optional Lemon Glaze

Make tall, buttery, and flaky scones using this simple buttermilk recipe. These homemade scones achieve a moist center and are perfect for breakfast, brunch, or afternoon tea.
- Prep Time: 15 min
- Cook Time: 15 min
- Total Time: 30 min
- Yield: 8 servings 1x
- Category: Breakfast
- Method: Baking
- Cuisine: American
- Diet: Vegetarian
Ingredients
- 2 cups all-purpose flour
- 1 tablespoon baking powder
- 1/2 teaspoon salt
- 1/4 cup granulated sugar
- 1/2 cup (1 stick) cold unsalted butter, cut into small pieces
- 3/4 cup cold buttermilk
- 1 large egg, beaten (for egg wash)
- 1 tablespoon milk (for egg wash)
- For Glaze (Optional): 1 cup powdered sugar, 2 tablespoons fresh lemon juice
Instructions
- Preheat your oven to 400°F (200°C). Line a baking sheet with parchment paper.
- In a large bowl, whisk together the flour, baking powder, salt, and sugar.
- Cut the cold butter into the dry ingredients using a pastry blender or your fingertips until the mixture resembles coarse crumbs with some pea-sized pieces of butter remaining. This keeps the scones flaky.
- Pour in the cold buttermilk all at once. Use a fork to mix until just combined. Do not overmix; the dough will be shaggy.
- Turn the dough out onto a lightly floured surface. Gently knead it 3 or 4 times until it comes together.
- Pat or roll the dough into a 3/4-inch thick circle or rectangle. Use a sharp, floured biscuit cutter (about 2.5 inches) to cut out the scones. Press straight down without twisting the cutter to help the scones rise tall.
- Place the cut scones close together on the prepared baking sheet.
- In a small bowl, whisk the beaten egg and milk together for the egg wash. Brush the tops of the scones lightly with the wash.
- Bake for 12 to 15 minutes, or until the tops are golden brown.
- While the scones bake, prepare the glaze if using: Whisk the powdered sugar and lemon juice until smooth.
- Remove the scones from the oven and let them cool slightly on a wire rack. Drizzle with the lemon glaze while still warm, if desired.
Notes
- For the tallest scones, keep all ingredients, especially the butter and buttermilk, very cold.
- Do not twist the biscuit cutter when cutting the shapes; this seals the edges and prevents the scones from rising properly.
- If you prefer a different flavor, substitute the lemon juice in the glaze with vanilla extract or orange zest and juice.
- For a savory option, omit the sugar and add 1/2 cup shredded sharp cheddar cheese to the dry ingredients.
Nutrition
- Serving Size: 1 scone
- Calories: 280
- Sugar: 12
- Sodium: 350
- Fat: 15
- Saturated Fat: 9
- Unsaturated Fat: 6
- Trans Fat: 0
- Carbohydrates: 32
- Fiber: 1
- Protein: 5
- Cholesterol: 55